21 Inexpensive Wood Ceiling Ideas That Add Instant Rustic Charm
The ceiling is the one surface in a room that most people never think to touch — which is exactly why touching it has such an outsized effect. A wood ceiling doesn’t just add texture; it changes the entire emotional register of a room, bringing warmth downward from above in a way that painted drywall simply cannot replicate. And the most surprising part? It doesn’t have to be expensive. The ideas here are built around budget materials, DIY-friendly installations, and smart sourcing — proving that rustic charm is far more about intention than investment.
Shiplap Plank Ceiling
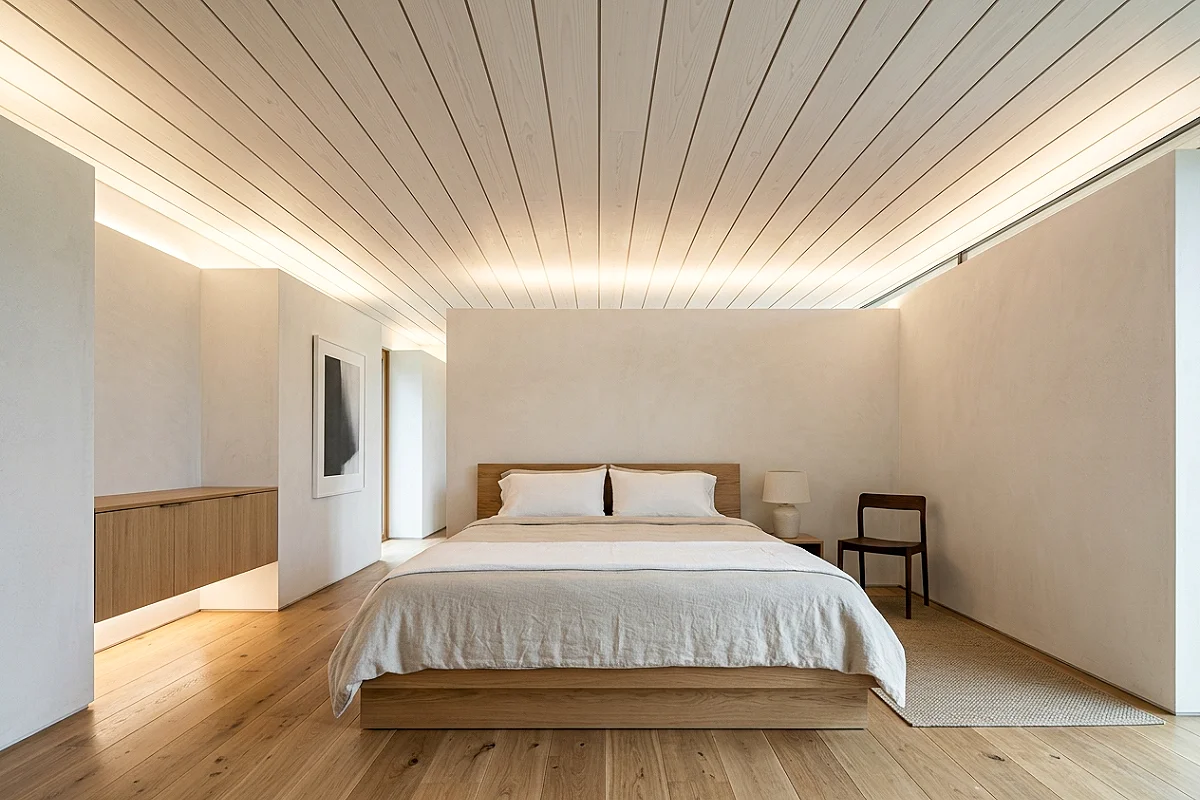
Shiplap is the workhorse of the budget wood ceiling world — widely available, easy to install, and immediately recognisable as the material that defines modern farmhouse style. Run the planks lengthwise across the ceiling to visually extend the room, or perpendicular to the longest wall to bring the ceiling height down in the cosiest possible way. Paint it white for a bright, airy cottage feel, or leave it in a natural pine tone sealed with a matte hardwax oil for genuine warmth.
- Standard 1×6 pine shiplap boards are among the most affordable lumber options at most home improvement stores
- Pre-primed shiplap cuts painting time in half and gives a cleaner, more consistent finish
- Nail directly into ceiling joists — no furring strips required for most installations
- The reveal gap between boards (typically ¼ inch) adds shadow line detail that makes the ceiling look custom-built
Pro Tip
Acclimate shiplap boards inside the room for 48–72 hours before installation. Wood expands and contracts with humidity, and boards installed without acclimation will gap or buckle within weeks of going up.
Reclaimed Pallet Wood Ceiling
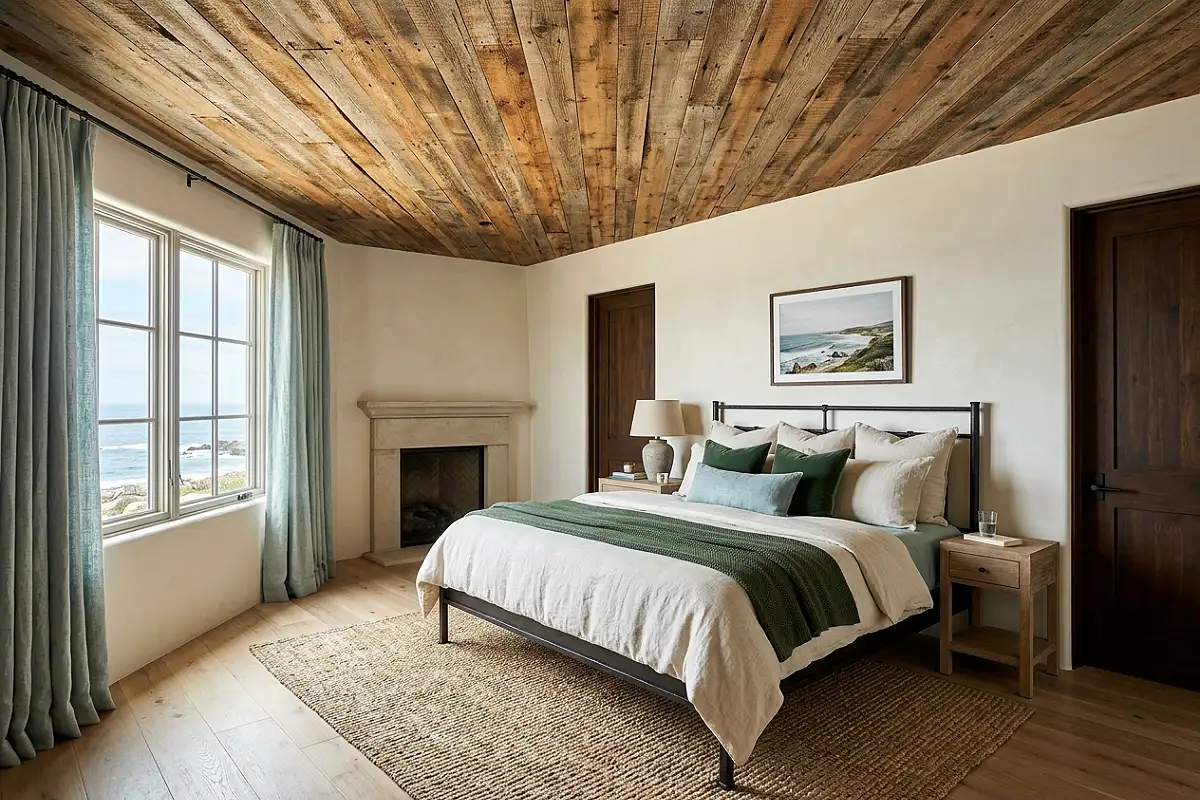
Shipping pallet wood carries decades of character in its grain — nail holes, weathering marks, the occasional stamp or stencil — and used as a ceiling material, it creates a surface of authentic rustic texture that new lumber simply can’t fake. Disassemble pallets carefully, sand lightly to remove splinters without erasing the patina, and seal with a clear matte finish. The result is a ceiling that looks genuinely aged and genuinely sourced rather than decoratively assembled.
- Look for HT (heat-treated) stamped pallets only — avoid MB (methyl bromide) treated ones, which are not safe for interior use
- Pallet wood varies in width and thickness, which creates natural variation in the finished ceiling — embrace it rather than fighting it
- Sort boards by colour tone before installing to distribute the range evenly across the ceiling
Pro Tip
Many industrial businesses, warehouses, and garden centres give pallets away for free or sell them for a few dollars each. Ask before buying — sourcing them free dramatically changes the economics of this project.
Tongue and Groove Pine Ceiling
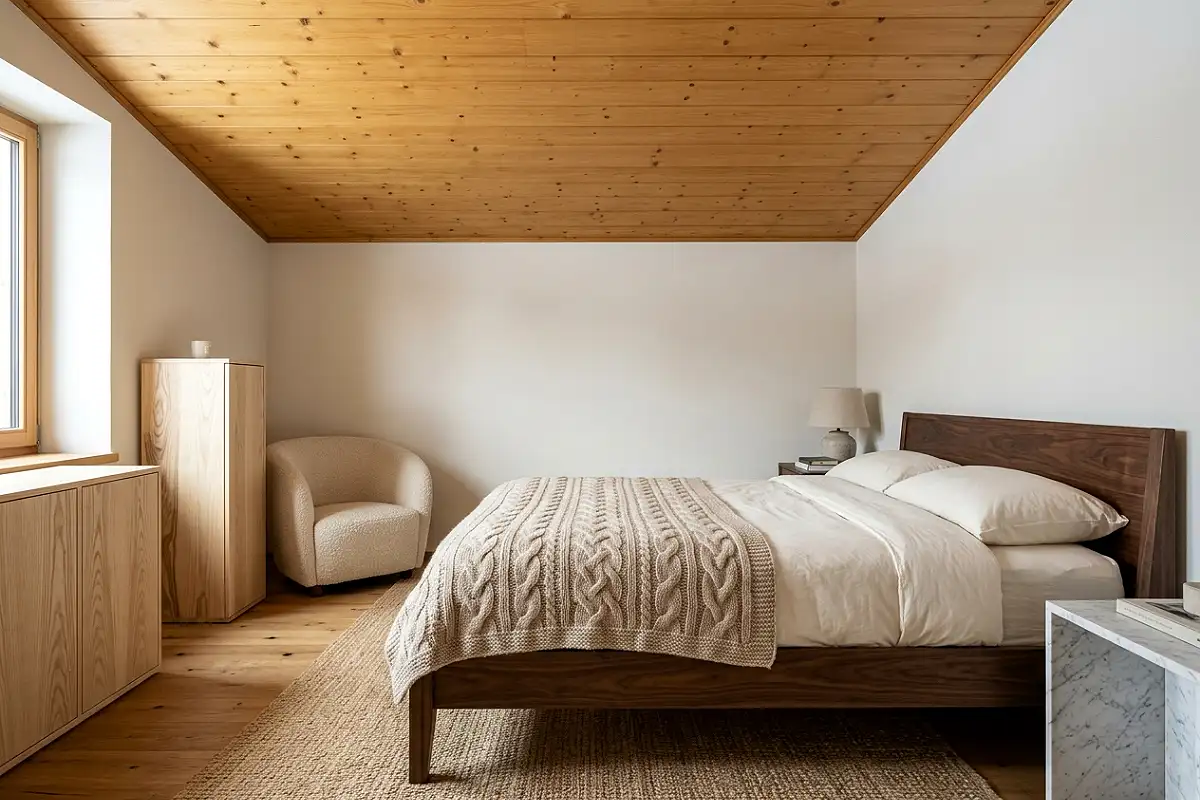
Tongue and groove pine boards create a ceiling with a clean, interlocking finish and no visible nail gaps — each board’s tongue slides into the previous board’s groove, giving the surface a continuous, almost furniture-like quality. This is the classic material of screened porches, summer cabins, and Craftsman bungalows, and it brings that specific warm, sheltered feeling indoors. Natural knotty pine in a honey or amber tone is the most affordable option and the most characterful.
- Tongue and groove boards are self-aligning, which makes solo installation significantly easier than individual planks
- Face-nail at the tongue edge so nail heads are hidden by the next board’s groove
- Stain in a warm walnut or golden oak tone to enrich the grain before sealing
- Available in 3½-inch and 5½-inch widths — wider boards make smaller rooms feel more expansive
Pro Tip
Apply a single coat of Danish oil before installation rather than after — it’s far easier to coat individual boards on the ground than to reach every surface once they’re overhead. Leave the tongue and groove edges uncoated so the joint still fits tightly.
Faux Beam Ceiling with Foam or Lightweight Wood
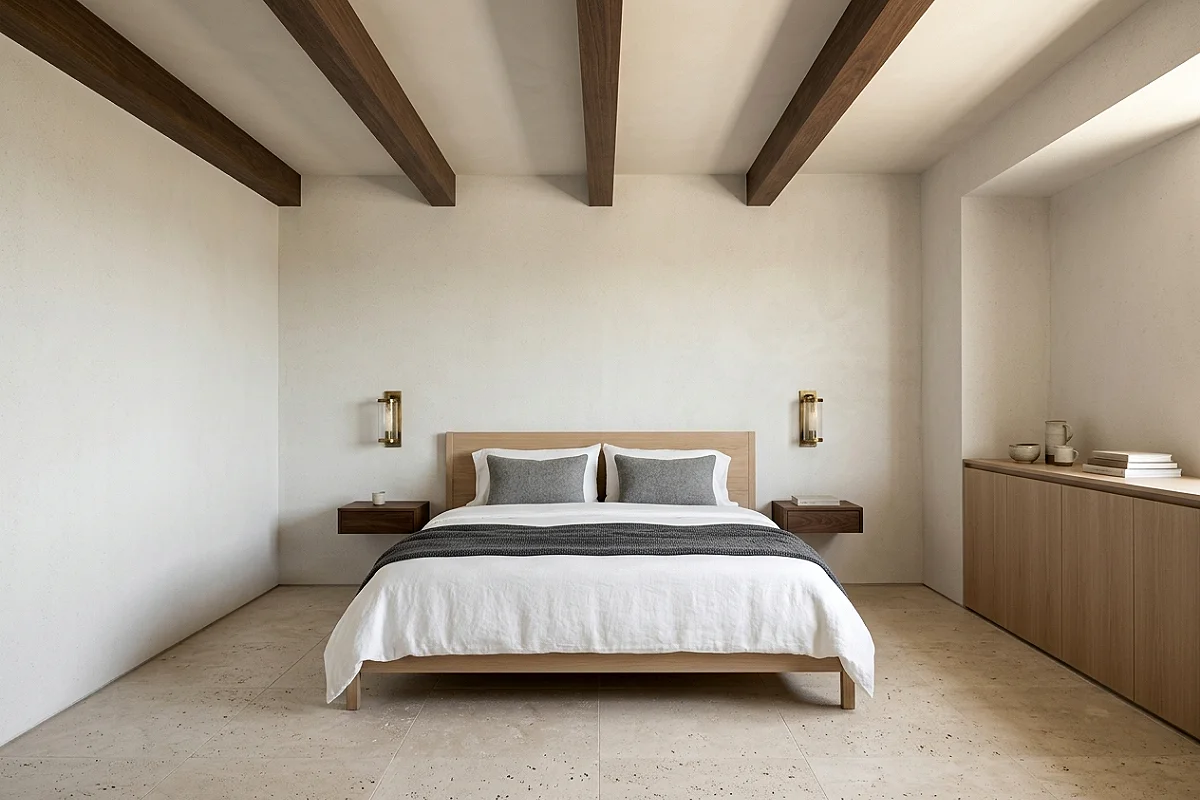
Genuine heavy timber beams are expensive and structurally demanding. Faux beams — hollow boxes of thin wood or high-density foam clad in a wood-look finish — deliver the same visual weight at a fraction of the cost and without any structural modification. Installed across a white or painted ceiling in three or five evenly spaced runs, they transform a flat, featureless room into something with genuine architectural presence.
- Foam faux beams are paintable, stainable, and weigh so little they can be glued directly to drywall
- Real wood faux beams made from three planks of pine (two sides and a top cap) installed as a hollow U-shape are nearly indistinguishable from solid timber at room height
- Space beams every 4–6 feet for a balanced, proportional look
- Dark walnut stain on light-coloured walls creates the highest-impact, most rustic result
Pro Tip
To make hollow wood beams look genuinely solid, distress the wood before staining — drag a wire brush along the grain, then strike the surface with a length of chain. The resulting marks read as decades of wear, and no one looking up at the ceiling from floor level will know the difference.
Whitewashed Wood Plank Ceiling
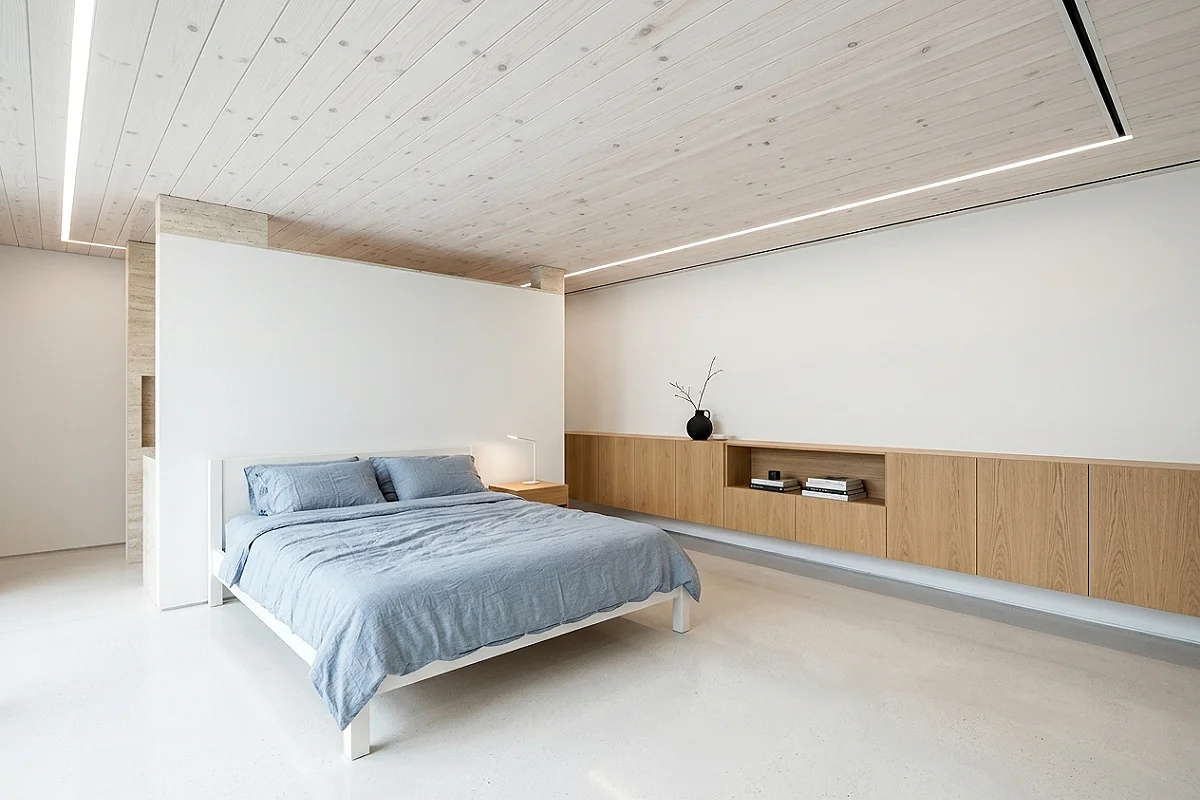
Whitewashing wood — a diluted paint technique that allows the grain to show through a semi-transparent white coat — produces a ceiling finish that sits perfectly between the warmth of natural wood and the brightness of white paint. It keeps rooms light and airy while retaining all the texture and character of the timber beneath. It’s one of the most effective ceiling treatments for coastal, Scandinavian, and French country bedrooms alike.
- Mix one part white paint with one part water for a basic whitewash; adjust the ratio until the grain shows through at the transparency you want
- Apply with a brush, then wipe back with a cloth in the direction of the grain while still wet
- Knotty pine takes whitewash especially beautifully — the knots remain dark against the white, adding graphic interest
- Seal with a water-based matte varnish to protect the finish without adding sheen
Pro Tip
Test the whitewash ratio on a scrap piece of the same timber before committing to the ceiling. The white appears lighter wet than it does when dry — always let the test sample dry fully before making your final ratio decision.
Cedar Plank Ceiling
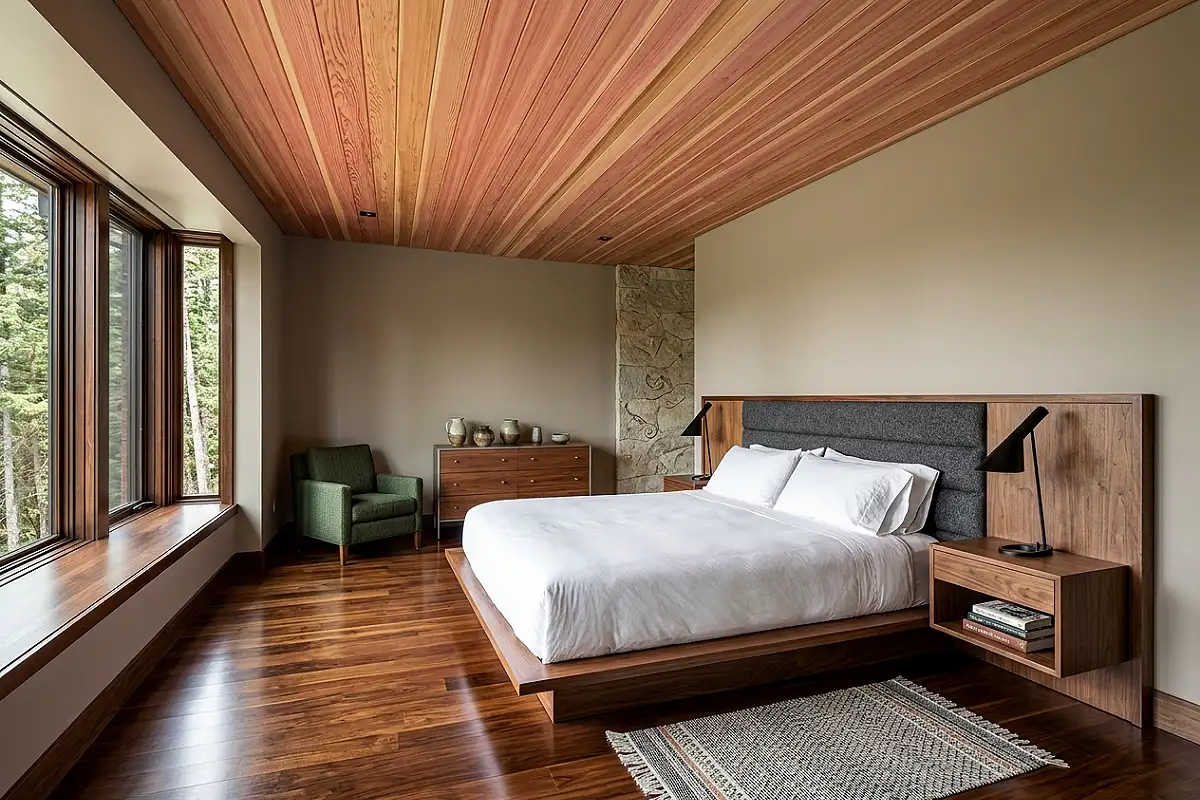
Western red cedar is the wood that fills a room with fragrance the moment it’s installed — that particular clean, woody cedar scent that has been used to line closets and wardrobes for centuries. On a ceiling, cedar brings all of that olfactory warmth plus its distinctive reddish-pink and honey tones, its fine, straight grain, and its natural resistance to moisture that makes it ideal for bathrooms, spa-style bedrooms, and any room where humidity is a consideration.
- Cedar is naturally lighter in weight than most hardwoods, making installation easier
- It takes stain and oil beautifully — a single coat of linseed oil deepens the colour dramatically
- The fragrance fades over time but can be revived by lightly sanding the surface
- Cedar’s natural oils make it resistant to rot and insects — a genuine practical advantage in addition to its aesthetic ones
Pro Tip
Seal cedar with a water-based finish rather than an oil-based one if you want to preserve the scent for as long as possible — oil-based sealants lock in the aroma initially but can reduce how much the wood breathes over time, diminishing the fragrance faster.
Wood Panel Coffered Ceiling on a Budget
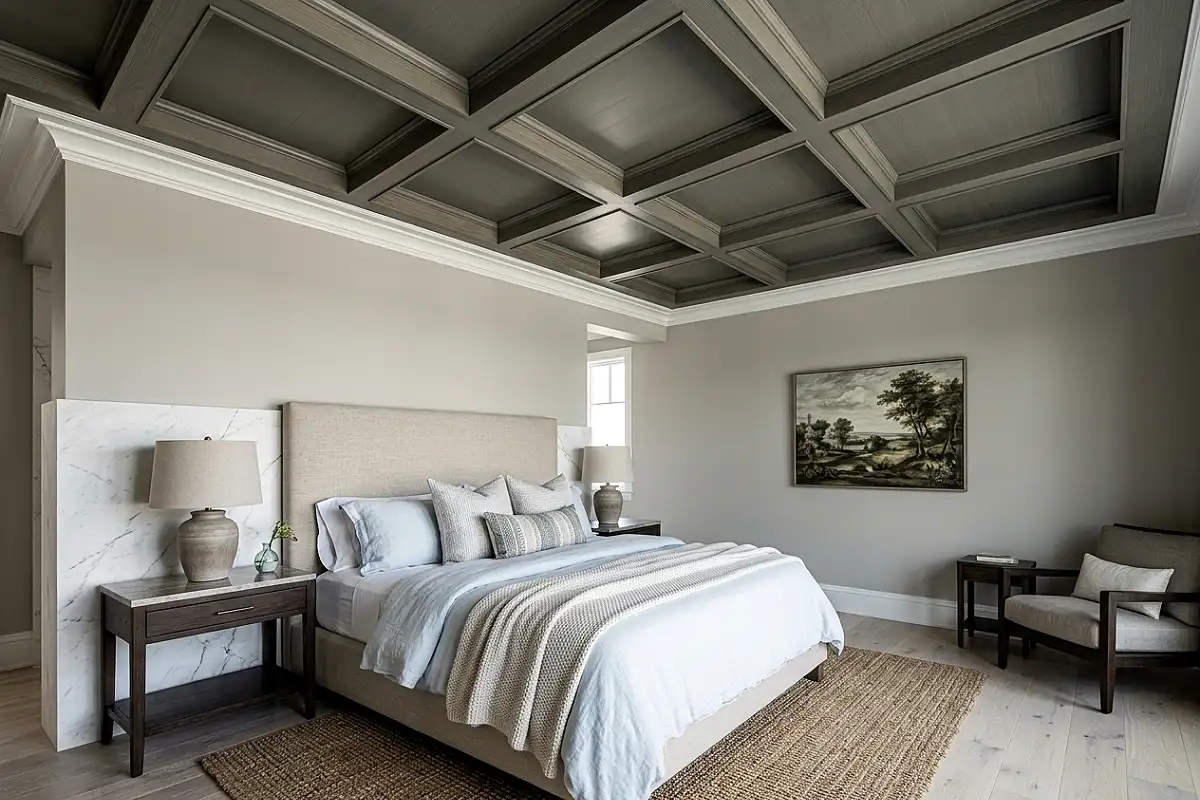
A coffered ceiling — the grid of recessed panels framed by beams that you’d find in an expensive study or a renovated Victorian townhouse — can be convincingly replicated using basic lumber and MDF trim at a fraction of the cost of genuine structural coffers. The key is simple geometry: a grid of wooden border strips attached to the ceiling creates the frame; flat wood panels fill each square. Paint the whole thing the same colour as the ceiling (or in a contrasting colour for drama) and the budget origins disappear entirely.
- Use 1×4 pine boards as the grid frame — they’re deep enough to create real shadow lines but thin enough to be lightweight
- A classic 24×24 inch grid works well in most standard rooms; larger rooms can go to 36×36 inches
- Painting the coffered ceiling two tones darker than the walls makes the panels appear genuinely recessed
- Crown moulding at the junction of the grid and the ceiling panel adds a professional finish
Pro Tip
Map the grid on paper first and work from the centre of the ceiling outward, so any partial panels end up at the edges near the walls where they’re least visible. A coffered ceiling with an uncentred grid is an immediately noticeable mistake that’s difficult to correct after installation.
Rough-Sawn Barnwood Ceiling Planks
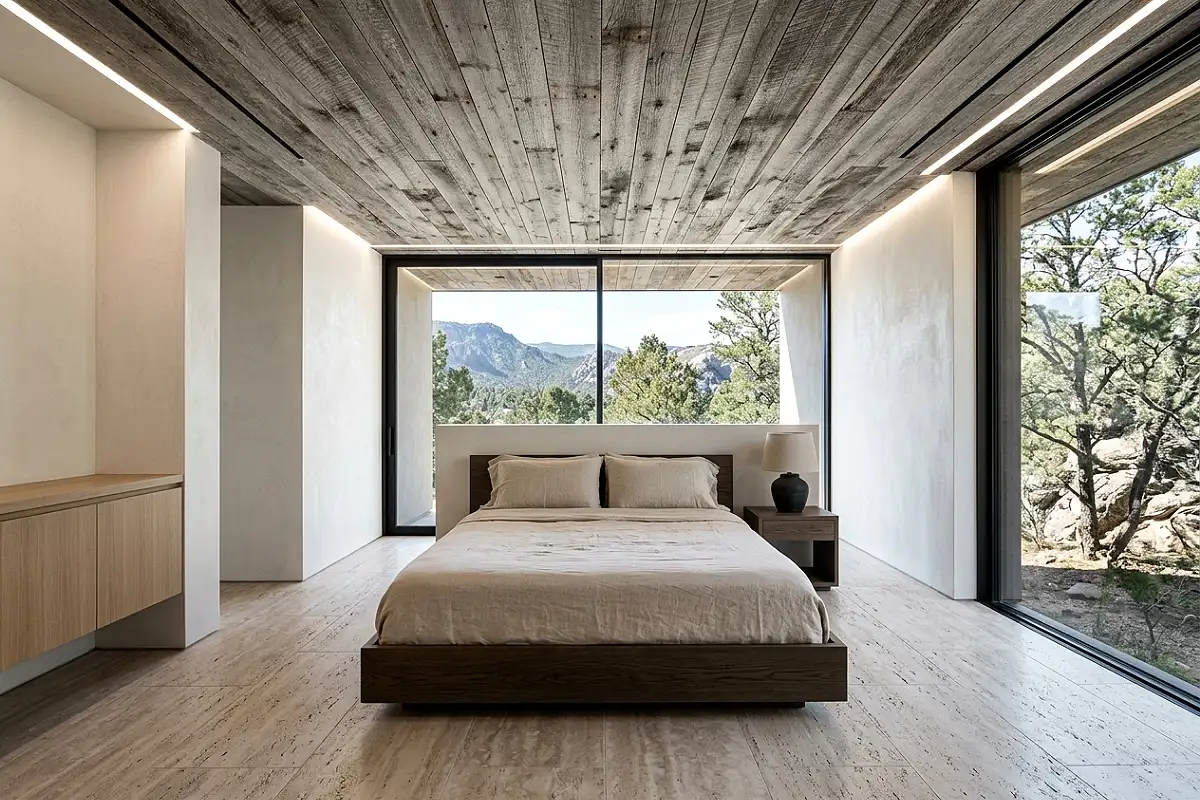
Rough-sawn barnwood — reclaimed from old agricultural buildings — has a specific character that no new lumber can replicate: saw marks from century-old mill blades, the grey-silver tone of decades of weather exposure, the occasional square nail hole or grain crack. It installs exactly like standard tongue and groove but produces a ceiling that looks like it survived a hundred winters. Sourced from salvage yards and reclaimed timber specialists, it’s often surprisingly affordable per board foot.
- Barnwood’s grey-silver tone works in industrial, Scandinavian, and rustic farmhouse rooms equally well
- No staining required — the existing patina is the finish
- Seal with a clear matte varnish to stabilise the surface without altering the colour
- Mix boards from different sources for a more genuinely collected, varied look
Pro Tip
Inspect reclaimed barnwood carefully for insect damage before bringing it indoors — old agricultural wood can harbour wood-boring beetles. Any boards with small circular exit holes should be treated with a boron-based wood preservative and allowed to dry completely before installation.
Stained OSB Ceiling with a Rustic Edge
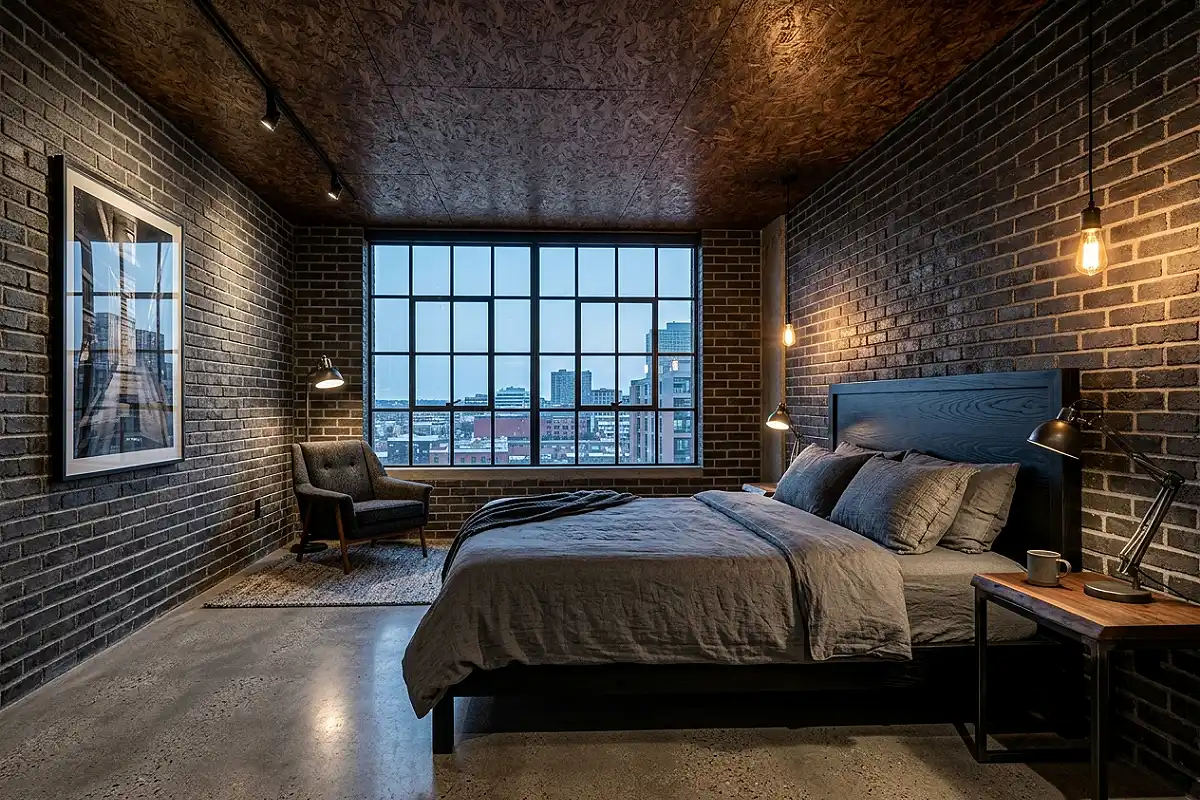
Oriented strand board (OSB) is the building material that most people see only as a subfloor or wall sheathing — but sanded lightly and finished with a dark walnut or ebony stain, it produces a ceiling with a graphic, almost abstract pattern of compressed wood fibres that has genuine visual interest. It’s one of the least expensive wood-based ceiling materials available, and its industrial-meets-rustic quality suits contemporary, loft, and modern farmhouse aesthetics with surprising elegance.
- Sand with 80-grit paper first to remove the surface texture, then 120-grit to smooth before staining
- Dark stain reduces the raw, construction-site association and emphasises the natural pattern in the wood fibres
- Apply in full 4×8 sheet panels rather than cut strips for the most dramatic graphic effect
- Seal with two coats of matte water-based polyurethane to prevent off-gassing and stabilise the surface
Pro Tip
Use exterior-grade OSB for ceiling installations — it has a smoother, denser face than the interior grade and takes stain more evenly. The slight additional cost is worth it for a significantly better finished appearance.
Diagonal Wood Plank Pattern Ceiling
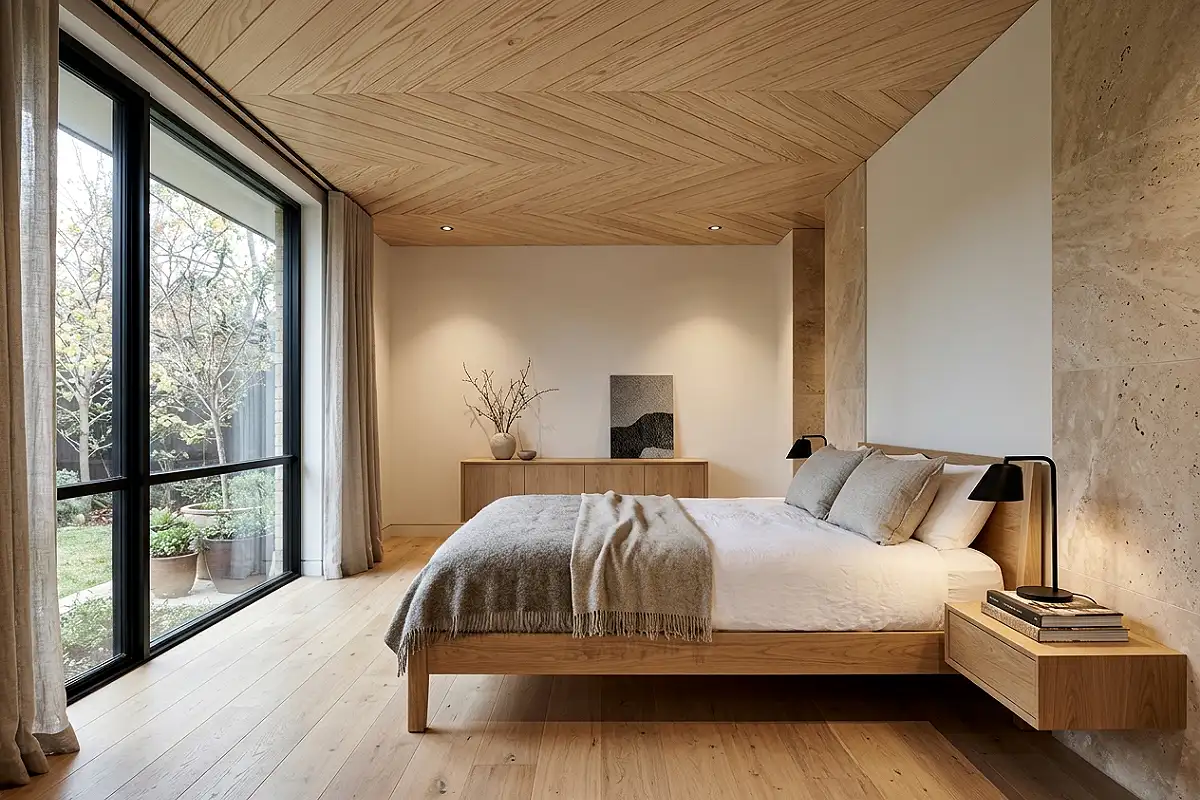
Running planks diagonally across a ceiling — at 45 degrees to the walls — introduces a dynamic, architectural energy that horizontal or perpendicular installations simply don’t achieve. It makes the ceiling the most visually active surface in the room, draws the eye in two directions simultaneously, and makes even standard rooms feel considerably more designed. It uses the same inexpensive pine or shiplap planks as a standard installation; the only additional investment is the time required to cut and fit angled ends.
- Start from the centre of the ceiling and work outward in both diagonal directions for the most balanced result
- A mitre saw set to 45 degrees handles all the angled cuts cleanly and quickly
- Choose a natural, medium-toned wood stain — the diagonal pattern already creates enough visual interest without the added contrast of a very dark or very light finish
- Works particularly well in smaller rooms where a horizontal plank run might feel monotonous
Pro Tip
Snap chalk lines across the ceiling at 45 degrees before installing any planks — these become your installation guides and ensure the diagonal runs consistently true across the entire ceiling without drift or curve.
Wood Slat Open Grid Ceiling
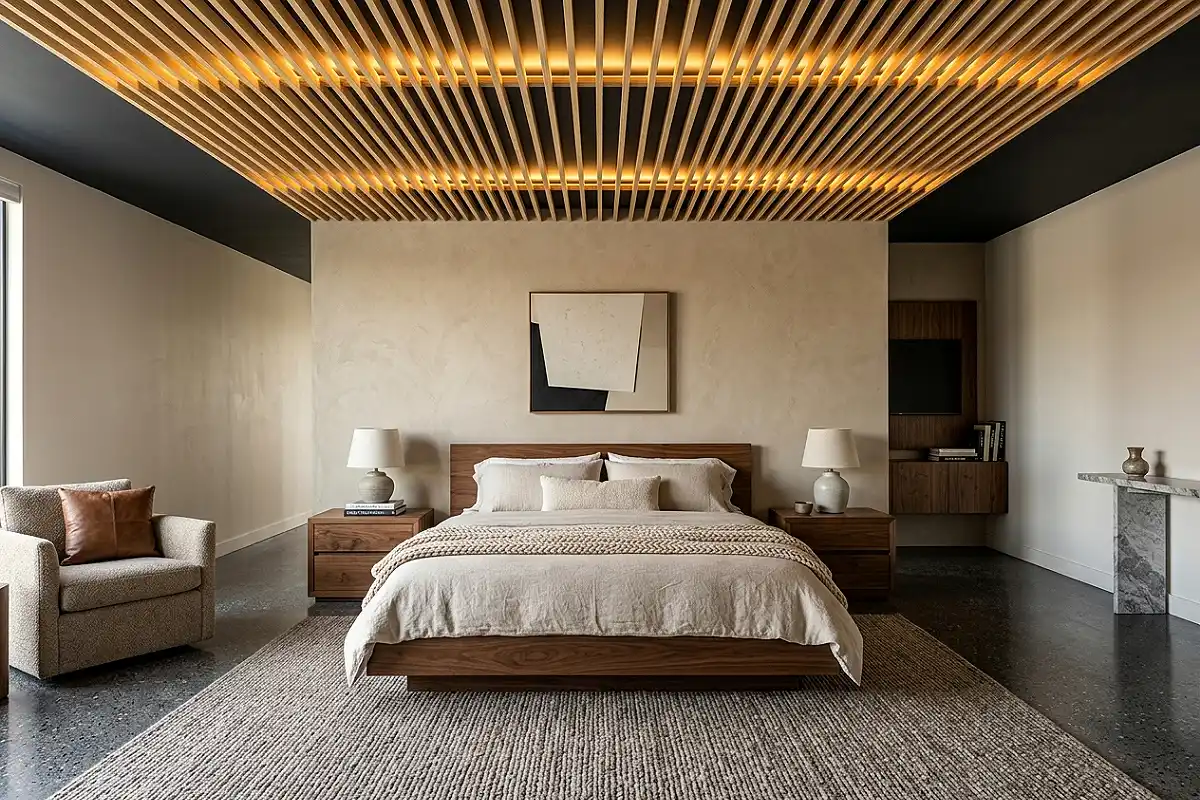
A wood slat ceiling — thin, evenly spaced strips of timber mounted across the ceiling with gaps between them — creates an effect that falls somewhere between a ceiling and a feature screen. The gaps allow light to pass through from above (particularly beautiful when a recessed warm LED strip is mounted above the slat plane) and give the room a layered, rhythmic quality that solid plank ceilings can’t achieve. It’s also faster and cheaper to install than full-coverage wood, because the gaps mean significantly less material is needed.
- Use 1×2 or 1×3 pine furring strips as the slats — they’re the cheapest dressed timber available
- Space slats 1 to 2 inches apart for a balance between coverage and light penetration
- Install a warm LED strip light above the slat plane before closing the gaps — the glow through the slats at night is the room’s most beautiful lighting effect
- A dark stain on the slats beside a dark ceiling plane above creates a moody, intimate atmosphere; a natural or whitewashed slat beside a white ceiling keeps it light and contemporary
Pro Tip
Paint the ceiling plane behind the slats in a dark colour — near-black or deep charcoal — before installing. The dark background makes the slats read as a deliberate design feature with genuine visual depth rather than a surface-applied treatment with a pale ceiling showing through the gaps.
Plywood Plank Ceiling in a Wide Format
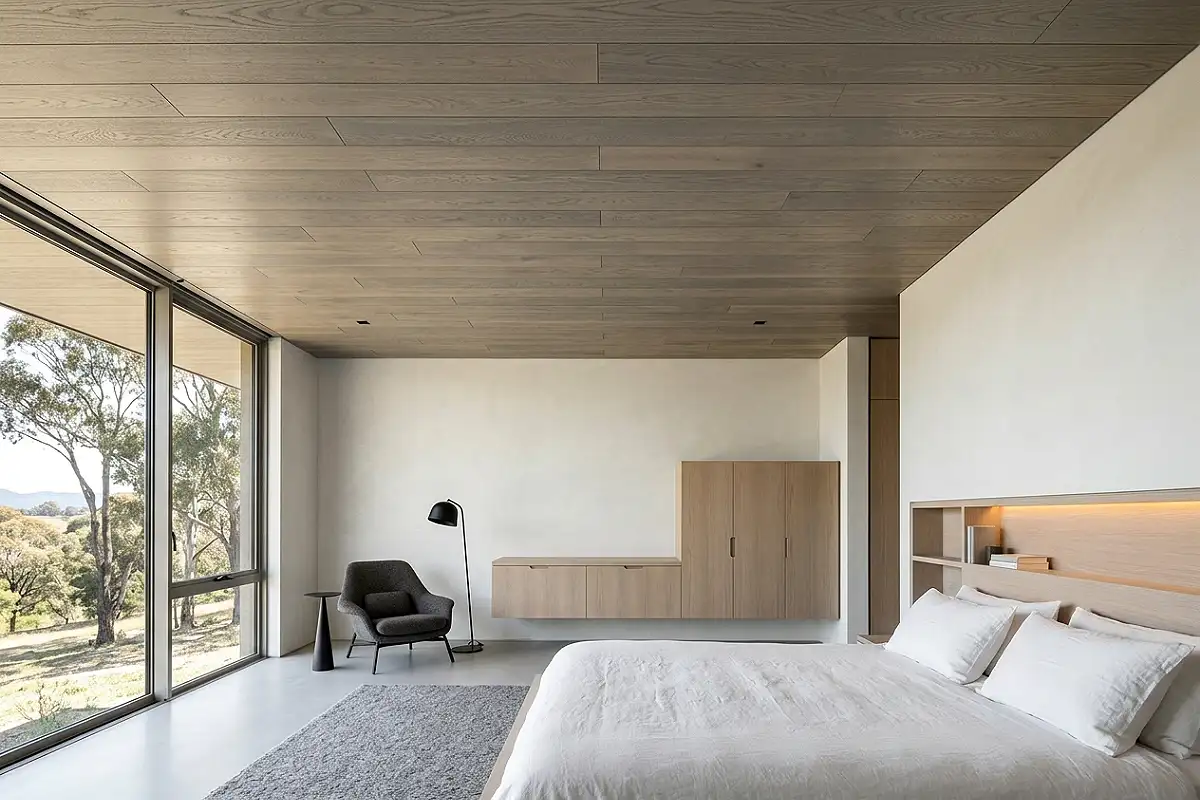
Standard 4×8 sheets of plywood, ripped into 8-inch or 10-inch wide planks on a table saw, create one of the most cost-effective wide-plank wood ceiling options available. The wide format gives rooms a sense of generous scale that narrow 3-inch shiplap can’t match, and plywood’s uniform thickness and stability make it easier to install without the warping or twisting that occasionally affects solid lumber planks.
- Sanded plywood (often labelled A/C or BC grade) gives the smoothest finish for painting or staining
- Stagger the seams between panels on adjacent planks so no continuous joint line runs across the full ceiling width
- Fill end grain edges with wood putty before finishing for the cleanest, most professional appearance
- A grey-wash stain on plywood creates a modern, contemporary wood ceiling with a cool, urban quality
Pro Tip
Have the plywood ripped into planks at the lumber yard rather than on-site if you don’t own a table saw — most stores charge a small fee per cut that’s well worth paying for the accuracy and safety it provides.
Ceiling Medallion with Wood Surround
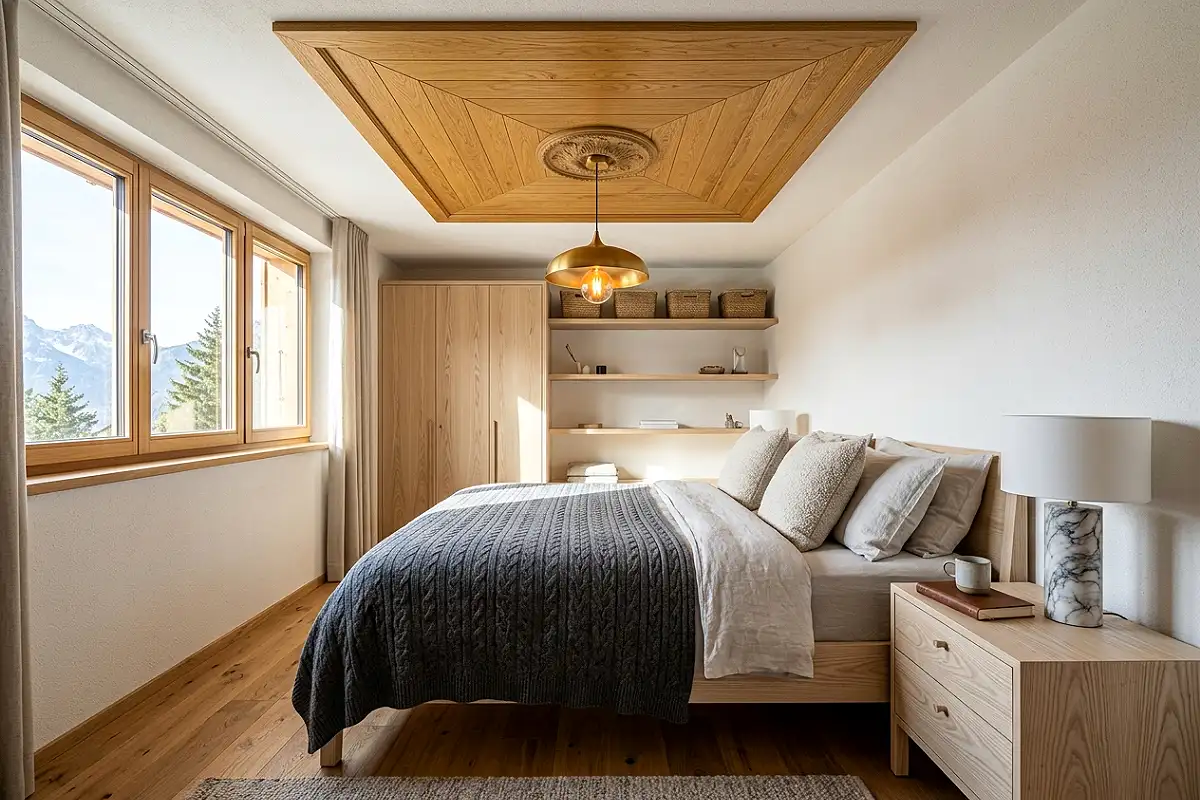
For rooms where a full wood ceiling isn’t practical or desirable, a ceiling medallion — a circular or octagonal feature centred on the existing light fitting — surrounded by a frame of thin wood planks or moulding creates a contained wood moment that adds character without the commitment or cost of wall-to-wall installation. It’s a one-day project with materials that cost well under $100 and produces a feature that immediately reads as a design decision rather than a decorative afterthought.
- Frame a 3×3 foot square or a 4×4 foot square around the ceiling rose using 1×3 pine planks mitre-joined at the corners
- Fill the interior with short tongue-and-groove boards, shiplap, or even a single sheet of quarter-sawn plywood
- Paint the wood to match the ceiling for a subtle, architectural effect, or stain it for a warm wood-on-white contrast
- A pendant light or chandelier hanging through the centre of the wood panel makes the whole assembly read as a deliberate design feature
Pro Tip
Centre the wood panel precisely on the light fitting before installing — mark the ceiling with chalk lines forming a cross from the midpoints of all four walls to find the room’s true centre. Even a 2-inch offset from true centre is immediately noticeable and difficult to ignore once spotted.
Herringbone Wood Ceiling Panel
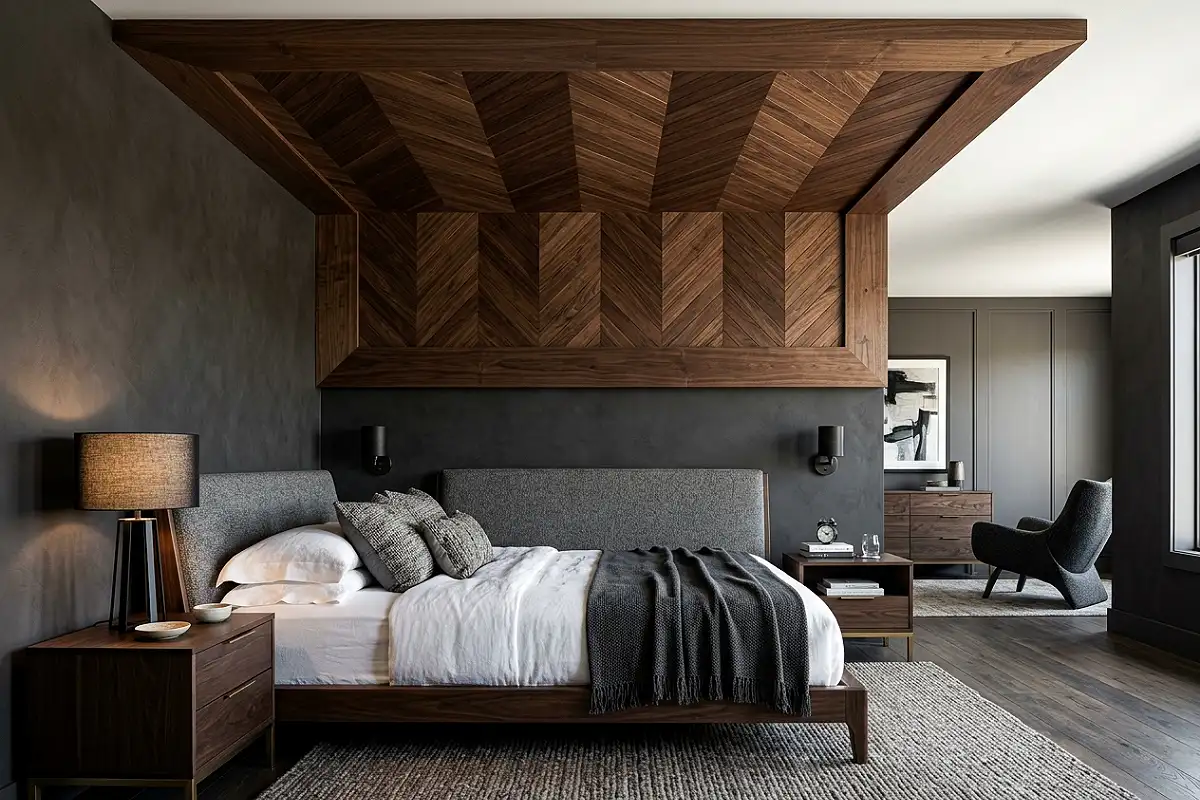
The herringbone pattern — short planks laid at alternating 45-degree angles in a V formation that repeats across the surface — applied to a ceiling section above a bed, a dining table, or a kitchen island creates one of the most visually impressive wood ceiling treatments available, and from materials that are no more expensive than any standard plank installation. The pattern itself does all the design work; the material quality matters less than the precision of the angles.
- Use 2-inch or 3-inch wide strips of pine for the most defined herringbone pattern — wider strips make the pattern less distinct
- Pre-cut all strips to the same length before installation so the pattern stays consistent
- Mark the herringbone angle guide lines on the ceiling in chalk before nailing any strips
- A dark stain makes the herringbone geometry read most clearly; a natural or light finish creates a softer, more textural effect
Pro Tip
Frame the herringbone panel with a border of four mitre-joined planks in a slightly wider width — the frame separates the pattern from the surrounding plain ceiling and makes the whole panel read as a deliberate architectural feature rather than a section of patterned surface floating without context.
Bamboo Mat Ceiling Covering
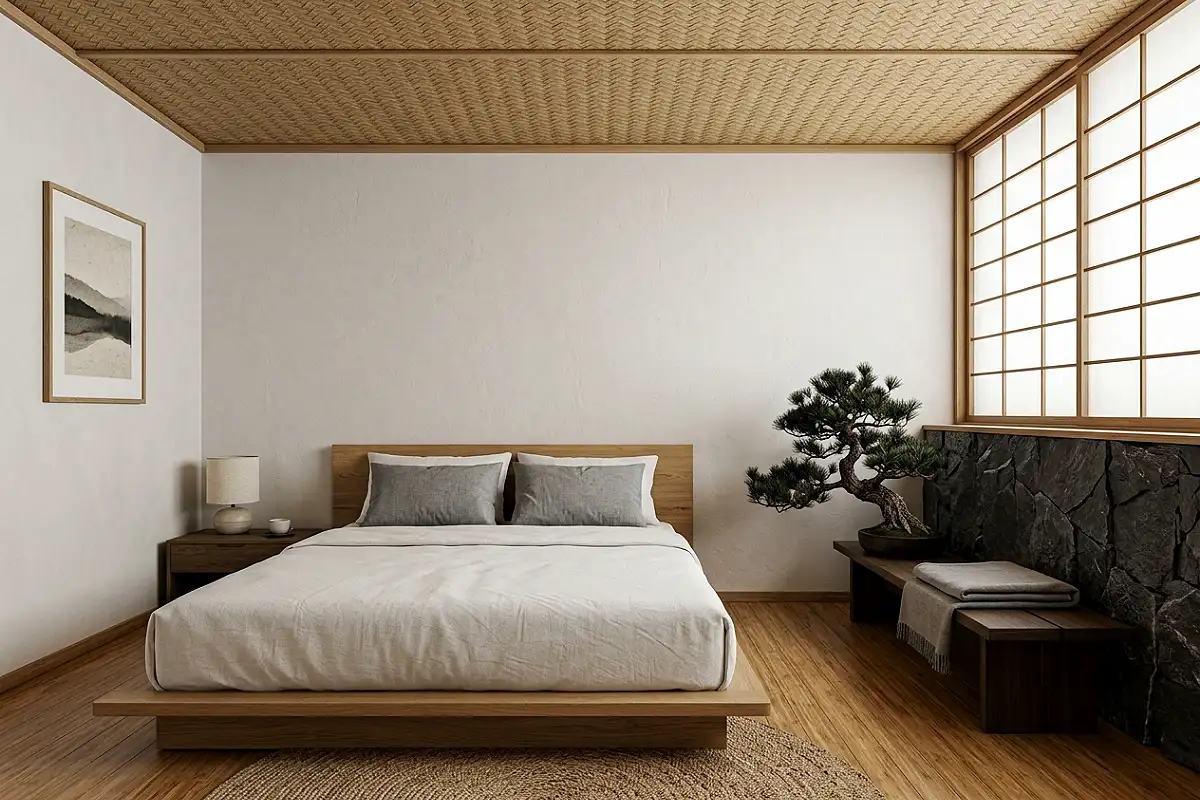
Woven bamboo mats — the kind sold as window blinds, room dividers, or area rug underlays — stapled directly to a flat ceiling create a texture-rich surface with a warm, tropical, or Japandi quality at minimal cost. The bamboo’s natural honey-to-amber tone adds warmth without the weight of solid timber, and the woven texture creates a softer, more organic surface than any plank installation. This is one of the only ceiling treatments on this list that genuinely takes a single afternoon to complete.
- Standard 6-foot wide bamboo roll blinds cover most ceiling sections without seams — wider rooms will need two widths joined at a ceiling joist
- Use a staple gun with ½-inch staples to secure directly into the drywall, hitting joists where possible for sections near the centre
- Cover the stapled edges with thin bamboo trim or a simple painted wood moulding for a clean perimeter finish
- The natural variation in bamboo colour — some strands lighter, some darker — creates a subtly patterned surface that’s far more interesting up close than flat paint
Pro Tip
Lightly mist the bamboo mat with water after installation and allow it to dry in place — this settles any minor ripples or raised areas that can occur when the mat is first applied to a flat surface, giving the finished ceiling a smoother, flatter appearance.
Painted Wood Ceiling in a Bold Dark Tone
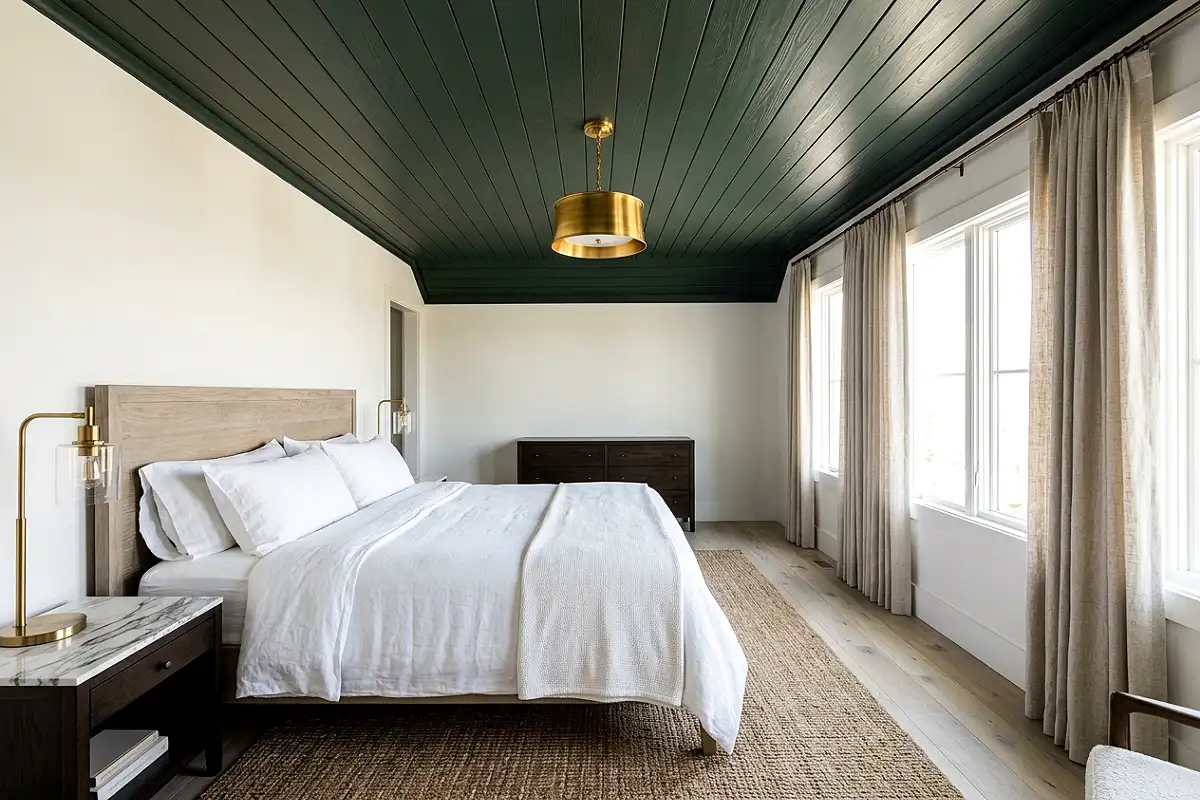
Wood planks don’t have to stay in the natural-stain or whitewash palette — painting a wood ceiling in a deep, dark colour transforms it into one of the most dramatic and architecturally powerful features a room can have. Navy, forest green, deep charcoal, or near-black applied to a tongue-and-groove or shiplap ceiling draws the eye upward in the best possible way, creating an intimate canopy above the room’s contents. The texture of the wood grain remains subtly visible through the paint, giving the surface more depth than painted drywall ever achieves.
- Use a flat or matte paint finish — sheen on a dark ceiling amplifies every imperfection in the wood surface
- Apply two coats and sand lightly between them with 220-grit for the smoothest dark finish
- Dark wood ceilings work best when the walls remain in a much lighter contrasting tone — the visual tension between the heavy ceiling and the light walls is the design
- Pair with warm brass or gold light fixtures overhead — they glow dramatically against a dark painted wood ceiling
Pro Tip
Prime the wood ceiling with a tinted primer in a mid-grey shade before applying a dark topcoat — it prevents the knots and grain from bleeding through and reduces the number of topcoats needed to achieve even, opaque coverage.
Exposed Rafter Ceiling with Stained Beams
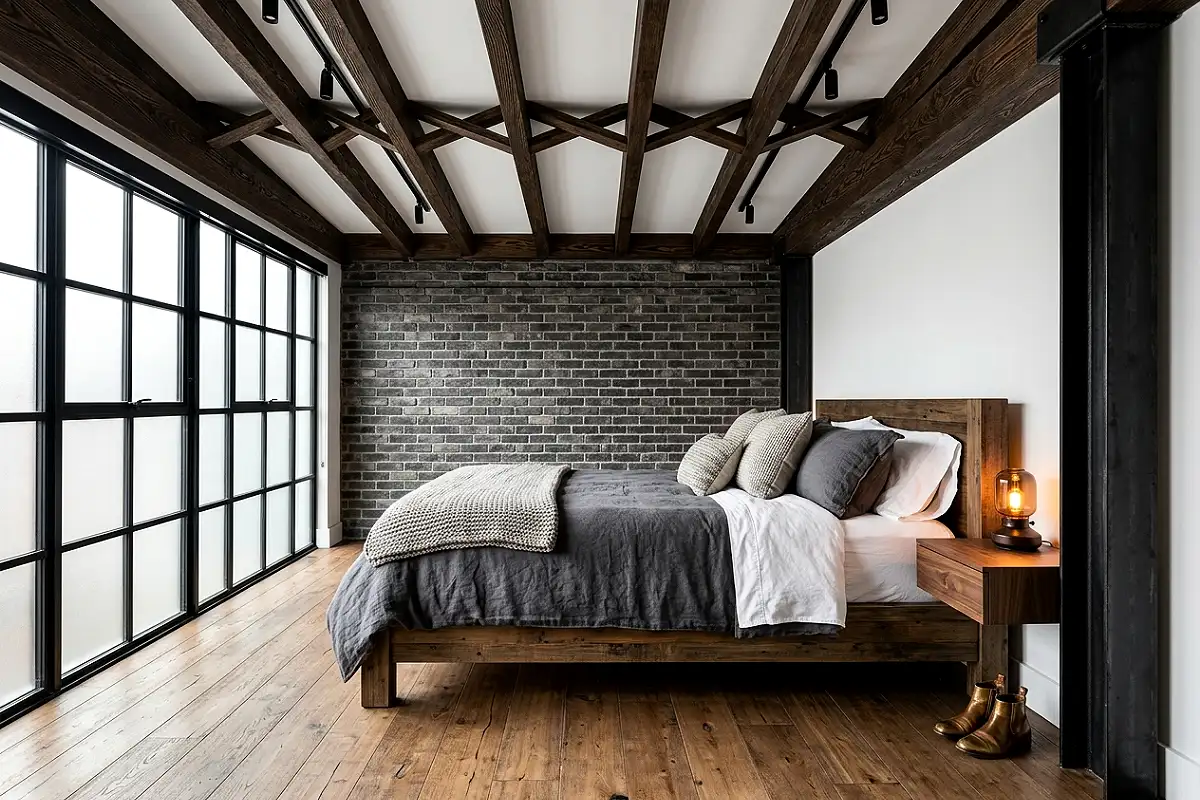
Where the structure allows, removing the ceiling drywall to expose the roof rafters — or the joists of the floor above — creates the most genuinely rustic ceiling treatment possible, because what’s revealed is actual structural timber rather than decorative application. In older homes, these exposed members often have beautiful irregular grain and the light patina of age. In newer construction, a coat of dark walnut stain and some selective distressing can produce much the same effect. Between the exposed beams, the ceiling plane can be left as drywall (painted white or a contrasting colour), filled with tongue-and-groove, or left open in loft-style construction to show insulation or the underside of roofing.
- Wire-brush exposed structural timbers before staining to open the grain and help the stain penetrate more deeply
- A white or pale ceiling plane between dark-stained rafters creates maximum contrast and the most dramatic rustic effect
- Hang pendant lights or Edison string lights between the beams for warm, distributed evening light
Pro Tip
Before removing any ceiling drywall to expose structure, check with a structural engineer or qualified contractor that the members you intend to expose are non-load-bearing — or that any load-bearing elements are safe to be left visible. This is a non-negotiable step, not an optional one.
Wood Ceiling with Integrated Rope Lighting
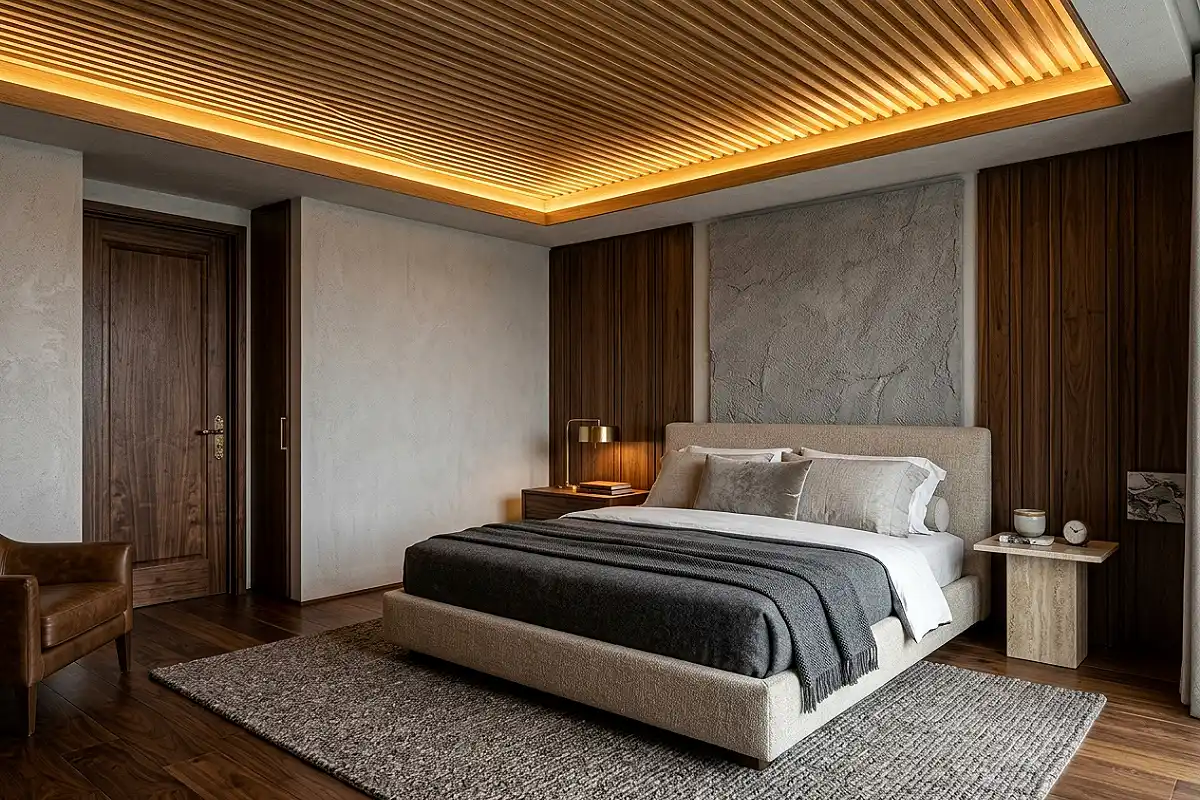
Installing warm LED rope or strip lighting within the gaps of a wood slat ceiling, along the underside of faux beams, or recessed into a plank ceiling behind a decorative rail creates a lighting scheme that transforms the wood ceiling into an ambient light source. The wood becomes simultaneously a ceiling surface and a diffuser, and the effect after dark is one of the warmest, most atmospheric domestic lighting experiences available — at a cost that’s a fraction of custom cove lighting or recessed installation.
- Warm white LED strips at 2700K or 3000K are the correct choice — cool white strips turn warm wood tones grey
- Recess the strip behind a 1×2 lip of wood so the LED source itself is hidden and only the glow is visible
- Connect to a dimmer switch — the ability to reduce the intensity is what transforms this from task lighting to atmosphere
- Zigzag the strip in a snake pattern across the inside of a hollow faux beam for even light distribution
Pro Tip
Use high-CRI LED strips (CRI 90 or above) for ceiling integration — high colour rendering index means the warm light will render the wood’s natural tones accurately, enhancing the grain colour rather than washing it out in a flat glow.
Drift Wood-Effect Grey-Stained Plank Ceiling
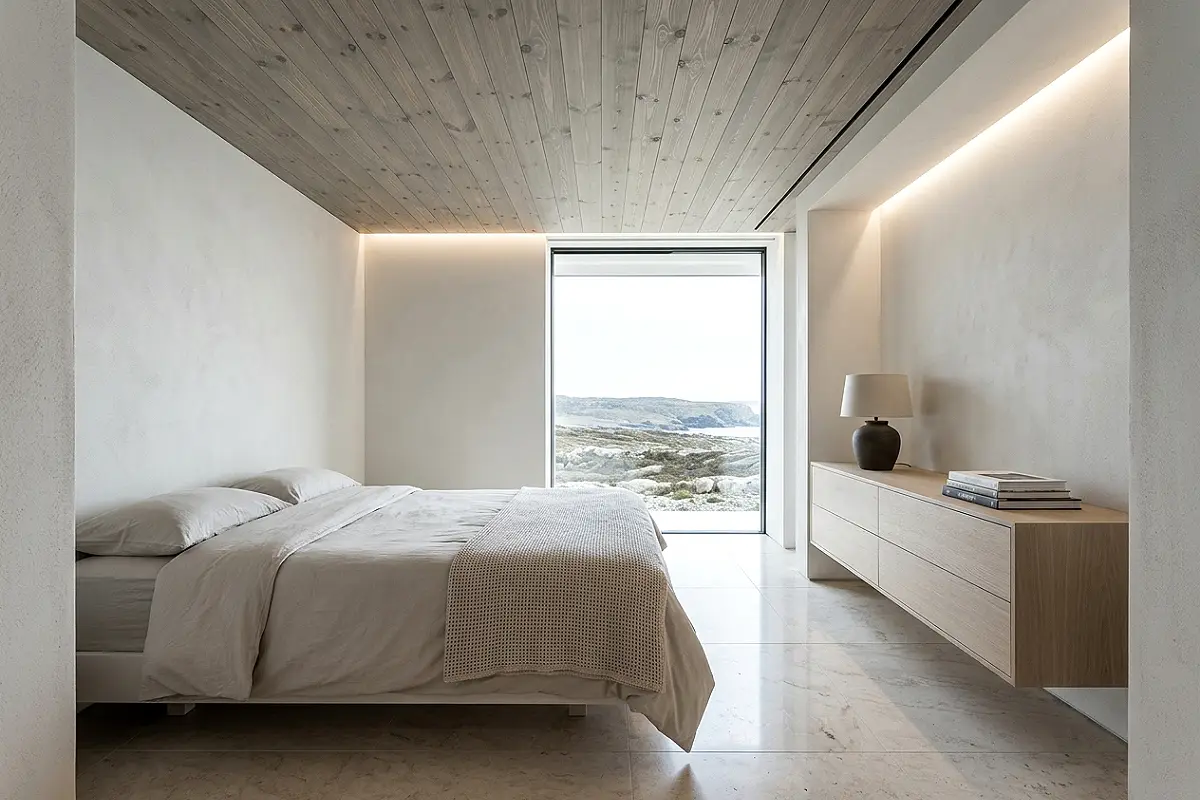
A grey wood stain on standard pine planks produces one of the most on-trend and versatile wood ceiling finishes available — the specific colour of driftwood left on a beach, pale and bleached and slightly silver, warm enough to feel organic but cool enough to suit contemporary and coastal interiors equally. It reads as expensive reclaimed timber from the floor but is achievable with inexpensive pine and a single tin of grey wood stain.
- Apply the grey stain over a light sanding — the slightly roughed surface helps the stain penetrate for a more even result
- Wipe back the stain immediately after application with a lint-free cloth to control the depth of tone
- Two coats of clear matte water-based varnish lock the colour and prevent the grey from fading with age
- Works particularly well in coastal, Scandi, and contemporary farmhouse interiors where the colour sits naturally within the room’s overall palette
Pro Tip
Mix a small amount of white chalk paint into your grey wood stain to produce a slightly chalky, more aged-looking grey — this prevents the finish from reading as commercial grey paint and gives it the slightly bleached, mineral quality of genuine driftwood.
Stacked Firewood Log Slice Ceiling Accent

Wood slices — cross-cut sections of small-diameter logs that reveal the circular grain pattern — glued to a ceiling section create the most dramatic and the most genuinely rustic wood ceiling treatment on this list. Applied above a bed in a bedroom, above a bathtub in a bathroom, or across a vaulted kitchen ceiling, they create a surface that stops every person who enters the room. The log slice concept is more labour-intensive than a plank installation, but the material cost is minimal — small-diameter logs are often available for free from tree surgeons and landscapers.
- Cut log slices to a consistent thickness of ¾ to 1 inch using a mitre saw or bandsaw
- Sand the cut face lightly and seal with clear matte varnish before installation to prevent sap seeping
- Apply to the ceiling using a strong construction adhesive — no nailing required for sections under 6 square feet
- Vary the log species and diameters for a more naturalistic, collected appearance
Pro Tip
Allow freshly cut log slices to dry for at least four weeks in a warm, ventilated space before installation — green or unseasoned wood will crack significantly as it dries, and those cracks will appear on your ceiling surface where they’re impossible to hide or repair.
Painted Trompe-l’Oeil Wood Beam Ceiling
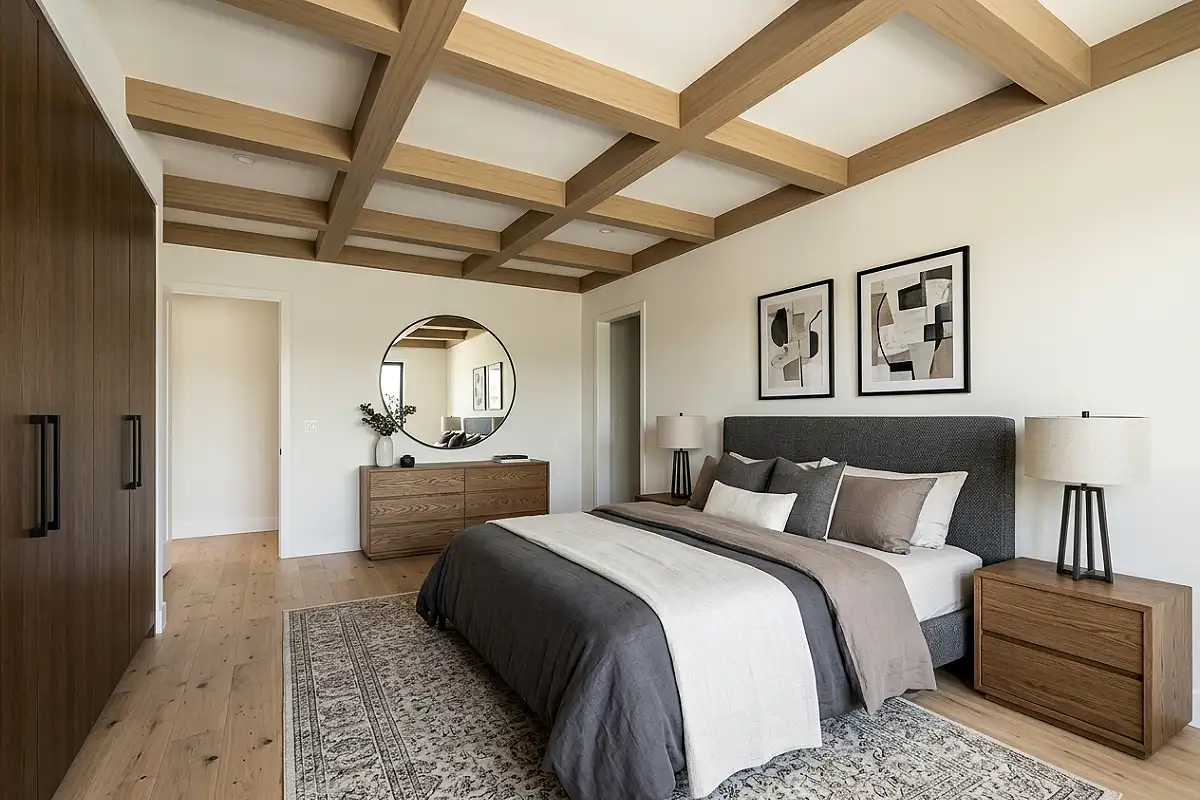
The most budget-friendly wood ceiling treatment of all requires no actual wood: a trompe-l’oeil painted beam ceiling, where beams are created entirely in paint using simple shadow and highlight techniques that fool the eye into perceiving three-dimensional structure on a flat surface. This is ceiling décor at its most theatrical — and at its most economical, requiring nothing more than a few pots of paint, a steady hand, and a reference photograph to work from.
- Paint the ceiling base colour first in a warm off-white or cream
- Mask the “beam” positions with tape in evenly spaced parallel runs — typically 4 to 6 inches wide
- Paint each beam in a mid-tone wood colour (raw sienna and burnt umber mixed into a tan base works well), then add a darker shadow line along one edge and a lighter highlight line along the opposite edge
- Remove tape before the paint is fully dry for a slightly soft edge that reads as more natural than a sharp masked line
- Add faint vertical grain lines in a slightly darker tone within the beam face using a fine brush or a dragging technique
Pro Tip
The trompe-l’oeil effect only works if the shadow direction is consistent across all beams — decide whether the light source comes from the left or the right and apply the shadow on the same side of every beam throughout. An inconsistent shadow direction is the detail that immediately breaks the illusion.