21 Cheap Wood Ceiling Ideas That Look High-End Without the High Price
The ceiling is often the most overlooked surface in a room—which is exactly what makes a beautifully designed wood ceiling so striking. Warm, textured, and architectural, wood adds character that painted drywall simply can’t replicate. And thanks to peel-and-stick planks, affordable shiplap, faux beams, and MDF panels, creating the look no longer requires a major renovation or a professional budget.
The ideas below explore a range of wood ceiling styles, from simple weekend projects to more involved designs that require basic DIY skills. Each offers a different combination of texture, warmth, and architectural interest, proving that a ceiling can become one of the most memorable features in a room—without the high price tag.
Peel-and-Stick Wood Plank Ceiling
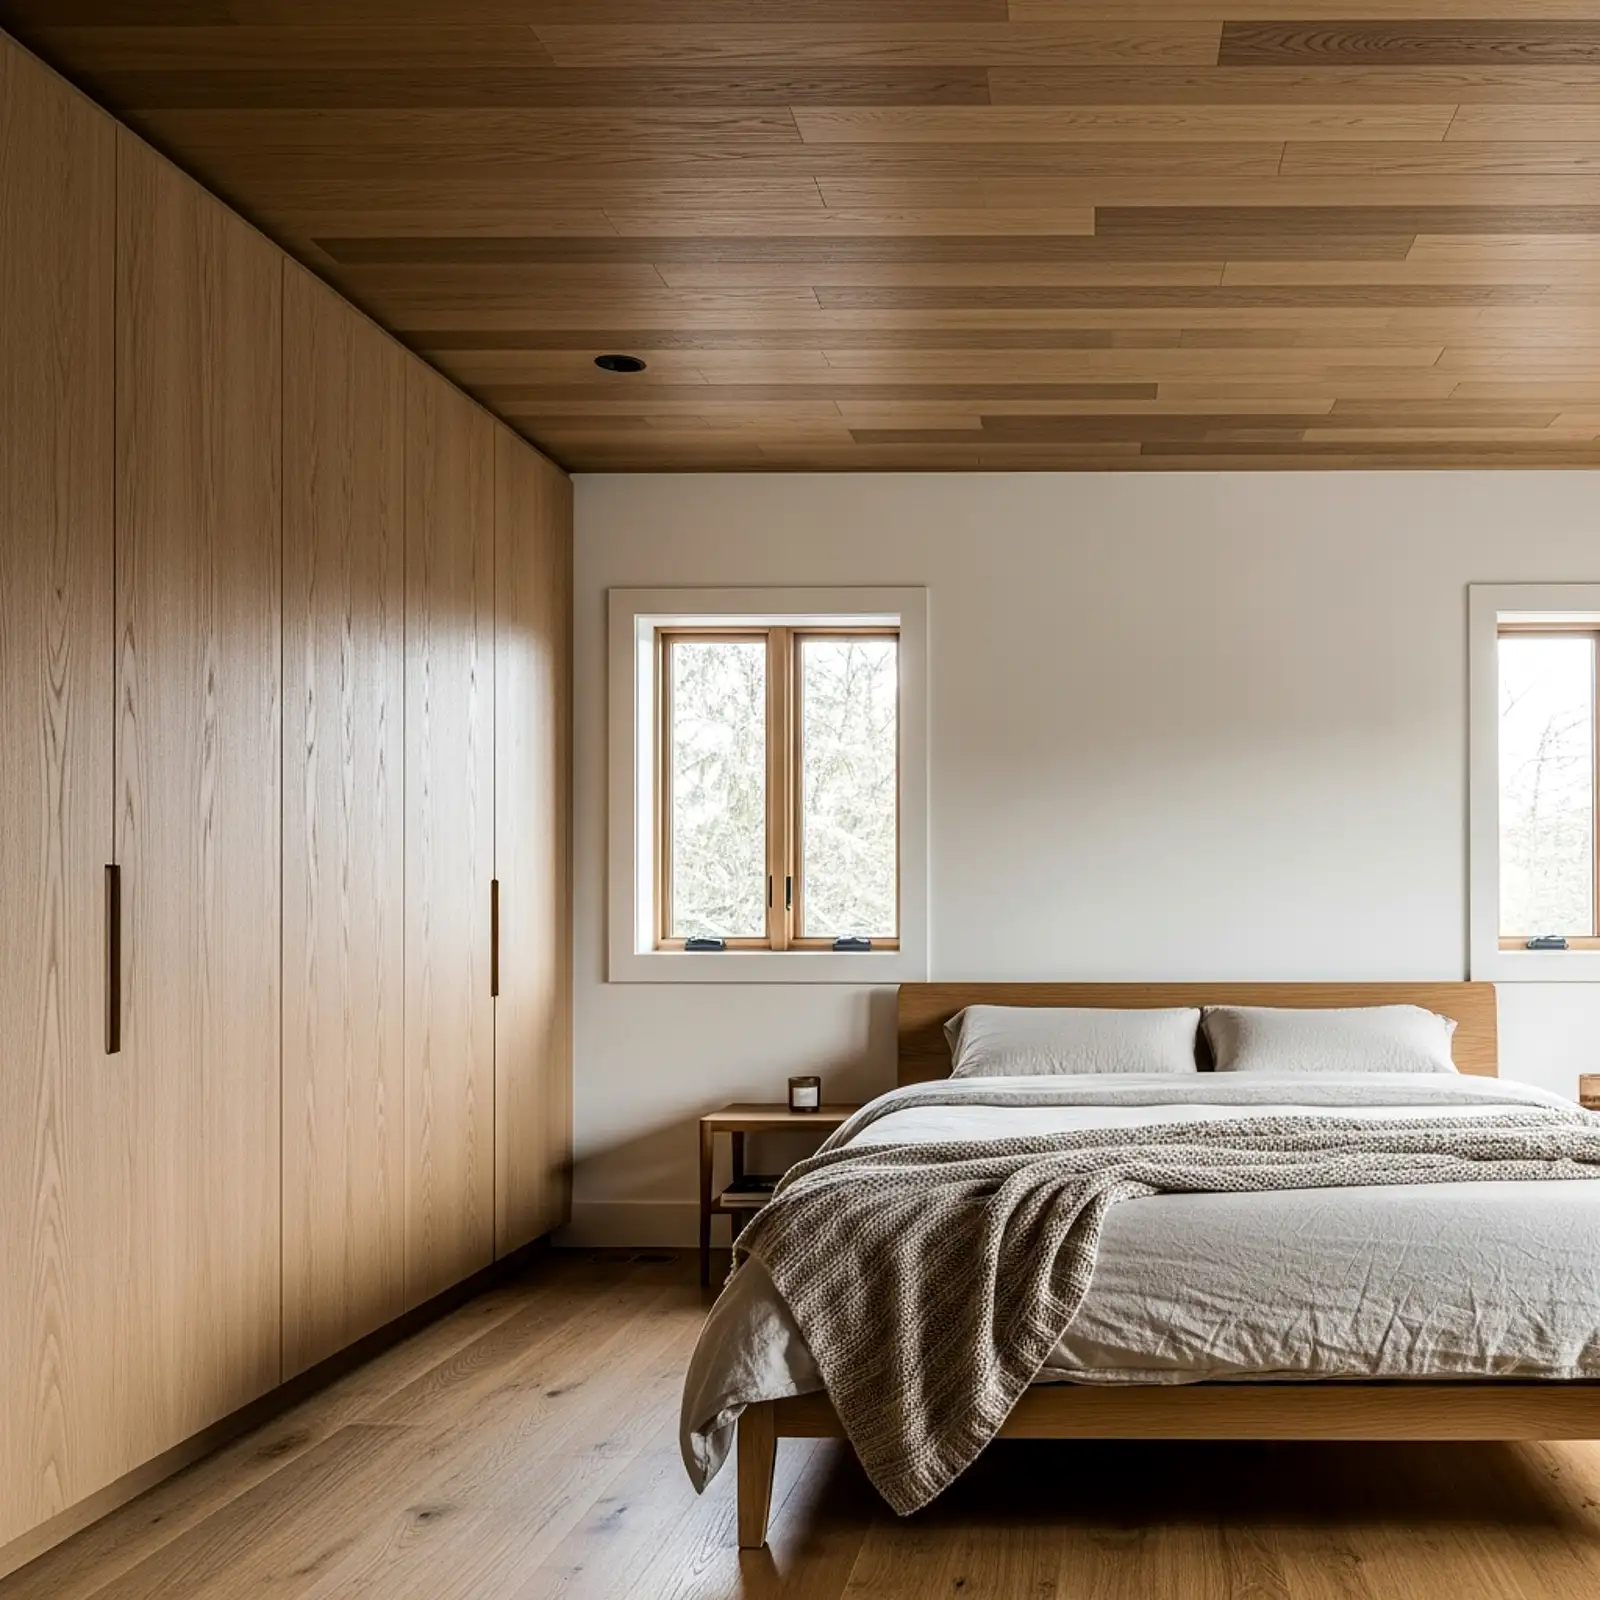
Peel-and-stick wood plank panels — self-adhesive thin wood veneer or wood-look vinyl strips that apply directly to a painted or primed drywall ceiling — are the single most accessible entry point into a wood ceiling at any skill level. Products like the Aspect Peel and Stick Backsplash Wood Plank and similar Amazon-available options come in warm oak, walnut, whitewash, and natural tones at approximately $3 to $5 per square foot. Applied in a staggered horizontal pattern with seams offset by at least a third of the plank length, the finished ceiling reads as tongue-and-groove planking from any normal viewing distance. The installation requires no tools beyond a tape measure, a utility knife, and a level line marked in chalk. A full bedroom ceiling can be completed in a single afternoon.
Pro Tip
Start your first plank row from the center of the ceiling rather than from a wall edge — find the true center point, snap a chalk line, and work outward in both directions. This ensures that any cut pieces at both walls are equal in width, which reads as intentional rather than as a measurement error. A centered installation always looks more professionally done than one that starts flush with one wall.
Whitewashed Shiplap Ceiling
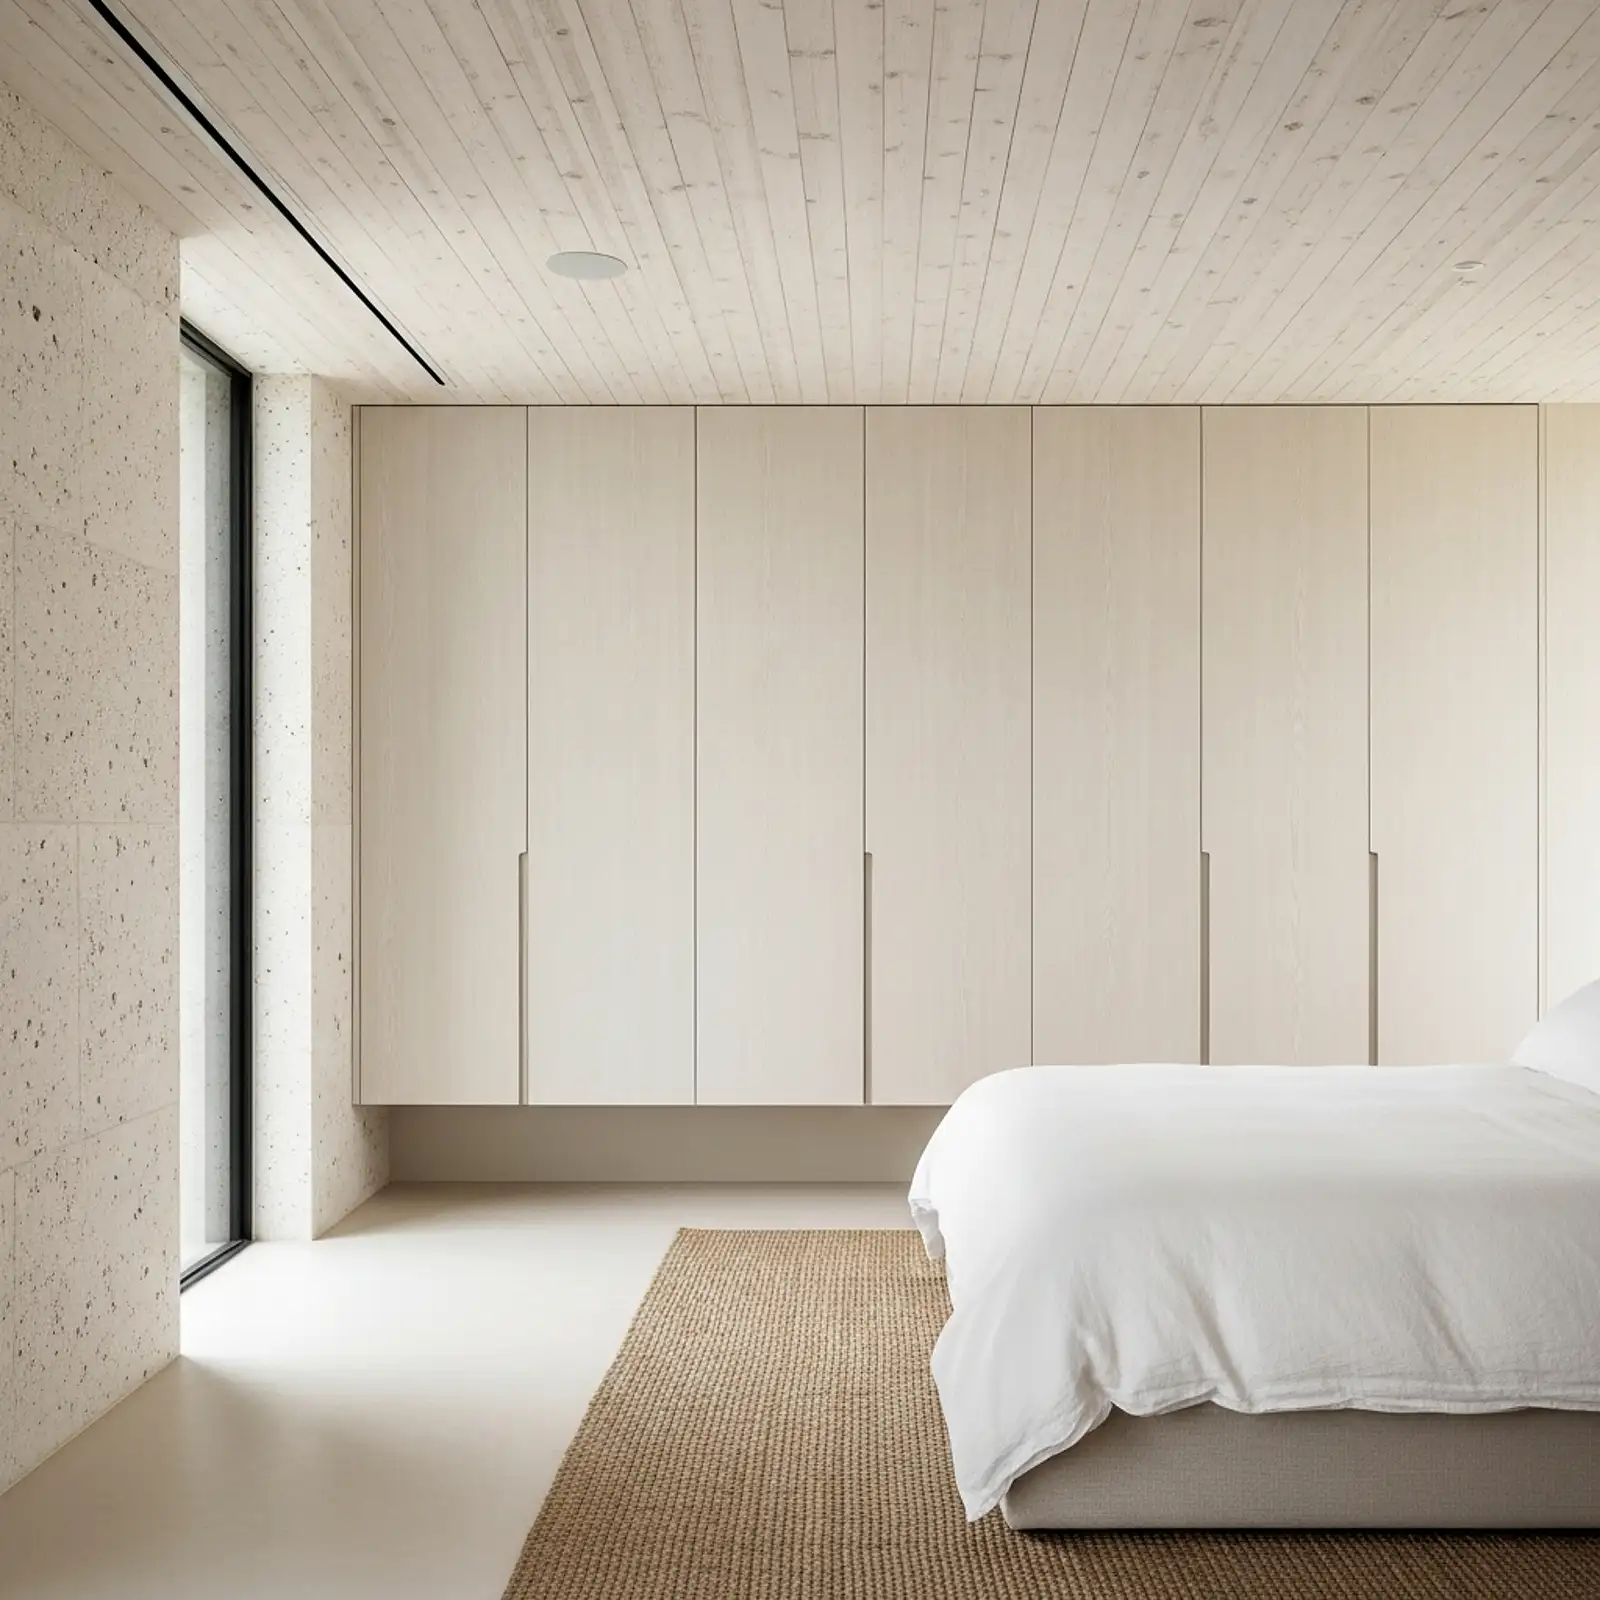
Thin pine shiplap boards — available from home improvement stores at $0.80 to $1.50 per linear foot — installed horizontally across the ceiling and finished with a diluted white wash instead of paint create a ceiling of weathered, coastal warmth that is among the most photographed looks in farmhouse and coastal bedroom design. The wash is applied by mixing one part white latex paint with two to three parts water, brushing it onto the board, then wiping back with a rag within 30 seconds so the grain shows through. The result is a surface that reads as sun-bleached, aged, and deeply beautiful — warm enough to feel organic, light enough to open the room upward. The boards are installed with a small gap between them using a coin as a spacer, adding a shadow-line detail that makes the ceiling look far more finished than raw boards without any gap would.
Pro Tip
Apply the whitewash before installing the boards, not after. Washing individual boards flat on sawhorses is infinitely easier than working on an overhead surface, produces a more even result, and eliminates drips onto walls and floors. Finish with a very light second wash coat on the installed ceiling to blend the seam areas, and the surface reads as entirely consistent.
Faux Wood Beam Ceiling
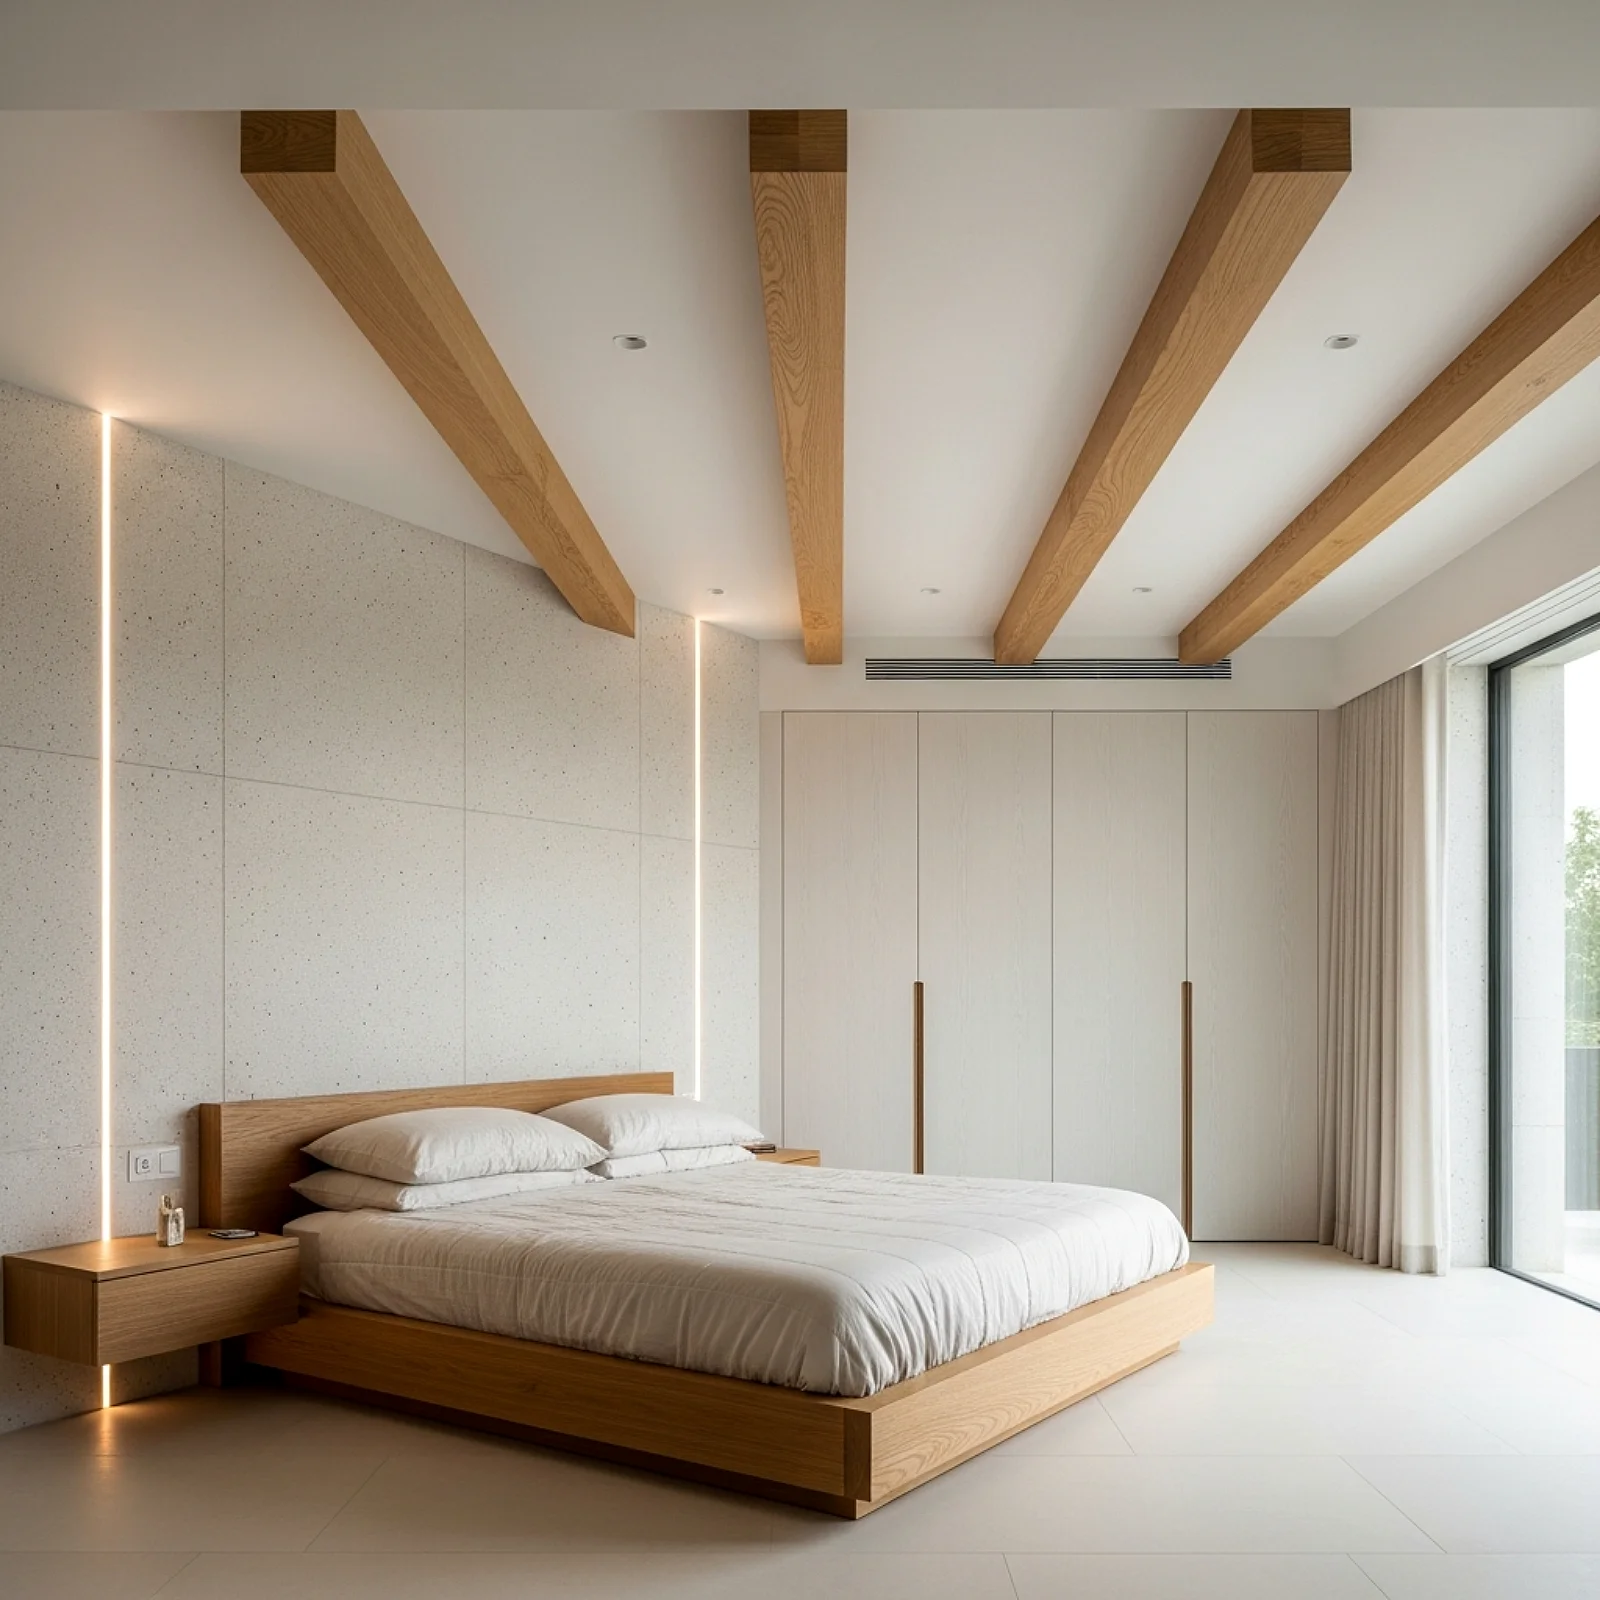
Lightweight polyurethane faux wood beams — hollow on the back, weighing a fraction of solid timber, and finished in realistic grain textures in oak, pine, walnut, and driftwood tones — are installed by screwing a simple wooden nailer strip to the ceiling and then slipping the hollow beam over it. The result reads as genuine structural timber from any normal viewing distance and in photographs is indistinguishable from the real thing. Three or five beams spaced evenly across a room ceiling cost between $80 and $200 per beam in mid-market brands like Barron Designs or Faux Wood Workshop, and the full installation requires only basic tools and one helper for lifting. The transformation from flat drywall to beamed ceiling is one of the most dramatic single-day home improvement changes available anywhere in the house.
Pro Tip
Space faux beams based on the rule of thirds — divide the room width into thirds and position one beam at each third line, with two additional beams at the outer edges if the room is wide. This spacing reads as structurally logical, which is what makes faux beams read as genuine load-bearing members rather than decoration. Beams spaced too closely look ornamental; beams spaced at structural intervals look architectural.
Tongue-and-Groove Pine Plank Ceiling
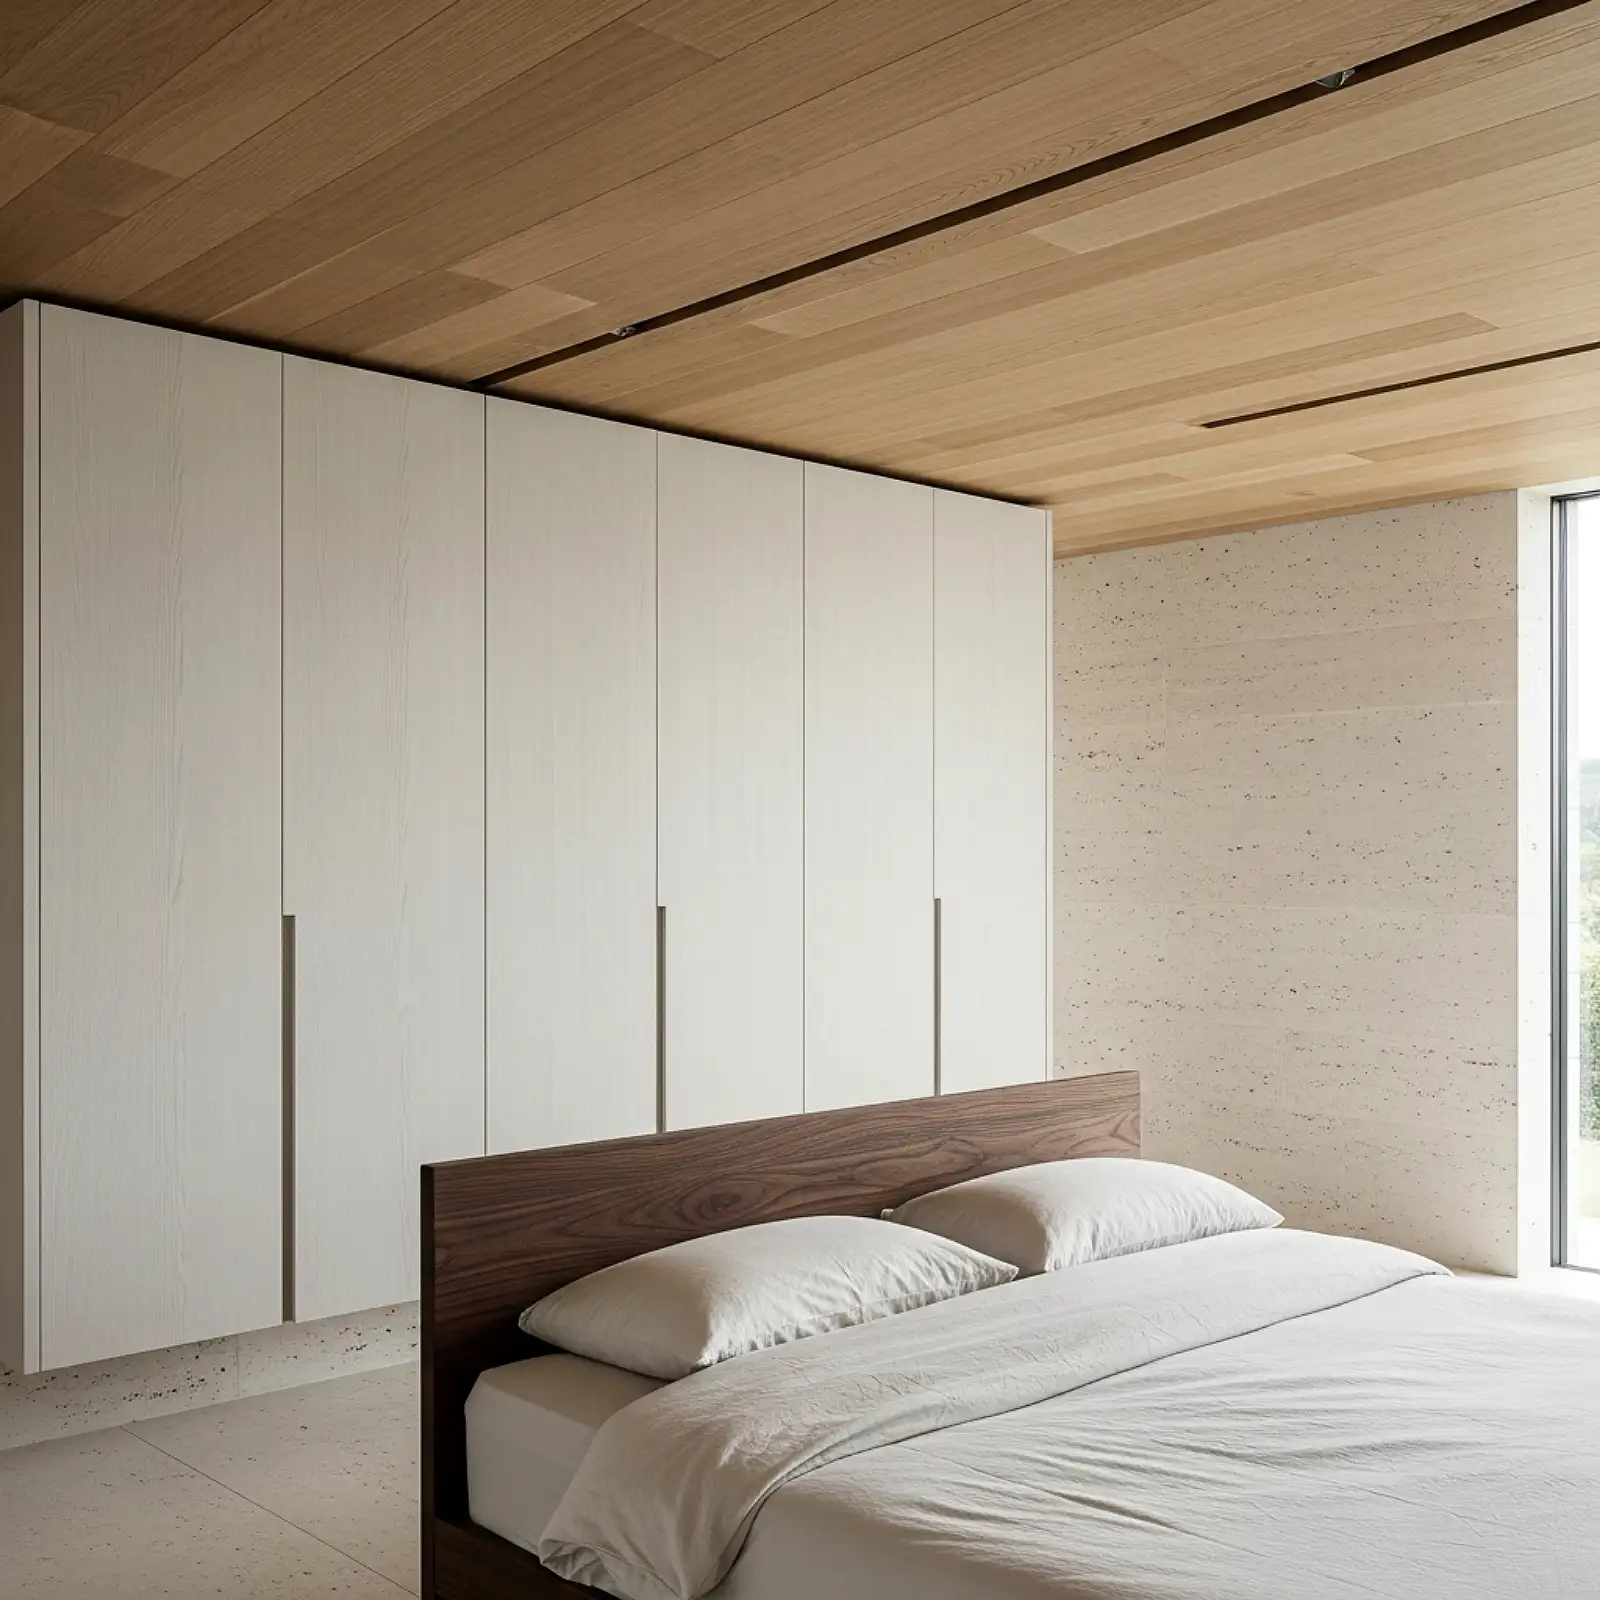
Tongue-and-groove pine planks — available at most lumber yards and home improvement stores at $1 to $2 per linear foot — are the traditional material for wood plank ceilings and deliver a warmth and authenticity that no peel-and-stick alternative matches in person. The tongue-and-groove profile means the boards interlock with no visible fasteners when blind-nailed through the tongue, creating a seamless, smooth surface that reads as bespoke carpentry. A standard bedroom ceiling in tongue-and-groove pine, stained in a warm honey oak or whitewashed, costs $200 to $500 in materials and a weekend in time. The material investment is modest; the visual transformation is genuinely extraordinary. In a bedroom especially, the warmth of natural pine overhead changes the entire quality of the room’s atmosphere in a way that no paint color or furniture change can replicate.
Pro Tip
Acclimate tongue-and-groove pine planks inside the room for at least 48 to 72 hours before installation. Wood expands and contracts with humidity, and boards installed before acclimating to the room’s specific moisture level can cup, bow, or develop visible gaps within weeks. Stacking the boards flat in the room with spacers between each one for air circulation is the only preparation step that genuinely affects the longevity of the installation.
Stained Plywood Panel Ceiling
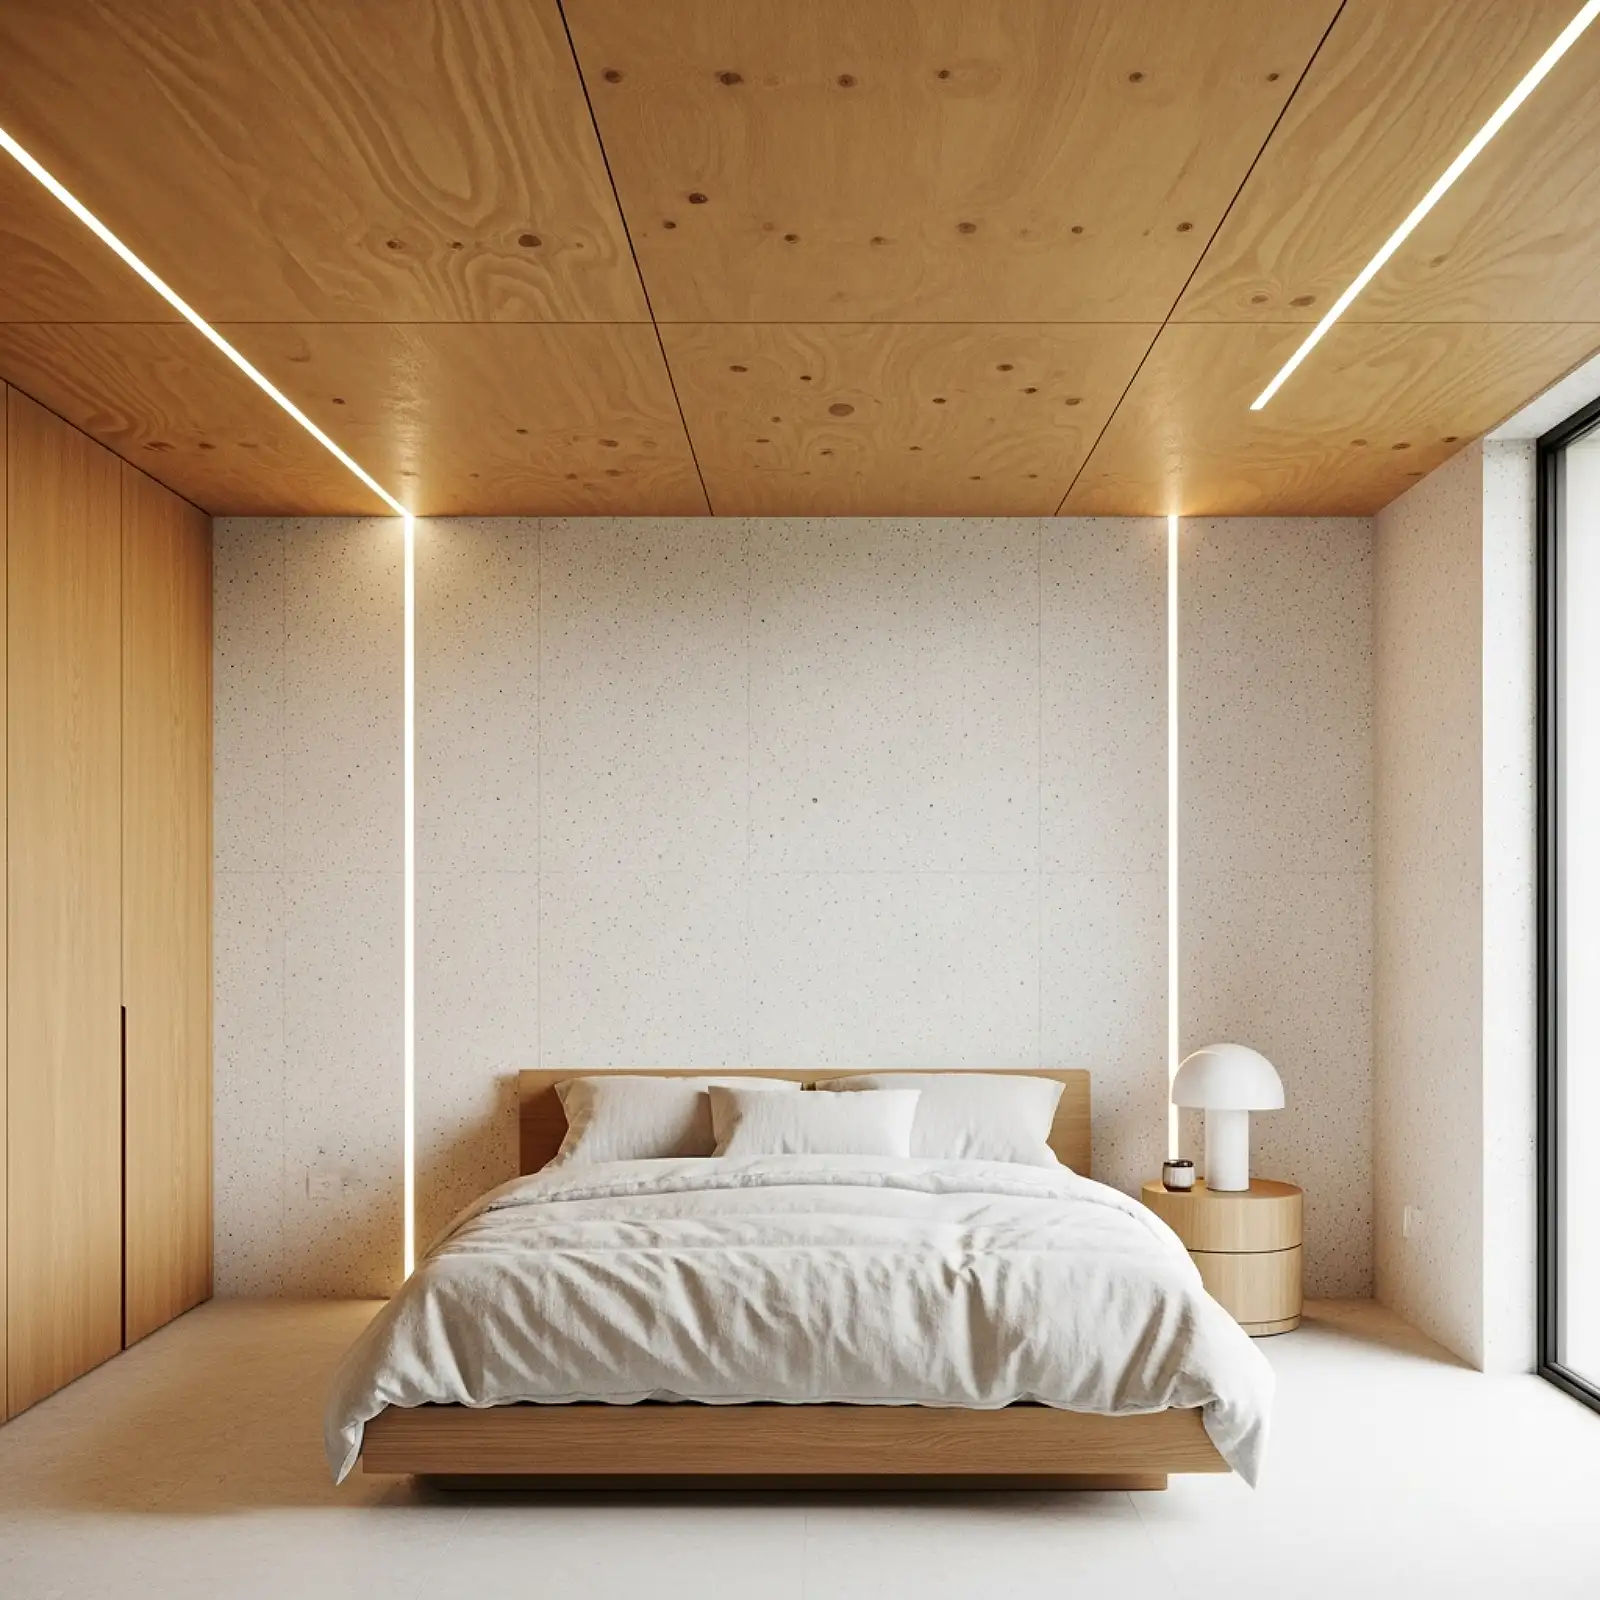
Thin plywood panels — 1/4-inch or 3/8-inch hardwood-veneered plywood in birch or oak veneer — cut to consistent widths of 8 to 12 inches, stained in a warm tone, and installed as planks create a ceiling surface with genuine wood grain character at a material cost of roughly $0.50 to $1.00 per square foot. Ripping a full 4-by-8-foot panel into 8-inch strips on a table saw or with a circular saw and straightedge produces 6 planks per sheet, each with a clean straight edge and a continuous grain. The plywood’s layered interior is visible only at the cut ends — fill these with wood filler and sand smooth before installation so the edge reads as solid wood. A full room in ripped plywood planks can cost under $150 in materials and is one of the most genuinely satisfying budget ceiling projects available.
Pro Tip
Apply stain before cutting the full panel into strips — staining large flat sheets produces a more even tone with fewer lap marks than staining individual narrow strips, where the brush tends to create visible overlaps at the board edges. Cut after staining and the strips install with a consistent, uniform color from the first board to the last.
Cedar Fence Board Ceiling
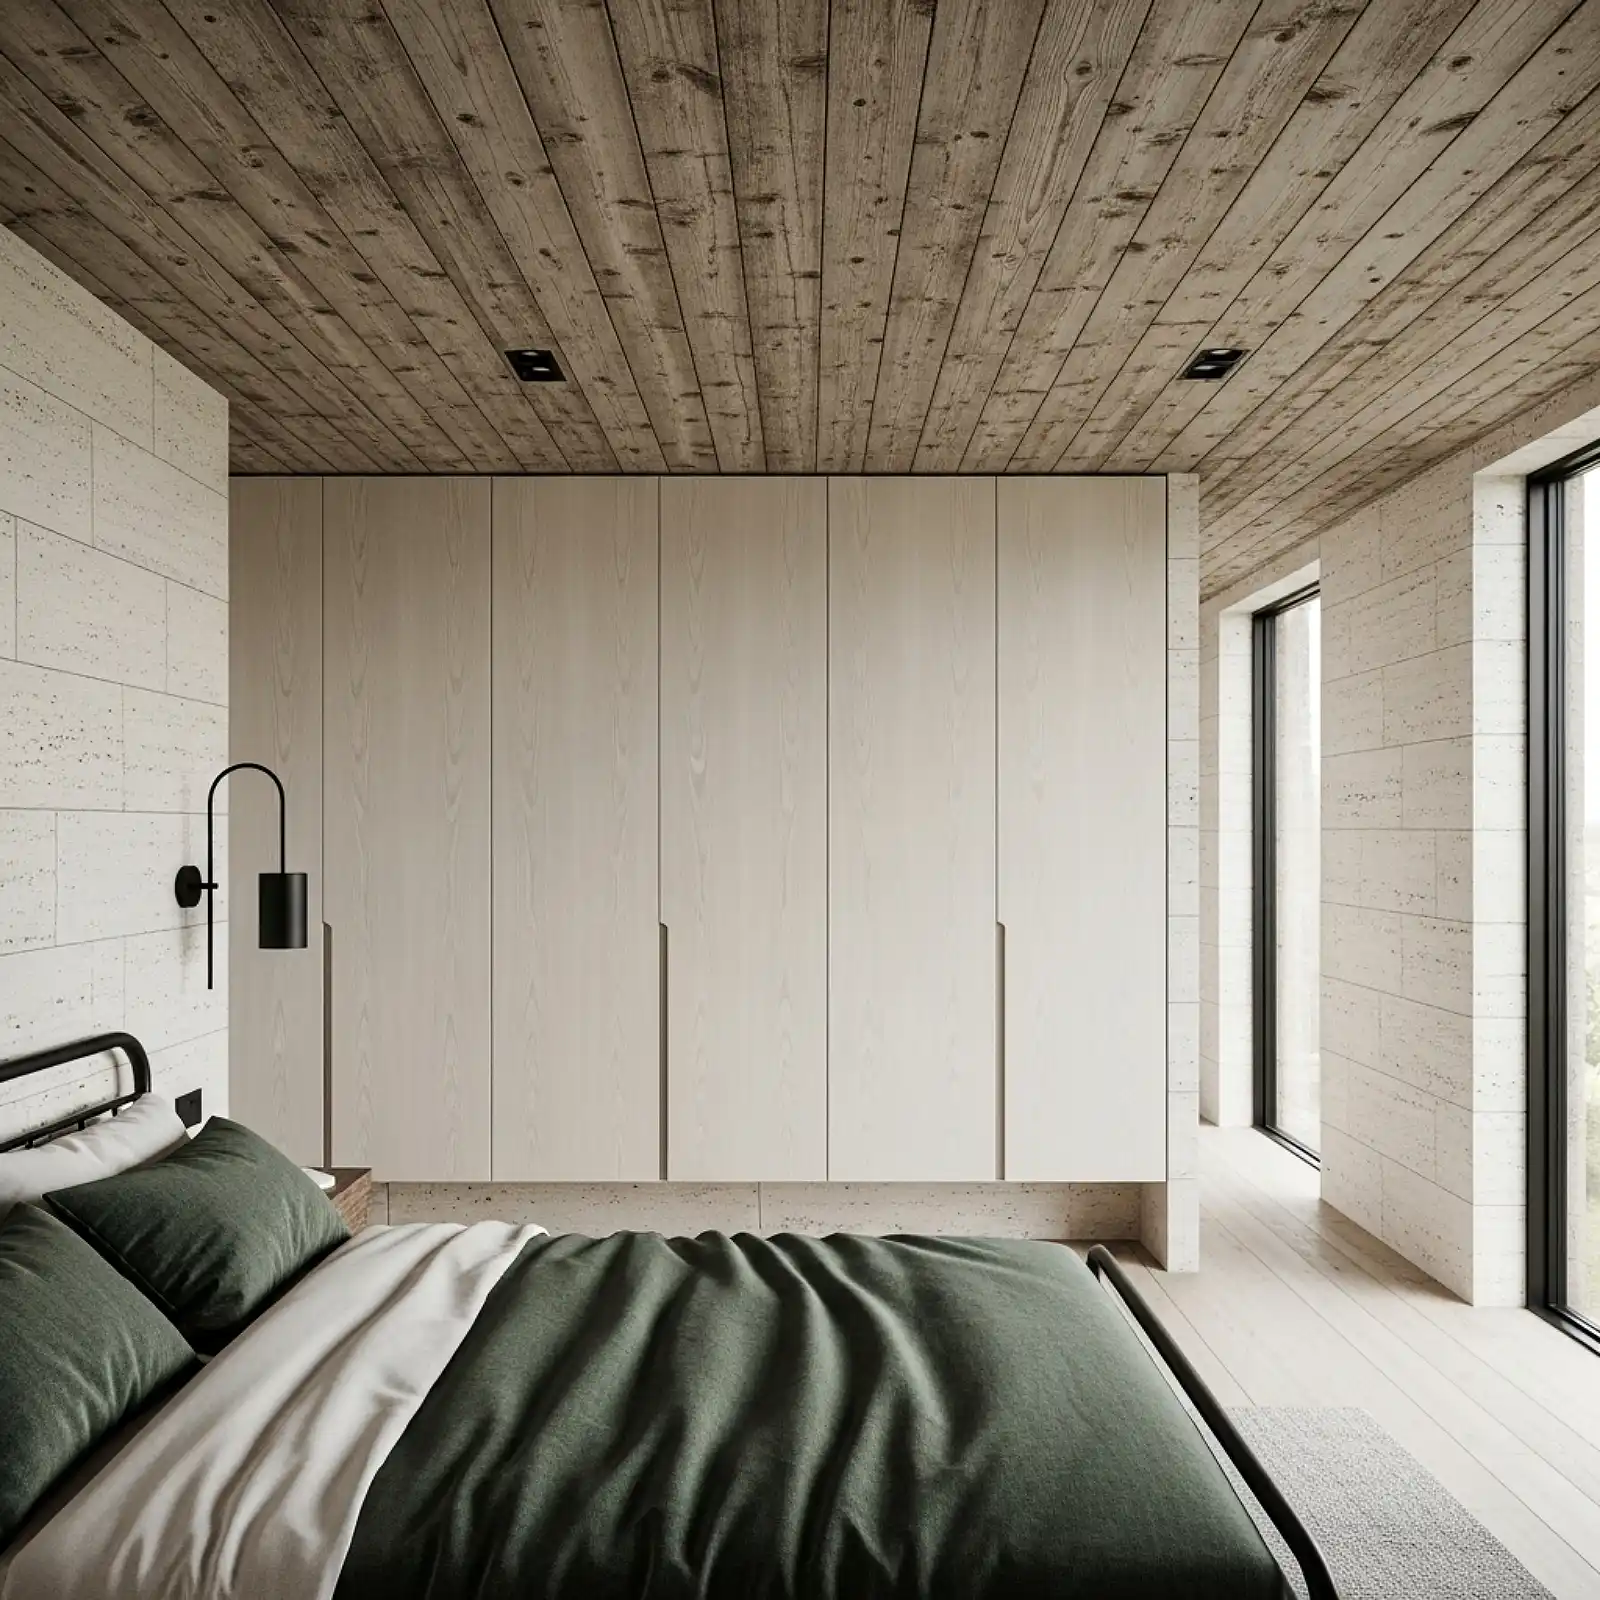
Cedar dog-ear fence boards — available at home improvement stores for $2 to $4 per 6-foot board — are one of the best-kept secrets in budget ceiling installation. The boards are rough-sawn on one face and smooth on the other, naturally aromatic, and weather to a beautiful silver-grey over time if left unsealed, or can be stained to a warm honey cedar or a driftwood grey immediately on installation. Ripped to a consistent width and installed with a small reveal between boards, they produce a ceiling with genuine material character and scent that no manufactured wood-look product can replicate. A full bedroom ceiling in cedar fence boards, including the boards, nails, and stain, typically costs under $100 — which makes it one of the most extraordinary value-to-visual-impact ratios available in any home improvement project.
Pro Tip
Sort cedar fence boards at the store by grain character and color tone before loading them. Cedar boards from the same pallet can vary significantly in color — some boards are pale cream, others are deep red-brown — and installing them randomly produces a visually chaotic ceiling. Sort into light, medium, and dark piles and alternate tones as you install for a naturally varied but balanced final appearance.
Dark Stained Shiplap Ceiling

Where whitewashed shiplap opens a room upward, dark-stained shiplap pulls it inward — creating a warm, enveloping overhead quality that makes a bedroom feel like the most sheltered and private possible space. Pine shiplap boards stained in a deep walnut, ebony-tinted oak, or dark espresso tone and installed on the ceiling of a bedroom with warm amber wall tones below create a room that reads as dramatically architectural and genuinely luxurious. The contrast between the dark wood overhead and the warm walls and white bedding below creates a layered depth that the best hotel suite designers have used for decades. Dark stained ceilings require good lighting planning — more low-level warm sources to compensate for the ceiling’s light absorption — but the atmospheric reward for that planning is significant.
Pro Tip
With a dark stained ceiling, install recessed LED puck lights or directional spotlights pointing downward rather than relying on a central ceiling fixture. A light source flush with a dark ceiling disappears visually; a directed light source that throws illumination downward and away from the ceiling preserves the rich depth of the dark wood while providing the functional light the room needs.
Herringbone Wood Plank Ceiling Panel
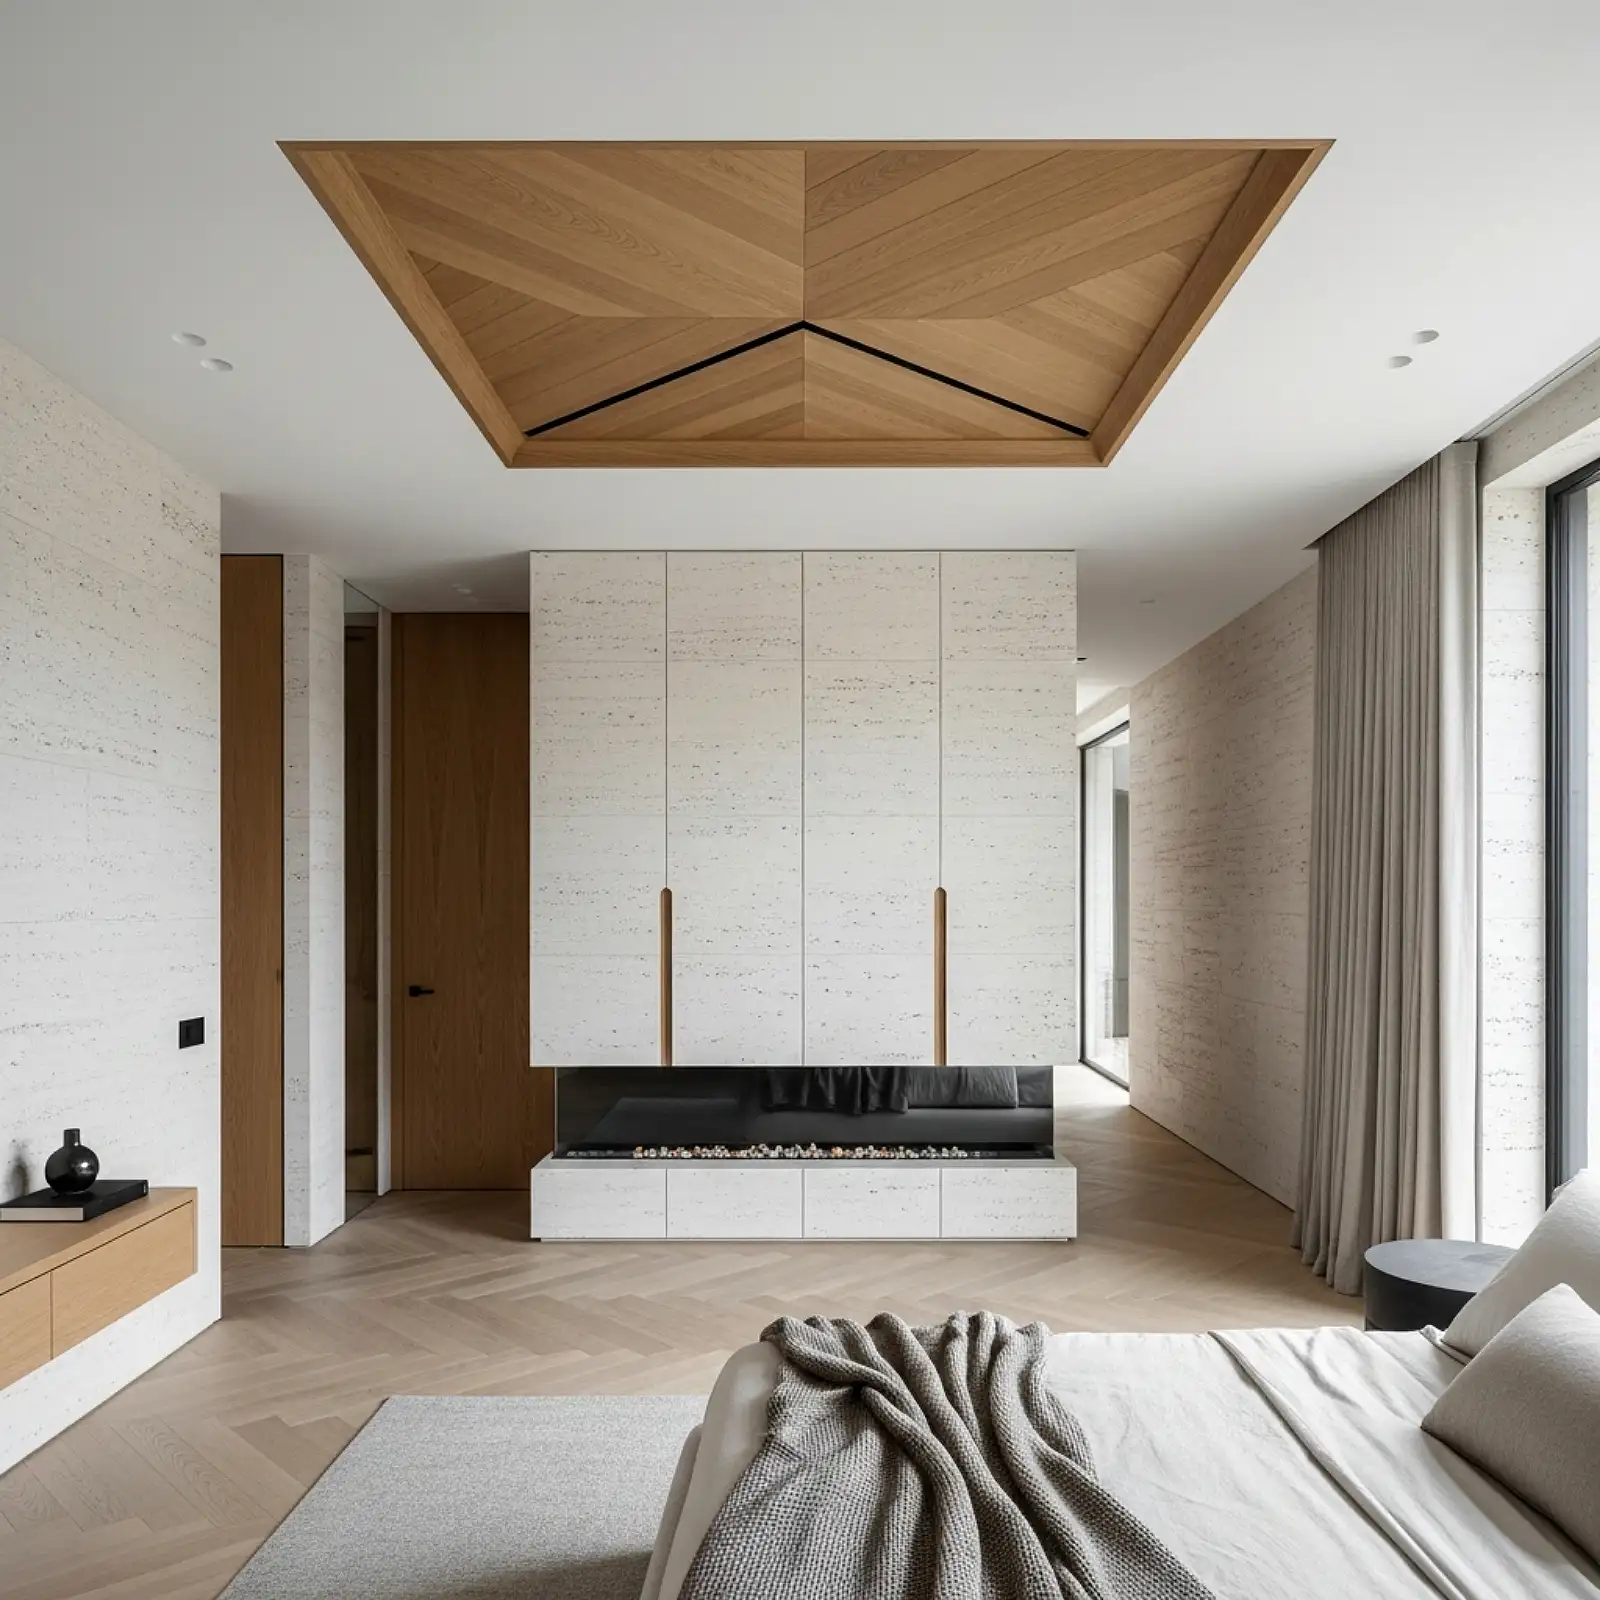
A herringbone pattern — alternating planks at 45-degree angles in a V-shaped chevron — applied to a ceiling panel above the bed, a breakfast nook overhead, or a hallway ceiling creates a statement so visually striking that it functions as the room’s primary design feature. The pattern is achieved with the same thin pine or plywood planks used in standard plank ceilings, simply cut at 45-degree mitered ends and installed in alternating directions. The geometric complexity appears to require advanced skill but demands only a miter saw set to 45 degrees and careful layout planning. Apply to a panel section rather than the full ceiling — a rectangle of herringbone centered above the bed flanked by plain shiplap on either side — and the pattern reads as intentional architectural detail rather than overwhelming the space.
Pro Tip
Draw the herringbone layout full-scale on kraft paper or on the subfloor before cutting a single board. The pattern’s center V-point must align precisely with the center of the ceiling panel for the herringbone to read as symmetrical — and finding that center point on paper costs nothing compared to finding it on the ceiling after cutting. Pre-plan, pre-mark, then cut confidently.
Reclaimed Wood Ceiling Planks
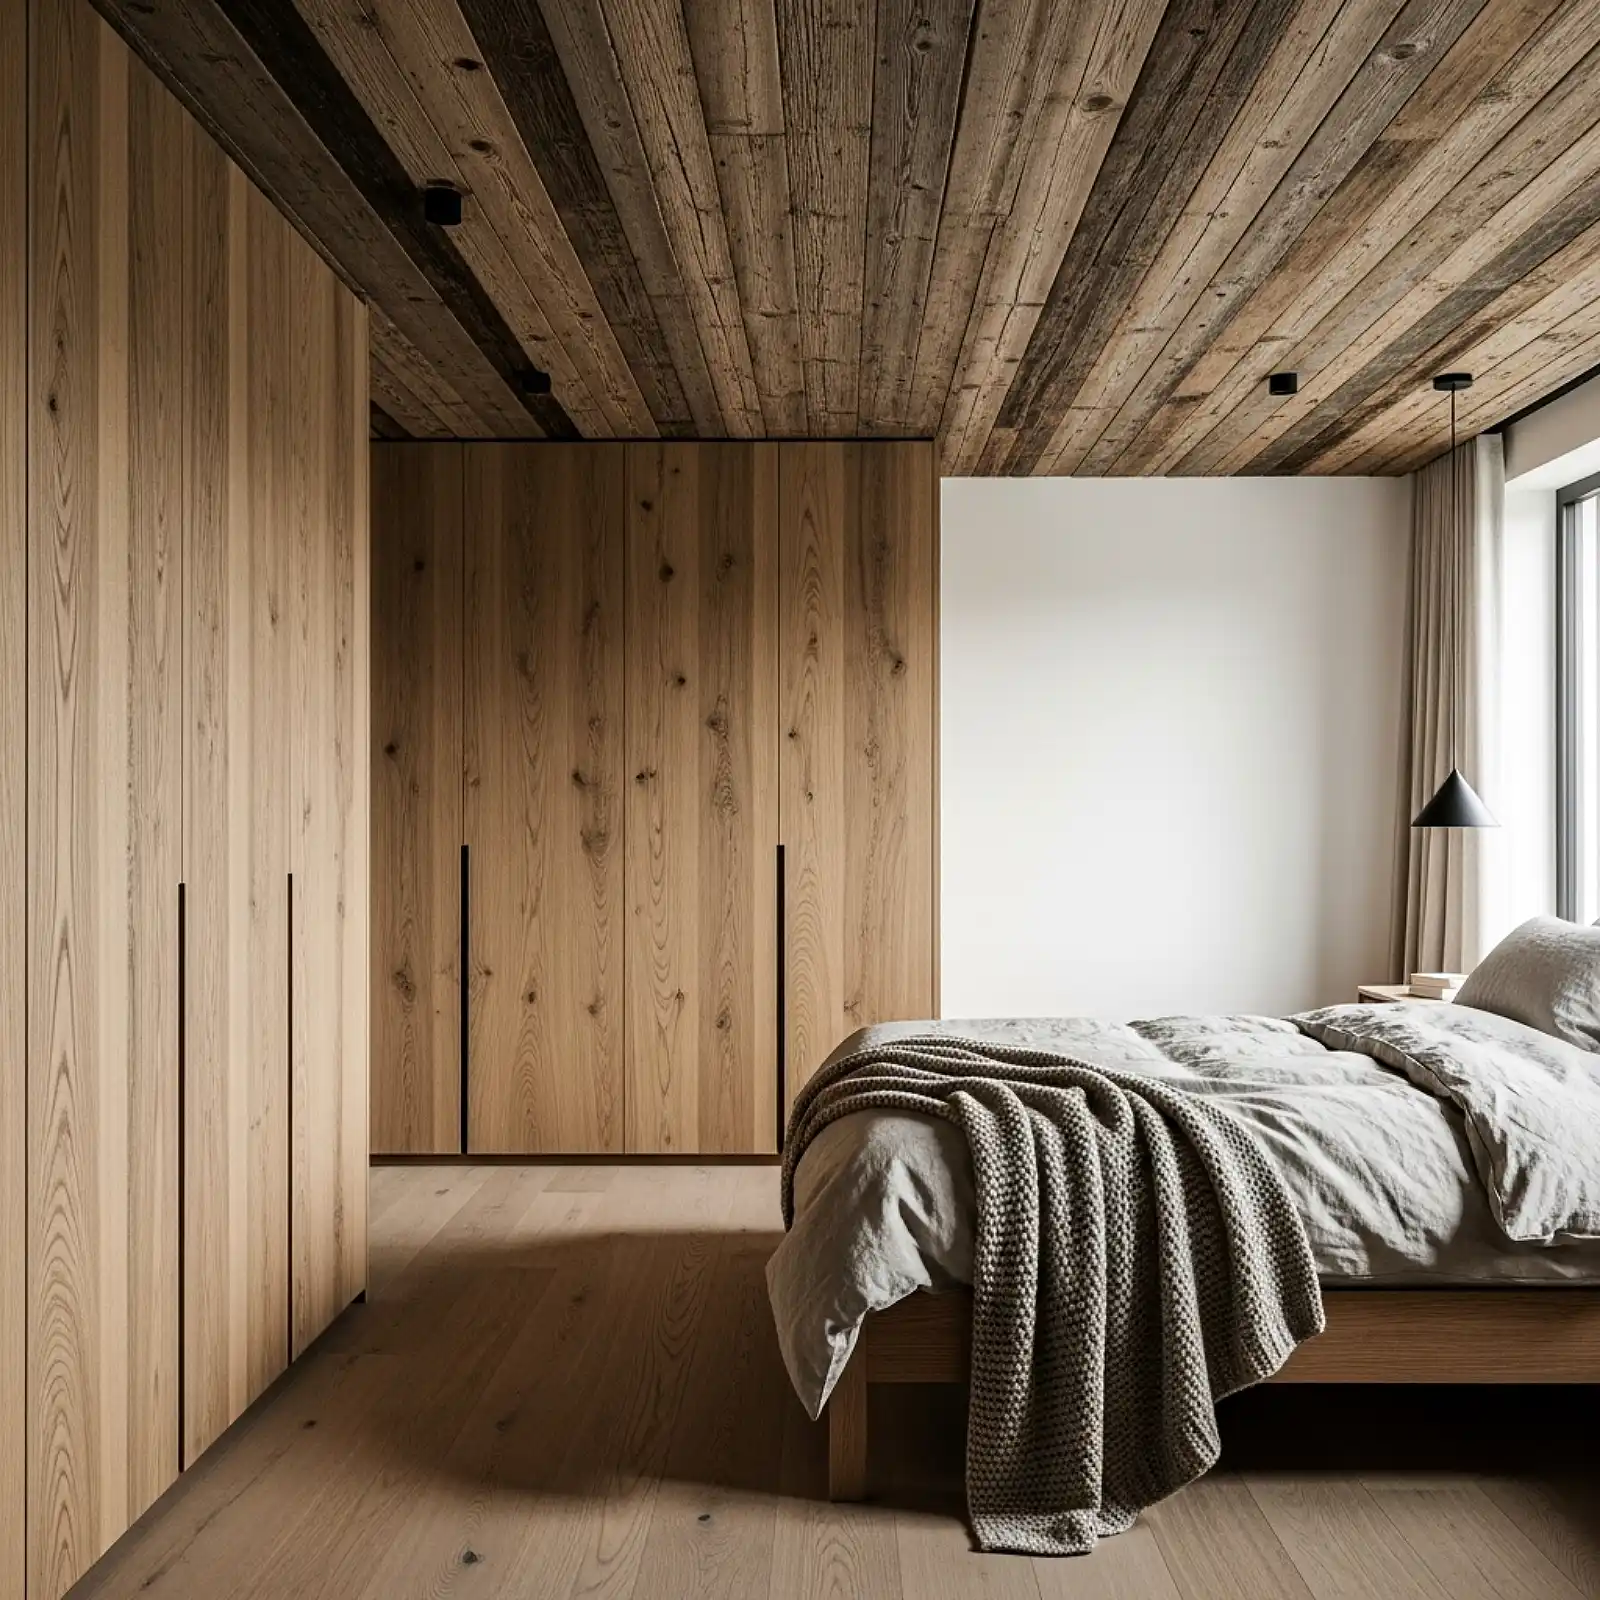
Genuine reclaimed wood — salvaged barn siding, factory floor boards, old fence rails, or pallet wood selected for quality and dried thoroughly — installed as ceiling planks brings a material authenticity and historical depth that no new wood can manufacture at any price. Each board carries its own unique combination of grain character, nail holes, weathering marks, and color variation that makes the ceiling look like it has been there for generations rather than installed last weekend. Sources for reclaimed wood include local salvage yards, architectural salvage dealers, Craigslist and Facebook Marketplace teardown listings, and specialist reclaimed lumber suppliers online. The cost varies widely but quality reclaimed barn siding is often available for $1 to $3 per square foot from private sellers — similar to new pine but with incomparably richer visual character.
Pro Tip
Run reclaimed wood boards through a metal detector before cutting or nailing — old barn wood and fence boards regularly contain buried nails, staples, and wire fragments that will damage saw blades and create unpredictable cuts. A basic handheld metal detector costs $20 to $30 and eliminates the single most common source of damaged equipment and wasted material in reclaimed wood ceiling projects.
Wood-Look Ceiling Tiles
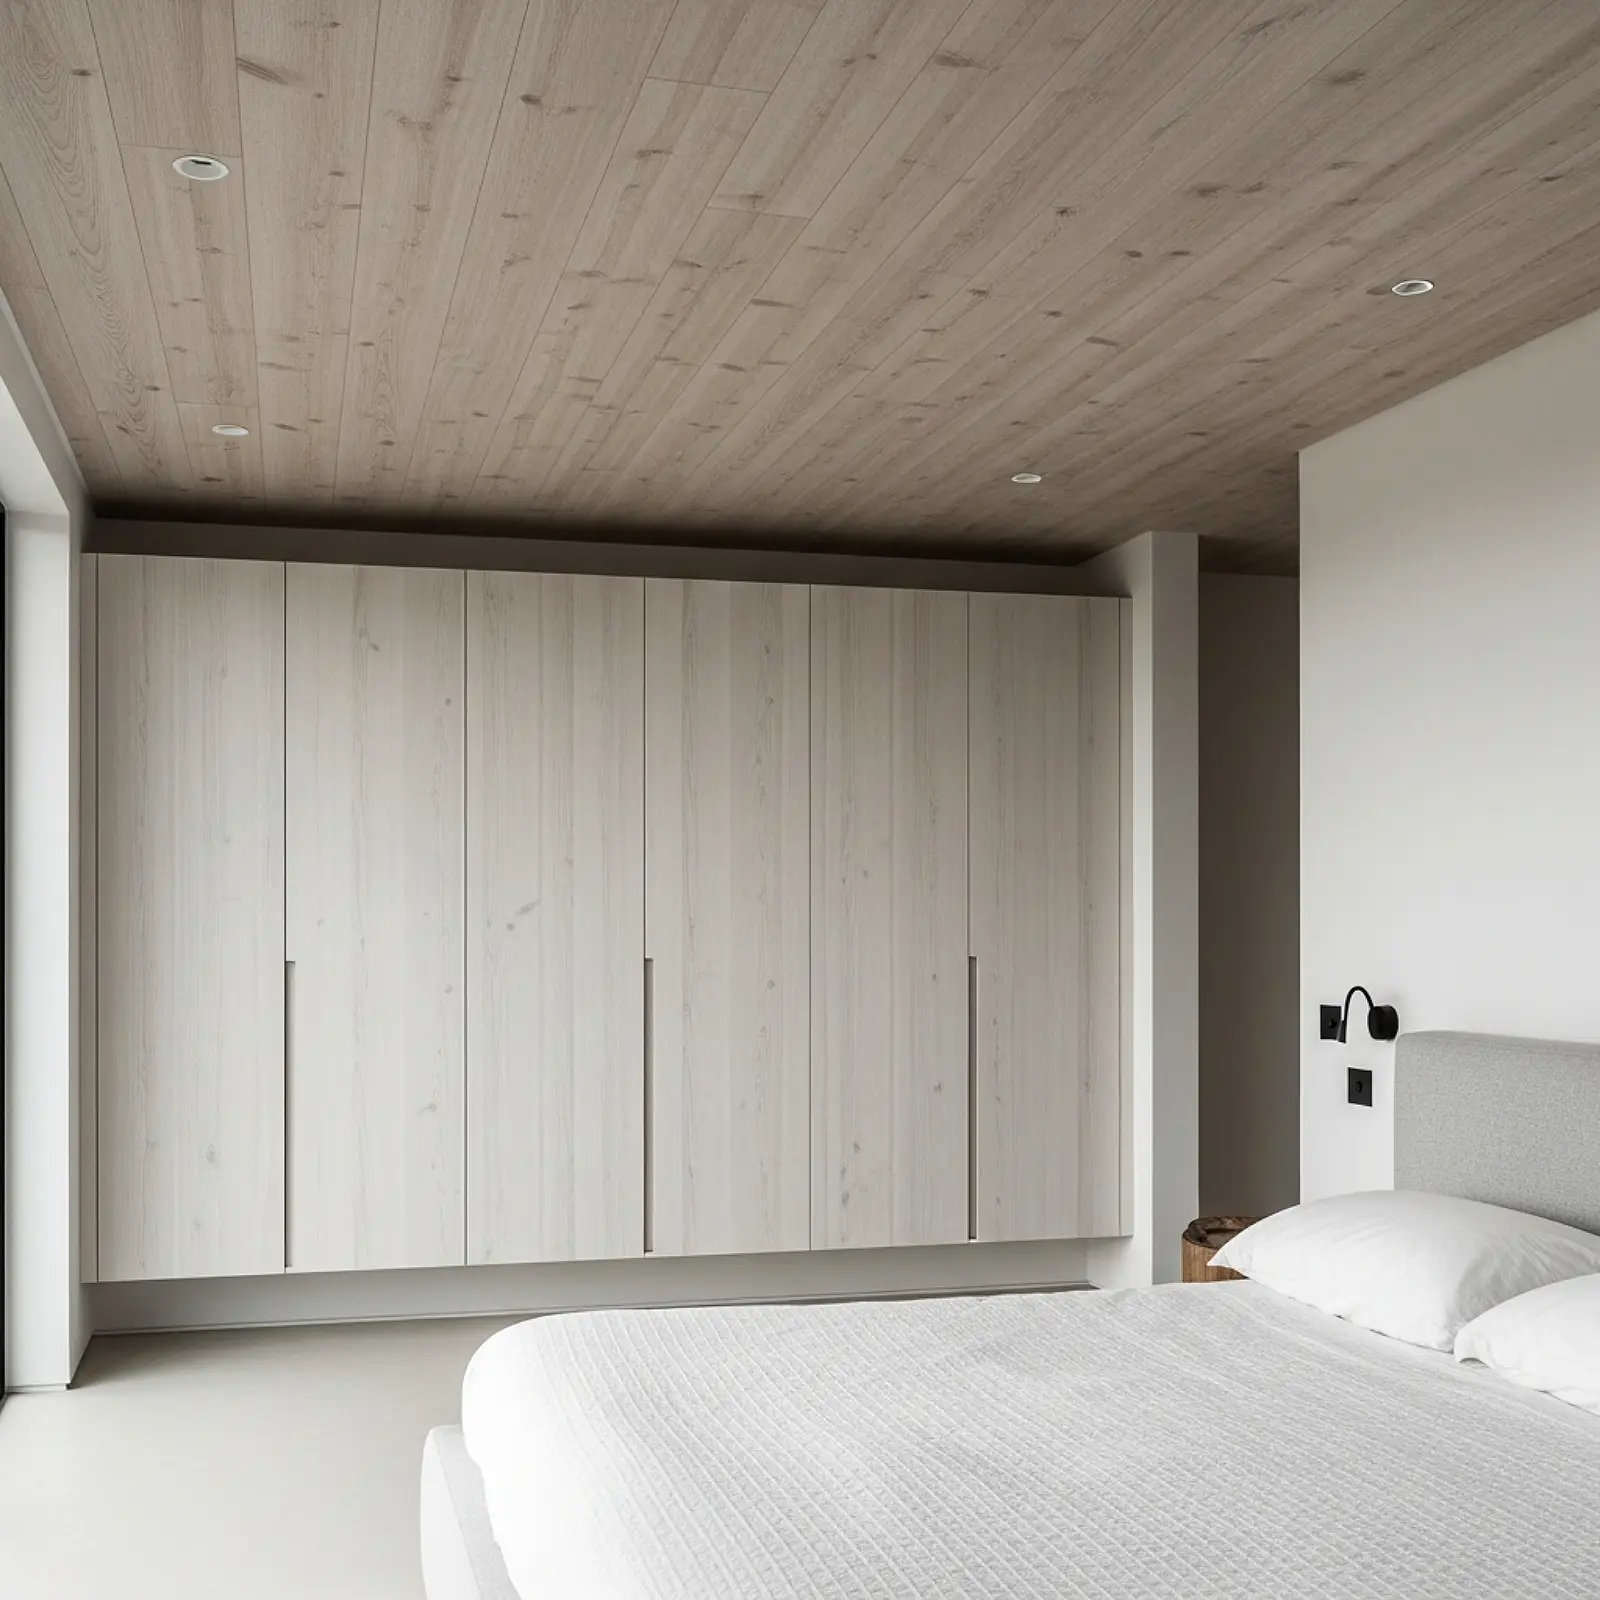
Tongue-and-groove-patterned ceiling tiles in a wood-grain print — available from suppliers like Ceilume and Armstrong in acoustic tile sizes (2×2 or 2×4 feet) that drop into standard suspended ceiling grids — allow renters and anyone with an existing drop ceiling to achieve a wood ceiling look without any permanent modification. The tiles print convincing wood grain in oak, cedar, and pine tones at $3 to $8 per tile, and the installation involves nothing more than lifting out existing tiles and dropping the new ones in. For rooms without an existing grid, surface-mounted tile systems adhere directly to the existing ceiling with adhesive. The look from below — a warm, planked wood overhead — reads beautifully in photographs and completely transforms the visual quality of a room that previously had a commercial acoustic tile ceiling.
Pro Tip
Orient wood-grain ceiling tiles so the grain direction runs parallel to the room’s longest dimension — this is the orientation that reads as most architecturally natural and makes the room appear elongated and purposeful. Tiles installed with grain running the short direction can make a room feel compressed and make the tile format more visually obvious.
Bamboo Panel Ceiling
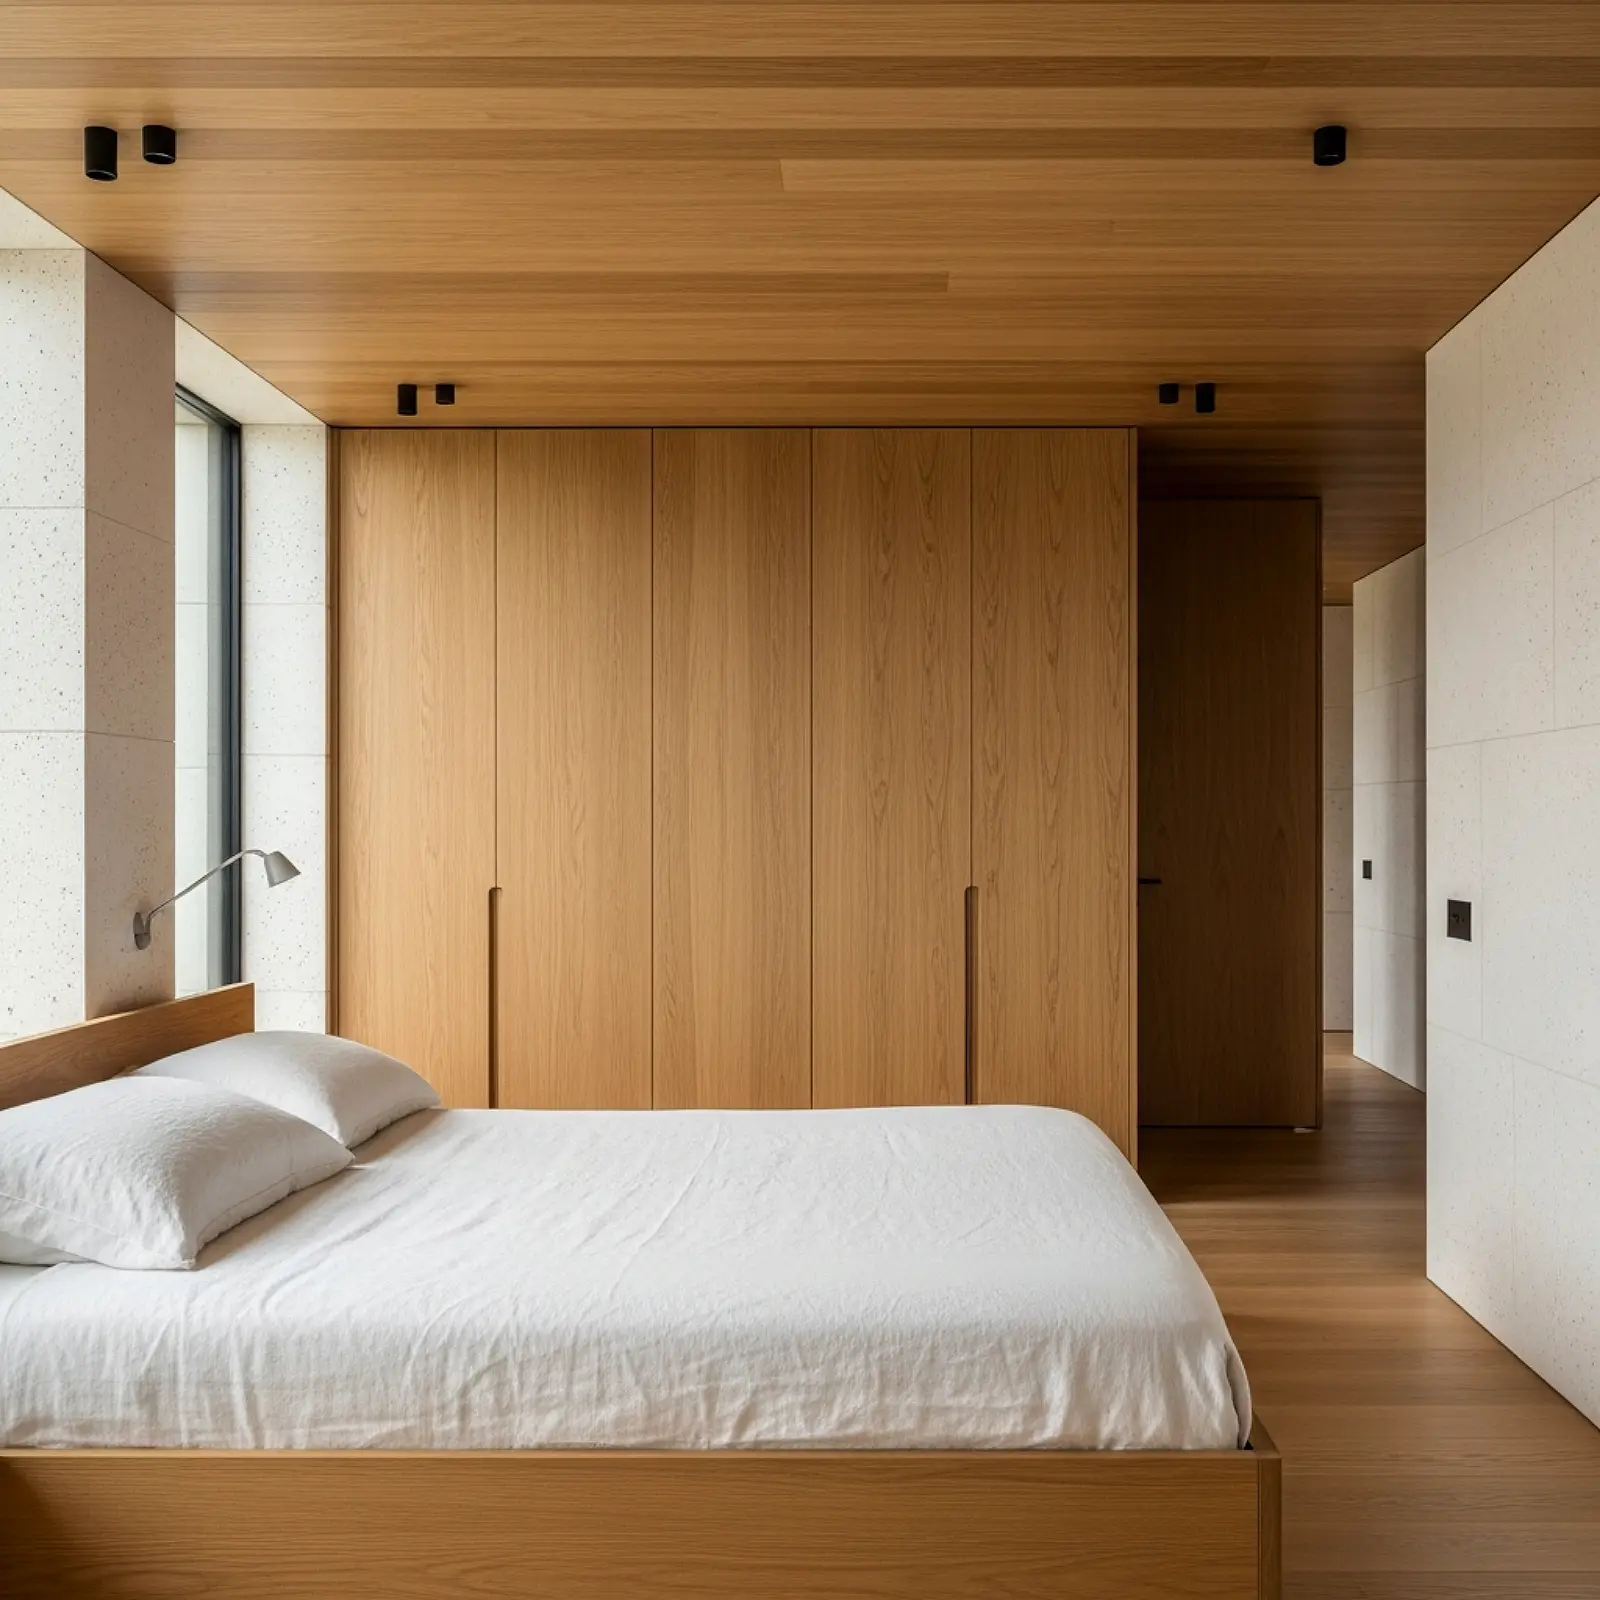
Bamboo ceiling panels — thin bamboo mat or carbonized bamboo planks available at flooring suppliers and online at $1 to $3 per square foot — bring an organic warmth and a specific material character to a ceiling that is distinct from any wood species and distinctly beautiful in its own right. Carbonized bamboo in a caramel or dark coffee tone has a specific warmth that reads as exotic and refined simultaneously. Bamboo panel ceilings are installed identically to thin wood plank ceilings — adhesive and finish nails on a plywood or drywall base — and finished with a clear sealer that deepens the natural color and prevents the surface from drying or splintering over time. In a bedroom with warm white walls and natural linen bedding, a bamboo ceiling reads as quietly extraordinary.
Pro Tip
Seal bamboo ceiling panels with a water-based polyurethane in a matte or satin finish rather than an oil-based finish. Oil-based sealers can yellow bamboo’s natural caramel tone significantly over time, especially in a bedroom where the ceiling receives limited UV exposure to prevent this process. A water-based matte sealer locks in the original color and keeps the bamboo surface looking as beautiful in year five as it did on installation day.
Painted Faux Wood Grain Ceiling
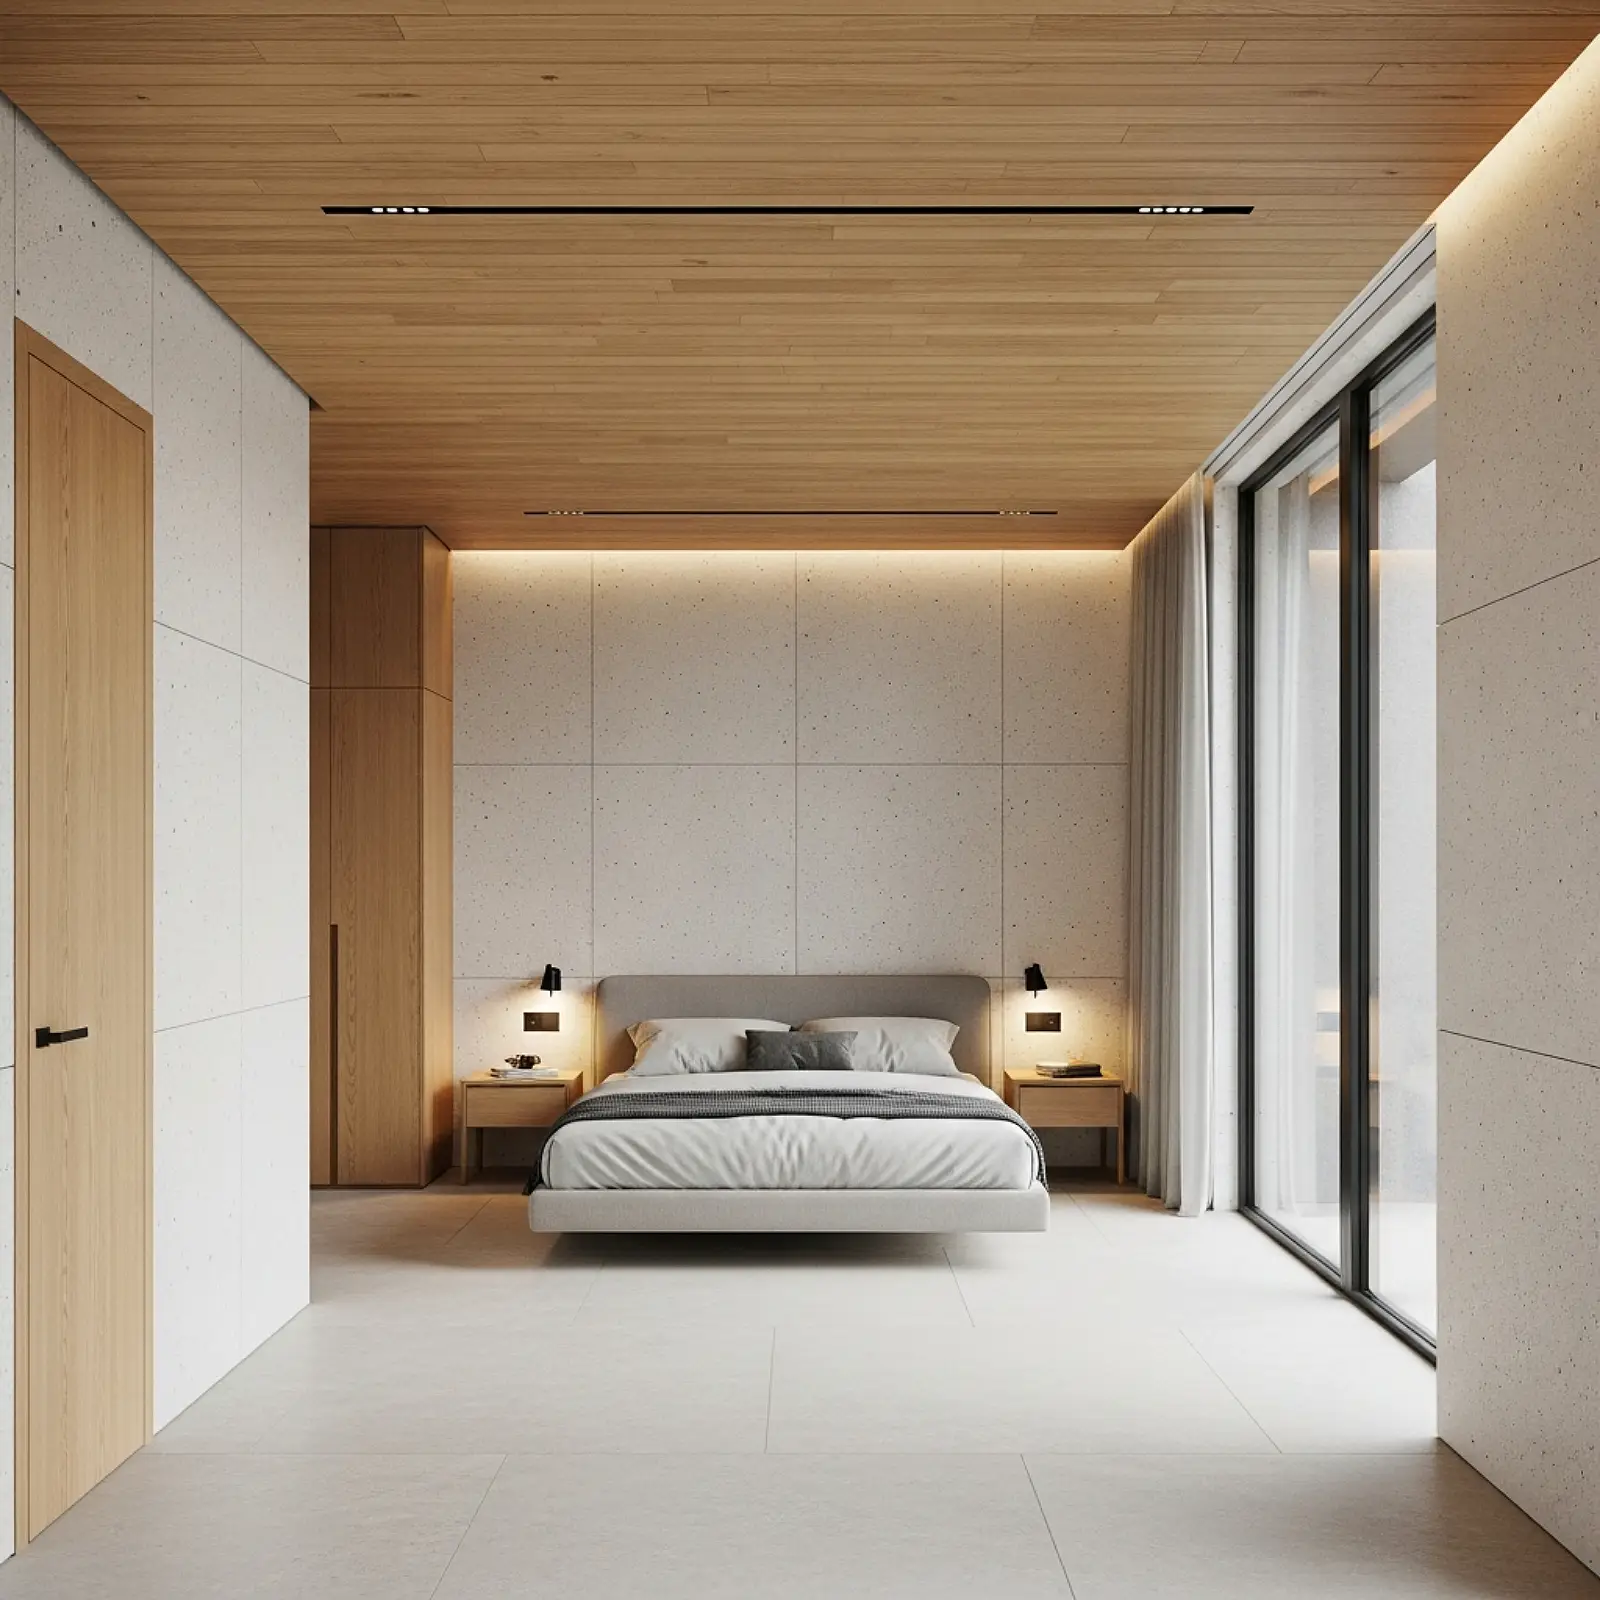
A faux wood grain finish — applied to a standard drywall ceiling using a base coat of warm caramel or honey paint, a glaze coat in a deeper brown tone, and a wood graining rocker tool dragged through the wet glaze while it’s still workable — creates a ceiling surface that reads as planked wood from a normal viewing distance and in photographs, for the cost of two quarts of paint and a $15 graining tool. The technique requires practice on a sample board before committing to the ceiling, but the rocker tool is specifically designed to produce realistic grain by creating a consistent wave pattern in the wet glaze. Applied in parallel bands across the ceiling with slight alignment variation between sections to simulate plank seams, the result is surprisingly convincing — particularly in lower-light conditions where the ceiling is seen primarily from below and at a distance.
Pro Tip
Work in 18-to-24-inch-wide sections across the ceiling, completing the grain in each section before the glaze dries — glaze becomes unworkable within 10 to 15 minutes. Have a partner apply the glaze while you follow immediately with the graining tool; working solo makes it nearly impossible to stay ahead of the drying time without a helper on a full ceiling application.
MDF Board Coffered Ceiling with Faux Wood Finish
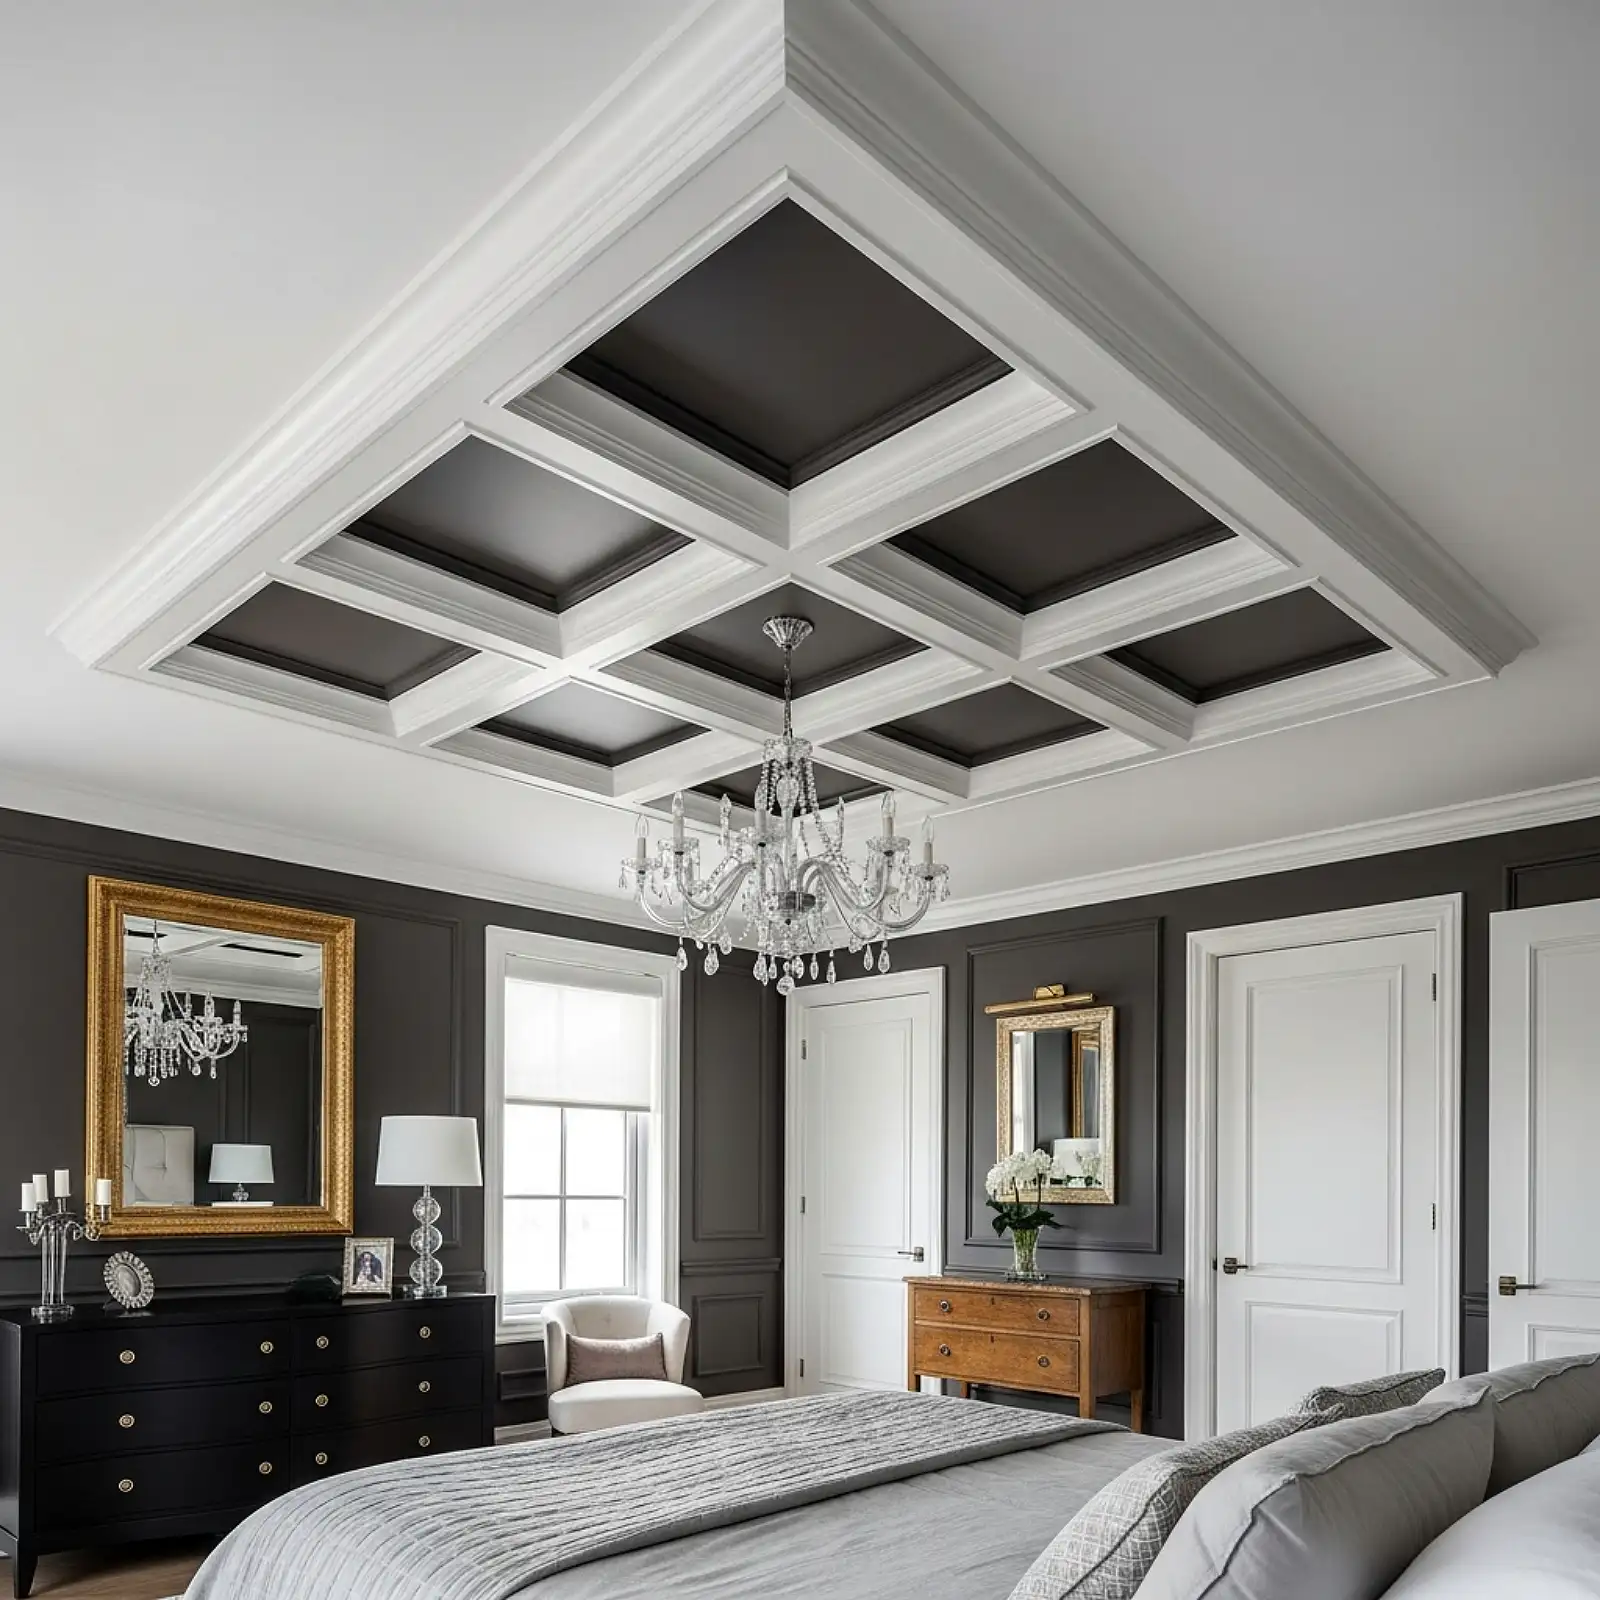
A coffered ceiling — a grid of shallow rectangular frames creating recessed panels overhead — built from MDF boards and finished with a wood-tone paint or a realistic wood-grain wallpaper inside the panel recesses creates the architectural grandeur of genuine coffered woodwork at a fraction of the cost. The frame pieces are 1×4 or 1×6 MDF boards cut to length and glued and nailed directly to the existing drywall ceiling in a grid pattern, with inside corner molding concealing the joints. Painted in a warm honey oak tone or a dark espresso with the ceiling color inside the recessed panels, the grid reads as three-dimensional architectural woodwork. For the most convincing wood quality, a wood-grain peel-and-stick contact paper inside each coffered panel adds the texture and grain pattern that paint alone cannot fully replicate.
Pro Tip
Lay out your coffered grid on graph paper first, scaling the panel size to the room dimensions so the panels divide the ceiling into equal sections with no awkward partial panels at the perimeter. A coffered ceiling where the outer panels are noticeably smaller than the interior panels reads as poorly planned; one where all panels are equal or the outer panels are gracefully consistent reads as architecturally resolved.
Diagonal Wood Plank Ceiling
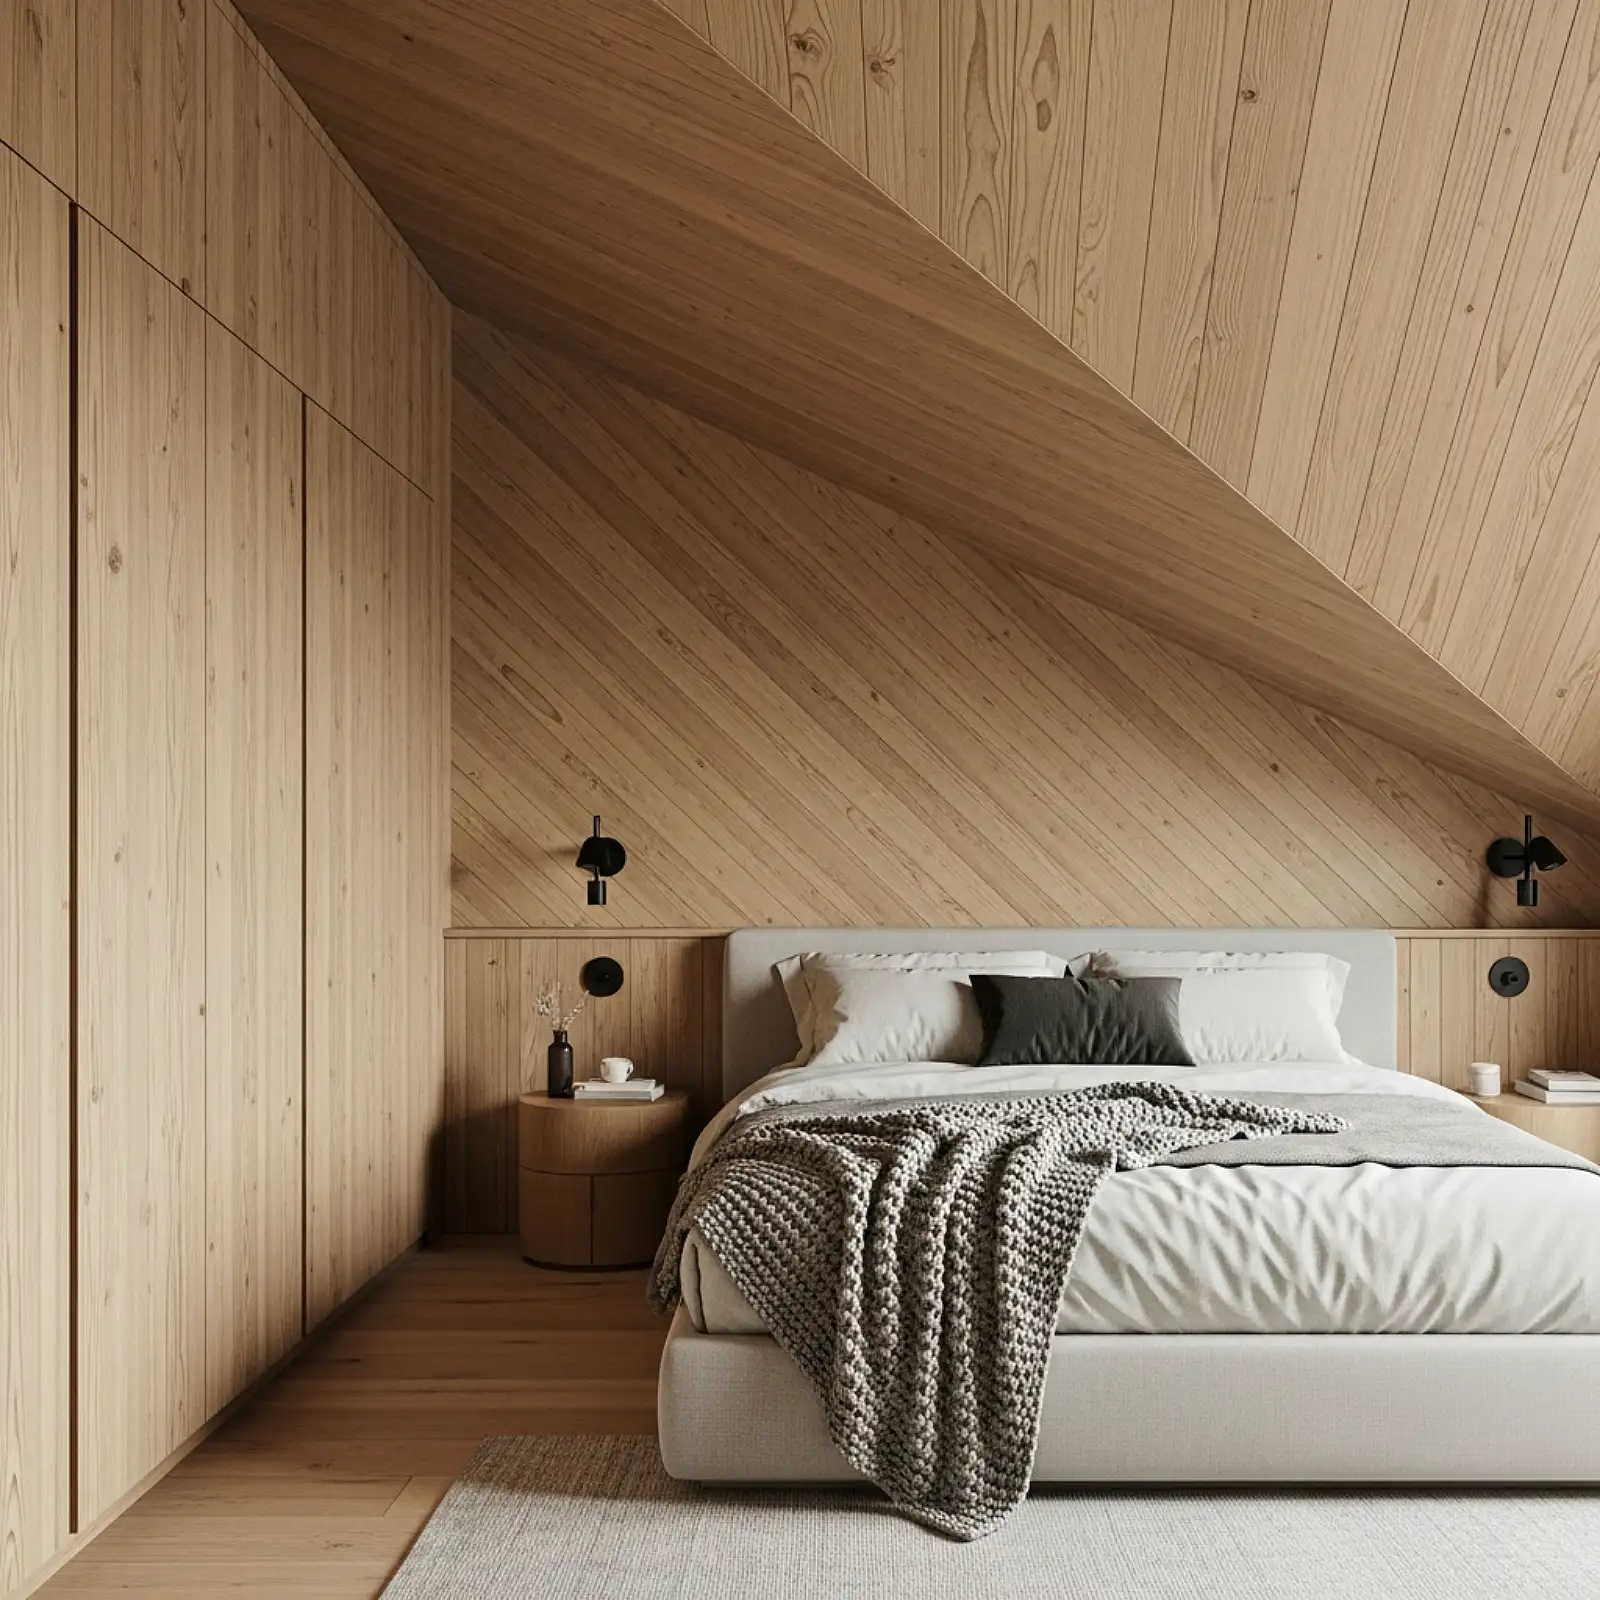
Installing wood planks diagonally — at a 45-degree angle across the ceiling — rather than parallel to the walls creates a ceiling treatment of dynamic visual energy that makes even a standard rectangular room feel dramatically more interesting and architecturally confident. The diagonal direction draws the eye across the ceiling in a way that horizontal planks don’t, creating a sense of movement that is particularly effective in narrow rooms where it expands the perceived width. The installation is only marginally more complex than a standard parallel plank ceiling — the diagonal requires angled cuts at each wall and a layout line snapped at exactly 45 degrees from the corner — but the visual result is dramatically more distinctive and far less commonly seen, which makes it one of the most reliably impressive budget ceiling projects available.
Pro Tip
Start diagonal planks from the corner that will be most visible from the room’s primary entry point — the corner the eye goes to first when entering the room. The diagonal lines should appear to radiate outward from that focal corner, which creates the most visually dynamic and intentional-looking diagonal ceiling composition.
Wood Plank Ceiling in a Tray or Niche
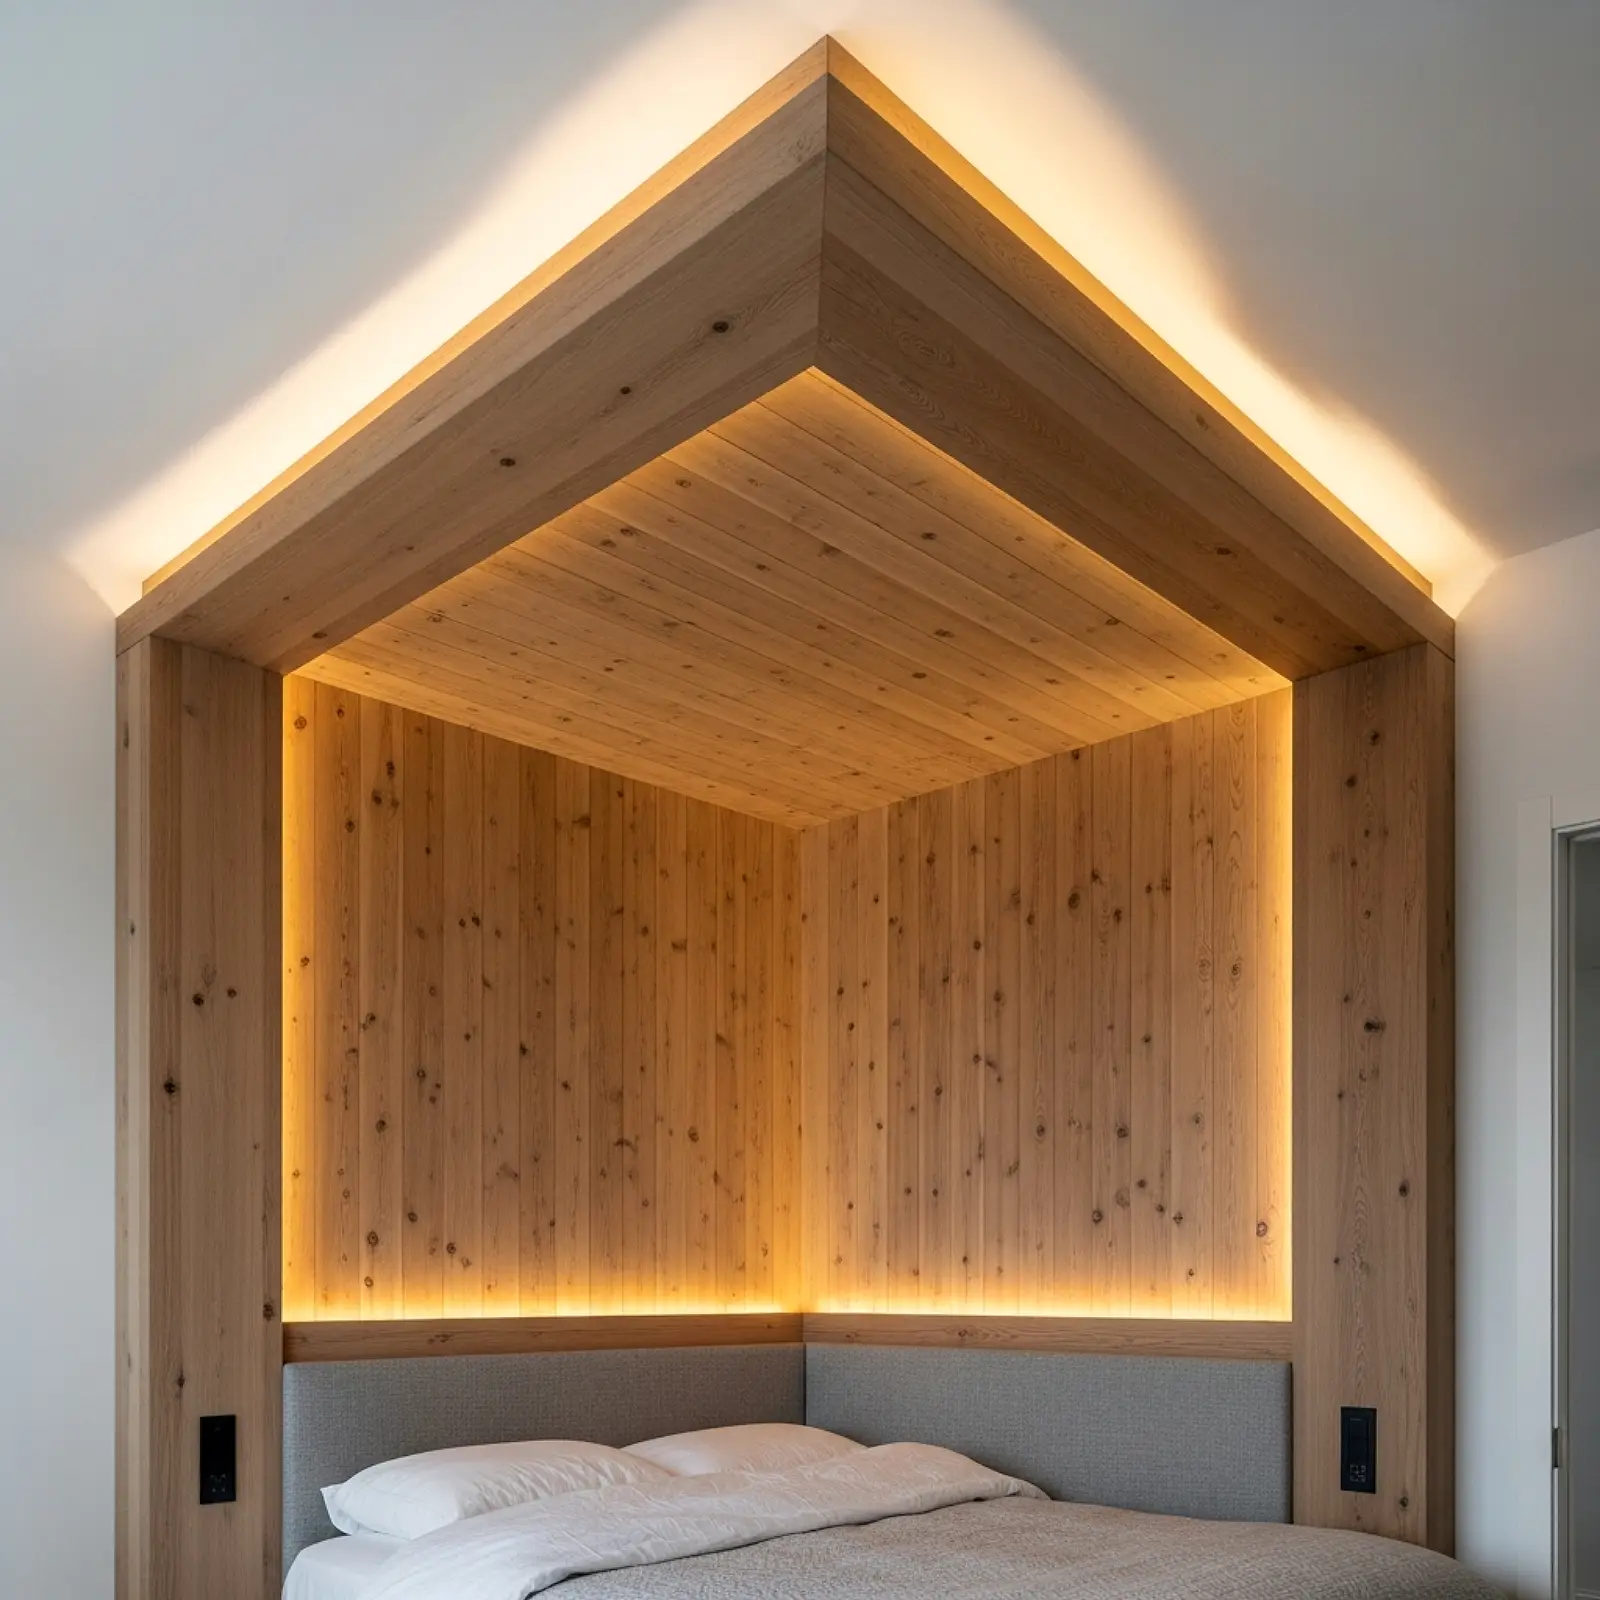
Applying wood planks inside a tray ceiling recess, a ceiling niche above the bed, or the underside of a built-in shelf creates a wood ceiling effect in a contained, defined area that delivers the full visual impact of a plank ceiling at a fraction of the material cost. A tray ceiling with a wood plank interior — tongue-and-groove pine in a warm stain against a painted tray perimeter — reads as a highly considered architectural detail that most people assume was designed by a professional. The contained nature of the installation means even absolute beginners can complete it in a few hours, with no concern about managing a full room’s worth of overhead work. If the room has no tray ceiling, a simple floating MDF frame mounted directly to the existing ceiling creates a shallow tray that can be fitted with planks for the same effect.
Pro Tip
Add LED strip lighting inside the tray perimeter — tucked behind the frame edge so it’s hidden from direct view — pointing upward at the wood ceiling inside the tray. The warm ambient glow from the hidden strip lights makes the wood ceiling in the tray appear to float and creates a soft, diffused light quality that transforms the bedroom’s evening atmosphere completely.
Salvage Yard Pallet Wood Ceiling
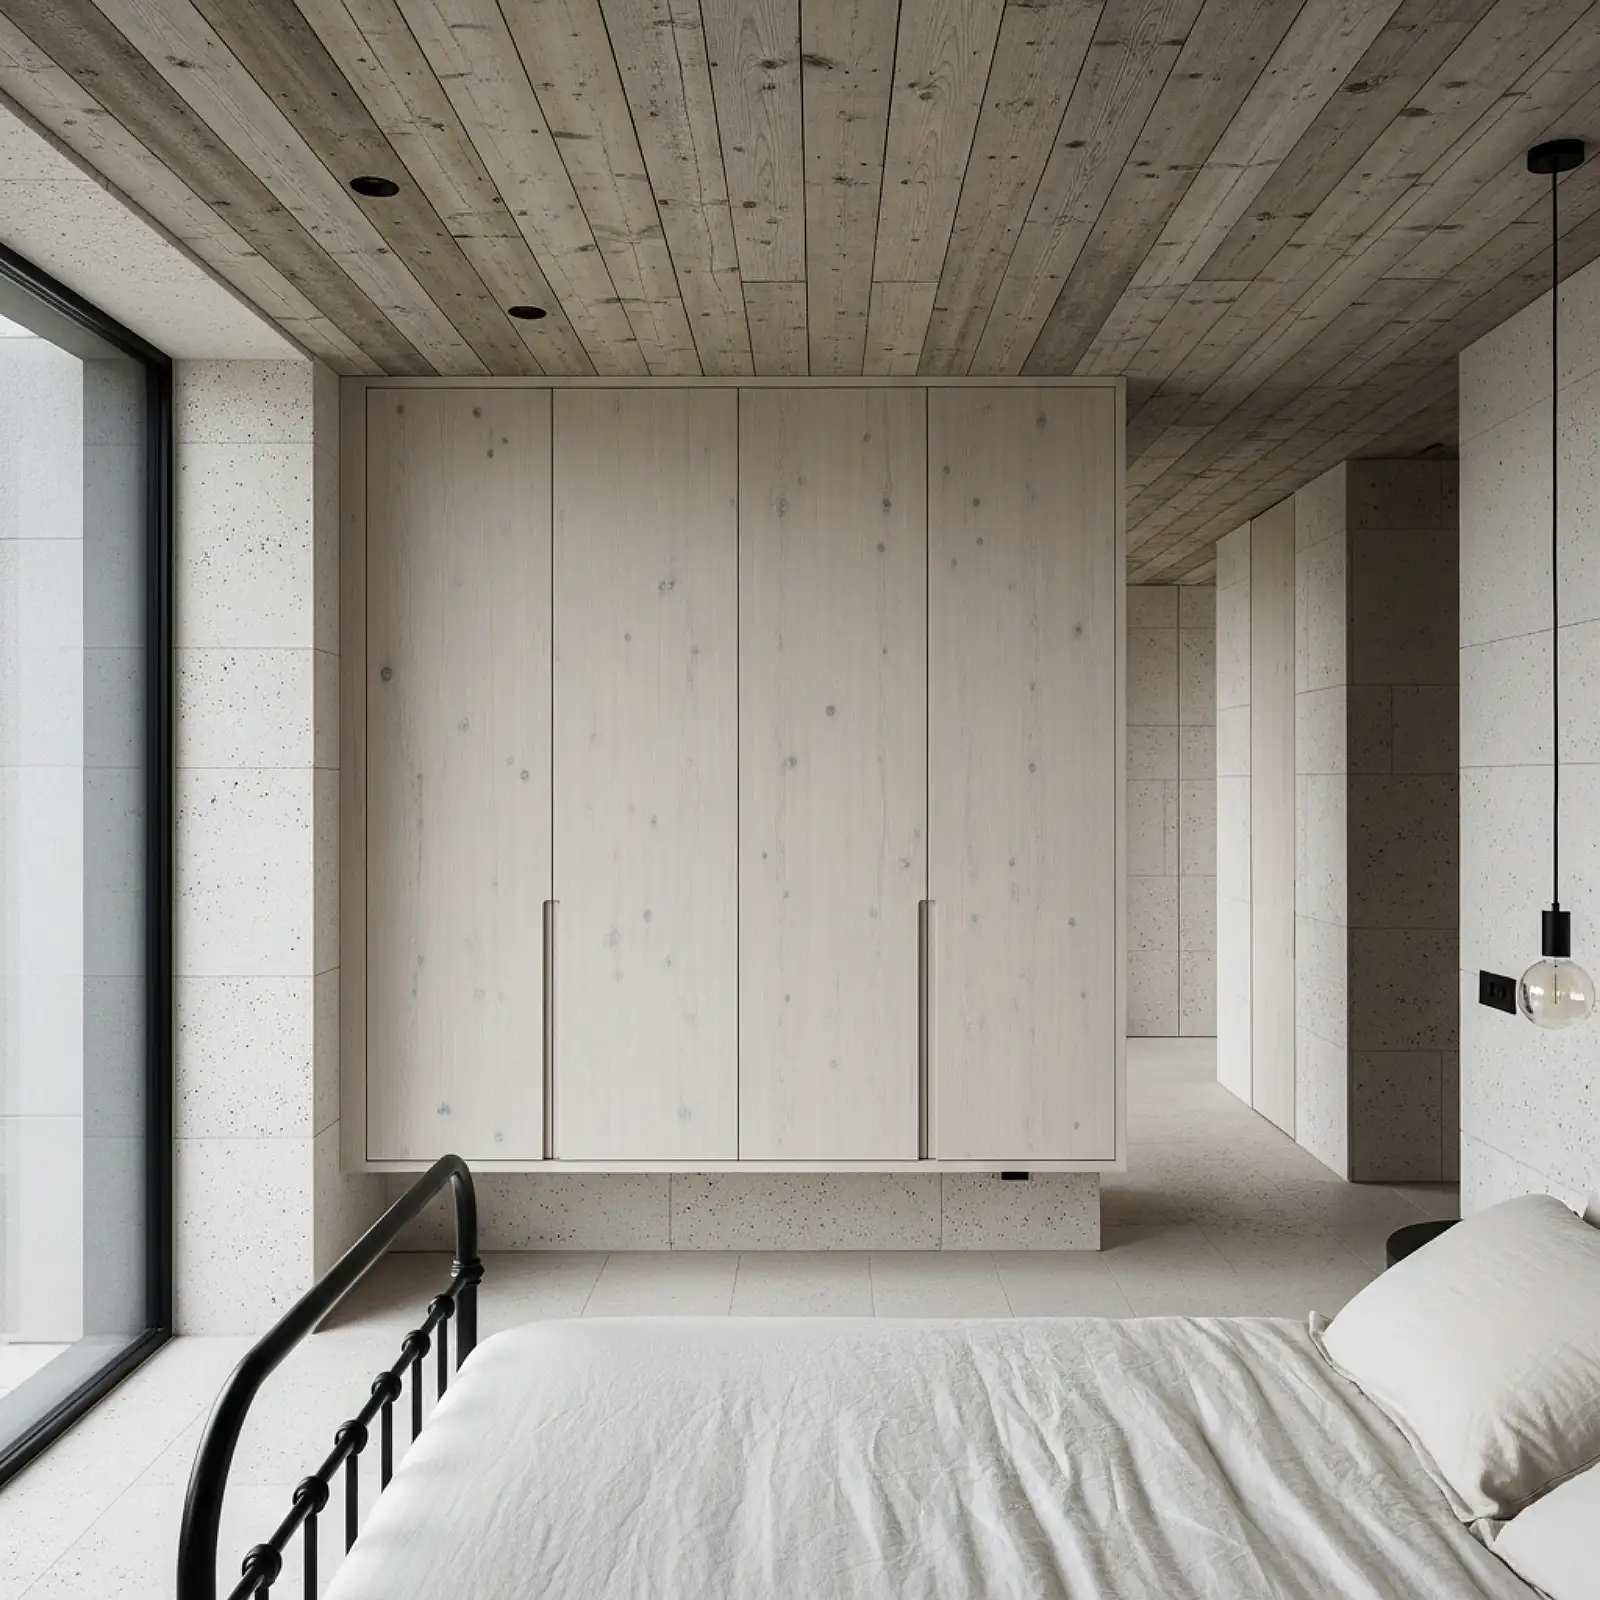
Deconstructed wooden pallets — free from many hardware stores, garden centers, and warehouses when asked — yield rough-sawn pine boards in a naturally aged, grayish-tan tone that, when sorted, cleaned, and installed as ceiling planks, creates one of the most characterful and genuinely free ceiling surfaces available anywhere. The boards vary in width and tone from pallet to pallet, which produces a visually rich, varied ceiling surface rather than a uniform one. Heat-treat pallets stamped HT rather than MB (methyl bromide) — MB-treated pallets have been chemically processed and should not be used for interior applications. Sanded lightly to remove splinters, sealed with a matte clear coat, and installed with staggered seams, a pallet wood ceiling is a genuinely striking design statement that costs only time.
Pro Tip
Disassemble pallets with a reciprocating saw rather than a hammer and pry bar. Prying pallet boards almost always splits and damages the wood; a reciprocating saw blade run along the stringer seam cuts the nails cleanly and leaves both boards and stringers intact and usable. It turns a frustrating 30-minute pry job into a clean 5-minute cut.
Wide-Plank Ceiling in Two Tones
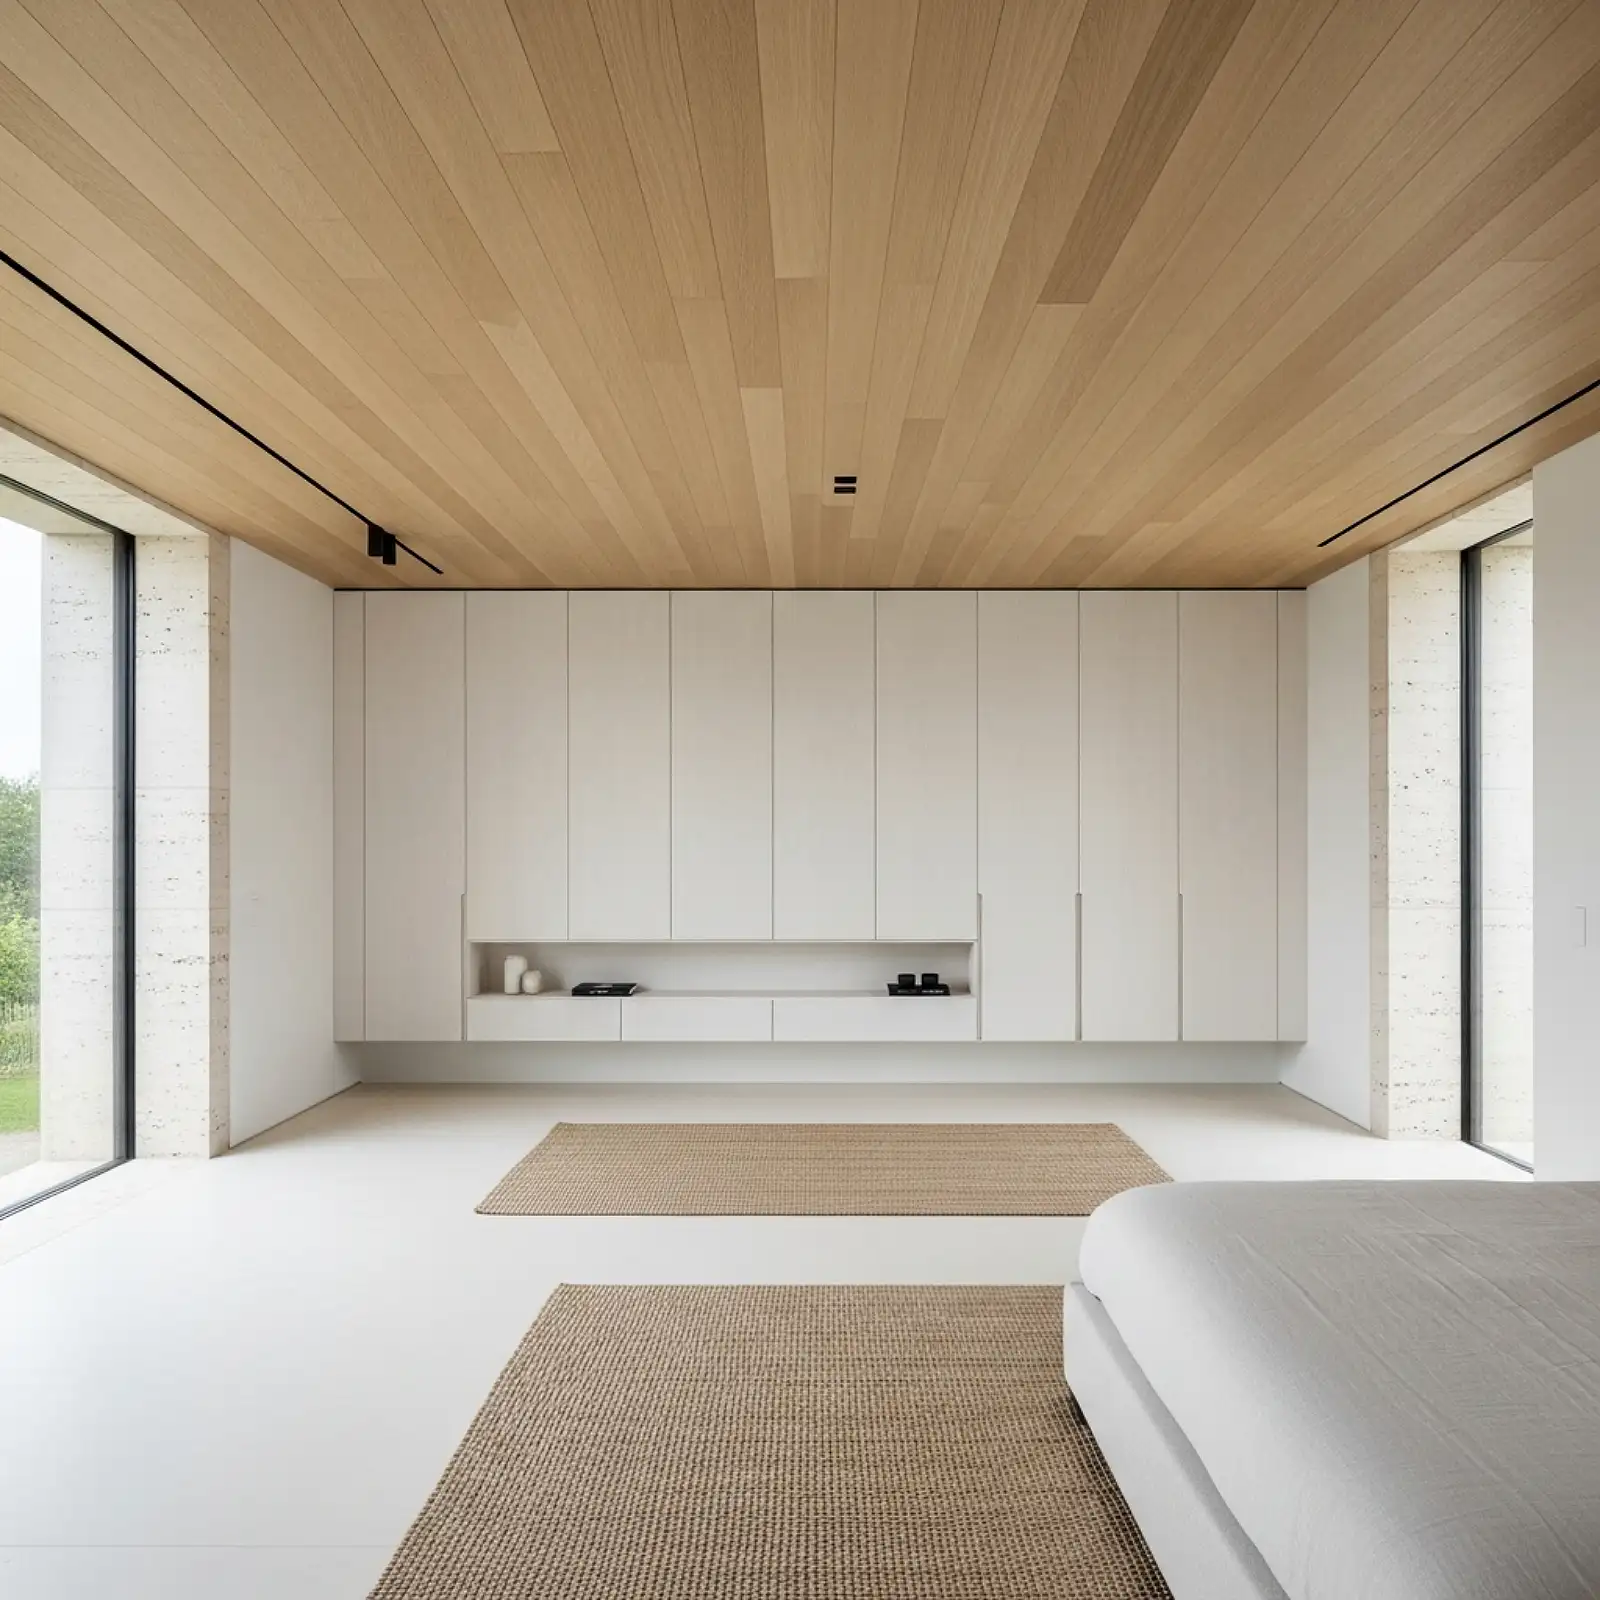
Installing wide planks — 6 to 10 inches wide — in an alternating two-tone pattern, with every other board in a slightly darker or lighter stain of the same wood species, creates a ceiling with a subtle visual rhythm that reads as intentional and sophisticated rather than simply planked. The two tones should be close enough to read as the same material family — a light honey oak alternating with a medium warm oak, or a pale whitewash alternating with a slightly deeper cream — so the pattern registers as variation rather than contrast. The technique requires nothing beyond two stain colors applied before installation and consistent alternation during the install. The finished ceiling reads as custom millwork at a cost that is entirely standard.
Pro Tip
Test the two stain tones together on adjacent sample boards in the actual room lighting before staining all the ceiling boards. The tonal difference that reads as beautifully subtle in showroom lighting can read as too contrasted in warm residential lamplight, and vice versa. Getting the tonal relationship right on samples takes 20 minutes and prevents a ceiling that looks different from the plan.
Floating Wood Ceiling Panels
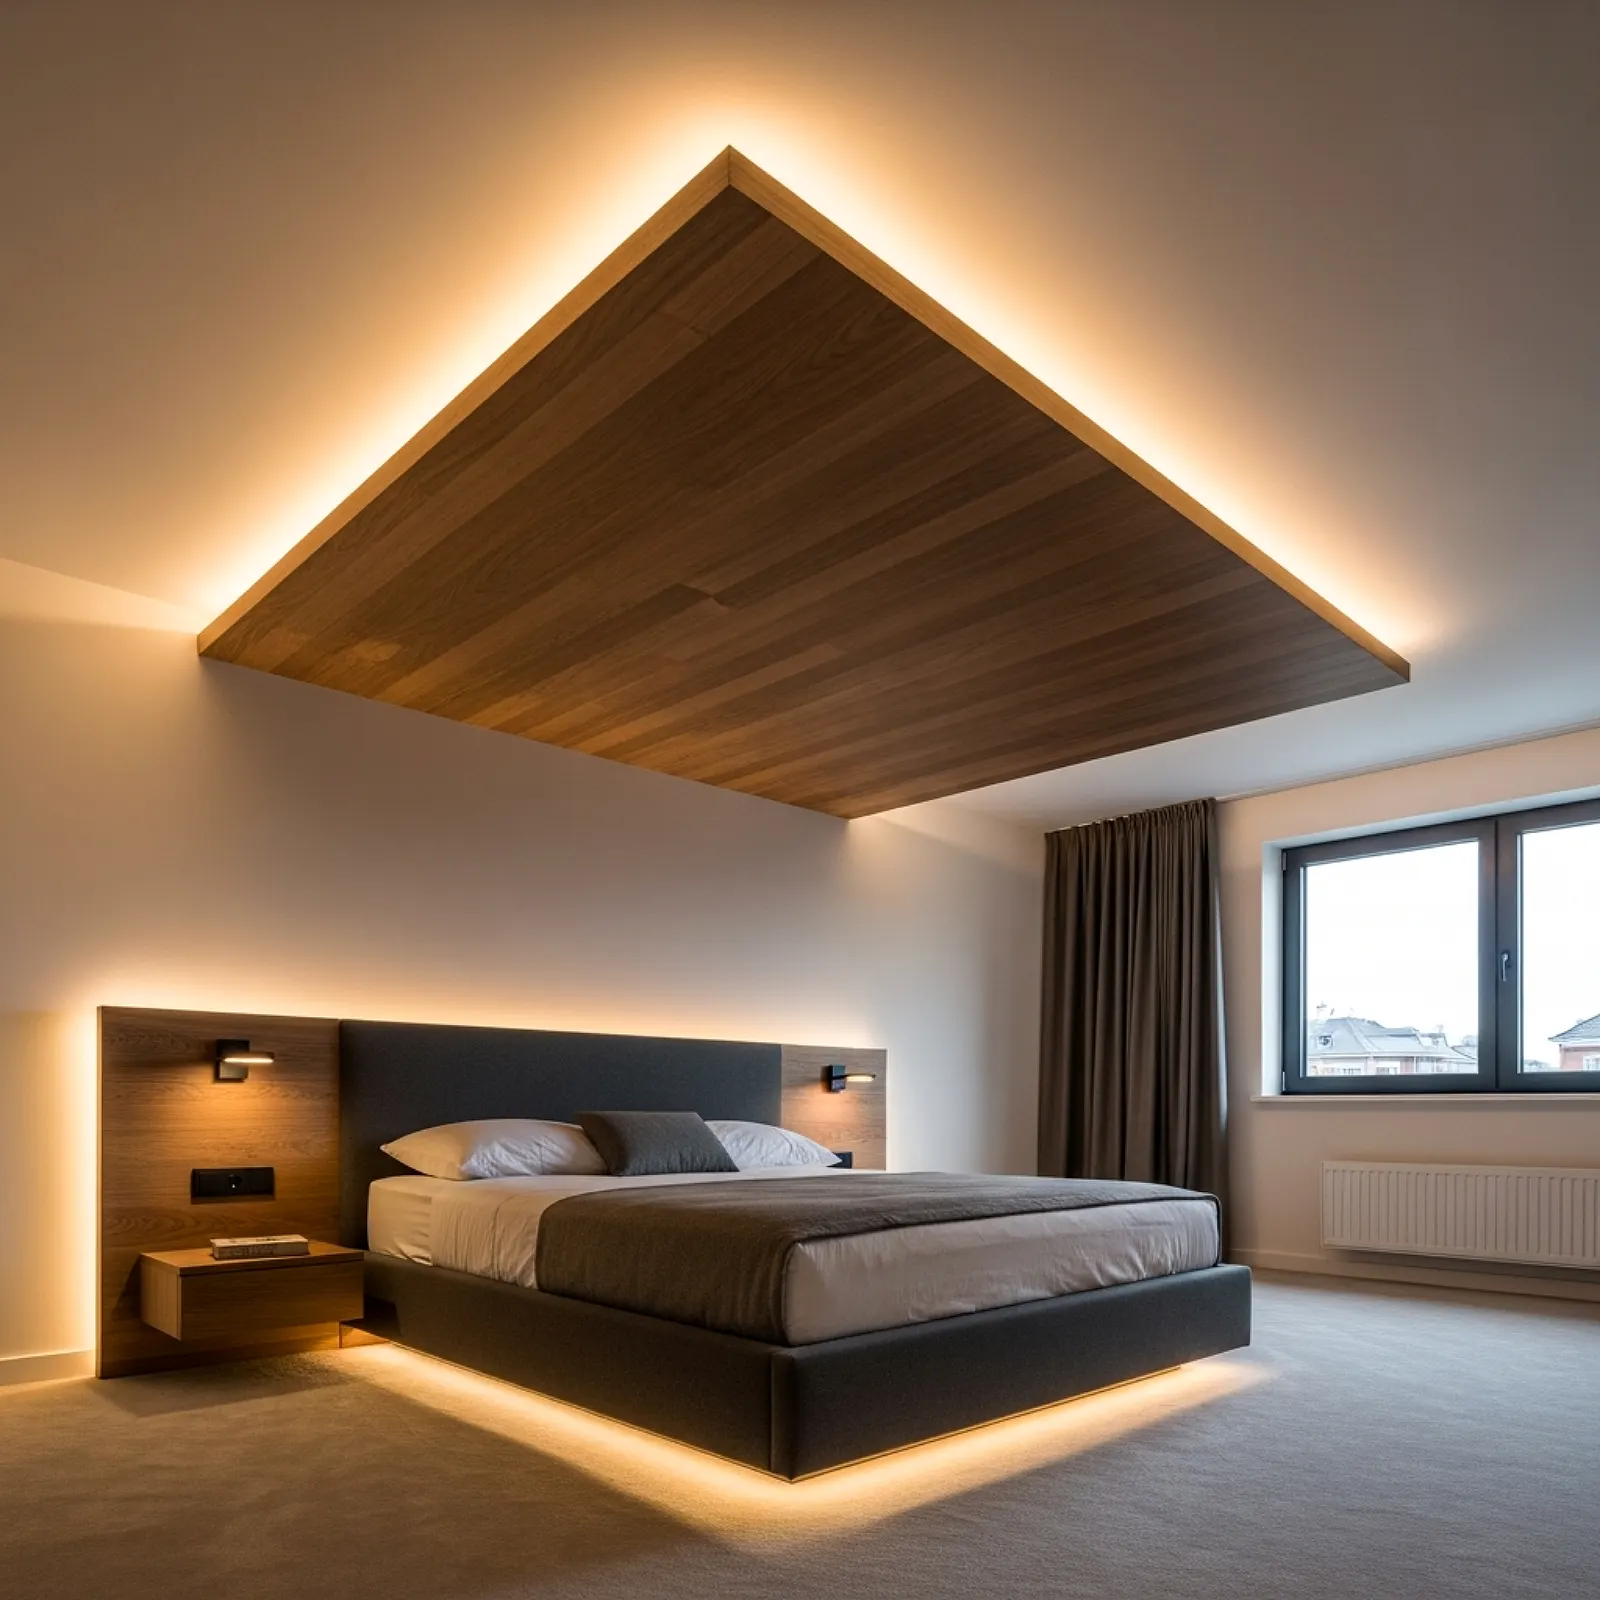
Rather than covering the full ceiling, floating individual wood panel sections — framed rectangles of planked wood suspended on thin metal rods or cables a few inches below the existing ceiling — creates a contemporary, slightly architectural approach to the wood ceiling that incorporates visible negative space between panels as part of the design. The panels can be pre-assembled on the floor — planks attached to a plywood backing frame — and hung from threaded rods through ceiling anchors, making this one of the safest DIY ceiling options for those nervous about extensive overhead work. The look reads as design-forward and considered in a way that a full plank ceiling doesn’t — the gaps between panels and between panels and wall create a layered, dimensional quality that looks particularly striking in a bedroom where the panels float above the bed area.
Pro Tip
Install warm LED strip lighting on the top surface of each floating panel, pointing upward toward the original ceiling. The upward glow bounces off the ceiling above and creates a warm halo effect around each panel that reads as sophisticated architectural lighting. This detail takes floating panels from an interesting structural idea to a genuinely beautiful evening atmosphere, and adds nothing significant to the material cost.
Stenciled Wood-Pattern Ceiling
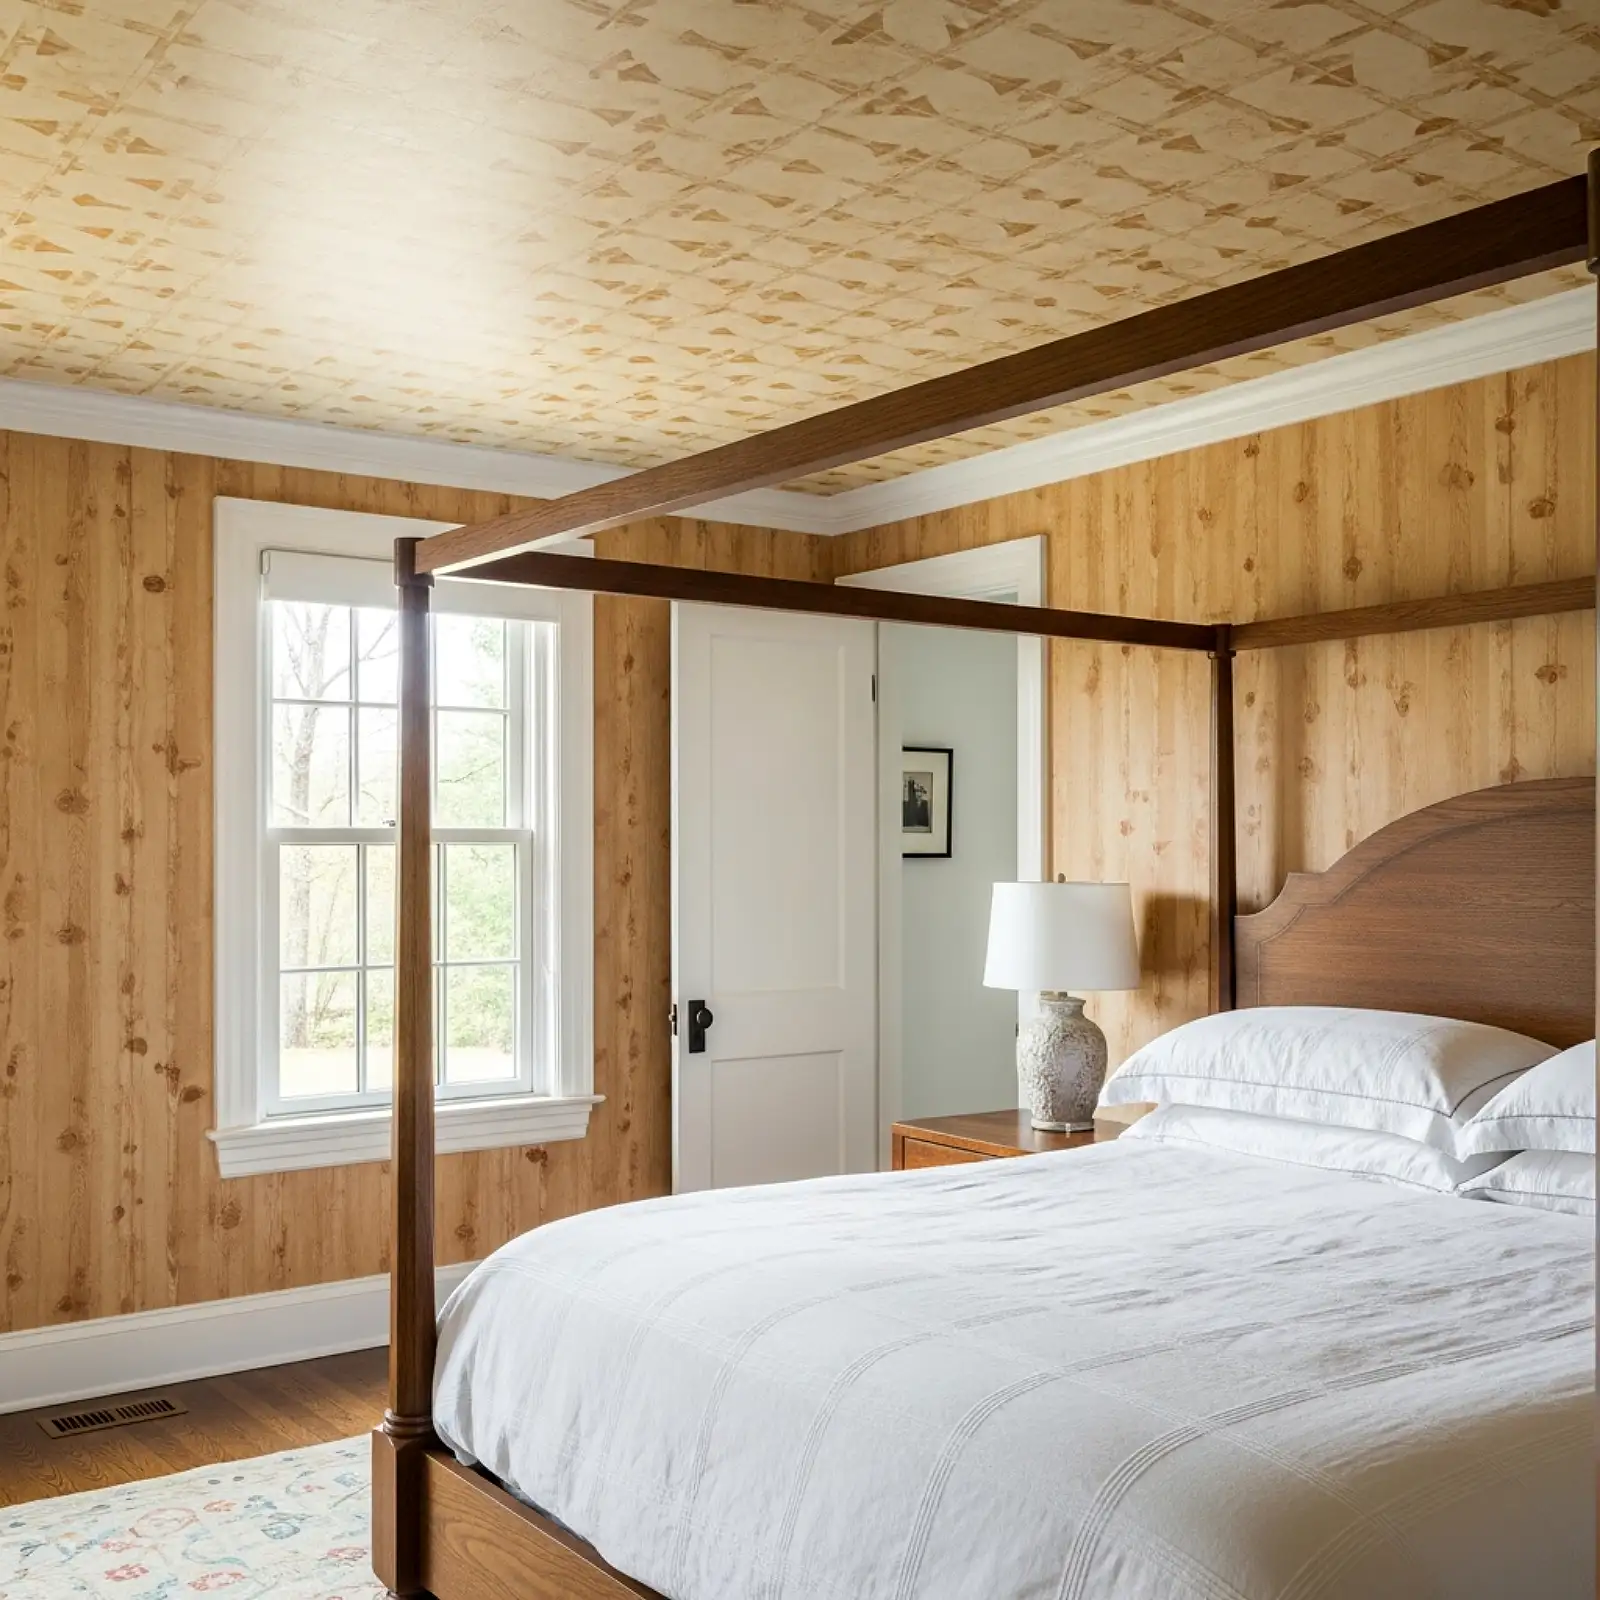
A geometric or wood-plank-pattern stencil applied to a painted ceiling in two close tones — a warm base coat in pale honey and a slightly deeper amber or grey stencil layer — creates the visual impression of a planked or geometric wood ceiling for the cost of a stencil ($15 to $30) and a quart of paint. Large-scale plank stencils are available from Cutting Edge Stencils and Royal Design Studio that, when applied with a foam roller in a low-contrast tonal pair, read as subtle and sophisticated rather than painted-on and craft-project. The technique is the most accessible of all the wood ceiling approaches on this list — it requires no tools, no structural knowledge, no assistance, and is fully reversible with another coat of paint if the direction changes.
Pro Tip
Use a dense foam roller rather than a brush for stencil application on a ceiling — it produces a more even, consistent coverage with less paint bleeding under the stencil edge, and it is significantly less tiring for overhead work than brushing. Load the roller very lightly — almost to dryness — before applying, which is the single technique change that most improves stencil crispness on any surface.
Box Beam Ceiling Grid
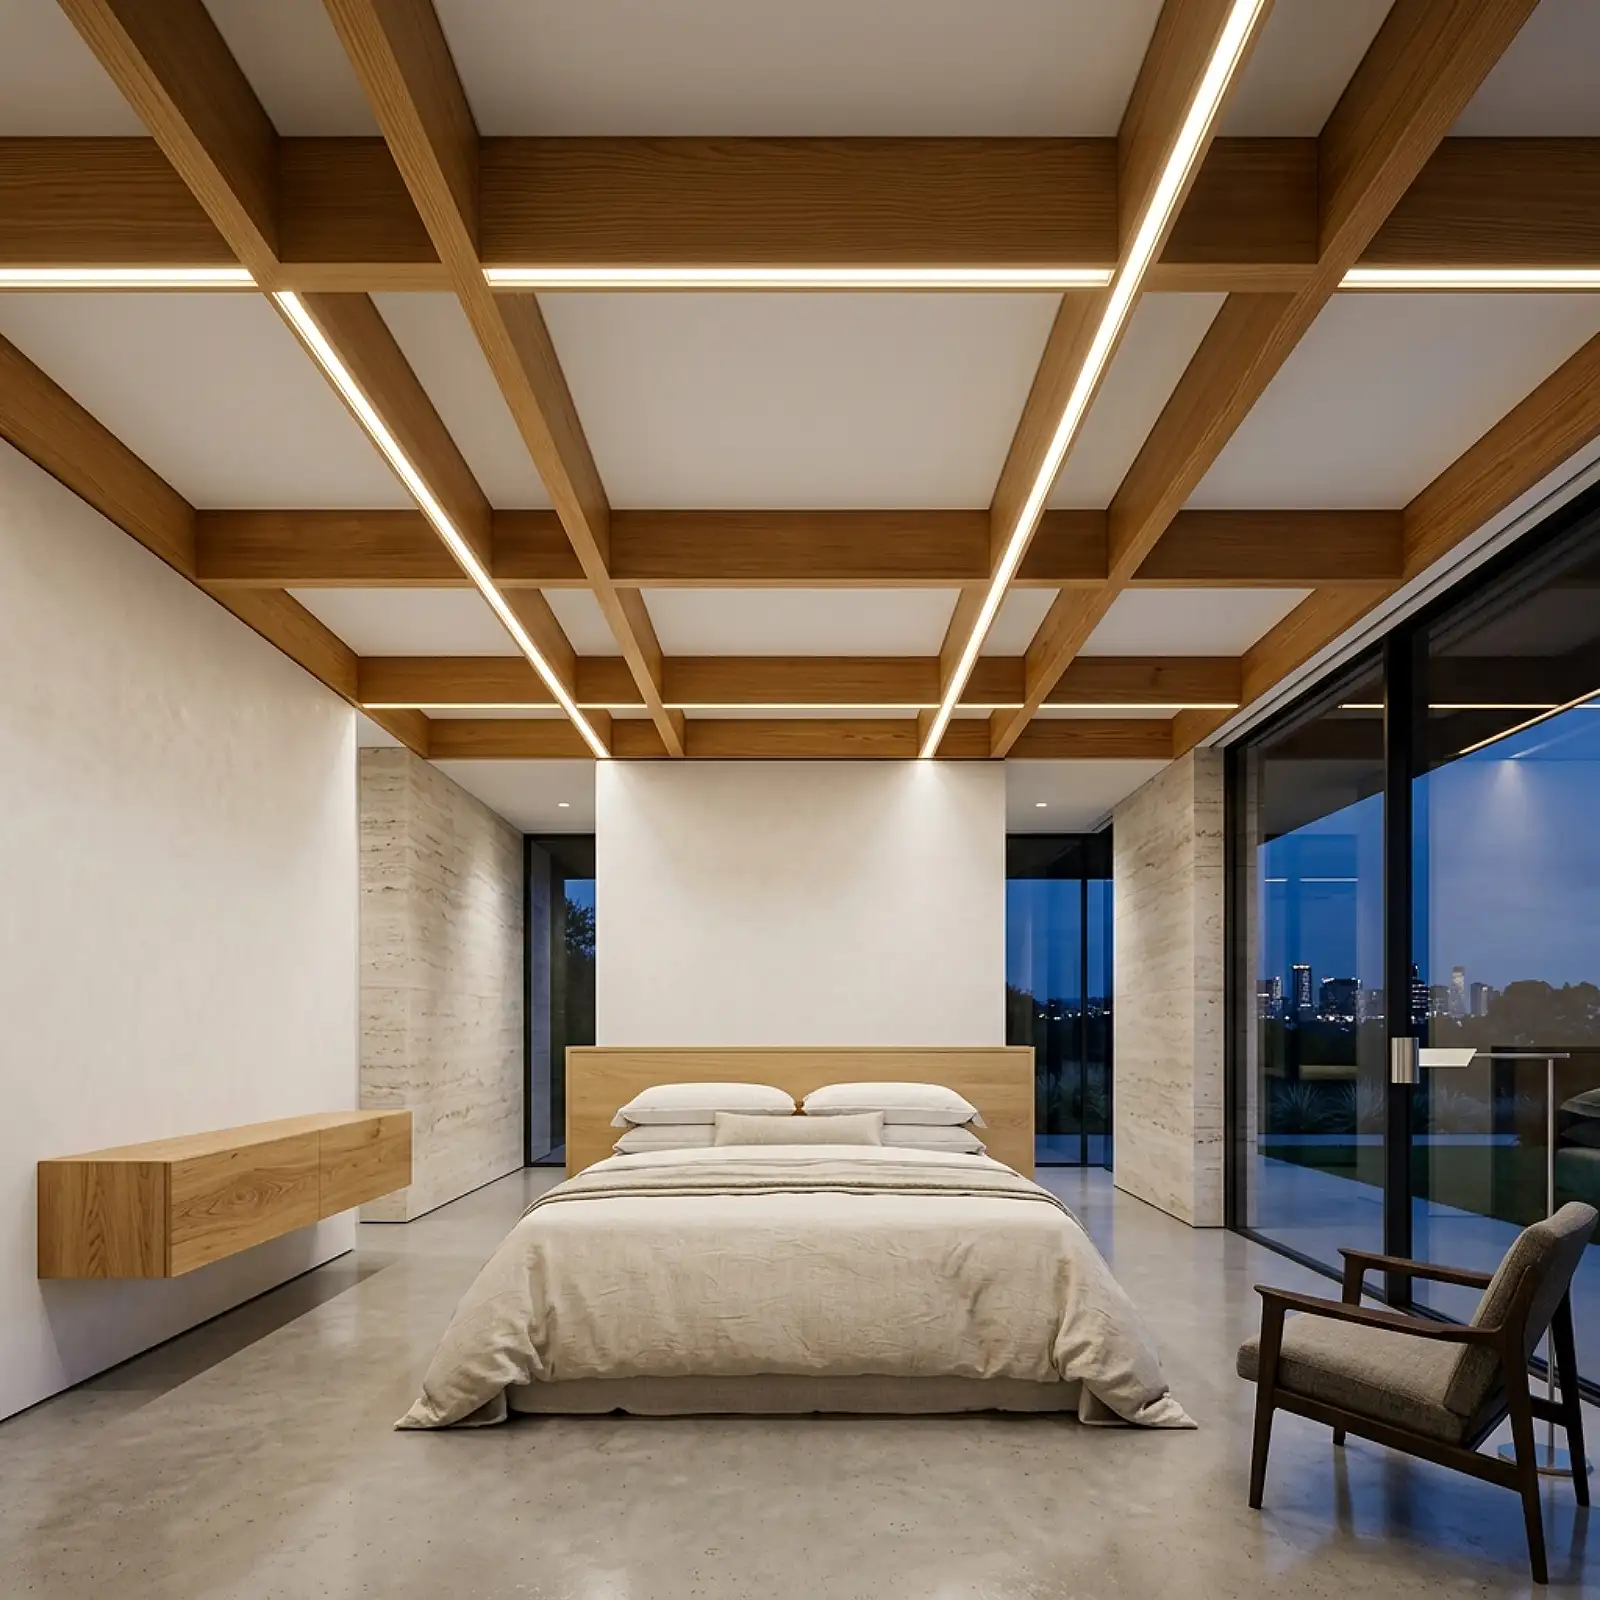
A box beam ceiling — a grid of hollow rectangular beam forms installed to create a pattern of evenly spaced coffers across the ceiling — constructed from 1×4 and 1×6 pine boards in a simple U-channel profile creates the visual impression of genuine structural boxwork at a cost of materials only. The box beams are assembled on the floor as open-bottomed U-shaped channels, lifted into position and secured with finish nails and construction adhesive, then filled with wood putty at the corners and painted or stained. In a warm honey or natural pine stain against a white ceiling field, the box beam grid creates a room-defining overhead feature of genuine architectural weight. The project requires a miter saw, a nail gun, and a level — tools available at most tool rental centers if not owned.
Pro Tip
Build box beams with a slightly wider base than top — an 8-inch-wide base board with 6-inch-tall side boards creates a beam with a subtle trapezoidal profile when viewed from below that reads as more solid and structurally convincing than a perfect rectangular box. This slight taper is invisible unless you’re specifically looking for it and makes the beams read as genuinely substantial from across the room.
Limewashed Wood Plank Ceiling
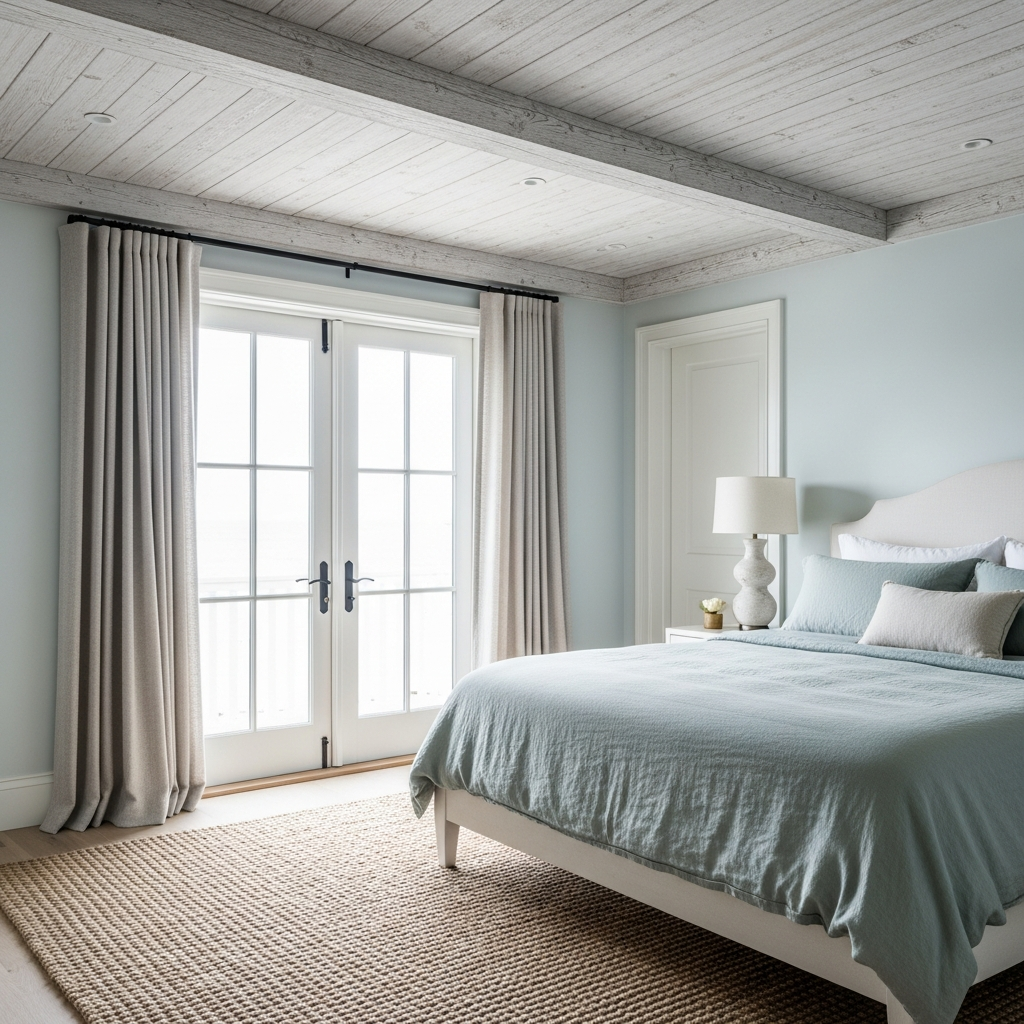
Pine or cedar planks finished with a limewash rather than paint or stain produce a ceiling surface of extraordinary organic beauty — the limewash settles into the grain and knots of the wood, highlighting them in white while leaving the base wood tone visible in between, creating a surface that reads as genuinely aged and weathered in the most beautiful sense. The result looks like wood that has been whitened by decades of light and air rather than deliberately painted, and the variation between boards — each one different in grain, each one taking the limewash slightly differently — produces a ceiling with the specific visual richness that only naturally varied materials can achieve. Apply limewash with a wide natural-bristle brush, wiping back immediately with a damp cloth to control the depth of coverage on each board before moving to the next.
Pro Tip
Apply limewash to ceiling boards before installation while they’re horizontal and accessible, not after they’re mounted overhead. Limewash is a water-based product that drips significantly during application — working on a board lying flat allows full control of the finish and prevents the drips and runs that are almost inevitable when applying the product overhead. Install after the limewash has dried completely, at least 24 hours.
Frequently Asked Questions
What is the cheapest way to do a wood ceiling?
Pine boards, plywood planks, cedar fence boards, and reclaimed wood are among the most budget-friendly options. Peel-and-stick wood panels can also be cost-effective because they require minimal tools and installation time. The best choice depends on your ceiling size, desired finish, and whether you already have basic DIY tools.
Can I install a wood ceiling myself with no experience?
Yes. Peel-and-stick panels and lightweight ceiling tiles are the easiest options for beginners. Traditional pine planks or shiplap require basic tools and careful measuring, while faux beams and coffered designs involve more precise installation. If you’re new to DIY, start with a simple plank system and follow the manufacturer’s installation guidelines.
Does a wood ceiling make a room feel smaller?
It can, particularly when dark wood is used in a room with a low ceiling. Light, whitewashed, or natural-toned wood usually creates a warmer and more open appearance. If the room is small, choosing lighter finishes and keeping the surrounding walls bright can help maintain a spacious feel.
What type of wood is best for a budget ceiling?
Pine is one of the most affordable and versatile choices for a wood ceiling. It is easy to cut, widely available, and takes stain or paint well. Plywood strips, cedar boards, and reclaimed wood can also provide attractive results at different price points, depending on the look you want.
How do I make a cheap wood ceiling look expensive?
Focus on the finishing details. Stagger plank seams, keep spacing consistent, fill visible nail holes, and apply an even stain or wash. Quality lighting also makes a major difference by highlighting the natural texture and grain. Clean installation and a cohesive finish can make inexpensive materials look remarkably polished.
Is a wood ceiling a good idea in a bedroom?
Absolutely. Wood can add warmth, texture, and a cozy architectural quality that works especially well in bedrooms. Because bedrooms typically have lower moisture and less daily wear than kitchens or bathrooms, a properly installed and finished wood ceiling can be both practical and visually impactful.
A wood ceiling may be an unexpected design choice, but that’s part of its appeal. When done thoughtfully, it can transform an overlooked surface into one of the room’s most memorable features.