23 Basement Ceiling Ideas That Completely Transform Dark Spaces
The basement ceiling is the single biggest reason basements feel dark, low, and unfinished. Pipes, wires, and bare joists hang overhead like a reminder that this room was never meant to be beautiful. But a finished ceiling changes everything. It hides the mechanical clutter, brightens the entire space, and turns a forgotten basement into the most used room in the house.
The secret is choosing a ceiling treatment that fits your basement’s reality. Low clearances need different solutions than tall ones. Some ideas in this guide cost little more than paint, while others add genuine architectural character. Every one of them is designed to make a basement feel taller, brighter, and completely intentional.
From painted joists to tin tiles to draped fabric, these 23 ideas cover every budget and every style. Pick the treatment that matches your ceiling height, your skills, and your vision. Your dark basement is about to become the brightest idea in your home.
1. Painted Drywall Ceiling
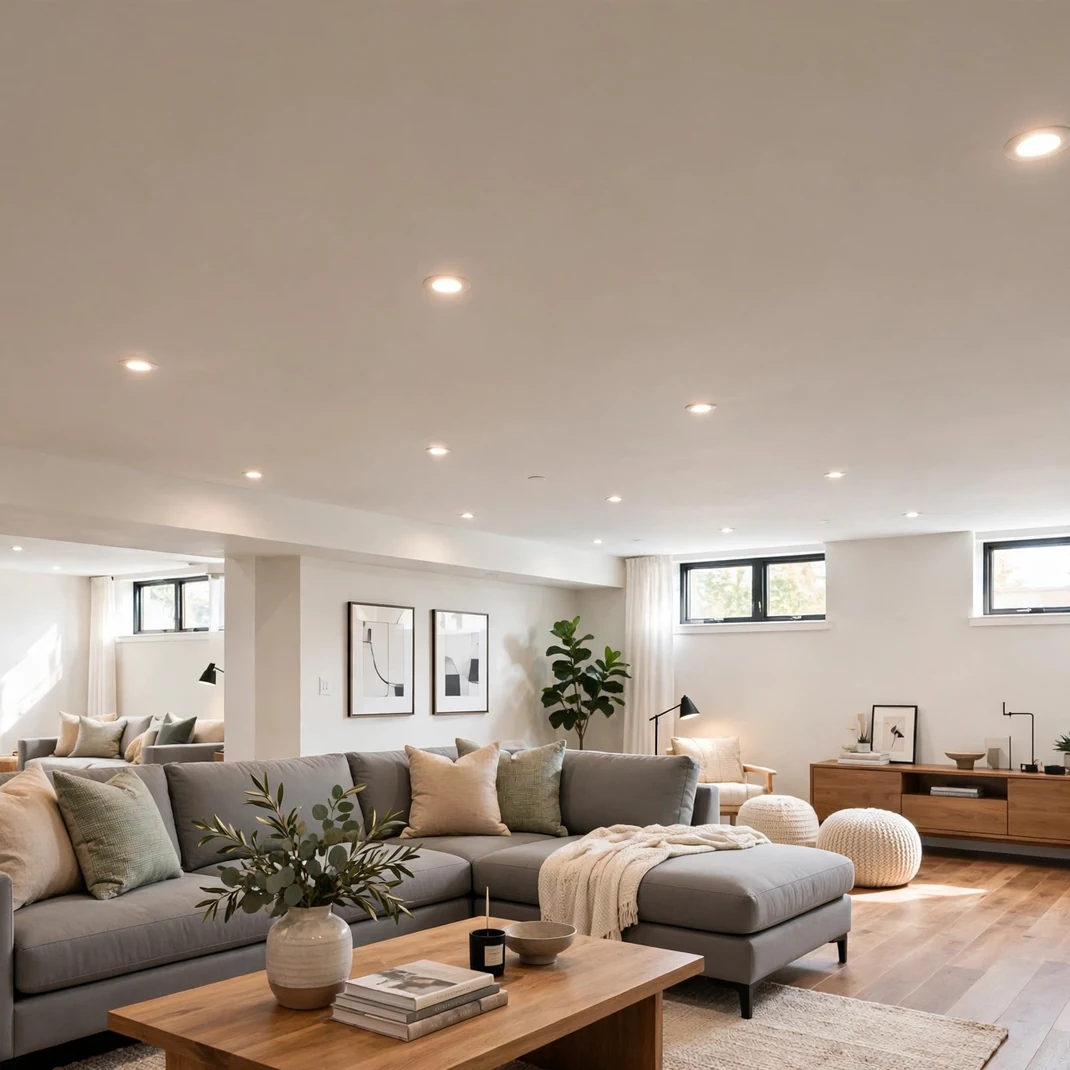
A painted drywall ceiling brings a clean, finished look that matches the rest of the house. Smooth white or soft off white paint reflects every bit of available light downward. This is the most conventional choice, and for good reason: it makes the basement read as a true extension of the house. Drywall also hides every pipe and cable completely for a tidy result. When you want the basement to feel like upstairs, this is the one to choose.
What to Get
- Moisture resistant drywall sheets
- Drywall screws and joint compound
- Primer and topcoat paint
- Taping knives and sanding block
How to Style It
Hang the drywall across the ceiling joists, staggering joints for strength. Tape and mud every joint, then sand until the surface feels perfectly smooth. Prime everything overhead before painting to prevent flashing. Apply two coats of flat white paint with a roller for even coverage.
Designer’s Secret
Choose a paint with a slight sheen like eggshell instead of dead flat. It bounces measurably more light around a windowless basement.
2. Exposed Joist Painting

Painting the exposed joists, subfloor, and every pipe a single color is the fastest ceiling transformation here. One color unifies the visual chaos into a cohesive architectural texture. Black creates a dramatic receding effect that raises the ceiling visually. White keeps things bright and airy for family spaces. This industrial look suits game rooms, gyms, and modern lounges perfectly.
What to Get
- Spray gun or heavy duty sprayer
- Ceiling paint in a custom tint
- Drop cloths and masking tape
- Respirator mask
How to Style It
Clear the space and mask every wall, floor, and fixture before spraying. Work the sprayer in steady passes, keeping the nozzle the same distance throughout. Hit the joists from multiple angles to cover every hidden edge. Two thin coats beat one heavy coat for a smooth finish.
Designer’s Secret
Spraying uses far less paint than brushing every joist by hand and finishes in a single day. A dark color hides future dust and cobwebs between the joists.
3. Tin Tile Panels
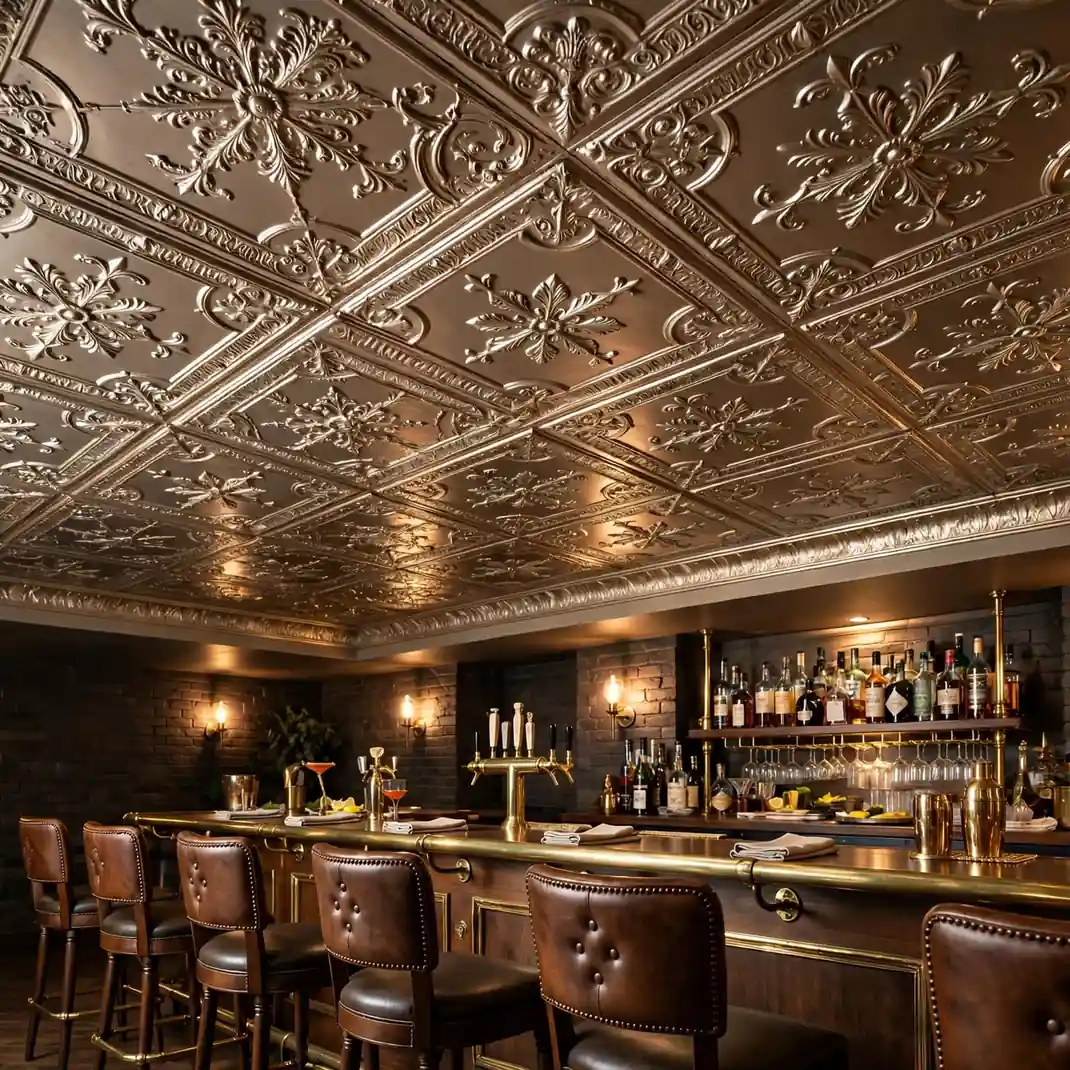
Pressed tin tiles bring vintage elegance overhead for a surprisingly modest cost. The intricate patterns catch light beautifully and draw the eye up with every glance. Available in dozens of designs, from Victorian florals to geometric modern motifs, they suit almost any style. Lightweight panels install directly to joists or strapping with simple nails. a tin ceiling gives the downstairs the soul of a historic brownstone.
What to Get
- Pressed tin ceiling panels
- Furring strips
- Decorative nails or adhesive
- Metallic paint if desired
How to Style It
Fix furring strips square to the joists, creating a level nailing surface. Start at the center and work outward for a balanced pattern. Overlap the panel edges to match the manufacturer’s pattern. Finish with metallic paint or leave the natural tin tone.
Designer’s Secret
Paint the tiles before hanging for crisp coverage in every crevice. a champagne or aged bronze finish appears far more expensive than plain silver.
4. Wood Plank Ceiling
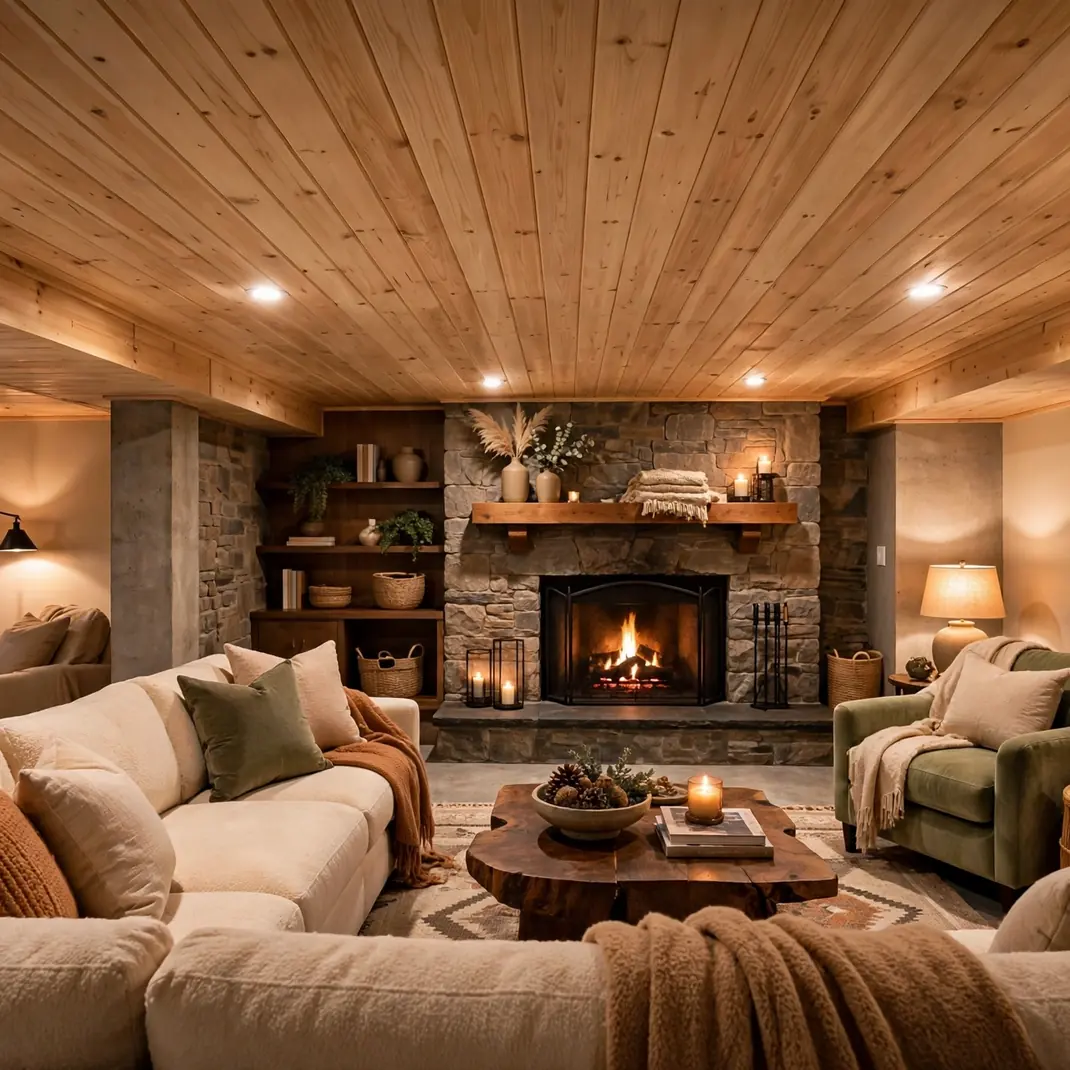
Wood planks add warmth that no other basement ceiling material can match. The natural grain leads the eye along the room, leaving the space feeling crafted rather than constructed. Light pine brightens a dark basement while walnut adds rich drama. Planks install easily with a nail gun and hide minor ceiling imperfections. This ceiling turns the lower level into a cozy cabin retreat.
What to Get
- Tongue and groove wood planks
- Nail gun and brad nails
- Wood stain or clear topcoat
- Chalk line
How to Style It
Snap a chalk line to keep the first row perfectly straight, since every row follows it. Face nail the first row, then blind nail the tongues of the following rows. Stagger the end joints randomly for a natural look. Protect the finished ceiling from basement humidity with a final sealer coat.
Designer’s Secret
Run the planks toward the longest sightline to stretch the space visually. A whitewash stain keeps the wood bright while letting the grain show through.
5. Beadboard Panels
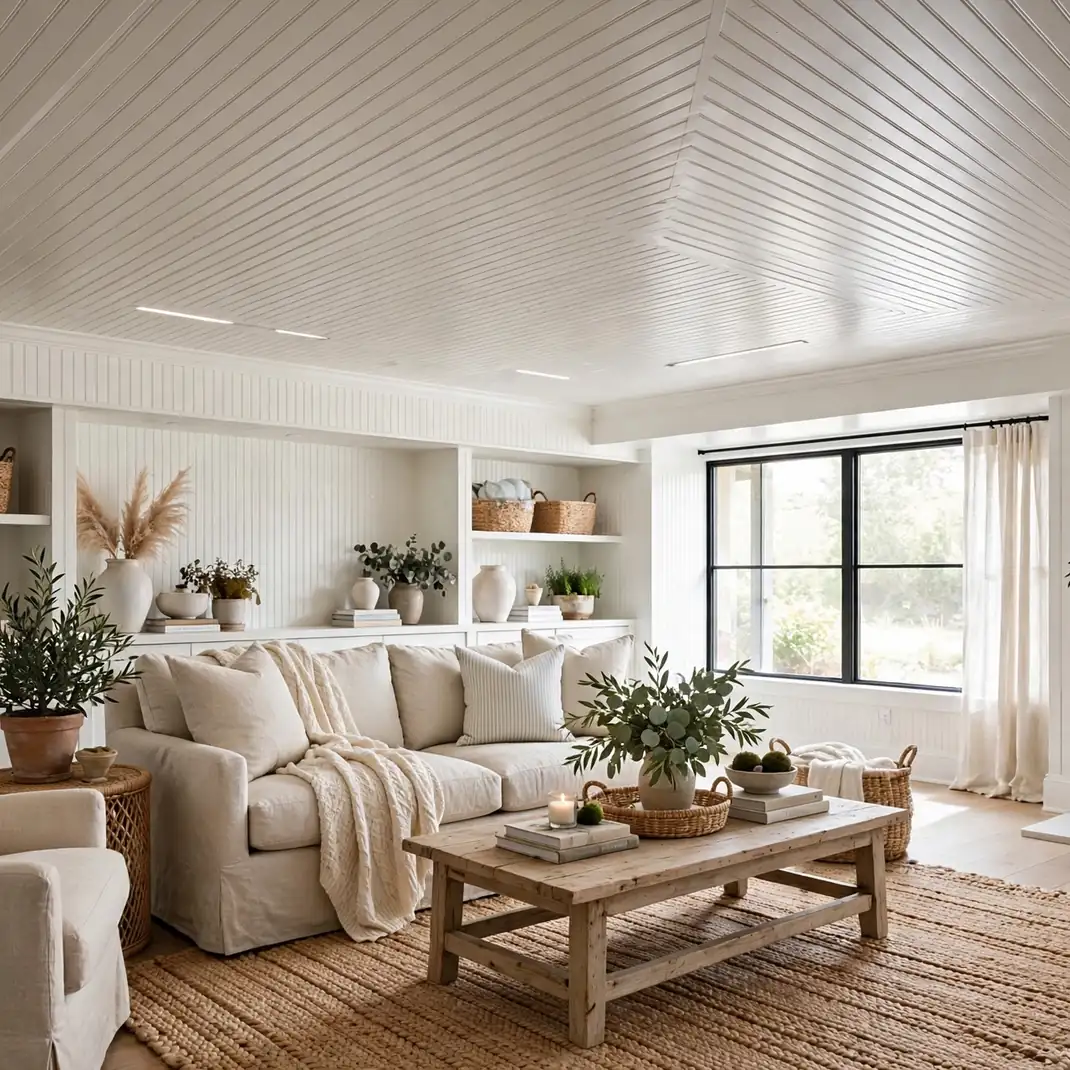
Beadboard brings classic cottage charm overhead with its rhythmic grooved lines. The repeating texture adds visual interest without overwhelming a low ceiling. Painted white, it reflects light and feels fresh and clean. Beadboard sheets mount fast and cost less than most alternatives. This is the pick for farmhouse, coastal, and traditional basement styles.
What to Get
- Beadboard panel sheets
- Construction adhesive
- Finishing nails
- White semi gloss paint
How to Style It
Cut panels to fit and test each one before applying adhesive. Press the panels firmly against the joists or battens and pin with finishing nails. Fill the nail holes and seal the joints for a flawless finish. Paint with semi gloss for a bright, wipeable finish.
Designer’s Secret
Beadboard’s grooves hide small installation imperfections that would show on flat drywall. Run the boards across the narrow dimension to widen the room.
6. Drop Ceiling Tiles
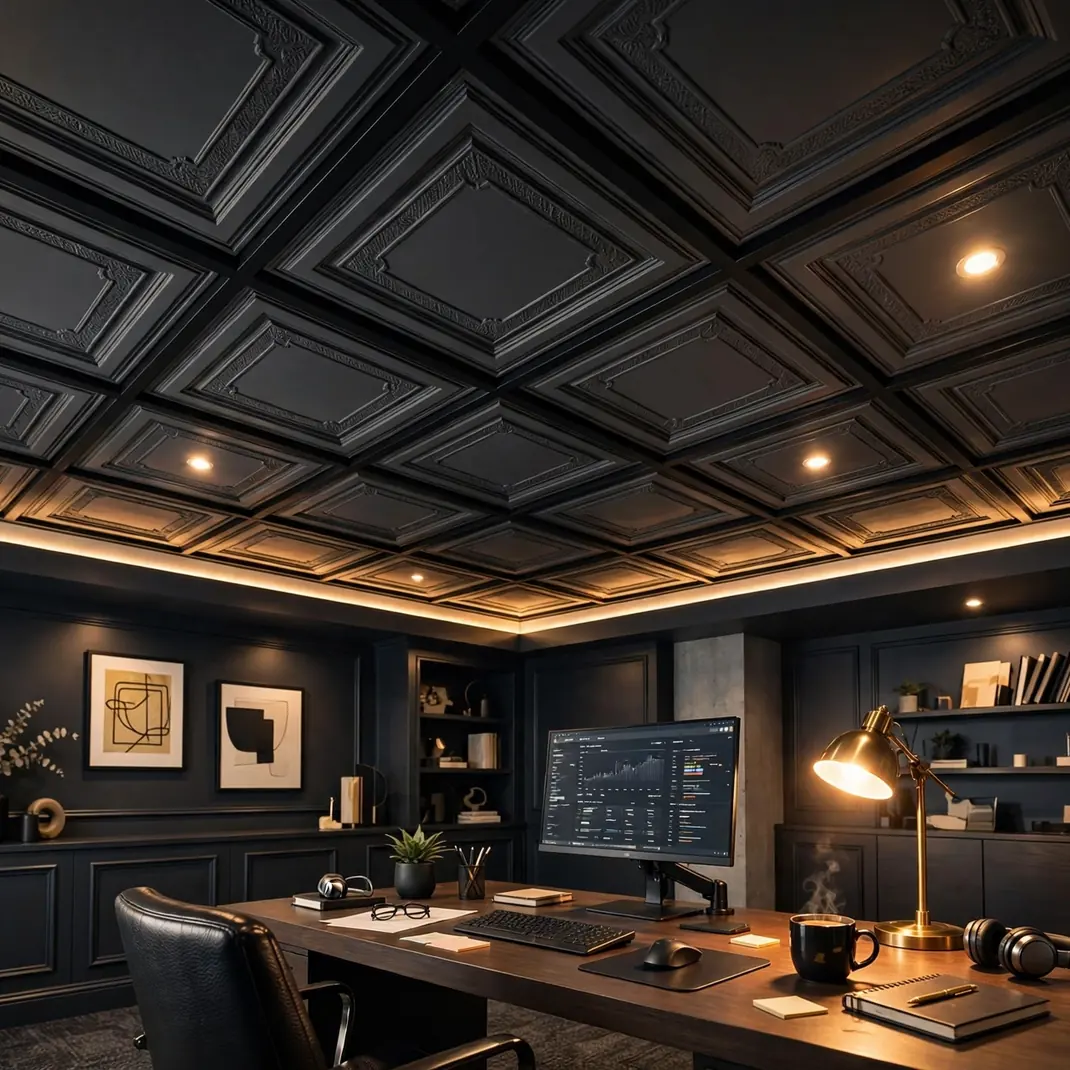
Modern drop ceilings have shed their dated office look with beautiful new tile designs. The grid system provides easy access to plumbing and wiring, which is a genuine advantage in basements. New tiles mimic wood looks, metallic finishes, and elegant coffered patterns. Installation is straightforward and requires no mudding or sanding. When a basement needs practical access, this is the smart choice.
What to Get
- Ceiling grid kit
- Decorative ceiling tiles
- Wire and eye screws
- Tin snips
How to Style It
Install the wall angle perfectly level around the room’s perimeter first. Hang the main runners with wire from the joists above. Snap in the cross tees to form the grid, then set each tile in place. Cut border tiles carefully with a quality utility knife.
Designer’s Secret
Hang the grid as close to the structure as possible to preserve every inch of headroom. Black grid with white tiles feels far more modern than the old white on white.
7. Fabric Draped Ceiling

Draped fabric turns a basement’s fifth wall into something soft, romantic, and unexpected. Billowing white or cream fabric hides every flaw while adding gentle texture overhead. This treatment works beautifully for sleeping spaces, lounges, and home theaters. The fabric diffuses light softly, which flatters the whole room. Few ceilings create such a dreamy atmosphere for so little money.
What to Get
- Lightweight fabric yardage
- Staple gun and staples
- Ceiling hooks or track
- Fabric steamer
How to Style It
Plan the drape pattern on paper, marking where each swag will fall. Staple or hook the fabric at the planned points, letting it billow naturally between them. Steam out the wrinkles once everything is hung. Trim the edges neatly where the fabric meets the walls.
Designer’s Secret
Choose flame retardant fabric for safety, especially near light fixtures. Sheer fabrics glow beautifully when backlit by recessed lights above them.
8. Corrugated Metal Panels

Corrugated metal panels give a basement an industrial edge overhead with genuine character. The ridged texture plays with light and shadow in a way flat ceilings never do. Galvanized panels suit workshops and modern spaces, while rusted patina versions warm up rustic designs. Panels are lightweight, affordable, and install with simple screws. This ceiling makes a bold style statement.
What to Get
- Corrugated metal panels
- Metal screws with washers
- Furring strips
- Metal cutting snips
How to Style It
Mount furring strips level over the joists to form a flat mounting plane. Size panels to length with snips, wearing gloves against the sharp edges. Overlap the corrugations by one ridge and screw through the high points. Keep the screw lines straight for a professional look.
Designer’s Secret
Seal rusted patina panels with a transparent matte finish to stop the rust from progressing. Pair the metal with warm wood walls to balance the industrial coolness.
9. Shiplap Ceiling
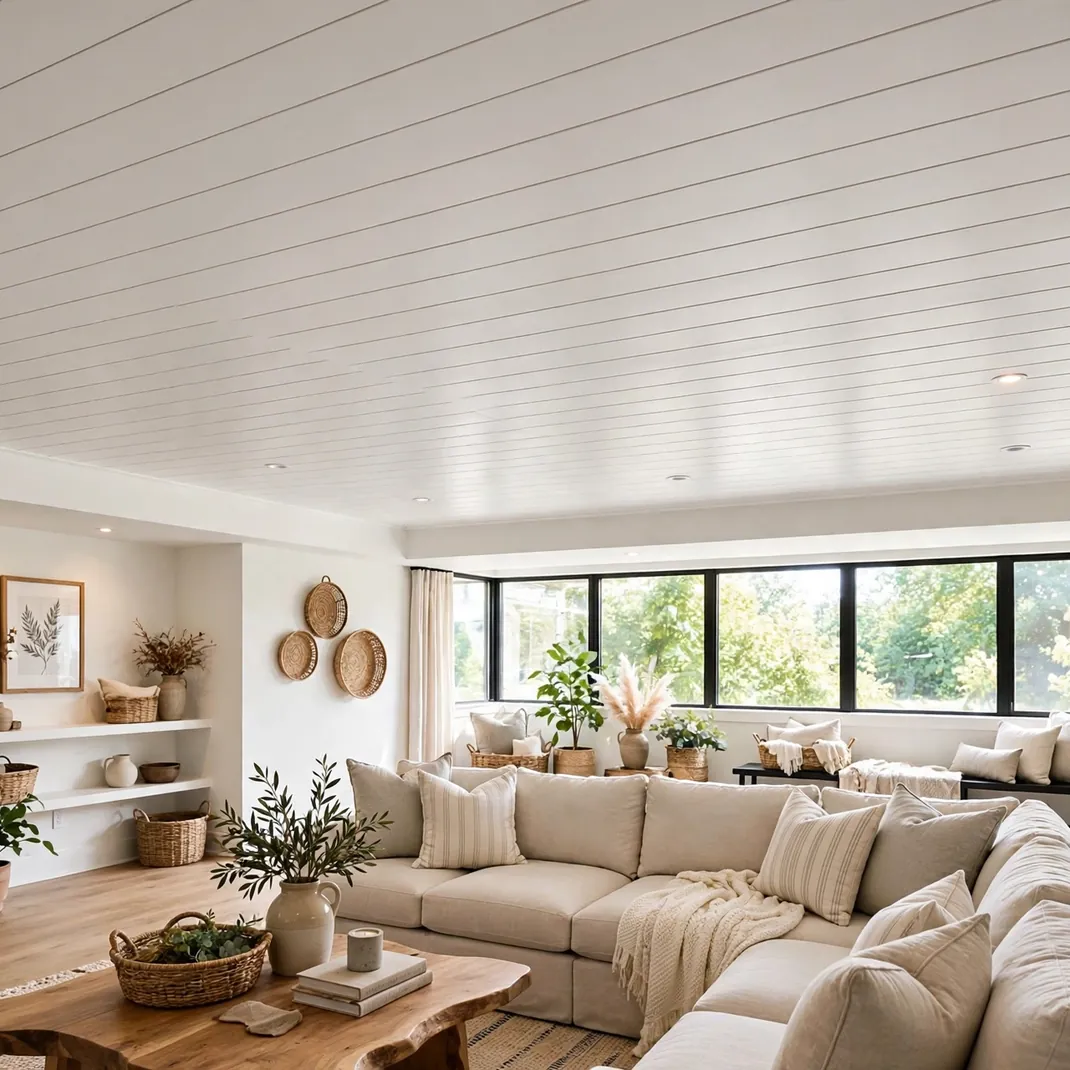
Shiplap overhead brings the beloved farmhouse look where the impact is biggest. The clean horizontal lines add order and calm where things might otherwise feel chaotic. Painted white, shiplap brightens the room dramatically. The small shadow gaps between boards add subtle texture. This ceiling feels fresh, timeless, and endlessly versatile.
What to Get
- Shiplap boards
- Nail gun
- Wood filler
- White paint
How to Style It
Start with a level first row, since the whole ceiling follows its line. Drive nails through the shiplap groove to hide the fasteners. Keep a consistent nickel gap between boards for the classic shadow line. Fill any visible nail holes, caulk the perimeter, and paint two coats.
Designer’s Secret
Use the same shiplap on one accent wall to tie the room together. A satin paint finish highlights the shadow lines better than a flat coat.
10. Coffered Ceiling

A coffered ceiling adds architectural grandeur that gives a basement the presence of the main floor. The lattice of recessed panels creates depth and shadow that draws the eye upward. This style fits home theaters, libraries, and elegant entertaining spaces. While it takes more work than paint, the result looks genuinely custom. A coffered basement ceiling impresses every guest who walks down the stairs.
What to Get
- MDF beams and trim molding
- Construction adhesive
- Nail gun
- Wall and ceiling paint, factory tinted
How to Style It
Lay out the coffer grid up above with chalk lines before cutting any wood. Install the beam grid first, checking every intersection for square. Add the inner trim molding to create the recessed panel look. Caulk all joints and paint the entire assembly one color.
Designer’s Secret
Keep the coffers shallow in basements to preserve headroom while holding onto the rich look. Painting the recessed centers a shade darker adds dramatic depth.
11. Faux Beam Installation
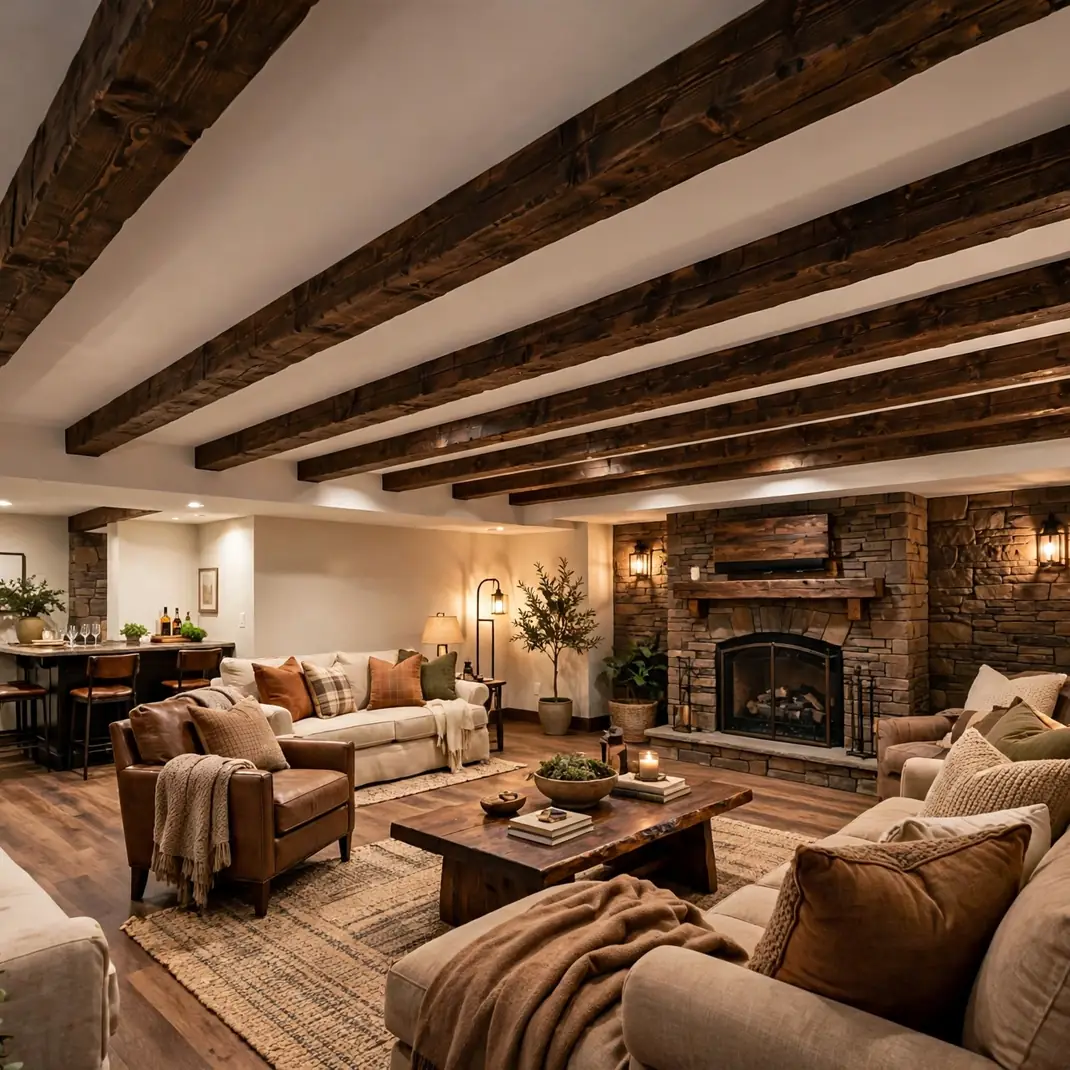
Faux wood beams add rustic warmth and architectural rhythm to a plain basement ceiling. Hollow box beams look convincingly like solid timbers at a fraction of the weight and cost. They also cleverly hide pipes, wires, and low ducts running overhead. Stained dark, they contrast beautifully with a white ceiling. Beams turn a flat overhead into a true design feature.
What to Get
- Faux wood beam boxes
- Mounting blocks
- Wood stain
- Construction adhesive
How to Style It
Locate the joists and install mounting blocks where each beam will hang. Slide the hollow beams over the blocks and secure with screws from the sides. Stain the beams before mounting for clean, even color. Caulk the top edge where each beam meets the ceiling.
Designer’s Secret
Space the beams to align with existing posts or room divisions for a structural look. Wrapping a low duct inside a wider beam hides an eyesore completely.
12. Whitewashed Brick Ceiling

A whitewashed brick ceiling is a rare treasure in older homes with brick basements. The texture of real brick overhead adds unmatched character and history. Whitewash brightens the dark brick while letting its texture and variation show through. this ceiling becomes the undeniable star of the space. If your basement has a brick ceiling, celebrate it rather than covering it.
What to Get
- Whitewash or diluted latex paint
- Stiff brush
- Drop cloths
- Masonry sealer
How to Style It
Clean the brick thoroughly and wait for full drying before starting. Brush the whitewash into the mortar joints and brick faces with a stiff brush. Wipe back some areas with a rag for a varied, aged look. Lock the finished brick against dusting with masonry sealer.
Designer’s Secret
Test the whitewash ratio on a hidden section first, since brick absorbs paint unpredictably. A 50 50 paint to water ratio suits most brick beautifully.
13. Acoustic Tile Upgrade
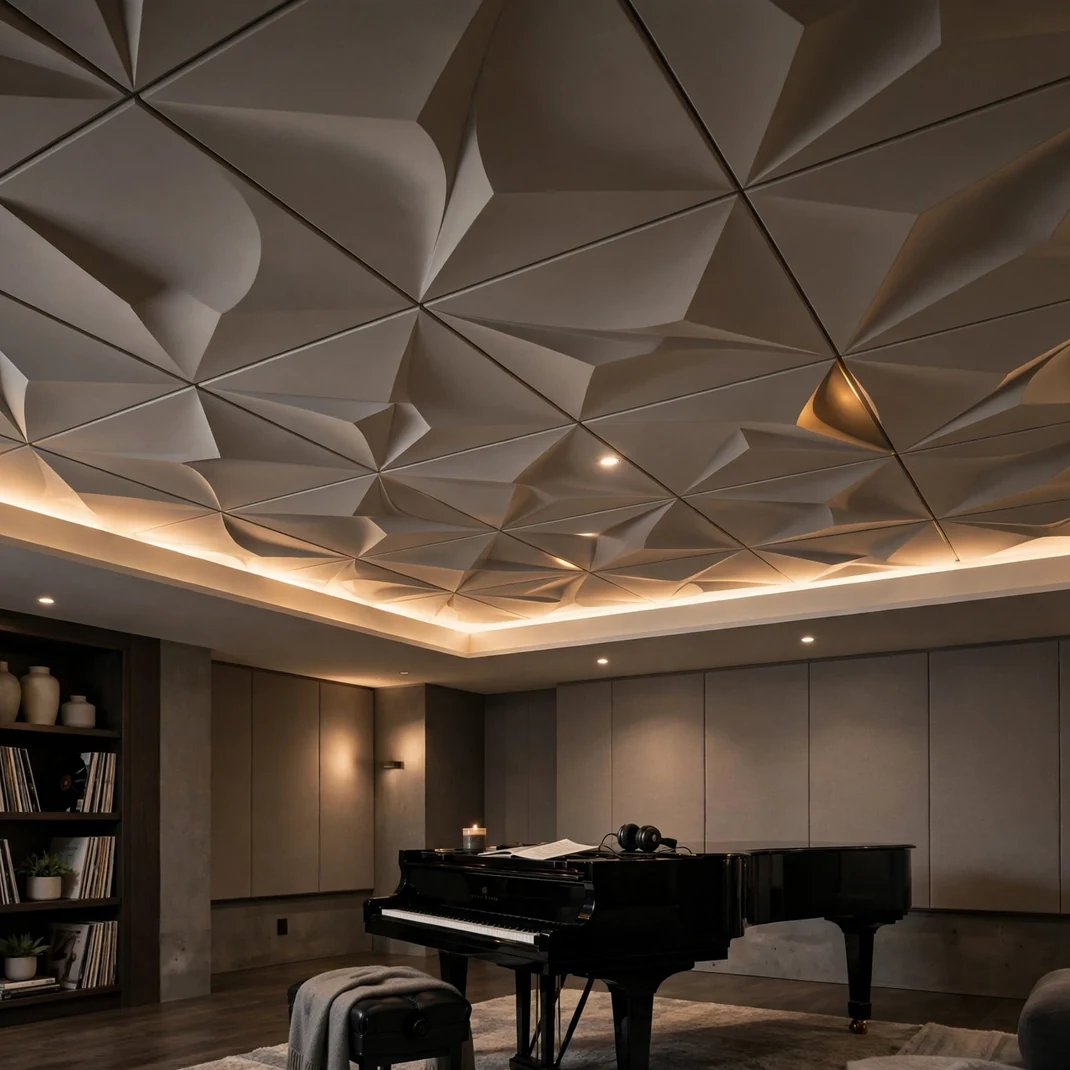
Upgraded acoustic tiles combine sound control with genuinely attractive design. Modern tiles feature sculpted patterns, wood grain prints, and rich colors far beyond the old speckled white. They quiet echo in home theaters and playrooms noticeably. The lightweight tiles pop into a standard grid in minutes. This is the practical ceiling that finally looks as good as it performs.
What to Get
- Decorative acoustic tiles
- Existing or new grid
- Utility knife
- Straight edge
How to Style It
Remove the old tiles and clean the grid thoroughly before starting. Cut the new tiles to fit border spaces with a precise knife. Lower each tile into its grid opening, pattern side down. Replace any bent grid pieces while the tiles are out.
Designer’s Secret
Choose tiles with a strong noise reduction rating for theaters and music rooms. Dark tiles on a black grid create a moody cinema ceiling.
14. Plywood Panel Ceiling
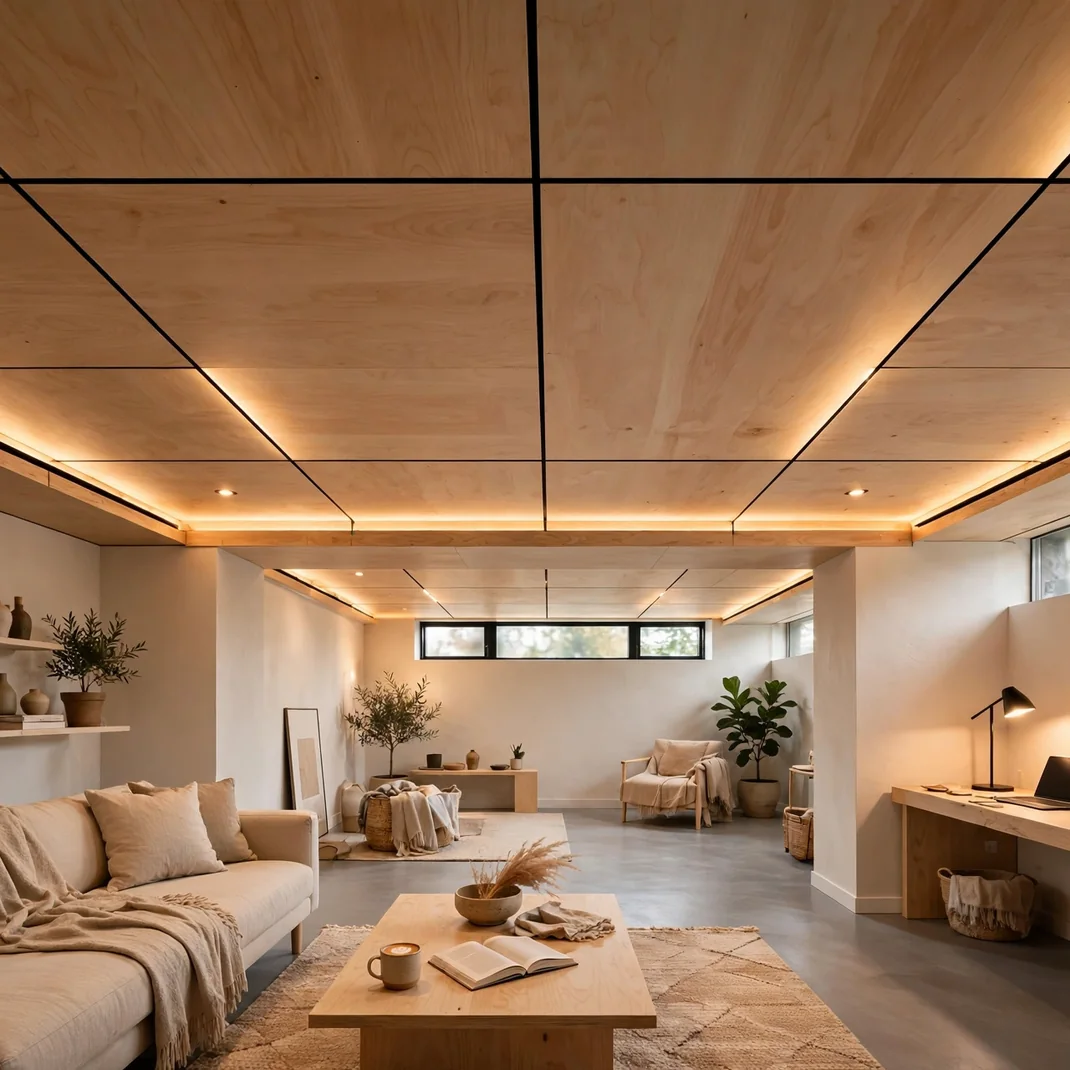
Plywood panels create a warm, modern ceiling at one of the lowest costs anywhere. Large sheets mount quickly and the wood grain adds organic texture overhead. Stained or clear coated, plywood glows with natural warmth. The panel seams can be covered with thin battens for a finished look. This ceiling suits Scandinavian, modern, and budget conscious designs.
What to Get
- Sanded plywood sheets
- Thin batten strips
- Wood toner or polyurethane
- Screws
How to Style It
Cut the sheets to measure and sand any rough factory edges. Drive screws through the panels into the joists, keeping the pattern neat and even. Cover the seams with thin batten strips for a paneled effect. Apply stain or topcoat after installation.
Designer’s Secret
Use Baltic birch plywood for the cleanest grain and fewest voids. Stagger the sheet joints like brickwork for a deliberate, designed pattern.
15. Stenciled Ceiling Pattern

A stenciled pattern turns a plain painted ceiling into custom art for the cost of paint. Moroccan, geometric, or damask motifs add personality that wallpaper cannot match overhead. The pattern draws attention upward, turning the ceiling into an intentional design feature. Metallic paints make the stencil shimmer in the light. This is the most creative ceiling of them all.
What to Get
- Large ceiling stencil
- Stencil brushes or rollers
- Contrast paint color
- Repositionable spray adhesive
How to Style It
Paint the base ceiling color first and allow it to cure fully. Position the stencil with spray adhesive and stipple the paint lightly to prevent bleeding. Reposition carefully using the registration marks. Shield the finished pattern with a clear matte topcoat.
Designer’s Secret
Practice the technique on poster board until your hand is steady. A tone on tone stencil in slightly different sheens looks sophisticated and subtle.
16. Recessed Lighting Grid
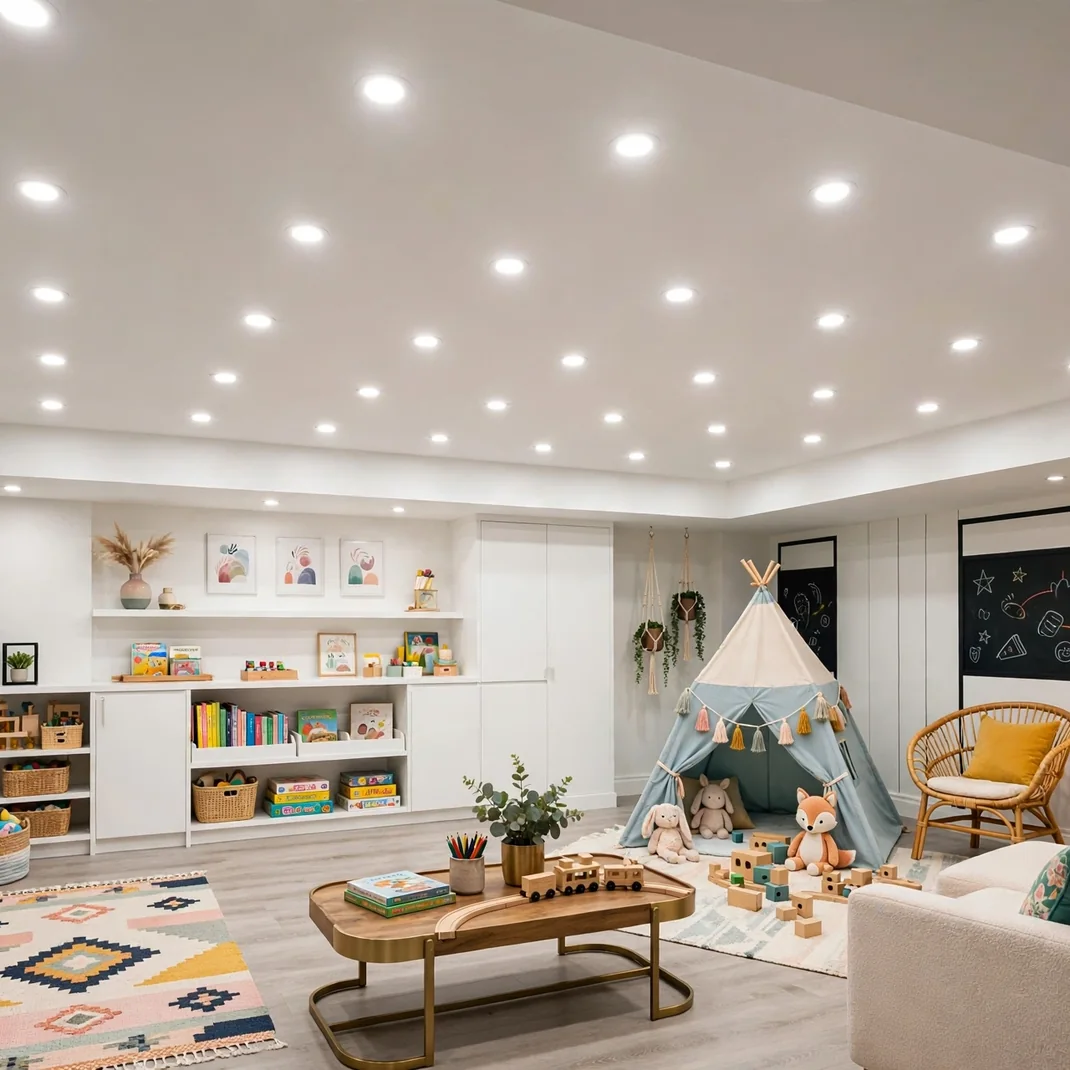
A bank of recessed lights makes the ceiling itself a source of brightness. Evenly spaced cans eliminate the dark corners that plague basements. Modern LED retrofits install into existing cans without an electrician. Dimmable lights let you tune the mood from bright playroom to cozy theater. Good lighting does more for a lower level than any other single upgrade.
What to Get
- LED recessed retrofit kits
- Existing cans or new housings
- Dimmer switch
- Hole saw
How to Style It
Plan the light layout overhead, spacing cans evenly for uniform coverage. Cut the holes with a hole saw and fish the wiring to each location. Install the retrofit kits following the package directions. Replace the wall switch with a compatible dimmer.
Designer’s Secret
Space the lights closer together than upstairs rooms need, since basements start darker. Warm 2700 kelvin bulbs keep the basement cozy instead of clinical.
17. Black Painted Ceiling

Painting the entire basement ceiling black is a bold move with a magical effect. The dark color makes pipes, ducts, and wires visually disappear into shadow. The ceiling seems to recede, which paradoxically makes the space feel taller. Black also creates the perfect backdrop for a home theater or moody lounge. This is the cheapest dramatic transformation of them all.
What to Get
- Flat black ceiling paint
- Sprayer
- Masking materials
- Respirator
How to Style It
Mask everything below, since black overspray shows on every surface. Spray the ceiling including every duct and conduit in flat black. Work in even passes to avoid shiny patches. Touch up any missed spots with a brush after the spray dries.
Designer’s Secret
Use dead flat paint only, since any sheen will catch light and reveal the pipes. Pair the black ceiling with light walls to keep the room balanced.
18. Reclaimed Wood Ceiling
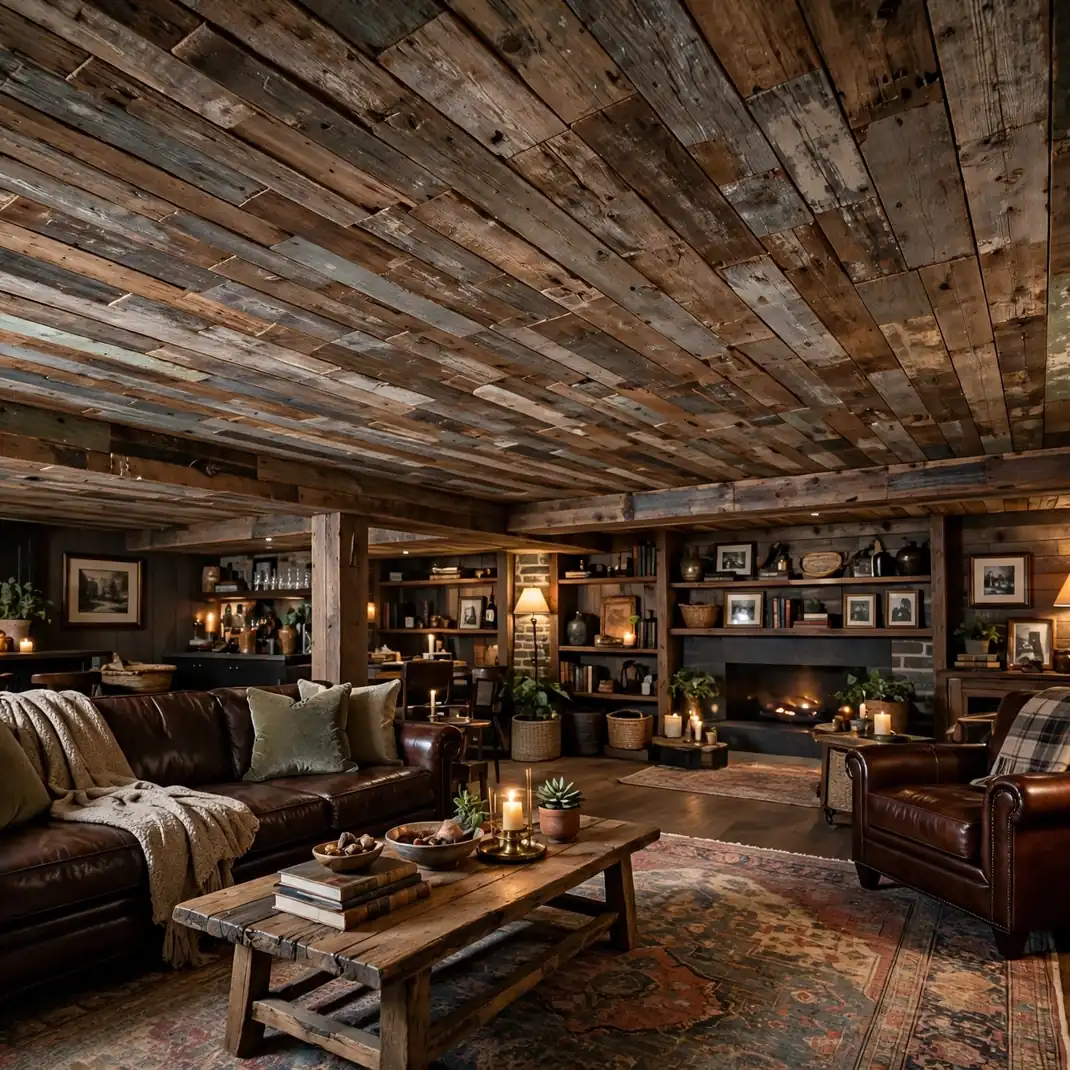
Reclaimed wood brings history, texture, and soul to the space overhead. Each board carries unique grain, old nail marks, and patina that new wood cannot imitate. The varied tones add richness that leaves the basement feeling established and warm. Sourcing from salvage yards keeps costs reasonable. This ceiling tells a story no new material can tell.
What to Get
- Reclaimed wood boards
- Pneumatic nailer
- Metal detector wand
- Wood cleaner
How to Style It
Run a metal detector over every board and remove any hidden nails. Clean the boards and let them dry fully before installation. Mix boards from different bundles for varied tone from wall to wall. Fasten the boards overhead, keeping courses straight.
Designer’s Secret
Ask salvage yards for discount bundles of short boards, since ceilings need less length than floors. Seal the wood to lock in old dust and prevent shedding.
19. Vinyl Plank Ceiling

Vinyl planks installed overhead deliver wood looks with total moisture immunity. Basements worry about humidity, and vinyl simply does not care. Modern prints mimic oak, walnut, and weathered barn wood convincingly. The click lock planks install with adhesive to a prepared surface. This is the worry free wood ceiling for damp basements.
What to Get
- Vinyl plank flooring
- Ceiling rated adhesive
- J roller
- Utility knife
How to Style It
Ensure the mounting surface is clean, dry, and flat before starting. Apply the ceiling rated adhesive as the directions specify. Press each plank firmly and roll with the J roller for full contact. Stagger the joints and trim the final row to fit.
Designer’s Secret
Choose planks with painted bevel edges for the most realistic wood look. Acclimate the planks on site for 48 hours before installation.
20. Grasscloth Covered Ceiling
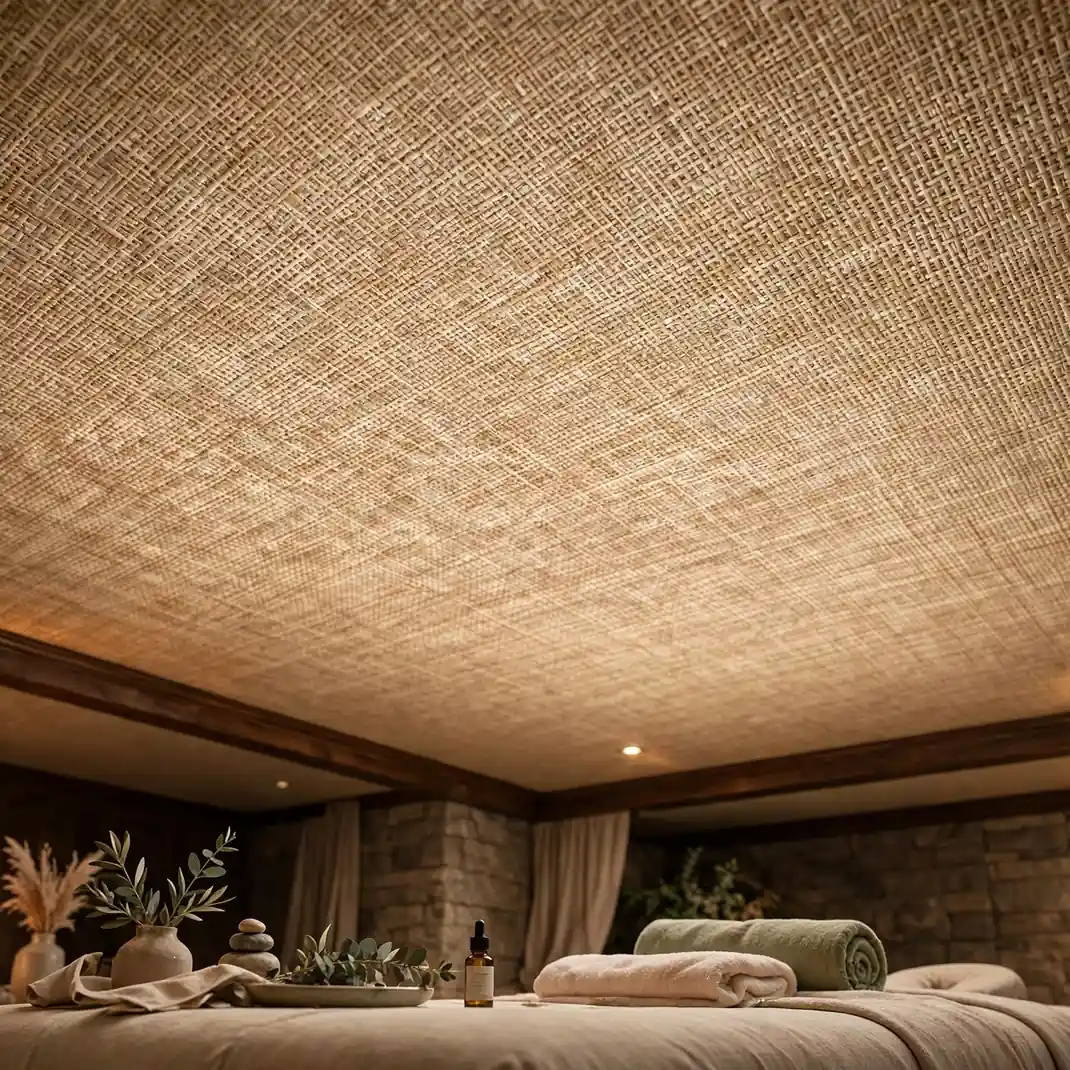
Grasscloth applied overhead adds natural texture that feels both exotic and calming. The woven fibers catch light in subtle variations across the surface. This covering suits bedrooms, reading rooms, and serene retreats. The organic material warms up a basement like nothing synthetic can. A grasscloth ceiling feels like a boutique hotel suite.
What to Get
- Grasscloth wallcovering
- Heavy duty wallpaper paste
- Smoothing brush
- Seam roller
How to Style It
Cut the grasscloth into manageable lengths for overhead work. Apply the paste to the ceiling section by section. Smooth each length carefully, since grasscloth shows every bubble. Butt the seams tightly without overlapping.
Designer’s Secret
Hire a helper, since hanging wallcovering overhead alone is miserable. Order all rolls from the same dye lot to avoid visible color shifts.
21. Glossy White Ceiling
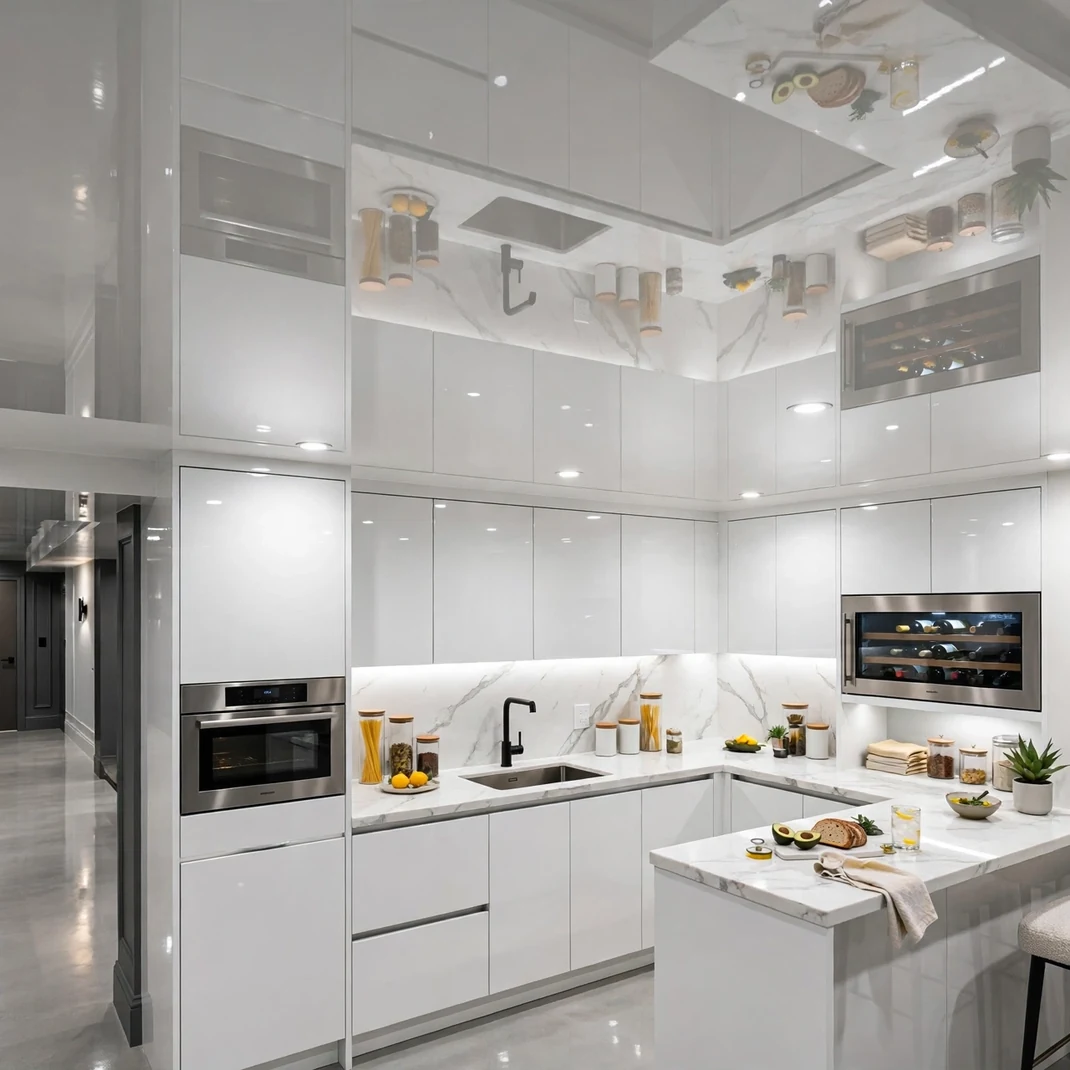
A glossy white ceiling acts like a giant reflector for every light below. The shine bounces light into corners that flat paint leaves dark. This finish makes low ceilings feel noticeably higher. Gloss also wipes clean easily, which matters in a basement. For maximum brightness on a budget, nothing beats gloss white.
What to Get
- High gloss white paint
- Fine nap roller
- Primer
- Sanding sponge
How to Style It
Prep the surface meticulously, since gloss reveals every flaw. Prime with a high opacity primer and sand smooth. Apply thin coats with a fine roller sleeve, avoiding texture buildup. Two to three coats build the mirror like shine.
Designer’s Secret
Gloss demands perfect prep, so skim coat any rough drywall first. Pair the glossy ceiling with matte walls for a sophisticated contrast.
22. String Light Canopy

A canopy of string lights transforms the whole basement into a glittering night sky. The warm points of light create magic that no flush mount fixture can match. This idea suits bedrooms, dens, and party spaces perfectly. Draped in swags or a tight grid, the lights define the ceiling beautifully. It is the most enchanting ceiling of the bunch.
What to Get
- Outdoor rated string lights
- Ceiling hooks
- Extension cords
- Timer plug
How to Style It
Map the light pattern above with painter’s tape first. Install the hooks following the planned swags or grid. Drape the strings with gentle sag between hooks. Plug into a timer so the canopy glows automatically each evening.
Designer’s Secret
Use warm white LEDs for a cozy glow rather than cool blue tones. Hide the cords along joists with cable staples for a clean look.
23. Painted Concrete Ceiling
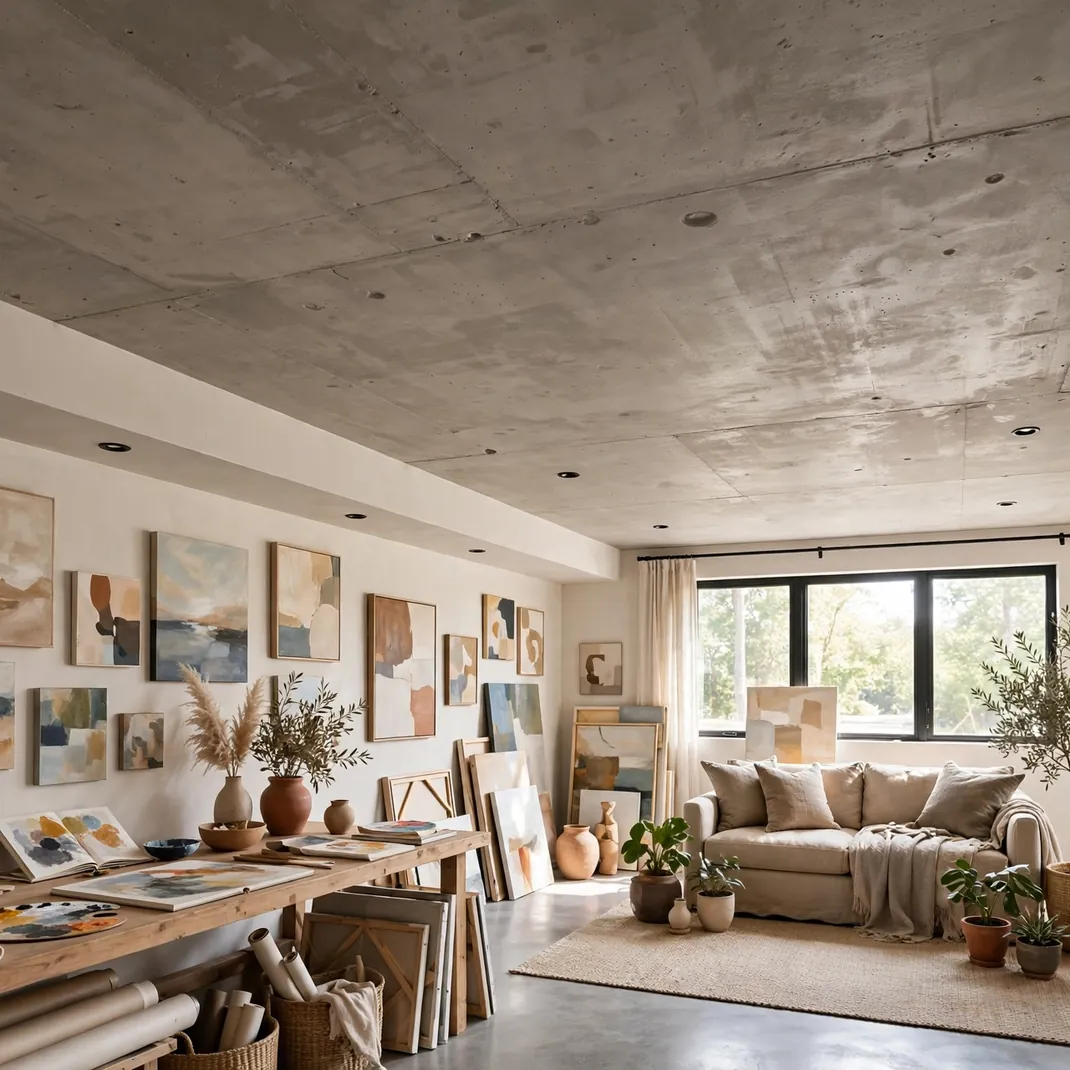
Painting a concrete basement ceiling celebrates the raw architecture of the building. The subtle texture of concrete adds industrial character that drywall cannot match. A coat of paint seals the surface against dust while preserving the authentic look. Light colors brighten the space dramatically. This is the honest, modern ceiling for concrete basements.
What to Get
- Concrete primer
- Masonry paint
- Long nap roller
- Degreaser
How to Style It
Degrease the concrete thoroughly and let it air dry fully. Roll on a concrete bonding primer for lasting adhesion. Roll the masonry paint on with a long sleeve to reach the texture. Two coats ensure even color and proper sealing.
Designer’s Secret
Fill large cracks with concrete patch before painting for a cleaner result. A satin masonry paint resists moisture better than flat coatings.
Conclusion
The basement ceiling sets the tone for the entire room below it. Whether you paint the joists black, install glowing tin tiles, or drape soft fabric overhead, the right ceiling erases the basement stigma completely. Choose the treatment that fits your ceiling height, your budget, and the way you will use the room. Finish the ceiling and the basement finally feels like home.