24 Halloween Window Displays to Brighten Your Kitchen
I consider the kitchen window the hardest-working surface in the room. It is the first thing guests notice from outside and the last thing you see while washing dishes at dusk, so dressing it for Halloween pays off twice.
The ideas below treat the window as a display case: sills become stages, glass becomes a backdrop, and daylight and lamplight become part of the styling. Each concept is sized for real kitchens and real routines, so the sink stays usable and the curtains still close.
1. Layer Pillar Candles Along the Sill for a Slow Evening Glow
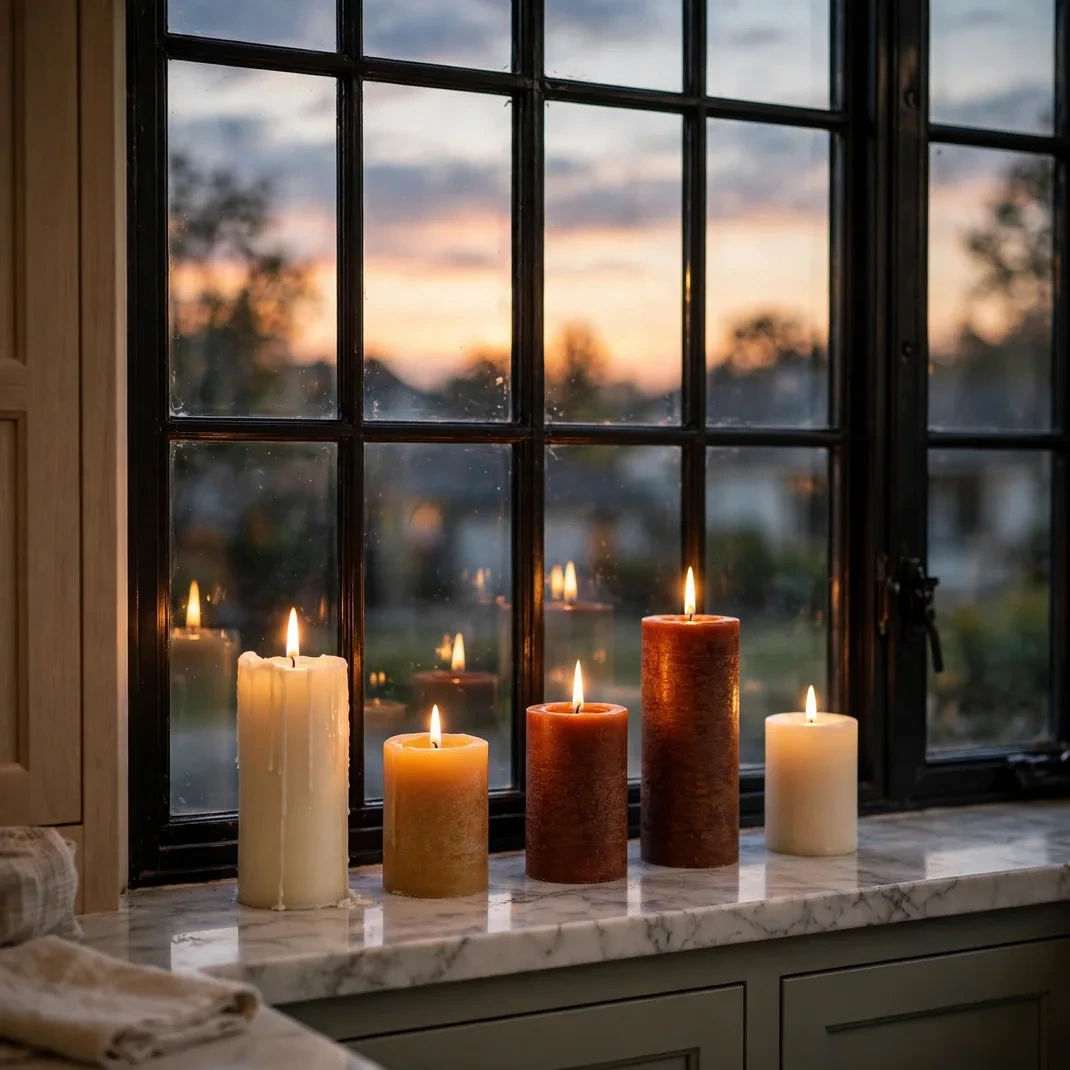
A row of pillar candles in cream, amber, and deep rust turns an ordinary sill into a slow-burning sunset. Vary the heights so the glow reads as a landscape rather than a lineup, and let the window glass catch the flicker for double the light. This is the simplest way to make the kitchen feel dressed without adding a single decoration you must store.
How to Style It: Group five to seven pillars in odd numbers, tallest in the middle, on a heatproof runner or marble slab. Keep at least four inches of clearance from curtains and blinds, and use battery candles for the two nearest the frame if the sill is narrow.
Why It Photographs Beautifully: Layered flames at different heights create natural depth, and the dark glass behind them turns every flame into a doubled reflection. The warm tones also flatter wood cabinetry and brass hardware in the same frame.
Pro Tip: Light the candles about twenty minutes before sunset so the transition from daylight to candlelight feels seamless rather than staged.
Budget-Smart Swap: Use one tall pillar flanked by jam jars holding tealights; the mixed glass heights mimic a curated collection for almost nothing.
2. Cut a Paper Silhouette Village That Glows Against the Glass
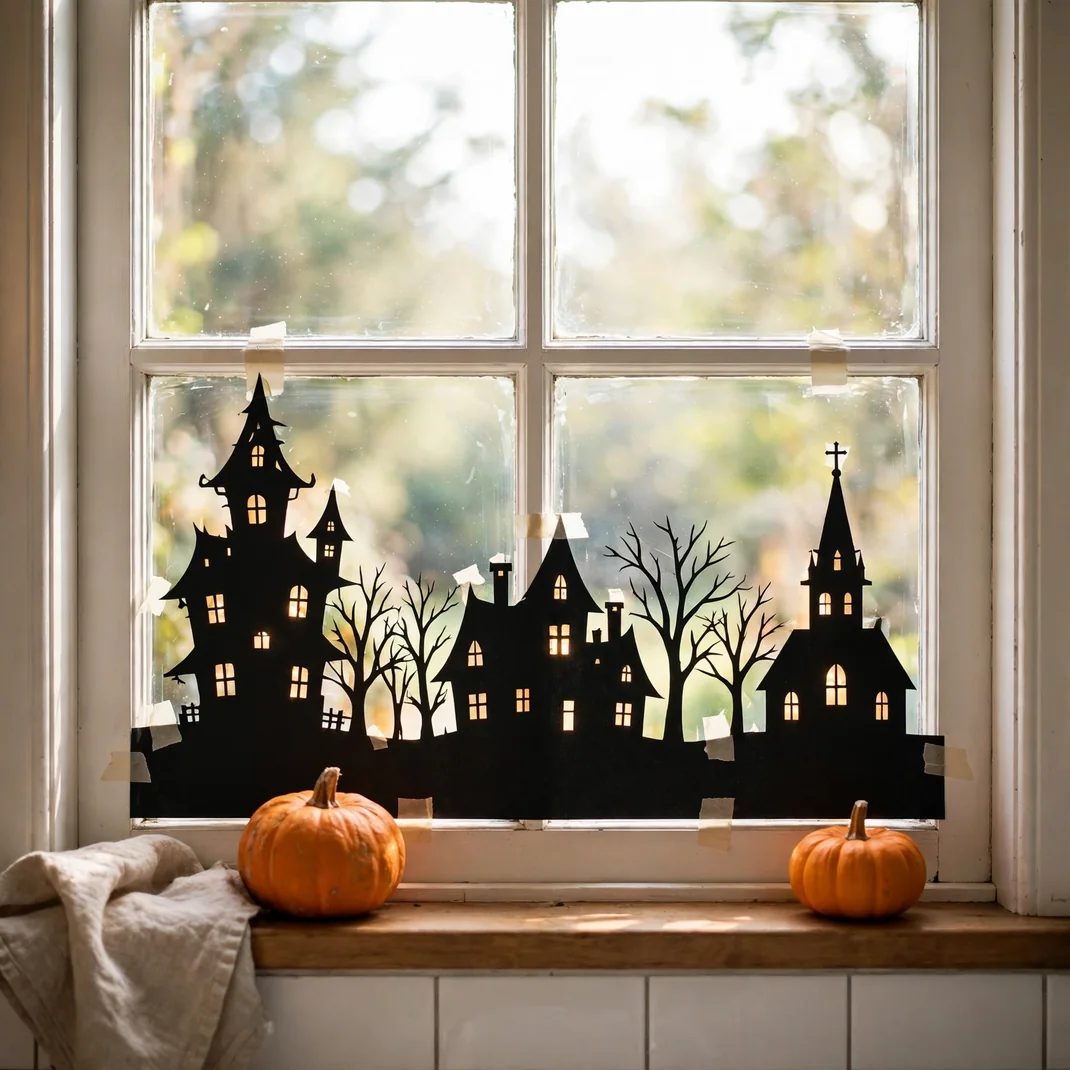
A skyline of haunted houses, bare trees, and a church steeple cut from black cardstock becomes pure magic when backlit by the window. From inside you see crisp graphic shapes; from the street it reads as a glowing storybook scene. Tape the strip low on the glass so daylight does the lighting work for free.
How to Style It: Cut the skyline from a single long strip of black poster board and tape it to the inside of the glass with removable mounting squares. Add tiny punched windows in the houses so pinpricks of light shine through, and anchor the strip with two small pumpkins at the sill.
Why It Photographs Beautifully: The high contrast of black shapes against bright glass photographs crisply at any hour, and the punched windows add delicate points of light that reward a closer look.
Pro Tip: At night, place one warm LED strip behind the skyline on the sill to recreate the daytime glow after dark.
Budget-Smart Swap: Print a free silhouette template and glue it onto a cereal box cut flat; the corrugated edge never shows against the glass.
3. Line the Sill with Mini Pumpkins in an Ombre Fade
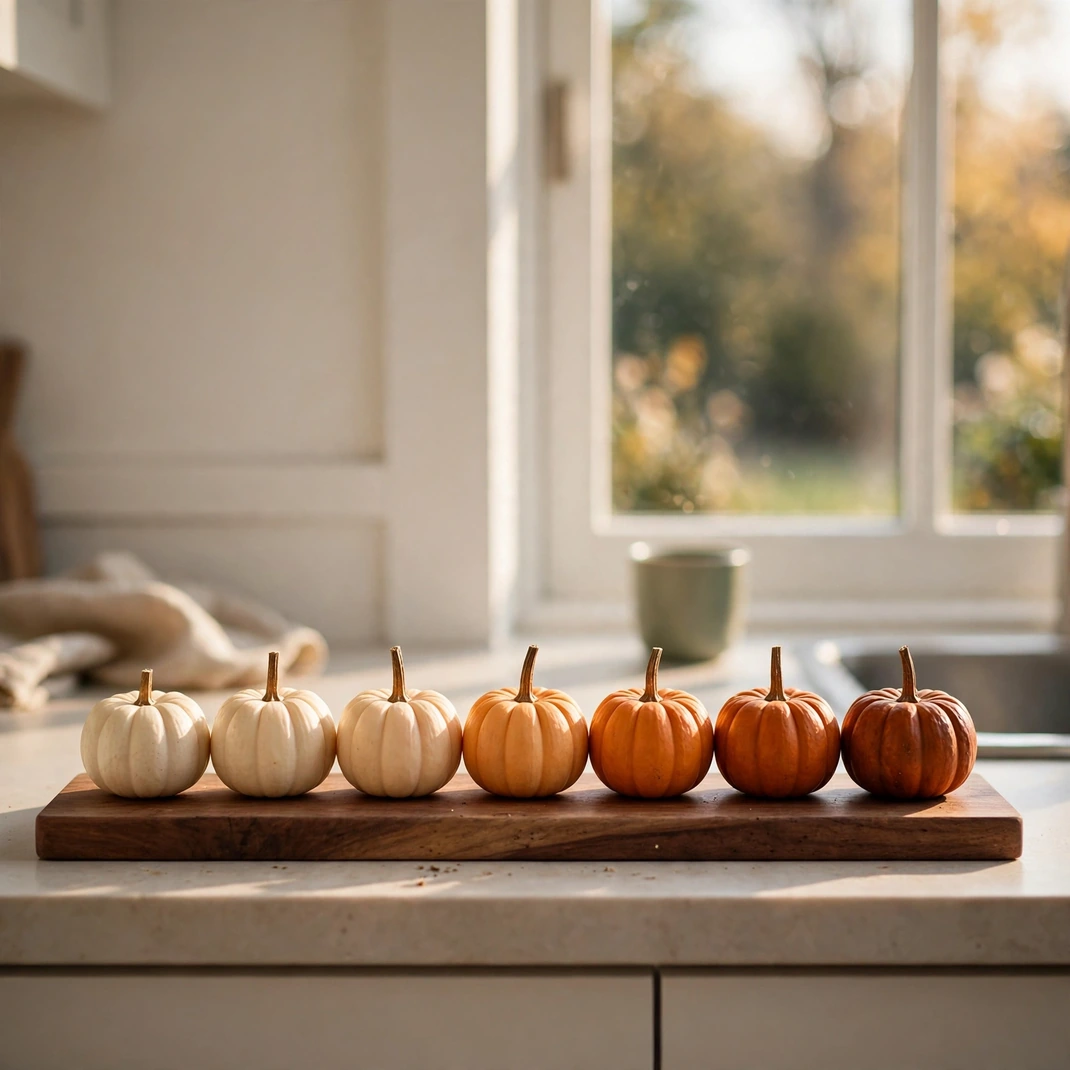
A single row of mini pumpkins fading from cream through apricot to deep burnt orange is quiet, orderly, and unmistakably October. The gradient does all the talking, so the arrangement needs no filler and no props. It suits modern kitchens where a busier display would feel cluttered.
How to Style It: Sort nine to twelve mini pumpkins by color and place them shoulder to shoulder from lightest to darkest, stems all pointing the same direction. Sit them directly on the sill or on a narrow walnut board for extra contrast.
Why It Photographs Beautifully: The gradual color shift gives the eye a path to follow, and the repeated round shapes photograph cleanly against the rectangle of the window. Side light picks up every rib and stem beautifully.
Pro Tip: Mist the pumpkins with a little water before photographing; the subtle sheen deepens the colors without looking wet.
Budget-Smart Swap: Paint small craft pumpkins with sample pots of wall paint in three tones; the matte finish looks remarkably like real rind.
4. Hang Glass Orbs with Fairy Lights at Staggered Heights
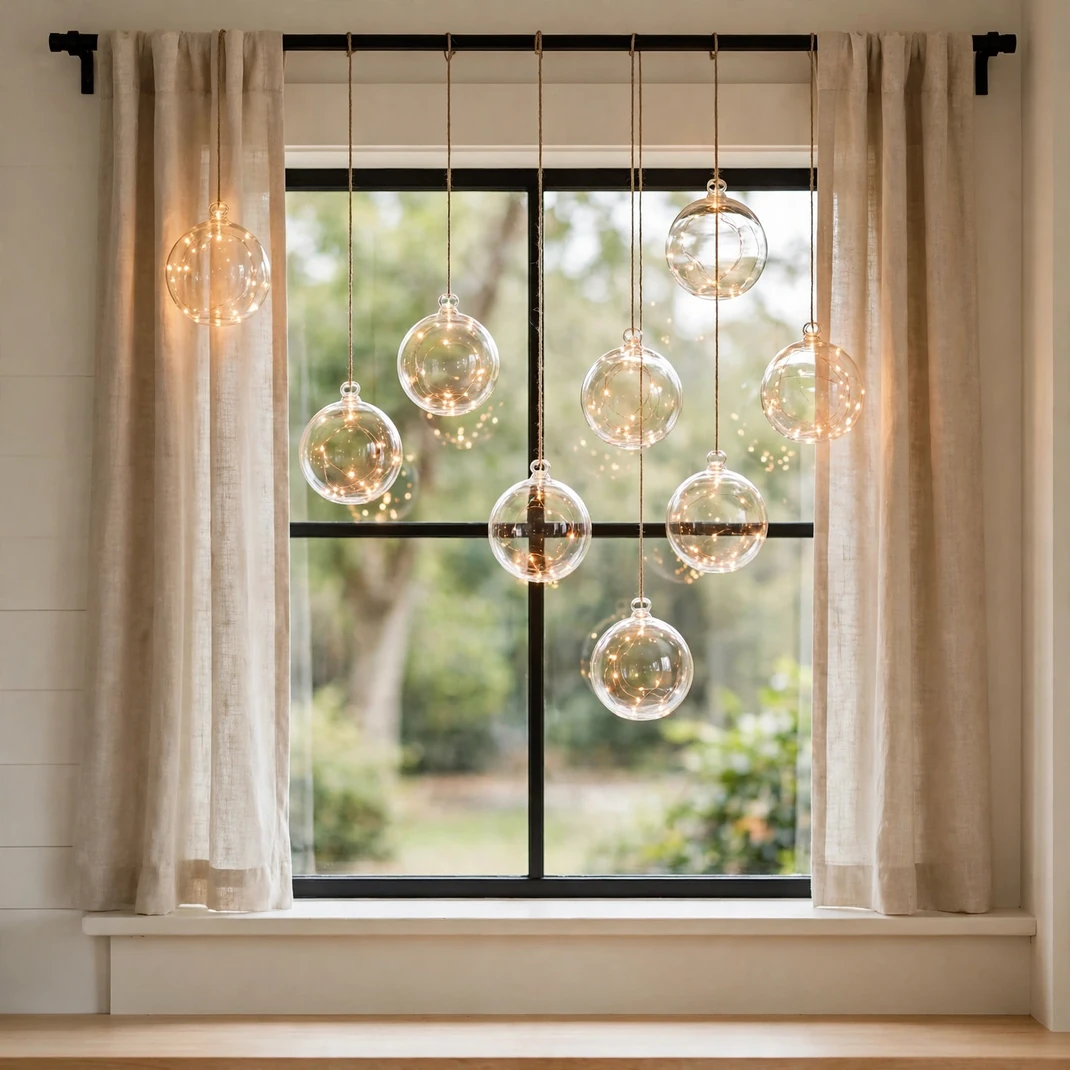
Clear glass orbs filled with warm fairy lights, hung from the curtain rod at staggered heights, turn the window into a floating constellation. By day they catch sunlight like dew; by night they glow like captured fireflies. Because they hang, the sill stays completely clear for everyday use.
How to Style It: Fill five to seven glass orbs or baubles with a short strand of copper-wire fairy lights each, then hang them from the rod on fishing line at heights varying by six inches. Keep the longest drop above the faucet arc so nothing interferes with the sink.
Why It Photographs Beautifully: The orbs create layered bokeh at night and sparkling refractions by day, giving you two completely different photographs from one arrangement.
Pro Tip: Use a single remote-controlled light set with one receiver so all orbs switch on and dim together.
Budget-Smart Swap: Hang the lights inside clean jam jars tied with twine; the rustic glass diffuses the glow just as softly.
5. String a Pressed-Leaf Garland Across the Frame
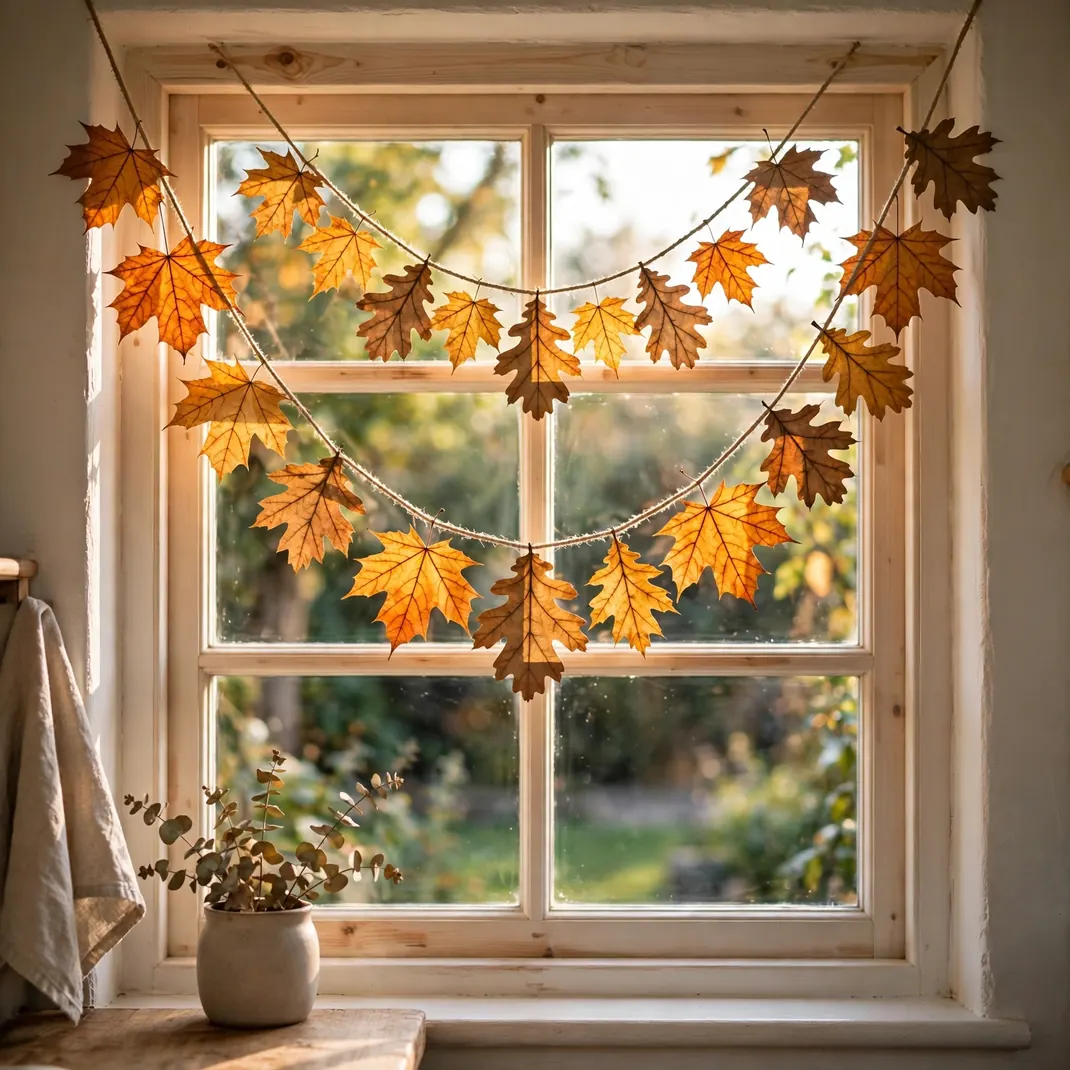
Real pressed maple and oak leaves strung on linen thread bring genuine autumn color right up to the glass. Backlit leaves glow like stained glass, showing every vein. It is delicate, fragrant-free, and costs nothing if you press leaves from your own street.
How to Style It: Press leaves flat for a week, then stitch three strands of them onto thread with a needle, spacing leaves two inches apart. Drape the strands in a gentle swag across the window frame, securing with small removable hooks.
Why It Photographs Beautifully: Translucent leaves against bright sky create jewel-toned color with zero effort, and the irregular edges give the composition an organic rhythm that feels collected rather than decorated.
Pro Tip: Brush the leaves with a whisper of matte sealant so they hold their color through the whole month.
Budget-Smart Swap: Cut leaf shapes from painted grocery bags in three autumn tones; the kraft texture reads surprisingly like dried foliage.
6. Turn the Sill into a Chalkboard Seasonal Menu Board
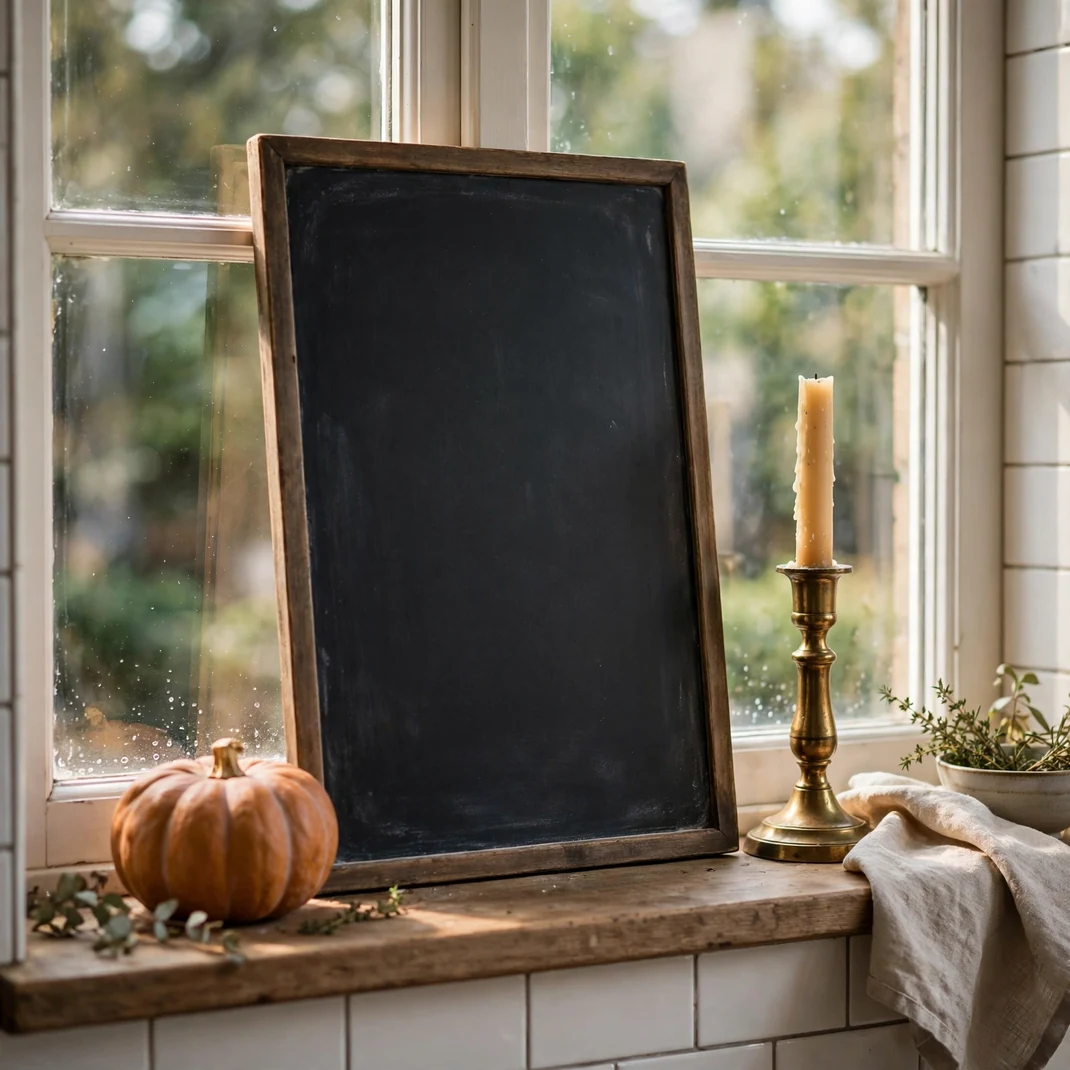
A narrow chalkboard propped on the sill, lettered with the week’s soups or a “tonight’s brew” menu, gives the window a bistro personality. Framed by a couple of gourds and a candle, it feels intentional and a little playful. Guests read it the way they read a cafe board, and it doubles as your meal-planning reminder.
How to Style It: Lean an A-frame or framed chalkboard against the glass at a slight angle, flanked by a small pumpkin and a brass candlestick. Letter the menu in chalk markers with one accent color, burnt orange or cream, and keep the text to five lines.
Why It Photographs Beautifully: Hand lettering adds a human, crafted focal point that contrasts with the hard lines of the window, and the dark board makes the candlelight beside it feel brighter.
Pro Tip: Season the board with a rubbed layer of chalk first so your lettering erases cleanly when the menu changes.
Budget-Smart Swap: Paint the back of a thrifted picture frame with chalkboard paint; the frame instantly makes the board look finished.
7. Backlight Apothecary Jars with Floating Candles
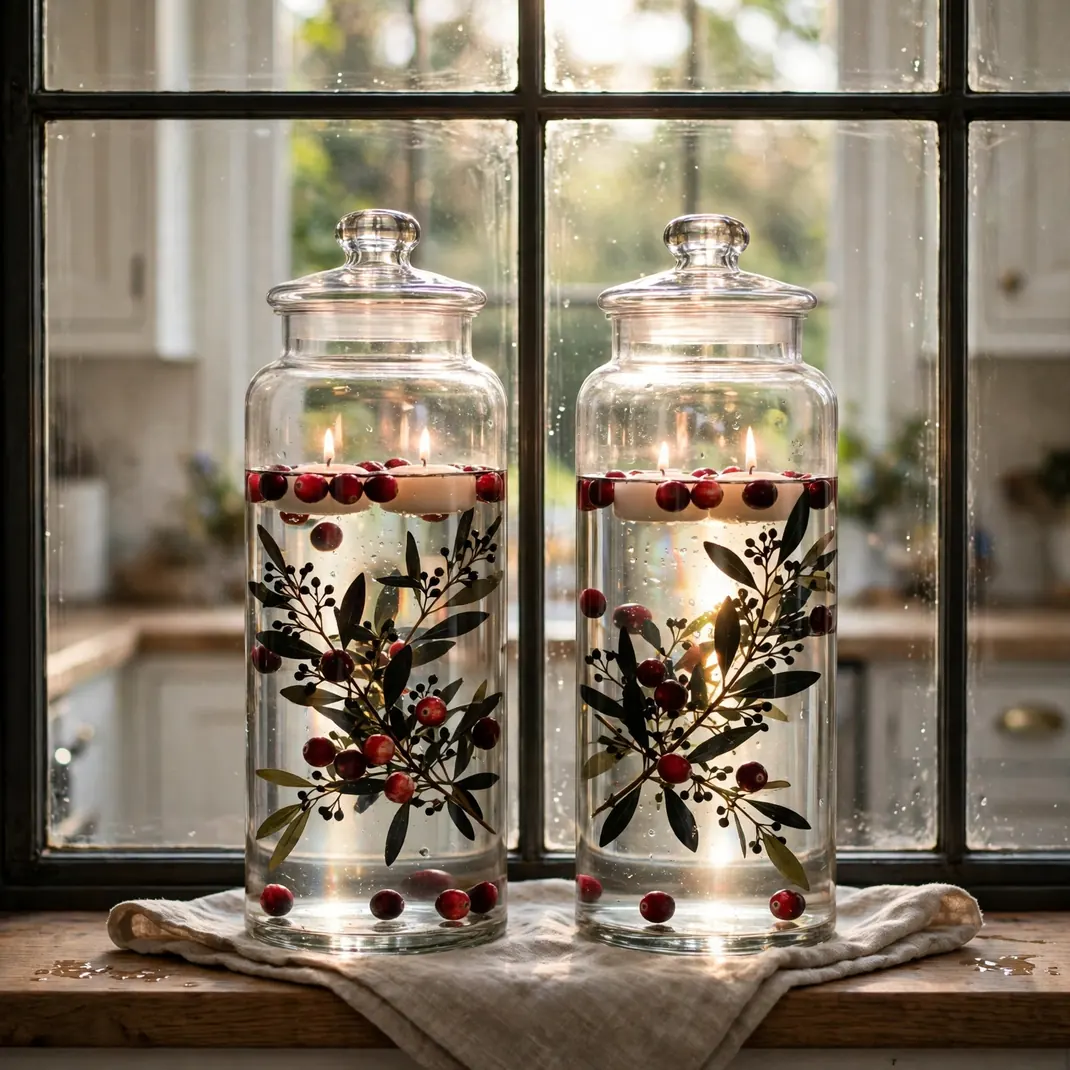
Tall apothecary jars filled with water, a floating candle, and a few cranberries or dark leaves look spellbinding when the window light shines through them. The water magnifies everything inside, and the floating flames dance gently. It is dramatic without a single plastic prop.
How to Style It: Fill two or three jars of graduated heights with water, drop in cranberries and a sprig of dark foliage, and float one candle in each. Place them directly against the glass so the daylight passes straight through the water.
Why It Photographs Beautifully: Water and glass create refractions that turn a simple jar into something luminous, and the cranberries glow ruby-red when lit from behind.
Pro Tip: Add a drop of glycerin to the water to slow the candle’s drift and keep it centered for photos.
Budget-Smart Swap: Use large mason jars and frozen cranberries from the freezer aisle; the effect is identical at a fraction of the cost.
8. Sweep a Cut-Paper Bat Garland Across the Pane
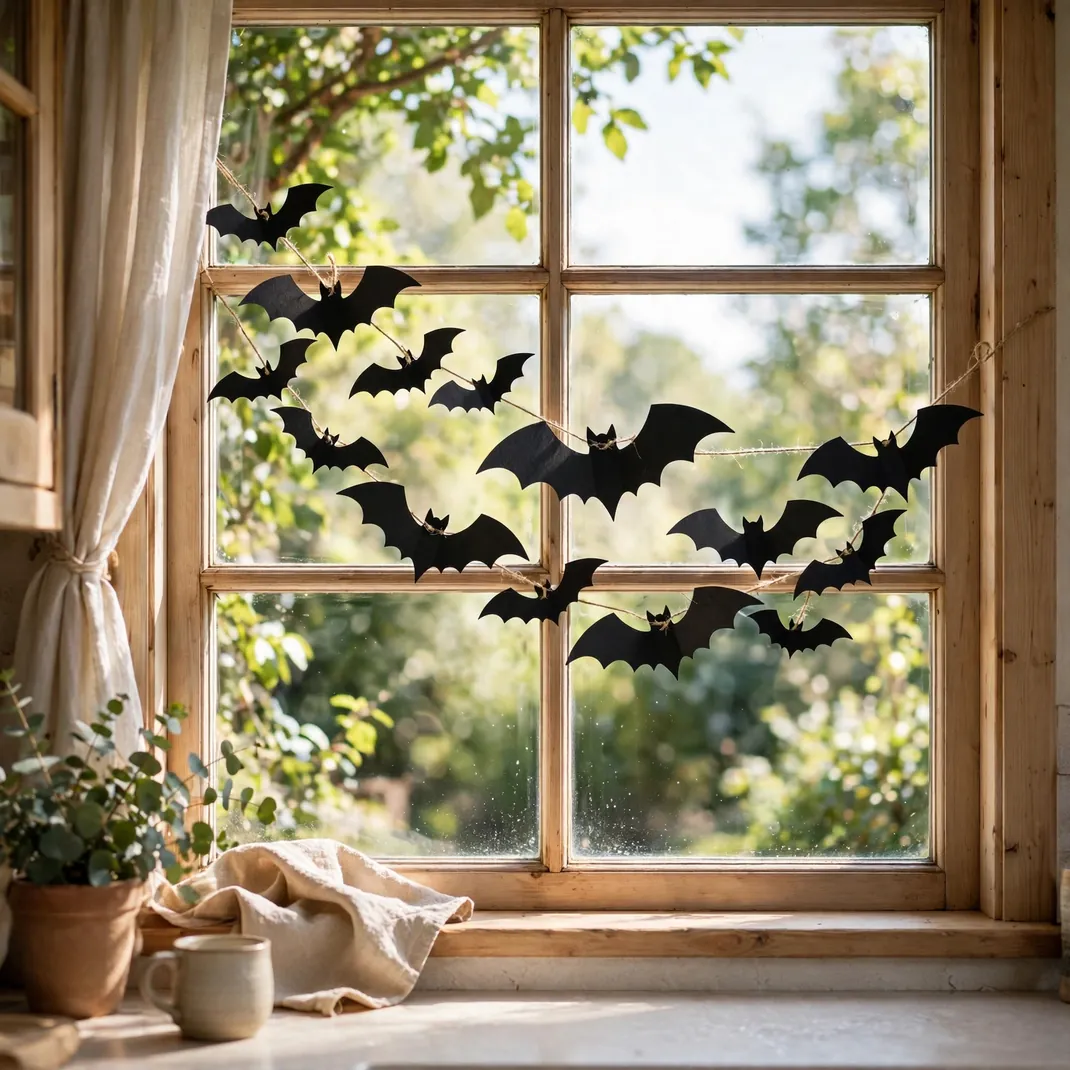
A swooping garland of black paper bats, strung on a gentle curve across the glass, adds movement and a wink of Halloween mischief. The bats’ irregular spacing feels like a flock in flight rather than a decoration. It takes twenty minutes with scissors and transforms the whole window.
How to Style It: Cut bats in three sizes from black cardstock, fold each slightly along the body for dimension, and tape them to clear thread at varied intervals. Stretch the thread in a loose S-curve across the pane with removable dots.
Why It Photographs Beautifully: The dark silhouettes against bright glass give instant graphic punch, and the curve leads the eye across the whole window in a way straight lines never do.
Pro Tip: Angle a few bats as if banking in flight; perfectly flat bats read as stickers, while tilted ones read as alive.
Budget-Smart Swap: Cut bats from black trash bags; the slight sheen catches light and the material costs nothing.
9. Dress Herb Pots with Tiny Gauze Ghosts
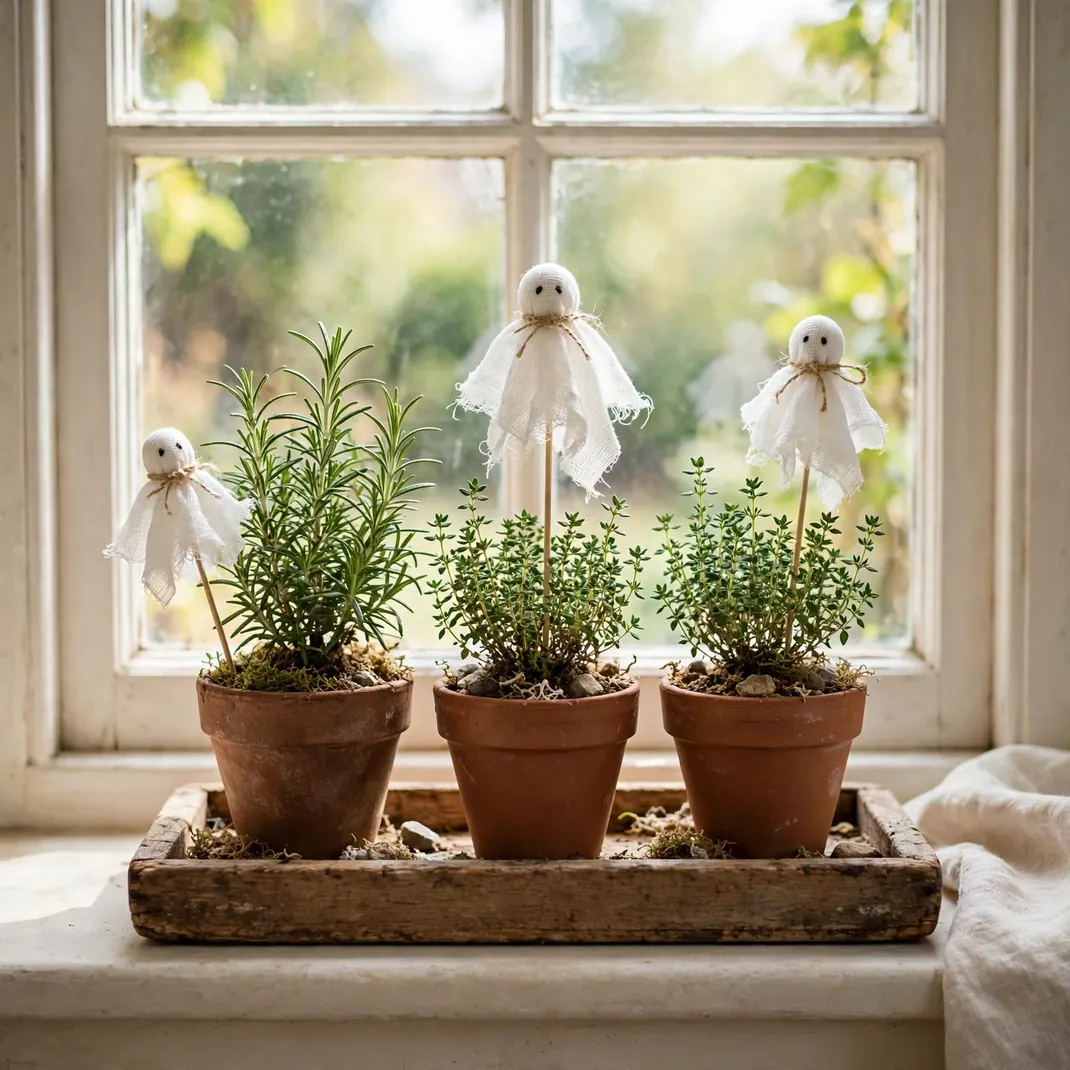
The rosemary and thyme already living on your sill get a Halloween costume: thumb-sized ghosts of white gauze draped over cotton balls on wooden skewers. They bob gently among the herbs and look handmade in the best way. The herbs stay usable, and the ghosts lift right out on November first.
How to Style It: Wrap small cotton balls in white cheesecloth, tie with thread, dot two eyes with a marker, and skewer three ghosts of different heights into each herb pot. Cluster the pots in a shallow wooden tray to corral the look.
Why It Photographs Beautifully: The soft white gauze glows against green herbs and bright glass, and the tiny scale contrast with the pots makes the whole scene feel charmingly miniature.
Pro Tip: Stagger the ghost heights so no two heads sit on the same line; the uneven rhythm is what makes it look crafted.
Budget-Smart Swap: Use white coffee filters instead of cheesecloth; the pleats give the ghosts a lovely ruffled edge for free.
10. Apply Stained-Glass-Look Film in Amber and Violet
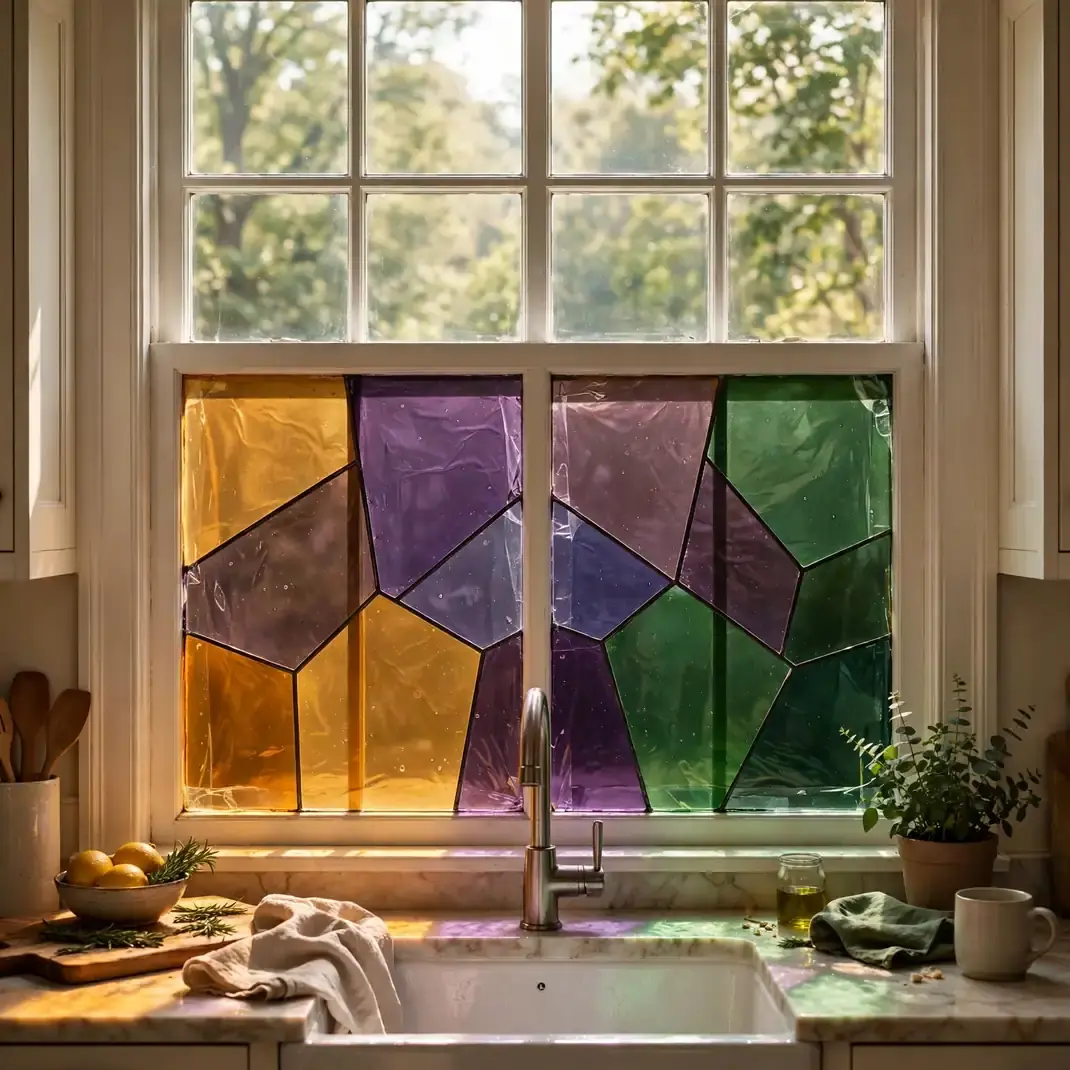
Static-cling window film printed with amber, violet, and deep green panes turns the glass itself into the decoration. Morning light streams through in jewel tones that wash across the counters. Unlike curtains, it adds color without blocking a single ray of daylight.
How to Style It: Cut the cling film to fit the lower two-thirds of each pane, leaving the top clear for an unobstructed view. Smooth it on with a credit card and a spritz of water, and trim the edges with a craft knife for a custom fit.
Why It Photographs Beautifully: The colored light patterns it throws across the kitchen are genuinely painterly, and they shift through the day, giving you endlessly fresh photos of the same window.
Pro Tip: Photograph the light pools on the counter, not just the window; the projections are often more beautiful than the film itself.
Budget-Smart Swap: Paint simple leading lines on plain frosted cling film with a black glass-paint pen for a custom stained-glass look at a fraction of the price.
11. Drape Dried Orange Slices and Cinnamon Across the Top
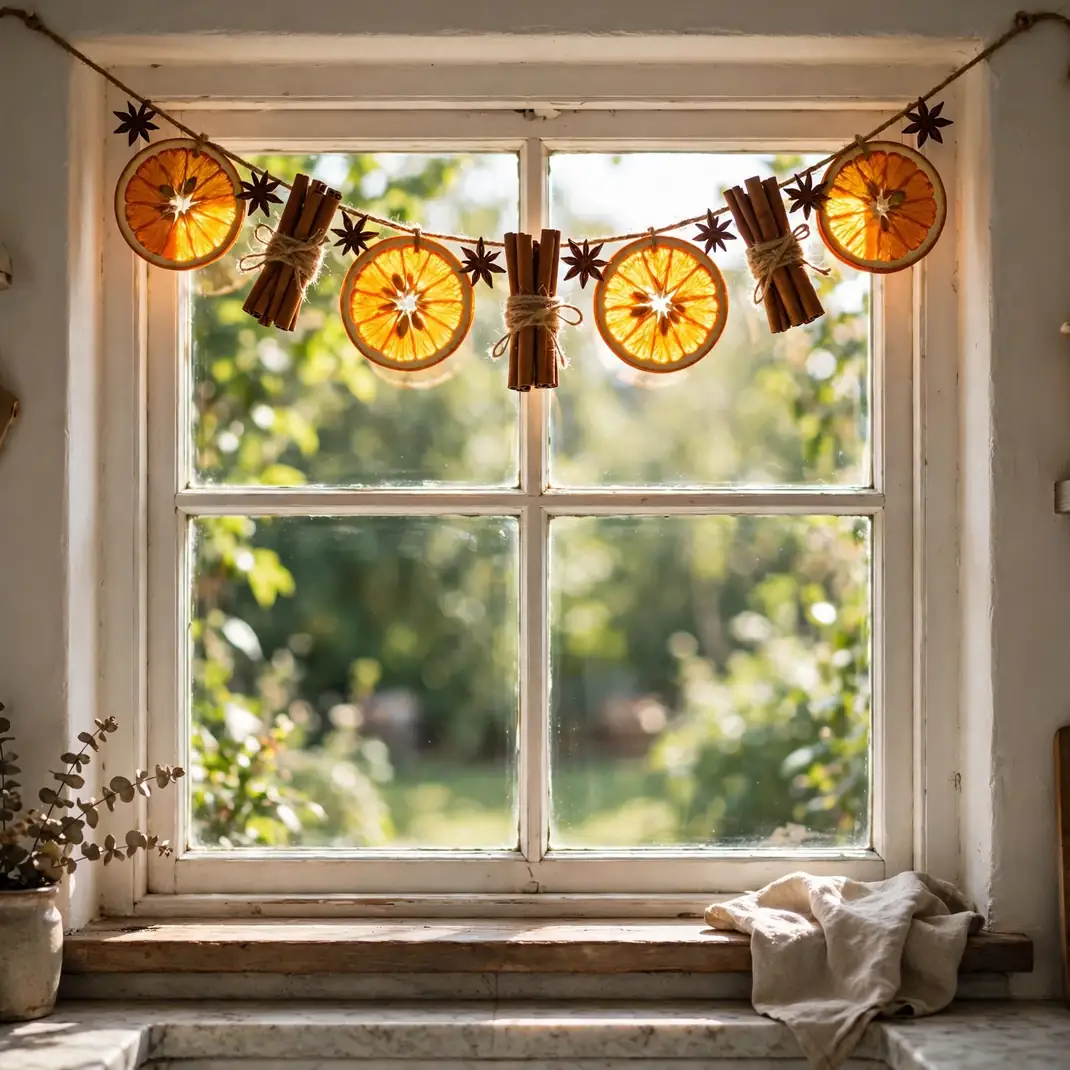
A garland of dried orange slices, cinnamon sticks, and star anise strung across the top of the window brings scent, color, and texture in one strand. The translucent orange wheels glow like little suns when the light hits them. It smells like October and looks like a harvest market.
How to Style It: Thread dried orange slices alternately with bundles of three cinnamon sticks tied with twine, spacing them three inches apart on jute string. Hang the strand from the curtain rod so it swags just below the top frame.
Why It Photographs Beautifully: The glowing orange discs against the sky create a natural bokeh of warm color, and the dark cinnamon bundles give the strand its graphic rhythm.
Pro Tip: Dry the orange slices at the lowest oven setting until fully crisp; any moisture left in them will spot the glass above the sink.
Budget-Smart Swap: Slice the oranges yourself from the fruit bowl rather than buying pre-dried; a bag of oranges makes three full garlands.
12. Double the Glow with a Mirror Tray Under the Candles
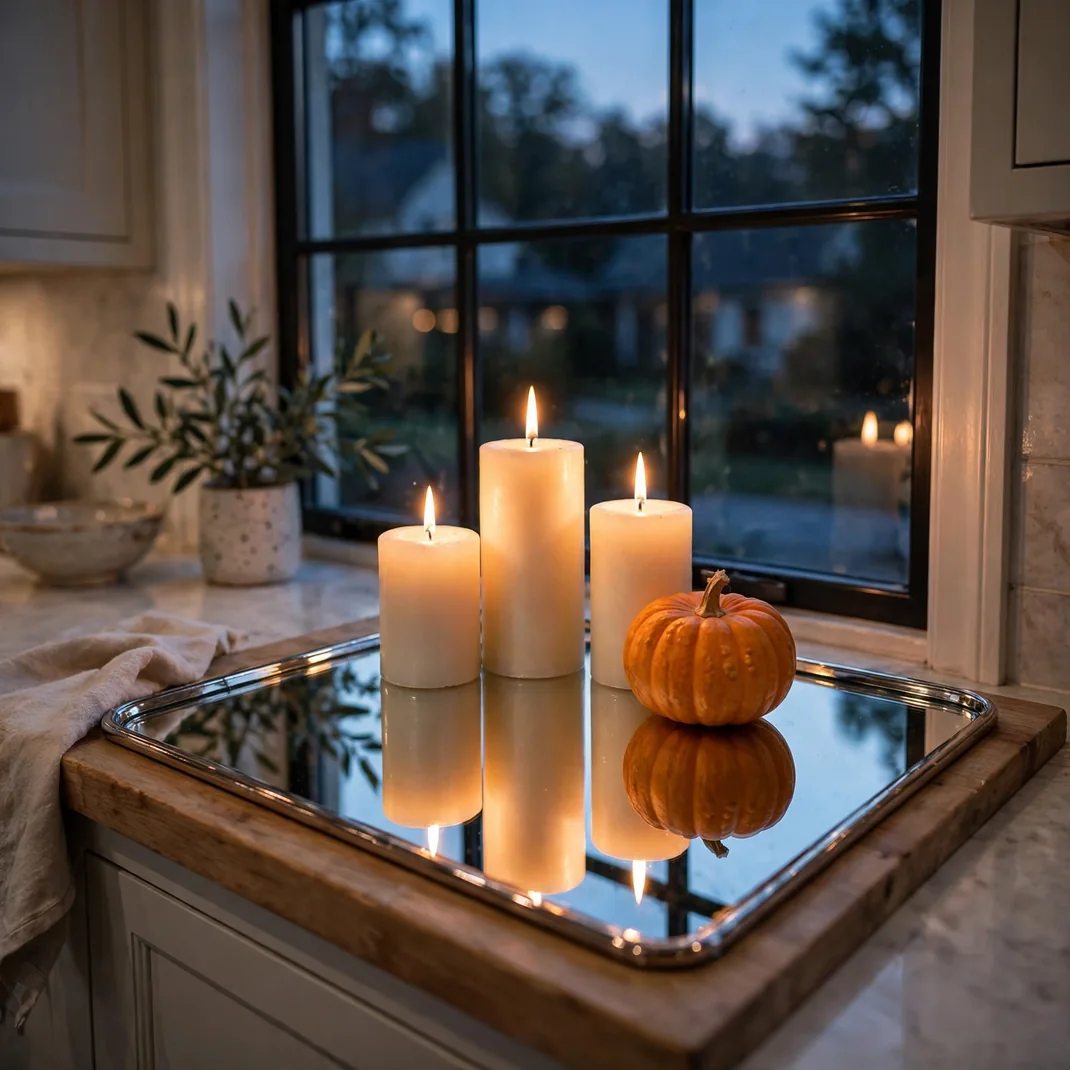
Setting your candle cluster on a mirrored tray does more than protect the sill: it reflects every flame upward and doubles the apparent light. The mirror also bounces daylight around on grey mornings, so the window brightens the kitchen even when the candles are out. It is a small trick with an outsized effect.
How to Style It: Place a rectangular mirrored tray, roughly eighteen inches long, centered on the sill, and arrange candles and one small pumpkin on top. Wipe the mirror with vinegar weekly so the reflection stays crisp.
Why It Photographs Beautifully: The mirror creates a symmetrical lower half to the composition, and flames reflected in glass photograph as elongated streaks of warm light.
Pro Tip: Angle the tray a few degrees off square with the window; the slight skew catches unexpected angles of light and avoids a flat mirror-on-mirror look.
Budget-Smart Swap: Lay a sheet of mirrored contact paper over a sturdy baking tray; from viewing distance it reads exactly like a real mirror tray.
13. Float a Shelf Above the Window for Tiny Jack-o’-Lanterns
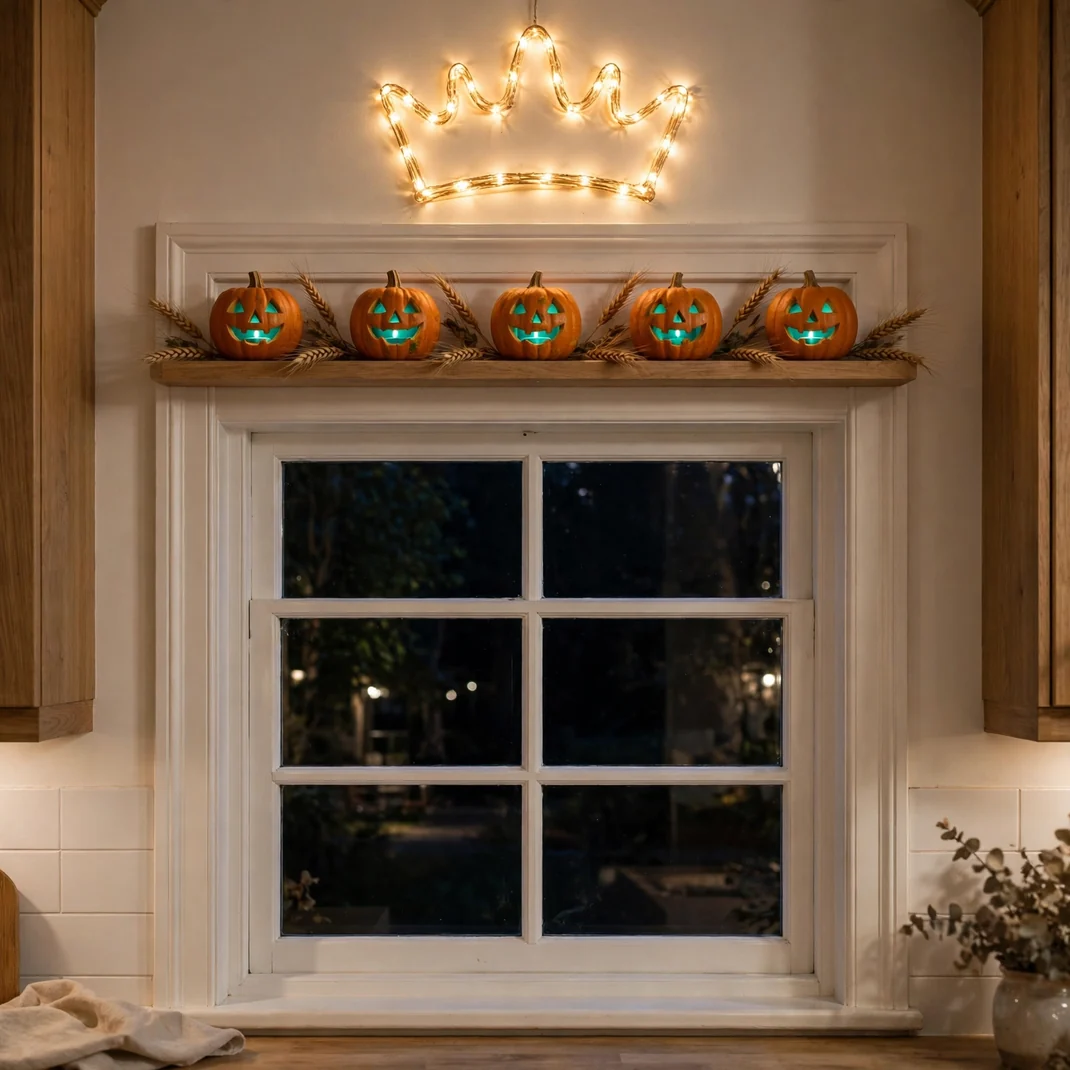
A slim floating shelf mounted just above the window frame creates a display ledge that never touches the sill or the glass. A row of tiny carved pumpkins up there glows down over the whole window like a marquee. It keeps the work surface clear while giving the window a crown.
How to Style It: Mount a six-inch-deep shelf three inches above the frame, spanning the window width. Carve simple faces into five to seven mini pumpkins, light them with one LED tealight each, and space them evenly with sprigs of dried wheat between.
Why It Photographs Beautifully: The elevated row creates a glowing header above the window that frames the whole scene, and the downward light rims the curtain tops and plants below.
Pro Tip: Carve the faces slightly larger than you think; small pumpkins read best from below with bold, simple features.
Budget-Smart Swap: Use battery pumpkins from the craft store on the high shelf; at that height and distance, no one can tell they are not real.
14. Layer Sheer Curtains Over Amber Panels for a Warm Filter
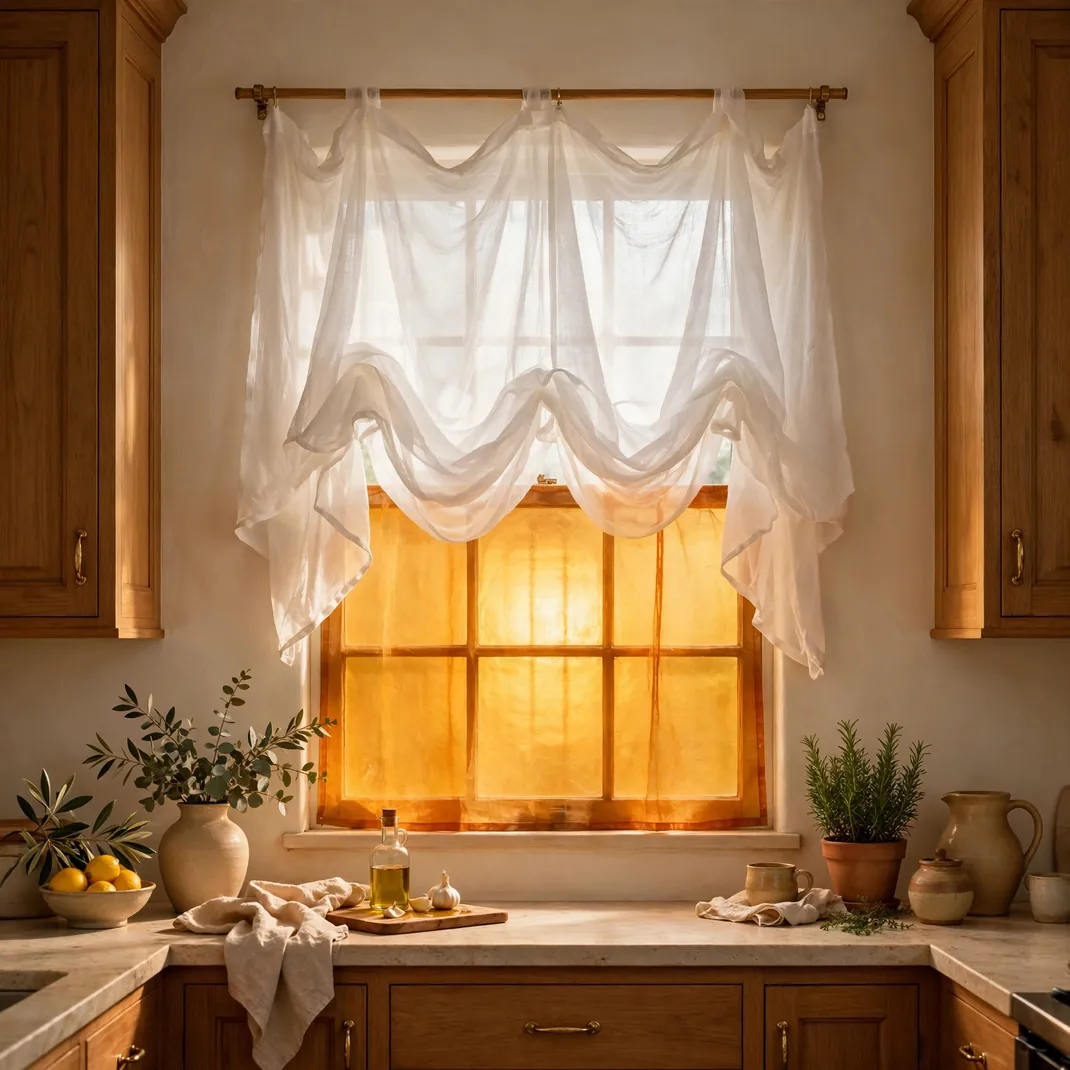
Hanging a sheer white curtain over a translucent amber panel turns the whole window into a warm light filter. The kitchen fills with honeyed light that flatters everything in it, and the layered fabric adds softness no hard decoration can. From outside, the window glows like a lantern.
How to Style It: Hang the amber panel on the inner rod and the sheer on the outer rod so the sheer diffuses the color. Choose a panel in a muted marigold rather than bright orange; the softer tone reads as candlelight, not costume.
Why It Photographs Beautifully: The filtered light acts like a permanent golden-hour effect, and the layered translucency gives window photos a dreamy, editorial softness.
Pro Tip: Keep the panels just skimming the sill rather than pooling; above-sink curtains stay cleaner and the light stays bright.
Budget-Smart Swap: Dye an old white sheer with strong black tea for a warm amber tint; the color is subtle and costs pennies.
15. Build a Moss Terrarium with Twigs and Tiny Pumpkins
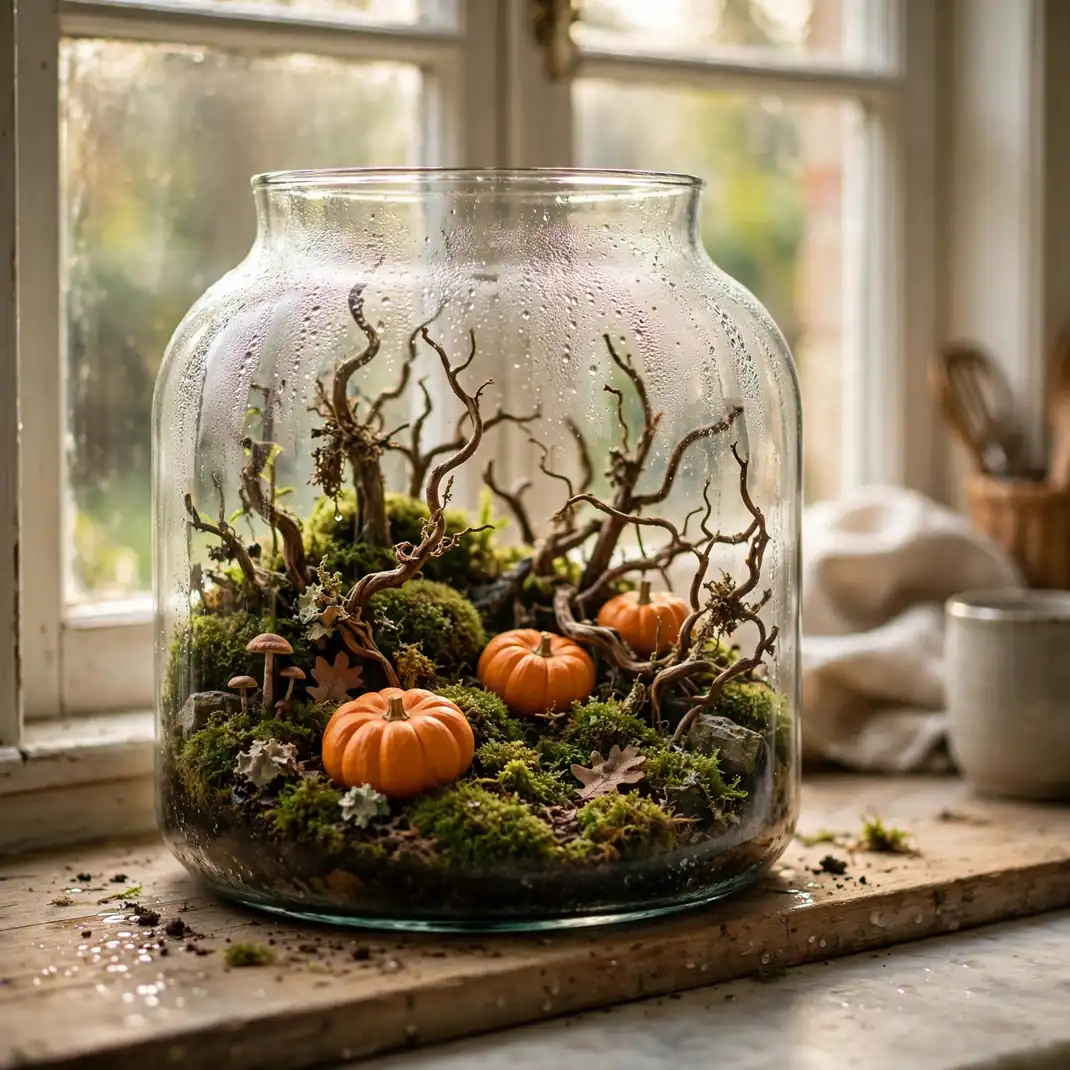
A glass terrarium filled with moss, twisted twigs, and thumb-sized pumpkins becomes a miniature haunted forest on the sill. The glass keeps the moss humid and the scene tidy, and the tiny scale invites close looking. It is the one display guests always pick up to examine.
How to Style It: Layer pebbles, charcoal, and soil in a wide-mouth glass vessel, press in clumps of live moss, and push in two upright twigs and three tiny pumpkins. Mist lightly and set it where it catches morning light.
Why It Photographs Beautifully: The layered interior reads like a landscape in cross-section, and condensation on the glass adds an atmospheric, dewy softness to close-up shots.
Pro Tip: Add one bleached miniature branch as a “dead tree”; the pale wood against green moss creates the haunted-forest mood instantly.
Budget-Smart Swap: Build it in a large pickle jar with moss gathered from a shady garden corner; the whole forest costs nothing but a walk.
16. Frost the Corners with Spiderweb Window Clings
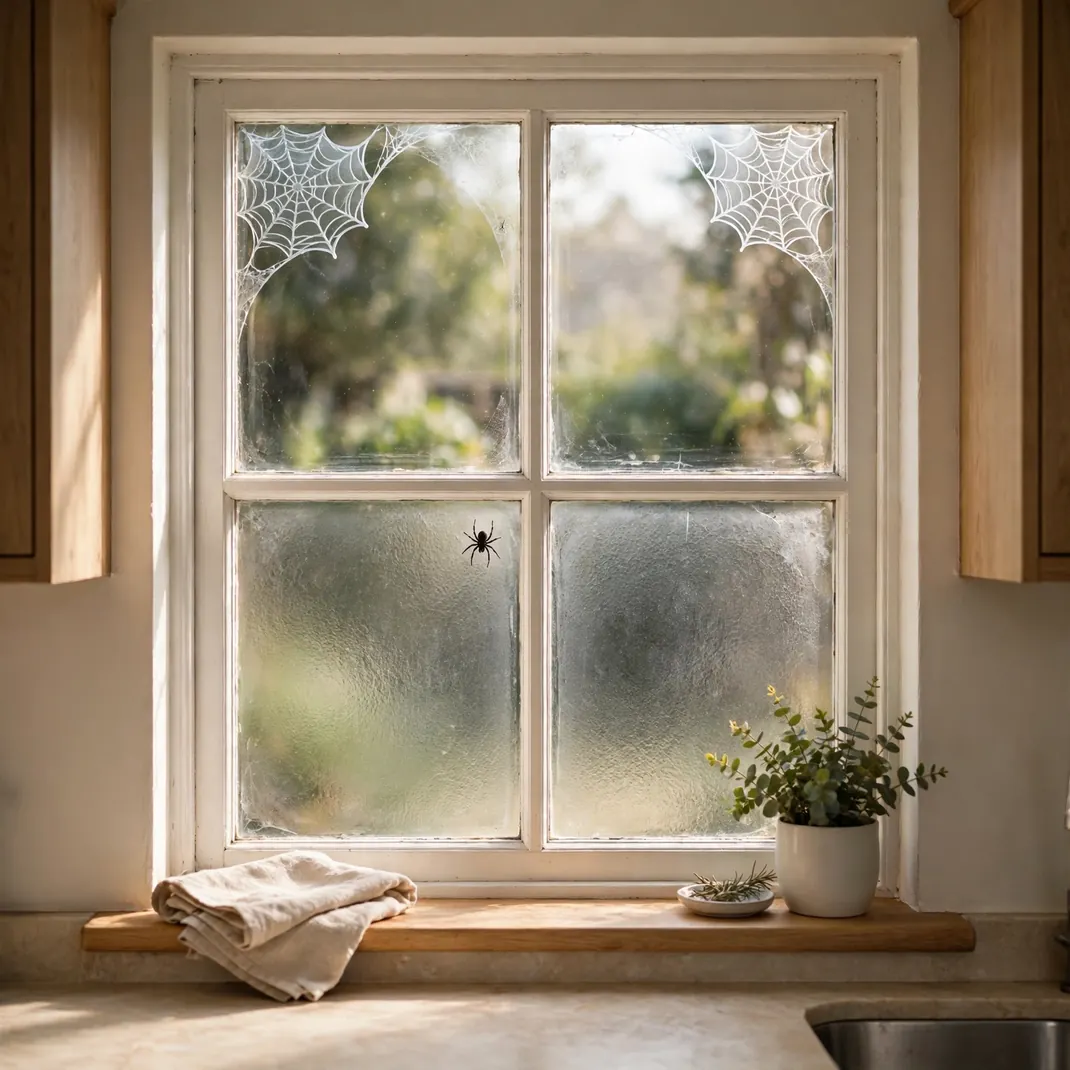
Frosted spiderweb clings in the upper corners of the glass add Halloween texture without blocking light or views. They catch the eye the way frost does, delicate and architectural. Because they are static cling, they peel off in seconds with no residue.
How to Style It: Apply one large web to each top corner and a single small spider cling on one web, leaving the center of the glass completely clear. Smooth out bubbles with a soft cloth and trim any overlap past the frame.
Why It Photographs Beautifully: The fine web lines create intricate detail in the corners that frames the view, and the frosted finish diffuses harsh sunlight into a soft glow.
Pro Tip: Place the spider slightly off-center in its web; perfect symmetry looks manufactured, while a natural hang looks real.
Budget-Smart Swap: Draw webs on the glass with a white window marker; it wipes off with glass cleaner and costs a fraction of the clings.
17. Pair Copper Mugs with Eucalyptus and Black Tapers
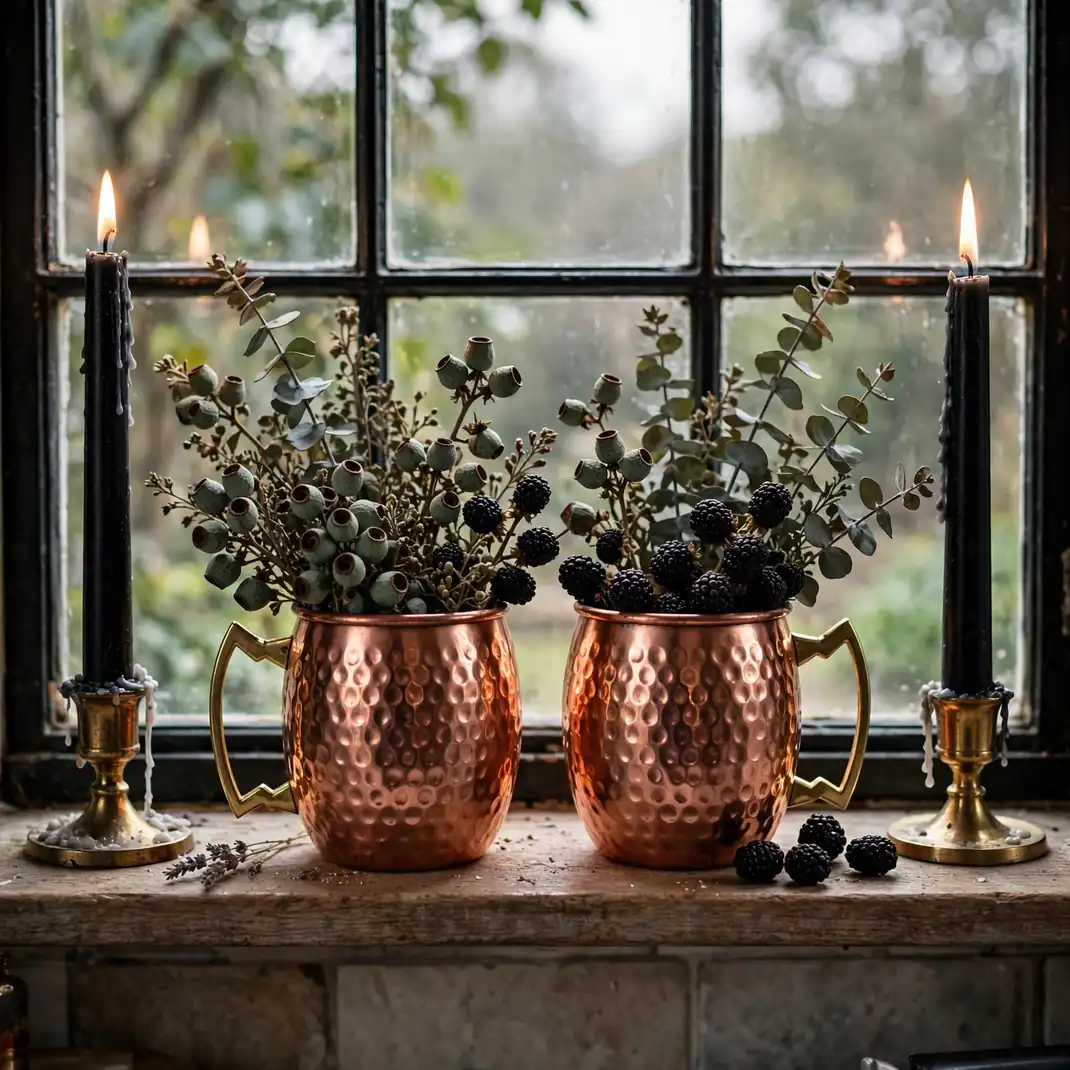
Hammered copper mugs holding sprigs of eucalyptus, flanked by tall black taper candles, bring a moody apothecary feel to the sill. The copper catches firelight beautifully and nods to the kitchen’s working tools. It is sophisticated Halloween, the kind that never shouts.
How to Style It: Fill two copper mugs with seeded eucalyptus and dried blackberries, then place one black taper in a brass holder at each end of the grouping. Keep the arrangement low and to one side so the sink view stays open.
Why It Photographs Beautifully: The hammered copper creates hundreds of tiny warm highlights, and the dark tapers give the composition the vertical lines it needs against the horizontal window.
Pro Tip: Let the candle wax drip naturally down the black tapers; the texture reads as intentional and gothic on dark candles.
Budget-Smart Swap: Spray-paint tin cans with metallic copper paint and sand the edges lightly; the hammered look is surprisingly convincing.
18. String Small Gourds on Twine Across the Window
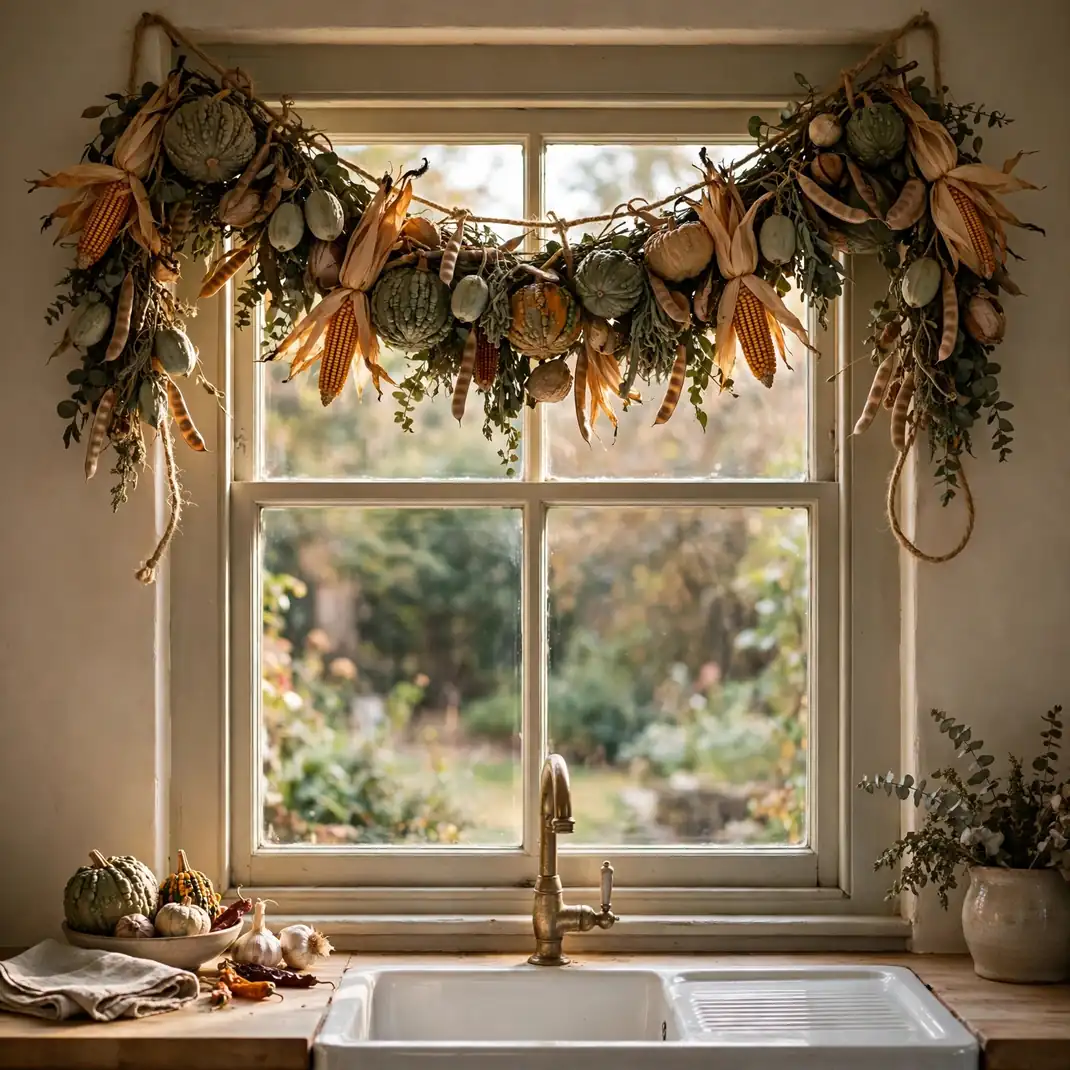
A swag of small warty gourds, dried corn, and pods strung on twine turns the window into a harvest market stall. The strange shapes and muted colors, dusty greens, tans, and deep oranges, feel collected over seasons rather than bought in a weekend. It celebrates the odd and the imperfect.
How to Style It: Wire each gourd through its stem with floral wire, then twist the wires onto a length of jute at six-inch intervals, alternating gourds with small dried corn ears. Hang the strand in a deep swag from two cup hooks above the frame.
Why It Photographs Beautifully: The sculptural, irregular forms create fascinating shadows on the glass, and the earthy palette glows warmly when backlit.
Pro Tip: Choose gourds with the most unusual shapes; the weird ones are the whole point of this display.
Budget-Smart Swap: Buy one bag of mixed ornamental gourds and split it between the window swag and a bowl on the counter; the bag stretches across two displays.
19. Set Witch-Hat Luminaries Glowing on the Sill
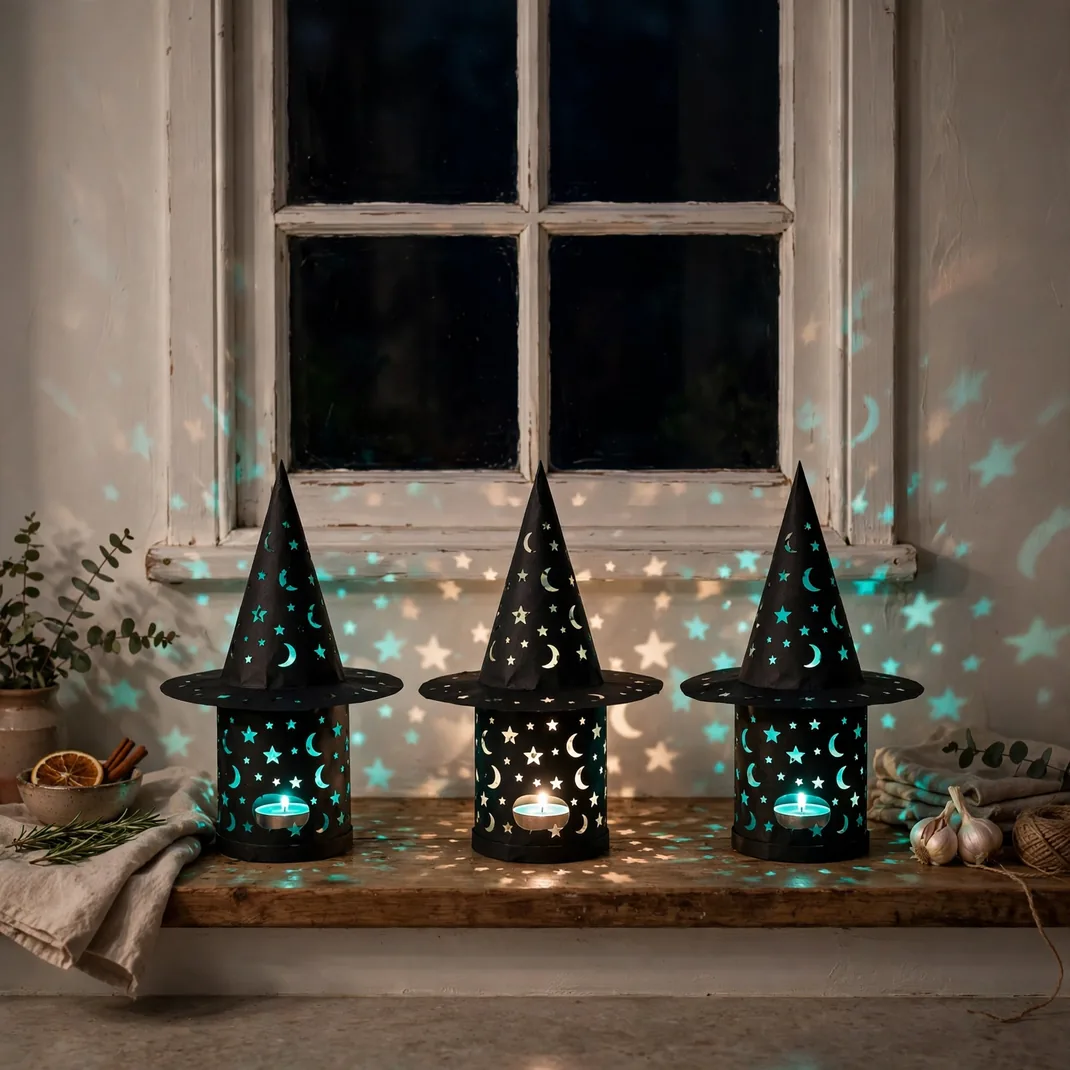
Cone-shaped witch hats with cut-out stars and moons, lit from within by LED tealights, cast patterned light across the sill and the wall above. They are playful without being childish, and the punched patterns throw the prettiest shadows in the room. Three hats in a row make a complete display.
How to Style It: Punch star and moon shapes into black paper cones with a craft punch, glue each cone to a cardboard brim, and set one warm LED tealight inside each. Line three hats along the sill with their brims overlapping slightly.
Why It Photographs Beautifully: The punched holes project constellations onto the surrounding surfaces, so the photograph captures light effects far beyond the hats themselves.
Pro Tip: Use flickering LED tealights rather than steady ones; the moving light makes the punched stars shimmer.
Budget-Smart Swap: Roll the cones from black construction paper and punch the shapes with a nail; the whole trio costs less than a coffee.
20. Stage a Tiered Tray of Treats in the Window Light
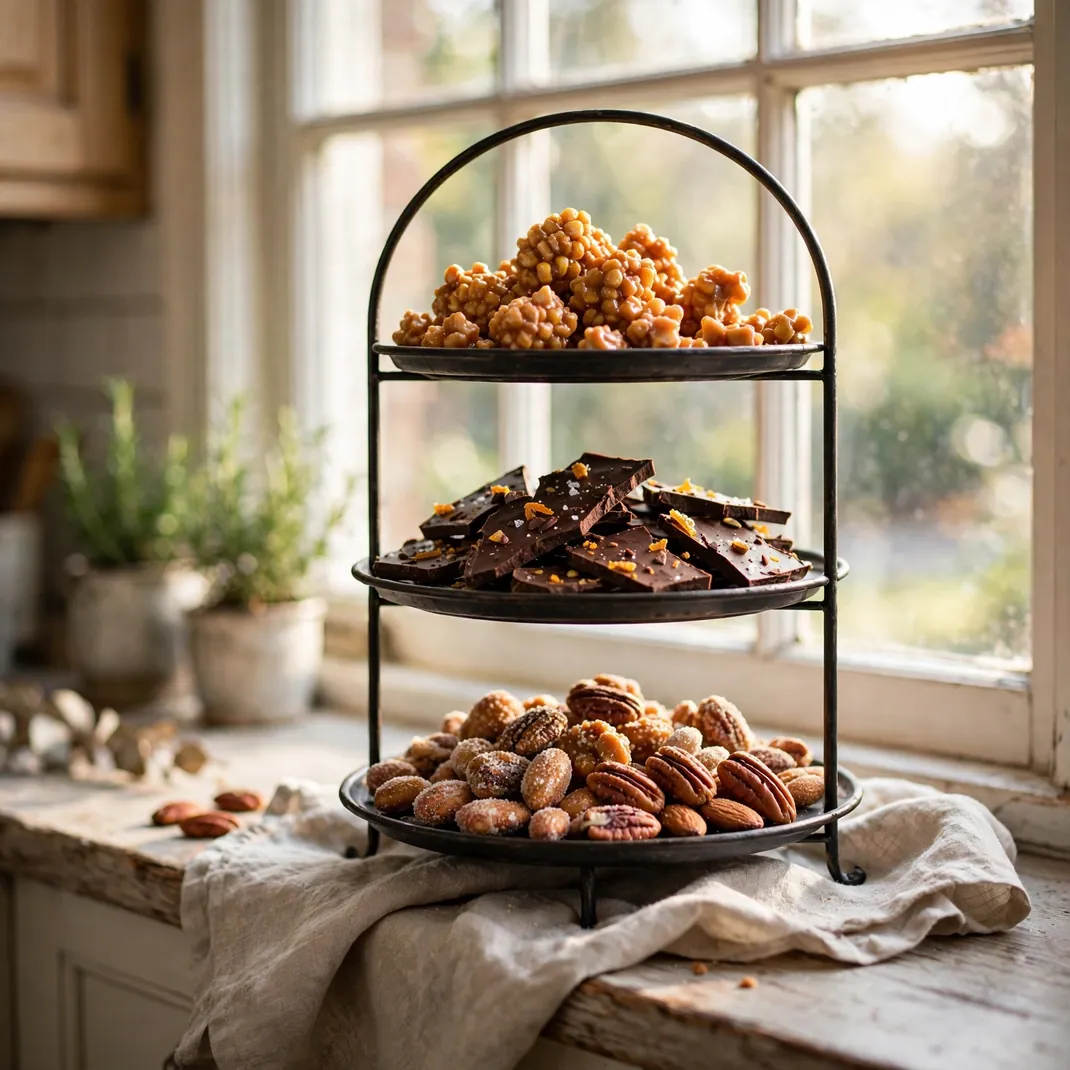
A three-tiered stand of Halloween treats set right in the window becomes edible decor: caramel corn, chocolate bark, and sugared nuts catching the daylight. It keeps sweets contained and visible, and guests help themselves without opening a single cupboard. The stand’s verticality suits narrow sills perfectly.
How to Style It: Fill the bottom tier with the bulkiest treat and work upward to the smallest, keeping the color palette to caramel, chocolate, and cream. Set the stand slightly off-center on the sill with a linen napkin underneath.
Why It Photographs Beautifully: The tiered structure creates a natural triangle composition, and backlit treats develop an appetizing glow that flat-lay food photos never achieve.
Pro Tip: Refill from the back and rotate the stand a quarter turn daily so the display always looks full from the front.
Budget-Smart Swap: Stack three plates on two overturned mugs to build a tiered stand; the homemade version has real farmhouse charm.
21. Spray Frosted Glass with Leaf Stencils
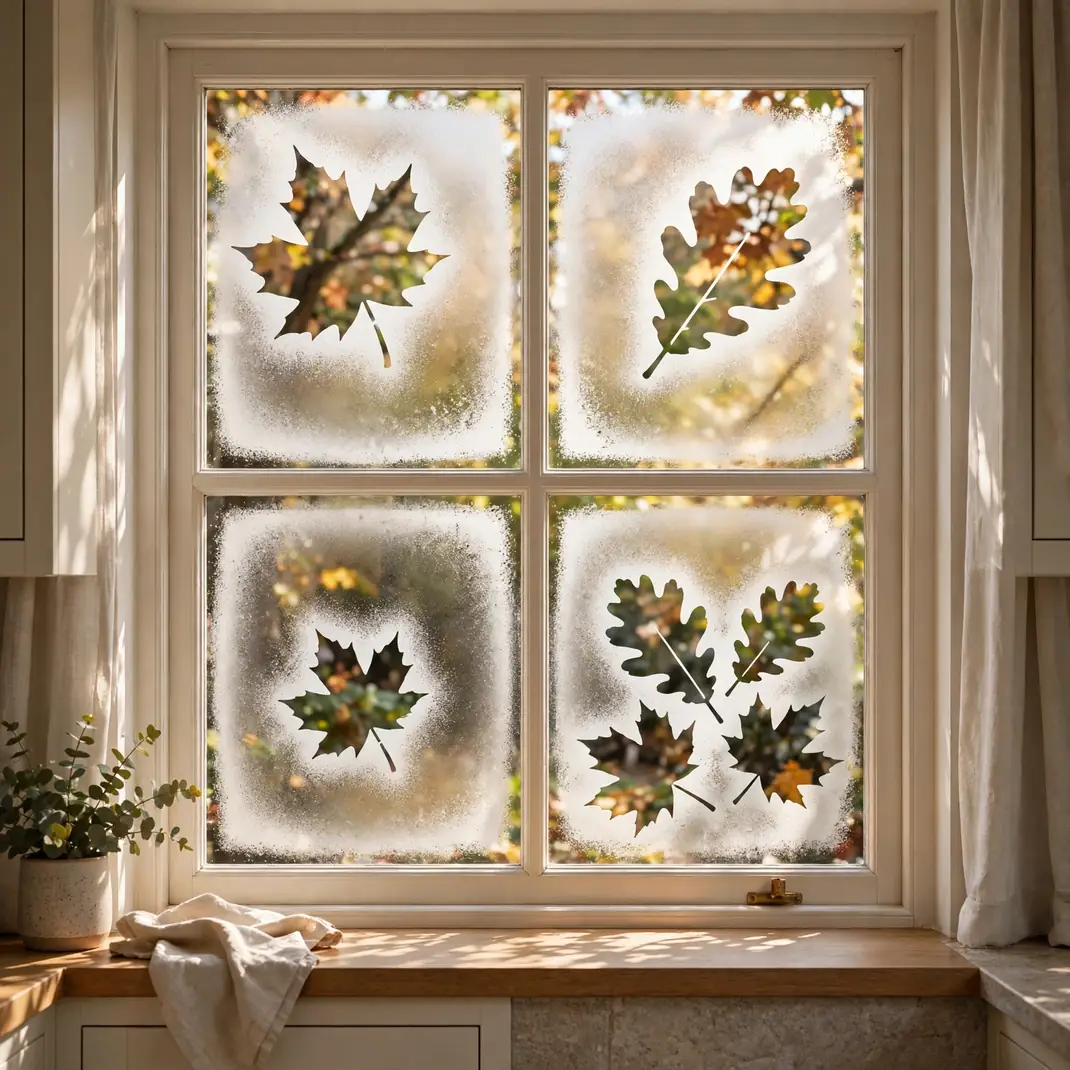
Frosted glass spray applied through leaf stencils leaves crisp autumn-leaf silhouettes floating on the pane. The effect is permanent-looking but sprays off with a razor blade, and it diffuses the light into something soft and seasonal. It is the most architectural idea on this list.
How to Style It: Tape real leaves or paper leaf cutouts to the inside of the glass, spray two light coats of frosted-glass spray around them from outside, and peel the leaves away once dry to reveal the clear silhouettes.
Why It Photographs Beautifully: The contrast between frosted and clear glass creates a dappled-light effect that looks like sunlight through trees, and the leaf shapes give it unmistakable autumn identity.
Pro Tip: Test the spray on a small corner first; two thin coats give a soft frost while one heavy coat can look cloudy and flat.
Budget-Smart Swap: Skip the spray and press white tissue-paper leaves directly onto the glass with a water mister; they cling all month and peel off cleanly.
22. Cluster Lanterns with LED Candles at Varying Heights
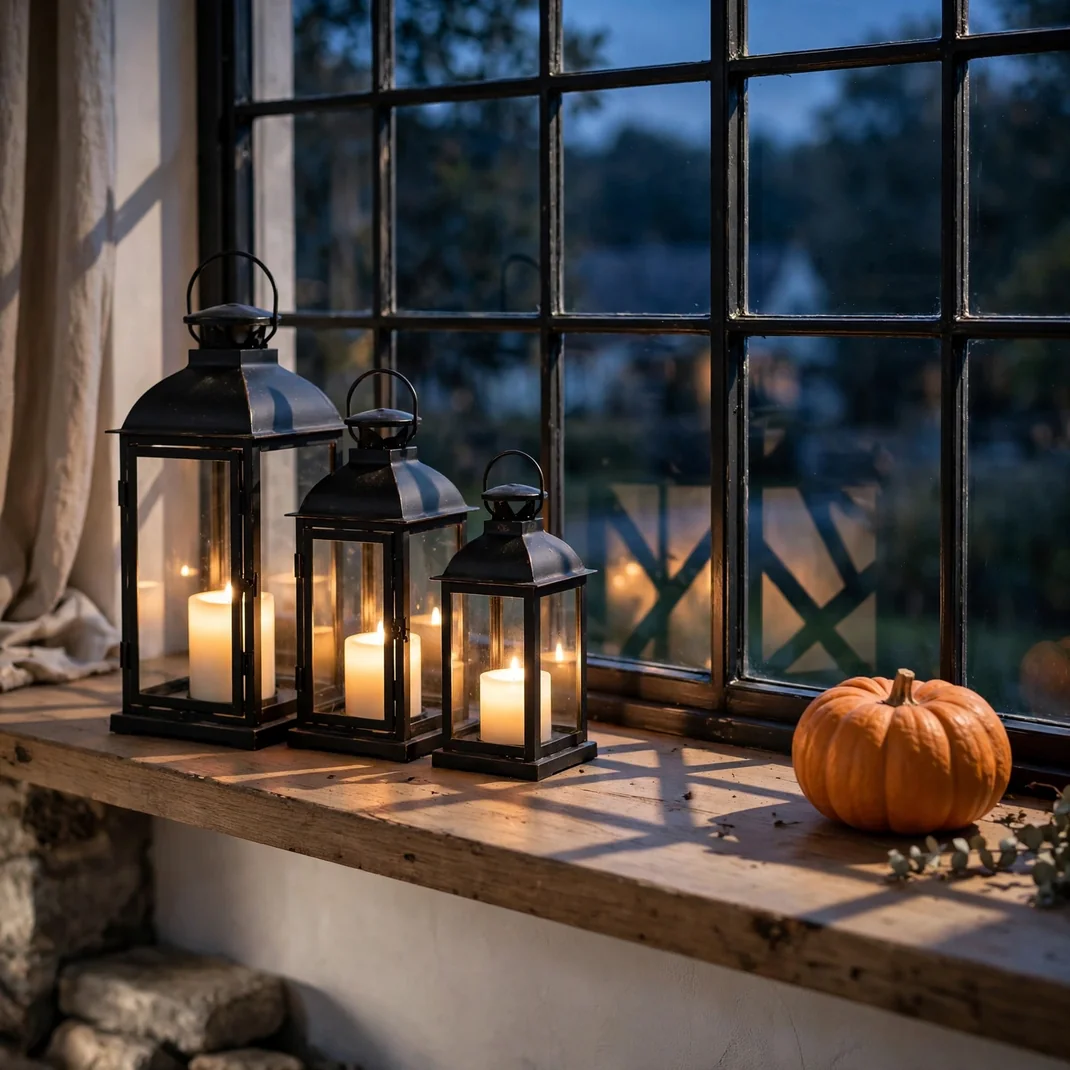
A cluster of black metal lanterns in three sizes, each holding a warm LED candle, gives the window a hearth-like presence. The lantern frames create beautiful geometric shadows, and the enclosed flames mean the display is safe even with curtains nearby. It reads as cozy rather than spooky, which suits everyday October living.
How to Style It: Group the tallest lantern in back and the smallest in front, slightly overlapping, on one side of the sill. Balance the other side with a single pumpkin so the composition stays asymmetrical and natural.
Why It Photographs Beautifully: The lantern glass and metal frames create layered reflections and repeating geometric patterns that give window photos real structure.
Pro Tip: Choose LED candles with a warm 2200K color temperature; cooler LEDs make lantern light look clinical instead of cozy.
Budget-Smart Swap: Paint thrifted glass hurricanes with black metal-look spray paint on the frames only; the glass stays clear and the effect is identical.
23. Hang Eucalyptus and Dried Wheat from the Curtain Rod
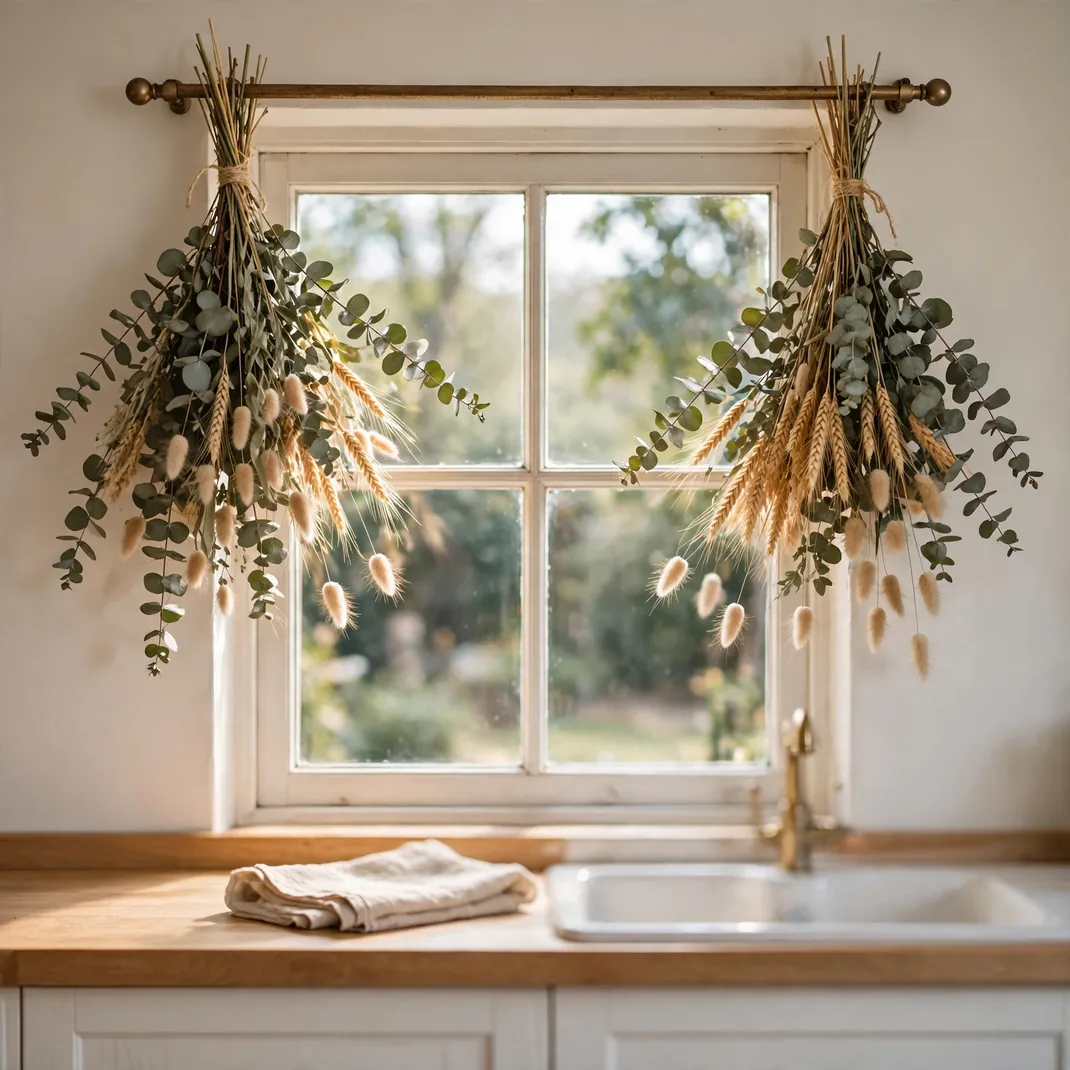
A loose bunch of eucalyptus, dried wheat, and bunny tails hung upside down from the curtain rod dries beautifully in place and scents the air faintly. The silvery greens and golds are pure autumn without a pumpkin in sight. It is the quietest idea here, and often the most admired.
How to Style It: Bind the stems with twine into two bunches of different lengths and hang them from the rod ends, letting them drape inward. Tuck a few dried orange slices into the binding for a hidden pop of color.
Why It Photographs Beautifully: The hanging bunches frame the window like living curtains, and their fine textures create delicate detail against the bright glass.
Pro Tip: Hang the bunches where they catch a little steam from the sink; the moisture keeps eucalyptus supple and fragrant longer.
Budget-Smart Swap: Forage the wheat and grasses from field edges and buy only the eucalyptus; the foraged stems give the bunch its wild character.
24. Carve One Statement Pumpkin with a Kitchen Motif
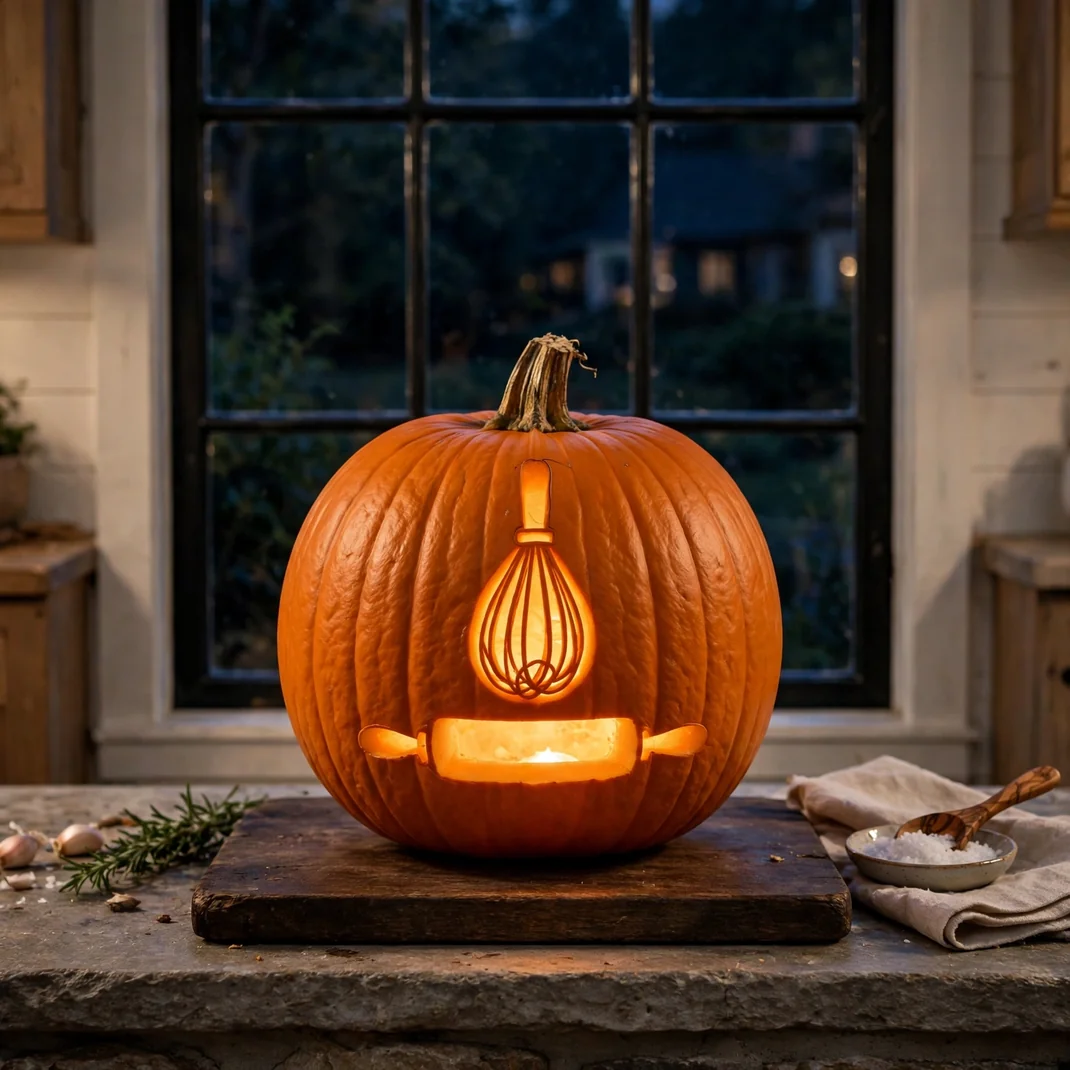
Instead of a row of jack-o’-lanterns, carve a single large pumpkin with a kitchen motif: a whisk, a rolling pin, or a steaming mug. Centered on the sill and lit from within, it becomes a signature piece that belongs to this room and no other. Guests notice the personal touch immediately.
How to Style It: Sketch the motif on the pumpkin with a dry-erase marker, carve with a fine serrated tool, and light it with a cluster of three LED tealights for even glow. Set it on a dark wood board to ground the composition.
Why It Photographs Beautifully: A single bold carving photographs far more crisply than a busy face, and the unexpected kitchen motif gives the image a story that generic jack-o’-lanterns lack.
Pro Tip: Rub the carved edges with a little petroleum jelly; it keeps the cuts from browning and extends the pumpkin’s display life by days.
Budget-Smart Swap: Carve a craft pumpkin once and reuse it for years; the carving stays sharp and you skip the annual pumpkin hunt.
Make the Window Glow, Then Let the Kitchen Breathe
The loveliest Halloween windows share one discipline: the display earns its place without stealing the kitchen’s function. Keep the sink clear, the curtains operable, and the sill wipeable, and the seasonal styling will feel like a gift rather than an obstacle.
Pick the two or three ideas that suit your light, your window size, and your tolerance for upkeep, and let the rest inspire next year. A window that glows a little every evening will do more for your October than a dozen decorations ever could