Black and white can carry a Halloween bedroom without leaning on novelty decorations. The strongest rooms use the palette to control shape, scale, light, and texture: a glossy ceiling changes the room differently from a wool rug, translucent screen, or sharply piped headboard. These 23 schemes move from graphic and contemporary to weathered and quietly eerie, with practical proportions, renter-friendly alternatives, and enough visual restraint to keep every idea stylish well beyond October.
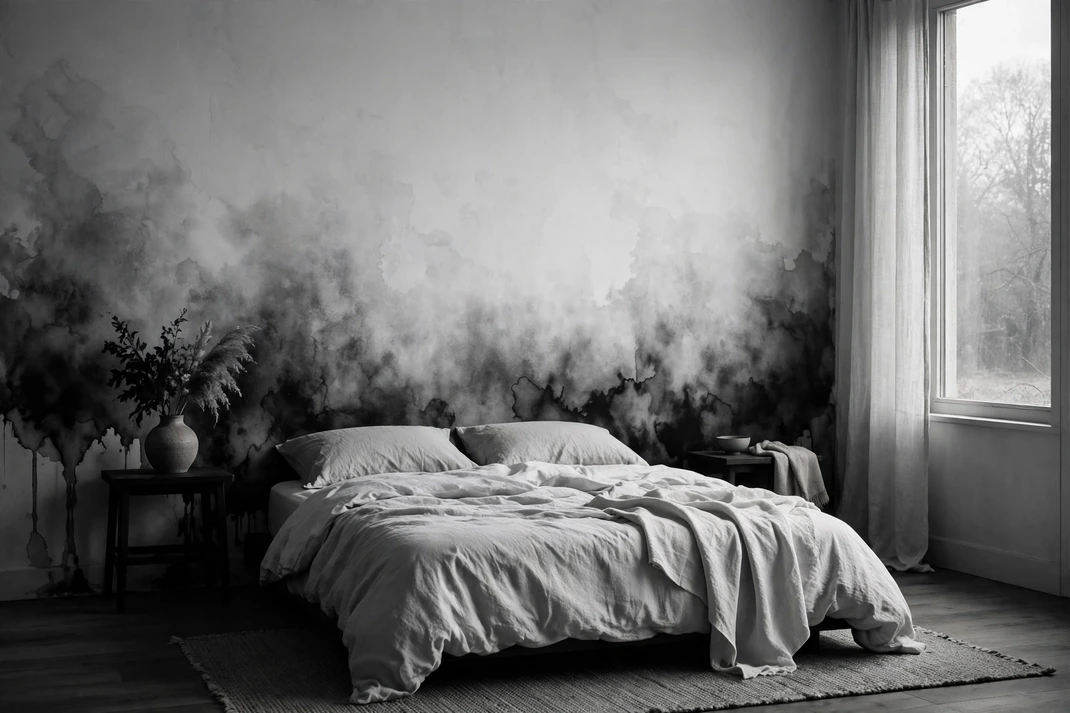
1. Fade an Ink-Wash Ombre Wall
A hand-painted wall that shifts from soft bone at the ceiling to pooled black near the floor gives the bedroom the mood of ink spreading through water. The blurred transition feels atmospheric rather than geometric, allowing simple furniture to appear almost silhouetted. It is a striking Halloween backdrop for anyone who prefers artful tension to literal motifs.
The Setup:Paint the wall warm white first, then work upward from the base with diluted charcoal-black paint and a wide masonry brush while both tones are still workable. Keep the darkest band below mattress height and let the middle third become smoky gray, so the bed remains legible. Renters can recreate the effect on three joined canvas drops mounted behind the headboard.Why It Photographs Well:The tonal fade creates depth without pattern, and side light reveals every soft brush mark. White bedding appears crisp against the darker lower wall while the pale upper section prevents the image from feeling underexposed. A slightly off-center composition makes the irregular wash look intentional rather than like a conventional accent wall.Pro Tip:Mix enough of each dilution before starting; stopping midway can leave a hard tide line that is difficult to disguise. Test the transition on lining paper and step back frequently, aiming for broad cloudy zones instead of fussy little strokes.
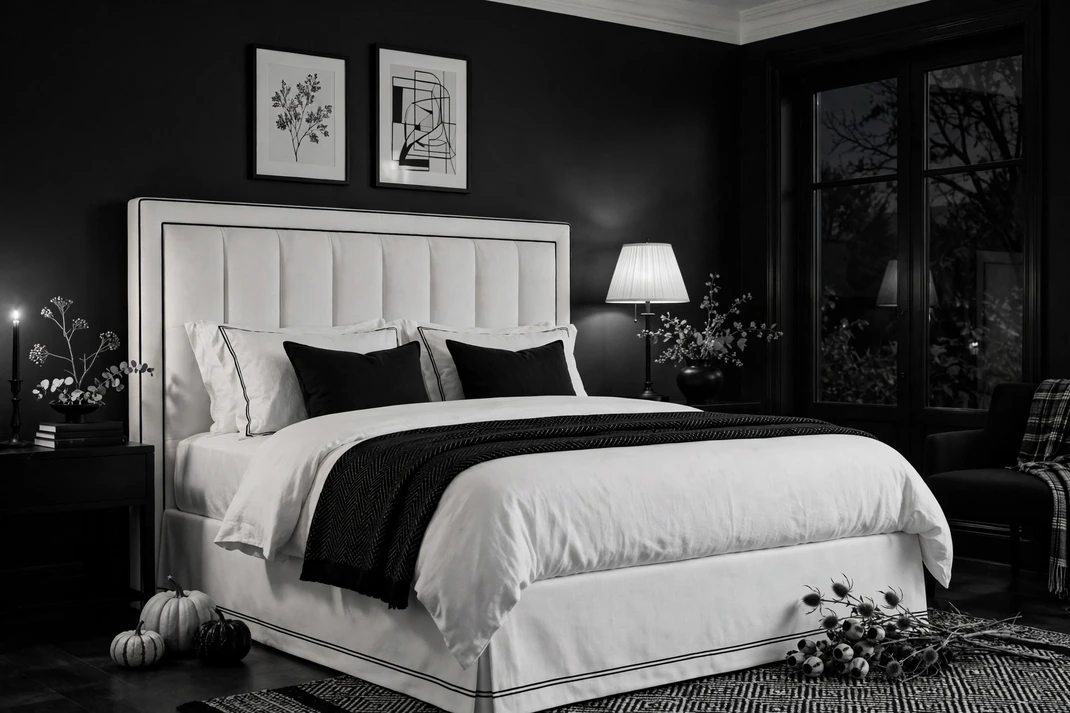
2. Tailor a White Bed with Black Tuxedo Piping
A white upholstered bed outlined in precise black piping has the polished formality of evening wear. The contrast traces every curve and corner, making a restrained bedroom feel graphic without adding busy pattern. For Halloween, the look reads sharp, nocturnal, and grown-up rather than themed.
The Setup:Choose an ivory linen headboard with a single black welt around its edge, then echo that line on one white duvet cover or tailored bed skirt—not on every pillow. Add matte-black bedside tables with simple silhouettes and leave at least 6 inches of pale wall visible around the headboard. On a budget, pin removable black upholstery braid to an existing white headboard, keeping the corners taut and symmetrical.Why It Photographs Well:The piping defines the bed against a pale wall and prevents white layers from disappearing into one bright mass. Fine black lines guide the eye around the composition while the broad unpatterned surfaces keep the frame calm. Photograph straight on and level with the mattress to preserve the tailored geometry.Pro Tip:Use soft ivory rather than optical white if the room has warm bulbs; the gentler tone keeps black from looking severe. Limit visible piping to two planes so the room suggests a tuxedo instead of resembling a diagram.
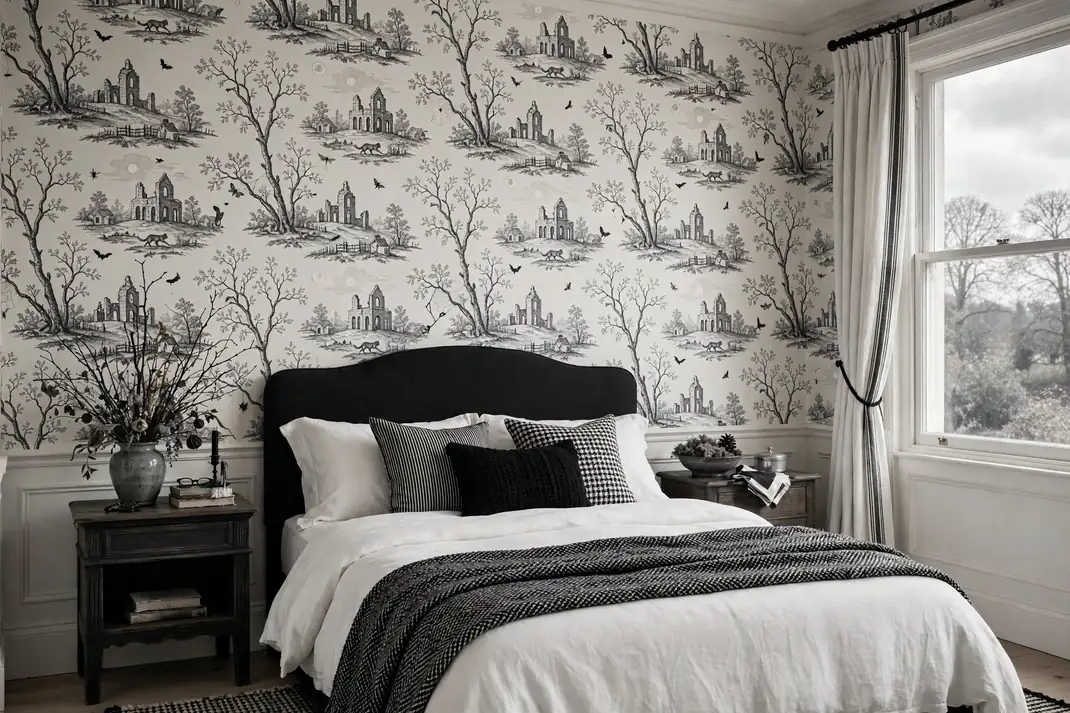
3. Paper the Room in Nocturne Toile
Black-and-white toile becomes deliciously unsettling when the pastoral scene hides bare branches, distant ruins, or tiny moonlit creatures. From across the room it reads as elegant traditional wallpaper; only closer inspection reveals the Halloween story. That slow visual discovery gives the scheme more personality than a wall covered in obvious seasonal icons.
The Setup:Use the toile on the headboard wall and choose either black imagery on an ivory ground for brightness or ivory imagery on black for a cocooning room. Pair it with solid black linen, chalk-white cotton, and one aged-oak piece so the pattern remains the only narrative element. Peel-and-stick panels are the most practical rental option; align the repeat at eye level before smoothing the upper and lower sections.Why It Photographs Well:The small scenic repeat rewards both wide room shots and detailed close-ups, giving an image set natural variety. Plain bedding creates a quiet foreground and keeps the delicate linework readable. Soft window light from one side brings out the paper texture without producing glare along the seams.Pro Tip:Order a full-repeat sample, not a tiny swatch, because the spacing between scenes determines whether the wall feels refined or crowded. Keep lampshades and curtains completely plain; a second illustrated fabric will compete with the hidden details.
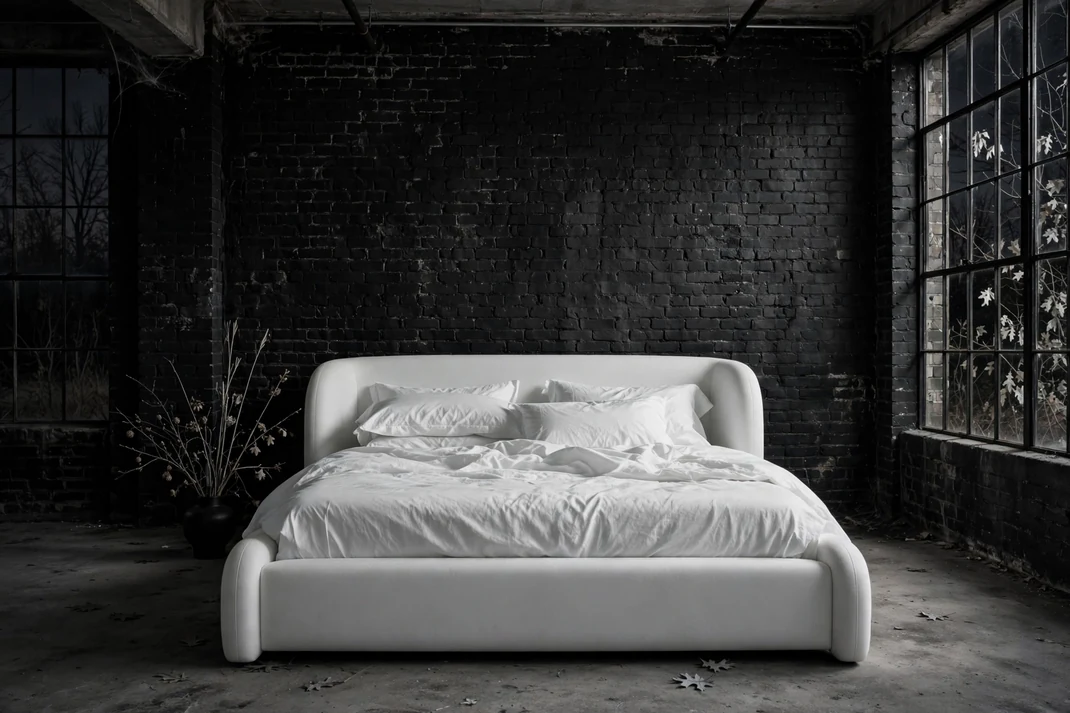
4. Set a Chalk-White Bed Against Sooty Brick
A wall of sooty black brick behind a chalk-white bed creates a raw, abandoned-warehouse mood with surprisingly little decoration. Rough masonry absorbs light while crisp cotton and rounded upholstery soften the industrial edge. The scheme feels convincingly haunted at night yet clean and architectural during the day.
The Setup:Paint existing brick with breathable mineral masonry paint in soft black, or install lightweight realistic brick panels on a removable backing. Center a low chalk-white upholstered bed against the wall and add cotton bedding in three nearby whites—cream, bone, and oyster—to avoid a flat block. Use blackened wood nightstands and a pale concrete floor lamp to connect the two sides of the palette.Why It Photographs Well:Mortar joints create fine shadow lines behind the broad white bed, producing depth even in a straight-on image. Tonal whites retain detail instead of blowing out under daylight, while the matte wall prevents distracting reflections. A low camera angle will capture the brick texture without making the headboard feel undersized.Pro Tip:Choose a black with a warm charcoal undertone; blue-black masonry can make creamy bedding appear yellow. Vacuum and seal genuine brick before styling so loose dust never transfers to the headboard or pillows.
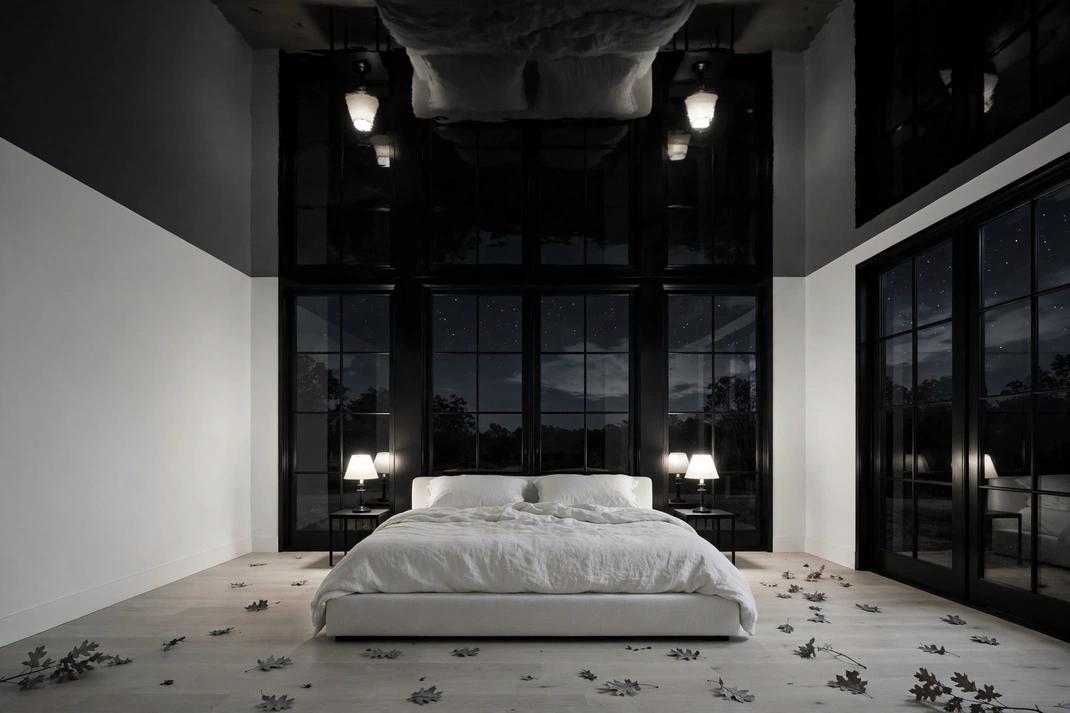
5. Lacquer the Ceiling Black Above White Walls
A glossy black ceiling hovering over white walls creates the illusion of a still night sky without stars, moons, or other familiar Halloween symbols. The reflective surface catches dim lamps and doubles their glow, while the pale walls keep the room open. It is dramatic overhead, but the floor-level palette can remain serene and minimal.
The Setup:Use a high-gloss or lacquer-look black finish only on a smooth, carefully prepared ceiling, then stop it at a simple white cornice or a razor-clean paint line. Dress the room in warm-white walls, an ivory rug, and a low black bed frame so the upper surface remains the feature. Install dimmable shaded sconces rather than an exposed overhead bulb, which would create a harsh reflected hotspot.Why It Photographs Well:The ceiling reflects window shapes and pools of lamplight, giving the upper half of the frame unexpected depth. White vertical surfaces bounce enough light back into the room to preserve detail. Include a sliver of ceiling in a wide corner view rather than aiming the camera straight upward; the contrast will feel more architectural.Pro Tip:Gloss reveals every patch and roller mark, so skim-coat imperfections and use a professional sprayer when possible. In a low room, switch to satin black for a gentler reflection while keeping the same enveloping effect.
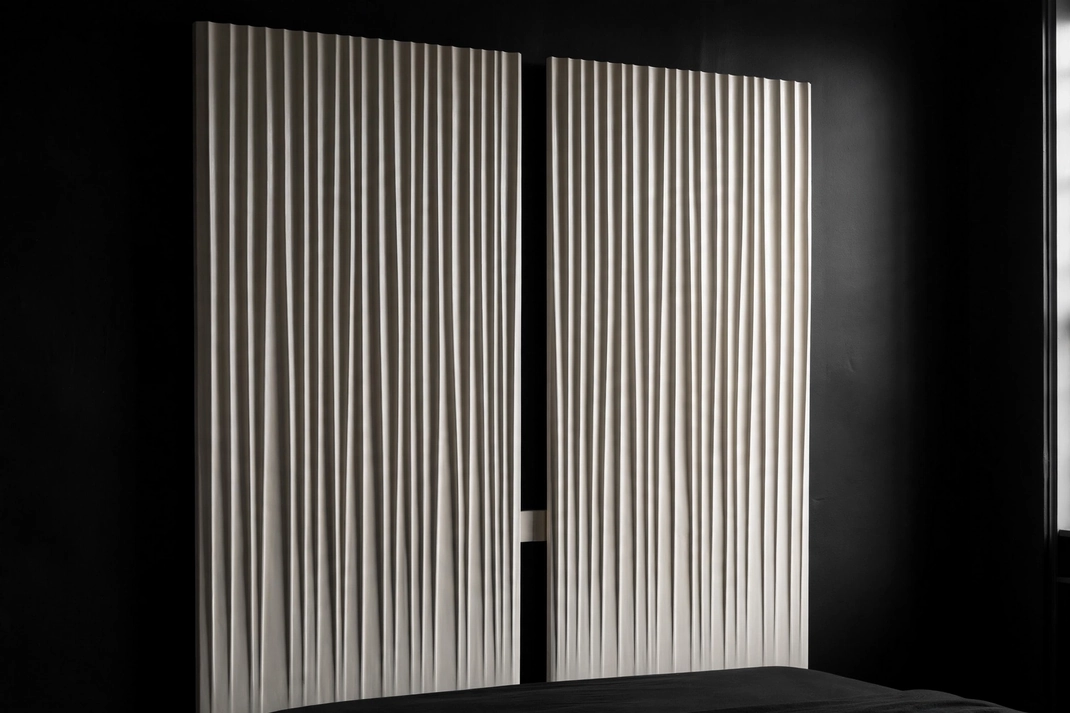
6. Float an Ivory Fluted Headboard on Ebony
A tall ivory headboard carved with shallow vertical flutes looks almost skeletal against an ebony wall. The relief is subtle in daylight and more dramatic after sunset, when side lighting turns every groove into a narrow shadow. Its sculptural quality gives a modern bedroom a quiet Halloween edge without adding a single prop.
The Setup:Choose a fluted plaster, wood, or upholstered headboard 8 to 14 inches wider than the mattress and mount it 2 inches off the wall on concealed cleats. Paint the backing wall matte ebony and keep the remaining surfaces pale gray or ivory. Add two narrow black swing-arm lights outside the headboard edges, aiming their beams inward so they graze rather than flatten the relief.Why It Photographs Well:Repeated flutes create a strong vertical rhythm, while the dark reveal around the headboard makes the pale form appear to float. Grazing light produces controlled shadows that remain visible in both detailed and full-room images. A centered composition emphasizes the symmetry and makes the ceiling seem taller.Pro Tip:Select broad, shallow flutes rather than narrow reeding; wider channels collect less dust and look calmer at bedroom scale. Leave the top edge unadorned so its silhouette stays clean against the black wall.
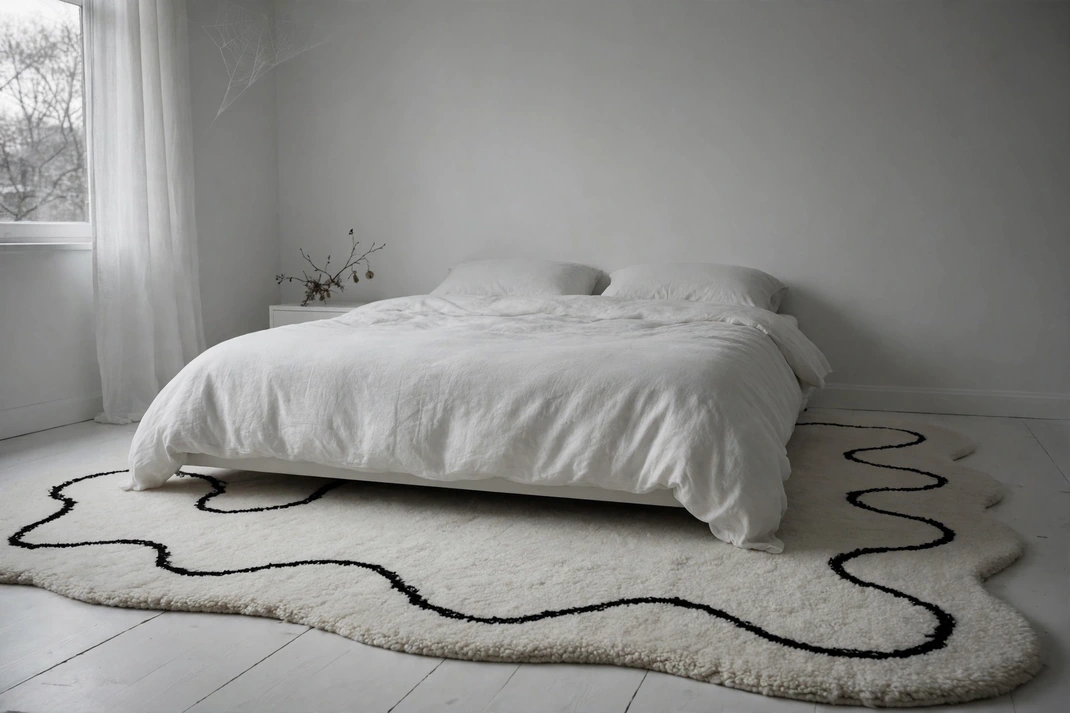
7. Ground the Bed with a Serpentine-Border Rug
An ivory rug edged by one thick, wandering black line gives the floor the energy of a hand-drawn path. Unlike a checkerboard or sharp stripe, the irregular border feels loose and slightly uncanny, especially when it disappears beneath the bed and reemerges on the other side. The rest of the room can stay almost entirely white.
The Setup:Choose a low-pile wool rug large enough to extend at least 24 inches beyond both bed sides and 30 inches past the foot. Look for a single black serpentine border on an ivory field, or add a washable textile band to a plain bound rug. Pair it with white oak furniture, black ceramic lamps, and solid bedding so the floor line remains the only large-scale drawing.Why It Photographs Well:The black curve pulls the eye through the foreground and makes an overhead or doorway view feel composed. Its asymmetry offsets the rigid rectangle of the mattress, while the pale field reflects natural light upward. Include at least two visible turns of the border in the frame so the design reads as intentional movement.Pro Tip:Map the rug and bed placement with painter’s tape before ordering; a curve hidden completely under furniture loses its purpose. Choose off-white wool flecked with gray for easier upkeep and a more forgiving October mood.
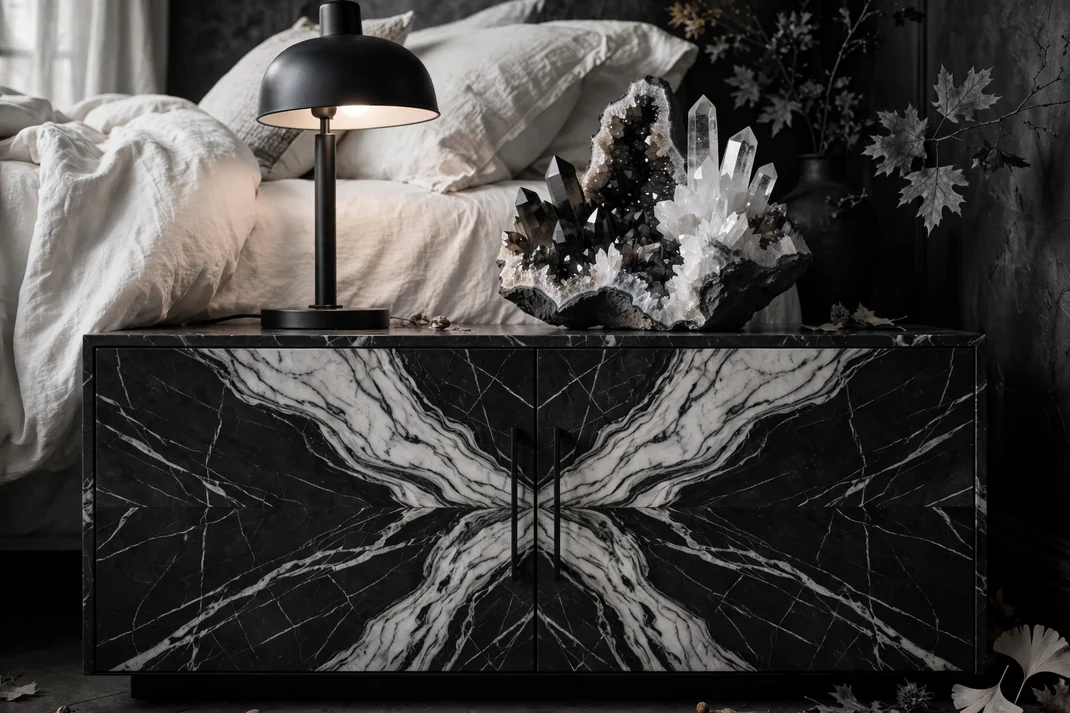
8. Build a Book-Matched Marble Nightstand Moment
Black marble with milky white veining makes a bedside surface feel like a storm frozen in stone. When two slabs are book-matched, the mirrored pattern creates an almost winged form without relying on a printed motif. Warm-white bedding and a single matte lamp let the mineral drama take center stage.
The Setup:Use a low two-door nightstand with book-matched black-and-white marble fronts, or apply high-resolution stone veneer to flat drawer panels. Keep the top nearly empty: one compact white ceramic lamp, a black tray, and a single glass of water are enough. Balance the weight of the stone with a white wall, an oatmeal floor, and a narrow black line repeated in the bed frame.Why It Photographs Well:Mirrored veining forms a natural focal point and gives close shots the depth of abstract art. The matte lamp breaks the polished surface, while the restrained styling prevents reflections from becoming cluttered. Photograph from slightly above the tabletop so the front pattern and thin top edge are both visible.Pro Tip:Approve the exact slab layout before fabrication; random veining will not create a true mirrored effect. If real stone exceeds the budget, wrap both doors from one continuous printed sheet, cutting them side by side so the pattern remains aligned.
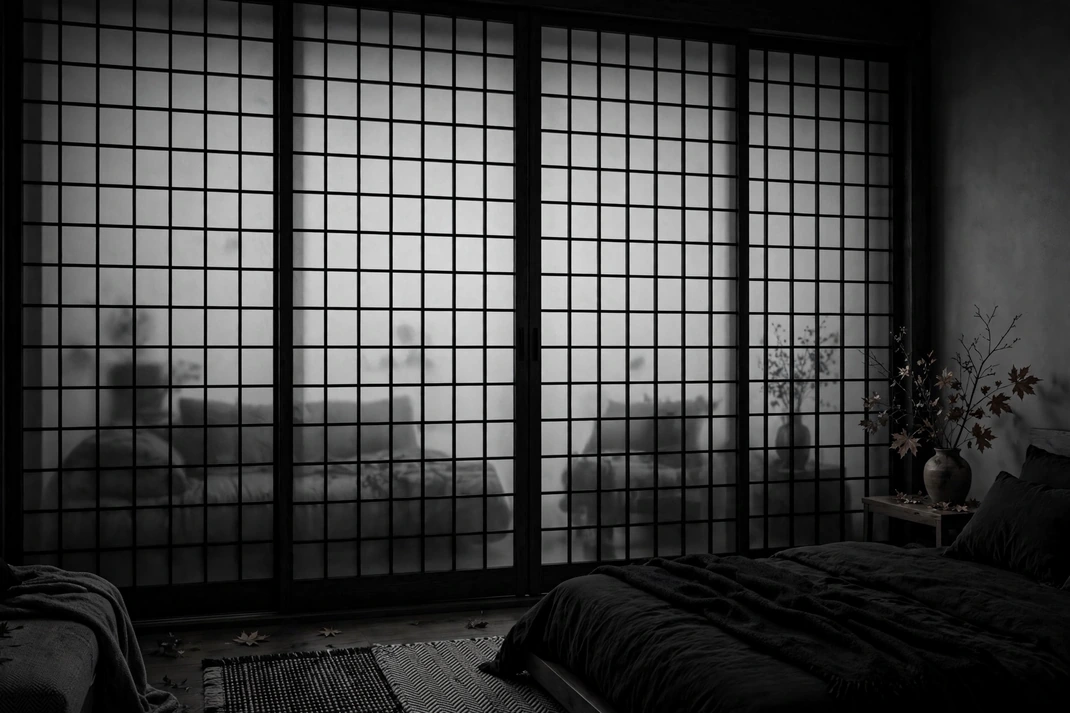
9. Filter Daylight Through Graphic Shoji Screens
Black-framed screens filled with translucent white panels turn the window wall into a luminous grid. The effect is orderly in daylight and wonderfully mysterious after dark, when the bedroom becomes a set of soft silhouettes behind paper-like surfaces. It brings Halloween tension through concealment rather than through decoration.
The Setup:Fit lightweight sliding or hinged screens just inside the window reveal, using black timber battens and durable translucent acrylic or fabric instead of fragile rice paper. Keep the grid rectangles broad and consistent, then repeat their geometry with one low black bed and square white cushions. Where built-ins are impossible, place a freestanding three-panel screen a few inches in front of plain roller shades.Why It Photographs Well:Backlighting turns each white panel into an even glow while the black frame creates crisp structure. The screen hides an ordinary exterior view, producing a clean editorial background in small rooms. Expose for the brightest panel and let the furniture fall one tone darker for a cinematic but believable image.Pro Tip:Use a washable, UV-stable insert and leave a small ventilation gap so condensation does not collect against the glass. Align the screen grid with the bed centerline; a drifting pattern is much more noticeable in monochrome.
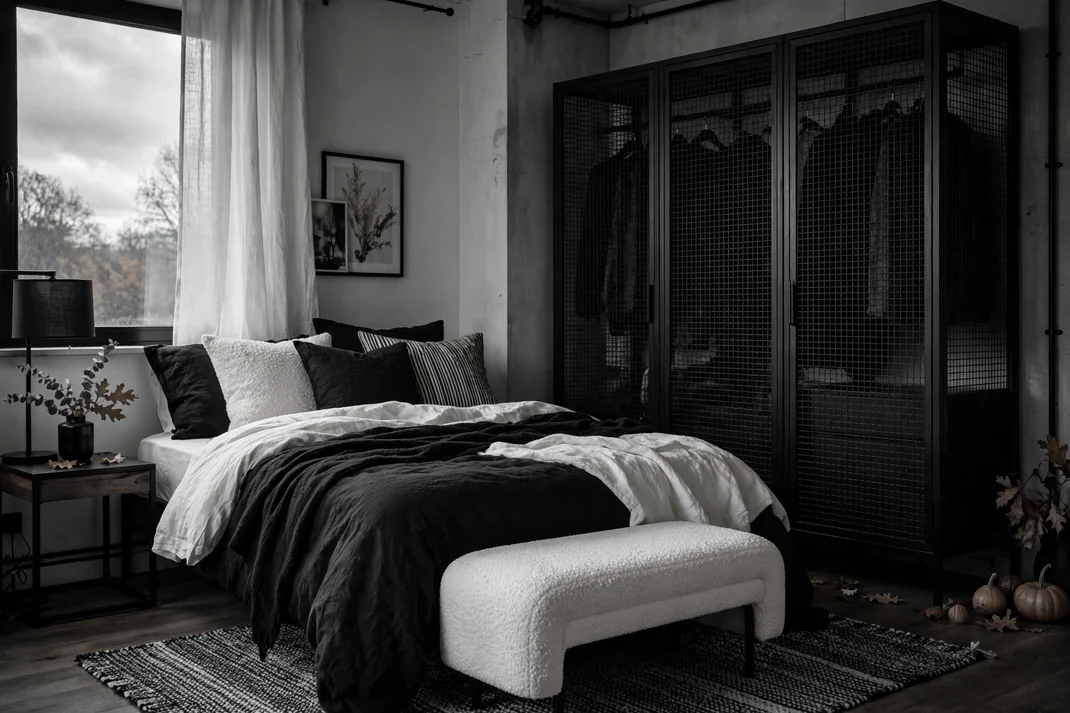
10. Mix White Bouclé with Blackened Steel Mesh
Cloudy white bouclé and blackened expanded metal create a tactile contrast that feels both soft and guarded. A rounded bench or chair supplies comfort, while a mesh-front wardrobe introduces shadow, depth, and a faintly industrial edge. The pairing is modern, practical, and moody enough for Halloween without turning the room into a set.
The Setup:Place one compact white bouclé bench at the foot of the bed and use blackened-steel mesh only on a cabinet front, radiator screen, or narrow room divider. Back the mesh with charcoal fabric if storage contents would create visual clutter. Repeat white in crisp percale bedding and black in slender furniture legs, leaving the walls pale and quiet.Why It Photographs Well:Bouclé catches hundreds of tiny highlights while the mesh produces a darker, repeating shadow pattern. Rounded upholstery against rigid metal gives the image a clear material story and keeps a limited palette from looking flat. Side light is best because it reveals both the yarn loops and the depth behind the perforations.Pro Tip:Specify powder-coated mesh with smooth, finished edges, especially near clothing and bedding. Keep the perforation scale medium; tiny mesh can shimmer in photographs, while very large openings expose too much storage.
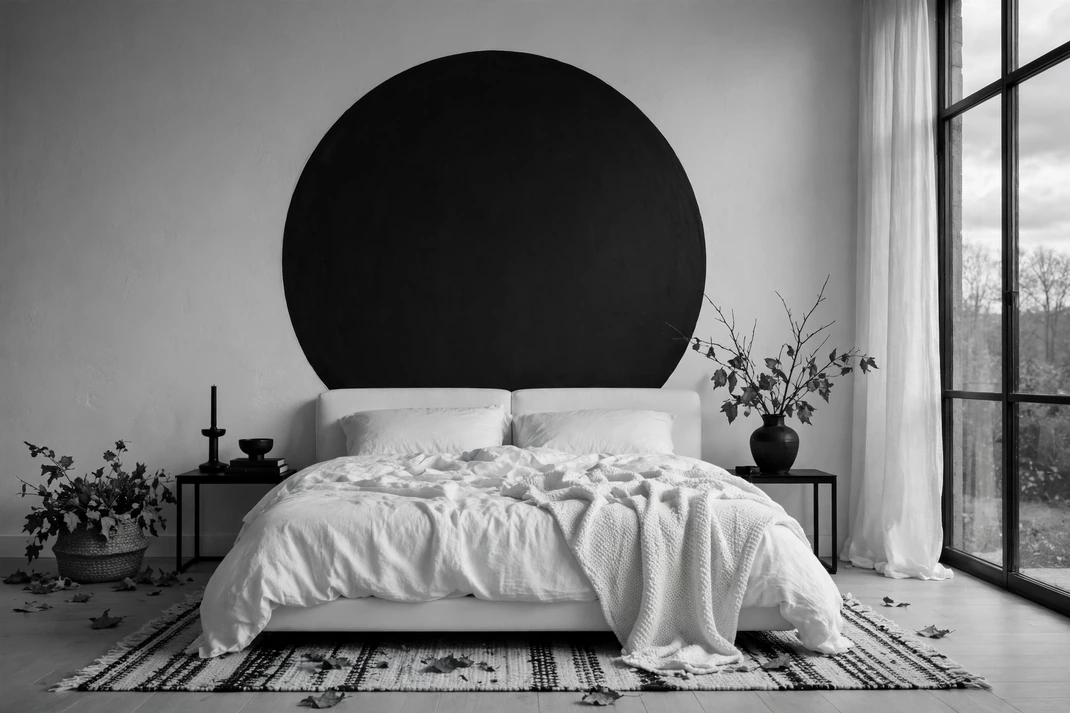
11. Paint an Oversized Black Portal Behind the Bed
A huge matte-black circle behind a low white bed reads like an abstract portal cut into the wall. The shape is bold enough to carry the entire scheme, yet its simplicity keeps the bedroom calm. It creates a Halloween sense of mystery while staying firmly within modern graphic design.
The Setup:Draw a circle 12 to 24 inches wider than the mattress and position its center slightly above the headboard midpoint, then fill it with ultra-matte soft black. Choose a low, rectilinear white headboard so the lower portion overlaps the circle cleanly. Keep lamps, bedding, and nearby art in solid white, black, or pale gray and avoid adding celestial symbols that would change the idea.Why It Photographs Well:The circle forms an instant focal point and makes the rectangular bed appear sharper by contrast. A centered image feels monumental, while an oblique angle turns the painted shape into a surprising architectural interruption. Matte paint keeps the black even and prevents window reflections from weakening the silhouette.Pro Tip:Use a pencil, string, and center pin or a projected template to keep the curve exact; hand-corrected edges are obvious at this scale. For rentals, cut the circle from removable matte vinyl in several carefully aligned panels.
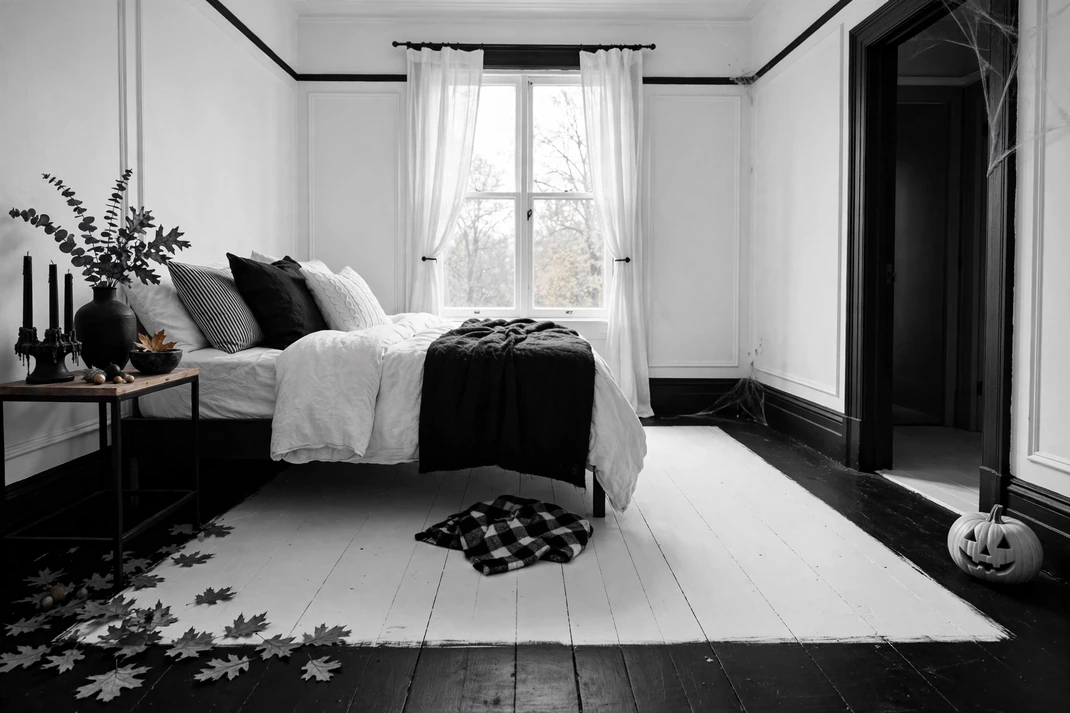
12. Outline White Floorboards with an Ebony Perimeter
White-painted floorboards edged by a broad ebony band make the room feel as if it has been drawn in ink. The dark perimeter sharpens every wall and doorway, while the pale center keeps the bedroom bright. It is an unusual way to introduce Halloween contrast at ground level rather than repeating it on the walls.
The Setup:Paint sound floorboards in a durable warm white, then add a 6- to 10-inch matte-black band around the room using low-tack floor tape for crisp edges. Stop the border neatly at fixed cabinetry and carry it through the doorway only if the adjoining floor uses the same finish. Keep furniture legs slim and dark, and use a small white bedside rug rather than covering the perimeter.Why It Photographs Well:The ebony line creates strong perspective, guiding the eye toward the bed and making the floor plan immediately readable. White boards bounce daylight upward, so black furniture retains detail instead of becoming a silhouette. A doorway shot captures the perimeter on three sides and gives the room an almost illustrated precision.Pro Tip:Apply the final white coat first, let it fully cure, and seal the tape edge with white before adding black; this prevents dark paint from bleeding underneath. Use satin floor paint rather than gloss so dust and scratches are less obvious on camera.
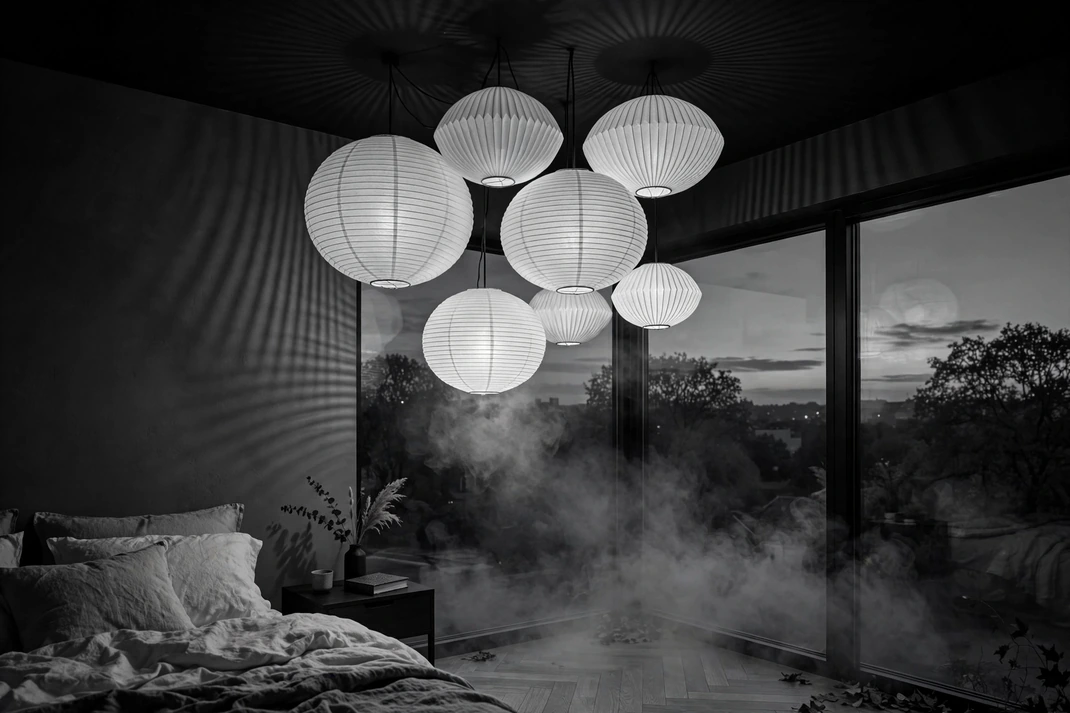
13. Float a Cloud of Pleated White Lanterns
A loose cluster of pleated white paper lanterns suspended beneath a black ceiling creates a soft, hovering cloud. Their rounded forms contrast with the dark plane above and cast delicate ribbed shadows after sunset. The installation feels ethereal and eerie without imitating candles, bats, or a chandelier.
The Setup:Hang five to seven LED-rated lanterns in three sizes from secure hooks, grouping them over a clear corner or centered bench rather than directly over pillows. Vary the drop by 6 to 12 inches and keep the lowest lantern safely above head height. Use one illuminated lantern for every two unlit forms, then ground the room with a black bedspread and white walls.Why It Photographs Well:Pleats hold fine bands of highlight and shadow, while the staggered sizes create real depth in a wide room view. The black ceiling removes visual clutter around the cords and makes each pale volume appear weightless. Photograph at blue hour so ambient daylight preserves the room while the lanterns add a gentle interior glow.Pro Tip:Use low-heat LED bulbs only and check every suspension point against the fixture weight. Keep the cords perfectly vertical and trim excess cable; tangled lines spoil the floating illusion faster than mismatched lantern sizes.
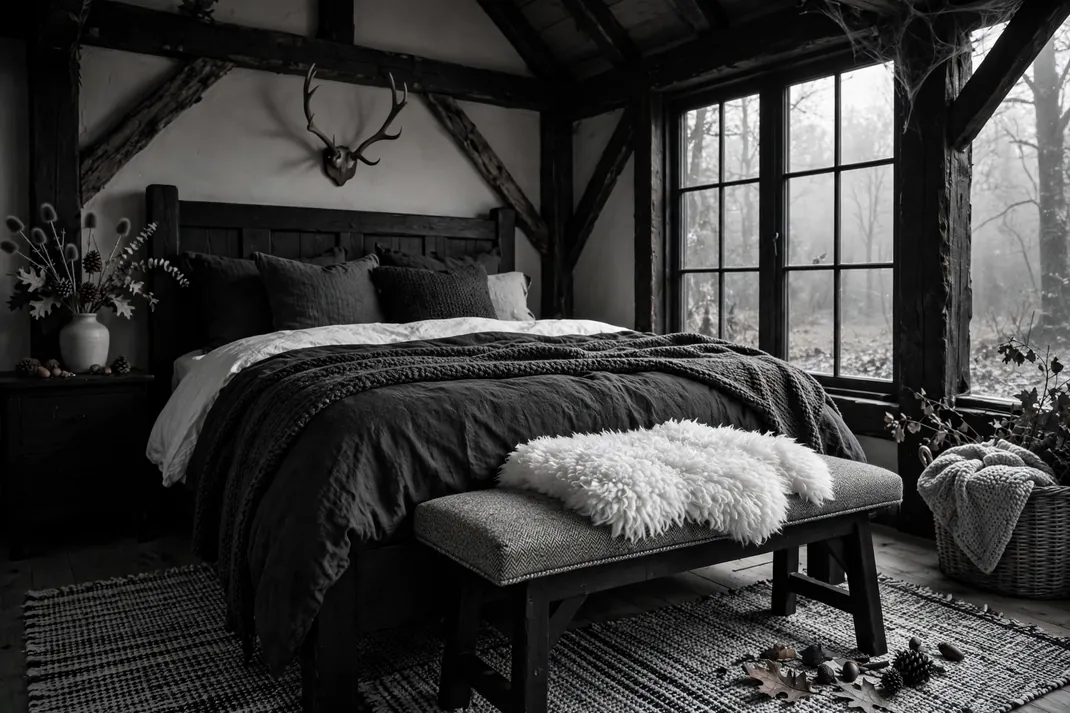
14. Layer Salt-and-Pepper Tweed with White Shearling
Salt-and-pepper tweed, white shearling, and black timber create a bedroom that feels wintry, tactile, and quietly feral. The tiny flecks in the woven fabric soften the strict palette, while shaggy white texture keeps the black elements from becoming formal. It is a cozy Halloween scheme for cabins, lofts, and contemporary rooms alike.
The Setup:Upholster a simple bench or headboard in medium-scale salt-and-pepper tweed, then add one white shearling cushion or small bedside rug. Use black-stained ash for the bed frame or nightstand and choose plain white cotton for the largest bedding layer. Keep the balance near 50 percent white, 30 percent mixed tweed, and 20 percent solid black so the room stays restful.Why It Photographs Well:Flecked tweed bridges the darkest and lightest values, helping the camera hold detail across the full monochrome range. Shearling creates a soft luminous foreground, while black timber supplies a clean structural line. Close side lighting reveals the three textures without needing extra decorative objects.Pro Tip:Choose a tweed with irregular flecks rather than a strict woven check, which can create visual noise beside shaggy wool. If genuine shearling is impractical, use a dense washable faux version with varied fiber lengths so it does not look flat.
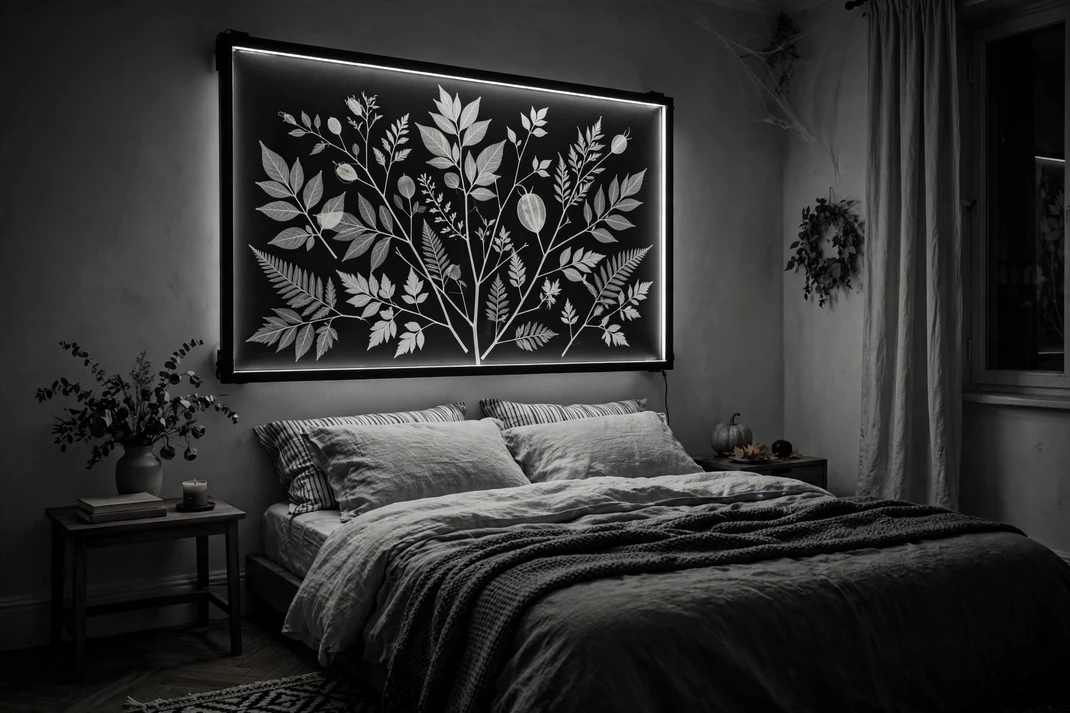
15. Mount an X-Ray Botanical Lightbox
A large illuminated panel showing pale leaves and stems against black gives the bedroom the eerie precision of an old scientific image. The translucent veins look delicate rather than gruesome, and the panel doubles as low ambient lighting. One oversized piece has more impact than a collection of small prints.
The Setup:Choose a licensed or original high-resolution botanical radiograph and have it printed on backlit film for a slim, dimmable LED frame. Mount it on the wall opposite or beside the bed, never directly above sleepers unless the hardware is professionally rated. Keep the surrounding wall matte white, add black linen at the foot of the bed, and conceal the power cable in a paintable channel.Why It Photographs Well:The panel supplies its own even contrast, so fine veins remain visible in low-light photographs. Its cool white glow separates black furniture from the wall and gives the room a convincing after-dark focal point. Reduce the panel brightness before shooting so the image retains detail instead of becoming a blank rectangle.Pro Tip:Select one specimen with generous black negative space rather than a crowded bouquet. Put the lightbox on a separate dimmer from the bedside lamps; independent control lets it function as art, night lighting, or a photographic backdrop.
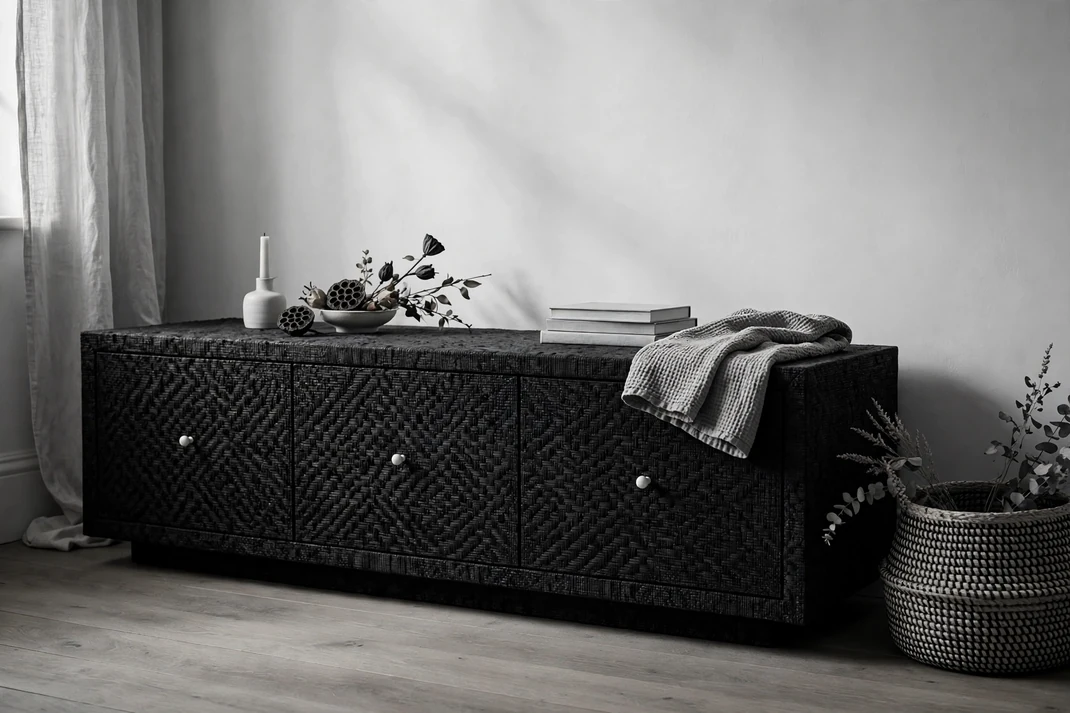
16. Wrap a Low Dresser in Black Grasscloth
A low dresser wrapped in black grasscloth adds fine linear texture and a dry, almost charred surface to a pale bedroom. White ceramic hardware punctuates the dark facade like small beads of light. The effect is refined enough for everyday use, but its tactile shadows become especially moody in October.
The Setup:Cover the drawer fronts and side panels of a clean-lined dresser with contract-grade black grasscloth, wrapping each edge neatly and keeping the grain direction consistent. Add round white porcelain knobs and leave the top in black wood or stone for durability. Place it against a chalk wall with a single oversized white lamp and no more than two low black objects.Why It Photographs Well:Grasscloth breaks the black surface into narrow highlights, preventing a large dresser from reading as a featureless block. White knobs establish rhythm, and the pale lamp gives the vignette a clear vertical anchor. Shoot from a three-quarter angle so light skims across both the front and side grain.Pro Tip:Seal exposed edges with a matching matte trim rather than saturating natural grasscloth with clear coat, which may darken unevenly. Use a removable fabric wallpaper on drawer fronts if the dresser is rented or valuable.
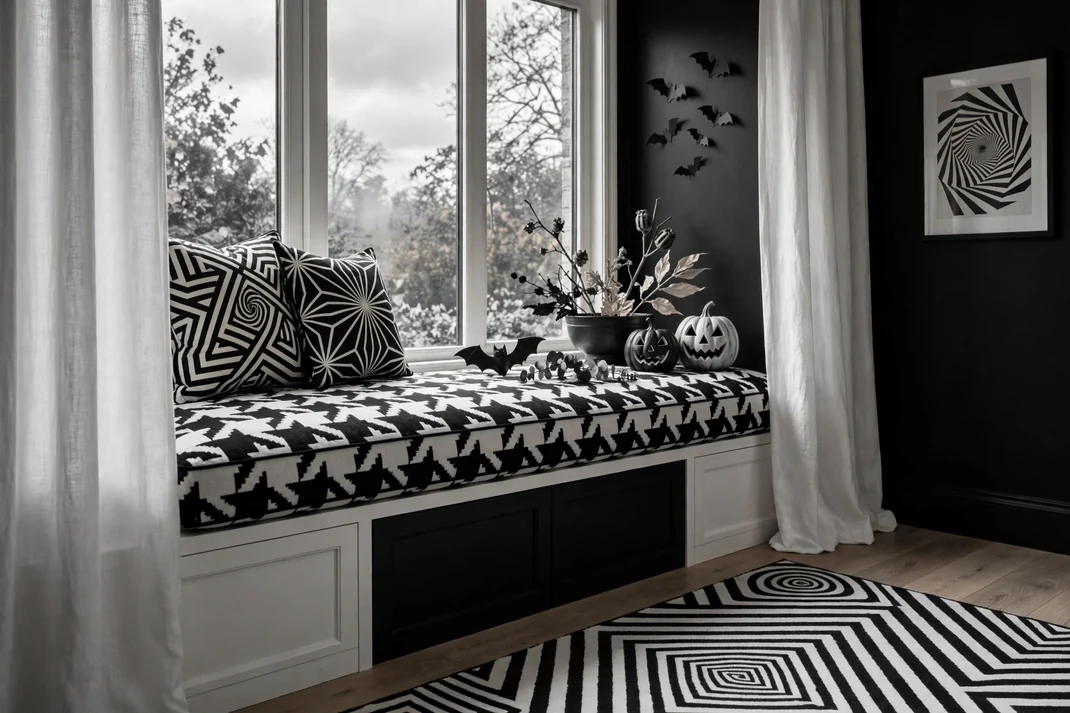
17. Upholster a Window Seat in Oversized Houndstooth
Oversized black-and-white houndstooth turns a window seat into a bold optical pause at the edge of the room. The enlarged motif feels more like abstract geometry than classic tailoring, especially beside plain black walls and white curtains. It brings playful Halloween energy without repeating stripes, checks, or illustrated prints.
The Setup:Cover one fitted bench cushion in houndstooth with a motif at least 4 inches wide, centering the repeat across the seat and front boxing. Add two solid cushions—one chalk white and one black—then hang unpatterned off-white curtains that clear the bench surface. If there is no built-in seat, use the same treatment on a storage bench placed squarely beneath the window.Why It Photographs Well:Large shapes stay crisp from across the room and give a bright window wall enough visual weight. Plain curtains diffuse backlight, keeping both halves of the pattern visible rather than washing out the white sections. Frame the bench frontally and include a slim strip of dark wall on each side for balance.Pro Tip:Ask the upholsterer to pattern-match the cushion top and boxing; misaligned teeth are especially obvious in high contrast. Choose a woven performance fabric, not a printed surface, so the motif holds up to repeated sitting and cleaning.
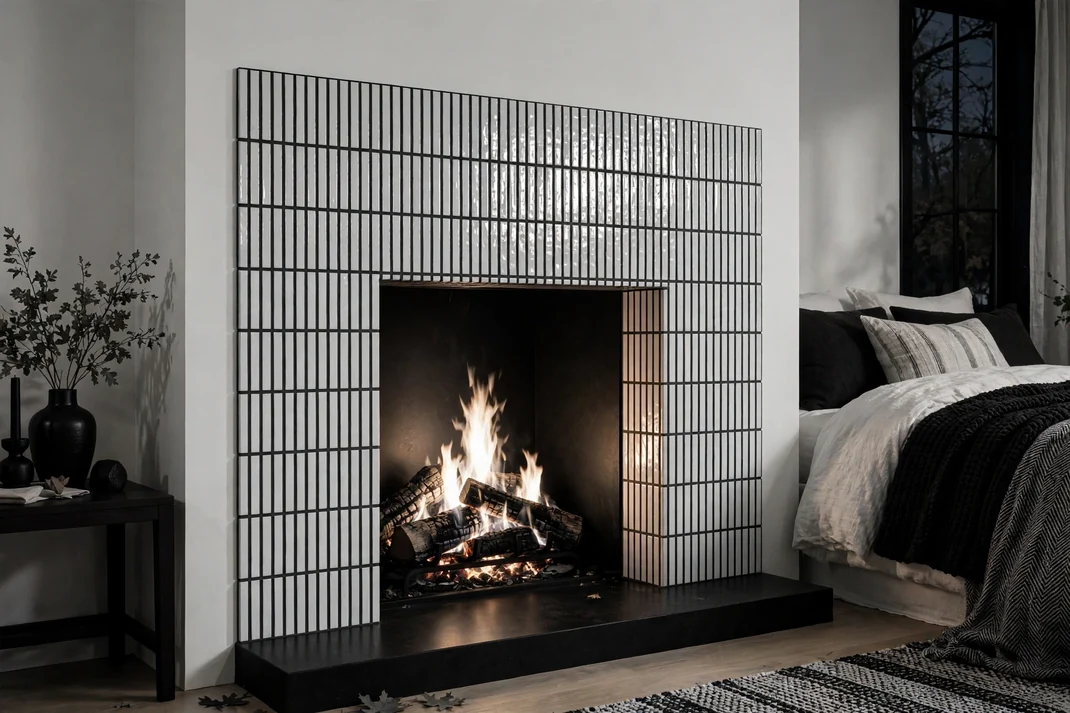
18. Tile a Fireplace in White Finger Tile and Black Grout
Glossy white finger tiles outlined in black grout give a bedroom fireplace a narrow, rhythmic pattern that flickers beautifully in firelight. The surrounding wall can remain white, while a black hearth slab anchors the vertical lines. This scheme feels crisp and contemporary, with just enough visual tension for Halloween evenings.
The Setup:Tile the approved noncombustible surround with vertical white finger mosaics and specify dark charcoal grout rather than pure black, which can appear harsh. Finish the hearth in honed black stone and keep the mantel slim, pale, and almost empty. For a nonworking fireplace, use flame-free LED logs and follow the same material proportions without implying that decorative panels are heat safe.Why It Photographs Well:Hundreds of narrow grout lines create texture while glossy tile catches tiny warm reflections. The black hearth forms a clean base and prevents the fireplace from dissolving into a white wall. Photograph slightly off-axis so the tile glaze shows dimension, but keep the vertical joints visually straight.Pro Tip:Have the installer make a grouted sample board first; grout often dries lighter than the chart and can stain porous tile edges. Use only materials and clearances approved for the specific firebox, and keep seasonal textiles well away from any working flame.
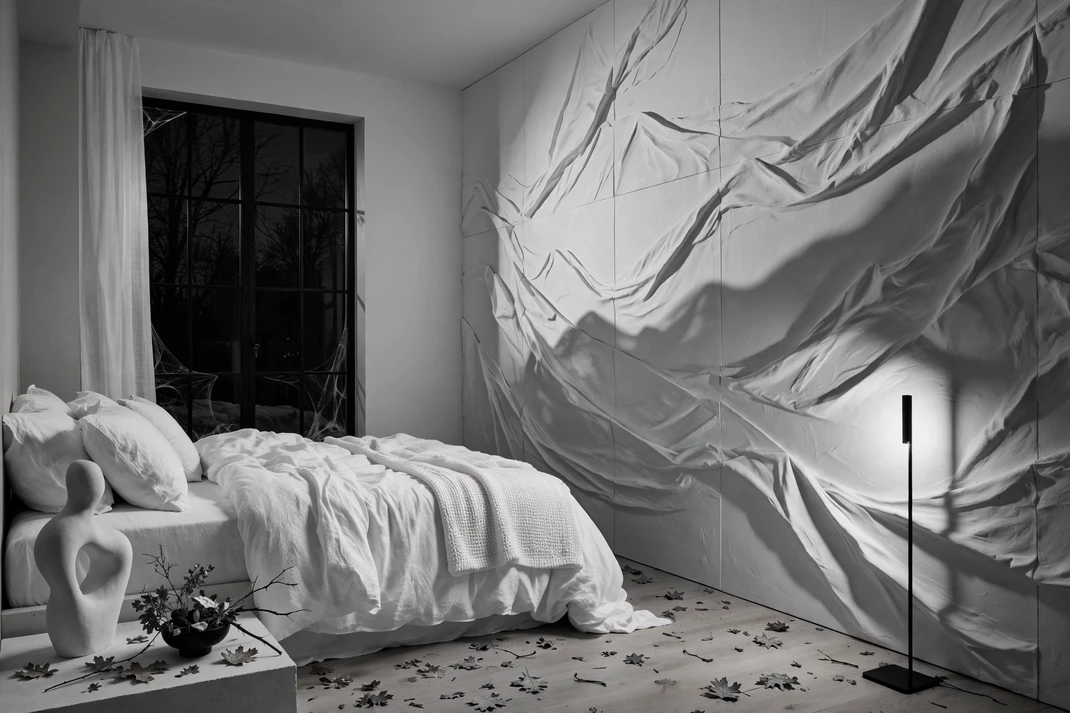
19. Cast Shadows Across a White Plaster Relief Wall
A white wall built from shallow abstract plaster reliefs becomes haunting when a narrow black floor light sends long shadows across it. In daylight the surface reads as quiet sculpture; at night the raised forms shift into a dramatic landscape. The room remains nearly all white, with darkness created by light placement rather than heavy furnishings.
The Setup:Install lightweight, securely fixed bas-relief panels on a side wall, choosing broad folds or abstract topographic shapes instead of figurative faces. Place one cool-running black LED uplight 8 to 14 inches from the wall and aim it at a shallow angle. Keep the bed in white linen with a single black bolster, and leave the floor area in front of the light unobstructed.Why It Photographs Well:Raking light turns a monochrome surface into a full range of grays, adding depth without introducing color. The long shadows change as the camera moves, so even one installation yields several distinct compositions. Expose for the highlights on the plaster and allow the deepest recesses to approach black.Pro Tip:Mock up the reliefs with cardboard and test the light after sunset before drilling; a few inches can completely alter the shadow pattern. Use a dimmer to keep the effect atmospheric rather than stage-bright.
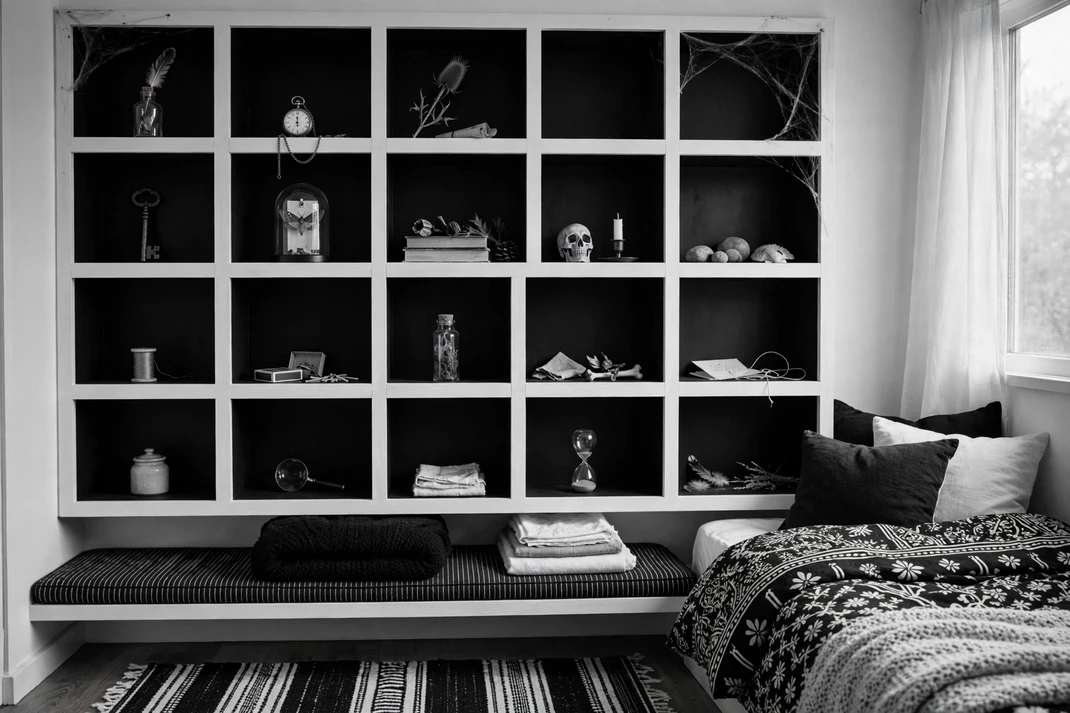
20. Carve Out White Cubby Shelves with Black Interiors
A wall of white cubbies painted pitch black inside creates a sequence of deep, shadow-box compartments. The pale outer grid stays architectural, while the dark recesses make a few everyday objects look strange and precious. It gives a compact bedroom useful storage and a subtle cabinet-of-curiosities mood without themed shelving.
The Setup:Paint the face frames and dividers warm white, then coat only the back and inner sides of each cubby in matte black. Leave at least one-third of the compartments empty and style the others with pale books, a white box, folded linen, or one black ceramic form. If using modular units, join them securely and anchor the whole run to the wall according to the manufacturer’s instructions.Why It Photographs Well:The white grid establishes order while each black interior creates real visual depth. Sparse pale objects appear almost spotlighted against the recesses, and empty cells provide negative space. A square-on composition works best because it keeps the dividers parallel and turns the shelving into a graphic backdrop.Pro Tip:Paint the dark interiors before the pale face frames and use a small foam roller for clean internal corners. Vary object scale rather than filling every cell with similarly sized accessories; repetition should come from the architecture, not from clutter.
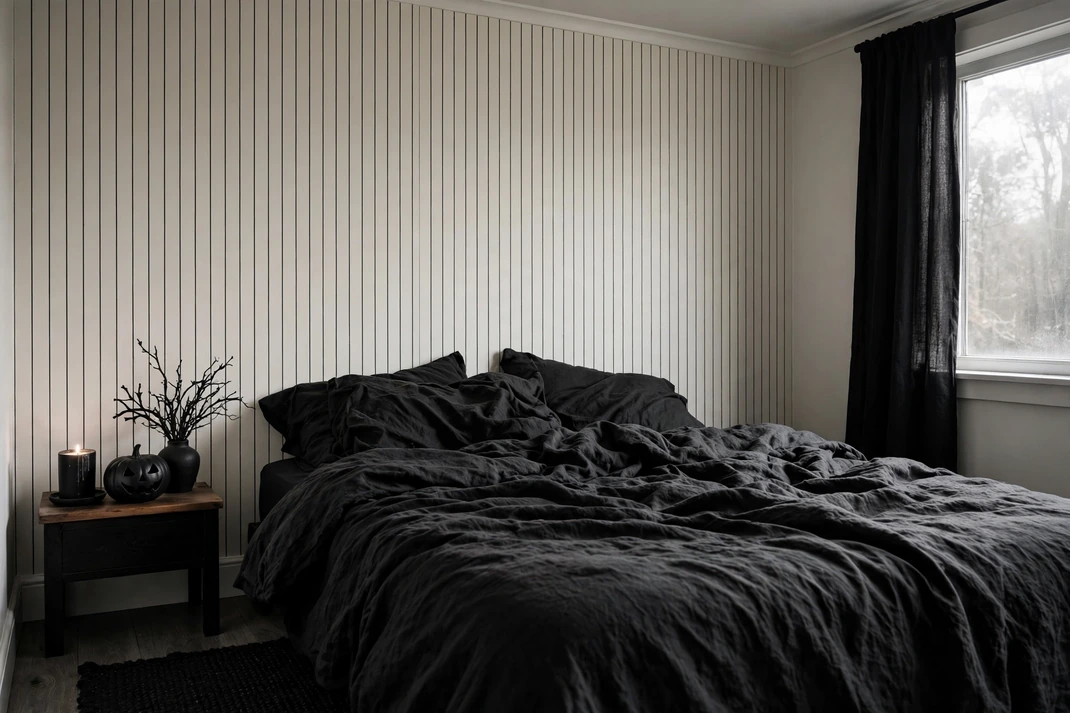
21. Use Pinstripe Wallpaper with Matte Black Linen
Fine black pinstripes on a warm-white ground create a disciplined backdrop for rumpled matte-black linen. The contrast between precise vertical lines and relaxed bedding keeps the room from feeling either too corporate or too theatrical. It is a subtle Halloween scheme that rewards close viewing and works beautifully in small bedrooms.
The Setup:Paper the headboard wall in a narrow, evenly spaced pinstripe with no secondary motif, then dress the bed in washed black linen over ivory sheets. Add one white lumbar cushion to interrupt the dark bed and choose pale wood nightstands with black metal pulls. Keep artwork off the striped wall; instead, place one simple black frame on an adjacent white surface.Why It Photographs Well:The vertical pattern gives the wall scale and makes the ceiling look higher, while soft linen folds prevent the image from feeling rigid. Narrow lines remain delicate in a wide shot and become tactile in a closer crop. Use diffused daylight and avoid aggressive sharpening, which can create a shimmering moiré effect.Pro Tip:Check the wallpaper sample through a phone camera before ordering; lines that look elegant in person may strobe on screen. Align the first drop with the bed center rather than the room corner so the pattern appears balanced behind the headboard.
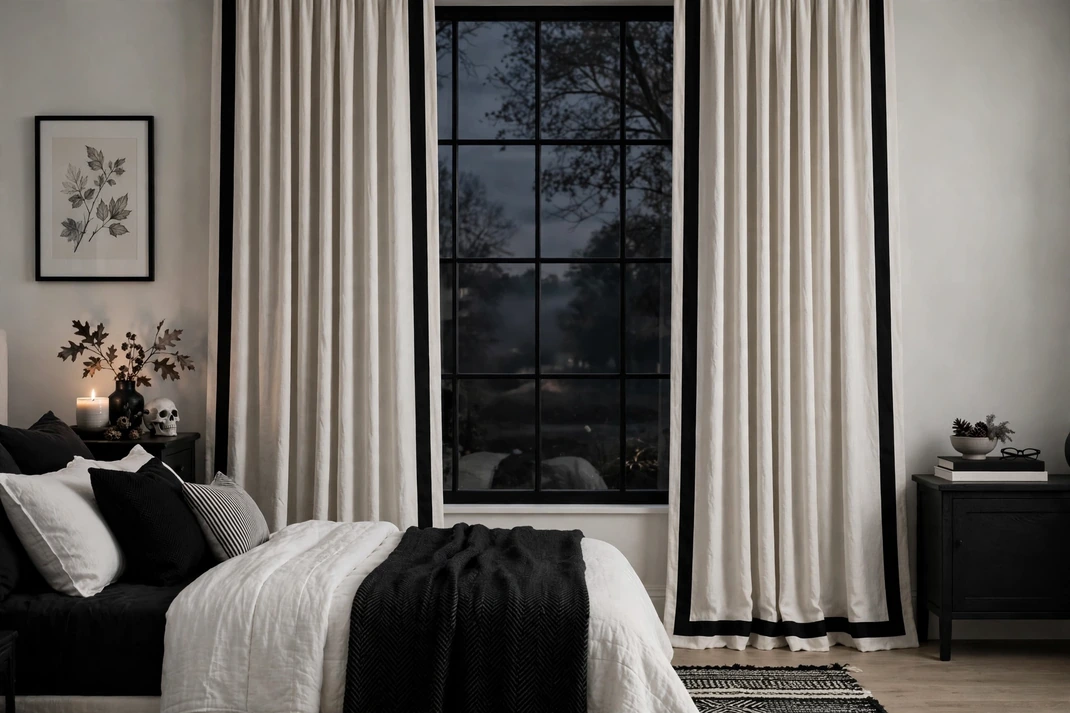
22. Draw a Black Grosgrain Border Around White Drapes
Full white drapes finished with a broad black grosgrain border make the window look like an oversized framed panel. The contrast is crisp by day and turns theatrical after sunset, when the pale fabric falls into soft gray folds. Unlike lace or heavy velvet, this treatment feels tailored, light, and easy to live with after Halloween.
The Setup:Sew 2- to 3-inch black grosgrain ribbon along the leading edges and hem of lined warm-white curtains, keeping the top heading plain. Hang the panels high and wide so each one stacks mostly outside the glass, then use a slim black rod with minimal finials. Repeat the ribbon width once on a white bedside cushion and leave the remaining textiles untrimmed.Why It Photographs Well:The border draws a clean rectangle around the brightest part of the room and gives white fabric definition against daylight. Long vertical lines add height, while the dark hem anchors folds that might otherwise appear to float. Photograph with the curtains half closed so both the frame and the soft pleating remain visible.Pro Tip:Prewash washable curtains and ribbon before sewing because different shrinkage rates can make the hem ripple. Use a matte woven ribbon rather than satin; it reads black from every angle and avoids distracting flashes near the window.
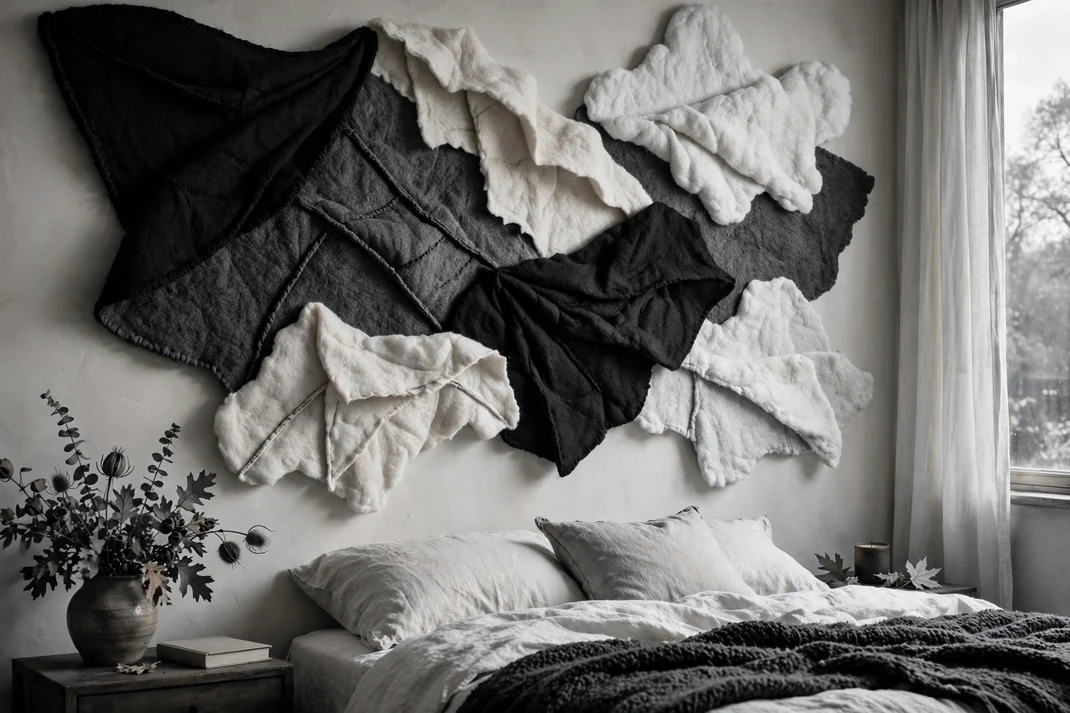
23. Build an Abstract Felt Mural in Black and Chalk
Layered panels of black, charcoal, cream, and chalk-white felt create a silent abstract mural with soft edges and deep seams. The shapes can suggest cliffs, folded wings, or shifting shadows without illustrating anything literally. Because felt absorbs both sound and light, the final bedroom feels hushed—a fitting close to a monochrome Halloween scheme.
The Setup:Cut high-density wool felt into six to nine large irregular shapes and layer them on a lightweight rigid backing, allowing selected edges to overlap by 1 to 2 inches. Size the mural to span about two-thirds of a blank side wall, keeping it clear of the bed and any heat source. Repeat charcoal in one throw and chalk white in the bedding, but leave nearby furniture natural or matte black.Why It Photographs Well:Overlapping edges cast narrow shadows, giving a colorless artwork surprising dimensionality. The felt’s matte surface holds rich blacks without glare and lets pale areas retain a soft, woolly texture. A three-quarter view with window light crossing the mural will reveal the layers better than a flat frontal shot.Pro Tip:Arrange the pieces on the floor and photograph several versions before fixing them; the strongest composition usually has one dominant dark mass, not equal patches. Mount the finished backing with hardware rated for its full weight rather than attaching loose felt directly above furniture.
A successful black-and-white Halloween bedroom depends less on equal color distribution than on purposeful contrast. Let one surface or material lead, use the opposite value to define its edges, and vary matte, glossy, rough, translucent, and soft finishes so the room never feels flat. The result can be dramatic in October while remaining polished enough to keep long after the season ends.