19 Kid Friendly Halloween Decor Without the Scare Factor
Here is what I have learned after years of styling Halloween for families: the houses kids love most are the ones they helped build. A plastic skeleton from the store might startle a four-year-old, but a lopsided ghost they painted themselves? That is a treasure. The nineteen ideas below all follow one rule, let little hands touch everything. No sharp carving tools, no genuinely frightening imagery, no decor that works better when the kids leave the room. Just a home that feels like October and hugs back.
1. Paint Smiling Pumpkin Faces
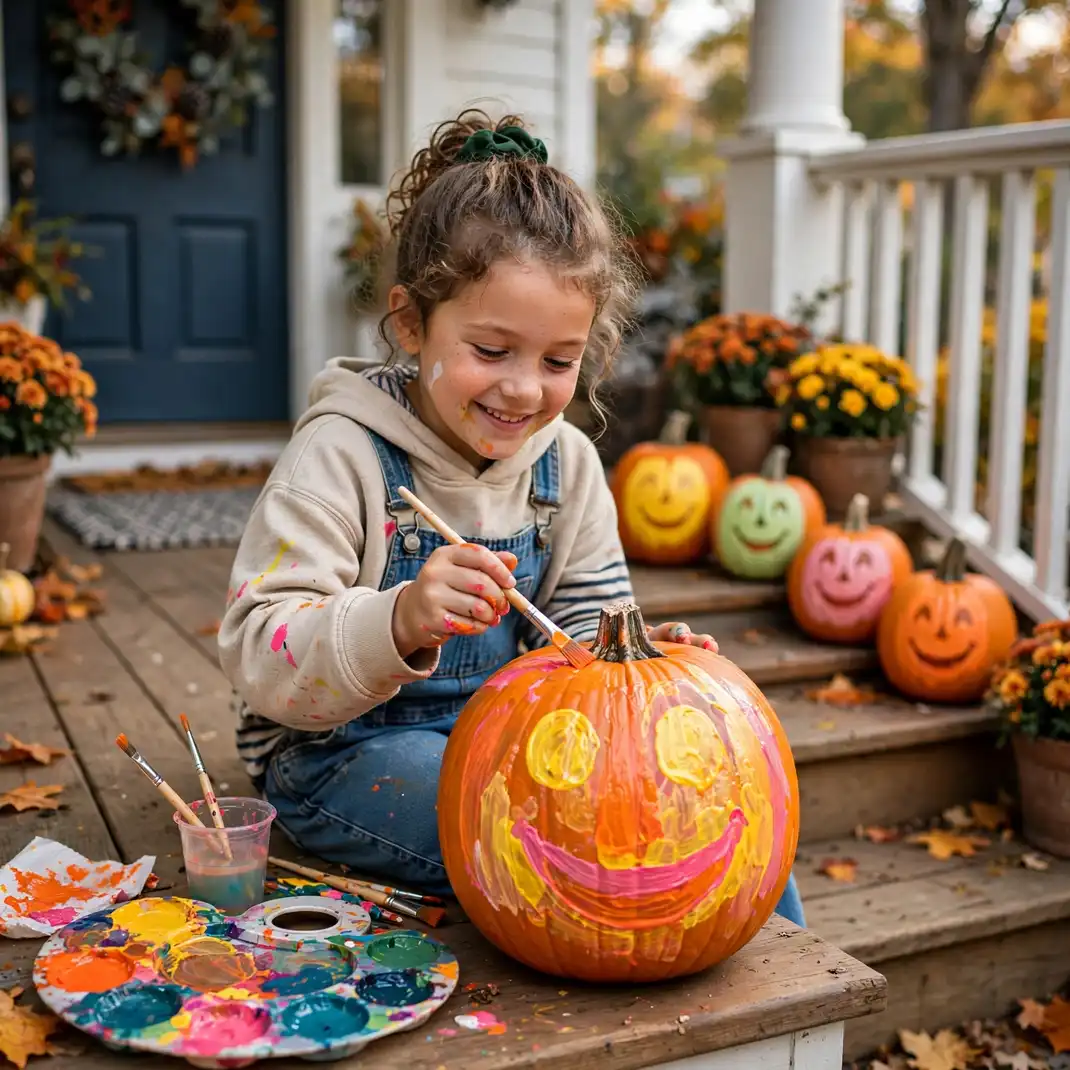
Skip the carving kit this year. Hand a kid a paintbrush and a pumpkin and watch what happens: the faces come out crooked, cross-eyed, gloriously happy, and every single one is better than anything you would carve. Painted pumpkins last weeks longer than carved ones too, no collapsing, no smell, no fruit flies staging a coup on your porch.
How to Style It: Set out acrylic paints and brushes, let each child design a face, and display the pumpkins on the porch steps.
Why It Photographs Beautifully: The row of grinning pumpkins makes the happiest porch photo of the season.
Pro Tip: Wipe each pumpkin with a damp cloth first. Paint grips clean skin far better than dusty rind, and you will get none of that flaking on day three.
Budget-Smart Swap: Craft paint and small pumpkins keep the whole project under ten dollars.
2. Hang Friendly Ghost Balloons
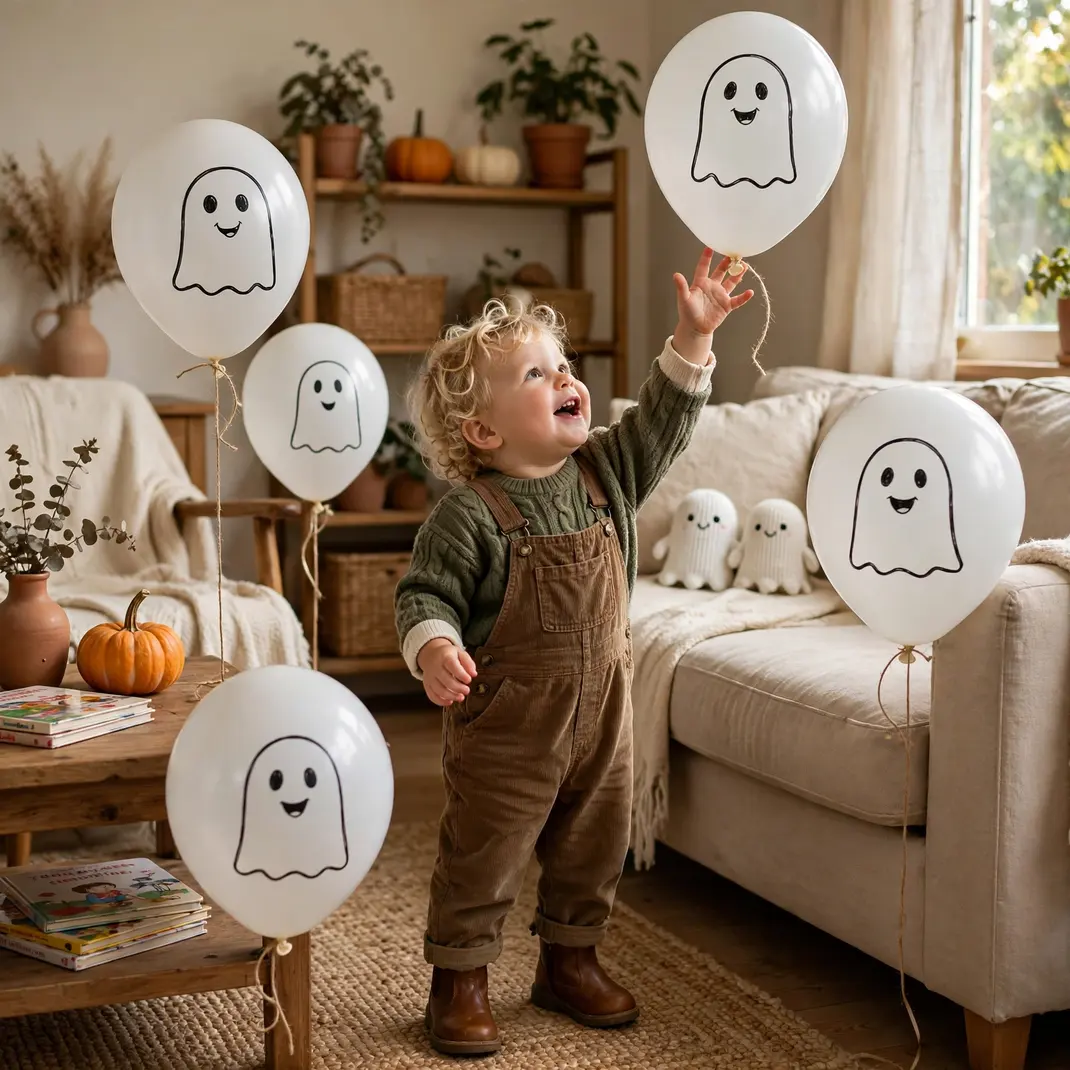
There is a specific shriek of joy a toddler makes when a balloon ghost bobs down to their eye level. White balloons, a marker, two minutes, and suddenly your hallway is haunted in the friendliest possible way. Fair warning: at least one balloon will escape and live on your ceiling for a month. Let it. It becomes a pet.
How to Style It: Draw happy ghost faces on white balloons, inflate, and tie them around the house at kid height.
Why It Photographs Beautifully: The floating ghost balloons make every room feel like a friendly party.
Pro Tip: Draw the faces before inflating, the marker lines stay crisp instead of stretching into a scream.
Budget-Smart Swap: A bag of white balloons and a marker are the entire cost.
3. Build a Candy Corn Wreath
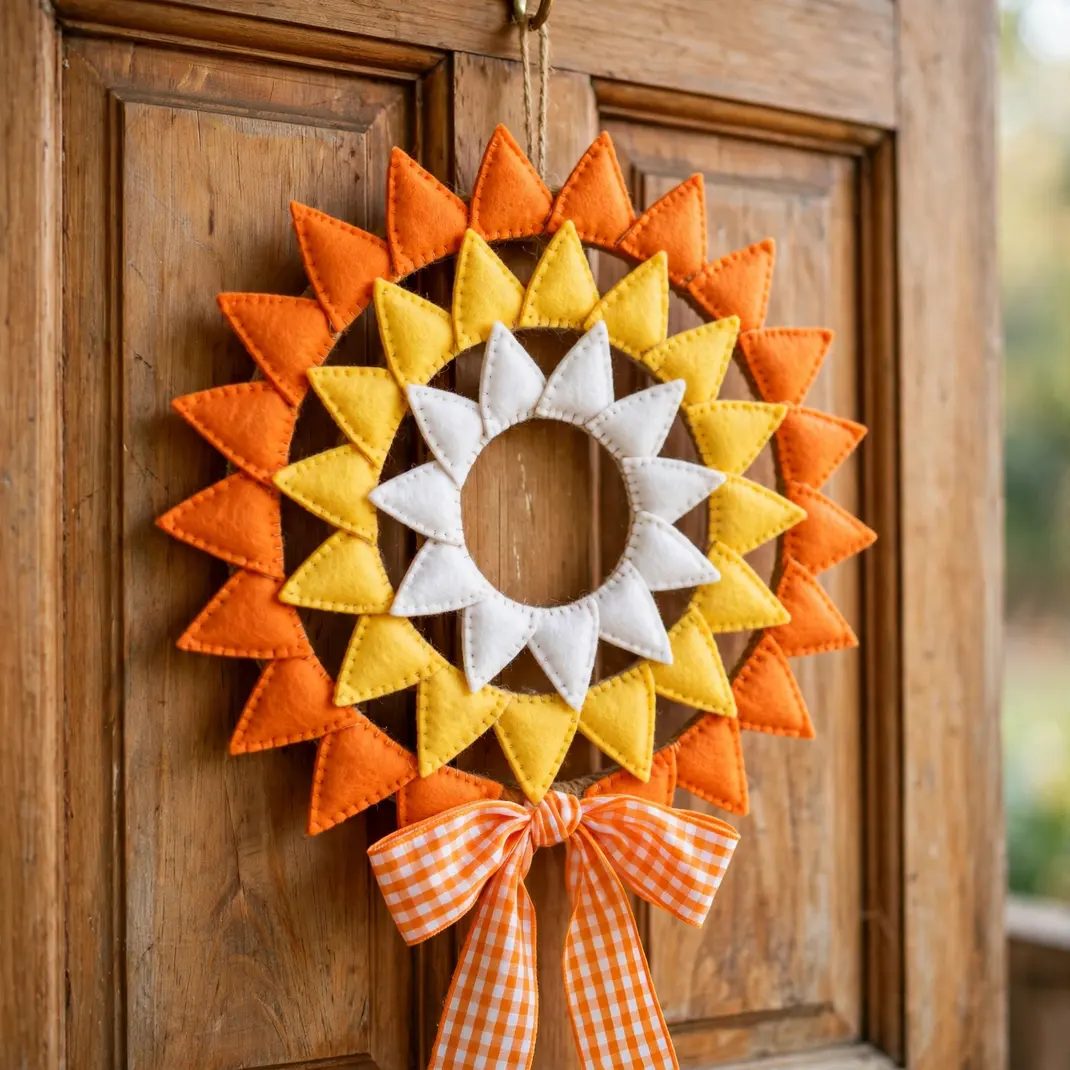
Your front door is the first thing trick-or-treaters judge, and kids are the harshest critics alive. A candy corn wreath passes inspection instantly: it is bright, it is sweet, it reads as Halloween from halfway down the street. I have hung complicated wreaths that got zero comments and a felt candy corn ring that stopped three neighbors mid-walk.
How to Style It: Glue felt triangles in candy corn rings onto a foam wreath form and hang with a bright ribbon.
Why It Photographs Beautifully: The bold candy colors pop in every front-door photo.
Pro Tip: Start gluing from the outer edge inward. It is much easier to hide the last row’s raw edges under the inner ring than the other way around.
Budget-Smart Swap: Felt sheets from the craft store cost pennies each.
4. Create a Monster Footprint Trail
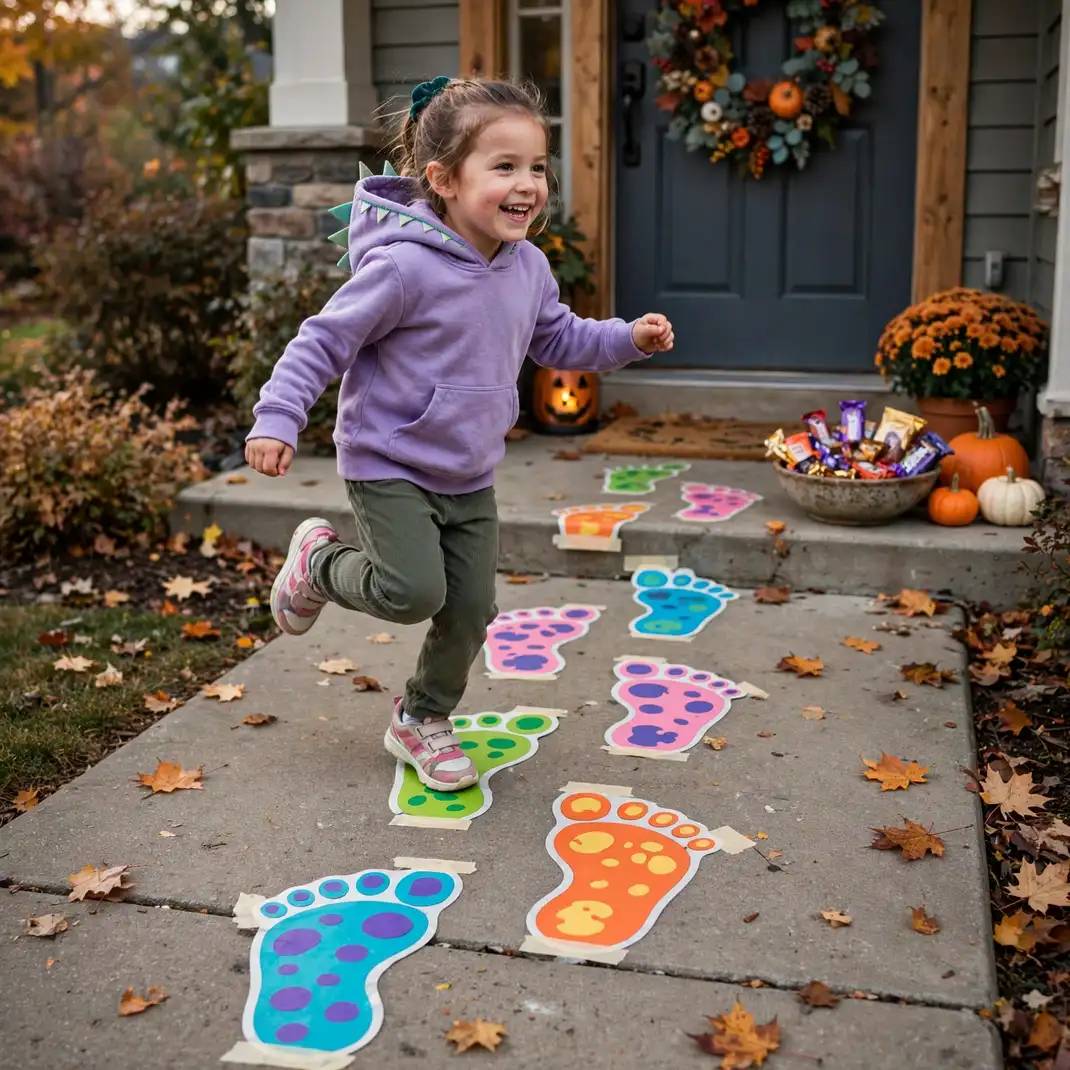
Big colorful footprints marching up your walkway, each one dwarfing a child’s shoe, ending at the treat bowl. The genius of this one is psychological: kids who might be nervous about knocking on a decorated door will follow footprints anywhere. The trail does the inviting for you.
How to Style It: Cut footprint shapes from colored card, lay a trail up the walk, and end at the treat bowl.
Why It Photographs Beautifully: Kids hopping along the footprint trail make the cutest arrival photos.
Pro Tip: Alternate left and right feet and space them for kid strides, not adult ones. A trail only adults can follow defeats the purpose.
Budget-Smart Swap: Cardboard and paint make free footprints.
5. Dress Chairs as Friendly Ghosts
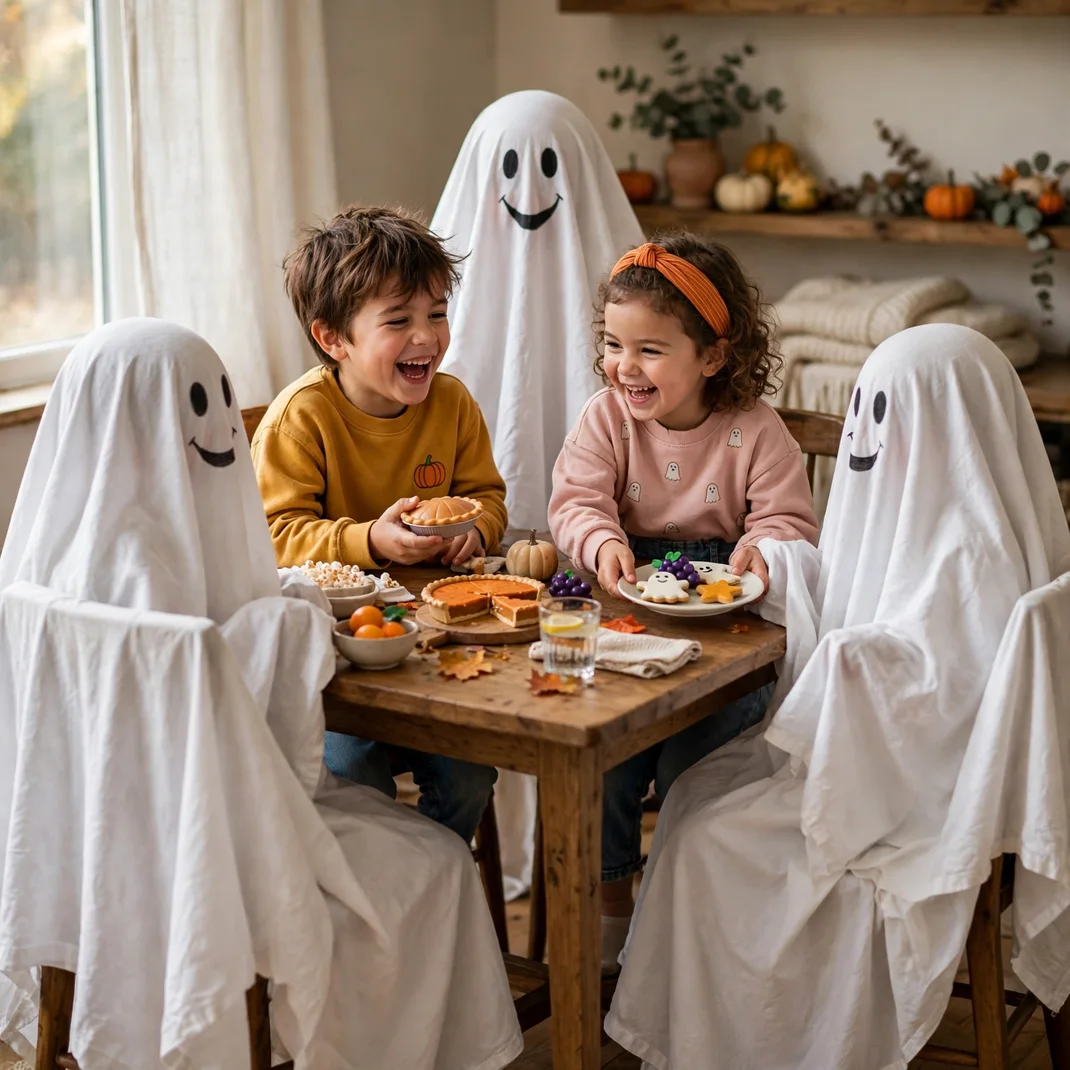
Dinner with ghosts sounds scary until the ghosts are wearing your dining chairs and grinning. Drape, draw a face, done. Then watch your kids solemnly serve imaginary food to their sheet friends. This is the kind of decor that creates a core memory disguised as a Tuesday dinner.
How to Style It: Drape white sheets over the chair backs, draw smiling faces, and seat a ghost at each place.
Why It Photographs Beautifully: The table of ghost guests is the funniest family dinner photo.
Pro Tip: Use fabric markers, not regular ones. Regular marker bleeds through the sheet and signs its name on your chair upholstery.
Budget-Smart Swap: Old white pillowcases work perfectly as mini ghost covers.
6. Make a Pumpkin Bowling Alley
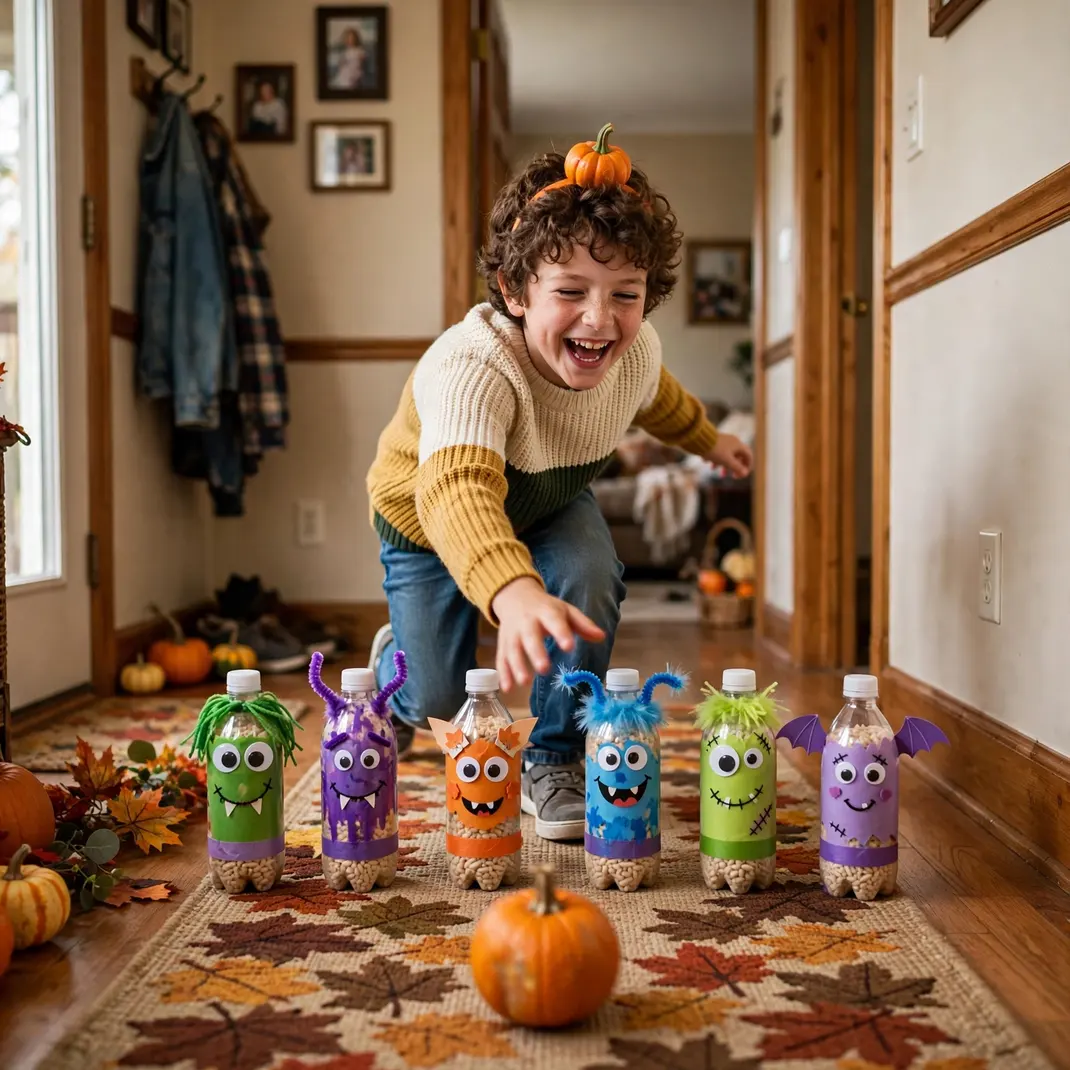
Real talk: pumpkins do not roll straight. They wobble, veer, and occasionally just stop and sit there, which is exactly why pumpkin bowling is perfect. The game is rigged toward comedy. Set up the pins, hand over a lumpy little pumpkin, and let physics do the entertaining.
How to Style It: Decorate empty bottles as friendly monsters, set them as pins, and roll small pumpkins to knock them down.
Why It Photographs Beautifully: The mid-roll action shots are pure family fun.
Pro Tip: Put a little water in each plastic bottle pin. The weight keeps them standing through near-misses but still lets a good roll topple them.
Budget-Smart Swap: Recycled bottles and mini pumpkins are the whole game.
7. String a Candy Garland
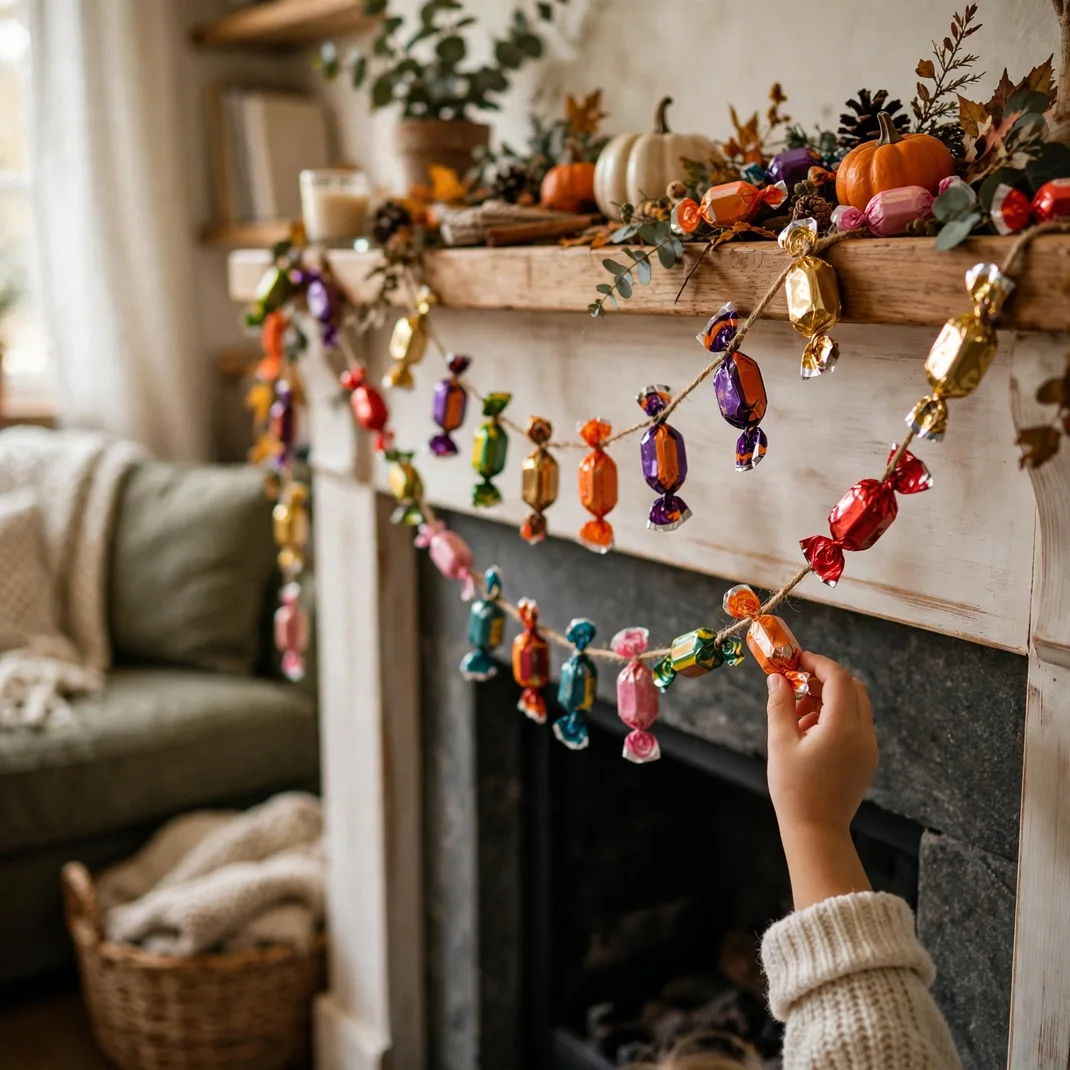
Decorations kids are allowed to eat hit different. A candy garland across the mantel starts the month full and glorious and ends the month as a bare string, and that slow disappearance is part of the fun. Pace yourselves. Or do not. I am not your mother.
How to Style It: Thread wrapped candies onto twine, alternating colors, and drape across the mantel or doorway.
Why It Photographs Beautifully: The colorful candy garland adds sweet charm to every room photo.
Pro Tip: Thread through the twisted wrapper ends, not the candy itself. Pierced wrappers go stale in days; intact ones last the month.
Budget-Smart Swap: Bulk wrapped candy is cheap and doubles as the treat supply.
8. Build a Scarecrow Photo Spot
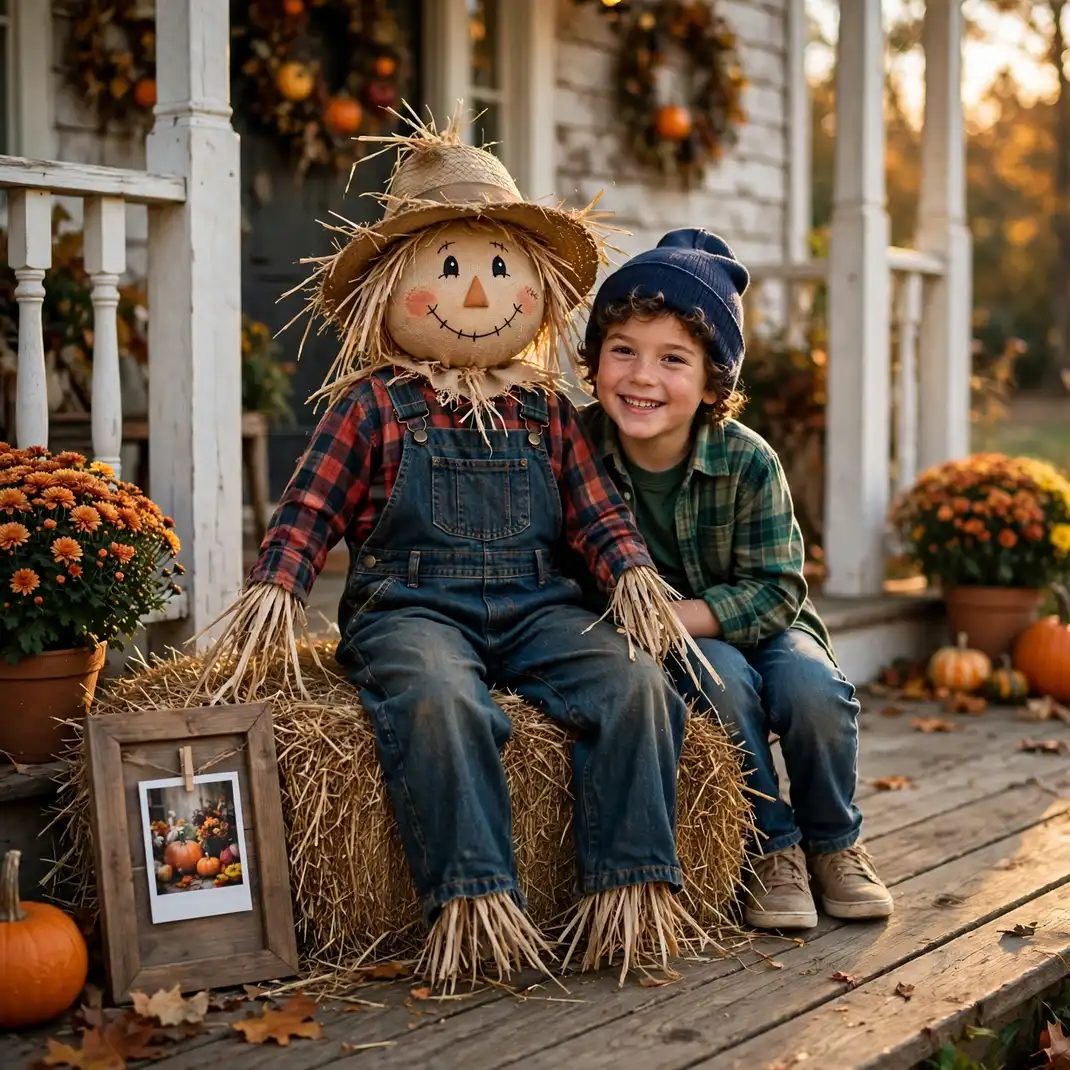
Every great Halloween house needs one designated photo spot, and a smiling scarecrow on a hay bale is the undisputed champion. Here is the trick most people miss: put it where the light is good in the afternoon, not just where it looks cute at noon. Golden-hour scarecrow photos will fill your camera roll.
How to Style It: Stuff old clothes with straw, add a smiling burlap face, seat on a hay bale with a photo sign.
Why It Photographs Beautifully: Every child poses with the scarecrow; the photo collection grows all month.
Pro Tip: Face the scarecrow east or west, not north. Flat front light flattens the burlap texture; side light gives it that storybook depth.
Budget-Smart Swap: Old clothes and newspaper stuffing make a free scarecrow.
9. Create Window Cling Art
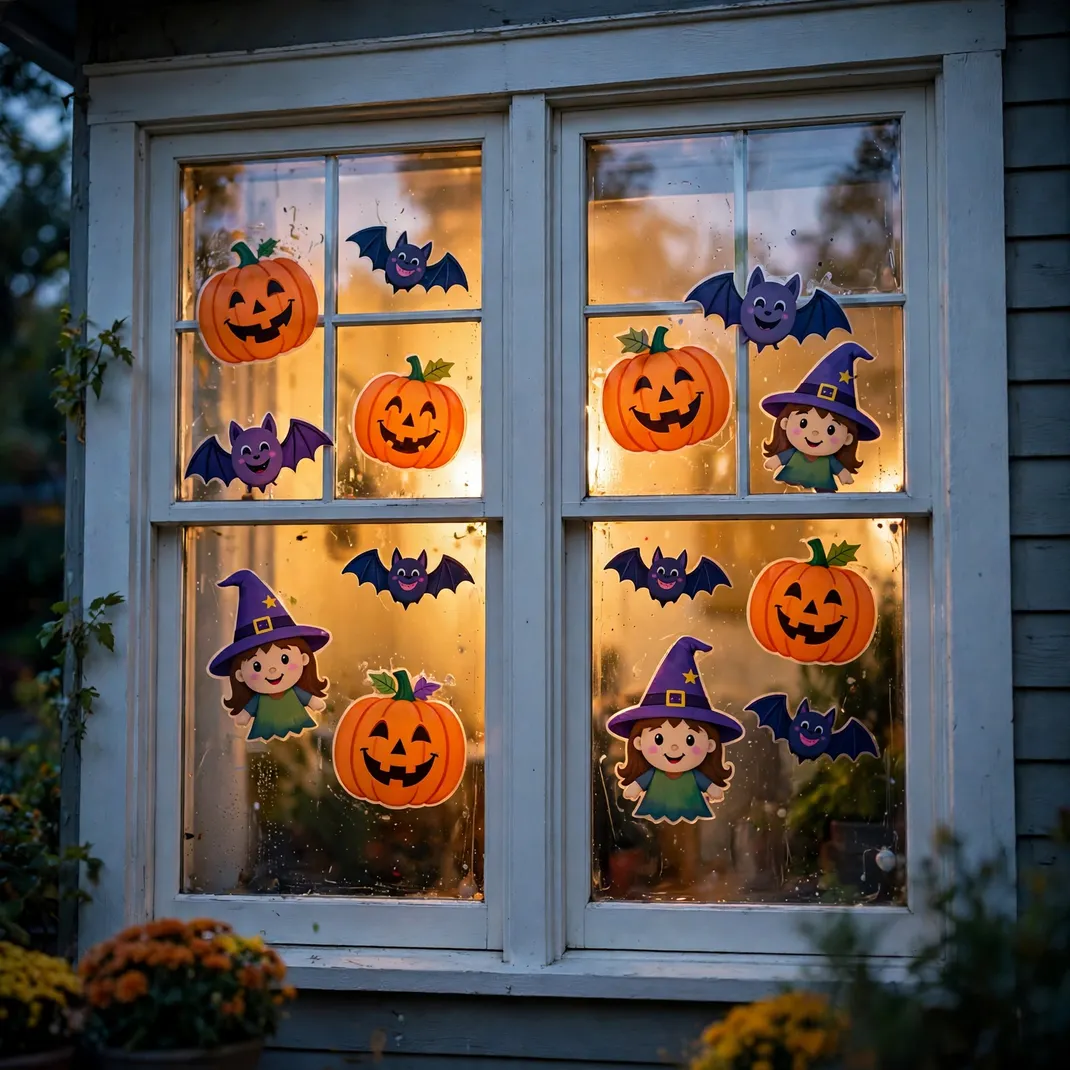
Window clings are the rare decoration that gets better the less you control it. Hand them to the kids, step back, and accept that the witch is going upside down next to a pumpkin the size of a house. That chaotic gallery, lit from behind at dusk, will charm every neighbor on the street.
How to Style It: Let kids press the clings onto the front windows, arranging their own spooky-cute scenes.
Why It Photographs Beautifully: The backlit window art glows beautifully in evening photos.
Pro Tip: Stick them on the inside of the glass, not the outside. Rain and curious fingers destroy exterior clings within a week.
Budget-Smart Swap: One pack of clings decorates every window and lasts for years.
10. Set Up a Costume Dress-Up Corner
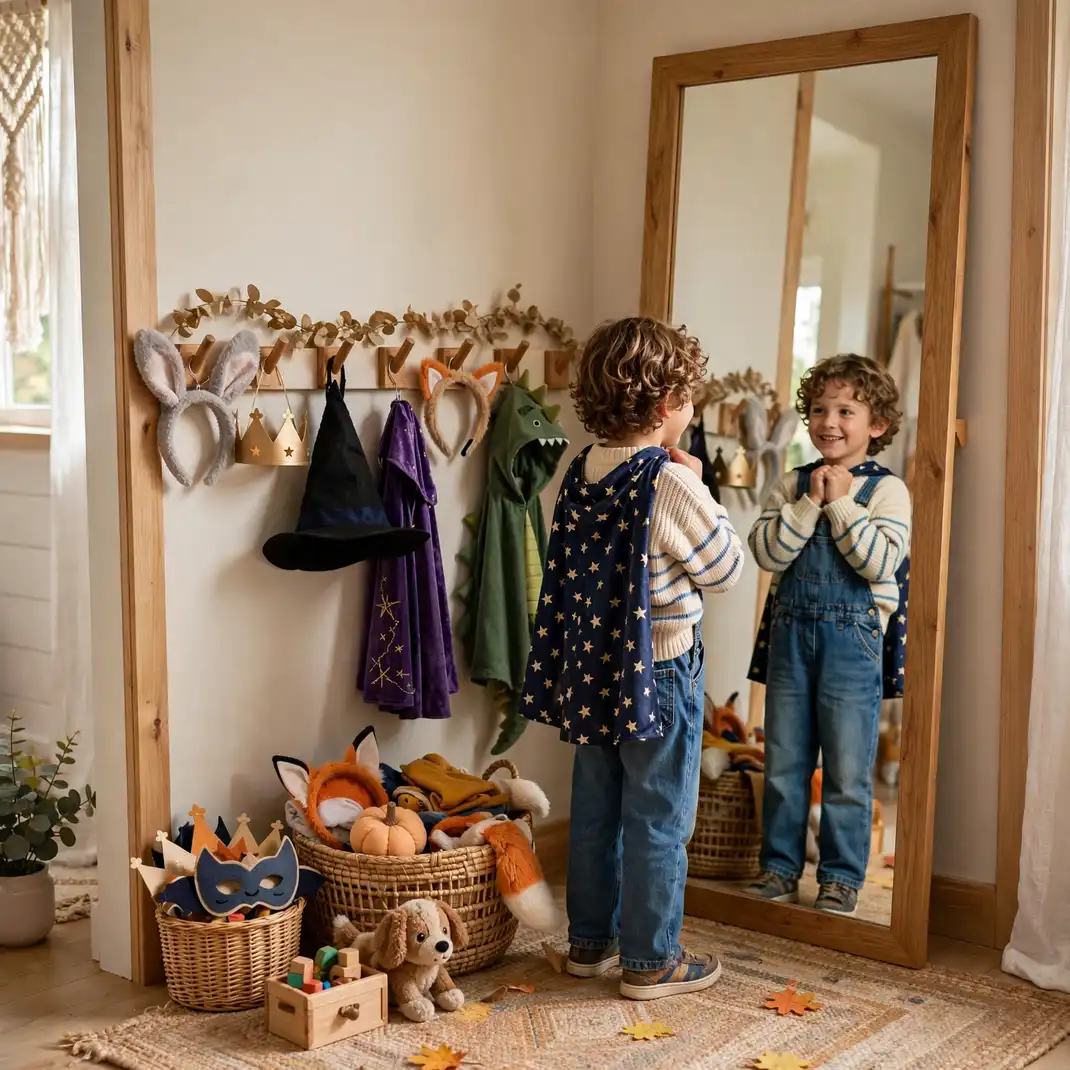
Here is a parenting secret disguised as decor: a dress-up corner buys you the entire month of October. While other parents are negotiating one Halloween night costume, your kids are cycling through personas daily, and every transformation is content. The mirror is non-negotiable. The reveal face they make in it is the whole point.
How to Style It: Hang the costumes on low hooks, add a full-length mirror and a small rug as the stage.
Why It Photographs Beautifully: The daily costume reveals make an adorable month-long photo series.
Pro Tip: Keep the hooks at kid height and skip anything with small detachable parts for under-fives. If it can be swallowed, it will be auditioned.
Budget-Smart Swap: Thrift-store costumes and handmade capes fill the corner cheaply.
11. Make Handprint Ghost Art
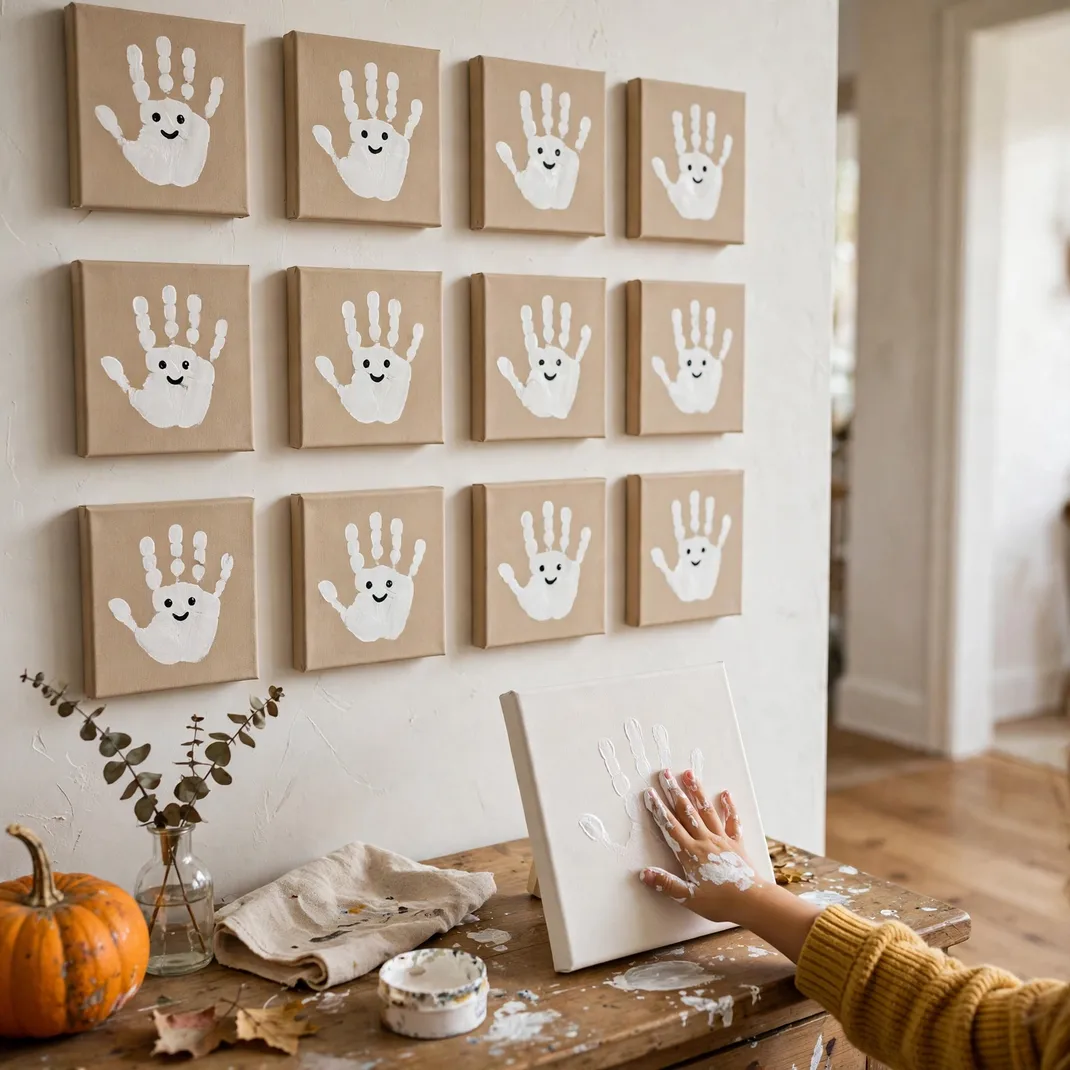
The handprint ghost is a cliche because it works. That tiny white hand, those two dot eyes, the date in the corner, grandparents will genuinely cry. My advice: make it a ritual, same canvas size every year, same hallway spot. In five years you will have a growth chart disguised as Halloween decor, and it will be the most valuable art in your house.
How to Style It: Press white-painted hands onto dark canvas, add faces when dry, and frame the yearly collection.
Why It Photographs Beautifully: The growing handprint gallery is the sweetest hallway display.
Pro Tip: Paint the palm, not the fingers, first, then fill in. A fully loaded handprint smears; a palm-first press gives you that clean ghost body with wiggle-finger edges.
Budget-Smart Swap: Cardstock works as well as canvas for a fraction of the price.
12. Decorate with Stuffed Pumpkins
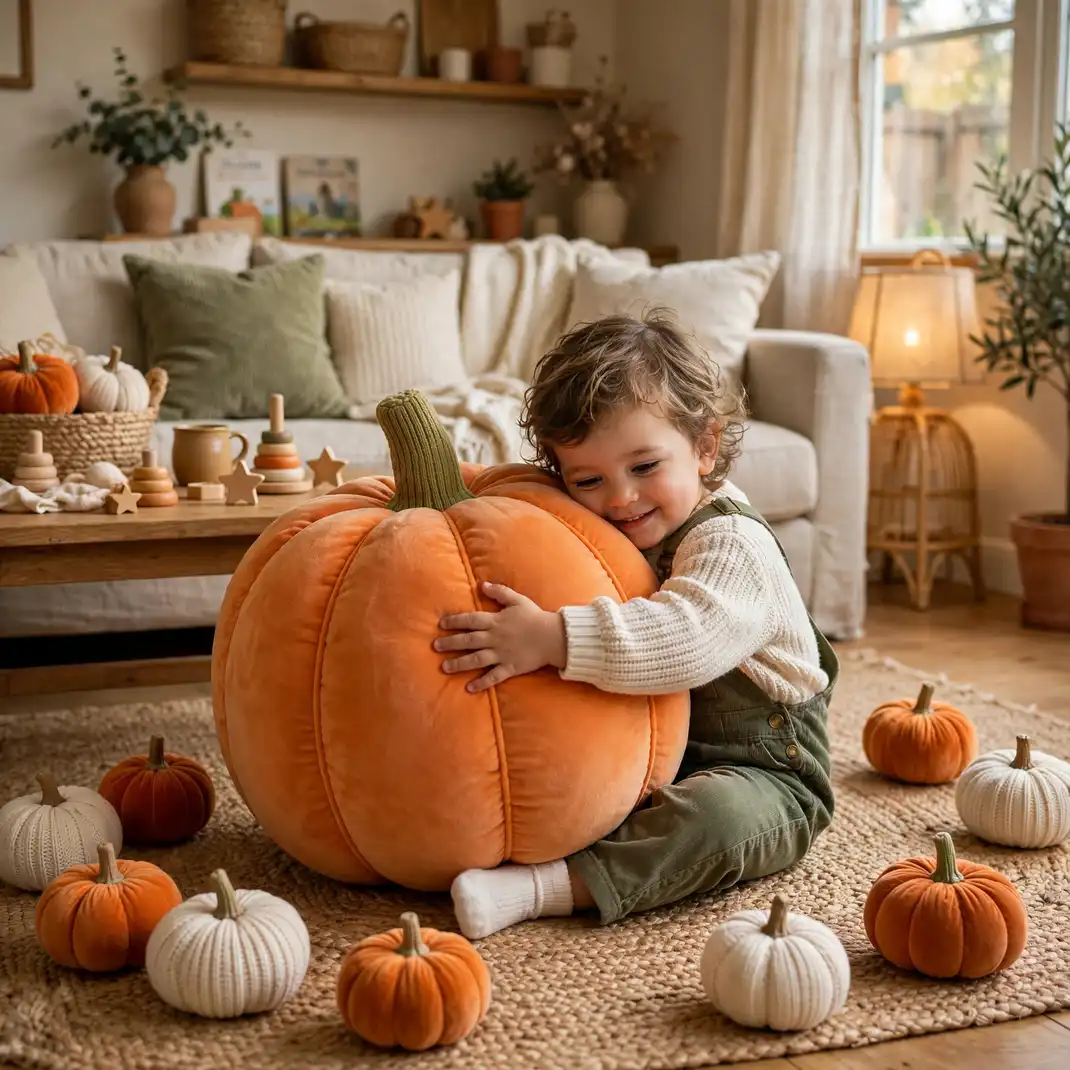
Toddlers experience decor primarily through throwing it. Fabric pumpkins are the only Halloween decoration engineered for this reality: soft, washable, unbreakable, and weirdly stylish in a cluster. Scatter them low, where small hands live, and your living room stays festive instead of becoming a crime scene.
How to Style It: Scatter fabric pumpkins in clusters on sofas, shelves, and the floor at kid height.
Why It Photographs Beautifully: Toddlers hugging giant fabric pumpkins make the cutest photos.
Pro Tip: Check the seams before buying, especially at discount stores. A pumpkin that bursts its stuffing on day two is a glitter-bomb of disappointment.
Budget-Smart Swap: Sew simple pumpkins from orange fabric scraps and stuffing.
13. Create a Treat Treasure Hunt
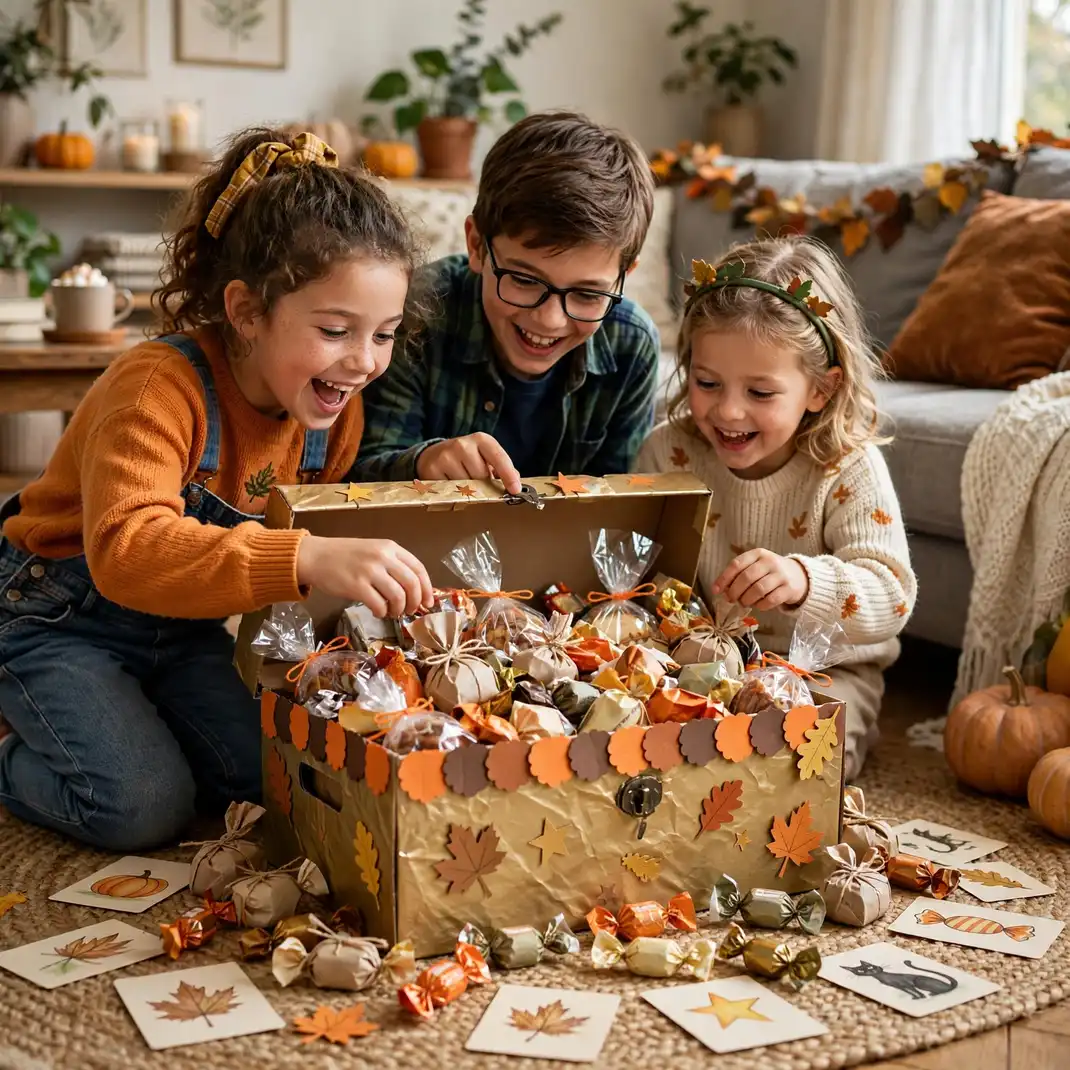
A treasure hunt is the only party activity with a one hundred percent success rate. I have never seen it fail, not once, across every age from three to thirteen. The secret is in the clues: picture-based, one per location, each slightly harder to find than the last. The final chest does not need to be elaborate. The hunt is the gift; the candy is just the receipt.
How to Style It: Draw picture clues on cards, hide them around the house, and end at a decorated treat chest.
Why It Photographs Beautifully: The triumphant treasure discovery makes the best action photo.
Pro Tip: Number the back of each clue card. When a card goes missing, and one will, you will know exactly which one and where it should have been.
Budget-Smart Swap: A decorated shoebox is a perfect treasure chest.
14. Hang a Friendly Bat Mobile
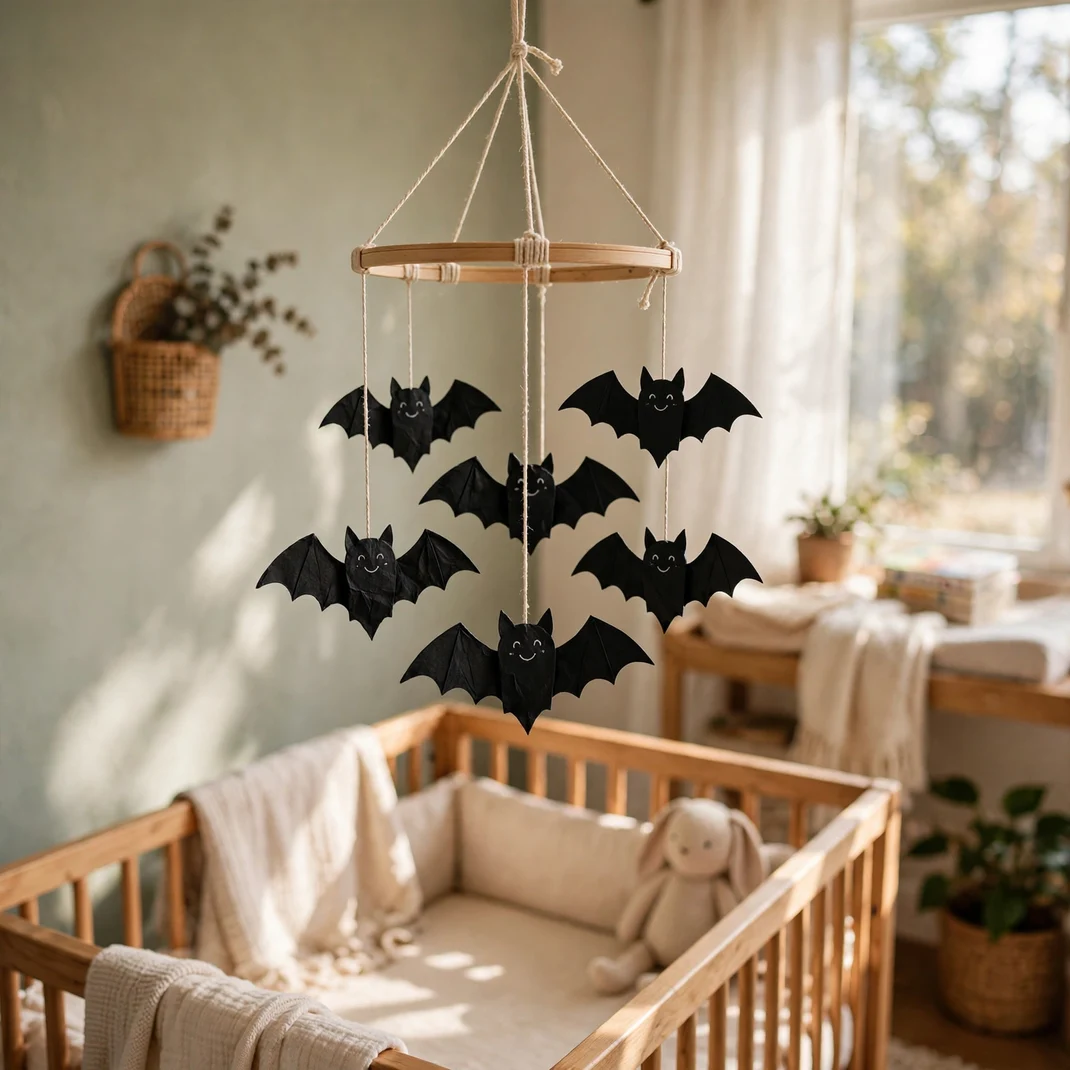
For the under-two crowd, Halloween decor has exactly one job: be interesting to look at from a crib. A mobile of smiling paper bats, turning slowly in the window breeze, nails it. Black shapes against daylight are high-contrast, which is literally what infant eyes track best. You are not just decorating; you are doing developmental science.
How to Style It: Cut smiling bats from black paper, hang at varied lengths from an embroidery hoop, and suspend above the play area.
Why It Photographs Beautifully: The twirling bats above a baby’s crib make a precious nursery photo.
Pro Tip: Balance the hoop by hanging bats in opposite pairs. An unbalanced mobile spins lopsided and tangles within a day.
Budget-Smart Swap: Construction paper and string are the entire mobile.
15. Serve Snacks on a Pumpkin Tray
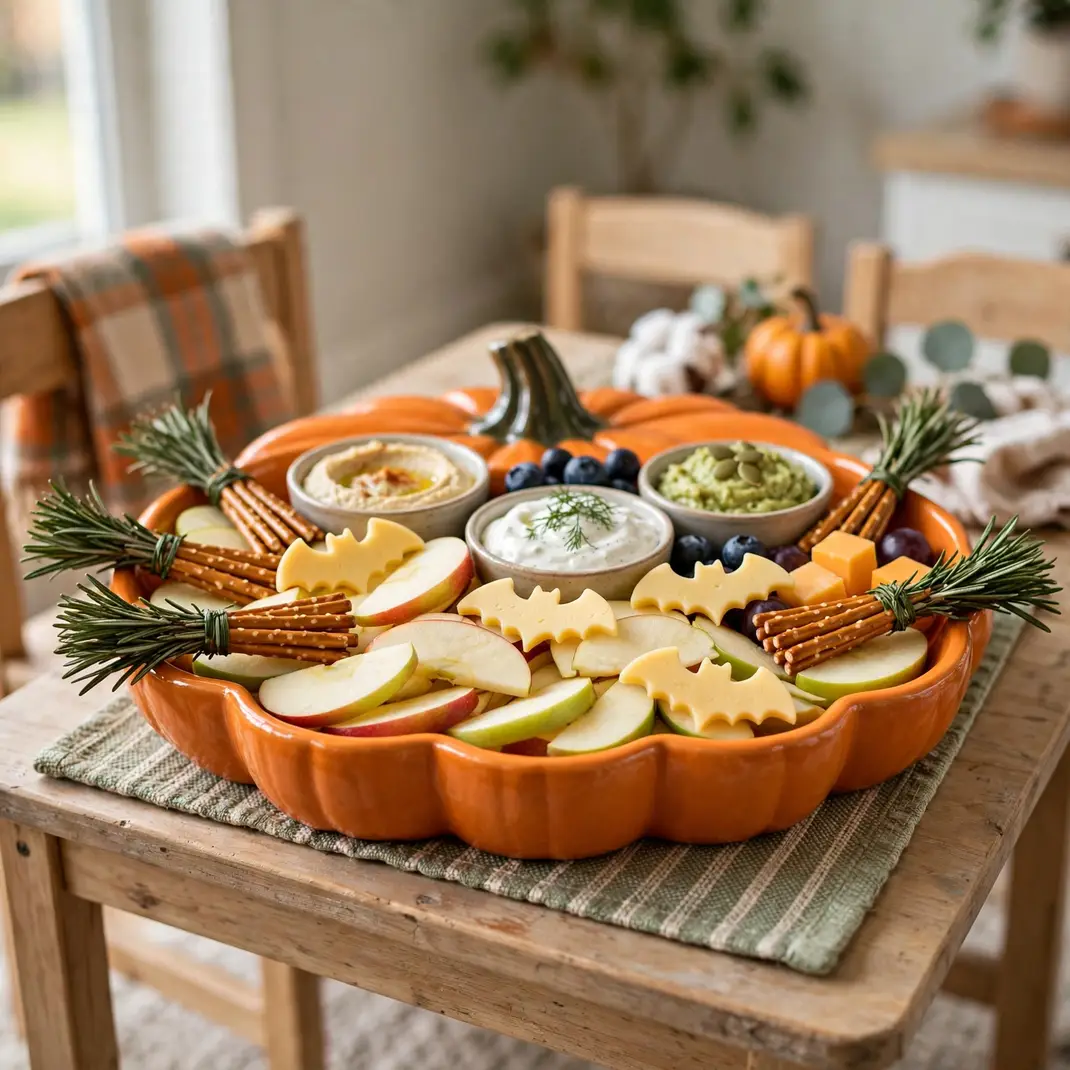
Presentation is a parenting superpower. The same apple slices a kid rejects from a plate become irresistible arranged on a pumpkin tray next to cheese cut into bat shapes. I do not make the rules; toddler psychology does. Lean into it.
How to Style It: Arrange the snacks in sections on the tray, add small bowls of dip, and set it at kid height.
Why It Photographs Beautifully: The colorful snack tray is as pretty as it is delicious.
Pro Tip: Toss apple slices in a little lemon water first. Brown apple ghosts are still tasty, but nobody photographs them twice.
Budget-Smart Swap: A regular tray with a pumpkin napkin works just as well.
16. Build a Cardboard Haunted House (Friendly Version)
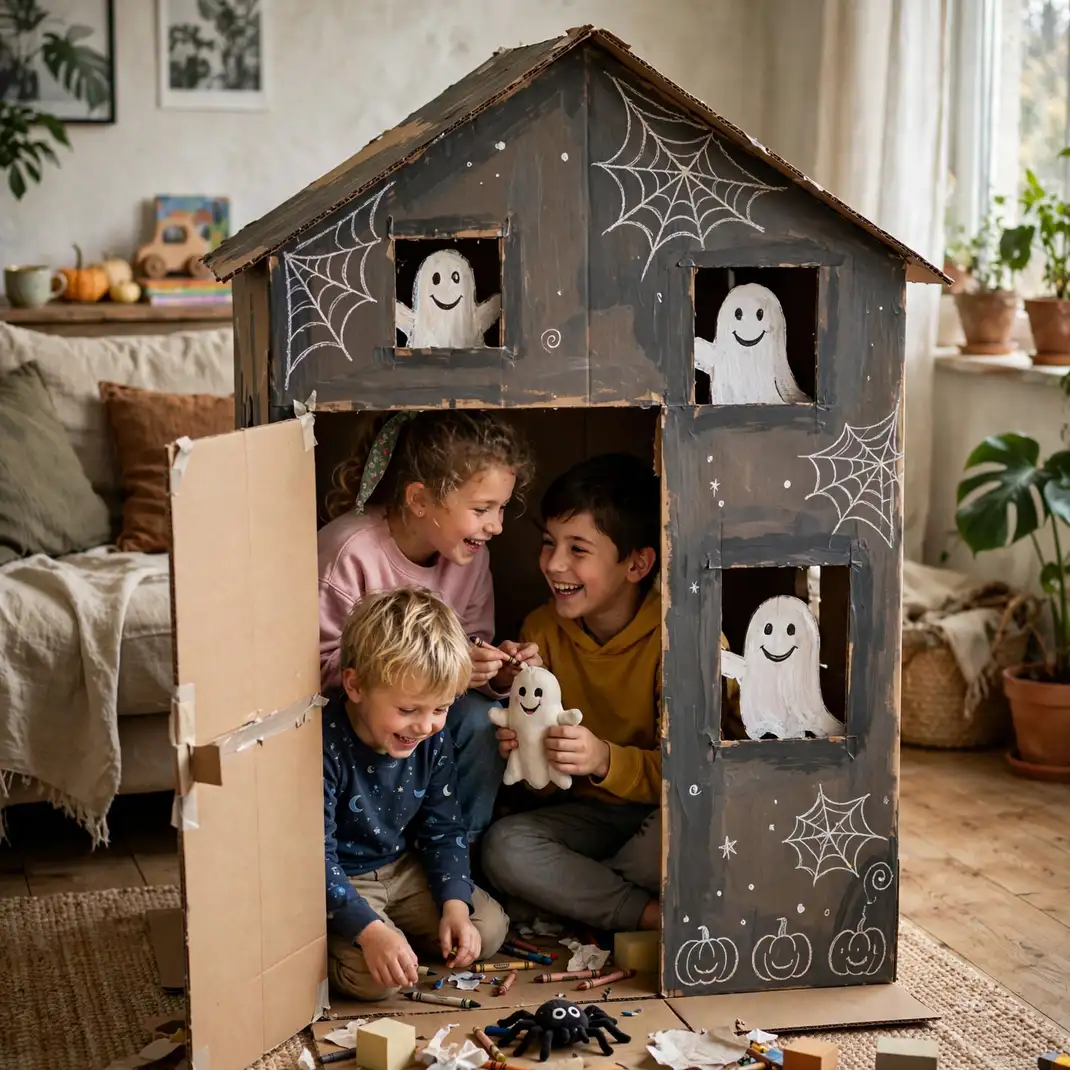
A refrigerator box is the most underrated toy ever manufactured, and at Halloween it becomes a haunted house with a strict no-ghosts-were-harmed policy. Paint it together, cut the windows together, and then get out of the way. Kids will inhabit that box for hours in ways no store-bought playhouse ever achieves.
How to Style It: Paint a large box as a house, cut windows and a door, and decorate inside with smiling ghosts.
Why It Photographs Beautifully: Kids peeking from the friendly haunted house make adorable photos.
Pro Tip: Cut the door on a hinge, three sides only, so it opens and closes. A door that actually works doubles the play value instantly.
Budget-Smart Swap: An appliance box from the store is free and perfectly sized.
17. Plant a Mini Pumpkin Patch Indoors
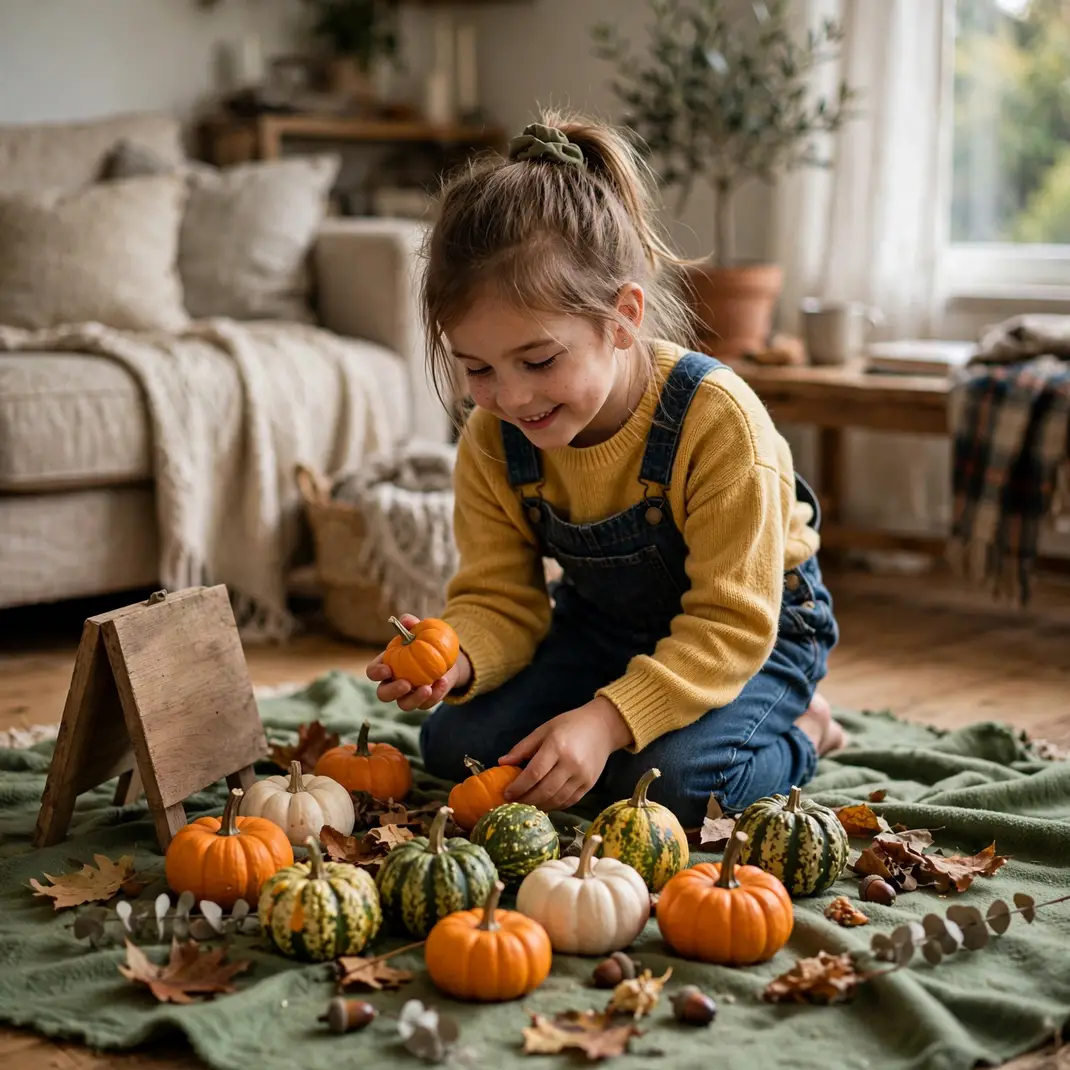
Not every family can get to a farm in October, and honestly, not every toddler survives one. An indoor pumpkin patch delivers ninety percent of the joy with none of the mud: the choosing, the carrying, the fierce ownership of a specific tiny gourd. Let them name theirs. You will hear about Pumpkina for weeks.
How to Style It: Lay a green blanket as grass, scatter mini pumpkins and gourds, and add a small wooden sign.
Why It Photographs Beautifully: Kids picking pumpkins from the indoor patch make the sweetest photos.
Pro Tip: Buy more minis than you think you need. The patch looks abundant, not sparse, and the extras become table decor everywhere else.
Budget-Smart Swap: Mini pumpkins are cheapest at farm stands in bulk.
18. Create Sticker Story Windows
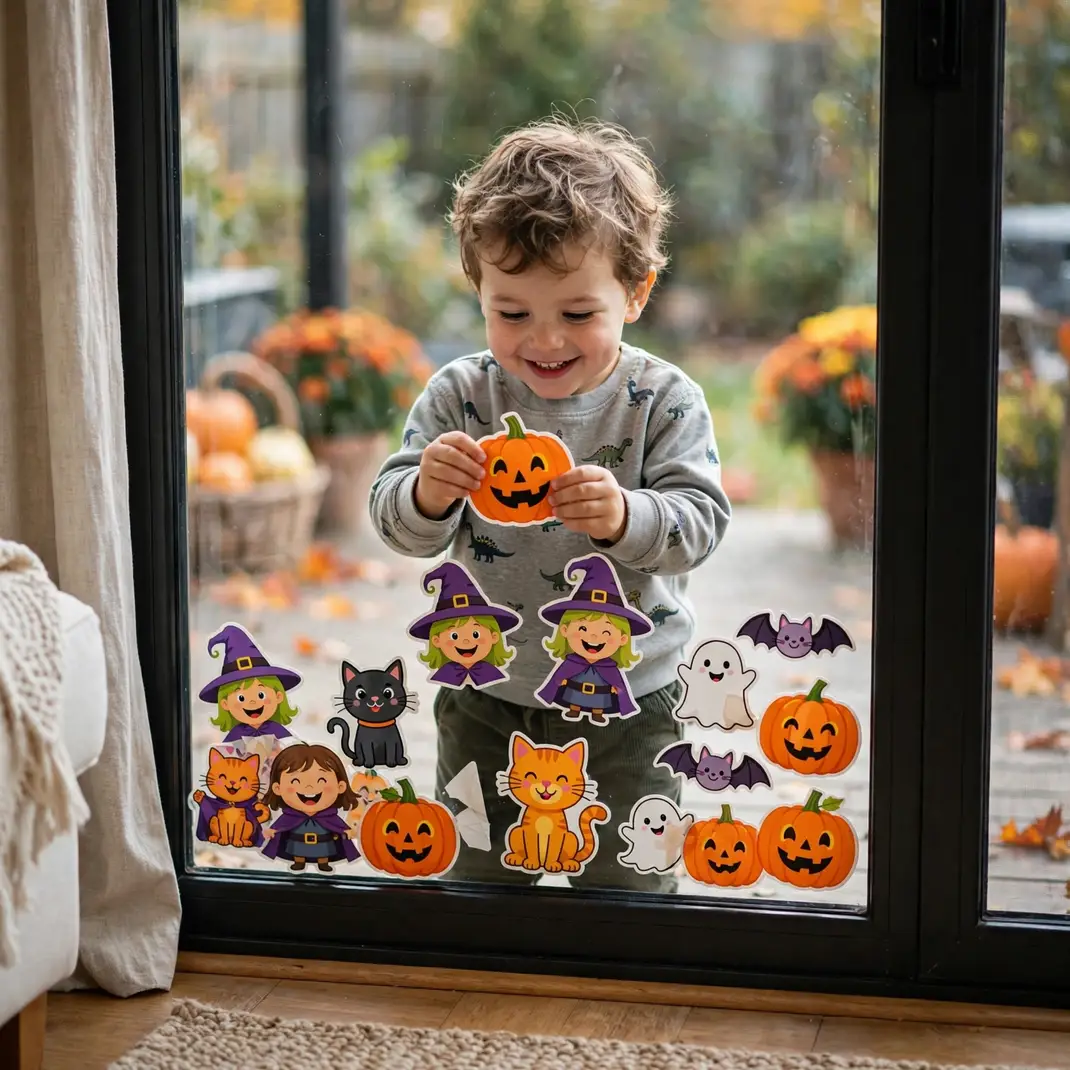
Toddlers do not decorate; they curate. Hand over the sticker sheets and watch a whole narrative emerge on the patio door: the witch moves next to the cat, the pumpkin gets bigger, everything gets rearranged by lunch. Do not fix their composition. Their version is better than yours, and they know it.
How to Style It: Give toddlers the sticker sheets and let them decorate the patio door glass freely.
Why It Photographs Beautifully: The sticker-covered glass with a toddler behind it is pure joy.
Pro Tip: Peel the backing off the first few stickers yourself and hand them over ready to stick. The backing is the only part of this activity toddlers actually hate.
Budget-Smart Swap: Dollar-store sticker books offer hundreds of stickers cheaply.
19. End with a Goodnight Ghost Parade
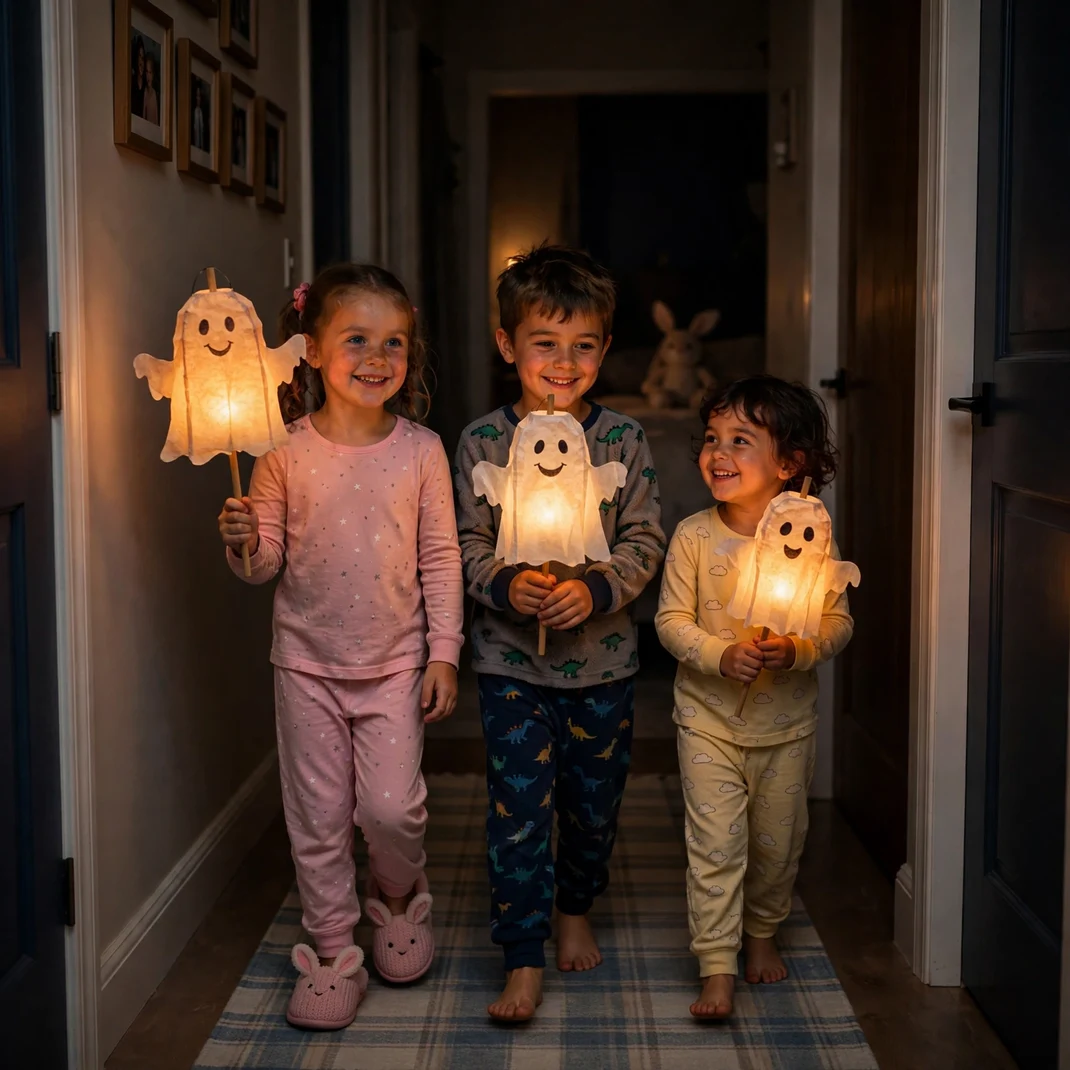
I am going to make a big claim: the goodnight ghost parade is the best new Halloween tradition in this entire article. A procession of small children carrying glowing paper ghosts through a dark house, whispering goodnight to each room, it turns the hardest part of the day into the most magical. Bedtime stops being a battle and becomes the finale.
How to Style It: Make paper lantern ghosts on sticks, parade through the house at bedtime, and tuck the ghosts in with the kids.
Why It Photographs Beautifully: The lantern-lit parade in the dark hallway makes a magical final photo.
Pro Tip: Keep the parade route short, three or four rooms max. A grand tour sounds lovely until someone melts down in the laundry room.
Budget-Smart Swap: Paper bags with drawn faces make perfect parade lanterns.
Nineteen ideas, zero scares, and one big takeaway: the best kid-friendly Halloween is not about avoiding fright, it is about handing kids the paintbrush. When they make the ghosts, the ghosts are friends. Happy haunting, little makers.