24 Farmhouse Kitchen Styling Tips With Halloween Warmth
A farmhouse kitchen is already made for October: worn wood catches low autumn light beautifully, stoneware gives everyday objects a sense of history, and the room naturally gathers people around something warm. Halloween styling works best here when it joins that lived-in character instead of covering it with novelty decorations.
1. Crown the Range Hood with Dried Hops and Russet Leaves
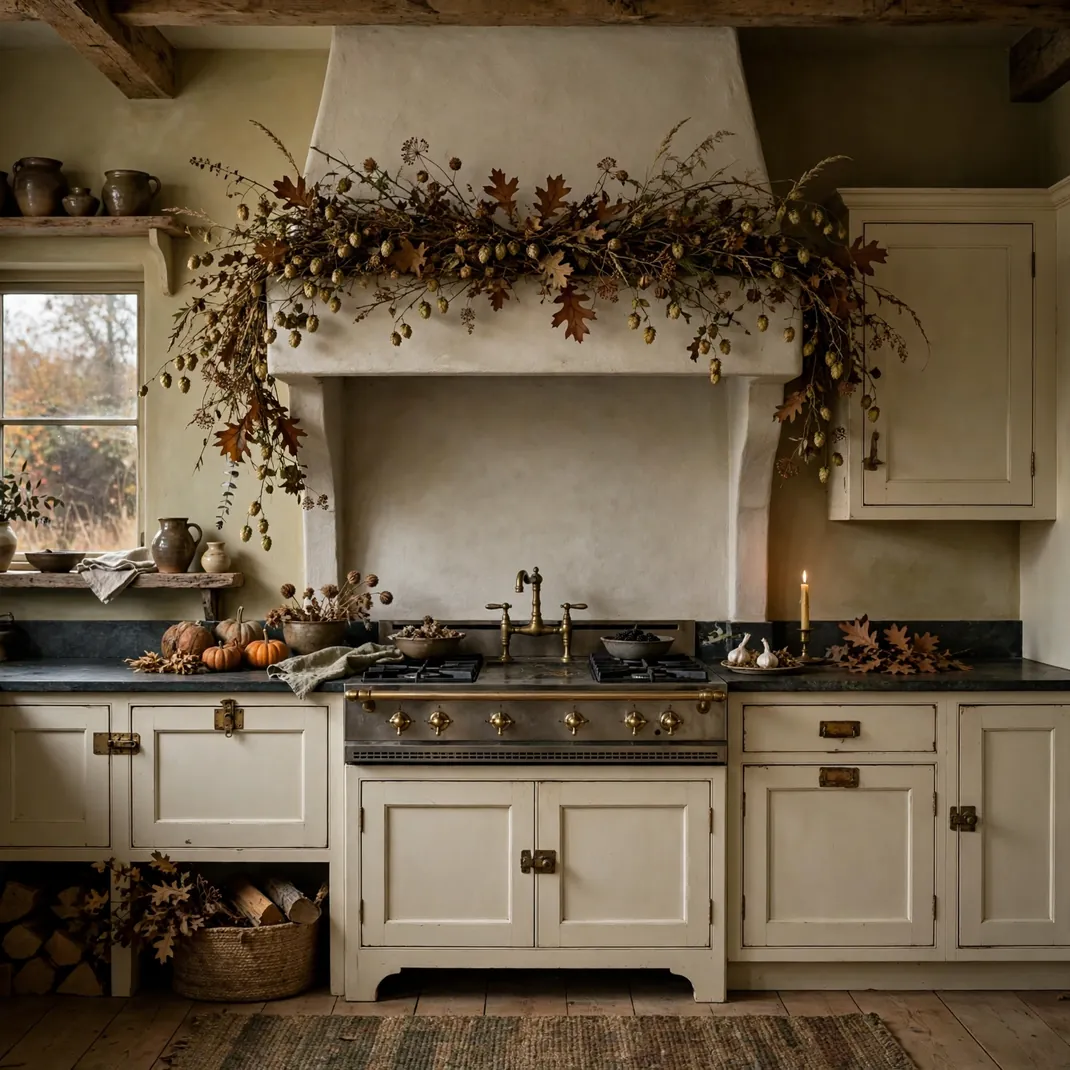
A loose sweep of dried hops, russet oak leaves, and tiny seed heads gives a simple plaster or wood range hood the warmth of an October hedgerow. The asymmetrical shape feels gathered rather than manufactured, and its muted green-brown palette complements cream cabinetry, soapstone, and aged brass.
- How to Style It: Secure a lightweight faux or thoroughly dried garland along the hood’s outer mantel with removable hooks, keeping every stem well away from burners, vents, and heat. Let one end trail 6 to 8 inches and tuck in three small rust-colored leaves for controlled color.
- Why It Photographs Beautifully: The curved foliage breaks up hard cabinetry lines and draws the eye naturally toward the range. Side light catches the papery textures while the restrained palette keeps the frame editorial.
- Pro Tip: Leave at least one-third of the hood mantel visible; that negative space makes the arrangement look intentional and preserves the farmhouse architecture.
- Budget-Smart Swap: Wire together fallen, fully dry branches and a few faux hop sprays instead of buying a finished garland, then store the faux stems for next autumn.
2. Build a Copper Kettle Moment Beside the Range
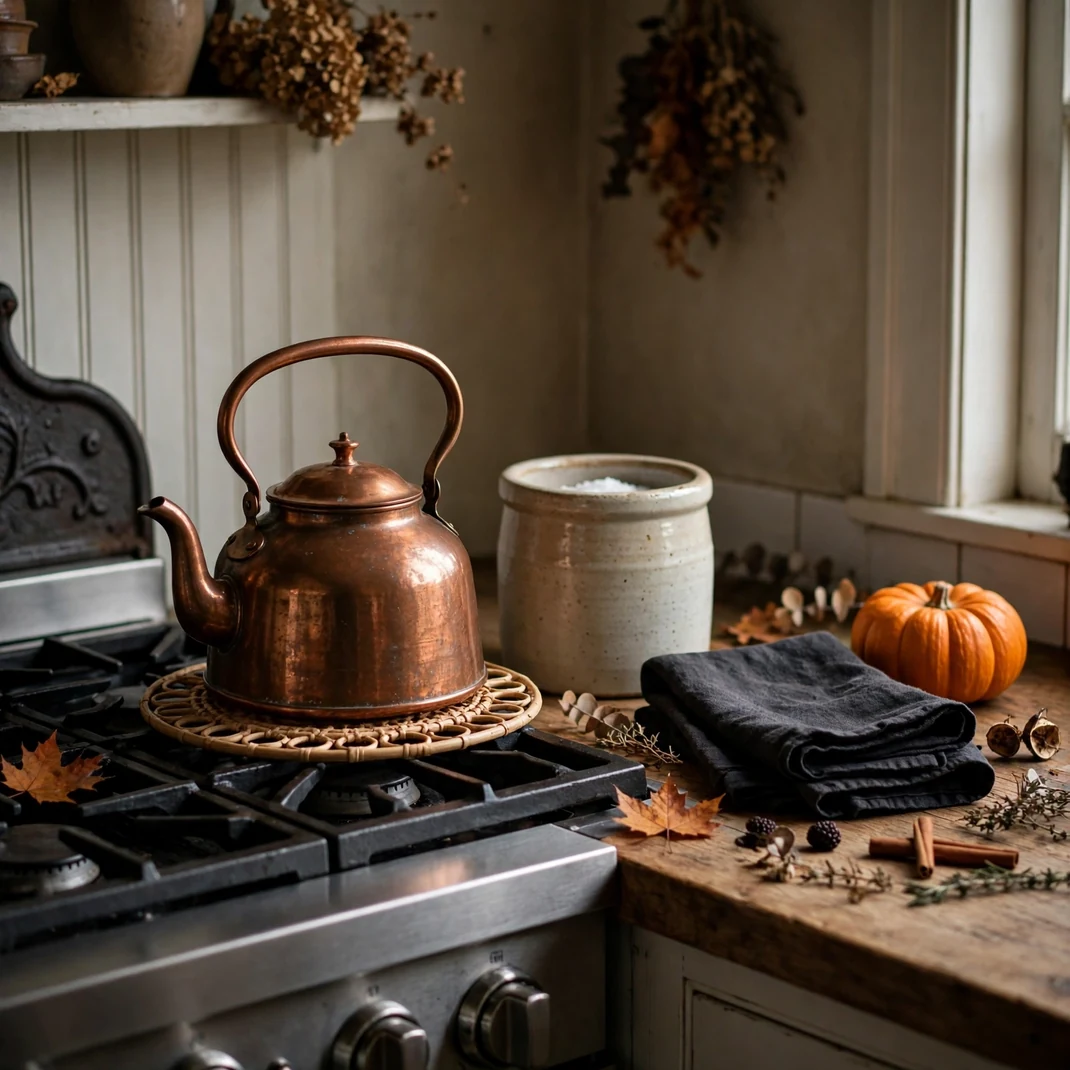
A burnished copper kettle, a squat salt crock, and a folded charcoal linen create a compact stove-side vignette that feels useful as well as seasonal. Copper supplies the pumpkin warmth, while the dark textile adds a quiet Halloween note without introducing a literal motif.
- How to Style It: Place the kettle on a heat-safe trivet at the cooler side of the range, with the crock slightly forward and the towel folded into a narrow rectangle. Keep the grouping below 12 inches wide so it never competes with cooking space.
- Why It Photographs Beautifully: Copper reflects amber highlights and creates a warm focal point against pale tile or limewash. The matte linen and rough stoneware prevent the metal from reading too polished.
- Pro Tip: Polish only the handle and rim, leaving the kettle body softly patinated; selective shine reveals the form while preserving its old-house character.
- Budget-Smart Swap: Use a secondhand copper-colored teapot or one small copper saucepan, then repeat the tone with an inexpensive terracotta salt pot.
3. Dress the Apron-Front Sink in Tobacco Ticking
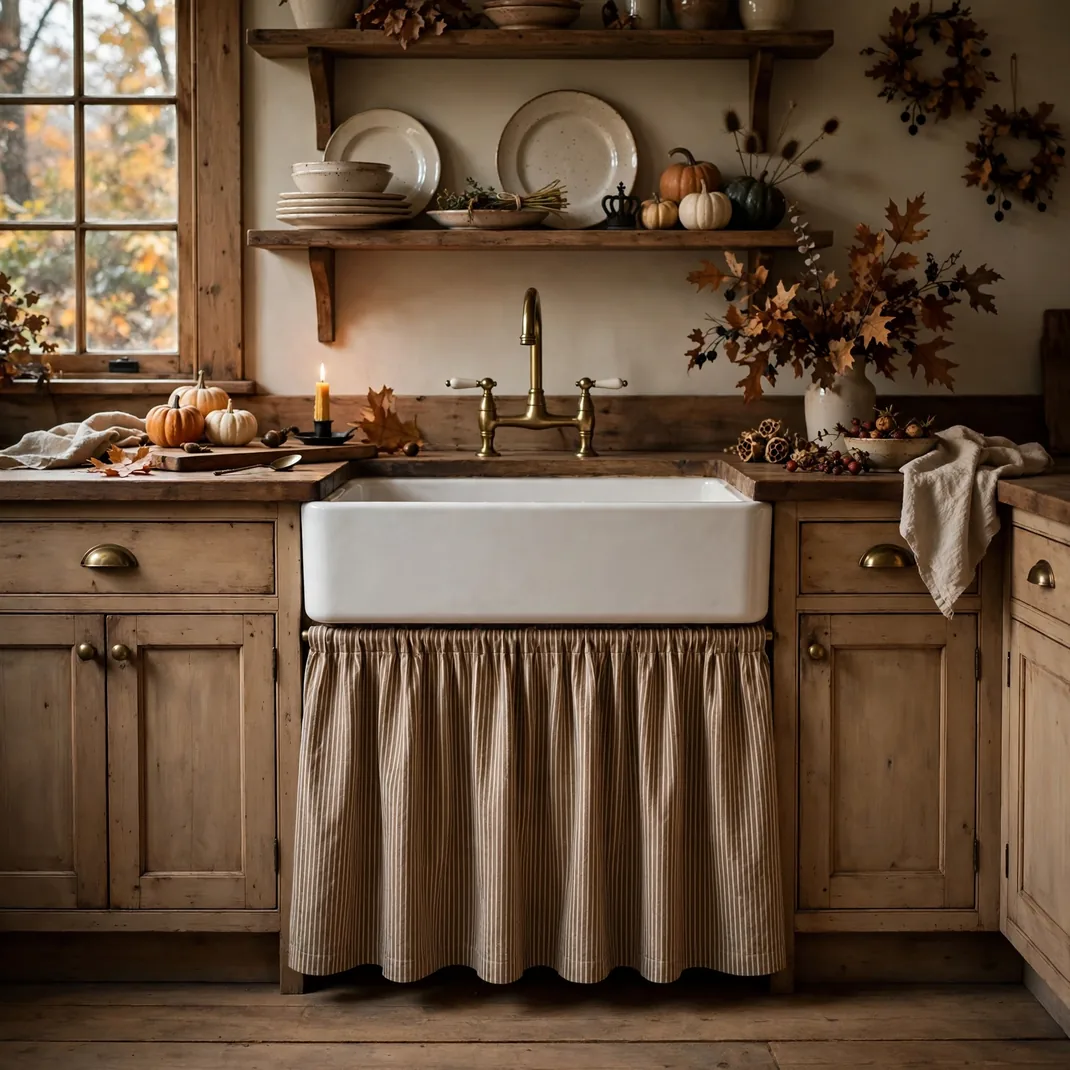
A tailored sink skirt in tobacco-brown ticking softens an apron-front basin and hides cleaning supplies with farmhouse ease. Narrow cream stripes keep the fabric crisp, while the earthy brown brings in Halloween warmth more subtly than orange.
- How to Style It: Mount the skirt on a tension rod just beneath the sink lip and hem it half an inch above the floor. Use a 1.75-to-2-times fullness ratio for soft gathers that do not billow into the walkway.
- Why It Photographs Beautifully: The vertical stripes visually lengthen the cabinetry and give the sink zone a clean rhythm. Soft folds balance the hard porcelain, metal, and counter edges in close shots.
- Pro Tip: Line the top 8 inches with washable cotton so splashes do not distort the front, and repeat the brown once in a wood brush or soap dish.
- Budget-Smart Swap: Cut and hem a ticking-stripe curtain panel; iron-on hemming tape makes this a sewing-free rental update.
4. Frame the Window with Smoke-Checked Café Curtains
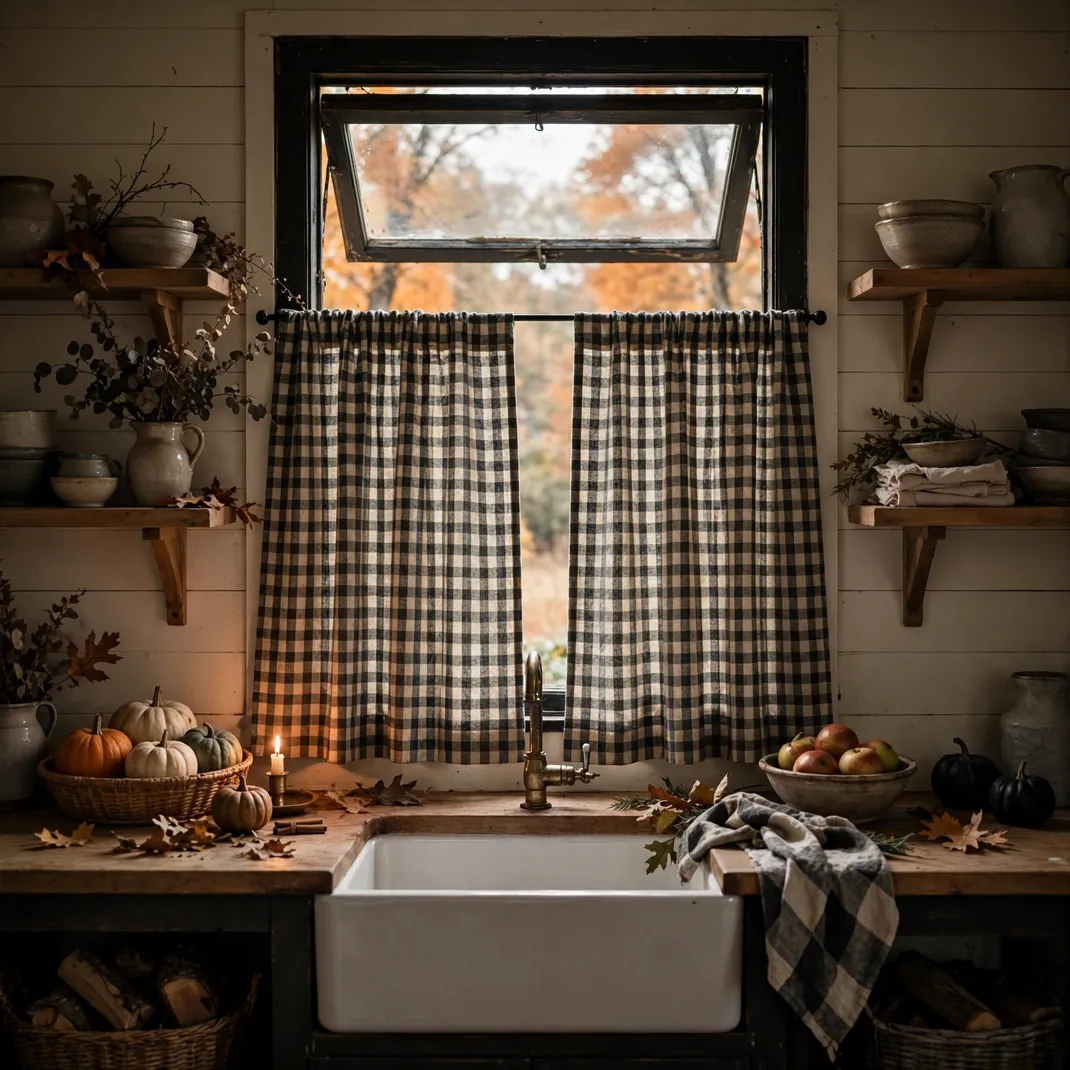
Charcoal-and-oatmeal café curtains bring a gentle shadowed pattern to the kitchen while leaving the upper window open to autumn light. The small-scale check feels familiar and farmhouse, yet the smoky palette makes the window distinctly October-ready.
- How to Style It: Hang two panels from a slender black or antique-brass rod positioned at the window’s midpoint. Let each panel just skim the sill, and choose fabric full enough to form relaxed folds when closed.
- Why It Photographs Beautifully: Backlight turns the woven check softly translucent and creates a bright upper frame over a moodier lower half. The pattern also adds scale without overwhelming a compact sink wall.
- Pro Tip: Use an oatmeal ground rather than pure white; it sits more naturally beside aged paint, creamware, and unsealed wood.
- Budget-Smart Swap: Turn two checked tea towels sideways and clip them to café rings, keeping the finished edges visible for a tidy look.
5. Curate a Plate Rack in Ironstone and Black Transferware
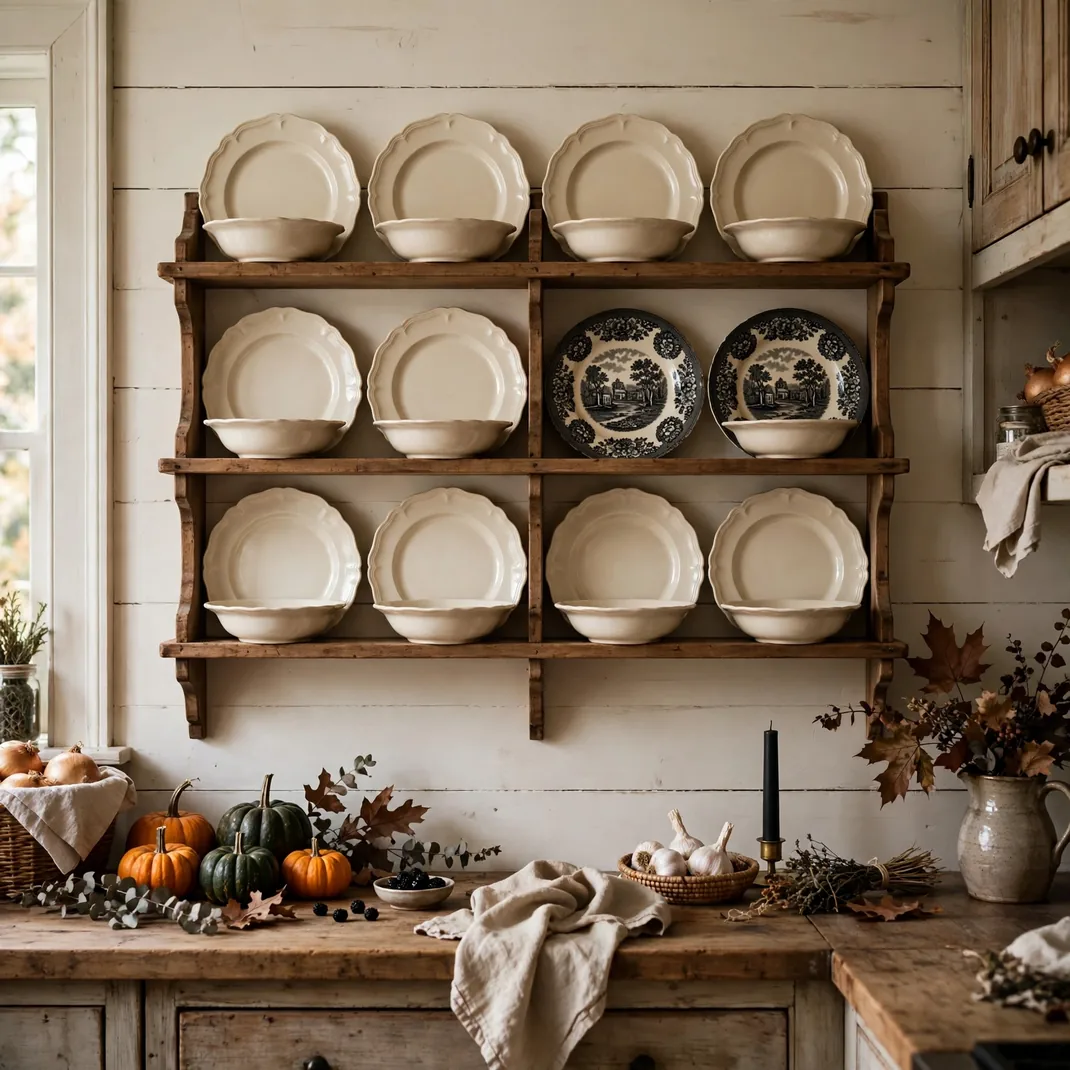
A wall-mounted plate rack filled with creamy ironstone becomes striking when two black transferware plates interrupt the pale repetition. The display still feels collected and useful, but those inky scenes bring just enough drama for Halloween.
- How to Style It: Alternate shallow plates with bowls, placing the darkest pieces off-center rather than side by side. Keep the largest plate near the middle and leave one slot empty to avoid a showroom-perfect arrangement.
- Why It Photographs Beautifully: Repeated circles create a clear graphic rhythm, and the black scenes read sharply against warm wood or chalky paint. Subtle crazing and glaze variation provide the close-up texture editors love.
- Pro Tip: Choose transferware with landscapes, vines, or birds rather than holiday wording, so the arrangement remains elegant after October 31.
- Budget-Smart Swap: Mix thrifted white plates with two inexpensive black salad plates; a unified cream palette makes mismatched shapes feel intentional.
6. Fill a Dough Bowl with Heirloom Gourds and Orchard Pears
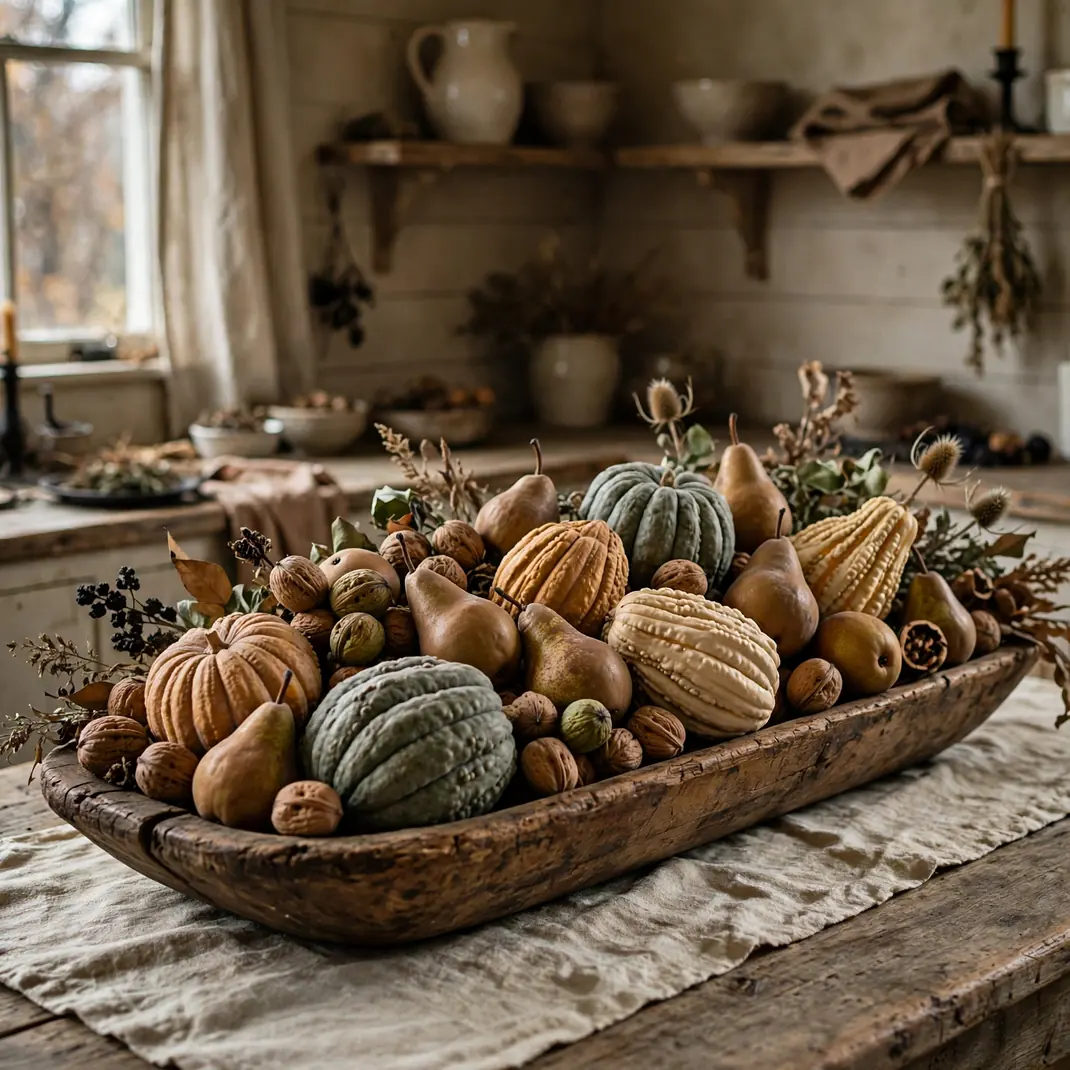
A long wooden dough bowl filled with ribbed gourds, russet pears, and a few walnut clusters makes the farmhouse table feel abundant without becoming a pumpkin pile. Dusty green, ochre, brown, and cream create harvest warmth with a naturally aged quality.
- How to Style It: Begin with three gourds of different forms, add five or seven pears, then fill low gaps with walnuts and curled leaves. Keep the arrangement below 10 inches so people can talk across the table.
- Why It Photographs Beautifully: The elongated bowl leads the eye through the frame, while irregular fruit shapes stop the composition from feeling staged. Side lighting reveals ridges, stems, and worn wood grain.
- Pro Tip: Set one pale gourd slightly beyond the bowl’s centerline; that small break in symmetry gives the centerpiece movement.
- Budget-Smart Swap: Use an oblong bread basket lined with a brown linen napkin, and bulk out the base with crumpled kraft paper hidden beneath the produce.
7. Turn the Island End into a Cider-Tasting Ledge
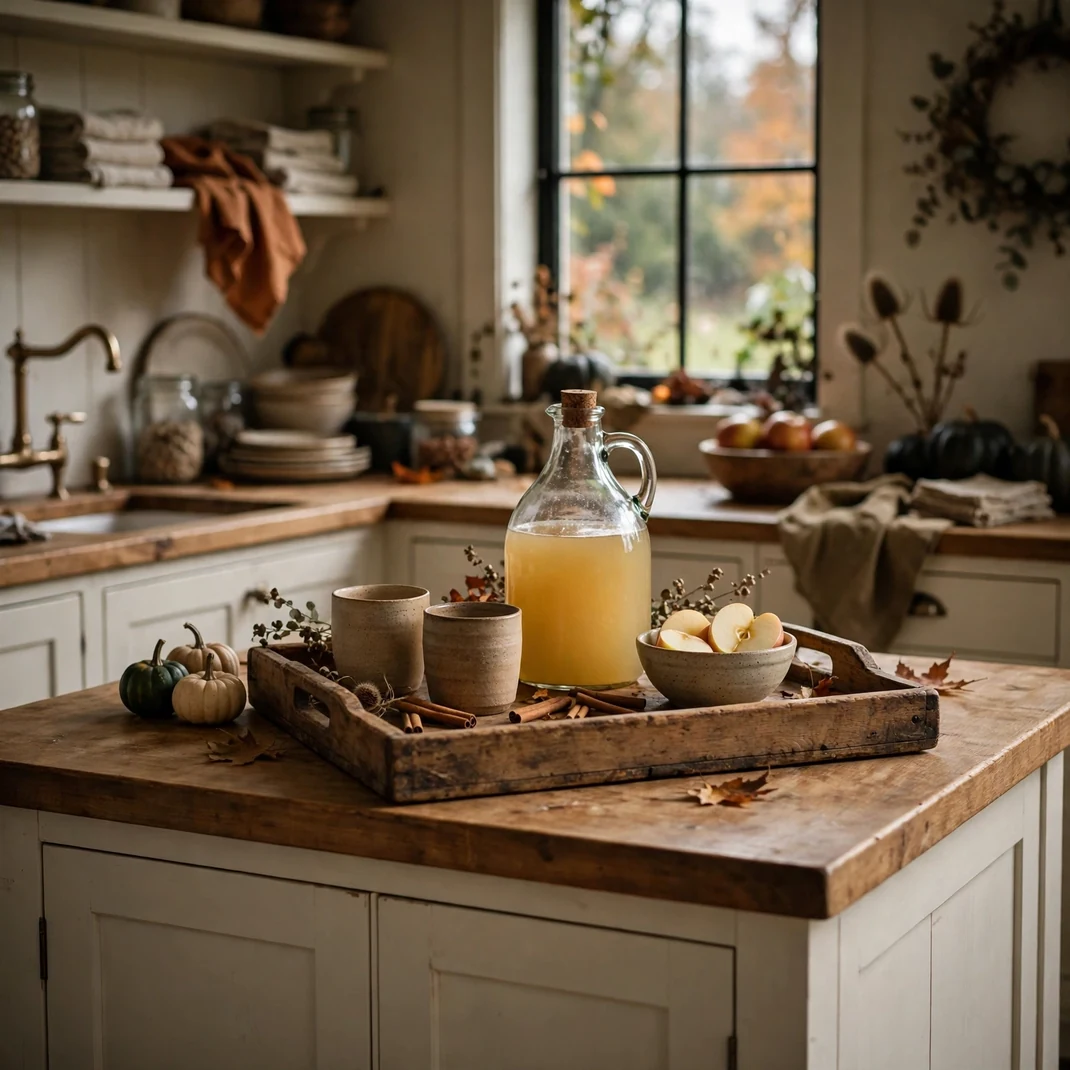
A narrow cider station gives the kitchen island a convivial October purpose without taking over the main prep surface. Cloudy apple cider in a glass jug, stoneware cups, cinnamon sticks, and one tiny bowl of sliced apples read as farmhouse hospitality rather than party décor.
- How to Style It: Contain everything on a 14- to 18-inch wooden tray at the non-working end of the island. Set the jug at the back, stack four cups beside it, and keep garnishes in one low bowl so the arrangement resets easily.
- Why It Photographs Beautifully: The translucent cider glows against dark counters, and the handled cups create a pleasing sequence of repeated shapes. A restrained tray makes the scene feel candid but composed.
- Pro Tip: Use cups in two related glazes—oatmeal and tobacco—to add depth while preserving the handmade, collected character.
- Budget-Smart Swap: Serve cider from a clear swing-top bottle and gather mismatched brown mugs from your own cabinets instead of buying a coordinated set.
8. Stage a Pie-Cooling Corner on a Vintage Baker’s Rack
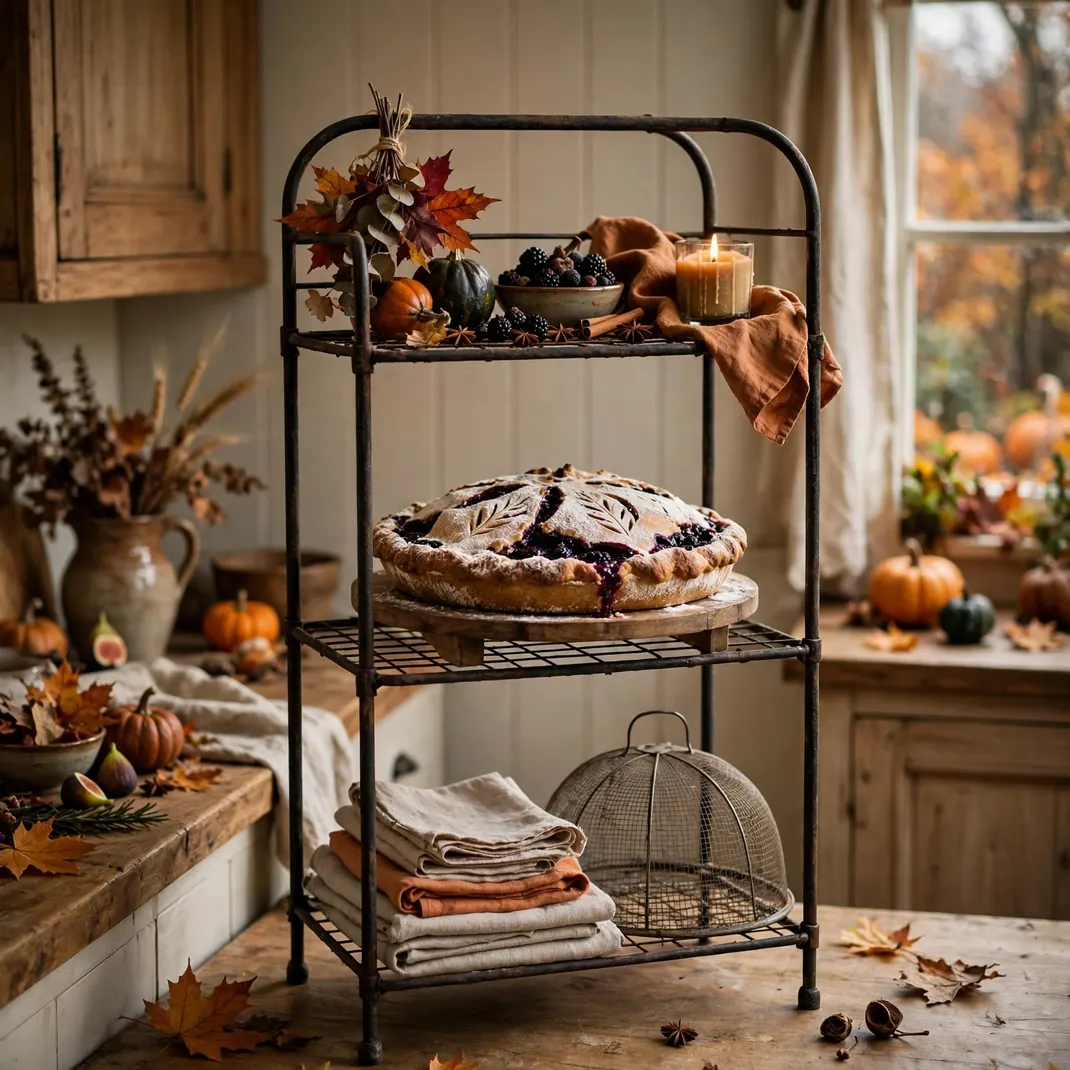
A slim baker’s rack holding one cooling pie, folded linen, and a wire food cover creates the kind of autumn scene that makes a farmhouse kitchen feel genuinely active. Dark berry filling and flour-dusted crust supply Halloween color through food rather than props.
- How to Style It: Dedicate the middle shelf to the pie on a raised wood board, place linens below, and keep the upper shelf nearly empty except for a flour crock. Leave 4 inches of air around the pie stand.
- Why It Photographs Beautifully: The open metal frame gives the vignette vertical structure without blocking the wall behind it. Flour, pastry, wire, and worn wood offer layered textures that feel believable in editorial kitchen photography.
- Pro Tip: Choose a dark fruit pie with a simple leaf-cut crust; it hints at the season while looking more refined than novelty pastry decoration.
- Budget-Smart Swap: Create the same vertical moment on a sturdy utility cart, using an upside-down mixing bowl beneath a board as a hidden riser.
9. Hang a Working Peg Rail of Blackened Kitchen Tools
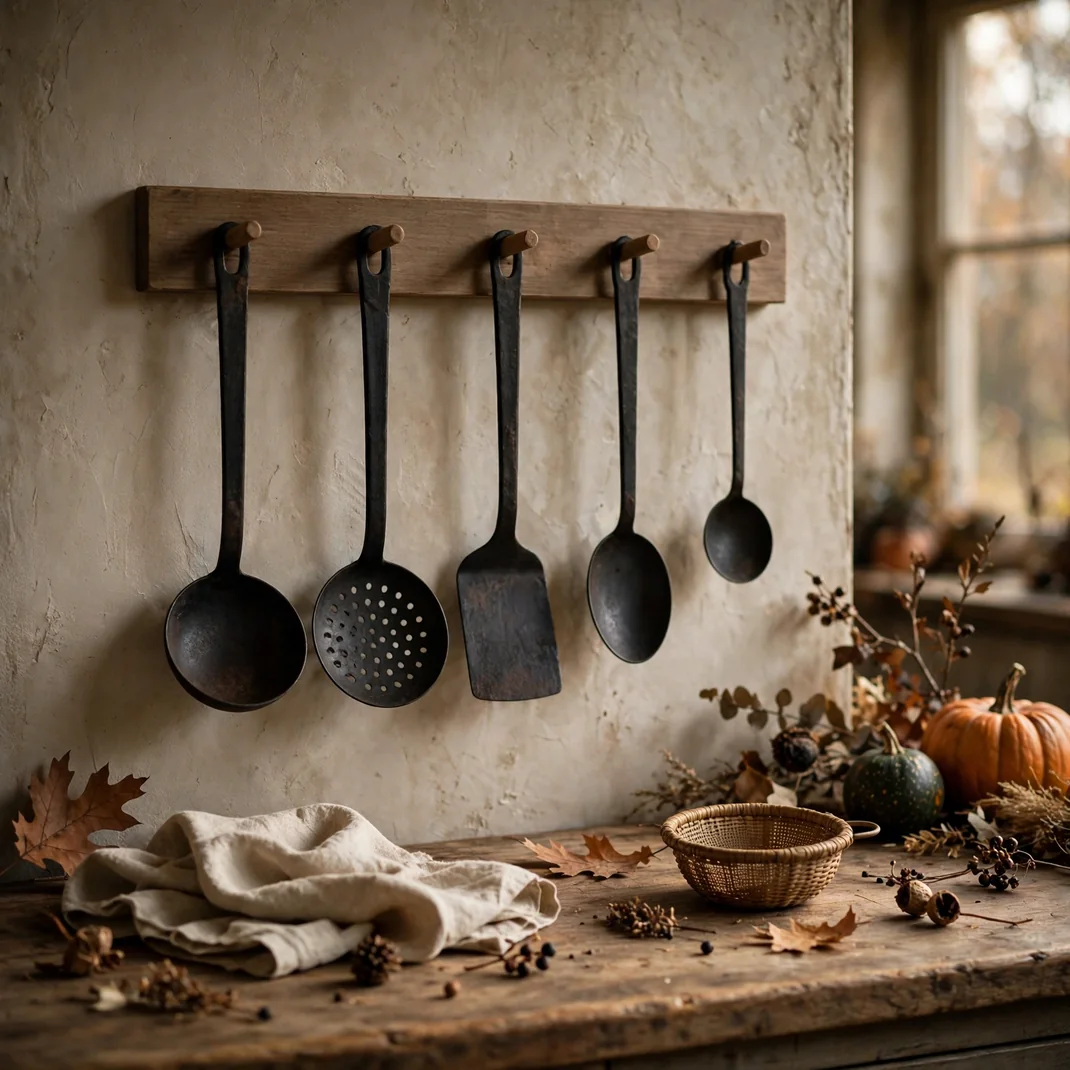
A Shaker-style peg rail gains October definition when it holds a measured row of blackened iron utensils, a flax oven cloth, and one small woven strainer. Because every object can still be used, the wall feels authentic rather than decorated for a single day.
- How to Style It: Hang tools from longest to shortest with at least 2 inches between silhouettes, then break the hard line with one softly folded towel. Keep the rail above a side counter rather than directly over the cooktop.
- Why It Photographs Beautifully: Dark utensils make crisp linear shadows on pale plaster, producing a graphic Halloween mood from ordinary equipment. The textile introduces a quiet vertical fold and prevents the composition from looking rigid.
- Pro Tip: Repeat one rounded shape—such as a ladle bowl—three times at different heights to give the rail a subtle rhythm.
- Budget-Smart Swap: Paint an unfinished wood peg strip in matte charcoal and hang the darkest tools you already own, mixing in a thrifted metal strainer.
10. Warm Open Shelves with Amber Pantry Glass
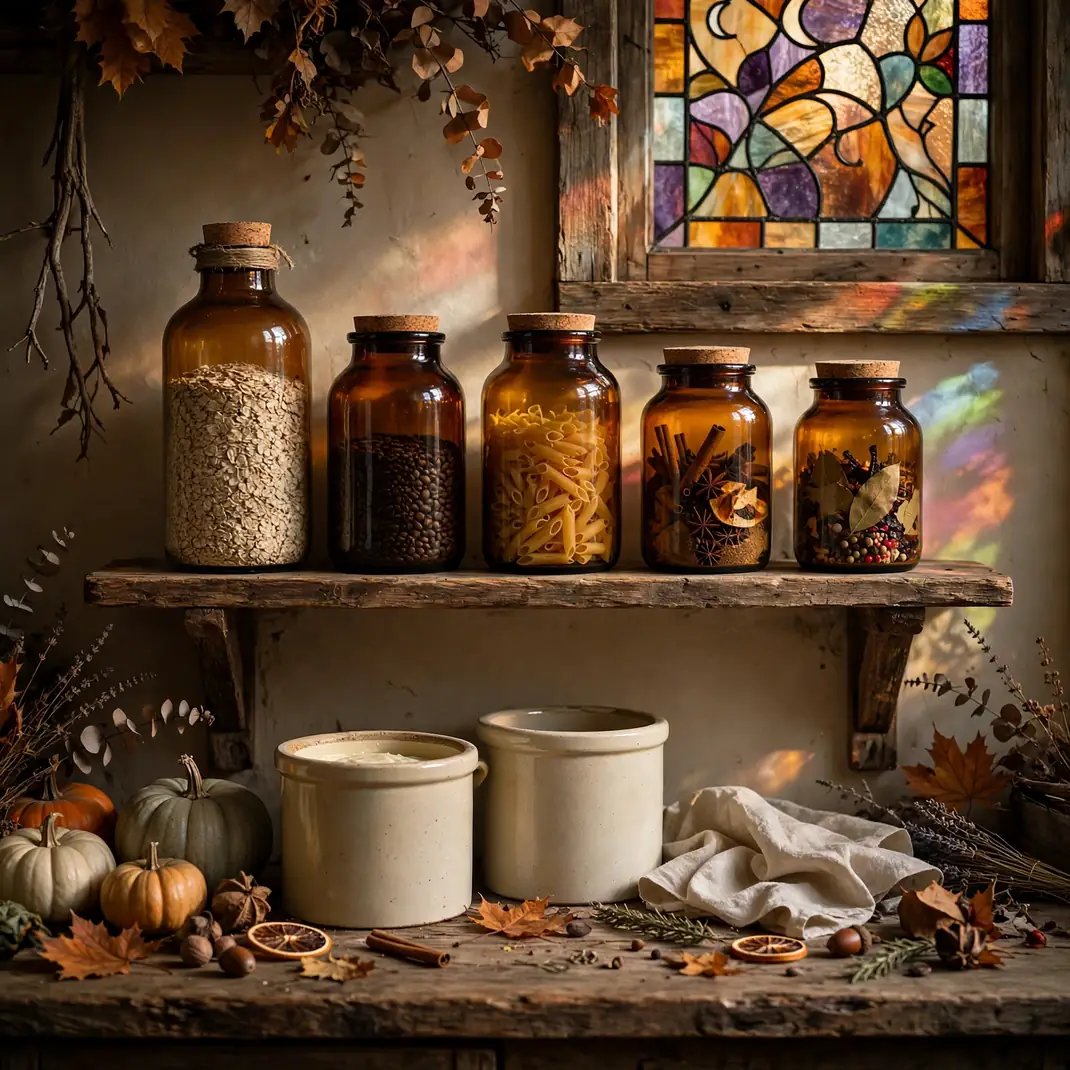
Amber jars filled with oats, coffee beans, dried pasta, and baking spices give open shelves a warm stained-glass effect in late-afternoon light. Mixed with cream crocks and rough wood, the translucent brown feels autumnal and faintly mysterious without looking like an apothecary display.
- How to Style It: Use three to five food-safe jars in graduated heights, placing the tallest toward one end and balancing it with a broad cream crock. Keep labels small and consistent, and leave at least 20 percent of the shelf open.
- Why It Photographs Beautifully: Light passing through colored glass creates glowing brown edges, while visible dry goods make the styling feel real. The negative space keeps each silhouette readable in a wide kitchen photograph.
- Pro Tip: Group jars by glass tone rather than exact shape; slight variations in amber look collected, but one off-color bottle can make the shelf feel random.
- Budget-Smart Swap: Reuse brown glass food jars with wide openings, remove their labels thoroughly, and decant only dry staples you reach for often.
11. Cover the Breakfast Banquette in a Harvest Patchwork
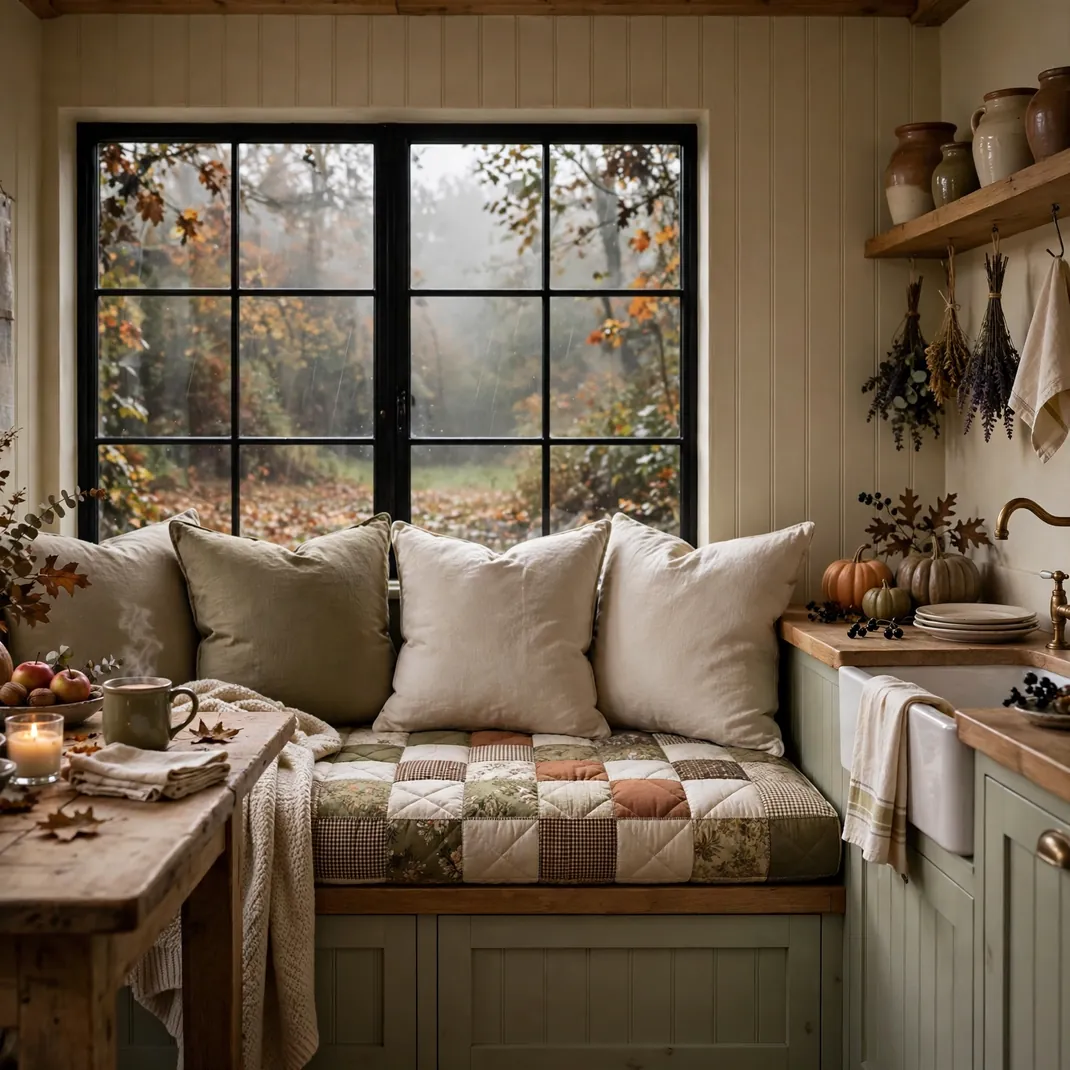
A fitted patchwork cover turns a plain breakfast banquette into a cozy October anchor using small checks, faded florals, and solid squares in tobacco, olive, cream, and muted pumpkin. The quilting adds farmhouse softness while the tailored fit keeps it from resembling spare bedding.
- How to Style It: Use the patchwork only on the seat cushion and keep the back cushions in solid oatmeal linen. Choose small blocks, secure the cover beneath with ties, and add one lumbar pillow in the darkest fabric.
- Why It Photographs Beautifully: The low horizontal band of pattern guides the eye into the nook while solids give it breathing room. Stitch lines catch angled light and make the seating look tactile rather than flat.
- Pro Tip: Repeat each color at least twice across the patchwork; isolated squares look accidental, while repetition makes mixed fabrics feel designed.
- Budget-Smart Swap: Fold a small vintage quilt to the exact seat depth and tuck excess fabric behind the cushion, using nonslip mesh underneath.
12. Lay a Block-Printed Runner Beneath Punched-Tin Lanterns
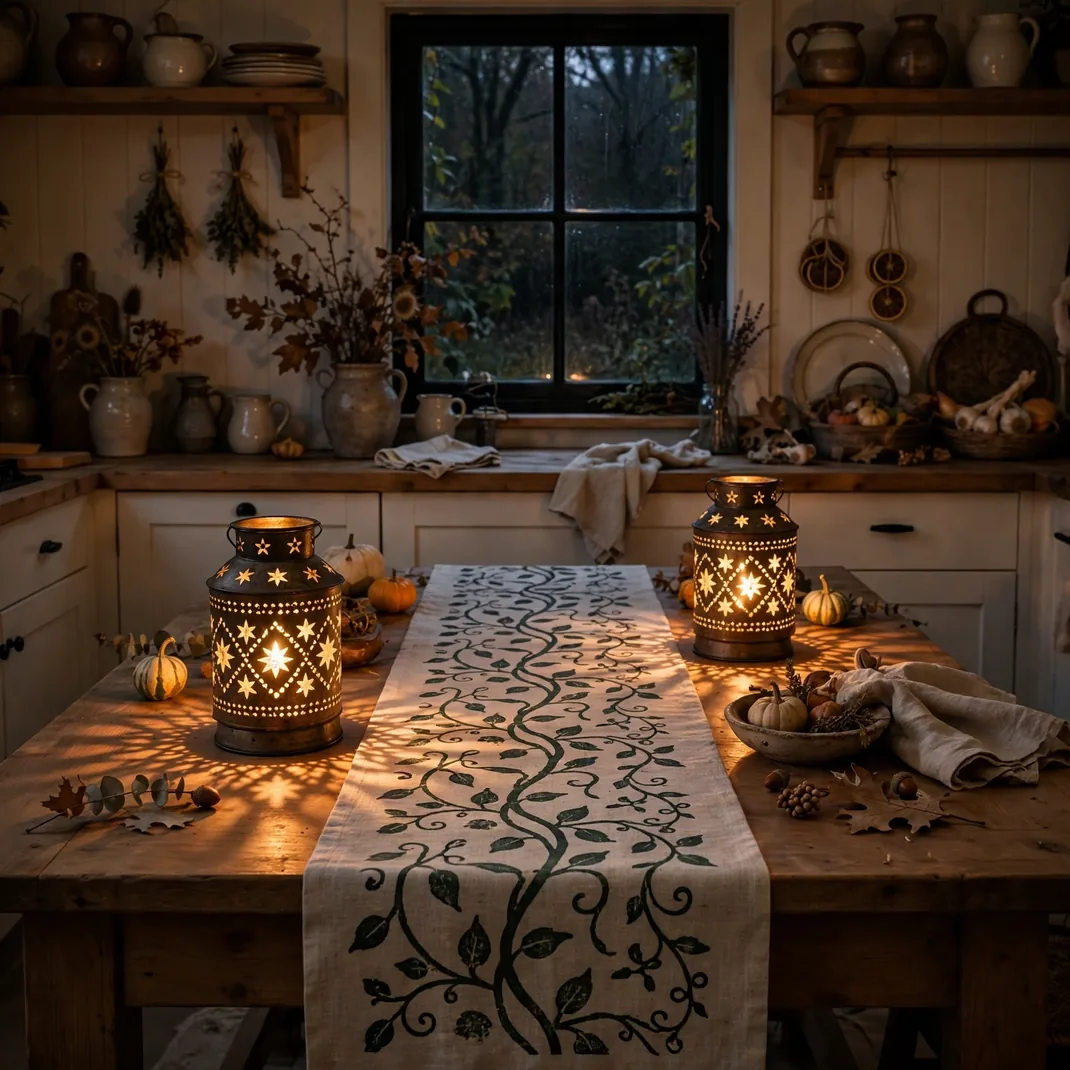
A narrow runner printed with abstract vines grounds the farmhouse table, while two punched-tin lanterns create pools of warm, patterned light. The combination feels handcrafted and nocturnal, giving dinner a Halloween hush without relying on black table linens.
- How to Style It: Choose a runner about one-third the table width and place lanterns at the quarter points rather than dead center. Use rechargeable LED candles, then add a low bowl between them so the table remains practical for serving.
- Why It Photographs Beautifully: The runner establishes a strong central line, and pinprick light adds depth around the edges of the frame. Repeated cutouts in the lanterns echo the hand-blocked pattern without matching it literally.
- Pro Tip: Keep the runner’s print matte and the lanterns softly metallic; contrasting finishes separate the layers in both daylight and evening shots.
- Budget-Smart Swap: Stamp a plain cotton runner with a carved potato or sponge motif and use thrifted perforated metal containers as LED lantern sleeves.
13. Turn a Vintage Toolbox into a Supper Caddy
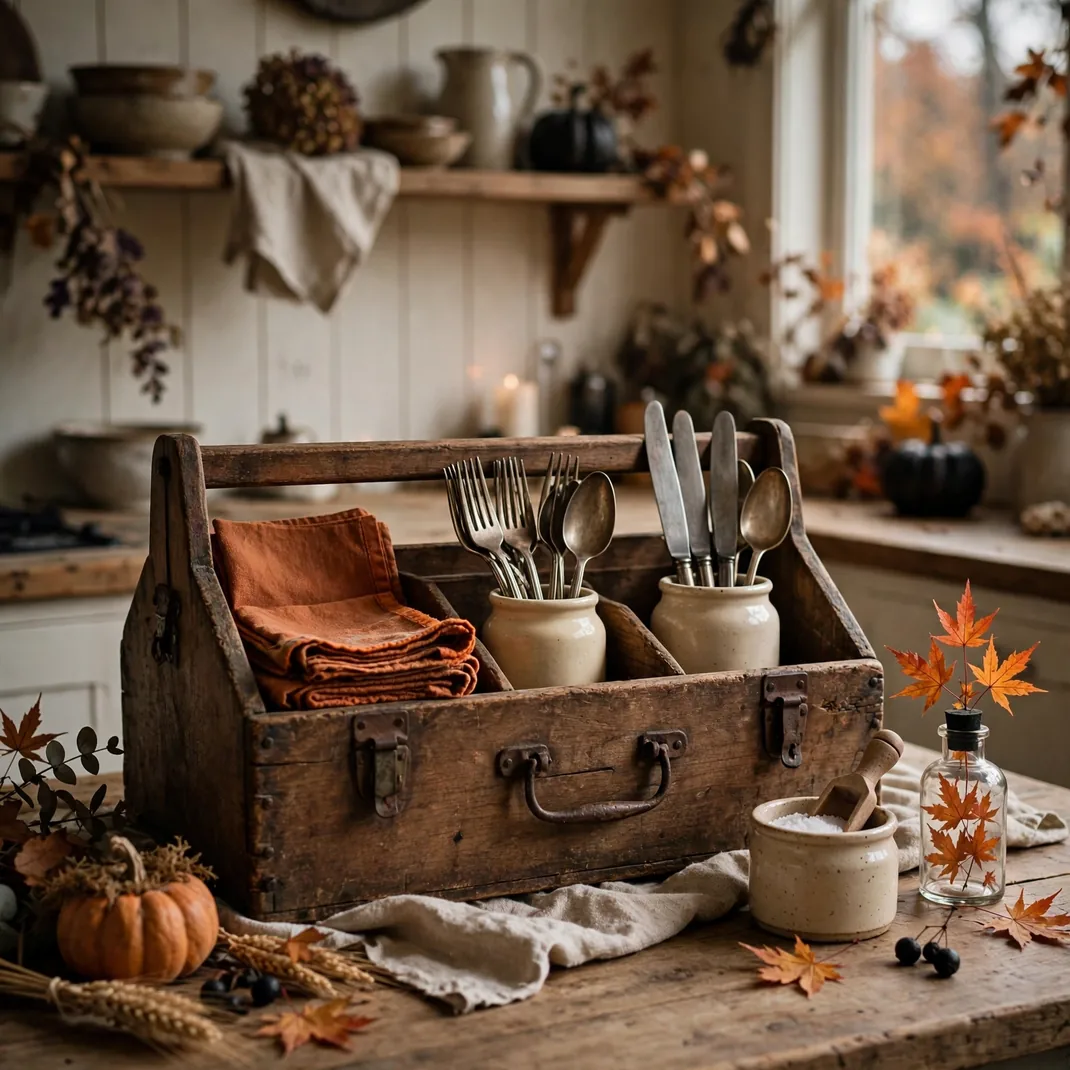
A weathered wood toolbox filled with napkins, flatware, salt, and a tiny bottle of maple-colored foliage brings Halloween warmth to casual meals without adding clutter. Its sturdy handle and divided form make the piece decorative, portable, and genuinely useful.
- How to Style It: Line one compartment with folded rust napkins, stand flatware in two cream jars, and reserve the smallest section for seasonings. Place the foliage off-center and keep it below the handle so the caddy is easy to carry.
- Why It Photographs Beautifully: The handle frames the contents like a still life, while the compartments create neat blocks of texture. Worn grain and dark nail heads bring age and contrast to a light counter.
- Pro Tip: Limit the styling to one warm textile, one pale ceramic, and one botanical accent; too many colors make the caddy look like storage rather than a centerpiece.
- Budget-Smart Swap: Stain an unfinished hardware-store tool tote with diluted walnut stain, then scuff the edges lightly after it dries.
14. Build a Moody Produce Still Life in Stoneware Crocks
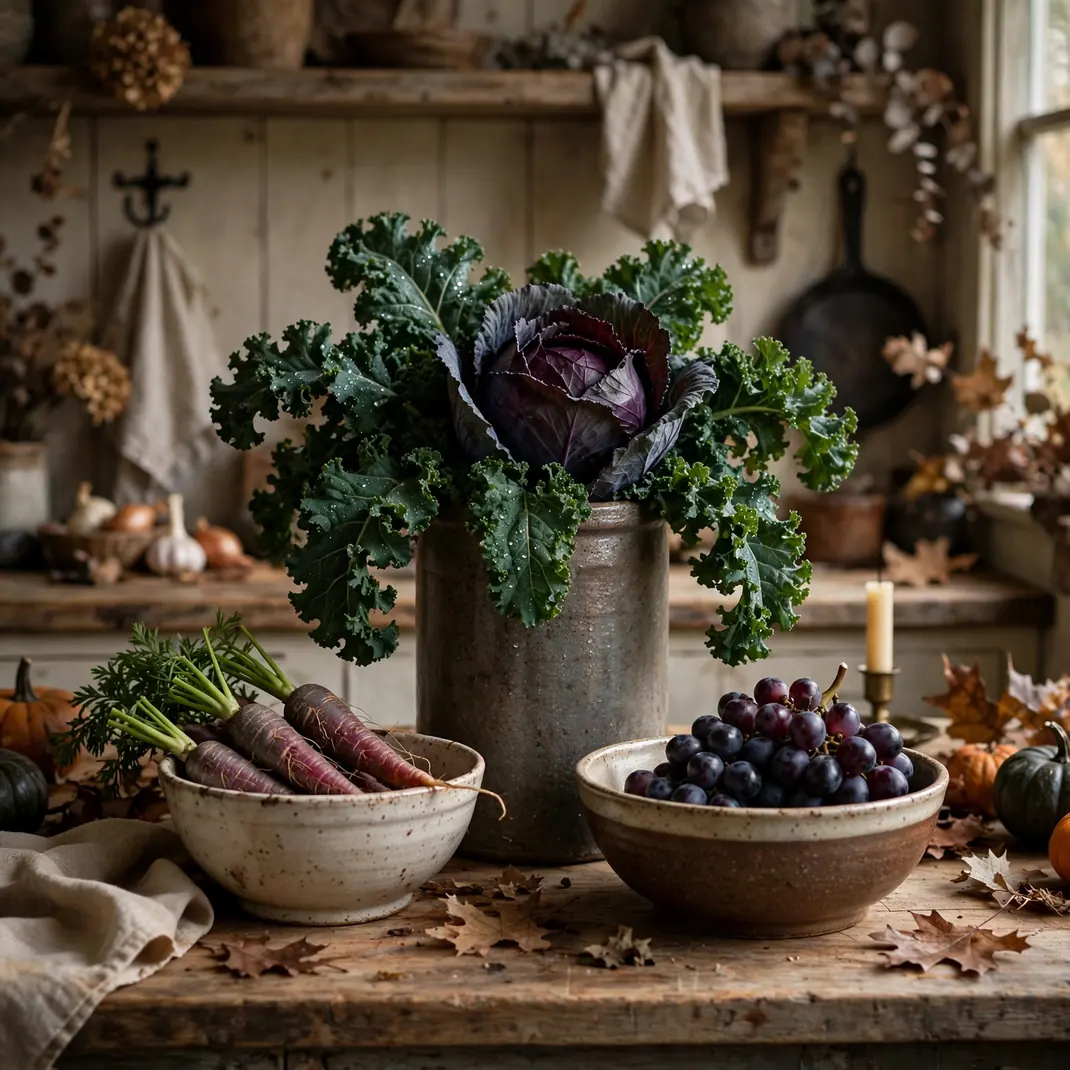
Deep green kale, burgundy cabbage, purple carrots, and dark grapes look unexpectedly dramatic when arranged in heavy cream and brown crocks. This edible still life gives the counter painterly Halloween color while staying rooted in the working life of a farmhouse kitchen.
- How to Style It: Use one tall crock for leafy vegetables, one medium bowl for grapes, and a low board for carrots. Arrange the three vessels in a loose triangle near the pantry or prep zone, not beside heat or direct sun.
- Why It Photographs Beautifully: Velvety leaves, waxy cabbage, matte roots, and glazed pottery provide four clearly different textures. The naturally dark produce creates depth without artificial black decorations.
- Pro Tip: Angle the largest cabbage so its cut stem is hidden and its curled leaves face the room; that turns an ingredient into a sculptural focal point.
- Budget-Smart Swap: Style only produce already on your meal plan and use mixing bowls in related neutral tones instead of buying vintage crocks.
15. Hang Oversized Breadboards as a Sculptural Backdrop
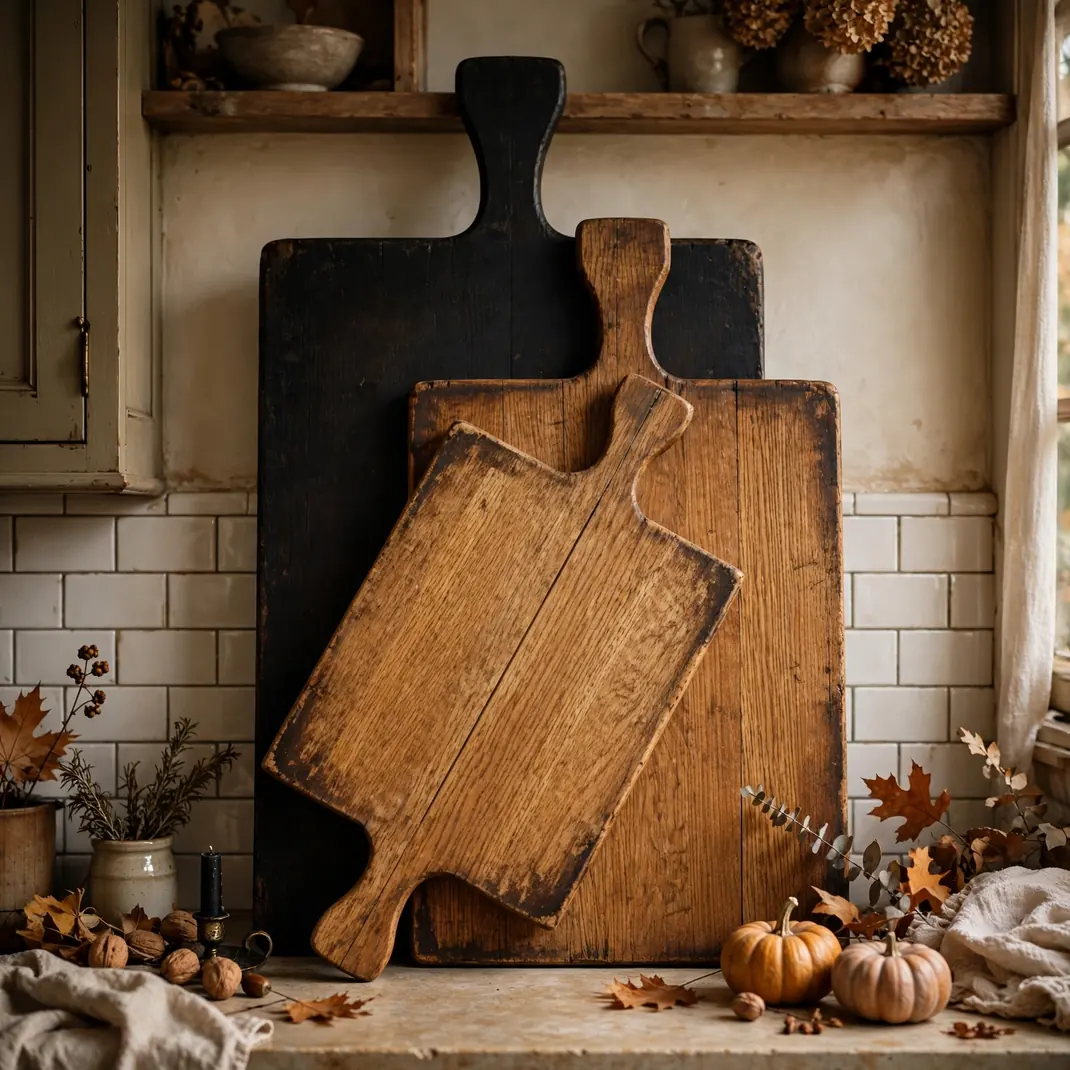
A layered trio of oversized breadboards turns an empty backsplash or side wall into a warm, architectural focal point. Paddle handles and time-darkened edges create strong silhouettes, especially when one board is nearly ebony and the others are honeyed oak.
- How to Style It: Overlap three boards by 2 to 4 inches, with handles at different heights, and secure each independently to rated hooks. Choose a wall outside the active splash zone if the boards are antique or decorative only.
- Why It Photographs Beautifully: Broad wood planes introduce warmth at eye level, and the offset handles form a compelling skyline. The near-black board gives the grouping a shadowy October anchor without a seasonal symbol.
- Pro Tip: Vary both shape and tone but keep the boards within one-third of each other in size; extreme scale changes can make the composition feel scattered.
- Budget-Smart Swap: Darken one inexpensive unfinished board with food-safe walnut oil or a food-safe dark finish, and pair it with boards already in your kitchen.
16. Paint a Reversible Harvest Floor Cloth
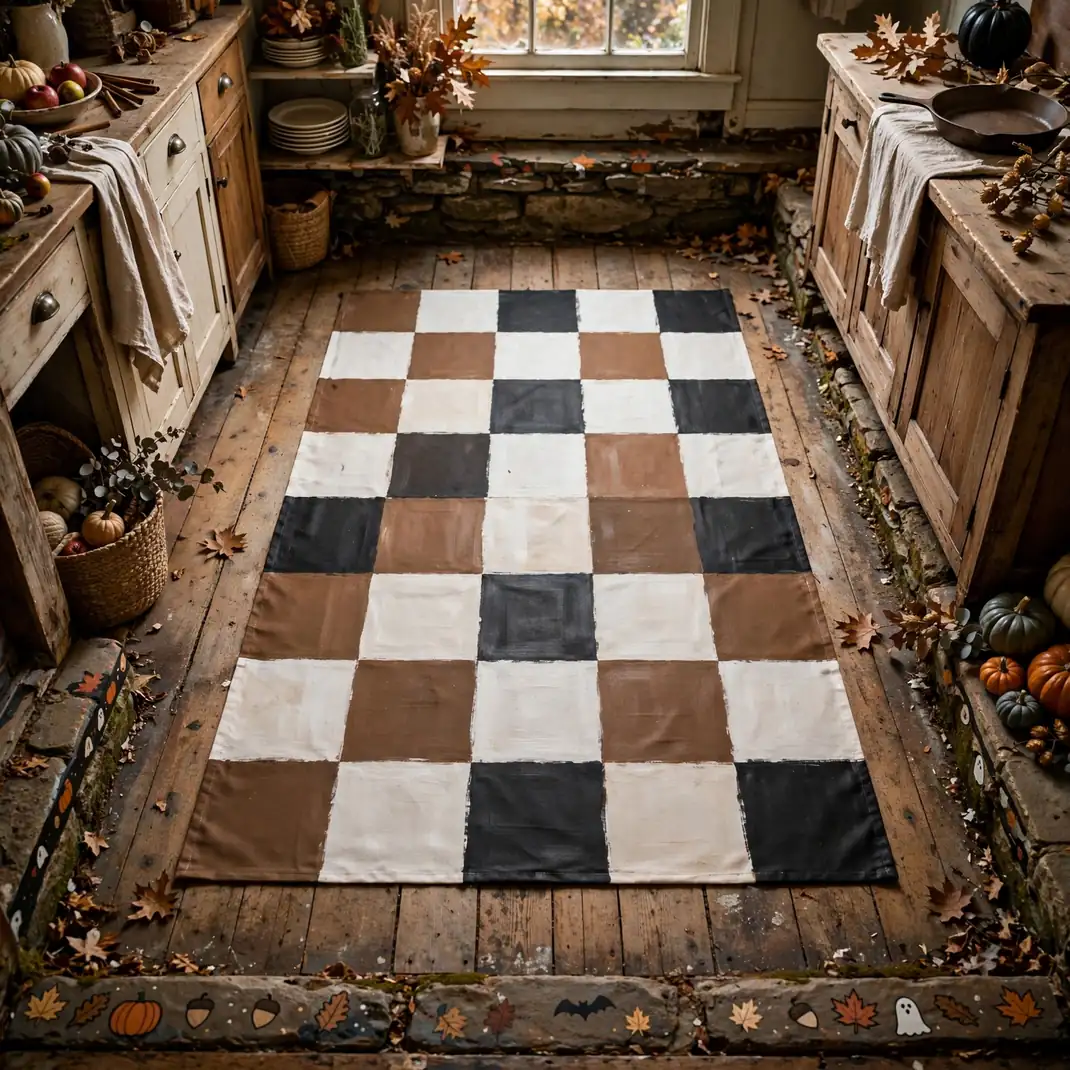
A canvas floor cloth painted in a large-scale tobacco, cream, and charcoal checkerboard gives the kitchen an old-house foundation with a playful Halloween edge. Unlike a plush rug, its flat surface is easy to wipe and will not visually crowd a narrow work aisle.
- How to Style It: Size the cloth to leave at least 4 inches of visible floor around every side and align its long edge with the island. Seal painted canvas thoroughly and add a nonslip pad before placing it outside the busiest spill zone.
- Why It Photographs Beautifully: The checkerboard establishes perspective lines that lead toward the cabinetry, making even a small kitchen feel composed. Warm, softened colors photograph more naturally than stark orange and black.
- Pro Tip: Use 8- to 12-inch checks so the pattern reads clearly beneath furniture; tiny squares can flicker visually in photographs.
- Budget-Smart Swap: Stencil only a wide checked border onto a plain washable cotton runner, leaving the center unpainted for a quicker project.
17. Line Glass-Front Cabinets in Deep Olive
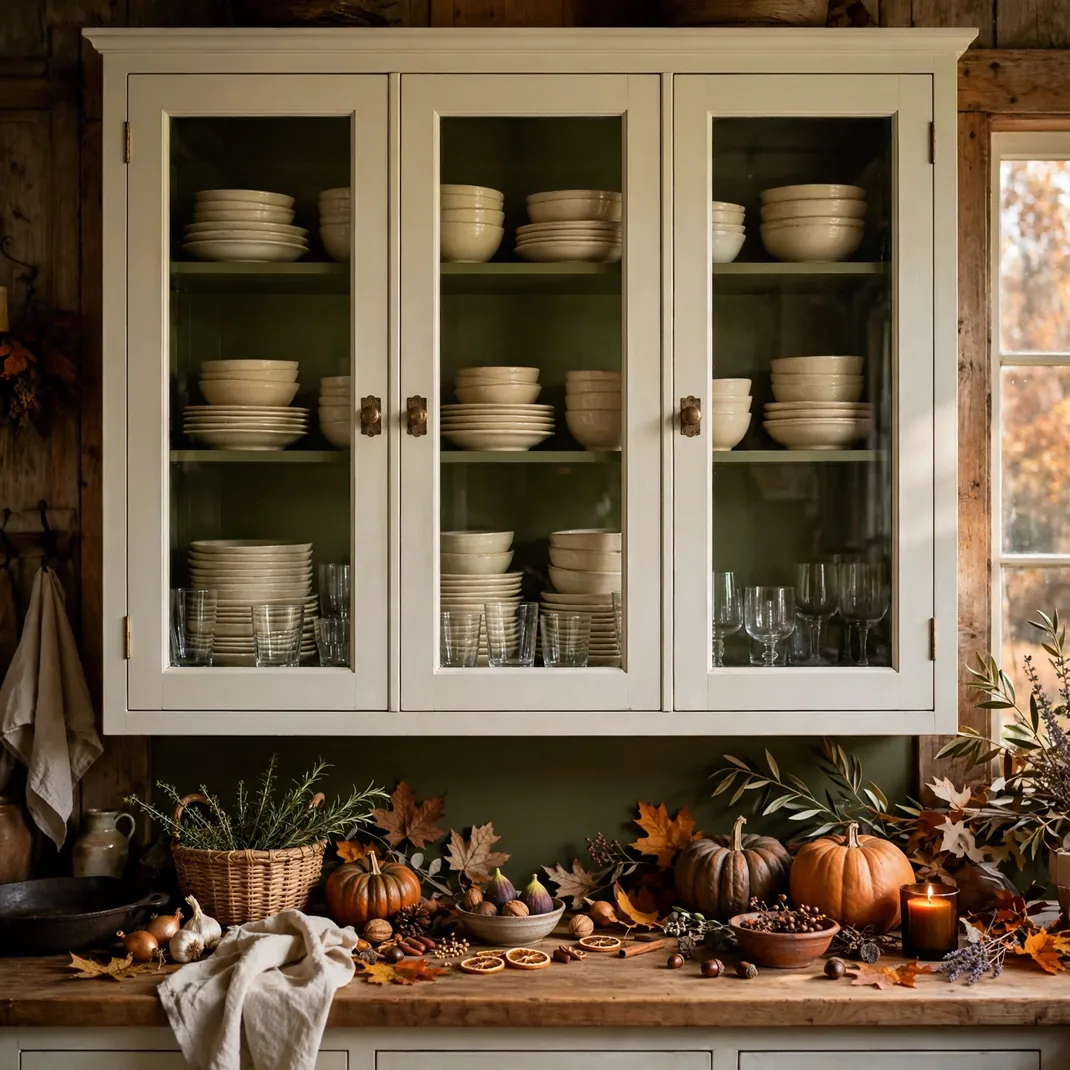
A deep olive backing inside glass-front cabinets makes cream dishes and clear glassware appear richer while giving the kitchen a permanent, earthy October undertone. Because the color sits behind the contents, it reads as depth rather than another busy surface.
- How to Style It: Paint or paper only the cabinet backs, then arrange pale dishes in stacks with clear glasses between them. Keep the darkest pieces on the lower shelf so the cabinet feels grounded rather than top-heavy.
- Why It Photographs Beautifully: Olive absorbs glare behind the glass doors and gives white ceramics crisp outlines. Small reflections at the door edges add dimension without obscuring the contents.
- Pro Tip: Test the color at night as well as during the day; choose an olive with brown undertones so warm bulbs do not turn it yellow.
- Budget-Smart Swap: Cut removable matte wallpaper or heavy olive paper to fit each back panel and secure it with low-tack mounting strips.
18. Set a Black Stone Cheese-and-Fig Corner
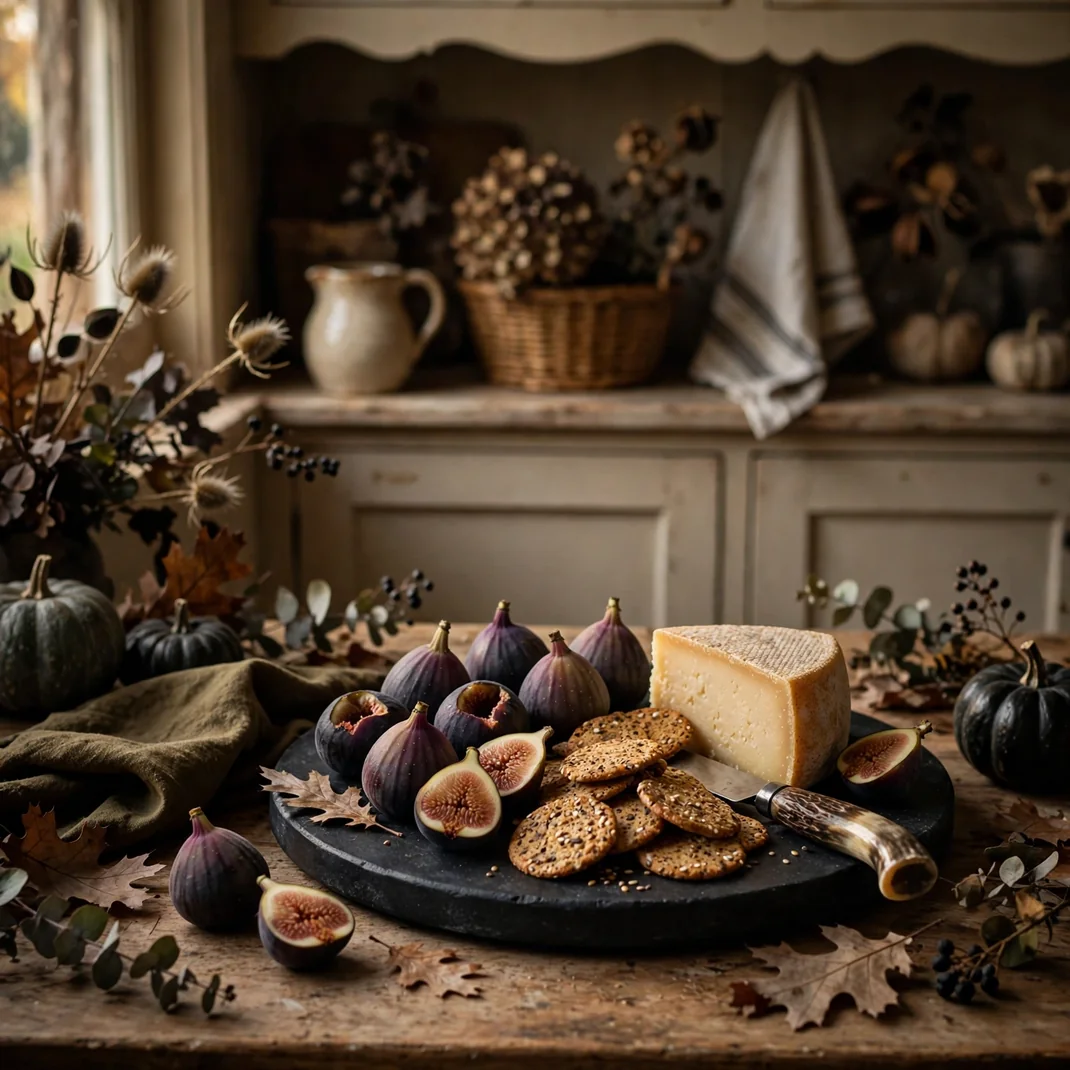
A matte black serving stone layered with purple figs, farmhouse cheese, seeded crackers, and a horn-handled knife makes a handsome late-October snack station. It feels generous and grown-up, with Halloween drama coming from contrast and ingredients rather than themed serveware.
- How to Style It: Place the stone on a dry counter away from prep traffic, anchor one corner with cheese, and fan figs diagonally toward the opposite edge. Keep crackers in a low basket beside the board so crumbs do not cover the composition.
- Why It Photographs Beautifully: Pale cheese and dusty-purple fruit stand out against the nonreflective black surface. The diagonal arrangement introduces movement while natural food textures keep the scene relaxed.
- Pro Tip: Leave a palm-sized area of stone exposed near the front; visible black surface is what gives the board its moody visual impact.
- Budget-Smart Swap: Use a dark baking tray lined with food-safe black parchment, or flip a well-seasoned cast-iron griddle to its flat side.
19. Stack Apple Crates into a Porch-to-Pantry Station
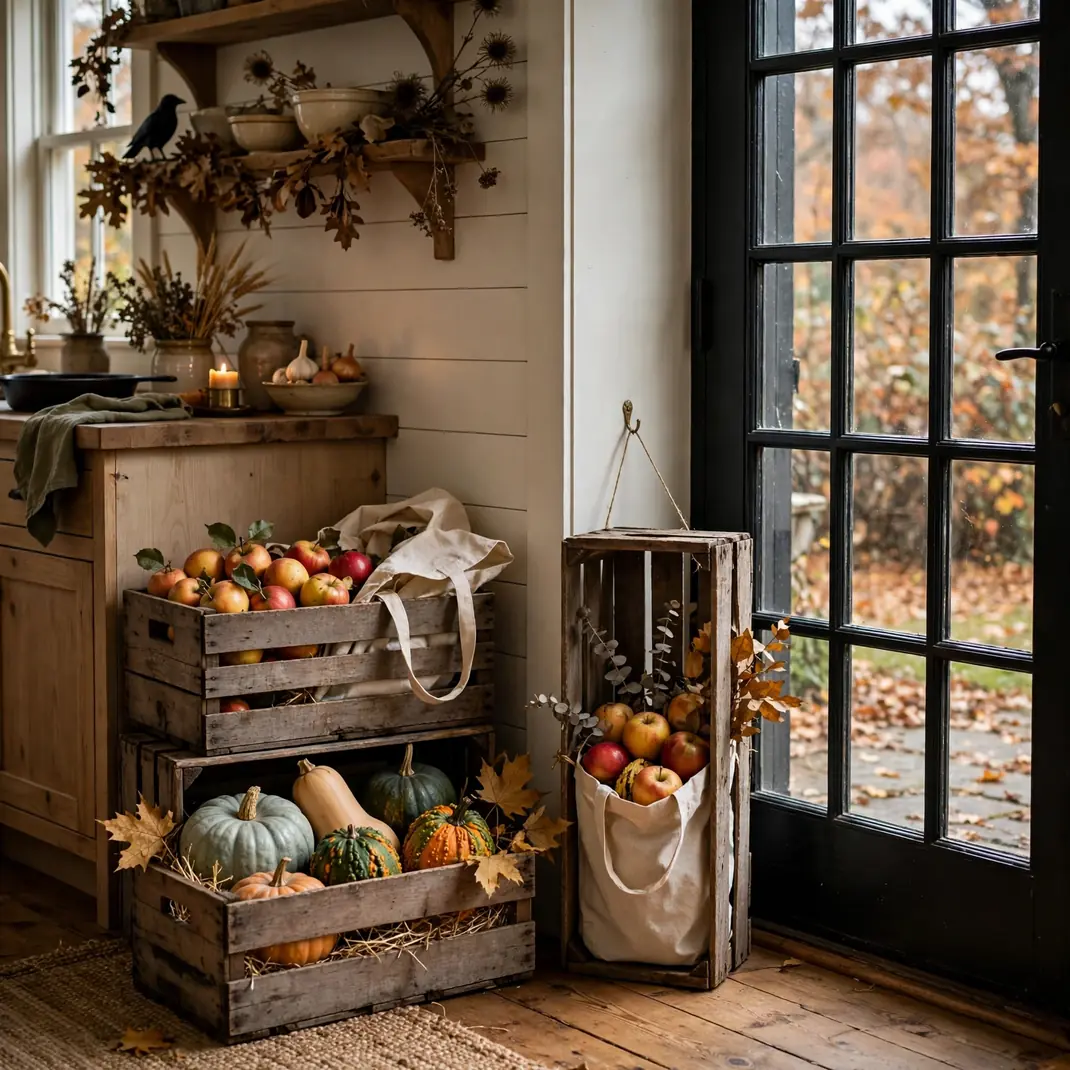
Two or three old apple crates stacked beside the kitchen door create a practical landing place for squash, apples, market bags, and muddy garden clogs. The arrangement brings harvest abundance indoors while keeping its rustic character disciplined and easy to navigate.
- How to Style It: Stack two crates horizontally and one vertically, anchoring them discreetly to the wall if needed. Assign one level to produce, one to folded market bags, and one to a boot tray so the display remains functional.
- Why It Photographs Beautifully: Boxed compartments organize varied objects into clear frames, and rough slats create strong horizontal shadows. A few ochre squash add warm color at floor level, balancing upper cabinetry.
- Pro Tip: Turn any printed crate end toward the wall unless its typography is genuinely old and quiet; too many markings make the station feel commercial.
- Budget-Smart Swap: Use unfinished storage cubes brushed with diluted brown paint, then sand only the corners for a timeworn finish.
20. Arrange Copper Molds in a Shadowed Wall Grid
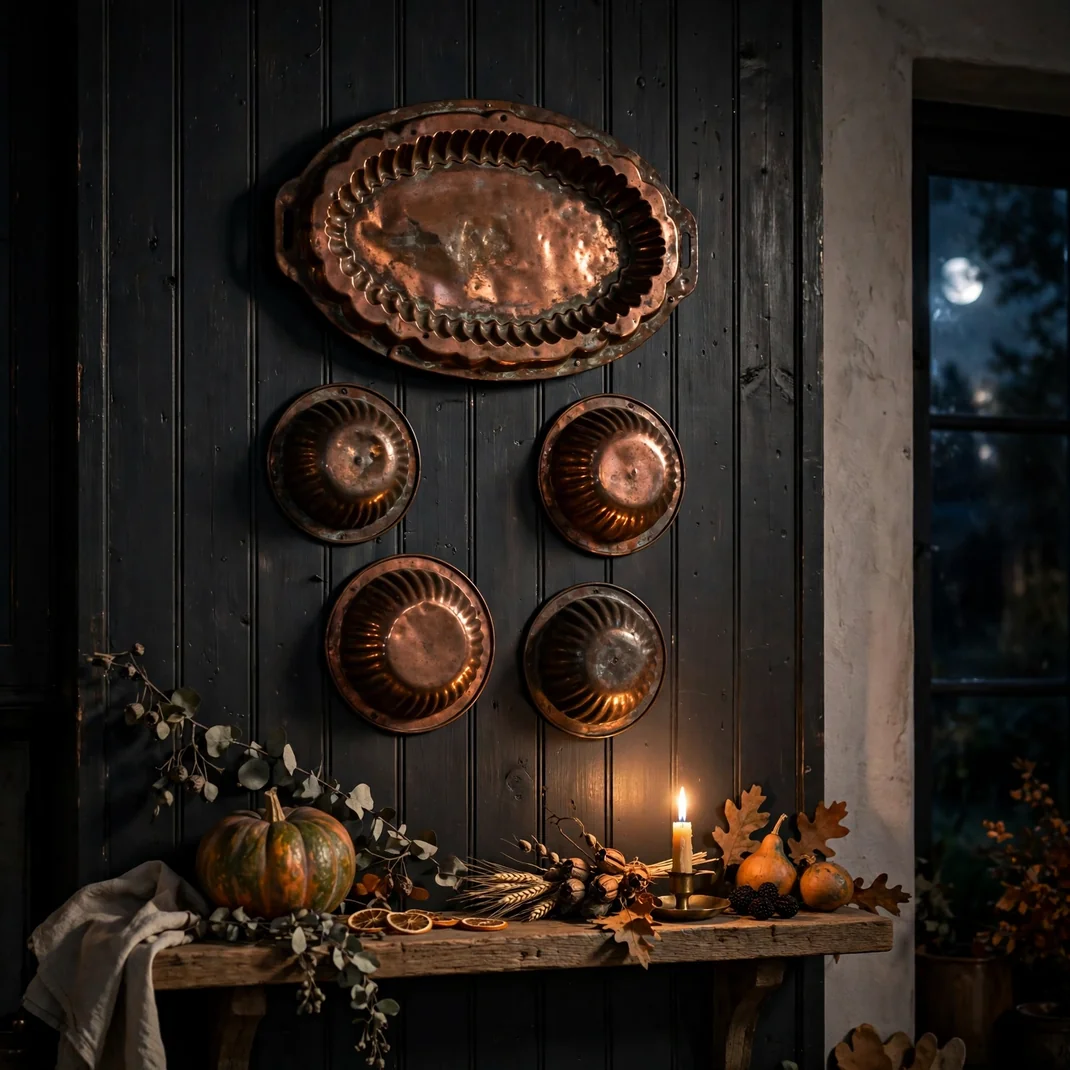
Vintage copper molds become wall sculpture when arranged in a loose grid against charcoal beadboard or a deep brown accent panel. Their familiar kitchen forms keep the composition grounded, while aged metallic highlights create a warm, moonlit glimmer after dark.
- How to Style It: Arrange five or seven molds on the floor first, mixing one large oval with smaller rounds. Hang them 2 to 3 inches apart inside an imaginary rectangle, and keep the lowest piece clear of counter splashes.
- Why It Photographs Beautifully: Concave and convex shapes catch highlights differently, so the wall changes as daylight moves. A dark backing makes every warm rim visible and gives the arrangement October depth.
- Pro Tip: Mix patina levels but avoid polishing every mold equally; variation makes the collection look inherited rather than newly assembled.
- Budget-Smart Swap: Spray thrifted aluminum molds in two closely related aged-copper tones, keeping the finish matte enough to avoid a plastic shine.
21. Corral the Sink Essentials on an Enamel Wash-Up Tray
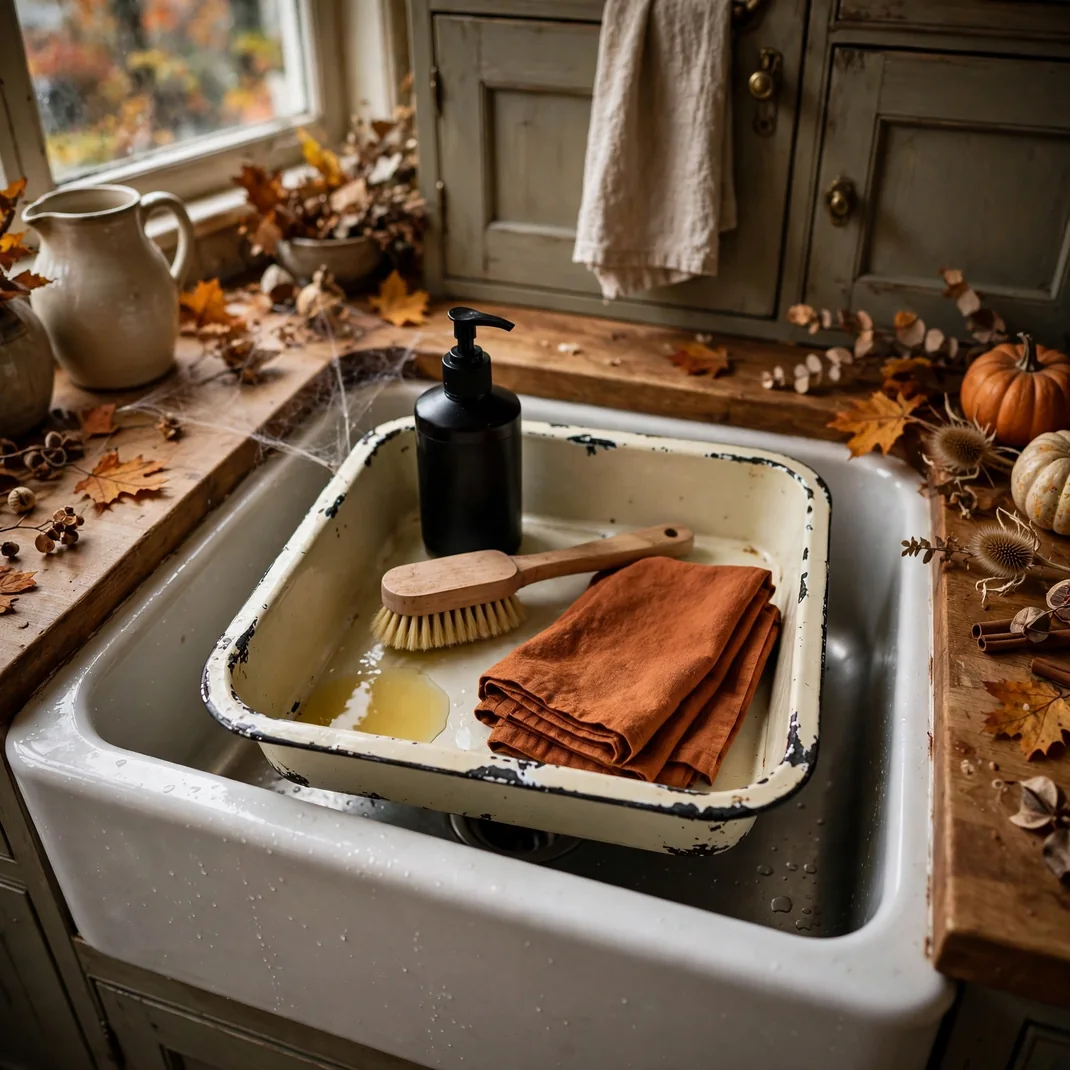
A chipped cream enamel tray turns dish soap, a wood brush, and folded rust-colored cloths into a neat farmhouse composition. One black soap bottle supplies a crisp Halloween note, while the contained layout keeps the sink from looking staged or crowded.
- How to Style It: Choose a tray no deeper than 6 inches and place the tallest bottle at the back, brush in the middle, and two folded cloths at the front. Leave room to lift each item without moving the others.
- Why It Photographs Beautifully: The pale tray outlines darker objects and creates a clean visual boundary on a busy counter. Wood, enamel, glass, and linen make a convincing material story in a small frame.
- Pro Tip: Decant soap into an unlettered bottle and remove excess packaging; simple silhouettes keep the vignette calm and editorial.
- Budget-Smart Swap: Use a rimmed enamel dinner plate or small white baking dish you already own, adding a rust washcloth for seasonal color.
22. Lower a Seeded-Glass Pendant over the Sink
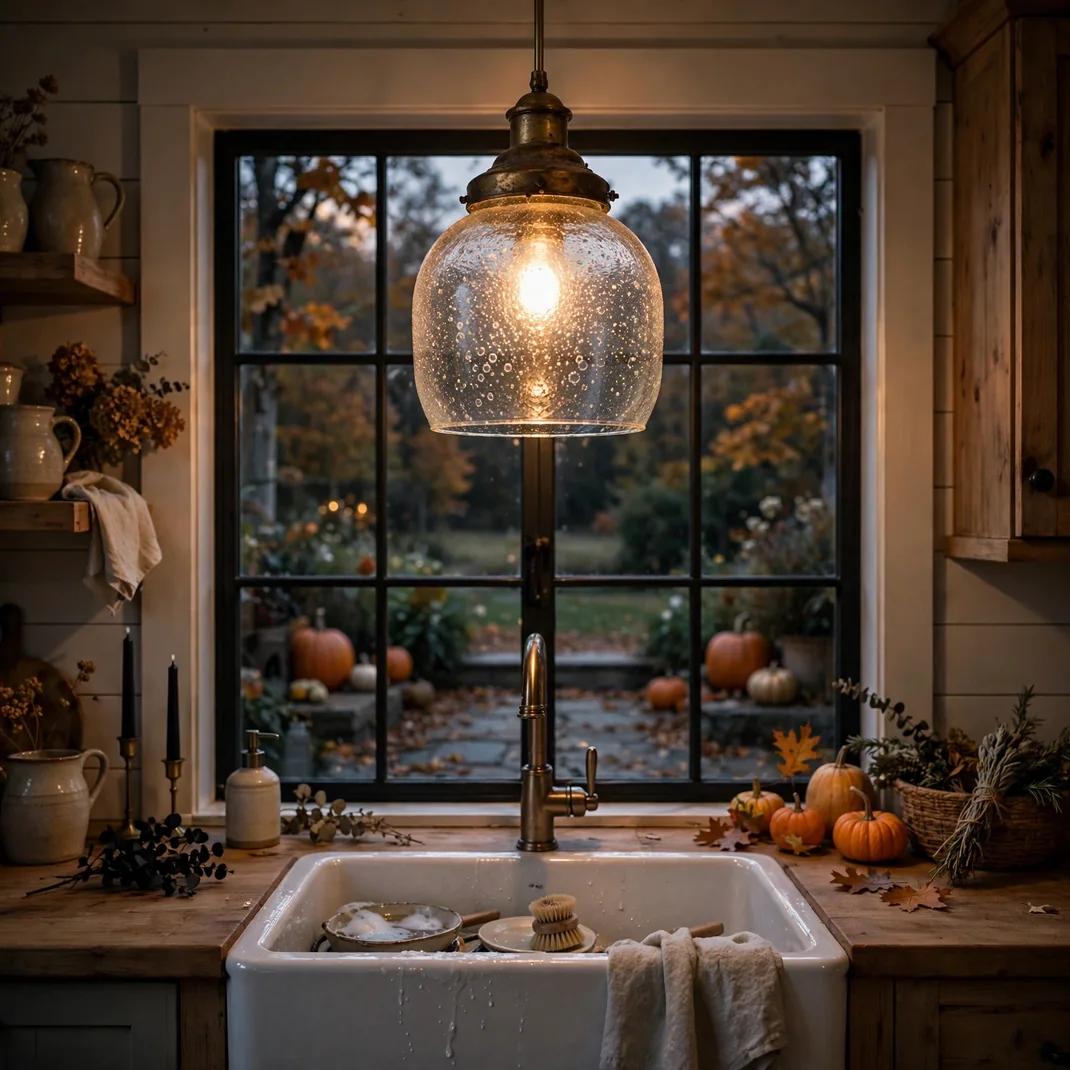
A seeded-glass pendant with an aged-brass cap gives the sink a warm halo and makes evening cleanup feel unusually cozy. The tiny bubbles distort the light just enough to suggest candle glow, while the simple silhouette suits both rustic and updated farmhouse kitchens.
- How to Style It: Choose a shade 8 to 12 inches wide and install it high enough to preserve the window view and safe clearance. Use a warm dimmable bulb, then keep nearby accessories low so the pendant remains the focal point.
- Why It Photographs Beautifully: Seeded glass scatters pinpoints of light across metal fixtures and the window, adding atmosphere without darkening the workspace. The centered pendant also gives sink-wall photographs a strong visual anchor.
- Pro Tip: Select a clear warm bulb rather than frosted white; its visible glow reinforces the old-fashioned lantern character through textured glass.
- Budget-Smart Swap: Replace only an existing fixture’s shade with a compatible seeded-glass globe, leaving electrical work to a qualified installer.
23. Paint Windsor Stools in Oxblood Red
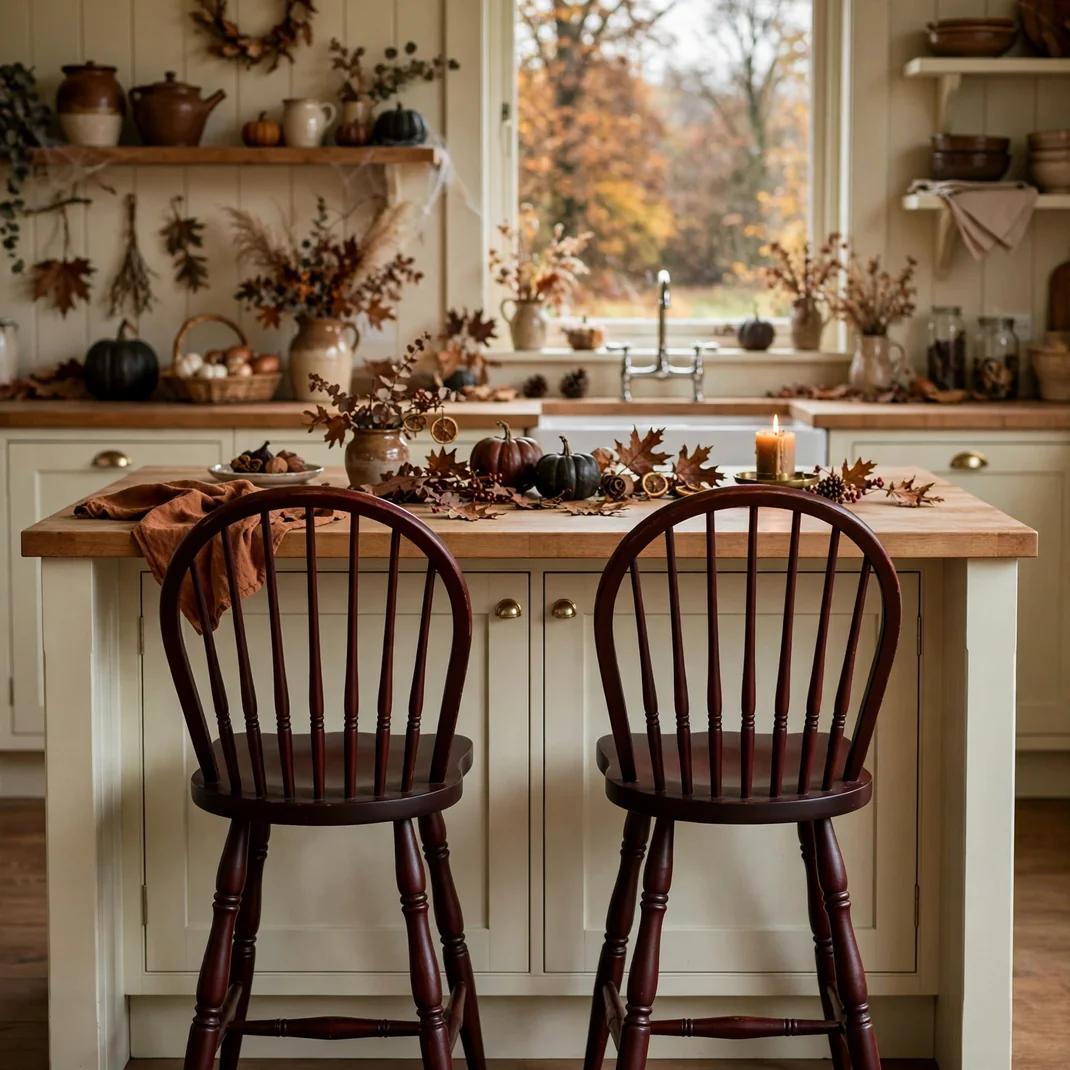
Oxblood-painted Windsor stools give a pale kitchen island a deep, sophisticated pulse of Halloween color. The traditional spindle backs preserve farmhouse character, while the brown-red finish feels warmer and more enduring than bright seasonal orange.
- How to Style It: Use two or three matching stools with 6 to 8 inches between seats and at least 10 inches of knee clearance beneath the counter. Pair the red with cream cabinetry, black hardware, and one natural woven element.
- Why It Photographs Beautifully: Spindle backs create a fine repeating pattern, and the saturated red draws attention to the island without dominating the room. A low-sheen finish catches soft highlights along the curves.
- Pro Tip: Choose an oxblood with a visible brown base and use satin, not high gloss; the color will read rich in daylight and almost black at night.
- Budget-Smart Swap: Paint only the seat and top rail of existing wood stools, leaving the legs natural for a lighter, lower-cost update.
24. Finish with a Copper Simmer-Pot Station
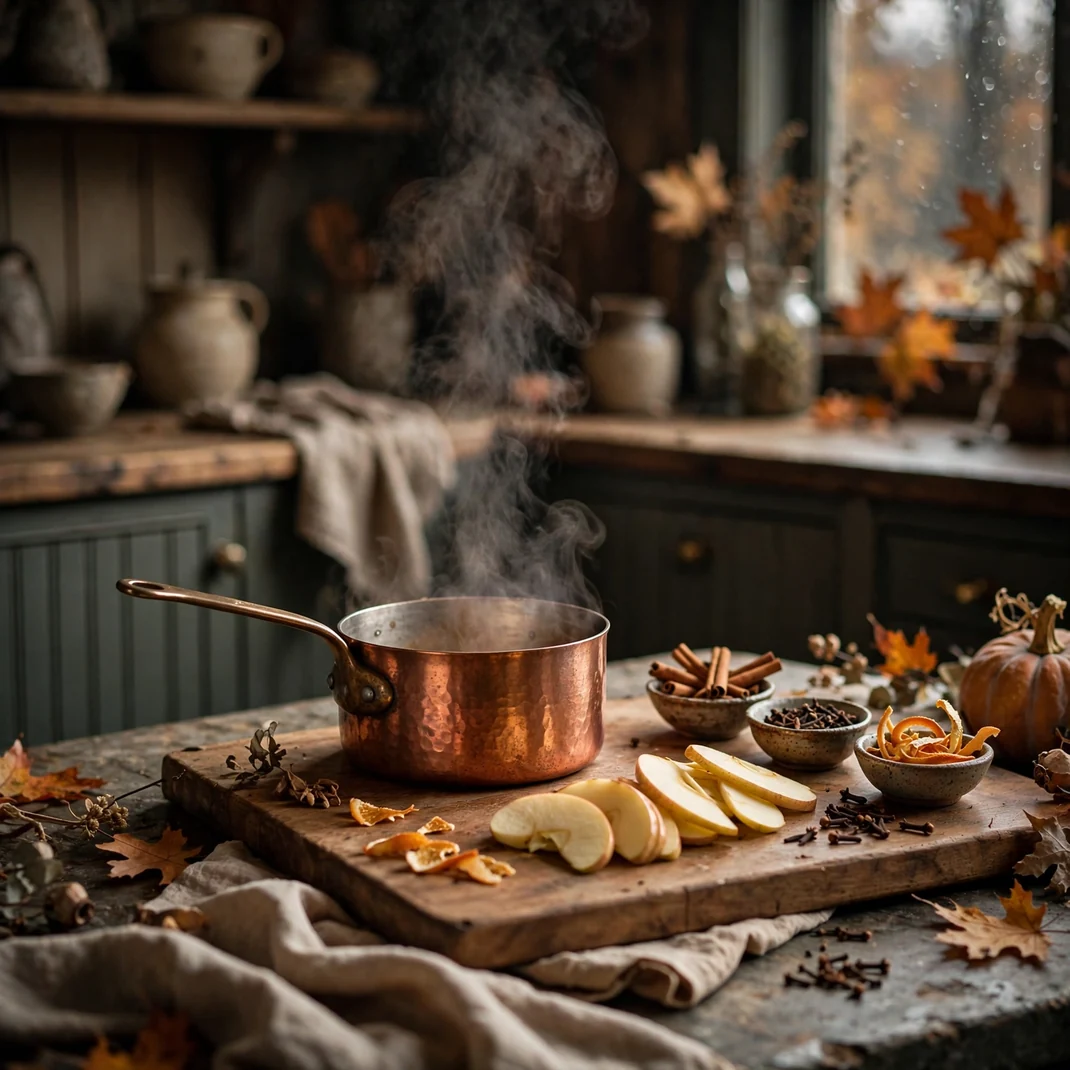
A small copper saucepan beside a wood board of apple slices, cinnamon, cloves, and orange peel gives the kitchen a final layer of Halloween warmth through scent. It looks like part of an autumn cooking ritual, not a decorative afterthought, and the ingredients reinforce the room’s harvest palette.
- How to Style It: Arrange measured ingredients in three tiny bowls on a board, with the saucepan behind them and a folded linen beneath one corner. Simmer with plenty of water on low heat only while attended, and keep the display clear of the active burner.
- Why It Photographs Beautifully: Curled peel, starry cloves, cinnamon bark, and copper create an intimate ingredient study with natural seasonal color. A little steam adds atmosphere in person while the structured board keeps photographs tidy.
- Pro Tip: Favor one dominant note—apple, orange, or clove—and use the others sparingly; a simpler blend smells cleaner and looks more deliberate.
- Budget-Smart Swap: Use apple peels, squeezed citrus halves, and the last cinnamon stick from the pantry instead of buying ingredients solely for fragrance.
Keep the Warmth, Edit the Theme
The strongest farmhouse Halloween kitchen is still unmistakably a kitchen: counters remain useful, walkways stay open, and every seasonal layer supports the room’s natural materials. Repeat two or three warm tones, let aged metal and wood carry most of the atmosphere, and reserve the darkest accents for a few clear focal points. When the season passes, the pieces worth keeping—good lighting, useful storage, honest textiles, and beautiful everyday tools—should still feel completely at home.