18 Halloween Lighting Tricks That Transform the Kitchen
Light is the fastest way to change a room’s mood, and in October the kitchen deserves better than the same flat overhead glare it gets all year. These eighteen lighting tricks layer warmth, shadow, and glow exactly where a kitchen needs them, from the pendants over the island to the dark corners under the cabinets. Each one is easy to set up, kind to a budget, and designed to photograph beautifully for your fall content.
1. Swap Pendant Bulbs for Amber Vintage Filaments
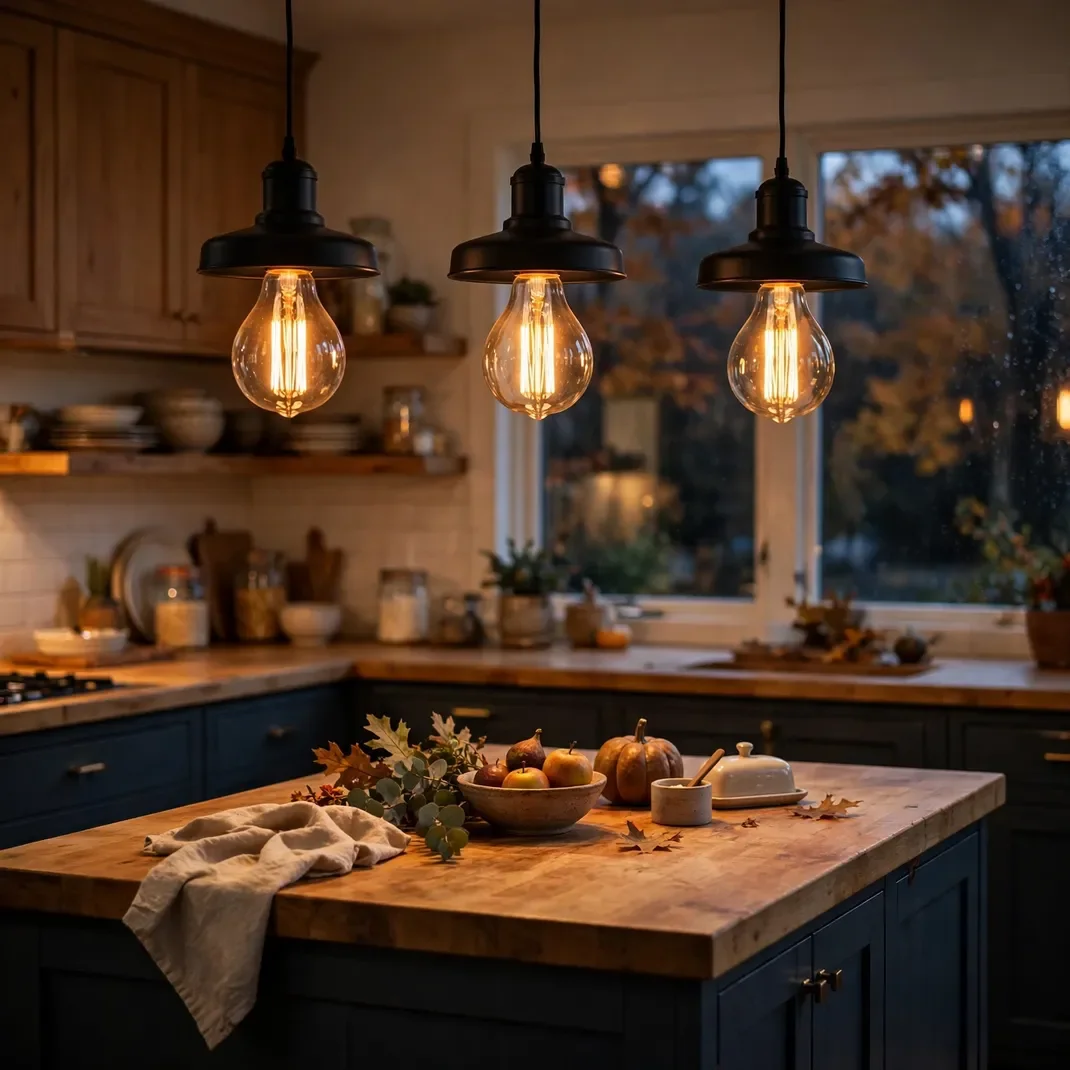
Trade the cool white bulbs in your island pendants for amber-tinted vintage filament bulbs, and the whole kitchen drops half a shade warmer in an instant. The visible filaments look decorative even when off, and at full glow they cast the kind of honeyed light that makes October evenings feel intentional. It is the single fastest lighting trick on this list, done in the time it takes to unscrew a bulb.
How to Style It: Choose 2200K amber filament bulbs in the same wattage your pendants already take, and swap every visible bulb over the island and breakfast bar so the color temperature matches.
Why It Photographs Beautifully: The glowing filaments become jewelry in the frame, and the warm cast flatters wood, brass, and every pumpkin in sight.
Pro Tip: Buy dimmable bulbs even if you have no dimmer yet; when you add one later, the filaments dim down to a true candle glow.
Budget-Smart Swap: Swap just the two most visible pendants first; the eye reads the warmth across the whole room even when a third bulb stays white.
2. Run Warm Plug-In LED Strips Under the Cabinets
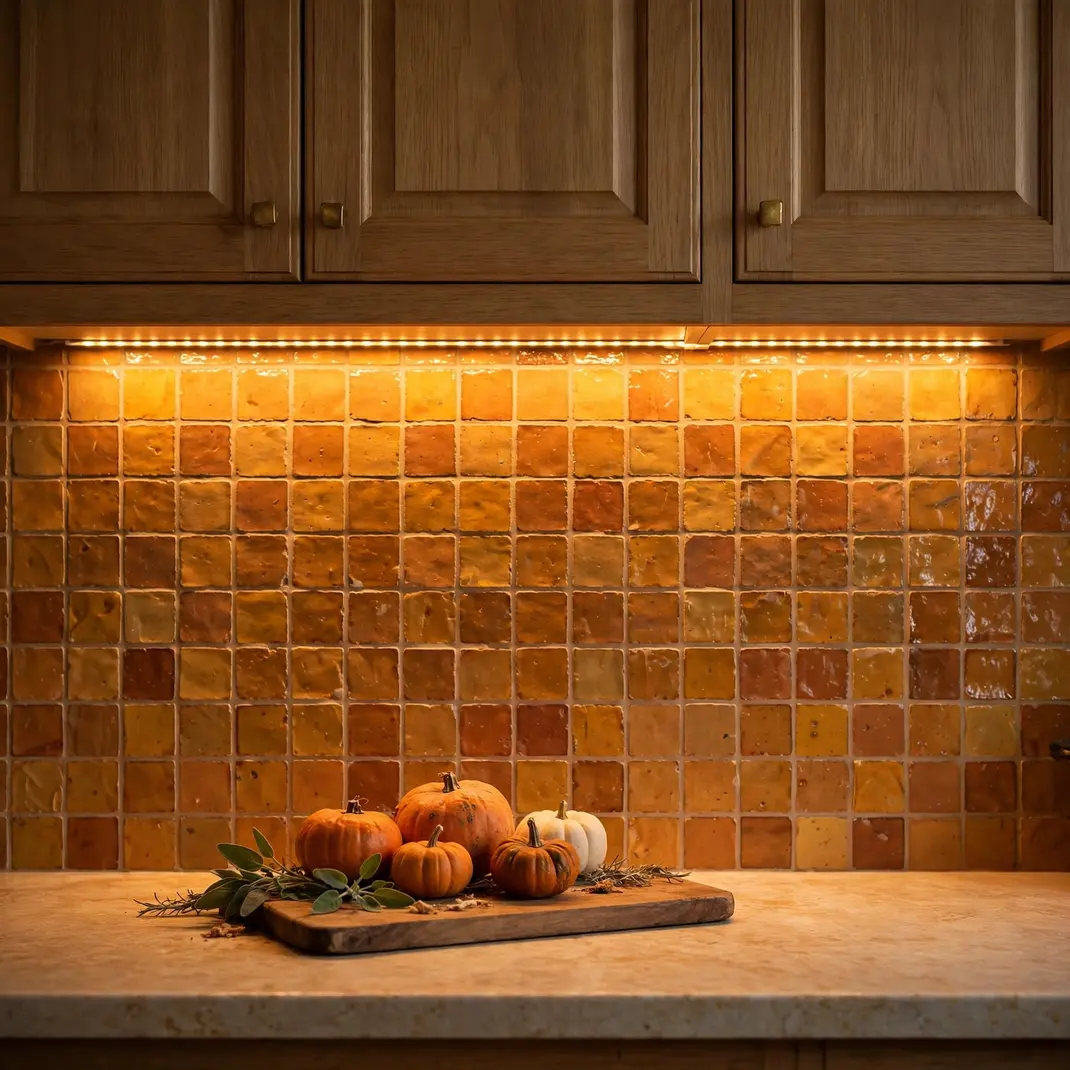
The shadowy strip of countertop under the wall cabinets is where kitchens lose their evening mood, and a plug-in LED strip fixes it in minutes. Choose a warm amber-white tape, stick it to the cabinet underside near the front edge, and the backsplash suddenly glows like a stage backdrop. It turns meal prep into atmosphere and makes every October tablescape behind it look lit on purpose.
How to Style It: Mount the strip toward the front lip of the cabinet so the light washes down the backsplash rather than pooling on the counter, and hide the plug behind a small appliance.
Why It Photographs Beautifully: Backsplash tile, copper, and glass jars catch the low raking light, giving photos a depth overhead lighting never delivers.
Pro Tip: Pick a strip with a remote so you can drop the brightness for dinner and raise it for cooking without crawling behind the toaster.
Budget-Smart Swap: Light only the longest cabinet run, usually beside the stove, and let that one glowing stretch carry the effect.
3. Backlight Open Shelves with Tea Lights Behind Jars
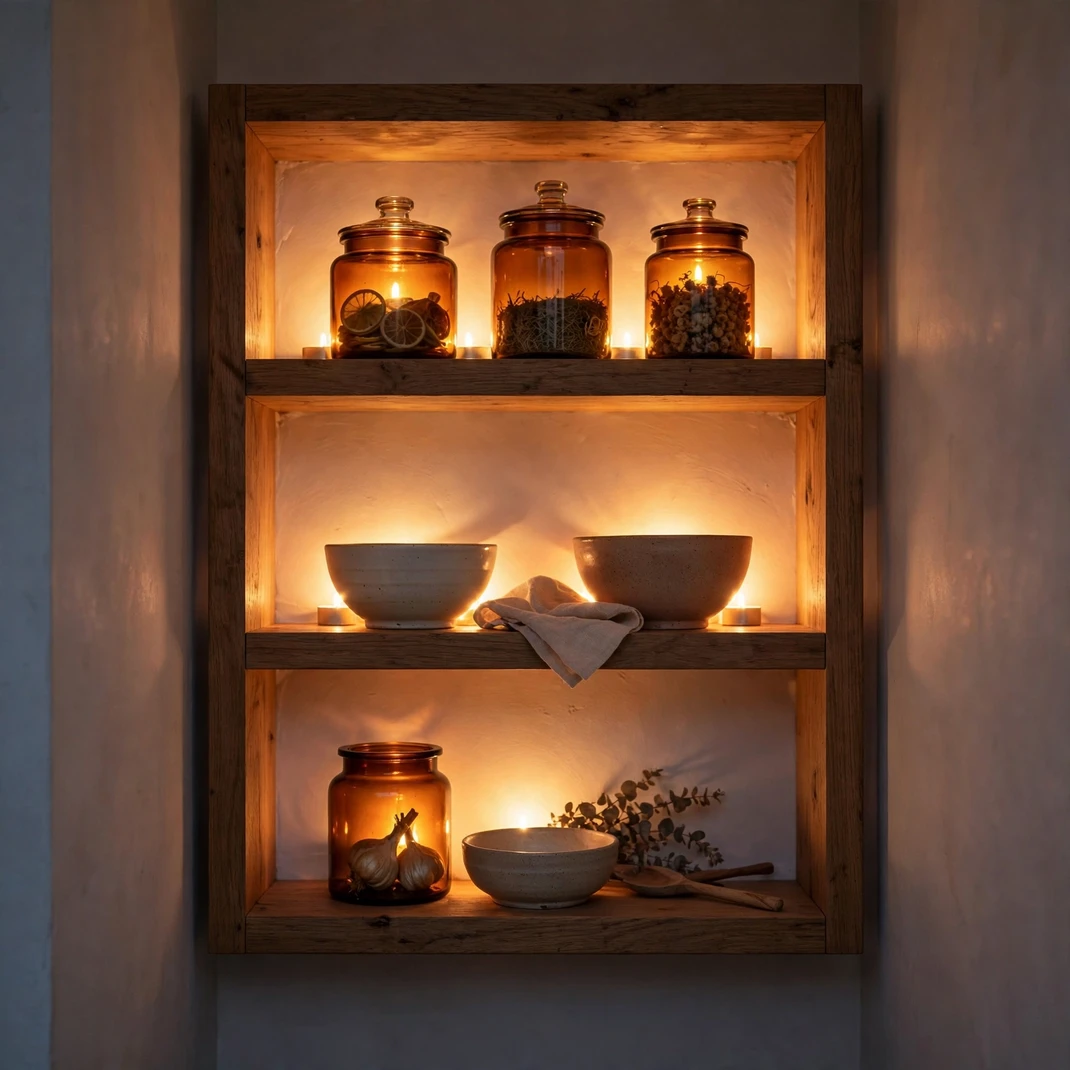
Open shelving becomes a glowing display case when you tuck flameless tea lights behind the jars and bowls already sitting there. The light outlines every silhouette and throws soft halos onto the wall, so your everyday dishes suddenly look curated. It is especially striking with amber glass, olive oil bottles, and anything with a little transparency.
How to Style It: Place one tea light behind every second or third object, pushed to the back of the shelf, and switch them on at dusk with a single remote.
Why It Photographs Beautifully: Backlit edges separate objects from the background, so shelf photos gain the crisp layered look of a magazine still life.
Pro Tip: Use tea lights with a warm flicker mode rather than steady glow; the subtle movement reads as candlelight on camera.
Budget-Smart Swap: A single shelf styled this way, the one nearest the stove or sink, gives you the full effect for the price of a few tea lights.
4. Drape Pumpkin String Lights Along the Range Hood
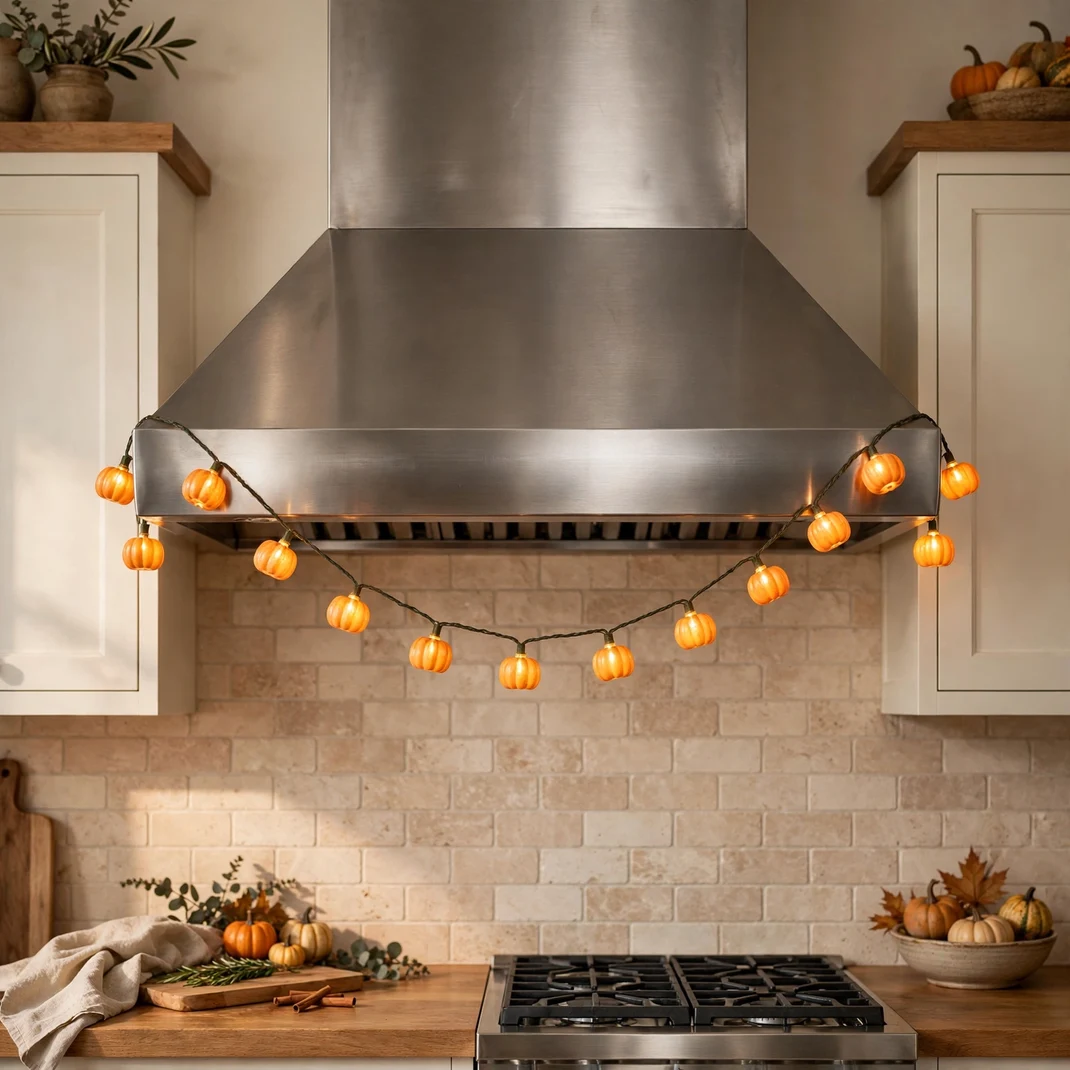
The range hood is the kitchen’s biggest blank surface, and a swag of small pumpkin string lights turns it into the room’s focal point. Drape one strand in a loose scallop across the front, letting the tiny pumpkins glow against the metal or plaster. It is playful without being childish, and it draws the eye upward where October styling rarely reaches.
How to Style It: Secure the strand with small clear adhesive clips along the hood’s front edge in two or three gentle scallops, hiding the battery pack behind the chimney.
Why It Photographs Beautifully: The glowing scallop creates a perfect leading line across the top third of any kitchen photo.
Pro Tip: Choose lights with a built-in six-hour timer so the hood glows every evening without you remembering to switch it on.
Budget-Smart Swap: One short 10-light strand is plenty; a sparse scallop looks more designed than a crowded one.
5. Cluster Lanterns with LED Candles on the Island
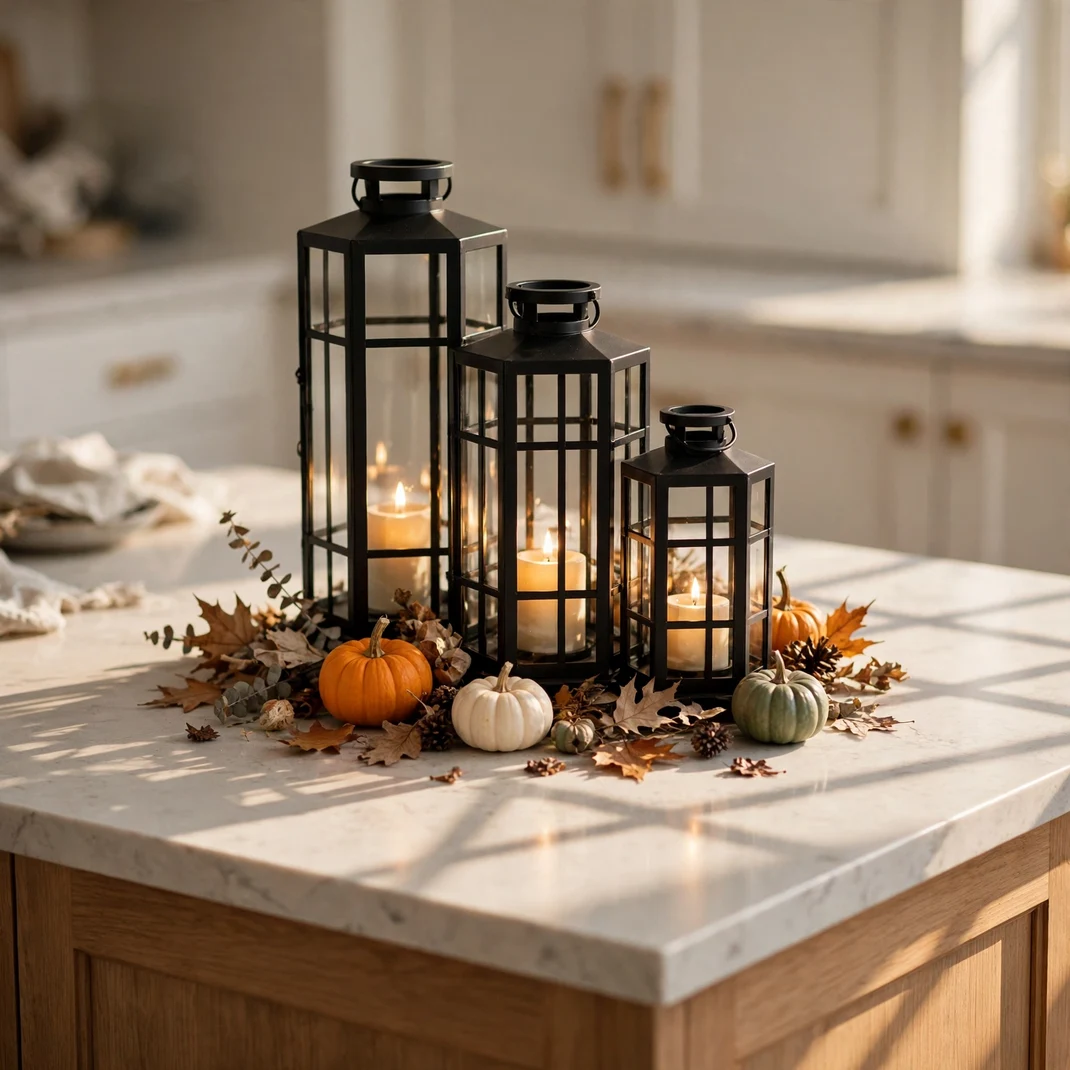
A cluster of black metal lanterns in three sizes, each holding a warm LED candle, gives the island a hearth-like center that anchors the whole kitchen. The lantern frames throw geometric shadows across the countertop, and the enclosed flames mean the display is safe beside fruit bowls and cutting boards. It reads cozy rather than spooky, which suits kitchens that host homework and morning coffee too.
How to Style It: Group the lanterns off-center on the island in a tight triangle, tallest at the back, and tuck a few dried leaves or mini pumpkins around the bases.
Why It Photographs Beautifully: The lantern grilles create patterned light and shadow that give flat countertop photos instant texture.
Pro Tip: Set the LED candles on staggered timers so the cluster lights itself in waves, like someone just walked through striking matches.
Budget-Smart Swap: Two lanterns instead of three still reads as a cluster; borrow the third from the porch for the season.
6. Fill Glass Bottles with a Fairy-Light Strand
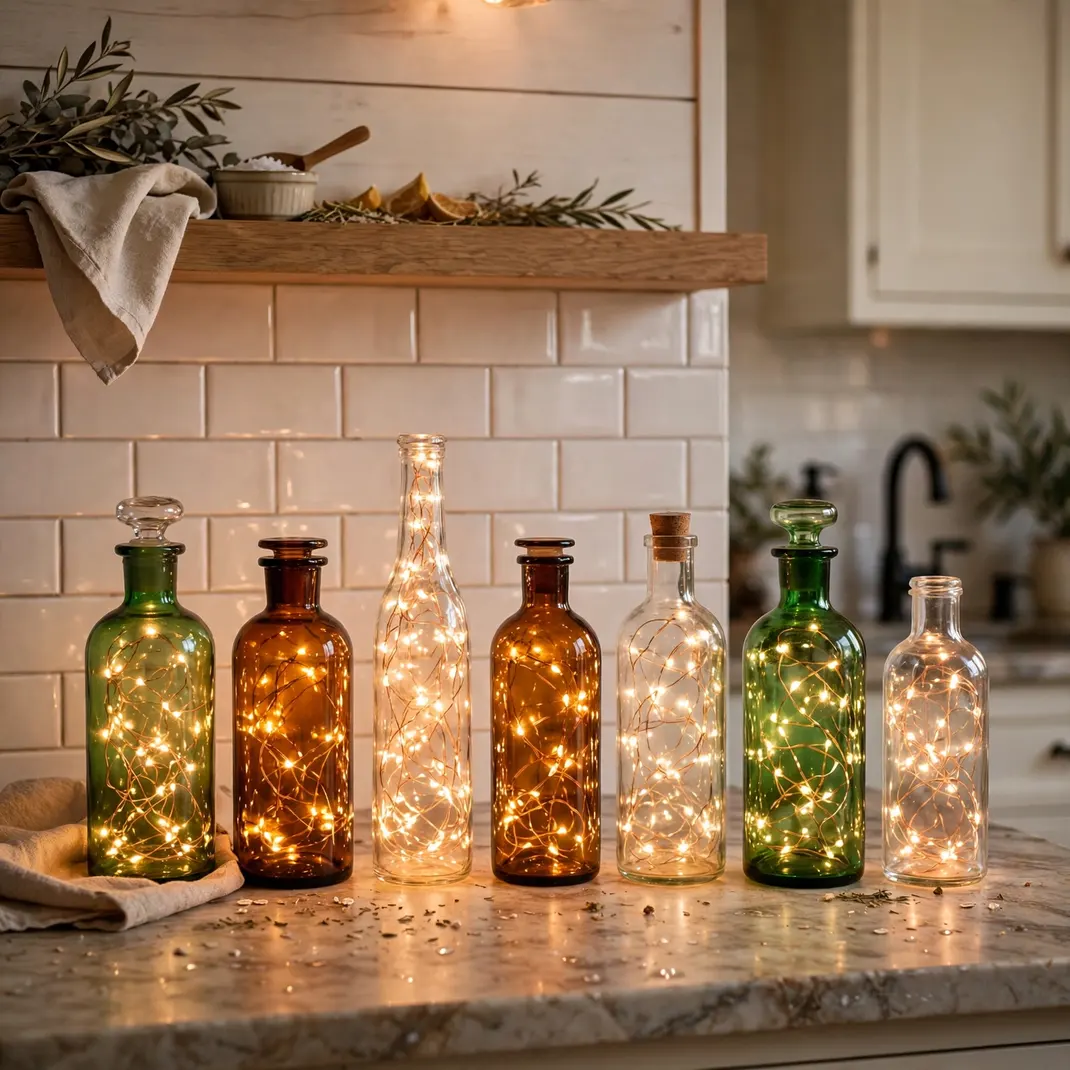
A row of empty glass bottles, each stuffed with a short strand of warm fairy lights, becomes a glowing apothecary lineup on the counter. Green wine bottles, amber medicine bottles, and clear milk bottles each tint the light differently, so the collection glows in layers. It is the prettiest way to use bottles you were about to recycle.
How to Style It: Feed one 20-light copper-wire strand into each bottle, coil the excess at the base, and line five to seven bottles along the backsplash in height order.
Why It Photographs Beautifully: The mixed glass tints create a natural ombre of green, amber, and gold that no filter can fake.
Pro Tip: Copper-wire strands bend to fit any bottle neck; avoid thicker string lights that bunch at the mouth.
Budget-Smart Swap: Start collecting bottles now from your own recycling; the glass is free and the lights cost less than a takeaway coffee.
7. Hide Puck Lights Inside Glass-Front Cabinets
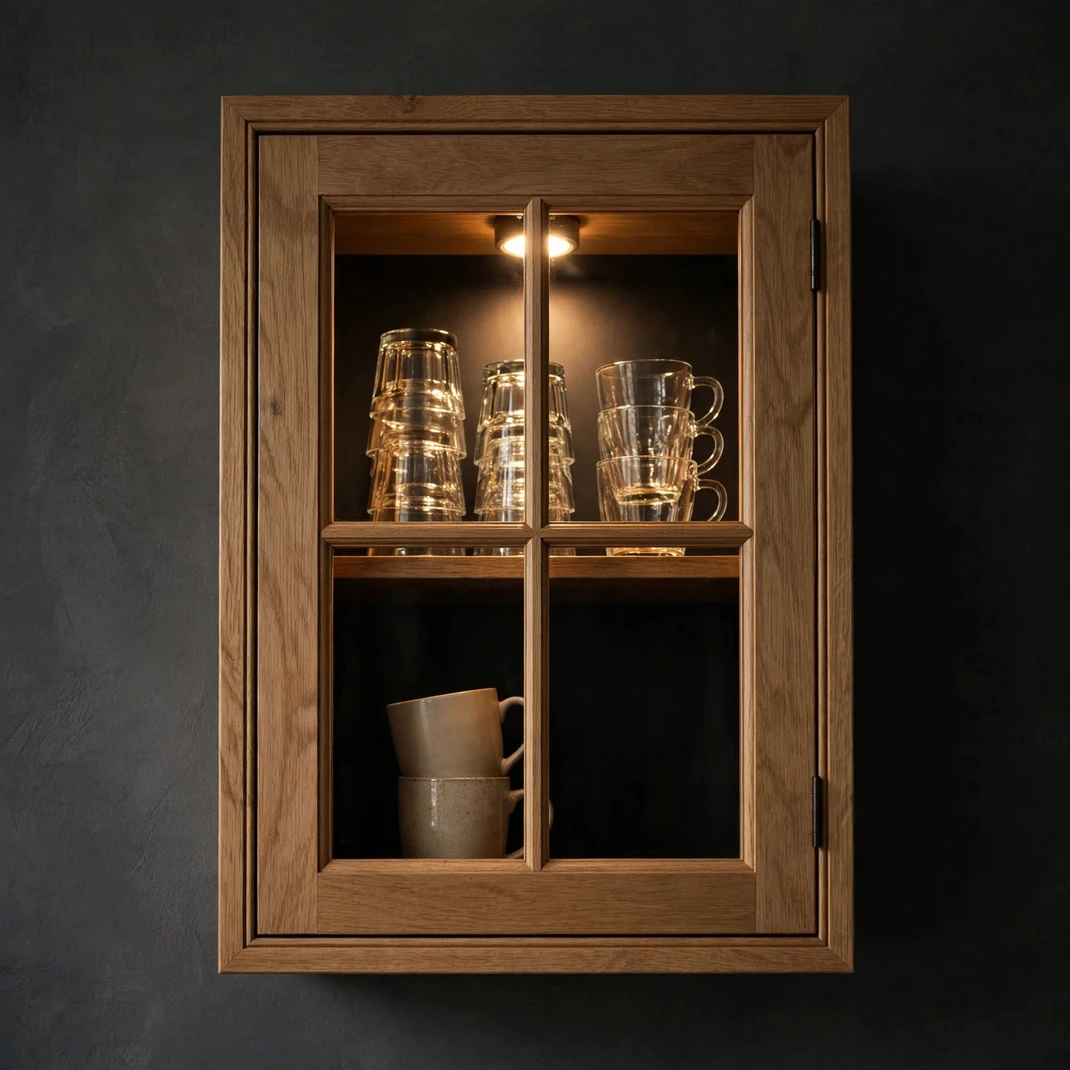
Glass-front cabinets spend October looking dark and flat while everything around them glows, and a pair of motion-sensor puck lights fixes that silently. Stick one puck to the top of each cabinet interior and your glasses and mugs light up the moment anyone walks past. It feels like the kitchen is quietly showing off, and guests always open the doors just to look.
How to Style It: Center one puck on the cabinet ceiling toward the front so the light falls through the glassware, and set the sensor to its shortest timeout to save battery.
Why It Photographs Beautifully: Lit glassware photographs like crystal, with bright edges and sparkling highlights against the dark cabinet interior.
Pro Tip: Warm-white pucks flatter wood and brass; cool-white ones make the cabinet look like a refrigerator display.
Budget-Smart Swap: Light the single most visible cabinet, usually the one beside the stove, and leave the rest dark for contrast.
8. Hang a Light Curtain Behind Sheer Panels
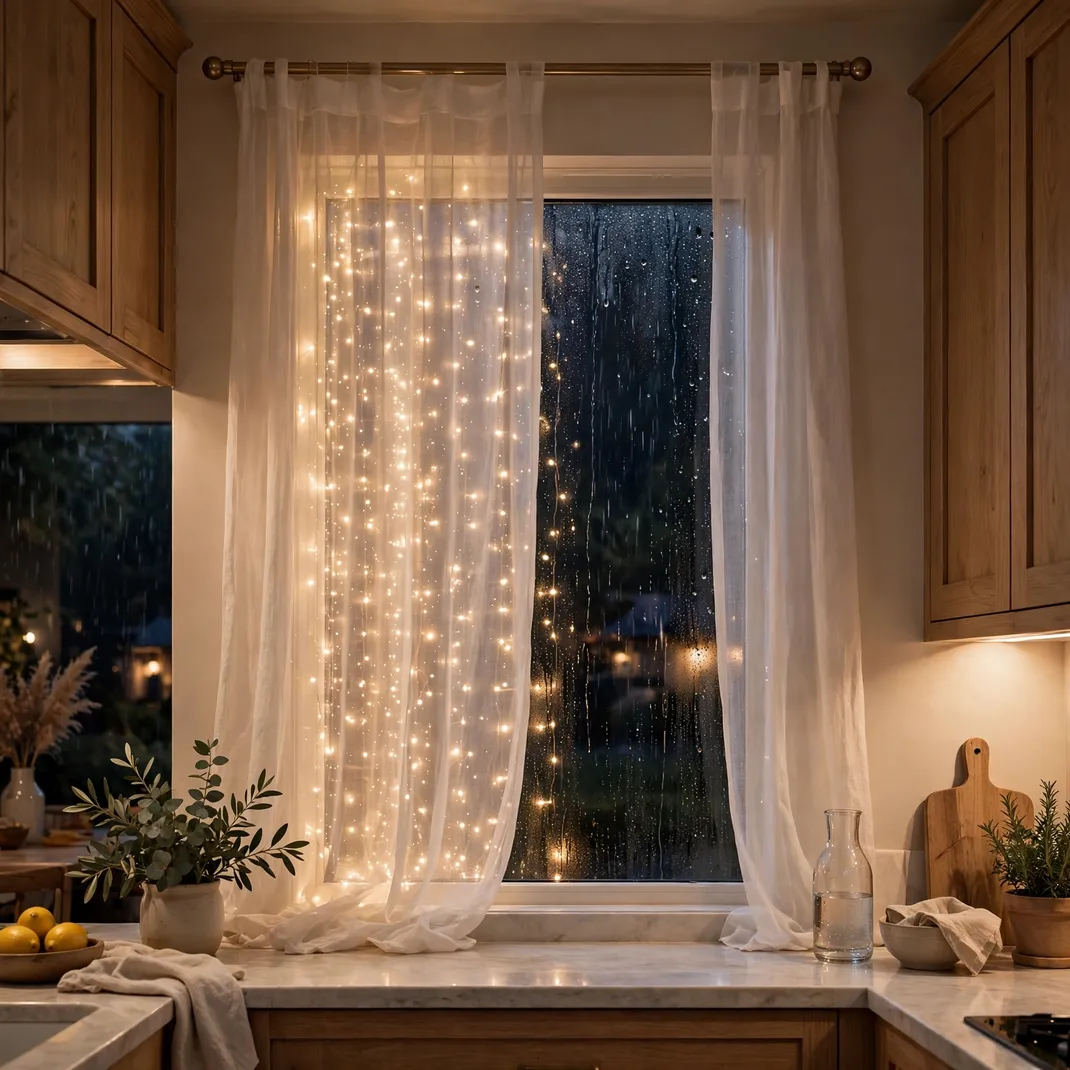
A curtain of warm micro-lights hung just behind a sheer window panel turns the whole window into a glowing backdrop after dark. The sheers diffuse the points of light into a soft shimmer, like rain on a city window, while the kitchen stays bright enough to cook in. It is the most romantic trick on this list, and from the street your kitchen looks like a lantern.
How to Style It: Hang the light curtain from the rod first, then the sheer panel in front of it, keeping both hems just above the sill so the counter stays usable.
Why It Photographs Beautifully: The diffused bokeh behind the sheer gives every evening kitchen photo a dreamy, expensive-looking background.
Pro Tip: Choose steady-on lights rather than twinkle mode; the twinkle fights with the sheer’s softness and looks busy on camera.
Budget-Smart Swap: A single narrow light curtain centered on the window reads as full coverage once the sheer diffuses it.
9. Set Flameless Pillars in Glass Hurricanes on the Island
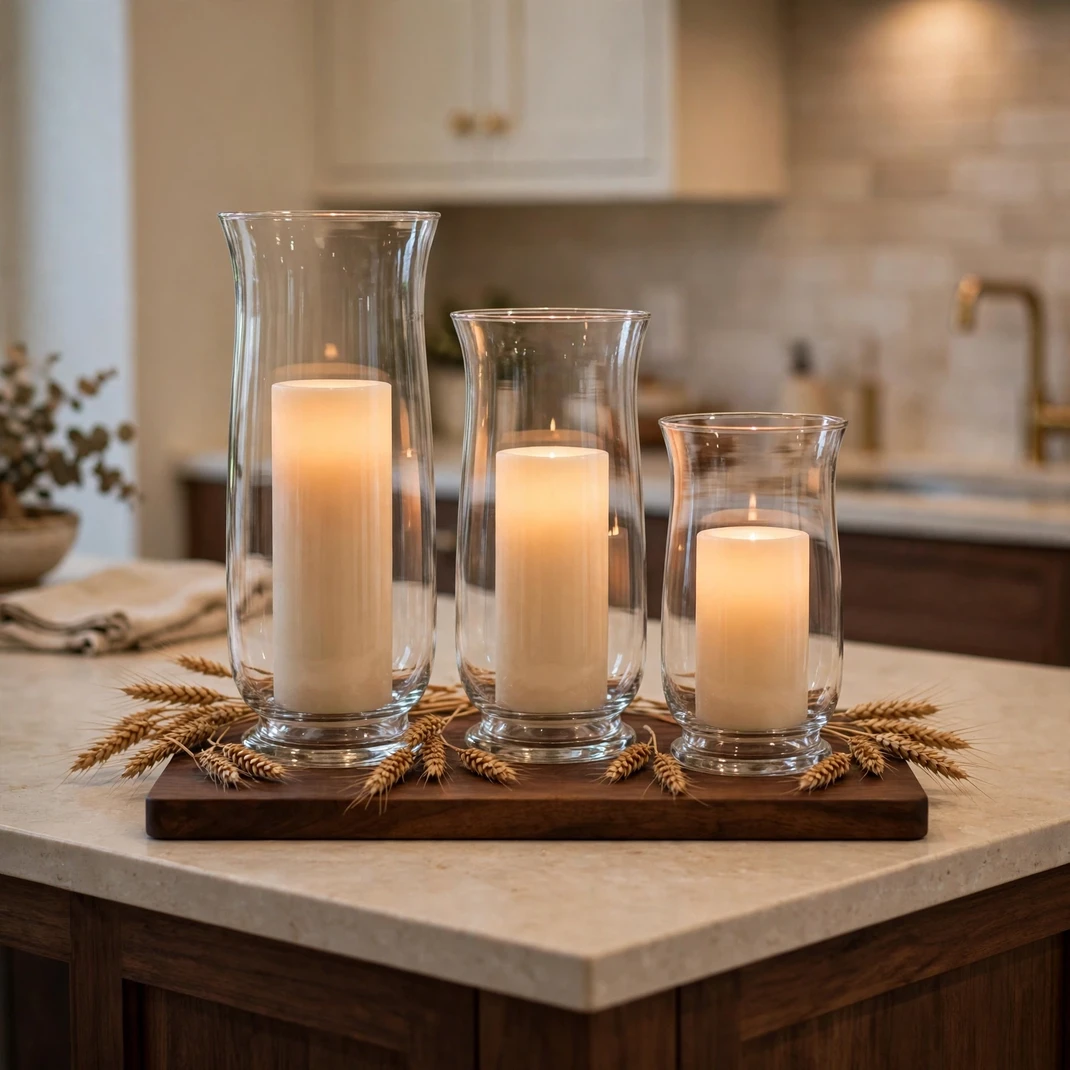
Real candles and busy islands do not mix, but flameless pillar candles inside glass hurricanes give you the same slow glow with zero risk near chopping boards and homework. Group three hurricanes of different heights on a wooden board, and the glass magnifies the flicker into something that reads as genuinely candlelit. It is the safest way to get true candle mood in a working kitchen.
How to Style It: Set the hurricanes on a dark walnut board to ground the grouping, vary the pillar heights by at least three inches, and add a sprig of dried wheat beside each base.
Why It Photographs Beautifully: The hurricane glass doubles every flame in reflection, so three candles photograph like six.
Pro Tip: Pick pillars with a melted wax-look top and a realistic flicker chip; smooth flat tops are the giveaway in close-up photos.
Budget-Smart Swap: Use the glass vases you already own as hurricanes; the shape matters less than the magnification effect.
10. Project Bat Silhouettes onto the Backsplash
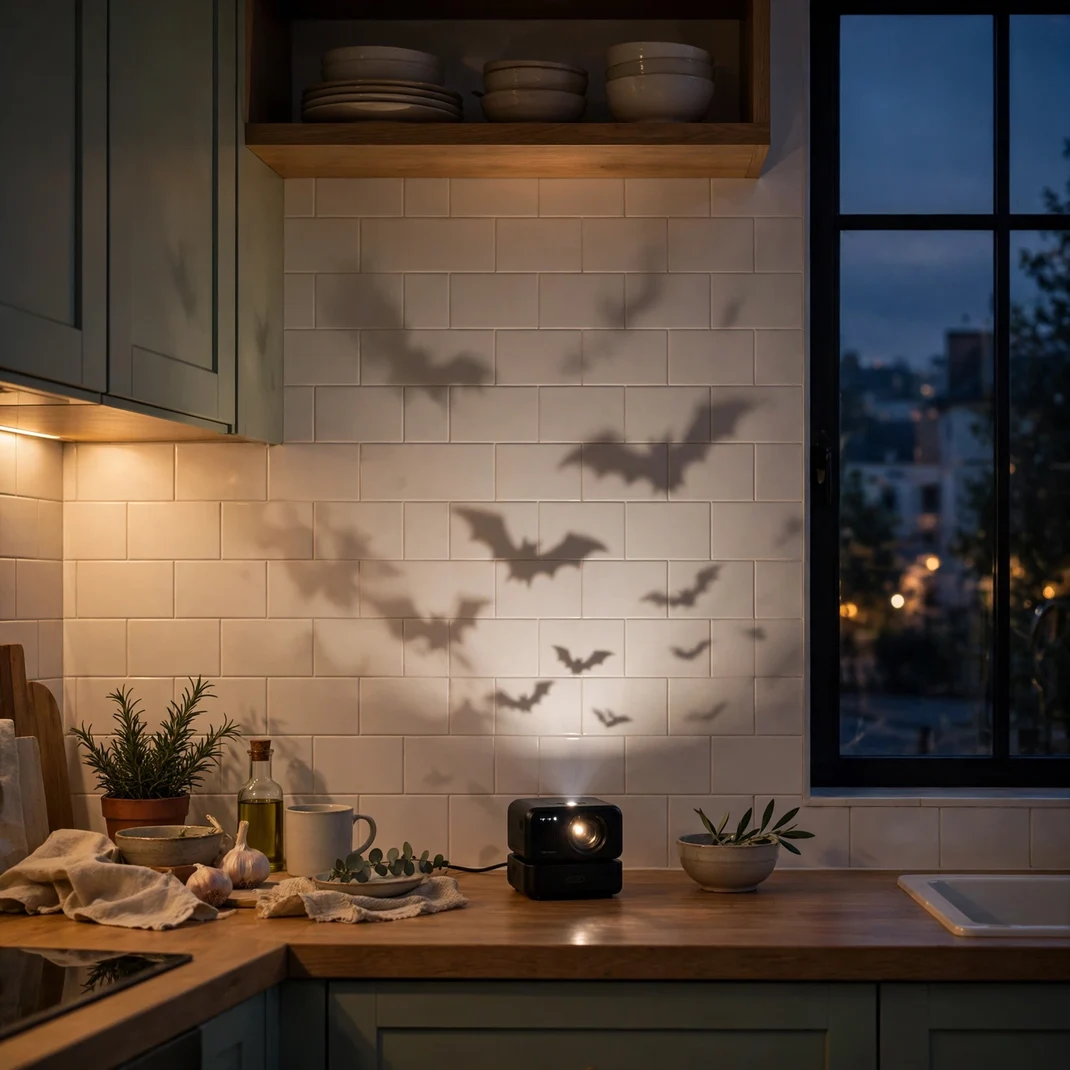
A small plug-in shadow projector aimed at the backsplash throws slow-drifting bat silhouettes across your tile all evening, and it is the only trick here that adds actual motion. The bats glide rather than flash, so the effect feels like dusk outside rather than a haunted house. Point it at a plain stretch of backsplash or a blank wall beside the cabinets for the cleanest read.
How to Style It: Place the projector on the counter about six feet from the target surface, angled slightly upward, and dim the under-cabinet lights so the silhouettes stay crisp.
Why It Photographs Beautifully: Moving shadows give still photos a cinematic depth, and short video clips of the drifting bats outperform every static decor shot.
Pro Tip: Choose a projector with a slow drift speed and warm-white light; fast multicolor modes cheapen the effect instantly.
Budget-Smart Swap: A DIY version works too: tape a bat cutout over a flashlight lens and rest it on the counter aimed at the wall.
11. Wrap the Island Base with Warm String Lights
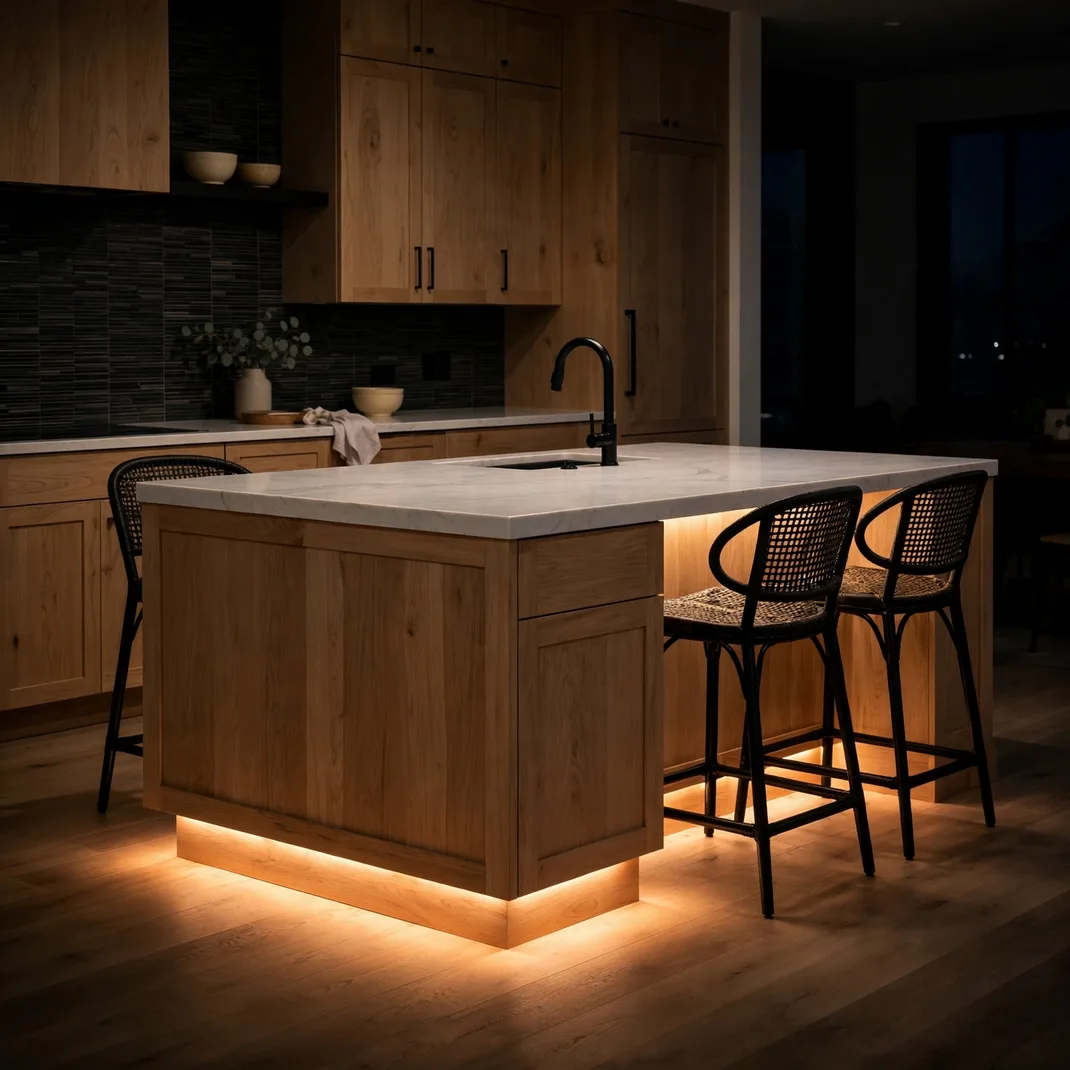
The base of the kitchen island is dead space after dark, and a loose wrap of warm string lights turns it into a glowing plinth. Wind one strand around the island’s legs or along its base trim, letting the lights pool slightly at the floor. The low glow makes the island look like it is floating, and it is the trick guests notice from the hallway before they even enter.
How to Style It: Run the strand along the recessed toe-kick of the island so the bulbs hide and only the glow shows, securing it with adhesive clips every foot.
Why It Photographs Beautifully: The floating-island effect gives wide kitchen shots a dramatic low light line that balances the pendants above.
Pro Tip: Use a battery pack tucked inside the island’s open shelf so no cord crosses the floor to an outlet.
Budget-Smart Swap: Light just the two long sides of the island; the short ends disappear in most viewing angles anyway.
12. Put the Pendants on a Dusk-to-Dinner Dimmer Routine
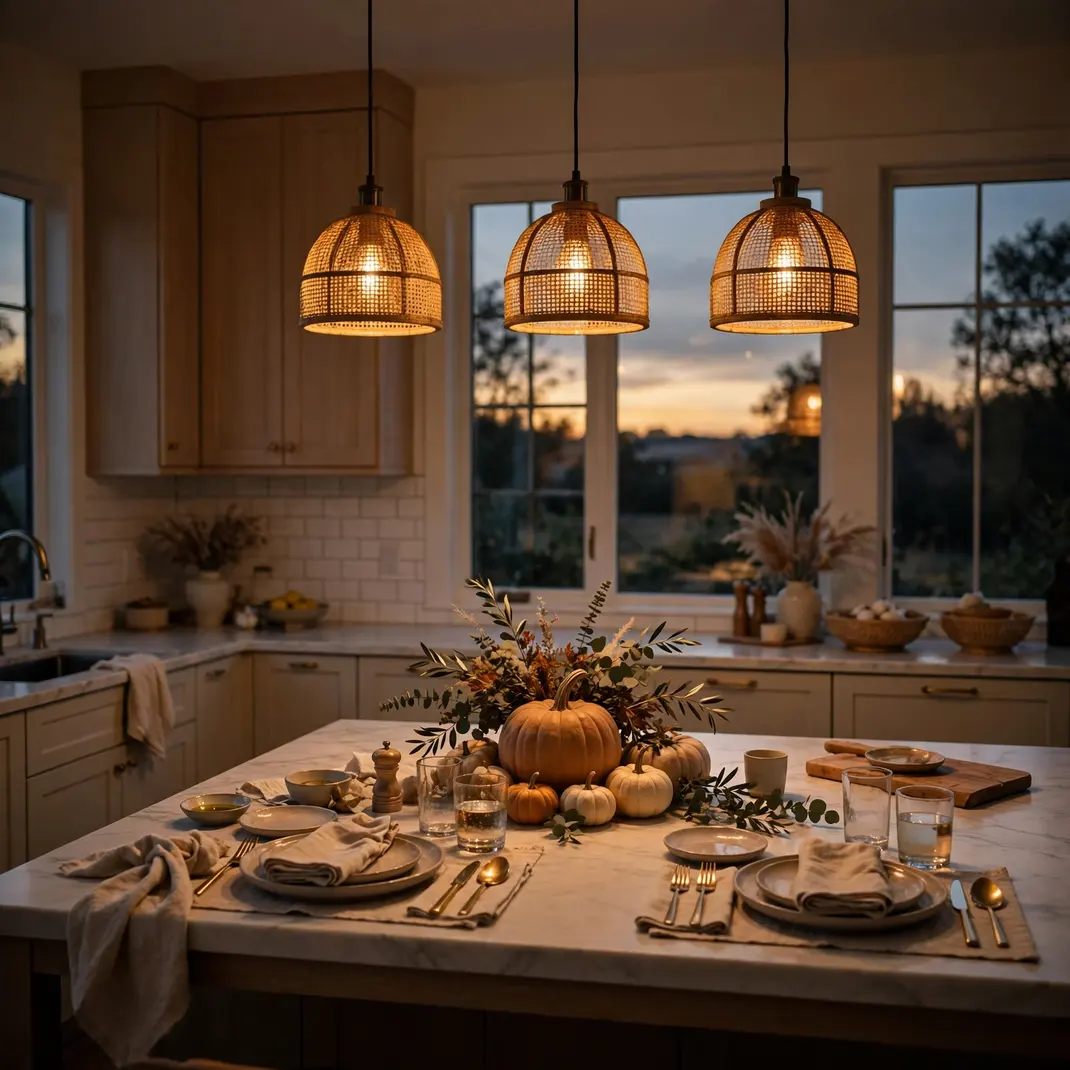
A smart plug with a dimmer routine does what no single bulb can: it lowers your pendants automatically as the evening deepens, so the kitchen glides from bright cooking light to amber dinner glow without anyone touching a switch. Set the routine once and October evenings stage themselves. It is invisible technology doing the most visible job in the room.
How to Style It: Plug the pendant circuit into a dimmable smart plug, program full brightness until sunset, then a slow fade to forty percent over the next hour.
Why It Photographs Beautifully: Shooting during the fade gives you golden-hour kitchen photos on demand, any evening you choose.
Pro Tip: This only works with dimmable bulbs, so confirm the filament bulbs from trick one are dimmable before you program anything.
Budget-Smart Swap: A manual plug-in dimmer dial costs less than a smart plug and gives you the same fade with one twist.
13. Line the Breakfast Bar with Glowing Jack-o’-Lanterns
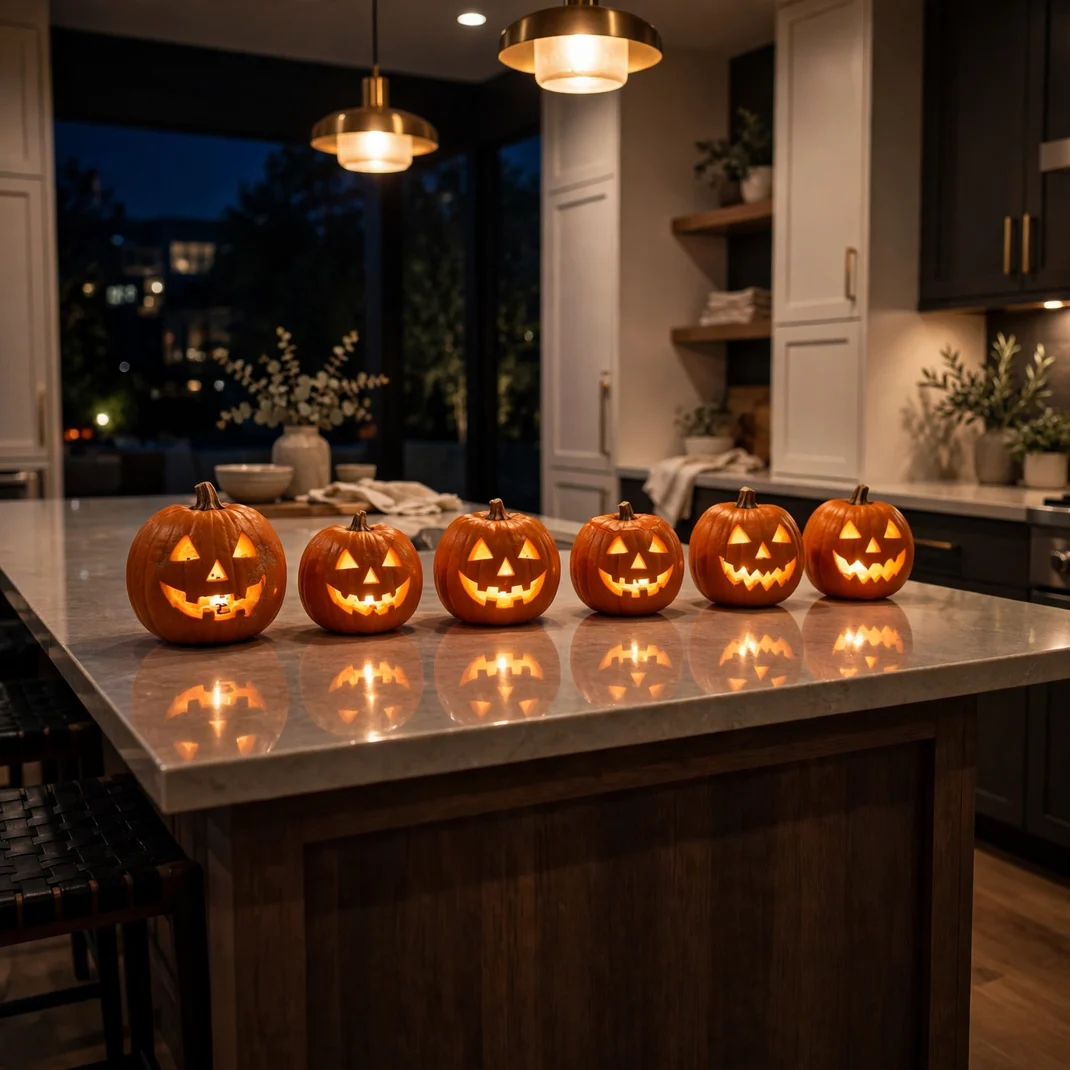
A row of small carved pumpkins along the breakfast bar, each lit from within, turns the seating side of the kitchen into a glowing gallery. Keep the carvings simple, triangle eyes and toothy grins read best at this scale, and the flicker reflects off the bar top in a way overhead lights never manage. It is the classic Halloween glow, placed exactly where the family gathers.
How to Style It: Space five to seven mini pumpkins evenly along the bar’s back edge, lit with LED tea lights, and turn off the nearest pendant so the pumpkins own the light.
Why It Photographs Beautifully: The row creates a perfect repeating rhythm of glowing faces, and the reflections double the effect on polished bar tops.
Pro Tip: Carve the faces slightly larger than feels right; small features disappear once the pumpkin is lit and viewed from across the room.
Budget-Smart Swap: Use craft pumpkins for the bar row; they carve cleanly, never rot, and store flat for next October.
14. Add a Toe-Kick Glow Under the Lower Cabinets
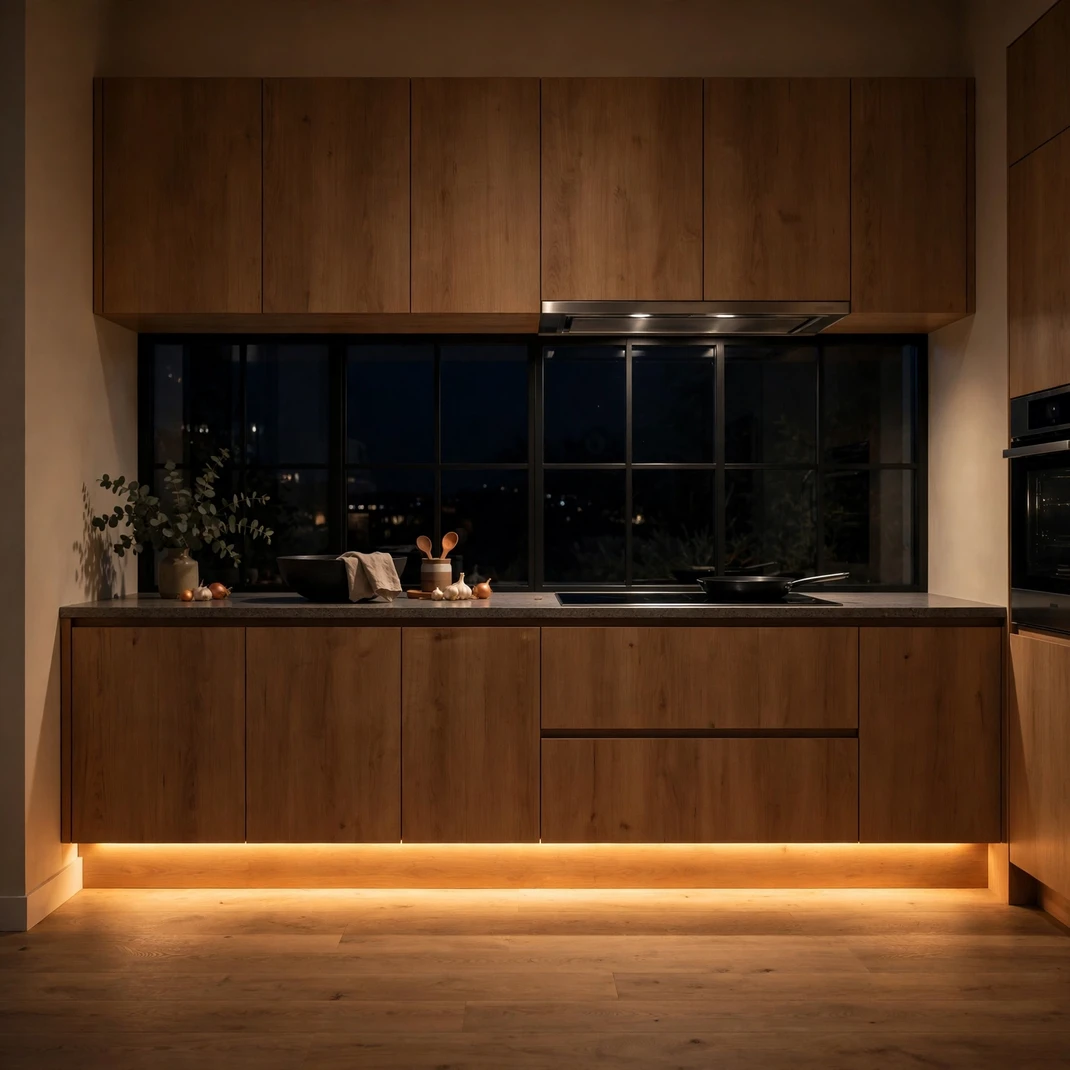
A slim LED strip tucked into the toe-kick recess under the lower cabinets washes the floor with a low amber halo that makes the whole kitchen feel like it is floating. It is the same trick luxury kitchens use year-round, dressed in October’s warmer color. The glow also works as the perfect nightlight for midnight trips to the fridge, no overheads needed.
How to Style It: Stick the strip to the recessed plinth facing the floor, run it continuously around corners, and plug it into the same timer as your other evening lights.
Why It Photographs Beautifully: The floor-level glow outlines the cabinet footprint in photos, giving wide shots a crisp architectural base line.
Pro Tip: Match this strip’s color temperature to your under-cabinet strips so the kitchen reads as one designed scheme, not two separate ideas.
Budget-Smart Swap: Light only the longest cabinet wall; the eye completes the glow around the corner on its own.
15. Build a Candlelit Botanical Centerpiece for the Table
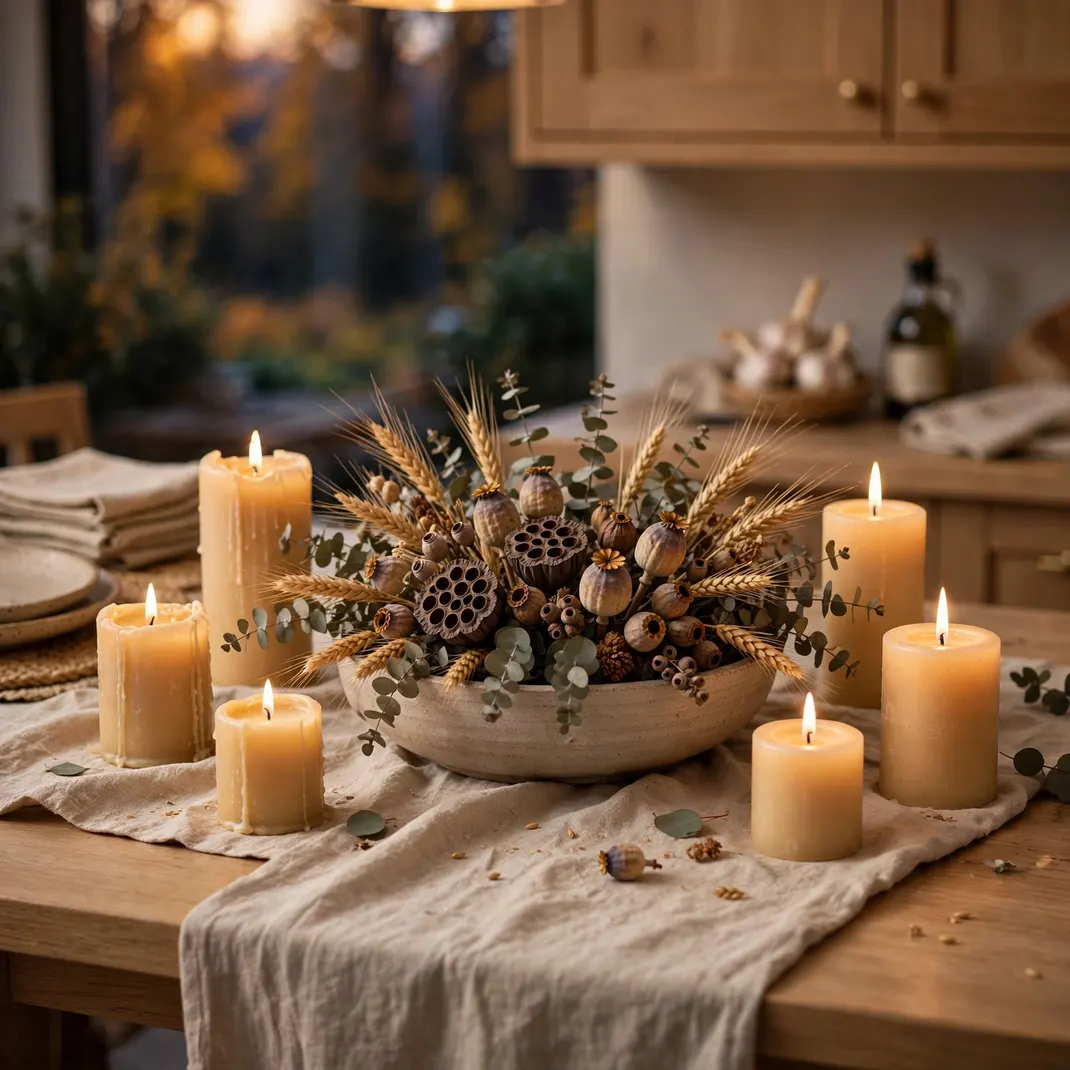
The kitchen table earns its own lighting moment with a low centerpiece of dried botanicals ringed by pillar candles at mixed heights. Wheat stems, dried eucalyptus, and seed pods catch the candlelight in golds and ambers, while the flames stay safely below sightlines across the table. It turns every October dinner into an occasion without moving a single piece of furniture.
How to Style It: Lay a linen runner, arrange the dried stems in a low wide bowl at the center, and ring it with five candles stepping down in height on either side.
Why It Photographs Beautifully: The low arrangement keeps sightlines open, so table photos show both the glowing center and the faces around it.
Pro Tip: Keep every flame below twelve inches so the centerpiece never blocks conversation or photographs awkwardly tall.
Budget-Smart Swap: Forage the botanicals from roadsides and parks; dried grasses are free and last for years.
16. Clip Silhouette Shades onto the Pendant Lights
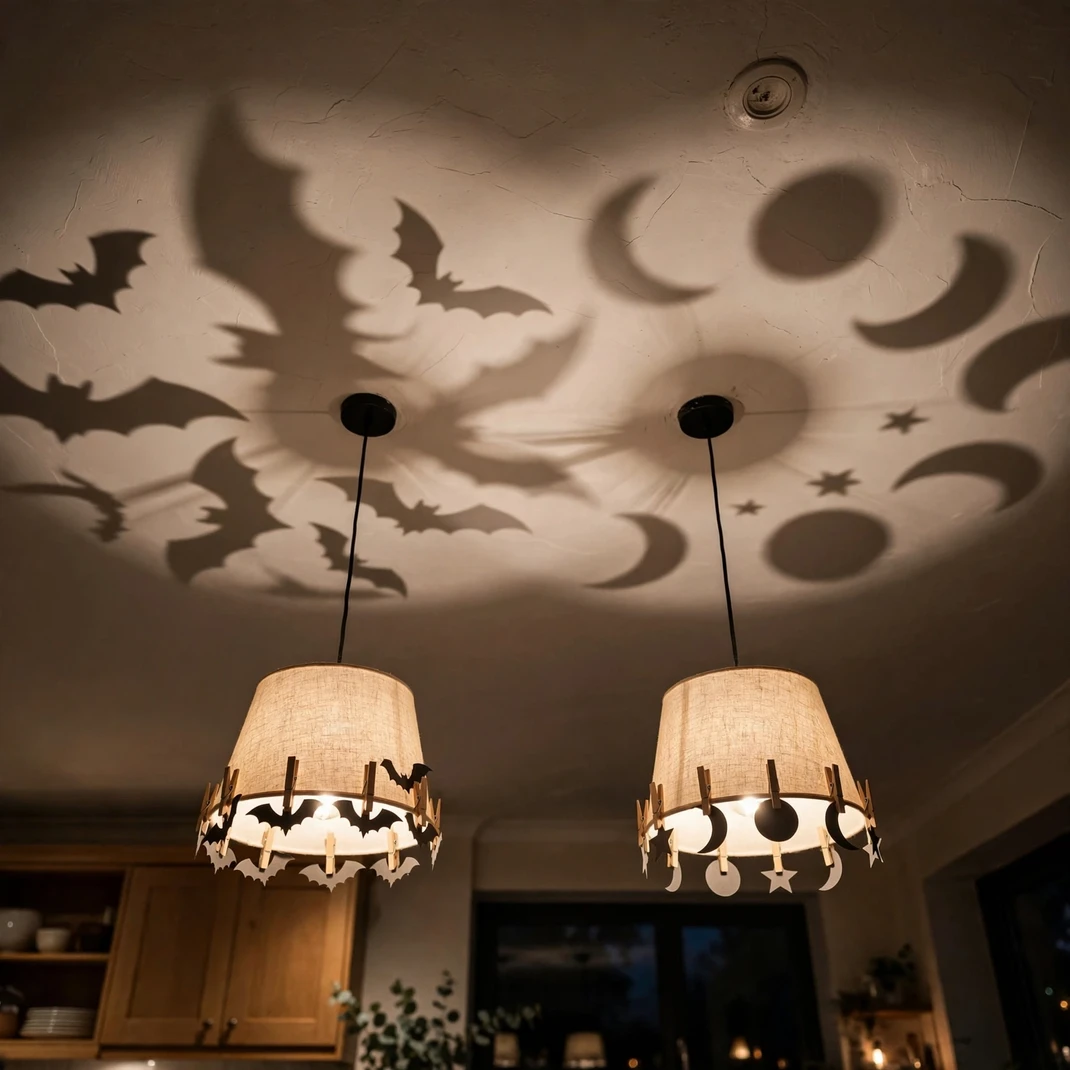
Clip-on paper silhouettes, bats, moons, bare branches, wrapped halfway around a pendant shade, turn your existing lights into shadow projectors. The bulb throws the cutout shapes across the ceiling and walls in oversized soft focus, so the whole room gets the Halloween treatment from a decoration nobody can see directly. It is the most surprising trick here for the least money.
How to Style It: Cut the silhouettes from heat-safe cardstock, clip them to the shade’s lower rim with small binder clips, and leave the top of the shade open so heat escapes.
Why It Photographs Beautifully: The giant soft shadows on the ceiling photograph like a professional gobo effect, far beyond what the tiny cutouts suggest.
Pro Tip: Use LED bulbs only for this trick; they run cool enough that cardstock near the shade stays completely safe.
Budget-Smart Swap: One silhouette per pendant is enough; the shadows multiply on their own across the ceiling.
17. Frame a Chalkboard Menu with an LED Strip
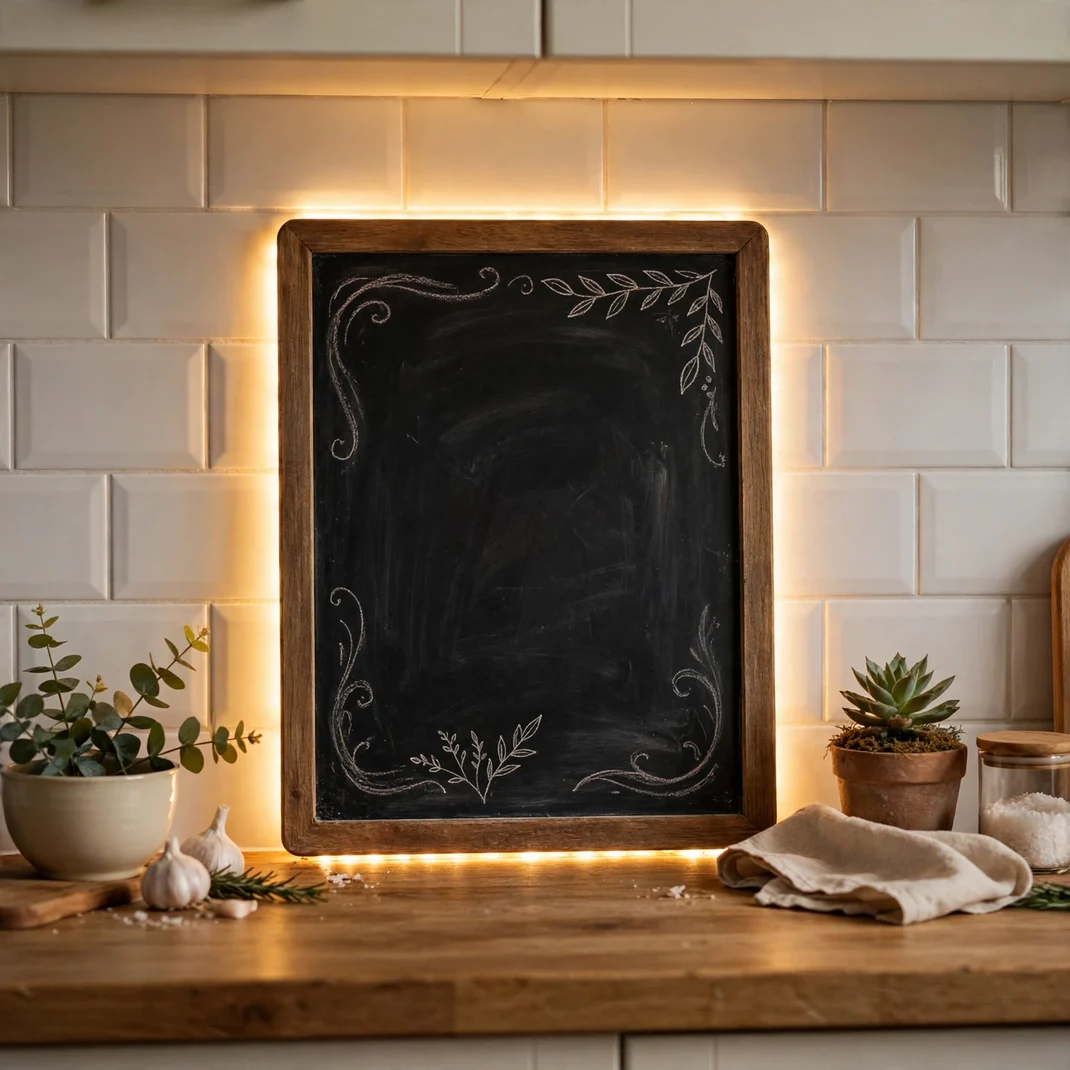
A chalkboard menu propped on the counter gets a bistro glow-up when you frame its back edge with a short LED strip. The light spills around the board’s silhouette and makes the chalk lettering pop like a cafe sign, turning tonight’s soup list into a feature. It is part lighting, part signage, and entirely charming.
How to Style It: Stick a one-foot LED strip vertically behind each side edge of the board, letter the menu in white chalk marker, and lean the board against the backsplash near the stove.
Why It Photographs Beautifully: The halo outline separates the dark board from dark backgrounds, so the lettering stays readable in every photo.
Pro Tip: Warm white light flatters chalk best; colored light turns white lettering murky and hard to read.
Budget-Smart Swap: A single strip cut in half does both edges; most plug-in strips can be trimmed to length at marked points.
18. Let the Porch Glow Show Through the Kitchen Door
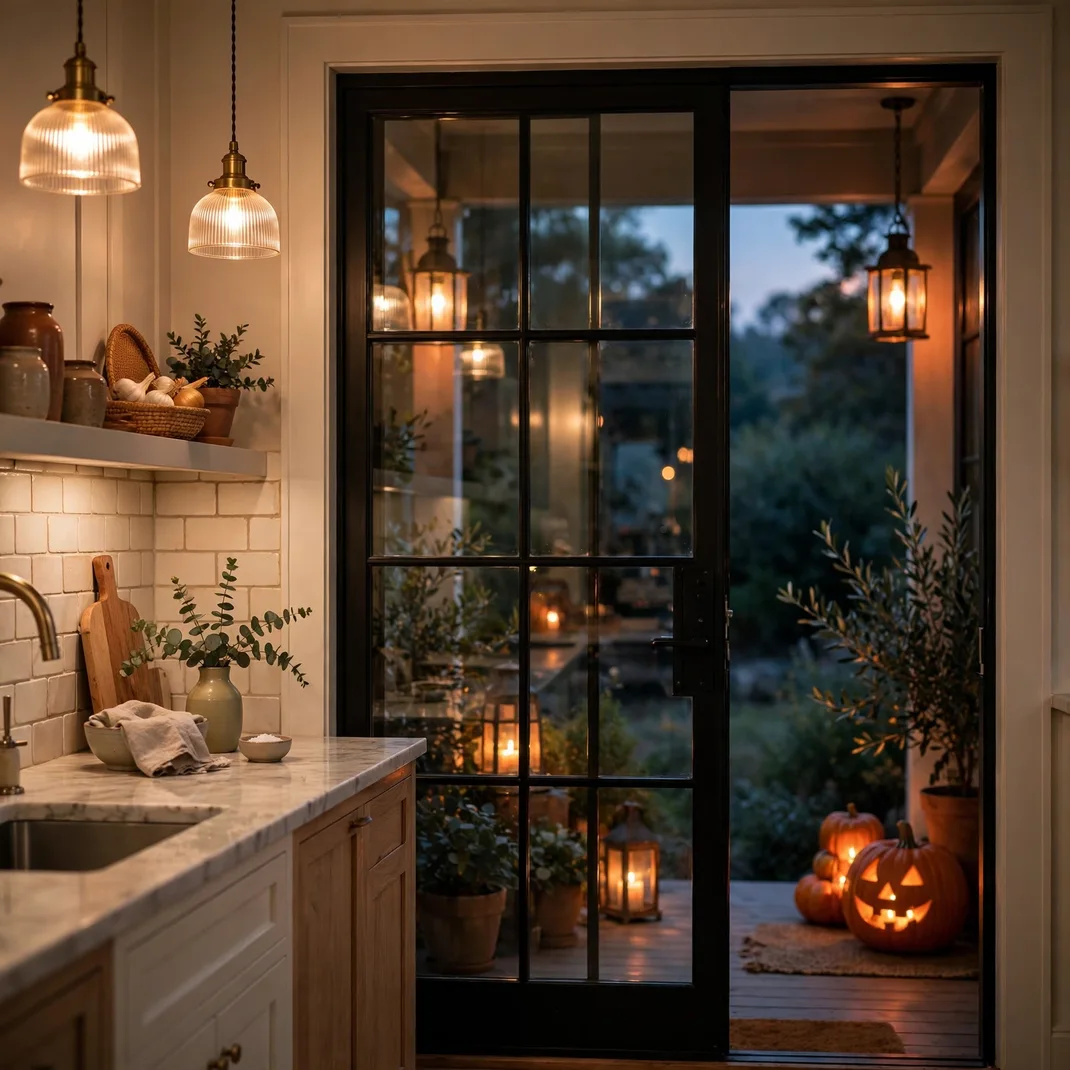
The last trick is not in the kitchen at all: dress the porch or entry visible through the kitchen’s door glass with warm lanterns and a glowing pumpkin, and the kitchen inherits the glow for free. Every glance toward the door shows layered depth, lamplight beyond glass beyond lamplight, and the kitchen feels bigger and more storied. It is the only trick on this list that works while you are cooking with your back to it.
How to Style It: Place two lanterns flanking the outside of the kitchen door and one carved pumpkin on the step, all on the same dusk timer as your indoor lights.
Why It Photographs Beautifully: The layered glow through glass gives kitchen photos a depth and story that single-room styling cannot fake.
Pro Tip: Keep the door glass clean for October; every fingerprint shows double when there is light on both sides.
Budget-Smart Swap: Borrow the porch lanterns from your island cluster after dinner parties; the same lanterns can work both shifts.
Make the Kitchen Glow All October
The best Halloween kitchen is not the darkest one or the brightest one; it is the one with light in layers, low and high, warm and flickering, steady and drifting. Start with the bulb swap and one strip of LEDs, then add whichever tricks made you smile as you read. By the time the trick-or-treaters arrive, your kitchen will be doing half the decorating itself, one glow at a time.