18 Preppy Halloween Room Upgrades With Playful Flair
Preppy style gives Halloween a polished backbone: tailored stripes, glossy finishes, crisp monograms, heritage plaids, and just enough orange to signal October. Instead of filling the bedroom with disposable party decorations, these upgrades borrow the confidence of a well-dressed club room and add playful seasonal details through trim, pattern, and carefully chosen objects.
1. Frame the Bed with a Club-Stripe Cornice
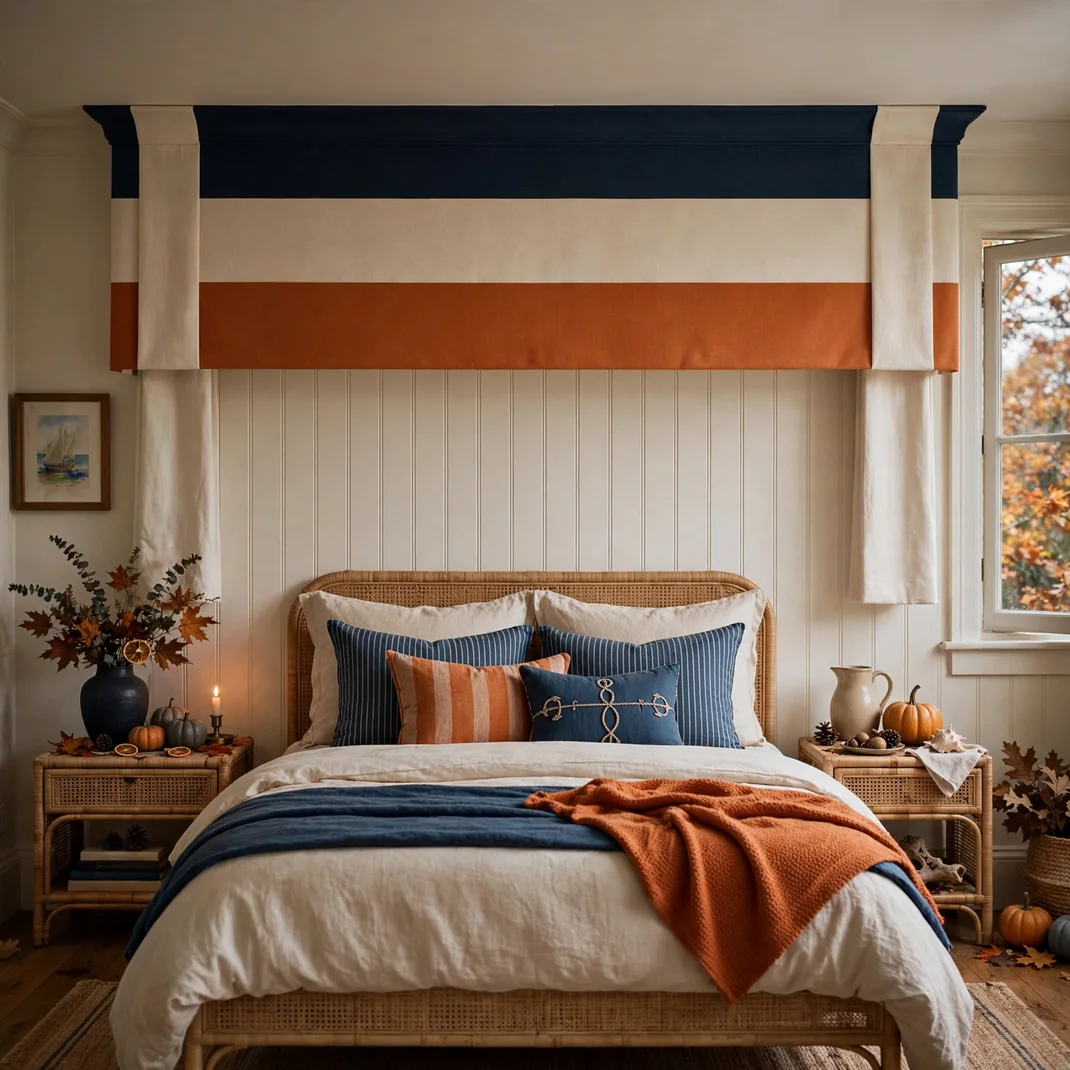
A shallow upholstered cornice in navy, cream, and pumpkin-orange stripes gives the bed the tailored presence of a smart seaside cabana. Mounted just below the ceiling, it creates height without the volume of full drapery, while two narrow cream panels soften the edges and keep the composition bedroom-friendly.
- How to Style It: Choose a stripe with bands at least 3 inches wide so the pattern reads from across the room. Upholster a lightweight cornice 6 to 10 inches wider than the bed, center the orange band, and hang plain cotton side panels that stop just above the floor.
- Why It Photographs Beautifully: The repeated vertical lines pull the eye upward, while the strong horizontal cornice frames the bed like a finished magazine set. Side daylight catches the fabric texture and keeps navy from turning into a flat dark block.
- Pro Tip: Match the stripe at every visible corner before stapling; broken lines make an otherwise tailored treatment look homemade. Keep the bedding mostly solid so the cornice remains the hero.
- Budget-Smart Swap: Wrap a foam-board cornice in striped fabric and secure it with removable picture-hanging strips rated for the finished weight. A striped tablecloth or shower curtain can provide enough yardage for less than decorator fabric.
2. Dress the Pillows Like Oxford Shirts
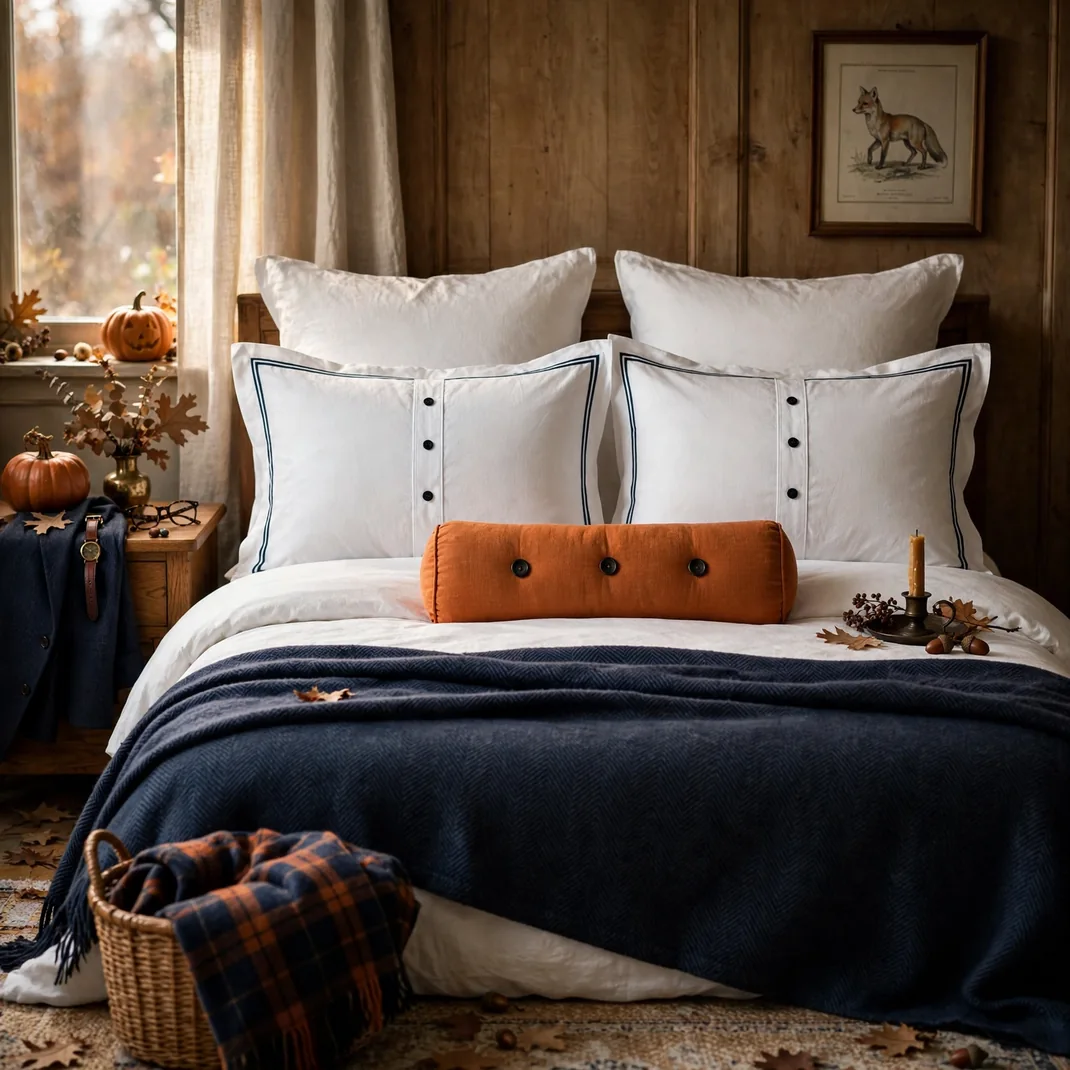
Crisp white pillow shams with button plackets, navy piping, and one pumpkin-orange cuff bring a witty menswear note to the bed. The idea feels unmistakably preppy, but the orange accent and black horn-style buttons give it a subtle Halloween wink rather than a costume-shop finish.
- How to Style It: Place two white Euro shams at the back, two Oxford-style standard shams in front, and one narrow orange lumbar pillow at the center. Repeat the navy piping on the duvet edge or bed skirt, but avoid adding another patterned layer near the pillows.
- Why It Photographs Beautifully: Button details reward close-up shots, while the symmetrical arrangement looks crisp in a full-bed photograph. Bright white cotton also reflects window light, making the small orange and navy details appear richer.
- Pro Tip: Use real shirt-weight cotton or percale rather than shiny polyester; the natural wrinkles make the styling feel believable. Steam the plackets but leave a little softness in the pillow bodies.
- Budget-Smart Swap: Repurpose two oversized white button-down shirts as sham fronts and back them with inexpensive white cotton. Use navy bias tape for piping and a scrap of orange fabric for the center cushion.
3. Edge a Roman Shade in Pumpkin Greek Key
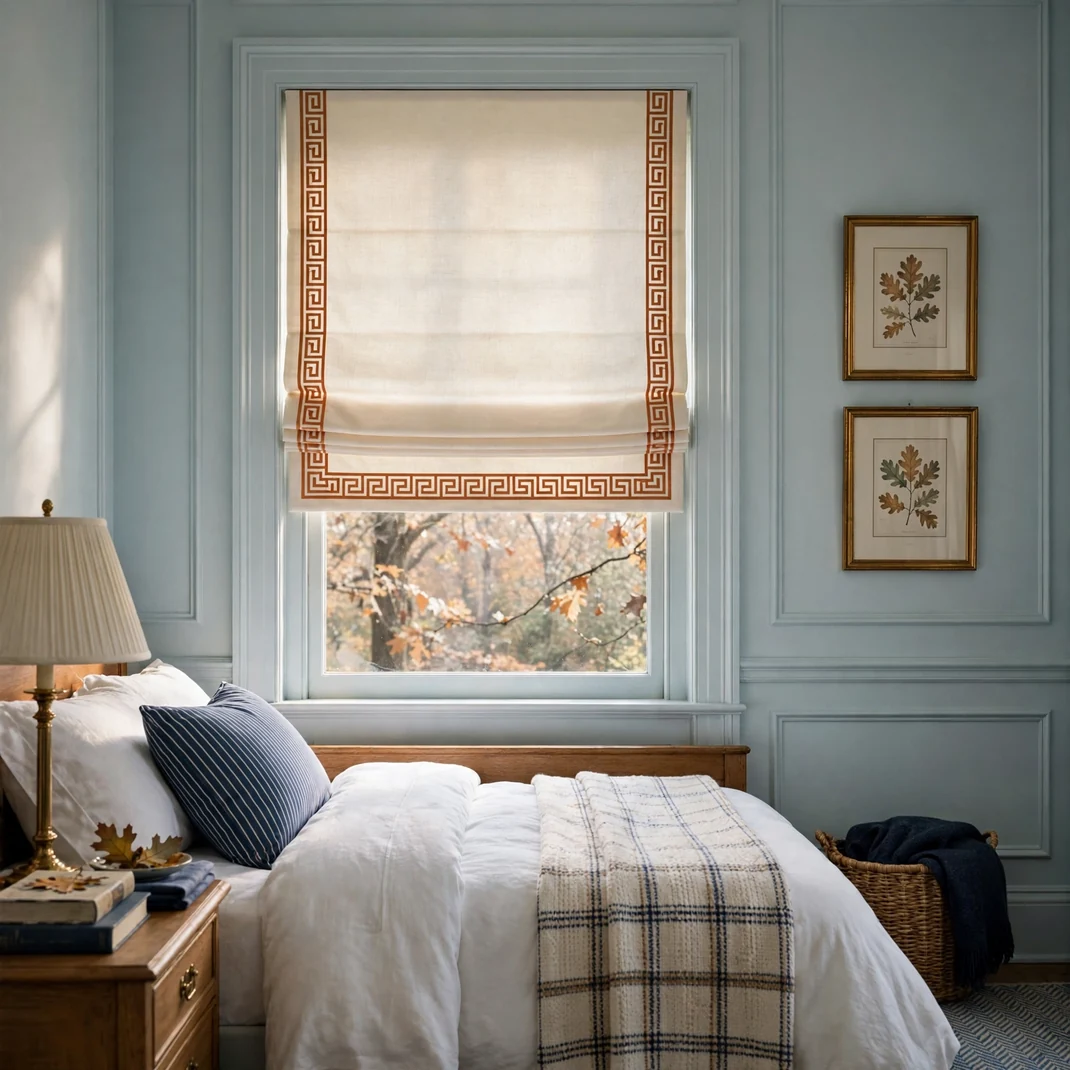
A cream Roman shade outlined in pumpkin-orange Greek-key tape gives the window architectural definition without adding another Halloween motif. The geometric border feels classic and energetic, especially against pale blue, warm white, or deep navy walls.
- How to Style It: Apply 1- to 1.5-inch Greek-key trim around the lower and side edges of a plain shade, keeping the corners perfectly squared. Echo the orange once with a small bedside object, then let the remaining window treatment stay neutral.
- Why It Photographs Beautifully: The crisp border creates a clean frame for daylight and remains visible even when the shade is partly raised. Its repeated right angles add graphic structure without producing the visual noise of a printed curtain.
- Pro Tip: Lay out the entire trim path with painter’s tape first so the motif meets neatly at both lower corners. Fabric glue works for a seasonal treatment, but blind-stitch the tape if the shade will stay up year-round.
- Budget-Smart Swap: Use washable orange ribbon to create a simplified double-line border on an existing roller shade. Two parallel bands deliver the same tailored effect without the cost of woven Greek-key tape.
4. Give a Campaign Chest Pumpkin Leather Pulls
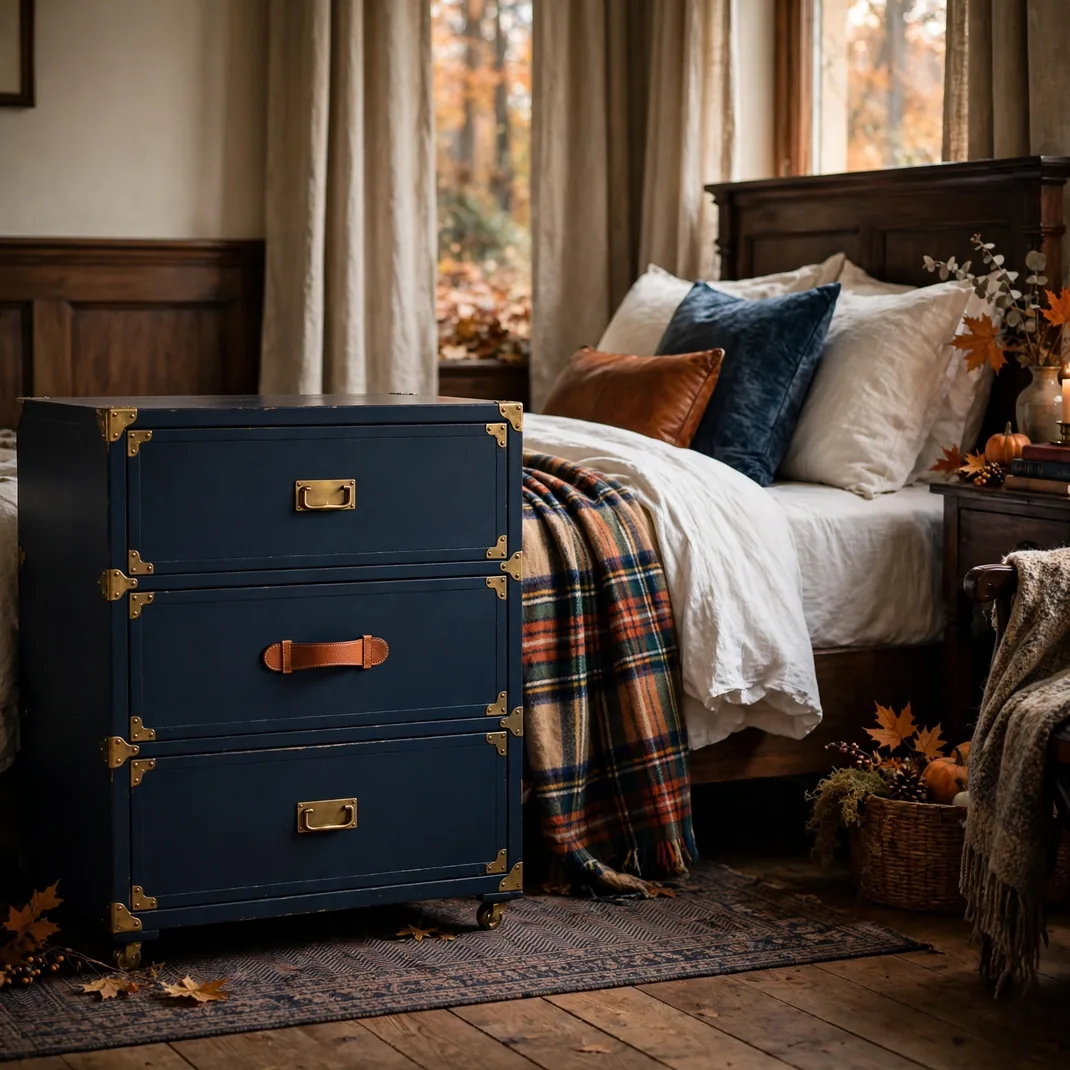
A navy campaign-style chest becomes an October statement when its brass fittings are paired with short pumpkin-orange leather pulls. The color combination is collegiate and polished, while the leather introduces warmth that works beautifully with plaid blankets and dark wood.
- How to Style It: Use a two- or three-drawer chest beside the bed and replace only the center pulls, leaving the corner brackets and outer hardware brass. Keep the top disciplined with a lamp, a small dish, and one stack of books rather than a collection of miniatures.
- Why It Photographs Beautifully: Glossy navy, aged brass, and matte leather each reflect light differently, giving a simple bedside shot unusual depth. The orange handles create three controlled points of color that guide the eye down the chest.
- Pro Tip: Choose vegetable-tanned leather and seal the cut edges with clear wax for a finished look. Pulls should be thick enough to hold their shape but short enough not to loop or sag.
- Budget-Smart Swap: Cut handles from an old orange belt and fasten them through the existing holes with brass Chicago screws. If painting furniture is not an option, add the pulls to a plain white or wood chest and repeat navy in the lamp shade.
5. Style a Chinoiserie Pumpkin Bedside Pair
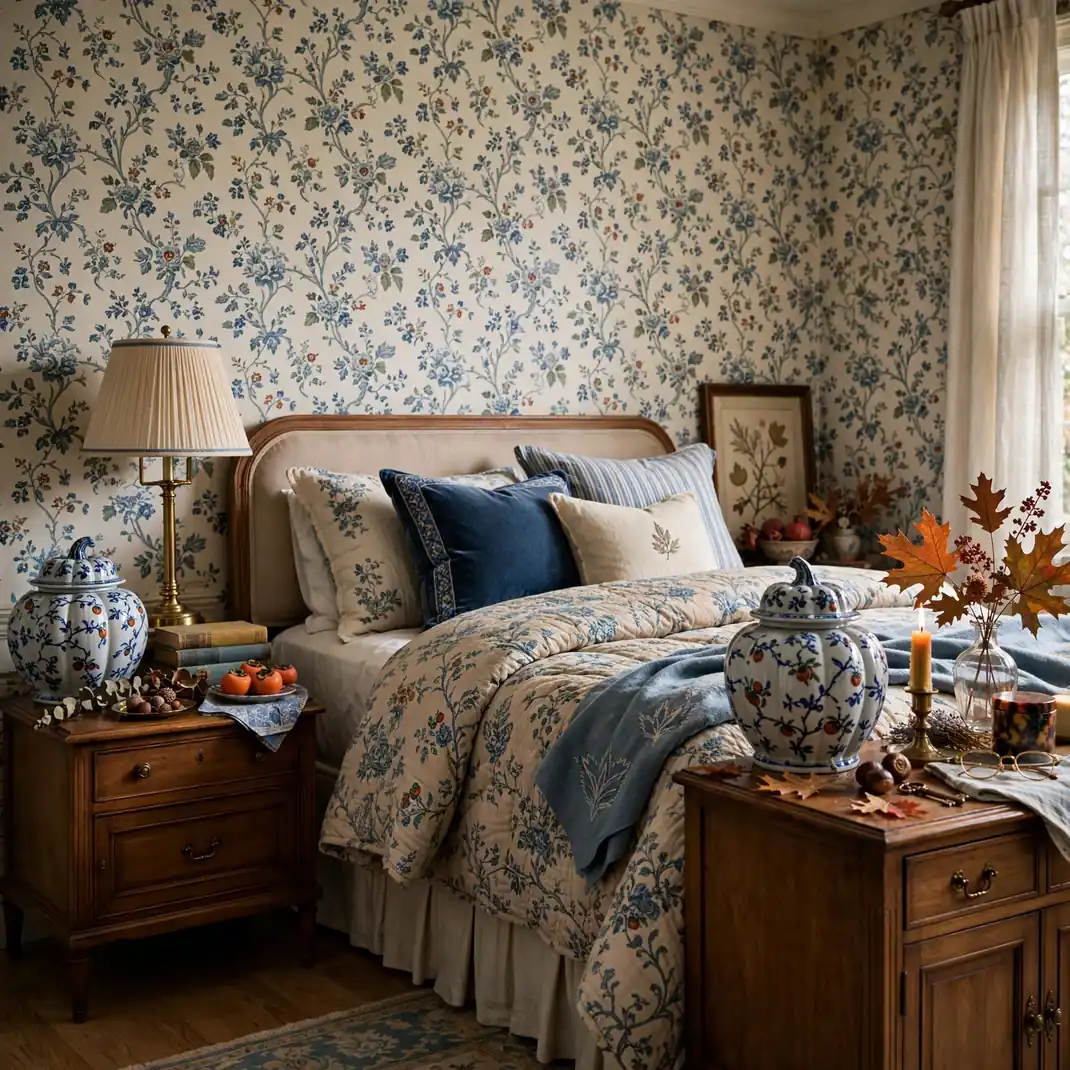
Two blue-and-white porcelain pumpkins bring a collected, grandmillennial mood to matching nightstands. Their familiar chinoiserie palette keeps the seasonal shape refined, while tiny persimmon details painted into the vines connect them to Halloween without turning the room orange.
- How to Style It: Place one lidded pumpkin jar on each nightstand, but vary the nearby objects so the arrangement does not feel staged like a showroom. Pair one with a brass reading lamp and the other with a small framed print, keeping both surfaces at least one-third empty.
- Why It Photographs Beautifully: The repeated pumpkin silhouettes create balance around the bed, and the glazed blue pattern catches highlights beautifully. White porcelain also separates cleanly from navy, grasscloth, or warm wood backgrounds.
- Pro Tip: Use pumpkins of equal visual weight rather than necessarily identical patterns. A slightly different vine or border on each jar makes the pair feel collected over time.
- Budget-Smart Swap: Paint removable blue floral motifs onto inexpensive white craft pumpkins with a fine acrylic marker. Seal them with a low-gloss clear coat so they resemble ceramic rather than foam.
6. Hang an Equestrian Rosette Ribbon Rail
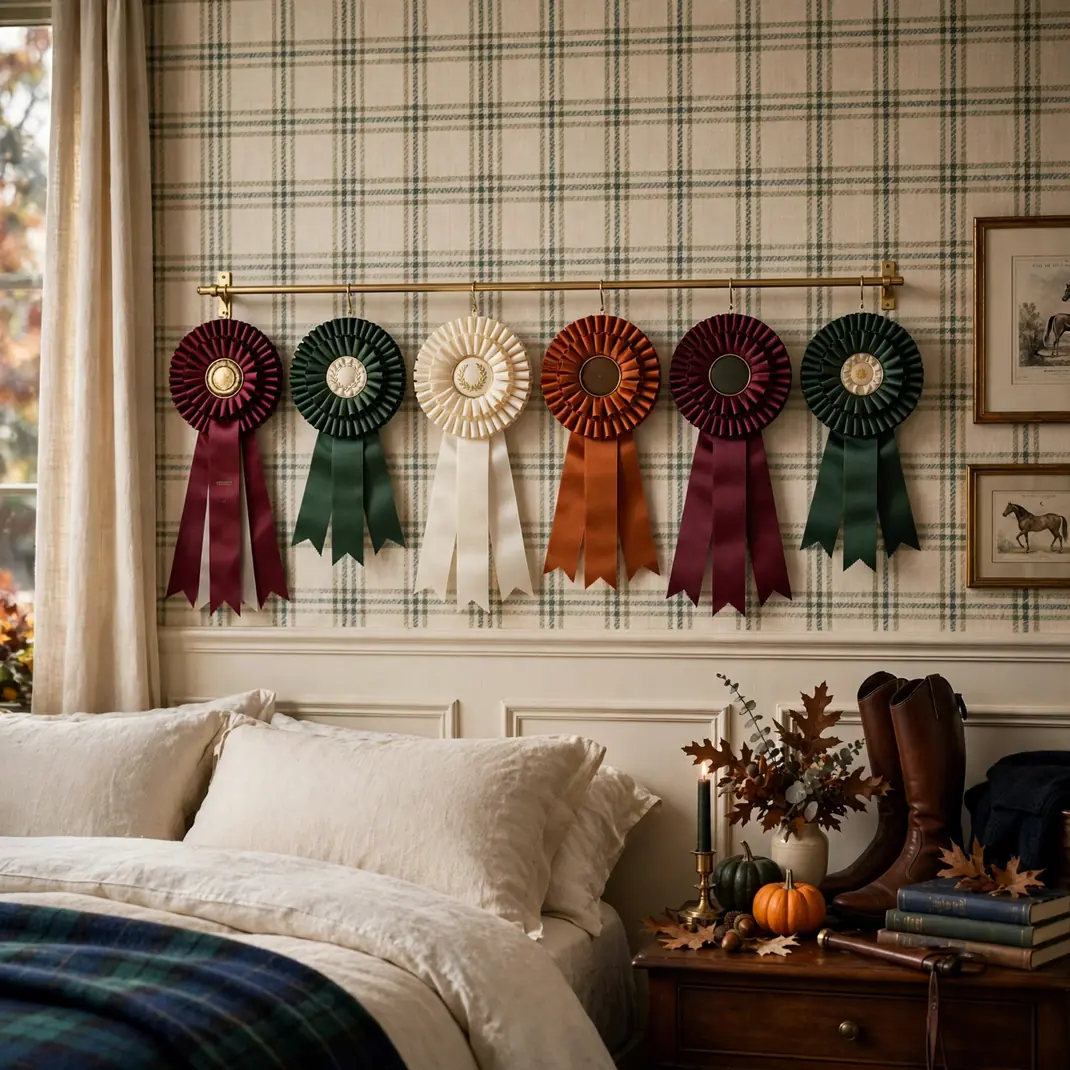
A neat row of prize-style rosettes in burgundy, forest green, cream, and burnt orange introduces equestrian character with a festive edge. Hung from a slim brass rail, the ribbons read as a curated sporting collection rather than party decorations.
- How to Style It: Arrange five or seven rosettes with alternating tail lengths, keeping the centers level and leaving several inches between them. Install the rail above a low dresser or beneath a framed landscape where the ribbons have breathing room.
- Why It Photographs Beautifully: Circular rosettes and trailing ribbons create a pleasing rhythm, while satin surfaces pick up small highlights in angled light. The limited palette keeps the display legible in both wide room views and tighter detail images.
- Pro Tip: Back each rosette with a stiff felt circle so it lies flat and does not twist. Use odd numbers and reserve the brightest orange for a single central rosette.
- Budget-Smart Swap: Pleat wide ribbon around cardboard circles and finish the centers with vintage-style brass buttons. Thrifted curtain rods or a narrow wooden dowel painted brass can stand in for a specialty rail.
7. Inset Closet Doors with Removable Tartan
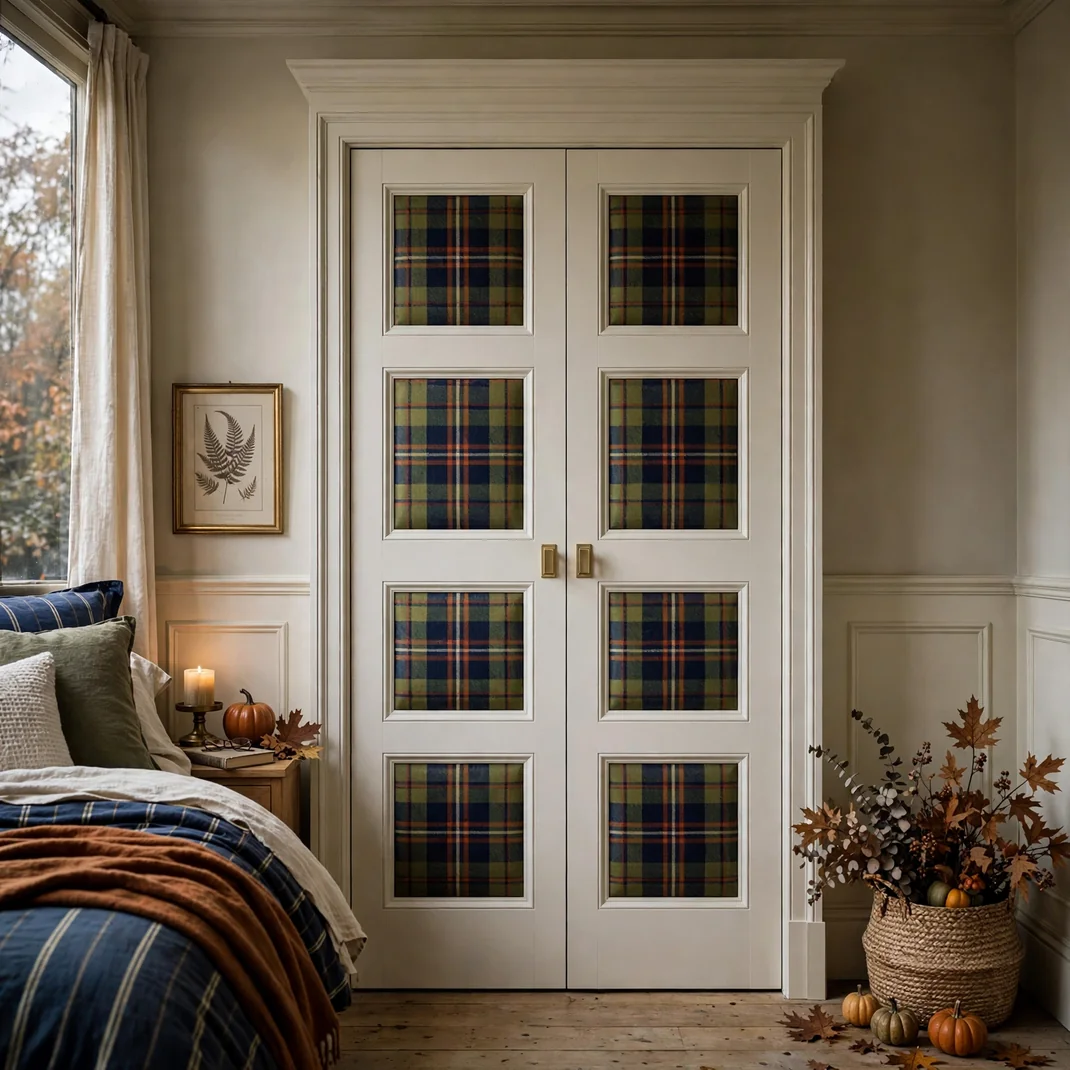
Tartan panels in moss, navy, rust, and cream turn plain closet doors into a handsome seasonal backdrop. Confined to the recessed panels, the pattern feels tailored and architectural rather than cabin-themed, and it can disappear after October without repainting.
- How to Style It: Measure each inset carefully and cut fabric-backed removable wallpaper or lightly starched fabric 1/8 inch smaller on every side. Keep the surrounding rails solid, and pair the doors with simple brass knobs so the plaid remains the main feature.
- Why It Photographs Beautifully: The grid of the plaid emphasizes the door proportions and creates an orderly background for the whole room. Rust lines read as a quiet Halloween accent, while navy and green prevent the palette from becoming overly autumnal.
- Pro Tip: Align the dominant horizontal stripe across every door before trimming the vertical edges. Misaligned repeats are especially noticeable on a pair of panels.
- Budget-Smart Swap: Mount plaid wrapping paper on thin foam board and press the boards into recessed door panels with removable mounting putty. This works best for a short seasonal display in a dry room.
8. Layer an Argyle Runner with Hidden Bats
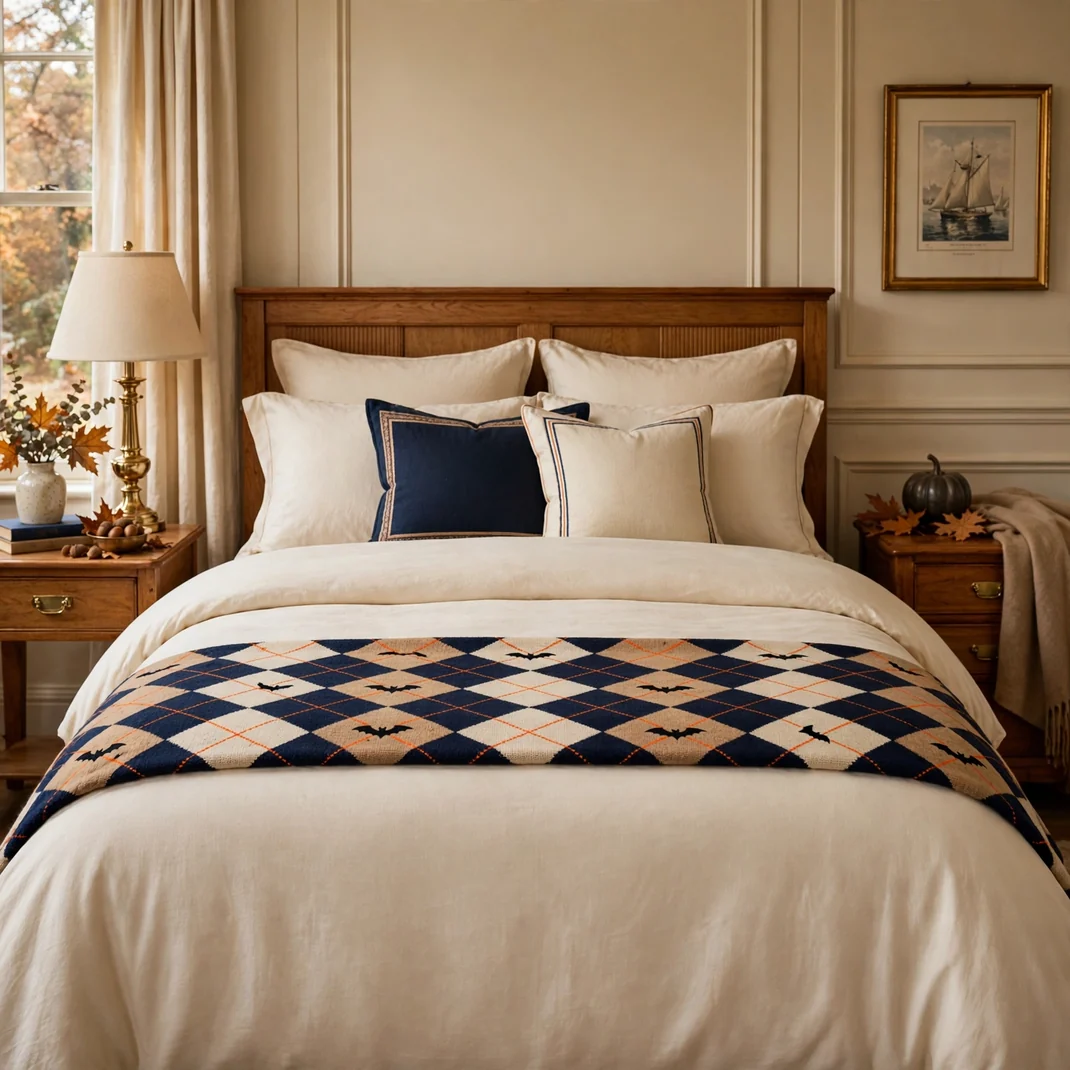
A narrow bed runner patterned in navy, camel, cream, and orange argyle adds country-club polish from across the room. Up close, a few of the diamond intersections are replaced with tiny black bat shapes, giving the traditional motif an unexpected October detail.
- How to Style It: Lay the runner across the lower third of the bed, allowing 8 to 12 inches to drop on each side. Keep the duvet cream or pale camel, then repeat black only in one bedside accessory so the hidden bats feel deliberate.
- Why It Photographs Beautifully: The diagonal lattice brings movement to a straight-on bed composition, and the small bats provide a discovery moment in detail shots. A low side angle highlights the difference between woven texture and flat appliqué.
- Pro Tip: Limit the bat substitutions to roughly one in every six diamonds. Too many will turn the argyle into a novelty print and weaken the preppy effect.
- Budget-Smart Swap: Cut small bats from black felt and hand-tack them onto an existing argyle scarf or narrow throw. The stitches can be removed after Halloween without damaging the base textile.
9. Tailor a Pleated Shade with Contrast Piping
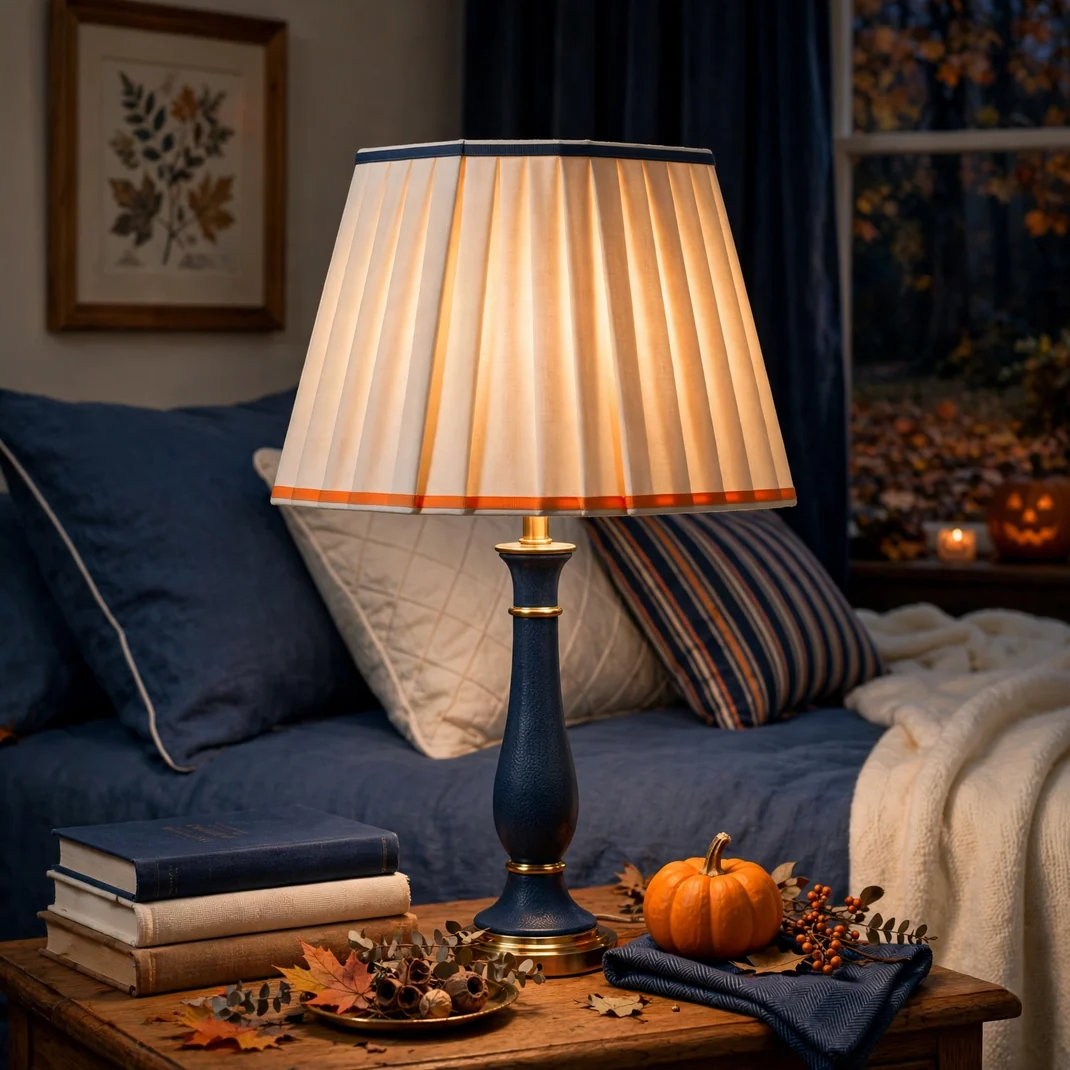
A box-pleated cream lampshade finished with navy top binding and a slender orange lower edge gives an ordinary bedside lamp the precision of custom upholstery. The tiny flash of orange glows warmly after dark, creating atmosphere without relying on themed lighting.
- How to Style It: Choose a straight-sided shade whose width is about two-thirds the height of the lamp base. Add navy trim at the top, orange piping at the bottom, and use a dark green, brass, or clear glass base to keep the palette grounded.
- Why It Photographs Beautifully: Pleats create fine shadows in daylight, while the orange edge forms a warm halo when the lamp is on. The close detail looks expensive because every line has a clear purpose.
- Pro Tip: Position the pleat seams at the back and line the shade with white or pale gold so it gives flattering light. Avoid black lining in a bedroom; it blocks too much useful illumination.
- Budget-Smart Swap: Glue narrow grosgrain ribbon to the top and bottom of a plain thrifted shade. Use fabric paint on the lower ribbon if you cannot find the exact orange tone.
10. Outline a Bamboo Mirror in Tortoiseshell
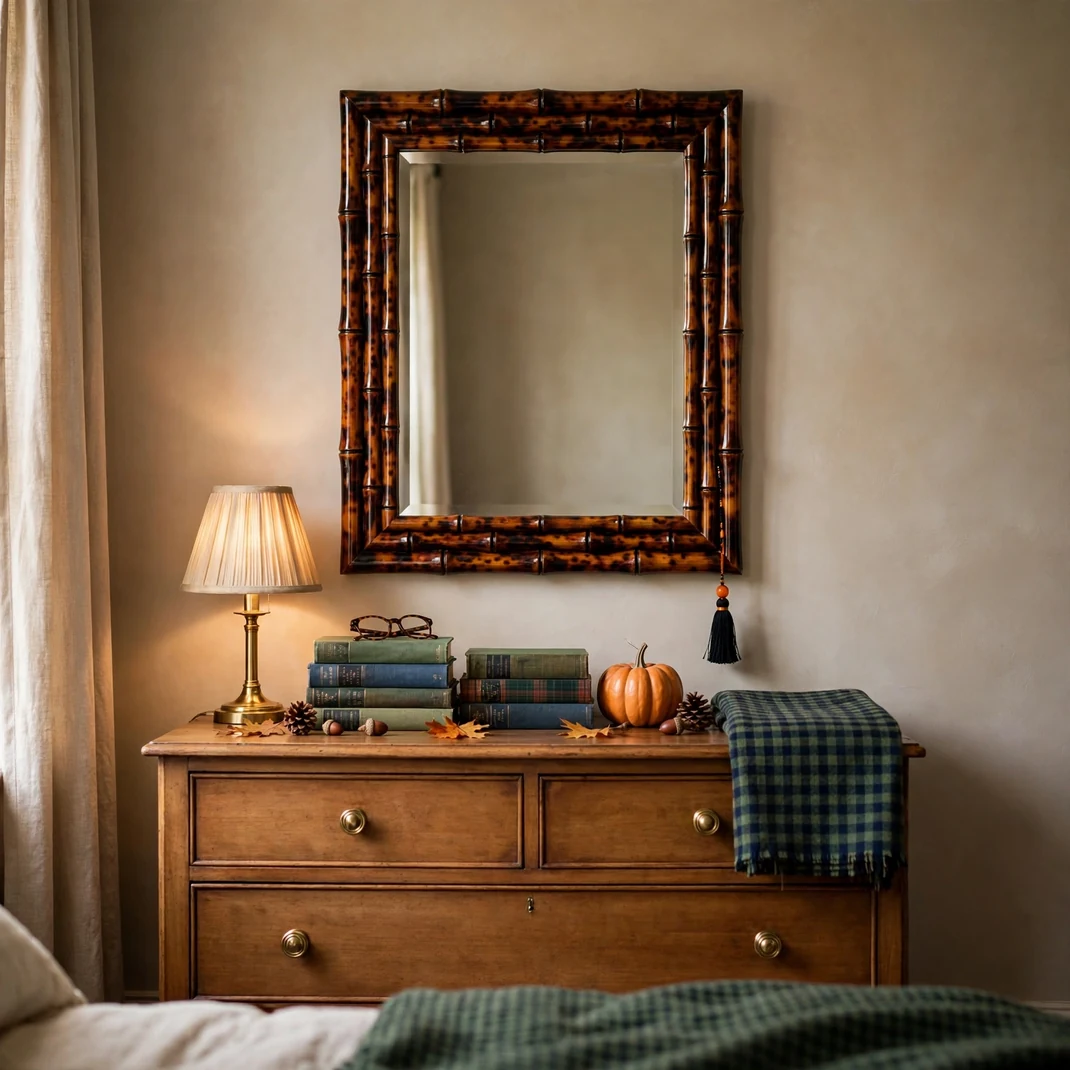
A faux-bamboo mirror in glossy tortoiseshell brings the warm, bookish side of preppy style into the bedroom. A single small black tassel with an orange bead hangs from one corner, adding a playful Halloween note without covering the mirror in bats or webs.
- How to Style It: Center the mirror above a dresser and keep the surface beneath it low and symmetrical: two small lamps or one lamp balanced by a shallow tray. Choose tortoiseshell tones with amber, chestnut, and black rather than bright yellow.
- Why It Photographs Beautifully: The mottled frame catches warm highlights and creates depth against both pale and saturated walls. Its bamboo joints give the eye a strong outline, while the tiny tassel adds an asymmetrical detail for close photographs.
- Pro Tip: Keep the reflected view intentional; angle the mirror toward a made bed, window, or artwork rather than an open doorway. Reflections are part of the composition, not empty background.
- Budget-Smart Swap: Paint a plain bamboo-look frame with translucent amber and dark-brown glazes, building irregular patches in thin layers. Finish with clear gloss and tie on a handmade thread tassel.
11. Center a Collegiate Monogram Bolster
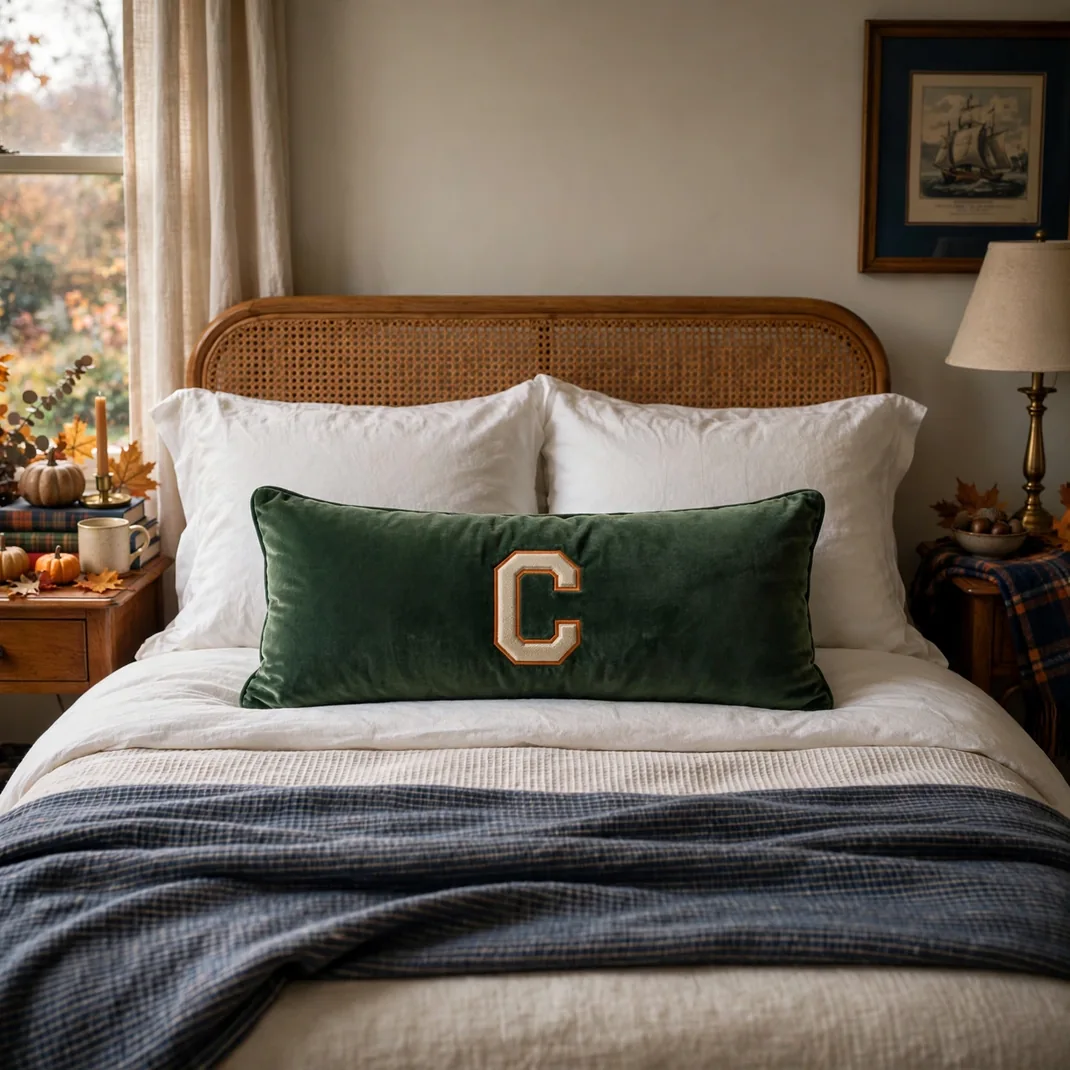
A long bottle-green velvet bolster embroidered with a cream collegiate monogram gives the bed one confident, personalized focal point. A narrow pumpkin-orange shadow stitch around the lettering brings in Halloween color while preserving the clean varsity look.
- How to Style It: Use one bolster approximately half to two-thirds the width of the mattress and place it in front of plain sleeping pillows. Choose one or two initials rather than a full phrase, and keep the remaining bedding in white, camel, or navy.
- Why It Photographs Beautifully: The centered monogram anchors a symmetrical bed photograph, and velvet shifts from dark to luminous as the pile meets the light. Orange stitching is subtle from across the room but crisp in a close crop.
- Pro Tip: Scale the letters generously but leave at least 3 inches of clear fabric around them. A smaller monogram can look like a misplaced logo on a large bolster.
- Budget-Smart Swap: Cut block initials from cream felt and attach them with temporary fabric adhesive, then add an orange outline with a simple running stitch. Remove the appliqué after the season or keep it as a permanent varsity detail.
12. Turn a Bamboo Étagère into a Prep-School Display
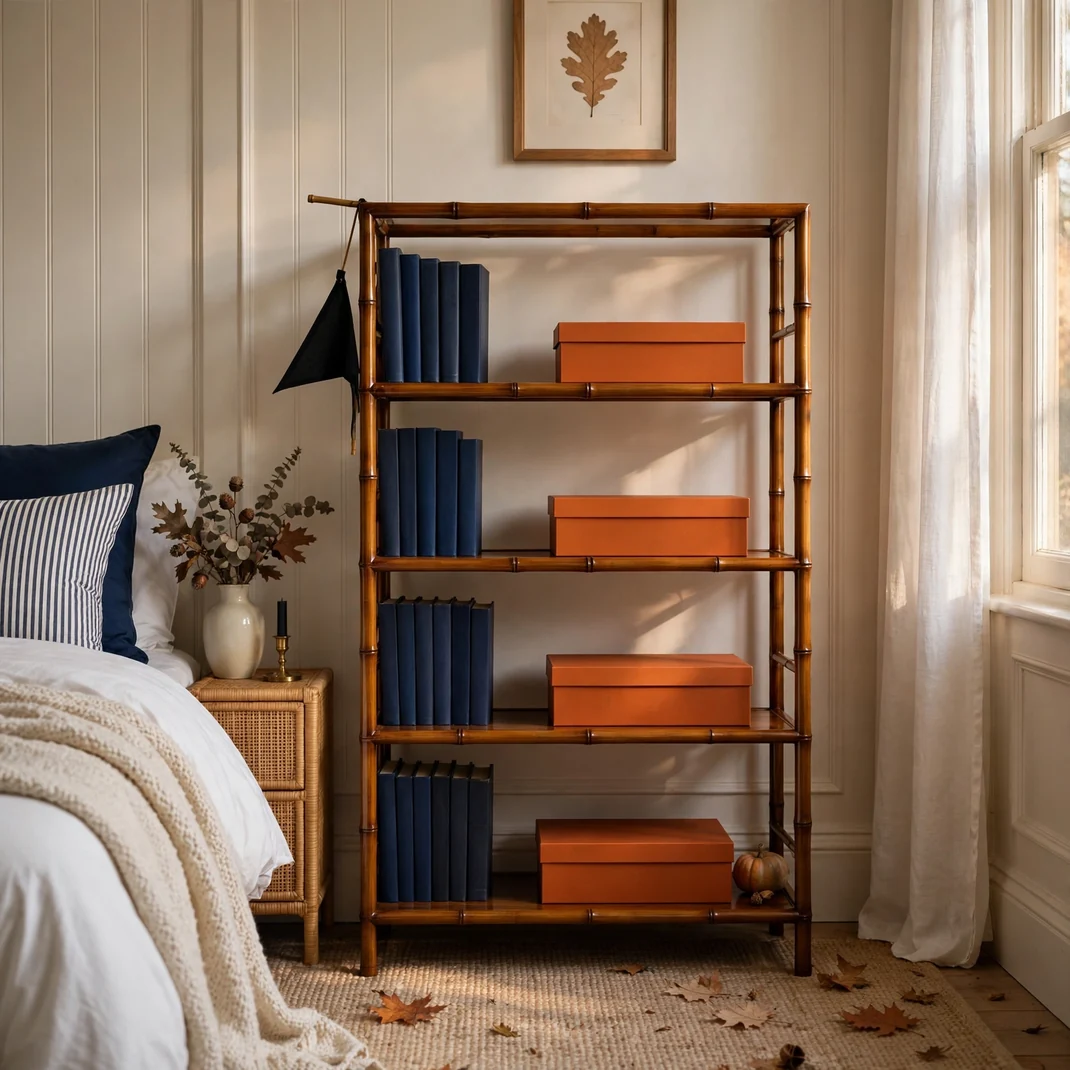
A lacquered bamboo étagère styled with navy books, orange boxes, and one black pennant creates a tidy prep-school vignette with Halloween spirit. Open sides keep the piece visually light, making it especially useful in a smaller bedroom where a dark bookcase would feel heavy.
- How to Style It: Limit each shelf to one vertical group and one horizontal object, leaving roughly a quarter of the shelf bare. Use orange on only two shelves, place cream objects between darker groupings, and tuck practical items into matching lidded boxes.
- Why It Photographs Beautifully: The open bamboo framework draws a delicate grid around the objects, helping each color block read clearly. Negative space prevents the display from becoming a cluttered assortment in photographs.
- Pro Tip: Style the shelves from the middle outward and step back after every layer. The eye should travel diagonally from the highest dark object to the lowest orange one.
- Budget-Smart Swap: Paint a narrow secondhand metal shelf in one satin color and add short lengths of split cane molding to the front edges. Coordinated shoeboxes wrapped in solid paper can replace lacquered storage boxes.
13. Stripe a Wicker Hamper Like a Regatta Flag
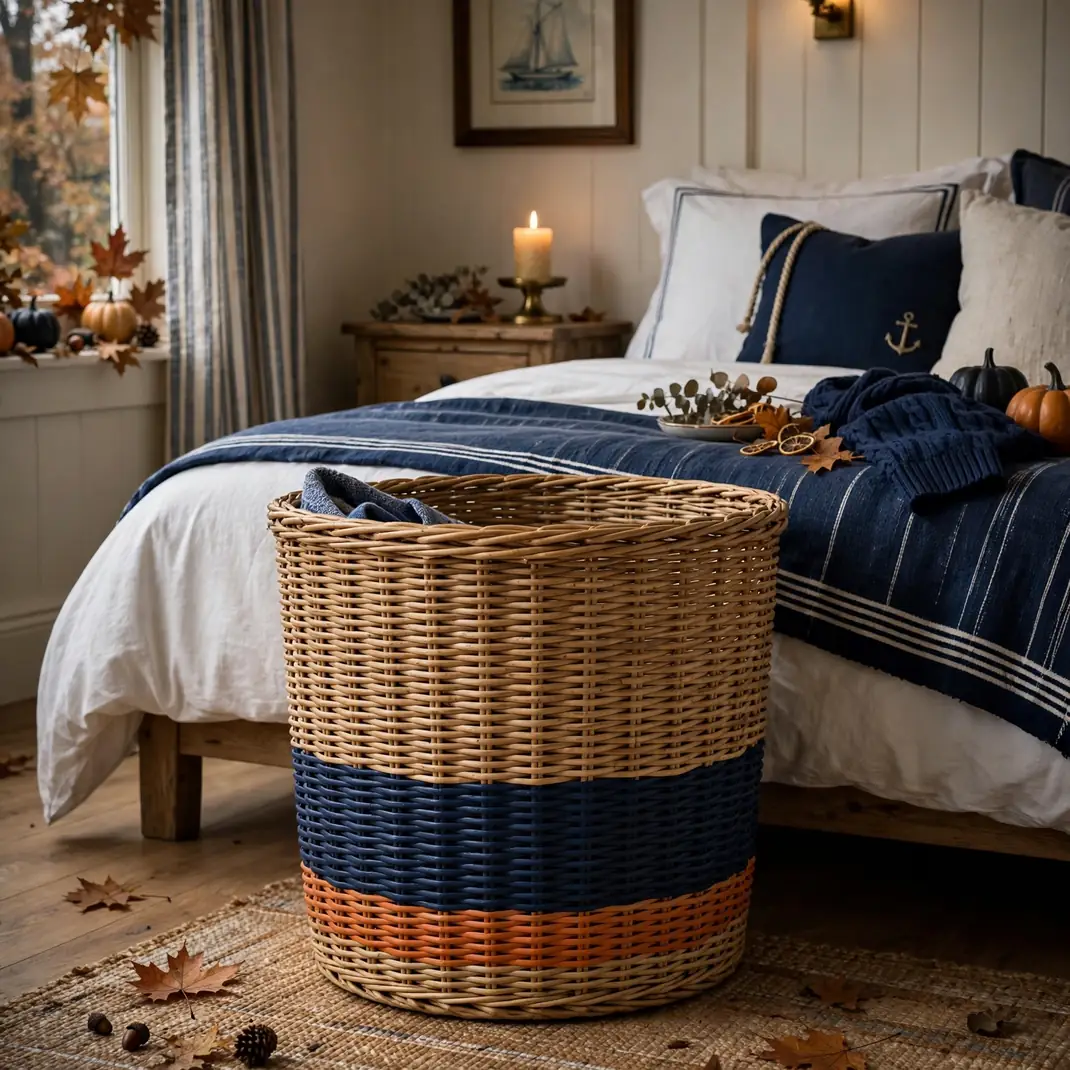
A natural wicker hamper gains crisp nautical energy with one broad navy band and a slimmer pumpkin-orange stripe. The upgrade turns a practical bedroom necessity into a color anchor, especially in rooms where floor space does not allow another decorative piece.
- How to Style It: Mask off the lower third of a straight-sided hamper and paint the bands around the full circumference, leaving plenty of natural wicker visible. Add a washable cream liner and position the hamper near the wardrobe rather than beside the focal wall.
- Why It Photographs Beautifully: Woven texture breaks up the painted stripes and looks rich in side light. The low color band grounds a room photograph without competing with artwork or bedding higher in the frame.
- Pro Tip: Use a dry brush and several light coats so paint does not clog the wicker weave. Seal only the painted areas with matte clear finish to preserve the natural contrast.
- Budget-Smart Swap: Tie wide navy and orange fabric bands around an unpainted basket and secure them inside with safety pins. The fabric can be washed, reused, and removed without altering the hamper.
14. Plant an Ivy Topiary in a Striped Cachepot
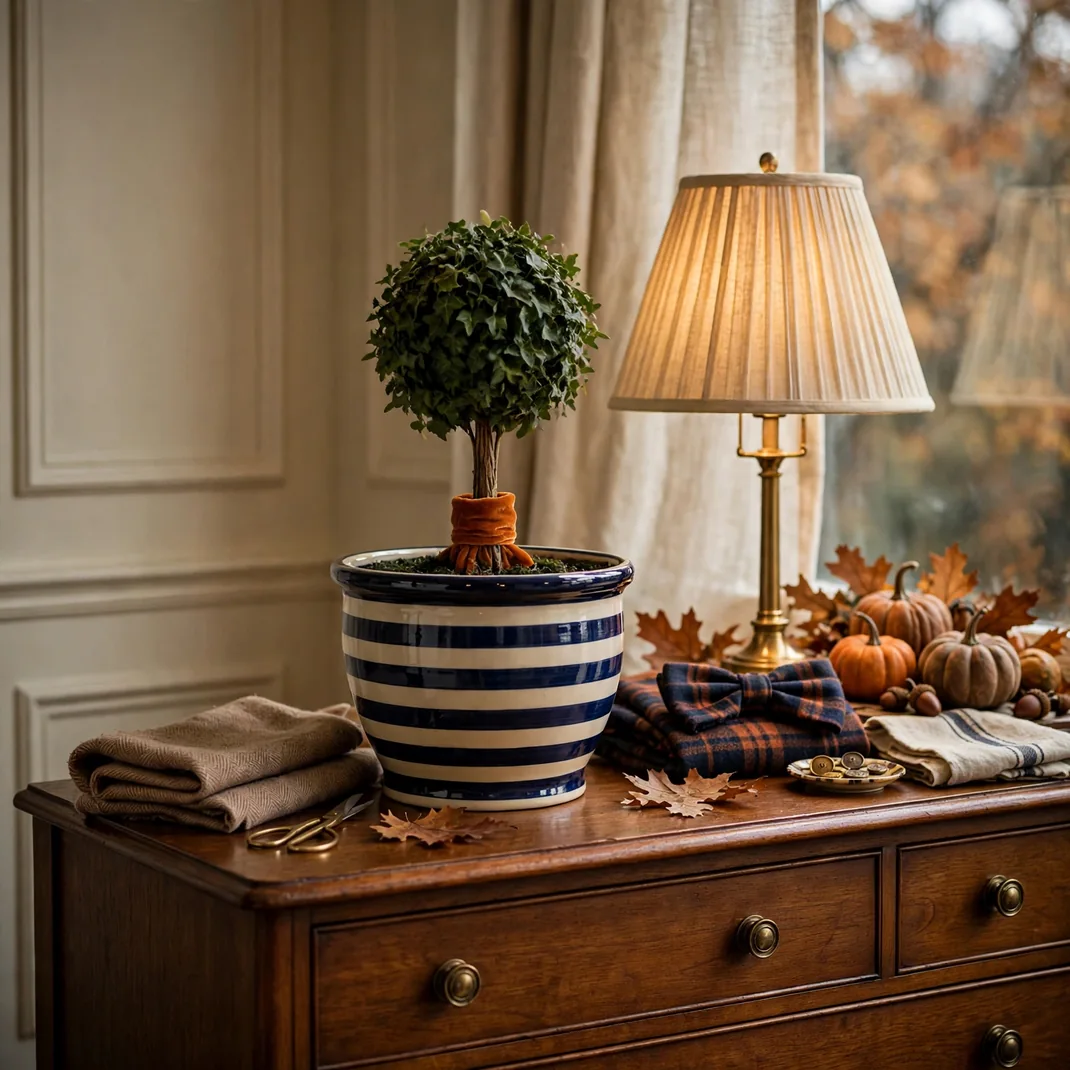
A clipped ivy topiary in a glossy navy-and-cream striped cachepot brings traditional garden-room polish to a dresser or window ledge. One small orange velvet collar around the trunk adds a seasonal accent that feels more like haberdashery than Halloween merchandise.
- How to Style It: Choose a compact ball or double-ball topiary no taller than the lamp beside it. Place the nursery pot inside a striped cachepot with a waterproof saucer, then keep the surrounding surface clear so the silhouette remains strong.
- Why It Photographs Beautifully: Living green softens the room’s straight lines, while the striped pot adds a precise graphic base. Backlighting from a nearby window outlines the leaves and gives the velvet collar a subtle glow.
- Pro Tip: Rotate the plant weekly and trim only the longest shoots so the ball stays full rather than rigid. Keep velvet above the soil line where watering cannot stain it.
- Budget-Smart Swap: Train inexpensive pothos around a small wire sphere set into a painted terracotta pot. Two bands of painter’s tape make it easy to create the navy-and-cream stripe cleanly.
15. Fill a Trophy Cup with Autumn Dahlias
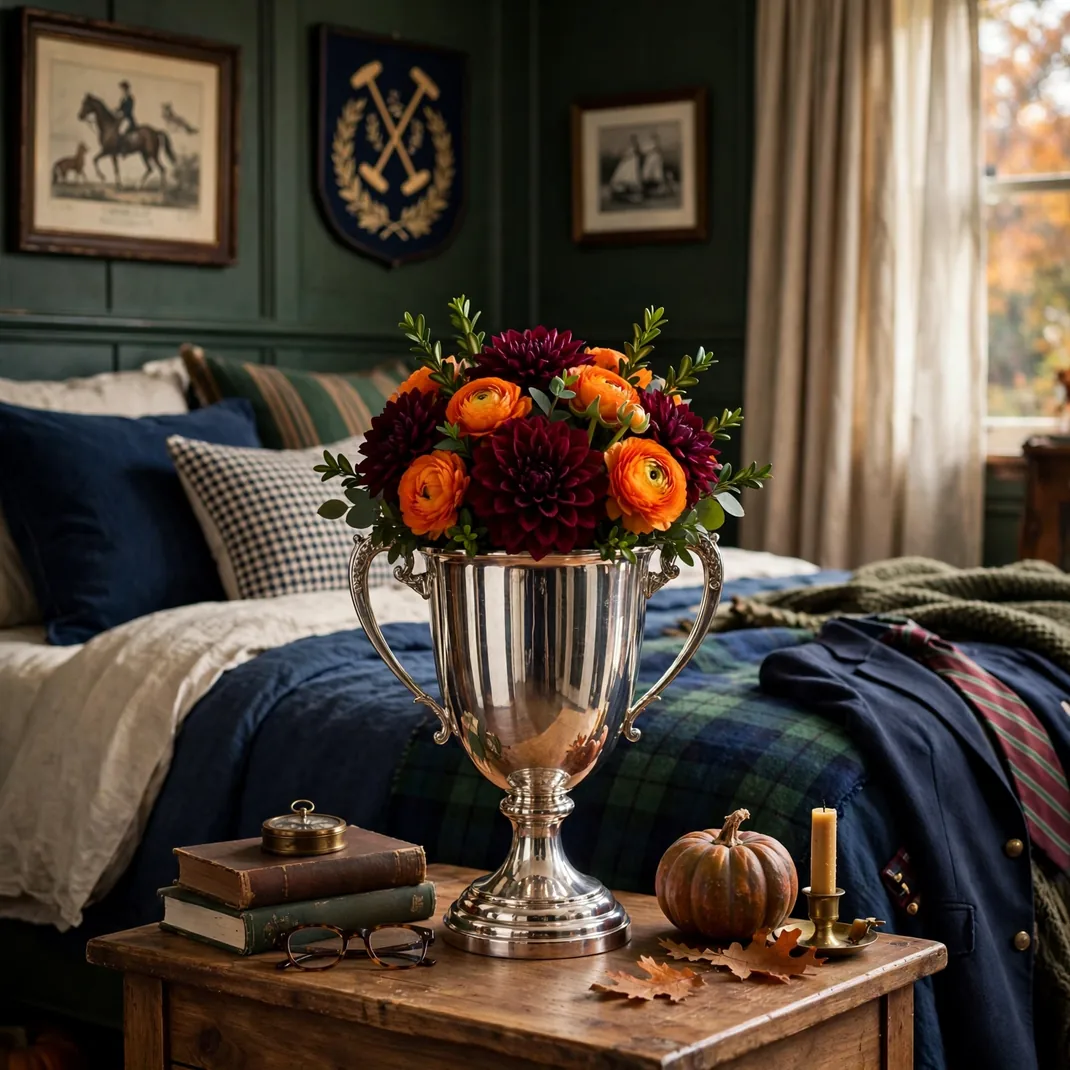
A polished trophy cup filled with burgundy dahlias, orange ranunculus, and clipped greenery gives Halloween flowers a sporting-club setting. It is festive without being fussy, and the silver vessel cuts through dark seasonal colors with a cool reflective note.
- How to Style It: Use a watertight insert inside the cup and build a low, rounded arrangement no more than one-and-a-half times the vessel’s height. Place it on a dresser with a small stack of books and nothing else tall nearby.
- Why It Photographs Beautifully: Silver reflects small flashes of the room’s colors, while the dense flower heads create soft contrast against hard metal. The low dome shape keeps the arrangement composed in both straight-on and three-quarter views.
- Pro Tip: Mix one-third foliage with two-thirds blooms and repeat each color at least three times around the arrangement. Avoid tall branching stems; they make the trophy silhouette disappear.
- Budget-Smart Swap: Use a secondhand stainless-steel ice bucket or metal compote and polish it well. Faux dahlias can look convincing when mixed with real eucalyptus or clipped garden foliage.
16. Band Ceiling-Fan Blades in Varsity Stripes
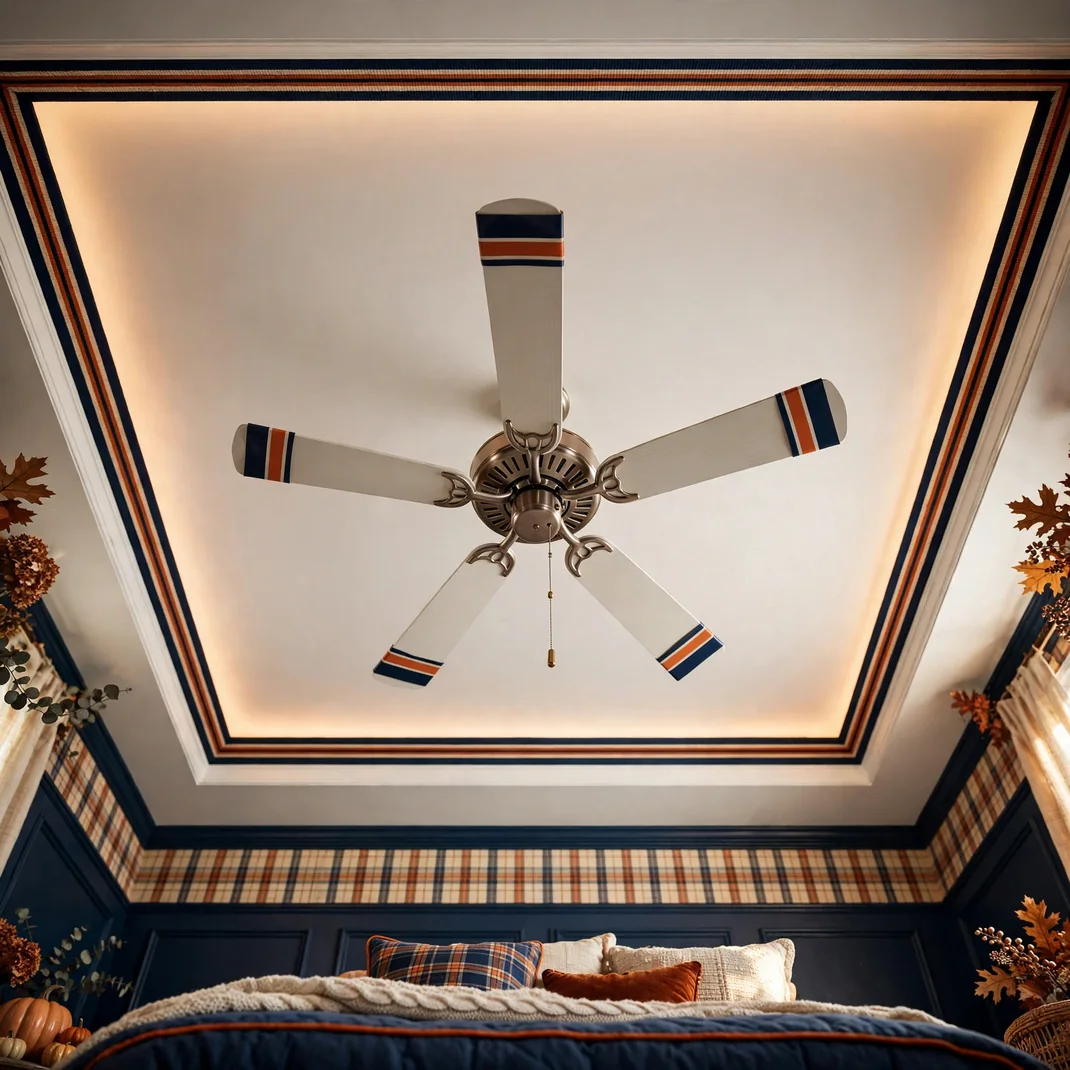
Removable navy and pumpkin bands on the tips of plain ceiling-fan blades create a sporty overhead detail that is easy to miss at first glance. When the fan is still, the stripes look like varsity trim; in motion, they blend into a warm halo of color.
- How to Style It: Apply identical removable vinyl bands to every blade, positioning them the same distance from the tip and keeping each strip narrow. Use only two colors and leave most of the original blade finish visible so the fan stays visually light.
- Why It Photographs Beautifully: The repeated bands form a radial graphic above the bed and make an often-ignored fixture feel intentional. Photograph the fan switched off so the spacing and color remain crisp.
- Pro Tip: Balance matters: use vinyl pieces cut from the same template and equal in weight on every blade. Never add fabric, dangling trim, or anything that changes the blade profile.
- Budget-Smart Swap: Cut stripes from removable craft vinyl samples rather than buying full rolls. A small sheet in each color is enough for all blades and peels away after the season.
17. Upholster a Vanity Stool in Windowpane Plaid
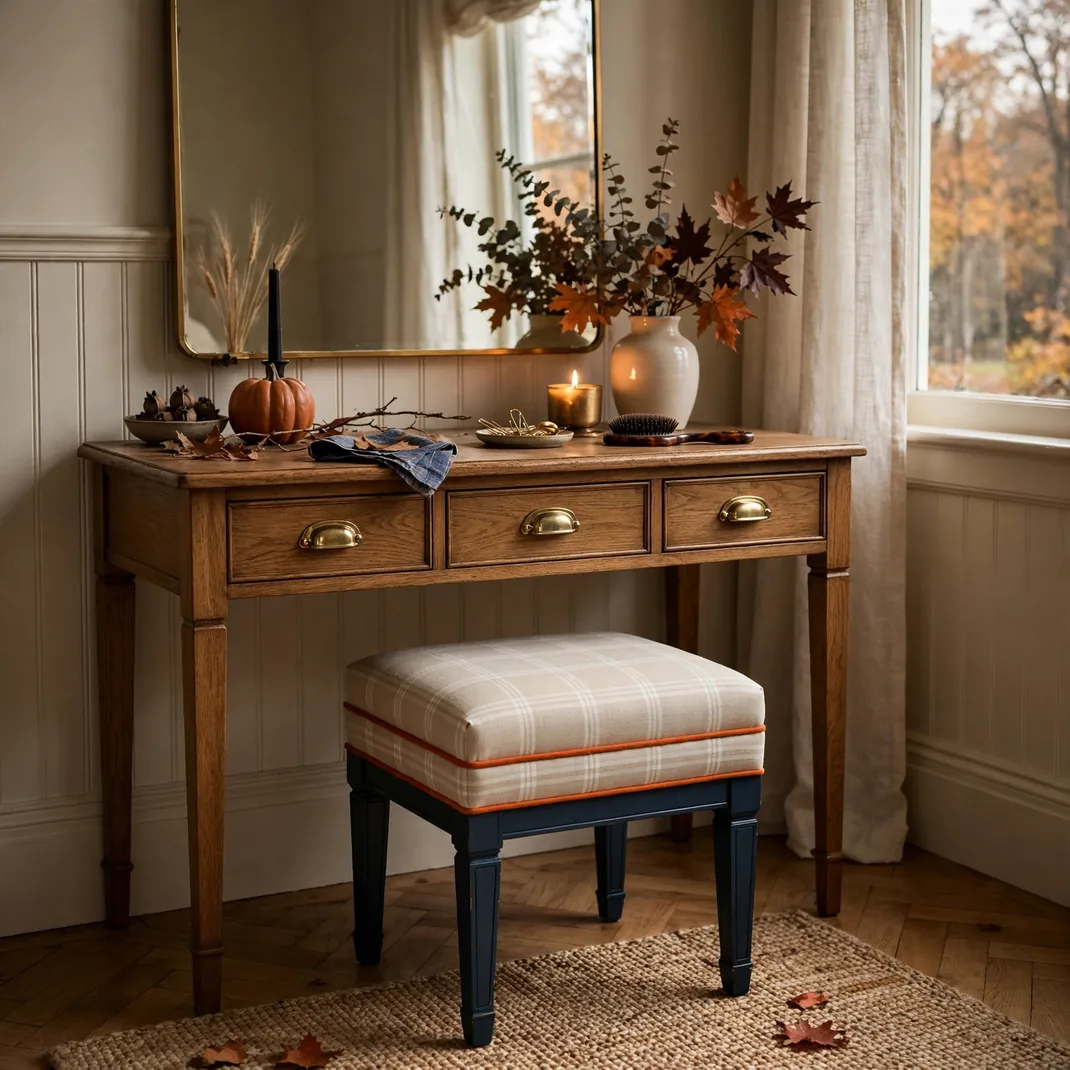
A compact vanity stool in cream windowpane plaid, finished with orange welt cord and navy-painted legs, delivers a tailored hit of pattern without committing to a large upholstered piece. It tucks neatly beneath a desk or dressing table, making the upgrade useful as well as decorative.
- How to Style It: Center the plaid on the seat so the vertical and horizontal lines run square to the frame. Keep the orange welt narrow, choose a matte navy for the base, and repeat cream nearby through a lamp shade or wall color.
- Why It Photographs Beautifully: The grid emphasizes the stool’s clean proportions, while piping traces the seat edge in a precise line. A three-quarter angle shows the contrast between woven fabric, painted wood, and the small orange detail.
- Pro Tip: Add a layer of firm upholstery foam rather than simply wrapping new fabric over the old seat. A crisp cushion edge is essential to the tailored preppy look.
- Budget-Smart Swap: Recover a basic wooden stool with a plaid scarf or remnant and use orange upholstery cord only across the front edge. Paint just the lower half of each leg if a full refinishing job is not practical.
18. Welcome the Room with a Crest-Style Door Plaque
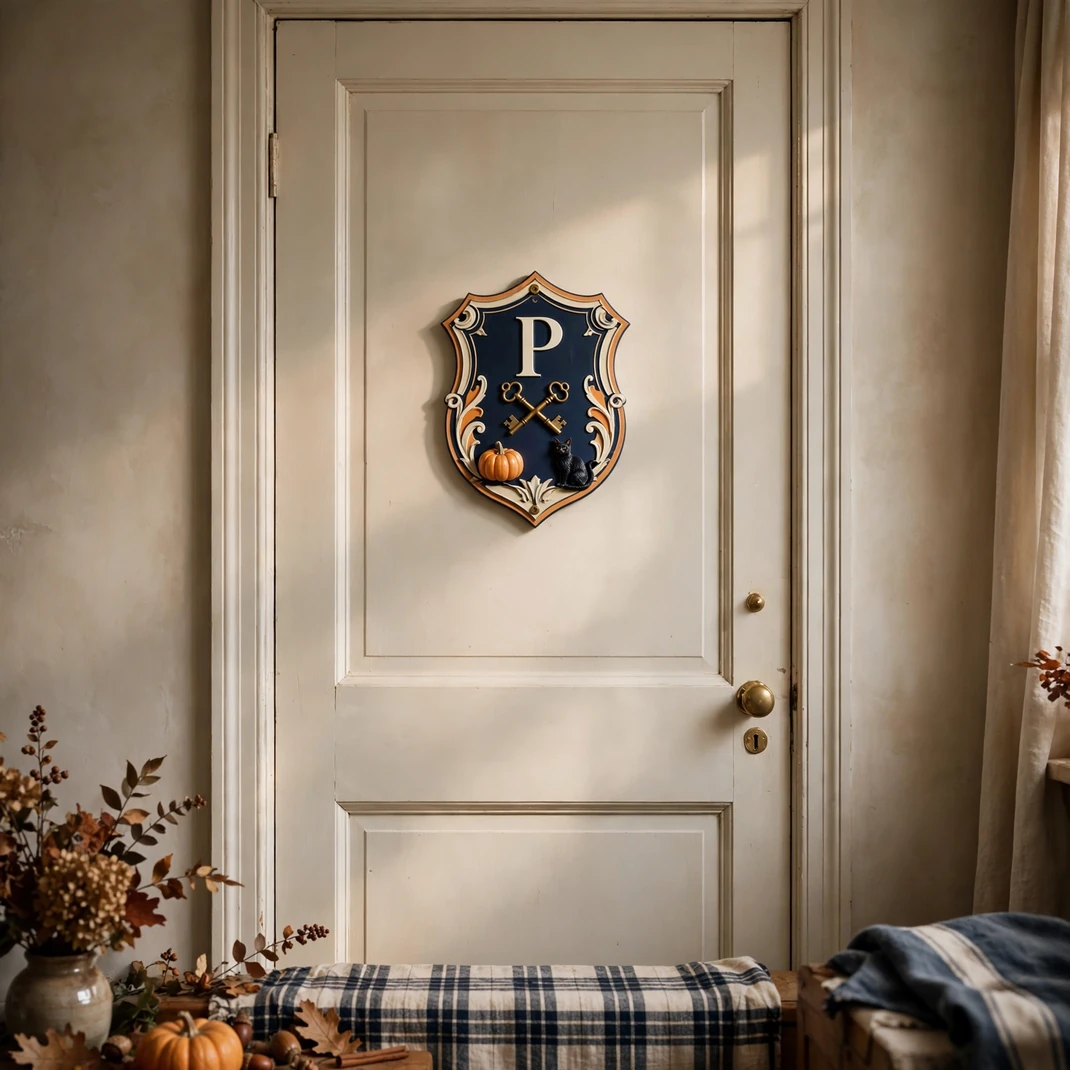
A small shield-shaped door plaque painted in navy, cream, and persimmon gives the bedroom a playful private-club identity. Crossed keys, a tiny pumpkin, or a black cat can sit beneath a single initial, creating a custom Halloween crest without using a printed sign.
- How to Style It: Keep the plaque between 8 and 12 inches tall and center it at eye level on the door. Use one large initial, two small symbols, and a simple border; too many details will make the crest look like a craft project rather than a finished emblem.
- Why It Photographs Beautifully: The symmetrical shield shape and high-contrast palette make a strong final detail shot, while the glossy door provides clean negative space. A small brass ribbon or hook adds a convincing hardware accent.
- Pro Tip: Sketch the design at full size and test it in black and white before painting. If the crest is clear without color, it will remain legible once the seasonal palette is added.
- Budget-Smart Swap: Cut the shield from sturdy cardboard, cover the edges with paper tape, and paint it with leftover sample pots. Hang it from a removable adhesive hook using striped ribbon.
Keep the Preppy Mix Crisp
The most convincing preppy Halloween bedrooms are edited, not crowded. Repeat each accent color two or three times, balance glossy finishes with natural texture, and let a single tailored upgrade lead each zone. Once the orange details come down, the room should still feel composed—which is the best sign that the seasonal styling was built on a strong foundation.