15 Rustic Modern Kitchen Ideas That Balance Cozy and Clean
There is a particular kind of kitchen that makes guests linger a little longer than they planned to. It smells faintly of coffee and cedar, the light falls soft across a stone countertop, and everything looks both effortless and intentional at once. That feeling has a name: rustic modern, the design language that lets rough hewn warmth and crisp contemporary calm share the same room without either one winning outright.
The magic of this style lives in its tension. Weathered timber meets honed marble. Handmade texture meets razor straight cabinetry. A centuries old farmhouse trick, like a deep apron sink or a limewashed wall, suddenly feels fresh again when it is framed by matte black hardware and clean sightlines. Neither side apologizes, and the result is a kitchen that feels collected over time rather than ordered from a catalog.
Below you will find fifteen ideas that strike that balance beautifully, each one practical enough to actually build. Some are weekend projects, others are worth saving for, but all of them share the same goal: a kitchen that wraps you in warmth while staying calm, uncluttered, and easy to live in. Pick the ones that speak to your space and let the transformation begin.
1. Exposed Reclaimed Timber Beams
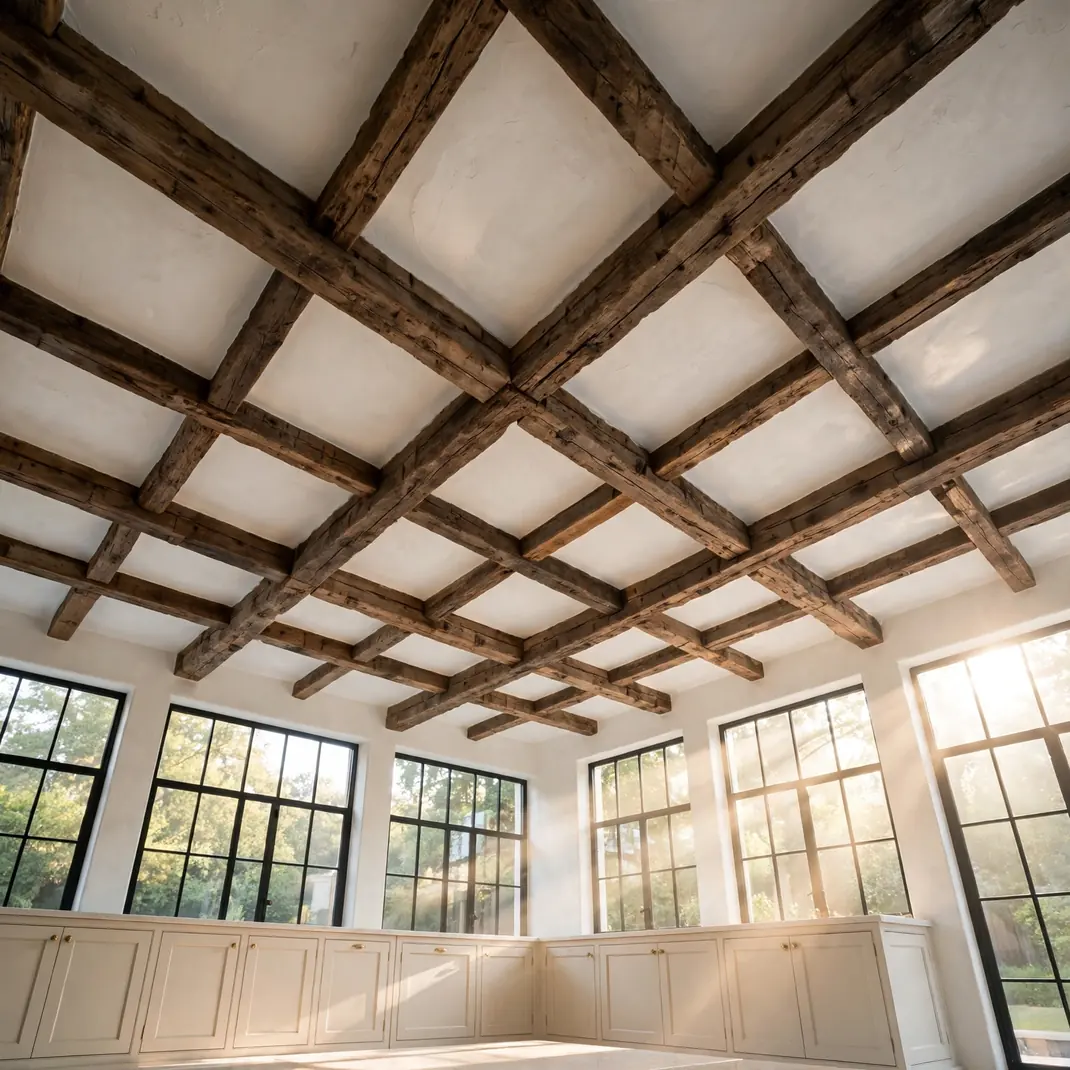
Look up and let the ceiling do the talking in your kitchen. Reclaimed timber beams bring instant soul to an otherwise streamlined room, their weathered grain and old nail holes telling stories that new lumber simply cannot fake. Set against pale plaster or light cabinets, the dark wood creates a bold rhythm overhead that draws the eye upward and makes the whole space feel taller. Keep surrounding finishes quiet so the beams remain the hero instead of competing with busy patterns elsewhere. This single move captures the heart of rustic modern: raw history softened by crisp contemporary lines.
What You Need
- Reclaimed or reproduction timber beams
- Contractor assessment of ceiling load capacity
- Matte wood sealant in a deep tone
- Heavy duty mounting brackets
- Soft white ceiling paint
How to Set It Up
Have a contractor confirm what your ceiling can safely carry, then mount the beams perpendicular to the joists at even intervals across the ceiling. Seal the timber in a matte finish that deepens the grain without adding shine, and repaint the ceiling between beams in soft white to sharpen the contrast. Space the beams widely enough that the ceiling still breathes rather than feeling heavy.
Pro Tip
Aim one slim recessed spotlight to graze along a single beam after dark; the raking light makes the grain glow and turns the ceiling into evening theater.
2. Warm Oak Shaker Cabinetry
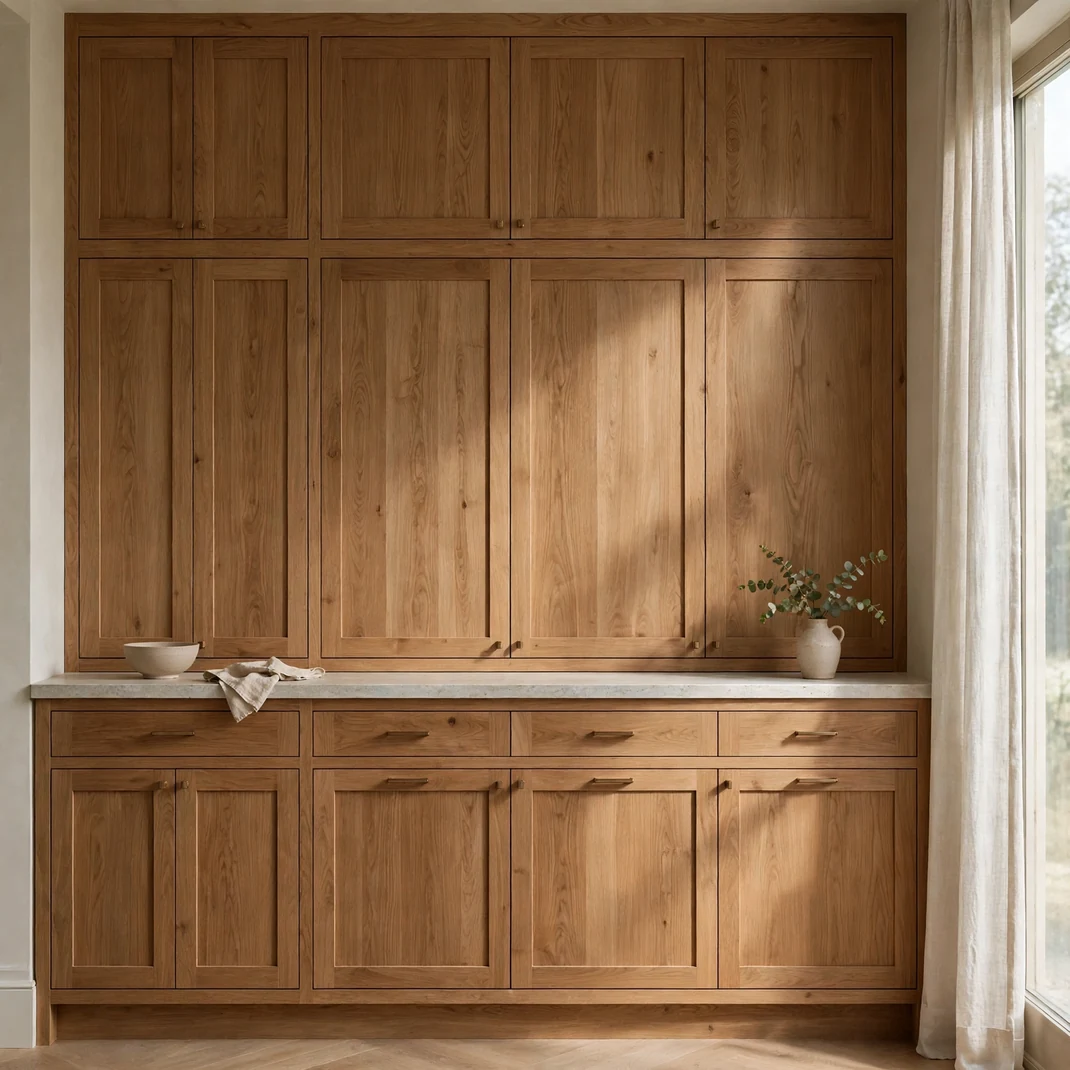
Cabinetry sets the emotional temperature of a kitchen, and warm oak shaker fronts land it perfectly. The simple recessed panel keeps the look clean and timeless, while the visible grain adds the organic movement that flat painted doors lack. Choose a honey or amber stain rather than anything orange, and pair the wood with pale stone counters so the room stays bright. Full height uppers in matching oak can feel enveloping, or mix in a few airy shelves to break the repetition. Either way, the kitchen reads as crafted rather than manufactured.
What You Need
- Oak shaker style cabinet fronts
- Honey or amber wood stain samples
- Pale stone or quartz countertop
- Soft close hinges
- Grain matched end panels
How to Set It Up
Order cabinet fronts in white oak and test stain samples against your flooring before committing, since undertones shift dramatically in different light. Install full height runs with minimal gaps for a furniture like feel, and finish with a satin protective coat that resists kitchen moisture. Keep wall color neutral so the oak remains the warmest element in the room.
Pro Tip
Ask your cabinet maker to book match the grain on the island front panels; the mirrored pattern looks custom and costs little extra.
3. Honed Marble Waterfall Island
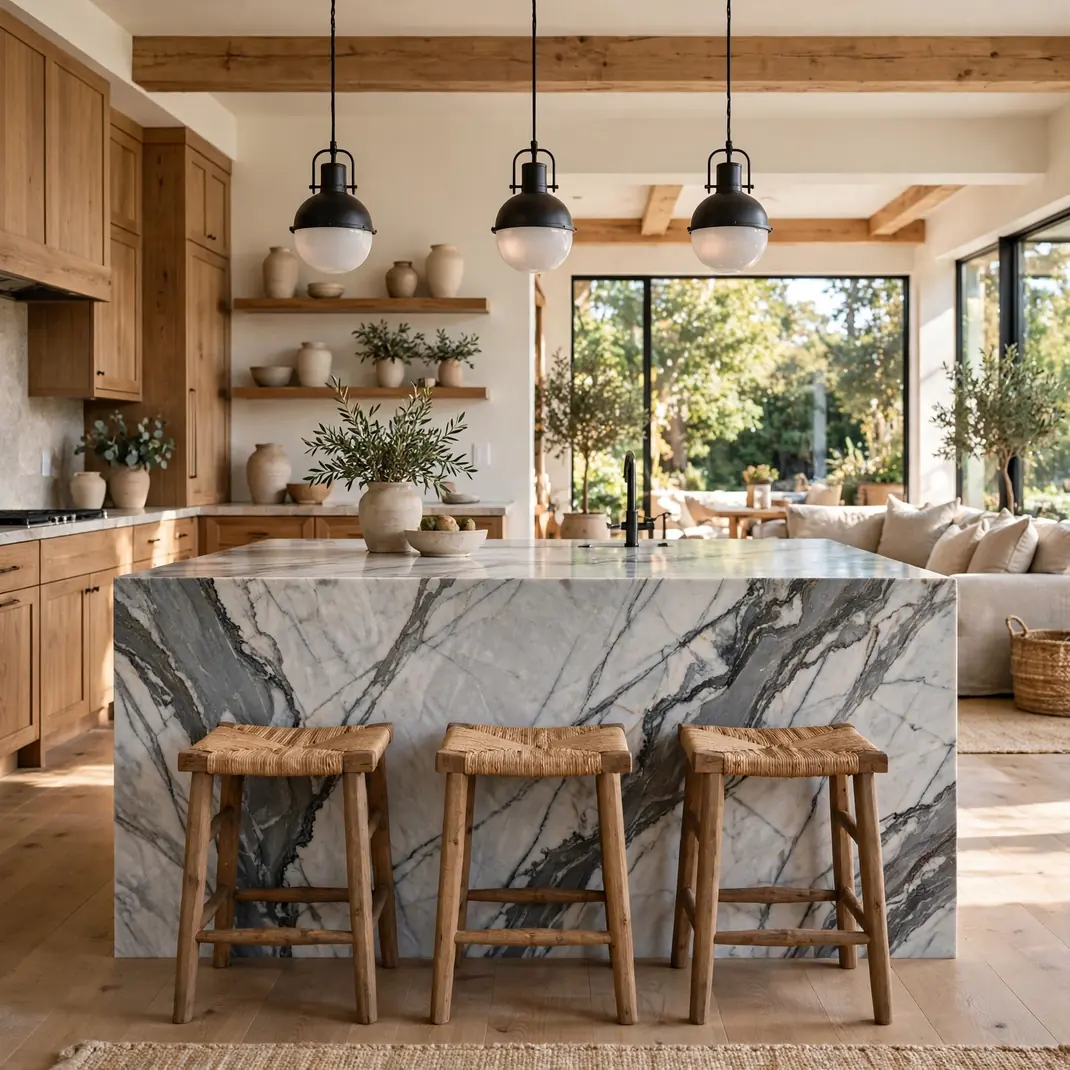
A waterfall island in honed marble is the clean half of the rustic modern equation, and it anchors the room like sculpture. The stone cascades down both sides in one continuous flow, hiding clutter prone edges and giving the island a monolithic calm. Honed rather than polished keeps the surface soft and fingerprint forgiving, which matters in a hardworking kitchen. Veining adds natural art that no two slabs share, so the island becomes the one of a kind centerpiece. Surround it with rustic stools or wooden beams and the tension sings.
What You Need
- Honed marble slab with strong veining
- Experienced stone fabricator
- Waterfall edge miter cutting
- Penetrating stone sealer
- Felt pads for stool legs
How to Set It Up
Select your slab in person since veining varies enormously, then have a skilled fabricator miter the waterfall edges for a seamless folded look. Seal the honed surface with a penetrating sealer and reseal yearly to guard against stains. Keep the island styling restrained; the stone remains the artwork on its own.
Pro Tip
Choose a slab with dramatic veining on one face and quieter pattern on the other, then face the dramatic side toward the living area for maximum impact.
4. Matte Black Hardware Accents
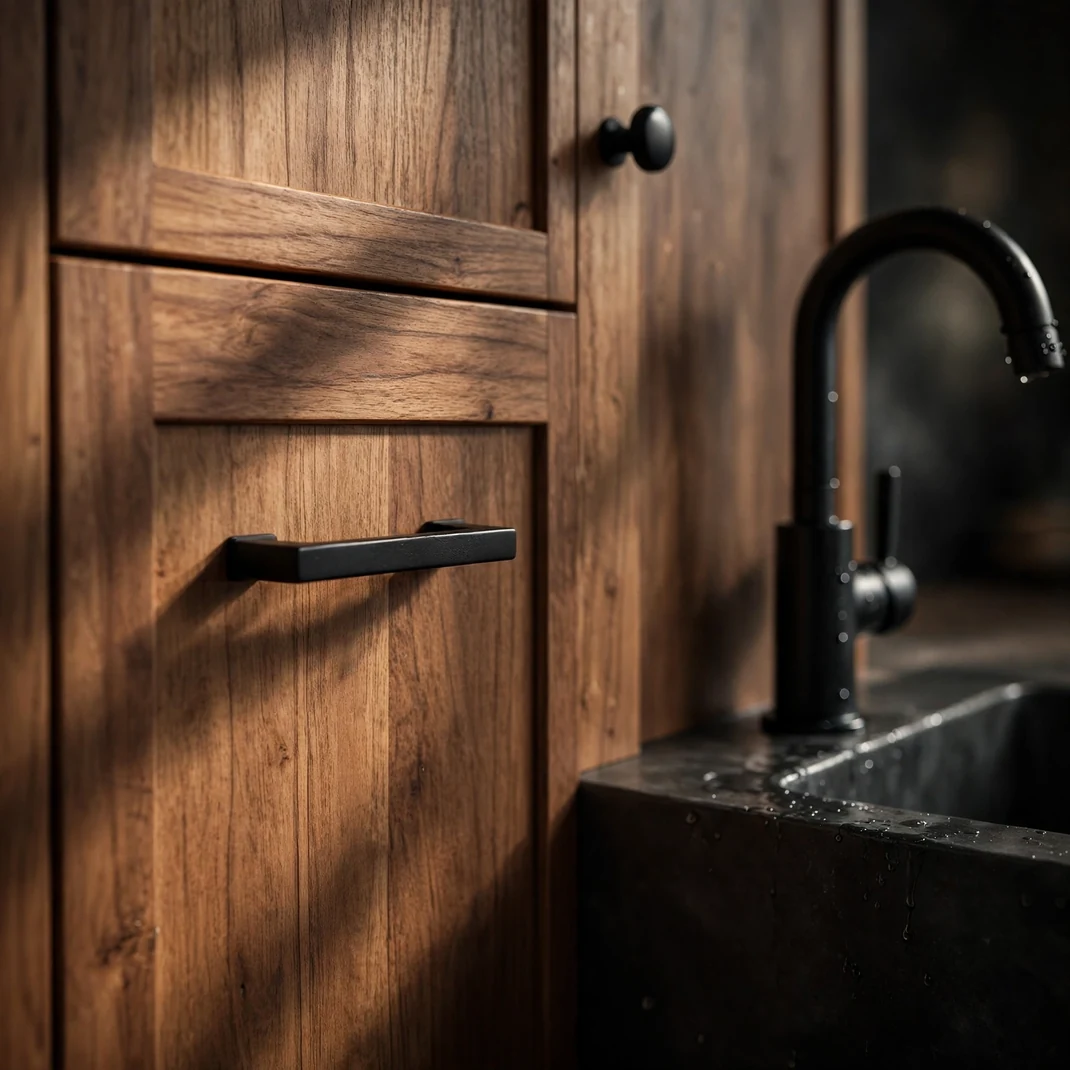
Hardware is jewelry for cabinets, and matte black pieces give rustic wood the crisp outline it needs. Against warm oak or weathered finishes, black pulls and knobs read as sharp punctuation marks that keep the room from feeling sleepy. The matte texture absorbs light instead of reflecting it, which suits the understated mood far better than shiny chrome. Repeat the finish on the tap, lighting, and even the range hood trim so it feels deliberate rather than random. Small change, enormous polish.
What You Need
- Matte black cabinet pulls and knobs
- Matching black tap
- Black pendant or sconce fixtures
- Screwdriver and cabinet template
- Touch up paint pen in black
How to Set It Up
Replace all visible hardware in one pass, using a template to keep hole spacing consistent across every door and drawer. Match the tap and light fixtures in the same matte black finish so the accent echoes around the room. Step back and check sightlines to confirm the black details form a pleasing rhythm rather than clustering in one spot.
Pro Tip
Mix two pull lengths on the same run of drawers, longer on wide drawers and shorter on narrow ones, for a tailored custom look.
5. Open Timber Shelving with Curated Stoneware
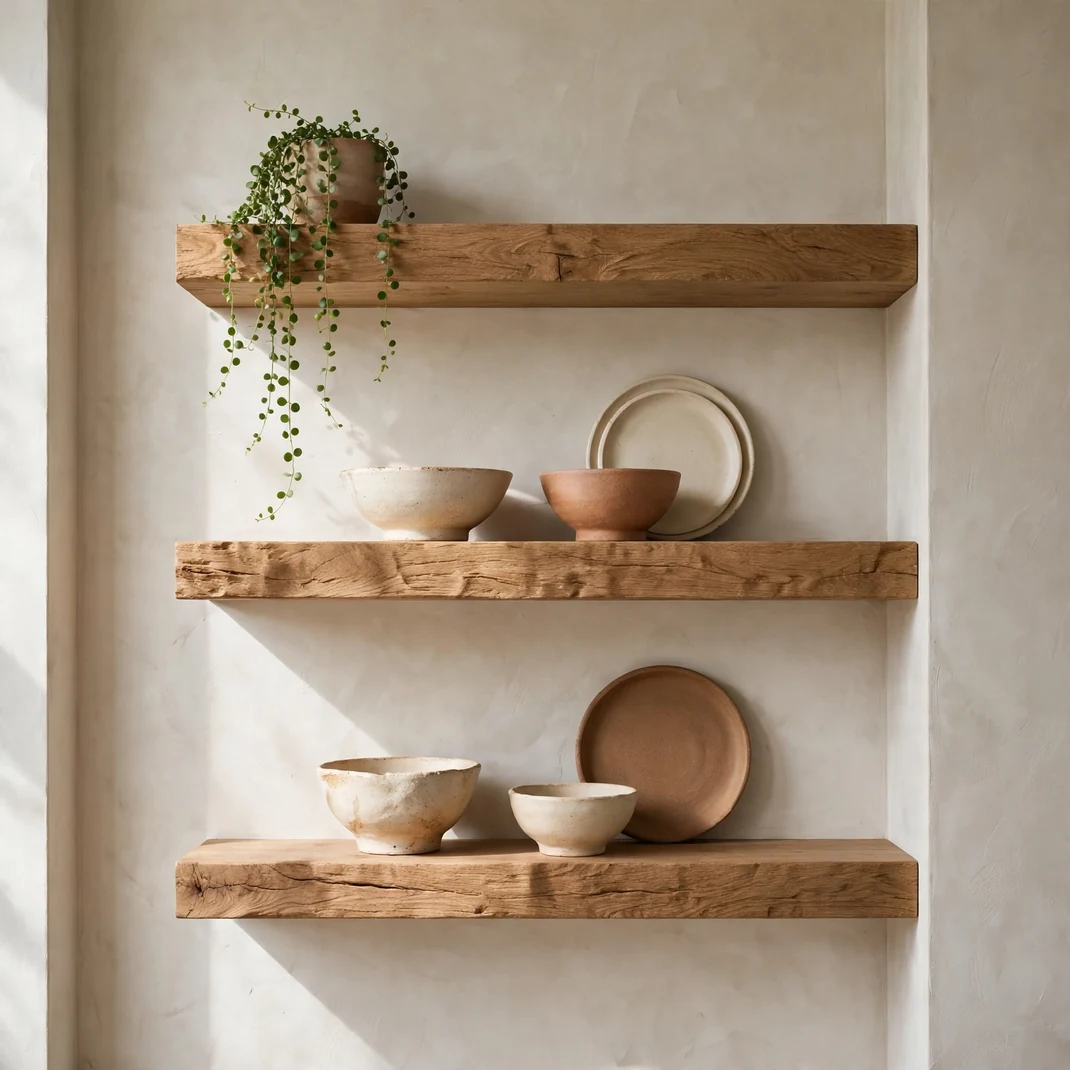
A few open oak shelves can warm up an entire wall faster than almost any other move. Thick floating shelves in oak or walnut display handmade stoneware, and the visible pottery adds the human touch that closed cabinets hide away. Curate ruthlessly: a short row of matching bowls, a stack of plates, and one small plant beats a crowded jumble every time. The wood shelf itself supplies rustic character while the edited styling keeps things feeling modern and calm. It is storage that doubles as art.
What You Need
- Thick oak or walnut floating shelves
- Concealed heavy duty shelf brackets
- Handmade stoneware bowls and plates
- Small potted trailing plant
- Stud finder and level
How to Set It Up
Mount shelves into studs with concealed brackets rated well above the weight of loaded stoneware, keeping the lowest shelf within easy reach. Style with restraint, grouping items in odd numbers and leaving generous negative space between clusters. Dust the shelves weekly since open storage collects it, and rotate pieces seasonally to keep the display feeling fresh.
Pro Tip
Stick to a tight palette of cream, clay, and sage across all your stoneware so the shelves read as one intentional collection.
6. Fireclay Farmhouse Apron Sink
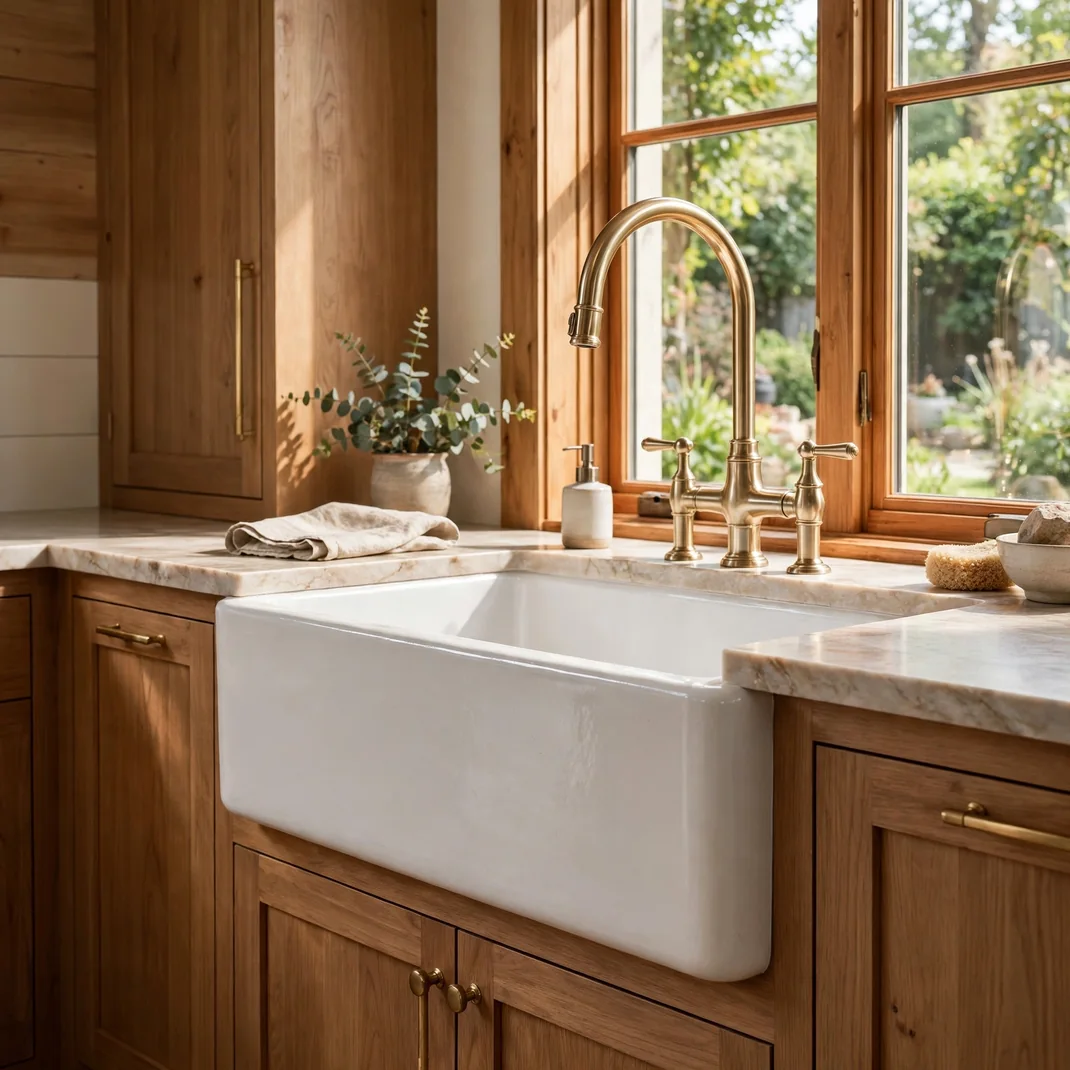
The deep apron front sink is a farmhouse icon that earns its place through sheer usefulness. Fireclay shrugs off stains and heat while the exposed front turns a workhorse into a design feature worth showing off. Pair it with a tall arched faucet and the sink zone becomes the prettiest corner of the kitchen. The generous single basin swallows roasting pans and stockpots that would defeat a divided sink. It is nostalgia you can actually cook with.
What You Need
- Fireclay apron front sink
- Cabinet base sized for apron installation
- Tall arched faucet
- Silicone sealant rated for kitchens
- Sink grid protector
How to Set It Up
Order the sink before finalizing the cabinets since apron fronts need a custom cut base cabinet. Set the sink so its front sits slightly proud of the cabinet face, then seal all edges with kitchen grade silicone. Add a stainless grid inside to protect the fireclay from heavy pots and keep it looking new.
Pro Tip
Choose a sink with a gently fluted or smooth apron rather than heavy detailing; simpler fronts age better alongside modern cabinetry.
7. Woven Rattan Pendant Lights
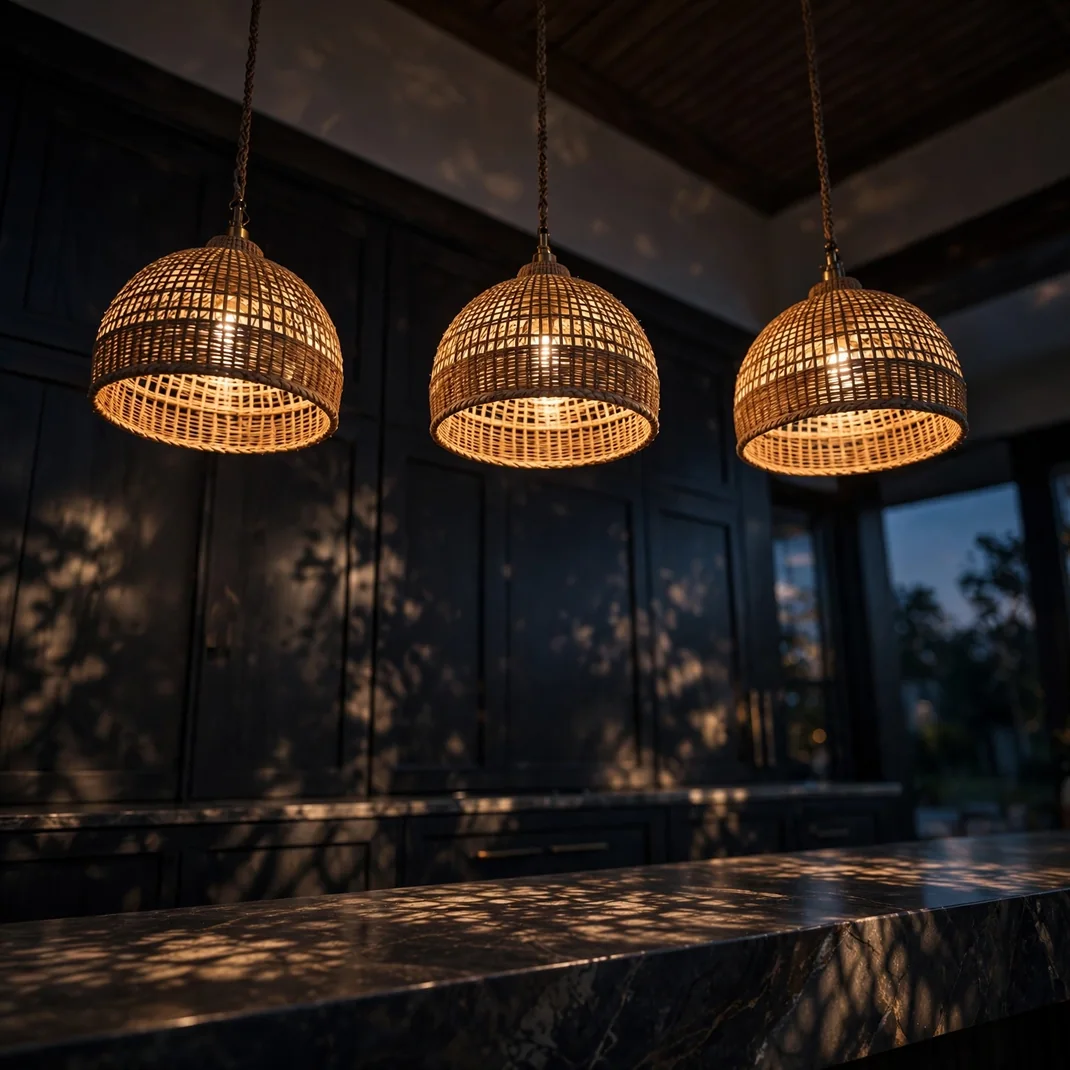
Lighting can single handedly set the cozy dial, and woven rattan pendants glow like lanterns over an island. The natural fibers filter bulbs into dappled pools of warmth that flatter both food and faces. Hung in a row of two or three, they add cadence and craft without blocking sightlines through the open plan. Their airy weave keeps the fixtures feeling light even at generous sizes. Come evening, the kitchen shifts from workspace to gathering place on their glow alone.
What You Need
- Woven rattan pendant shades
- Pendant suspension kits with cord
- Warm dimmable LED bulbs
- Ceiling hooks or a mounting bar
- Dimmer switch
How to Set It Up
Hang pendants thirty to thirty six inches above the island surface, spacing multiple shades evenly along its length. Wire them to a dimmer so you can drop the light low for dinners and raise it for prep work. Choose bulbs around 2700 kelvin for a candle like warmth that complements the rattan.
Pro Tip
If your ceiling is high, add a simple fabric cord in a longer drop rather than using chain; the soft line suits the relaxed material.
8. Limewashed Plaster Walls
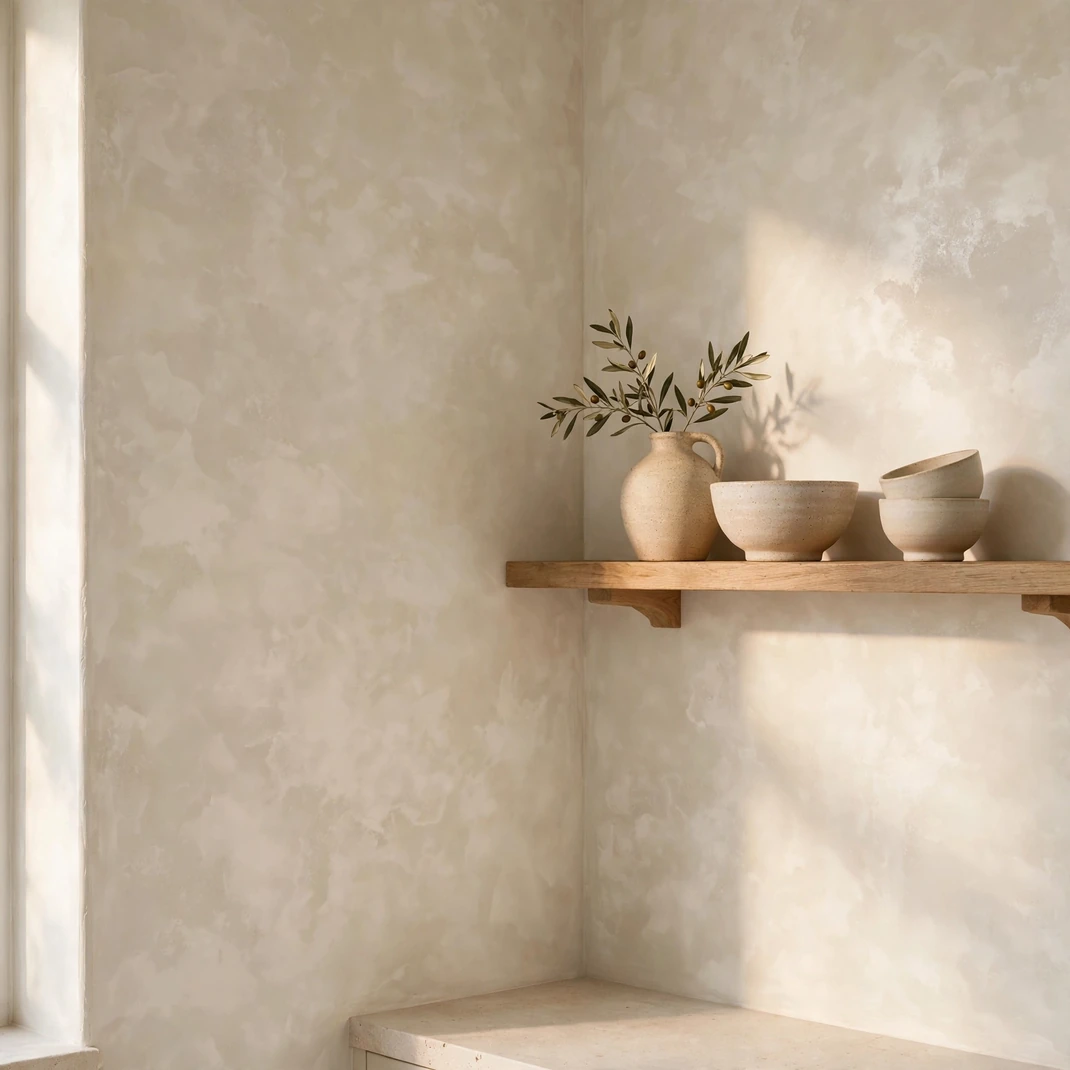
Flat paint can look lifeless next to rustic wood, which is where limewash steps in. The mineral finish builds soft clouds of tone that shift as daylight moves across the wall, giving the room a hand finished depth. In warm whites or pale clay shades it brightens the kitchen while still feeling earthy and alive. The subtle movement hides minor wall imperfections better than flat paint ever could. It is the quietest luxury on this list and one of the most transformative.
What You Need
- Limewash mineral paint
- Large block brush for application
- Painter’s tape and drop cloths
- Primer suited to mineral paint
- Sample pots in two shades
How to Set It Up
Test large sample patches and live with them for two days, since limewash dries lighter and mottling appears as it cures. Apply with a block brush in loose crisscross strokes, working in small sections and embracing variation rather than fighting it. Two coats usually build the right depth, and no topcoat is needed in low splash areas.
Pro Tip
Carry the limewash onto the ceiling in a smaller kitchen; wrapping the room in a single unbroken tone makes it feel larger and more cocooning.
9. Butcher Block Breakfast Ledge
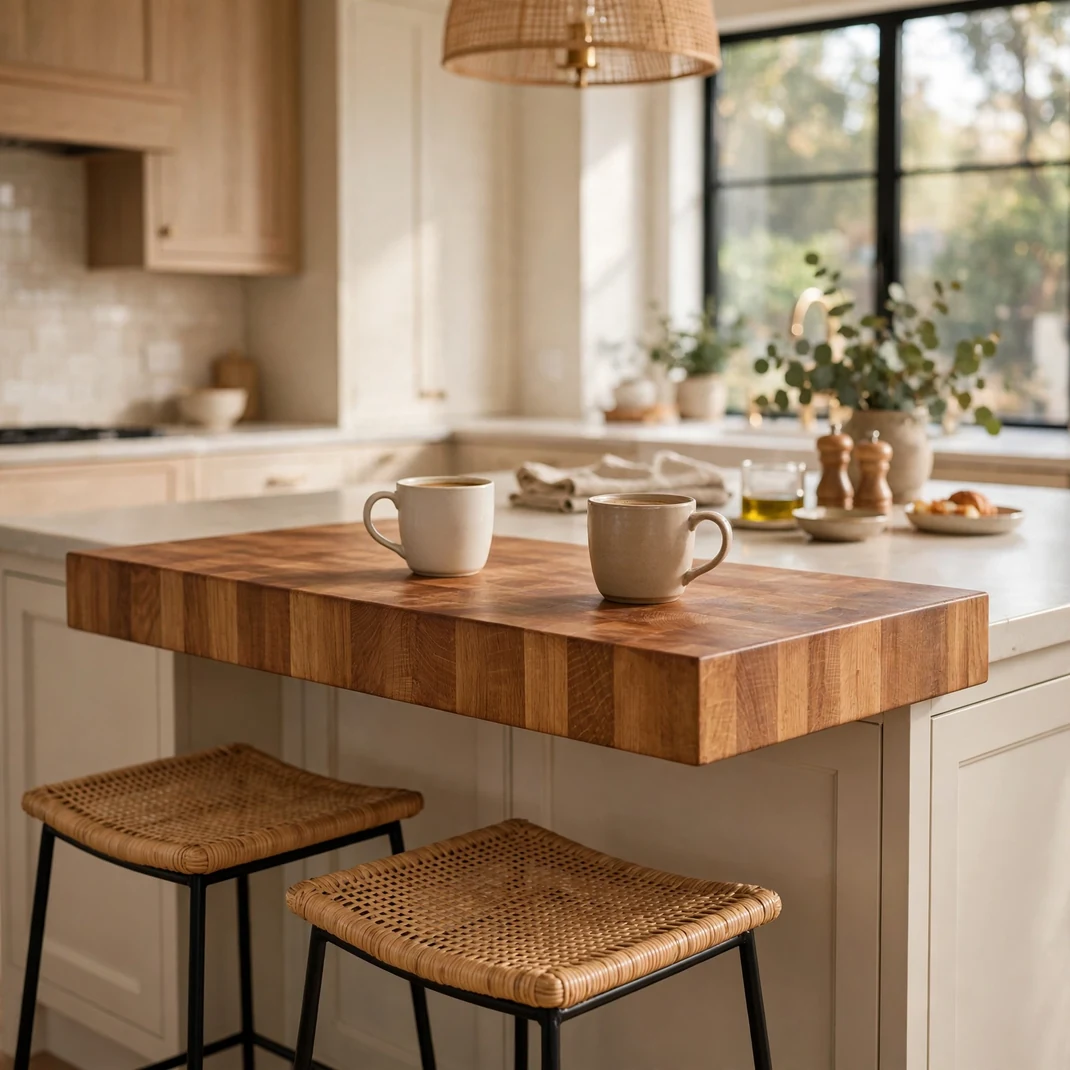
A thick butcher block ledge jutting from the island or a bare wall creates the casual perch every kitchen wants. The end grain surface invites coffee cups, laptops, and homework in a way that formal dining furniture never quite manages. Oiled regularly, the wood develops a rich patina that records years of happy use. Keep the profile chunky and the supports minimal so the wood reads as a solid sculptural slab. It blurs the line between cooking space and living space beautifully.
What You Need
- Thick butcher block slab
- Food safe mineral oil or board cream
- Heavy duty concealed supports or corbels
- Sandpaper in fine grit
- Comfortable counter stools
How to Set It Up
Mount the slab at counter height using supports rated for at least double the expected load, anchoring into studs or solid masonry. Sand the surface smooth, then feed it several coats of food safe oil until the wood stops drinking it in. Reoil monthly in the first year and quarterly after that to maintain the glow.
Pro Tip
Round over the front edge slightly with sandpaper; the softened profile feels better against forearms and looks more handcrafted.
10. Vintage Persian Runner Rug
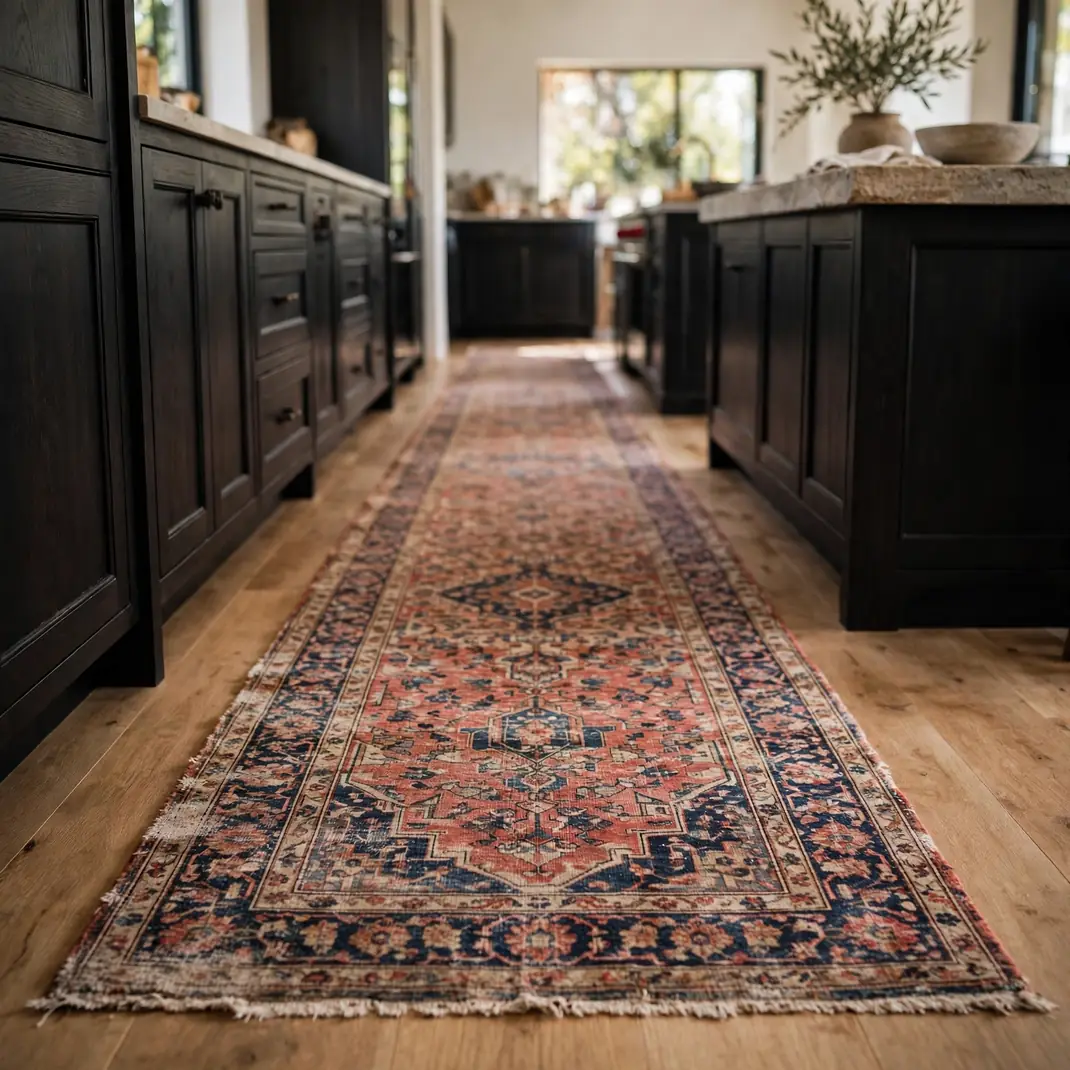
A vintage Persian runner is the fastest way to inject soul into a hard surfaced kitchen. The faded reds, indigos, and creams warm up tile or wood floors while the worn pile tells of decades past. Laid along the main work aisle, it cushions feet during long cooking sessions and muffles kitchen clatter. Low pile vintage pieces handle traffic gracefully and hide crumbs far more effectively than pale modern rugs. Just make sure it is flat enough that no one trips mid saute.
What You Need
- Low pile vintage Persian runner
- Non slip rug pad cut to size
- Rug friendly floor cleaner
- Furniture pads if chairs overlap it
- Measuring tape
How to Set It Up
Measure your work aisle and choose a runner that leaves a border of floor visible on both sides for a custom fit. Lay a non slip pad underneath, trimming it slightly smaller than the rug so no edge peeks out. Vacuum without a beater bar and blot spills immediately to safeguard the natural dyes.
Pro Tip
Look for rugs described as distressed or overdyed; their muted tones blend with modern kitchens more easily than high contrast traditional patterns.
11. Aged Brass Faucet

An aged brass faucet brings a jewelry box gleam that feels collected rather than brand new. The soft golden tone flatters both warm wood and cool stone, acting as a bridge between the rustic and modern halves of the room. Unlacquered brass will deepen and spot with use, which is precisely the charm: it ages alongside the kitchen. Team it with matching brass cabinet knobs or leave it as the single gilded moment; the basin becomes a small daily pleasure.
What You Need
- Aged or unlacquered brass faucet
- Matching brass supply lines if visible
- Soft cloth for polishing
- Gentle non abrasive cleaner
- Plumber’s tape
How to Set It Up
Have a plumber install the faucet with careful alignment since the eye goes straight to a crooked spout on a statement piece. If you choose unlacquered brass, embrace the evolving patina and skip harsh cleaners that strip it unevenly. Wipe down after heavy use to prevent water spots from etching too aggressively.
Pro Tip
Let the brass age naturally for six months before deciding whether you love the patina; you can always polish it back, but most people fall for the lived in glow.
12. Stone Clad Range Alcove
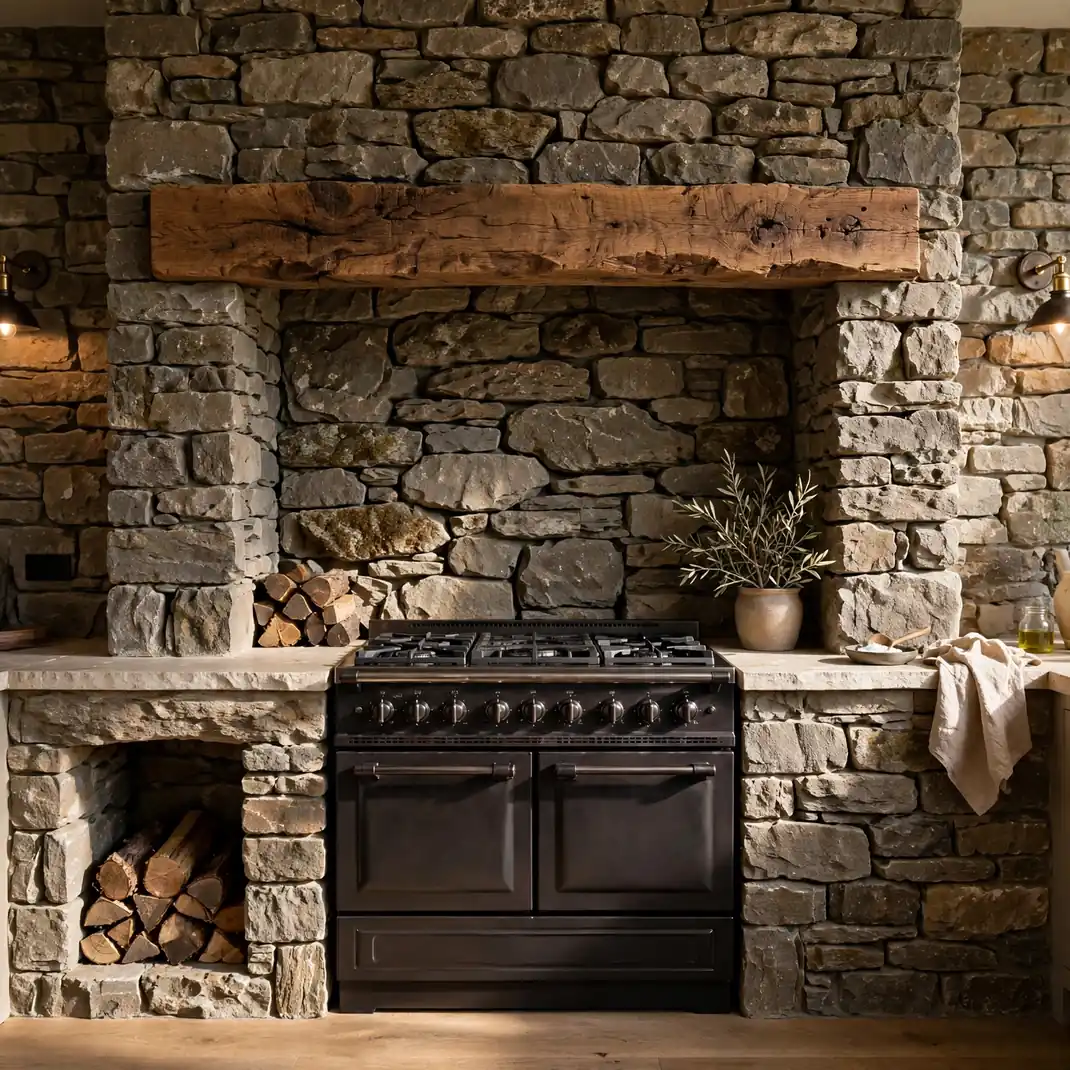
Framing the range in a stone clad alcove turns cooking into a hearth centered ritual. Rough cut stone or stacked ledgestone wraps the cooking zone in texture that makes even a standard range look bespoke. The alcove naturally contains splatter and steam while creating a dramatic focal point visible from across the house. Keep the mantel line clean and uncluttered so the stone itself does the talking. This is the farmhouse hearth reimagined for contemporary life.
What You Need
- Stone veneer or stacked ledgestone panels
- Heat rated adhesive and grout
- Range alcove framing lumber
- Mantel shelf in reclaimed wood
- Stone sealer
How to Set It Up
Frame the alcove to fit your range with generous clearance, then clad the interior faces with stone veneer using heat rated adhesive. Cap the opening with a chunky wooden mantel for display space above the cooking zone. Seal the stone to resist grease, and plan a strong range hood to handle the enclosed airflow.
Pro Tip
Run the stone all the way to the ceiling inside the alcove; the full height draw makes standard eight foot ceilings feel grand.
13. Glass Front Display Cabinets
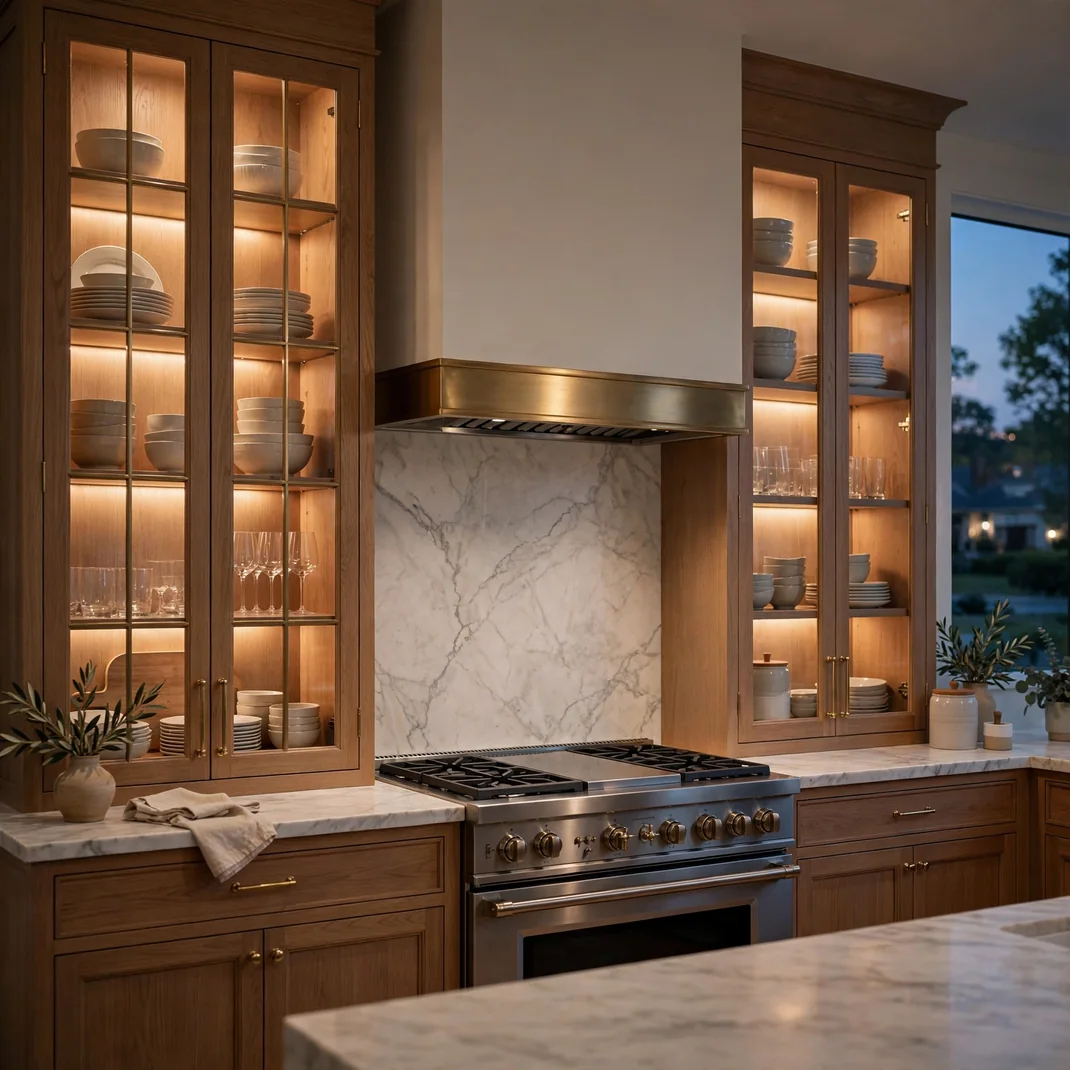
Swapping a few solid doors for glass fronts breaks up long runs of cabinets with airy lightness. Behind the glass, everyday dishes become a curated exhibit that adds personality without adding clutter. Choose reeded or seeded glass if you prefer a softer, more forgiving view of the contents. Interior lighting turns the cabinets into glowing lanterns after dark, doubling their impact. The mix of hidden and visible storage is the very definition of balance.
What You Need
- Glass front cabinet doors
- Reeded or clear glass inserts
- Interior LED puck lights
- Attractive everyday dishware
- Glass cleaner and microfiber cloths
How to Set It Up
Replace selected upper doors with glass front versions, keeping them to one zone such as flanking the range for symmetry. Add warm LED puck lights inside each cabinet, wired to the same switch as your under cabinet lighting. Style the interiors simply and commit to keeping them tidy, since glass forgives nothing.
Pro Tip
Limit glass fronts to twenty or thirty percent of your uppers; any more and the kitchen can start to feel like a shop display.
14. Window Seat Breakfast Nook
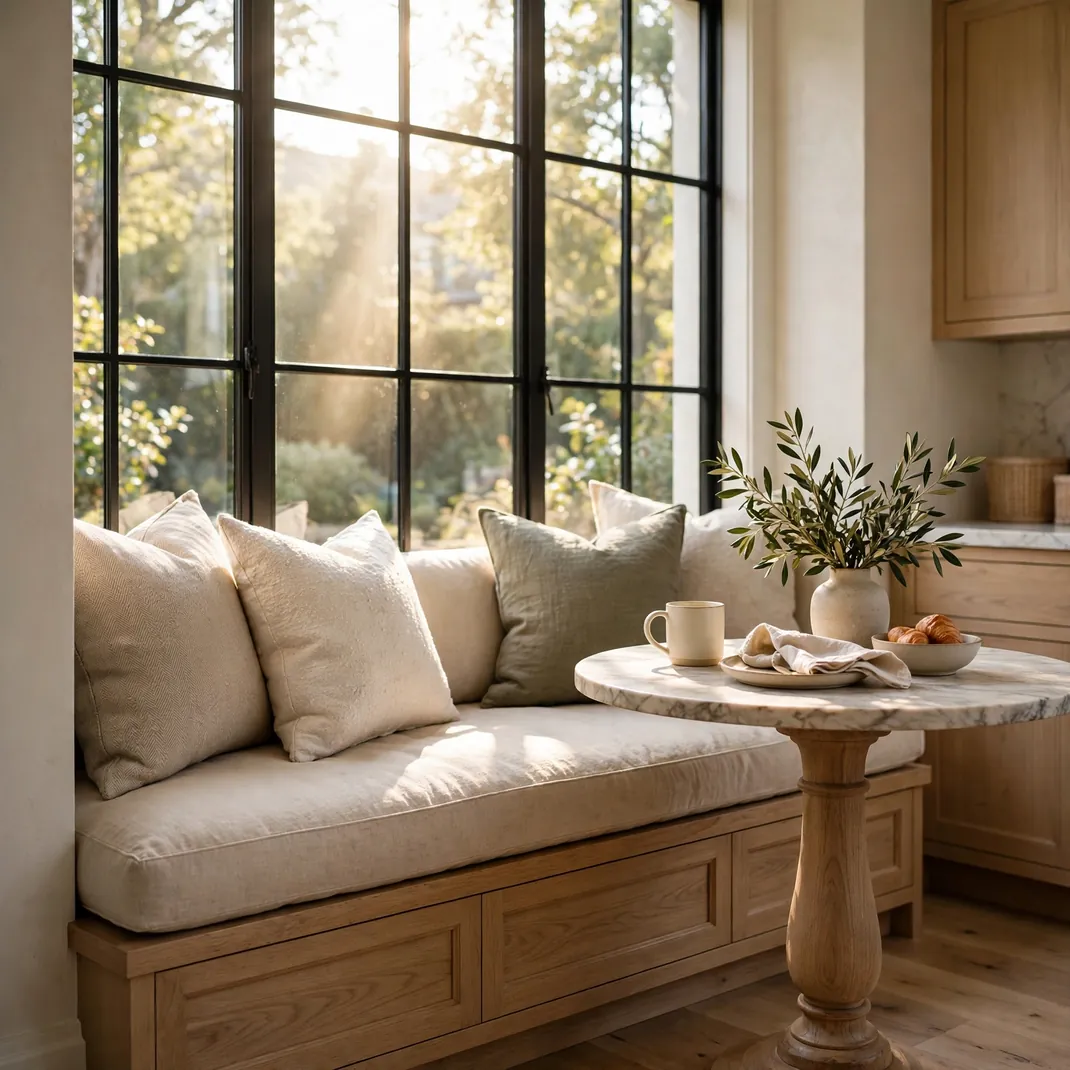
A built in window seat turns an overlooked corner into the most fought over spot in the house. Deep cushions in washable linen invite slow weekend breakfasts while hidden storage beneath swallows linens and seldom used gadgets. The banquette setup seats more people than separate chairs in equal space, perfect for lively family mornings. Add a small round pedestal table and the nook works for everything from coffee to crafts. Morning light does the rest.
What You Need
- Built in bench framing with storage
- Deep foam cushions in washable linen
- Small round pedestal table
- Throw pillows in varied textures
- Hinged lids or drawer fronts
How to Set It Up
Build the bench to seat height with a depth of at least twenty inches for true lounging comfort. Top it with thick foam cushions in a washable linen slipcover, then layer throw pillows for back support. Tuck a round pedestal table alongside so knees clear easily and chairs can pull up on the open side.
Pro Tip
Install a slim picture light or small sconce above the nook; dedicated light keeps the corner inviting long after sunset.
15. Linen Cafe Curtains with Iron Rods
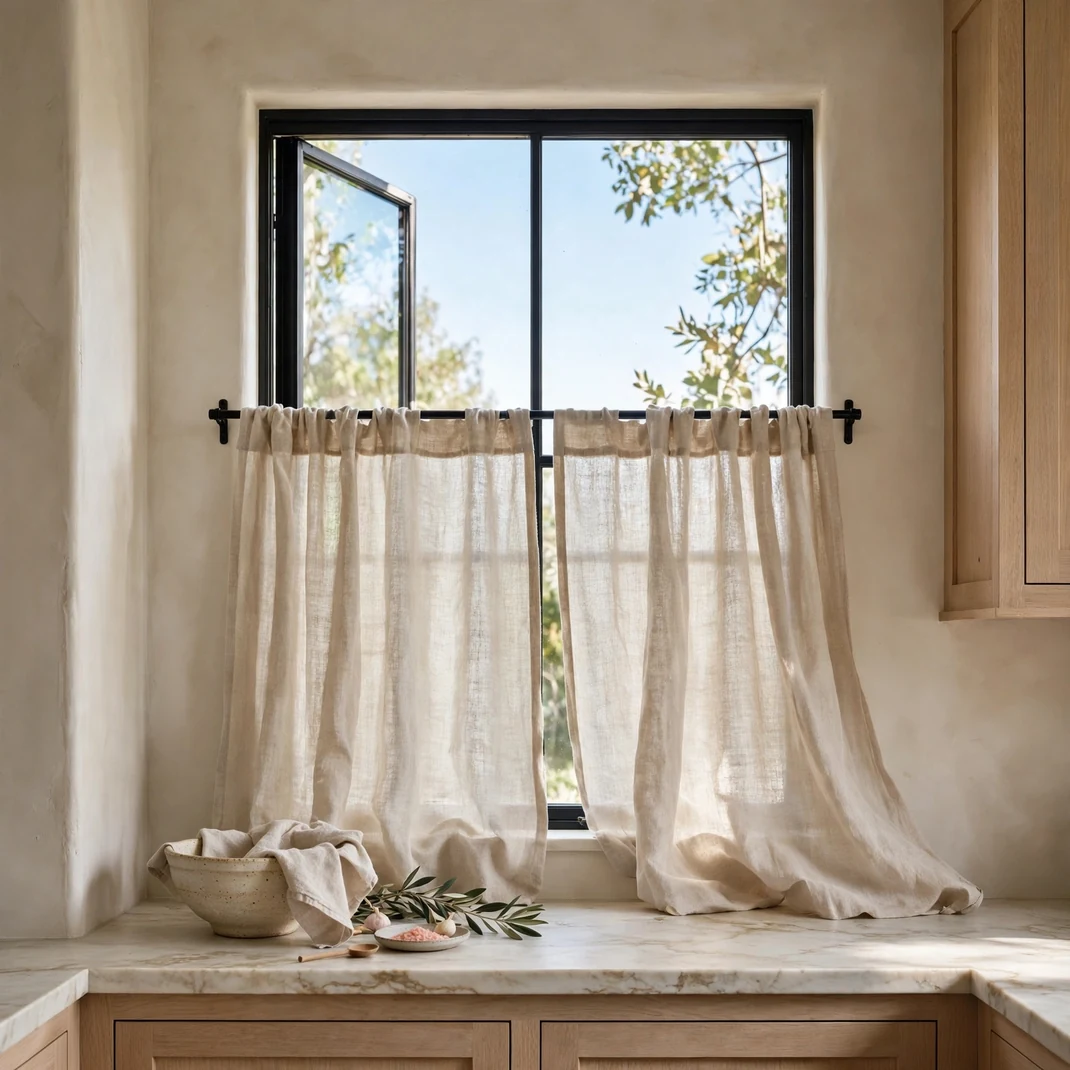
Cafe curtains in washed linen dress the lower half of kitchen windows with breezy softness. They filter harsh midday glare while leaving the upper glass open to sky and treetops. The natural wrinkles of linen are part of the appeal, bringing relaxed surface interest that tailored blinds cannot match. Slim black iron rods and simple rings keep the treatment feeling current rather than country kitsch. Privacy, light, and charm in one humble package.
What You Need
- Washed linen cafe curtain panels
- Slim black iron curtain rod and rings
- Tension rod as a no drill alternative
- Measuring tape
- Steam iron or hand steamer
How to Set It Up
Mount the iron rod at the window midpoint, or slightly above it for a taller feel, using rings that glide easily for daily adjusting. Hem panels to just brush the sill, then steam out packaging creases while leaving the natural linen texture intact. Choose a warm white or oatmeal tone that glows when backlit.
Pro Tip
Buy panels slightly wider than the window and gather them generously; skimpy curtains look apologetic while full ones look luxurious.
Conclusion
Rustic modern works because it refuses to choose between comfort and clarity, and your kitchen can do the same. Start with the one idea that made you catch your breath, whether that is the drama of timber beams or the quiet luxury of limewashed walls. Layer in a second and third change over time, letting the room evolve the way the best kitchens always have: gradually, personally, and full of life.