30 Small Kitchen Ideas That Seriously Make Tiny Spaces Look Bigger
Small kitchens have a bad reputation they do not deserve. Ask anyone who cooks in a truly tiny space and they will tell you the real enemy was never the square footage; it was the visual clutter, the dead corners, and the design choices that made every inch feel smaller than it had to. A compact kitchen, handled with intention, can feel airy, calm, and even luxurious, while a large one with the wrong moves can feel cramped and chaotic.
The secret is that spaciousness is mostly an illusion, and illusions can be engineered. Light, reflection, continuity, and vertical thinking trick the eye into reading a room as larger than the tape measure says. Every idea below works on one of those levers: bouncing light deeper into the room, stretching sightlines, hiding the visual noise, or stacking function upward instead of outward.
These thirty ideas range from afternoon projects to full renovations, but each one earns its place by making a genuine visible difference. You do not need all thirty; even three or four, chosen for your kitchen’s specific pinch points, can transform how the space feels every single day. Let us make your tiny kitchen feel twice its size.
1. Stretch Cabinets to the Ceiling
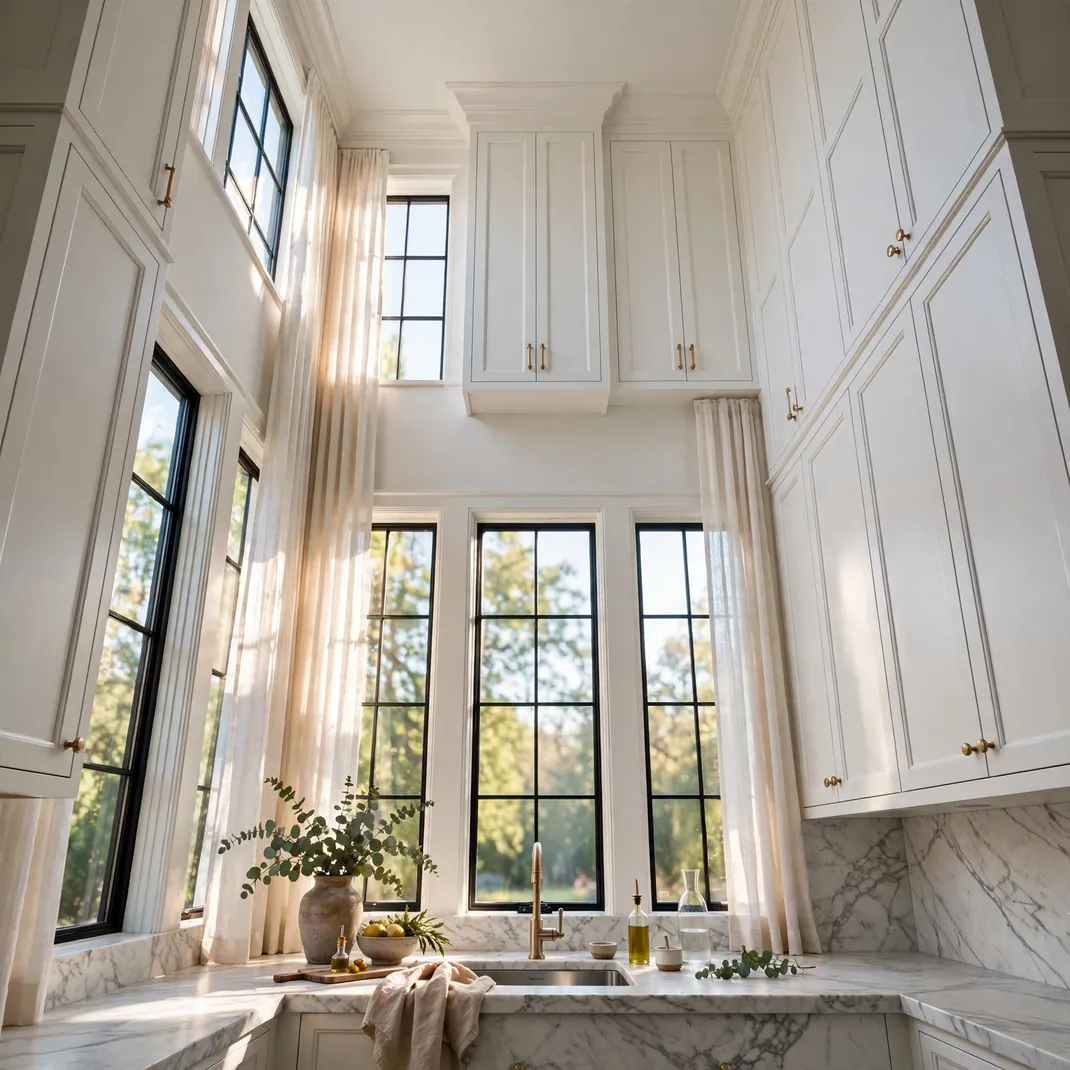
That dusty gap between your wall cabinets and the ceiling is wasted space shouting about how small the kitchen is. Running cabinetry all the way up draws the eye skyward, making the walls feel dramatically taller. The extra shelves swallow seldom used gadgets and bulk pantry goods, clearing valuable counter space below. Paint the tall cabinets the same color as the walls and they visually dissolve instead of looming. It is the single highest impact move for vertical drama.
What You Need
- Ceiling height upper cabinets or stackable top boxes
- Crown molding to bridge cabinet and ceiling
- Step stool or library ladder
- Stud finder with shims
- Matching paint or cabinet finish
How to Set It Up
Measure from counter to ceiling and order cabinet boxes that fill the full height, using stacked boxes if standard sizes fall short. Scribe crown molding across the top to hide any uneven ceiling lines for a flawless furniture look. Keep daily items on the lower shelves and relegate the top tier to things you touch monthly.
Pro Tip
Store a slim folding step stool in the toe kick gap or a nearby closet so the high shelves stay genuinely usable.
2. Mirrored Backsplash Panels
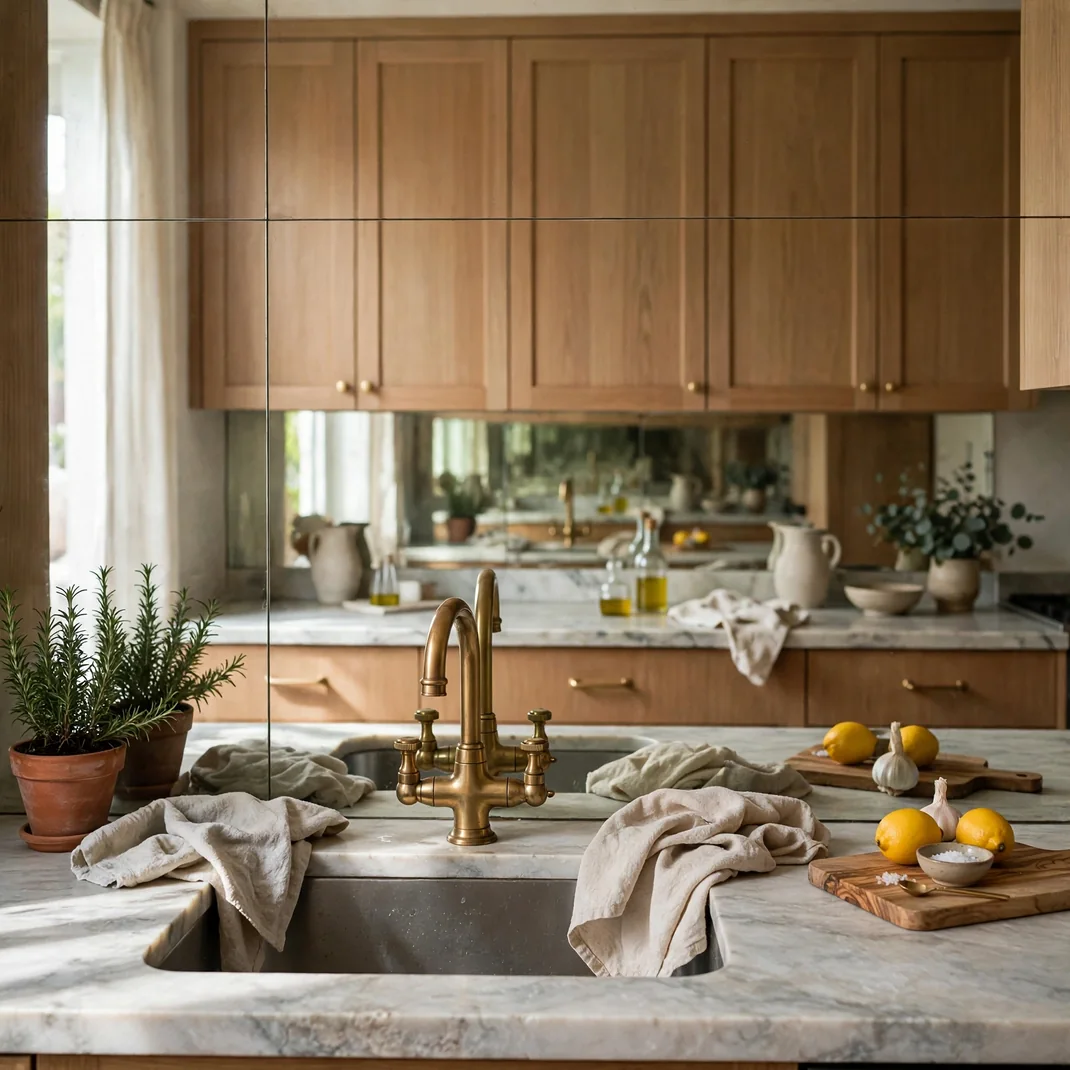
A mirrored backsplash doubles your kitchen visually in a way no paint color can match. It bounces window light deep into the room and reflects the opposite wall, creating the sensation of a second kitchen beyond the glass. Modern antiqued mirror finishes soften the reflection so it reads as elegant rather than nightclub. Keep the counter below it minimal since every object will appear twice. In a galley kitchen the effect is nothing short of magical.
What You Need
- Antiqued or plain mirror panels cut to size
- Mirror rated construction adhesive
- Clear silicone sealant
- Glass cleaner and microfiber cloths
- Painter’s tape for positioning
How to Set It Up
Have mirror panels cut to fit precisely between counter and wall cabinets, then mount with mirror rated adhesive applied in vertical ribbons. Seal all edges with clear silicone to block moisture creeping behind the glass. Wipe with a streak free glass cleaner and enjoy the instant sense of doubled space.
Pro Tip
Choose lightly antiqued mirror over perfect mirror; the soft mottling hides fingerprints and water spots far better.
3. Pull Out Pantry Tower
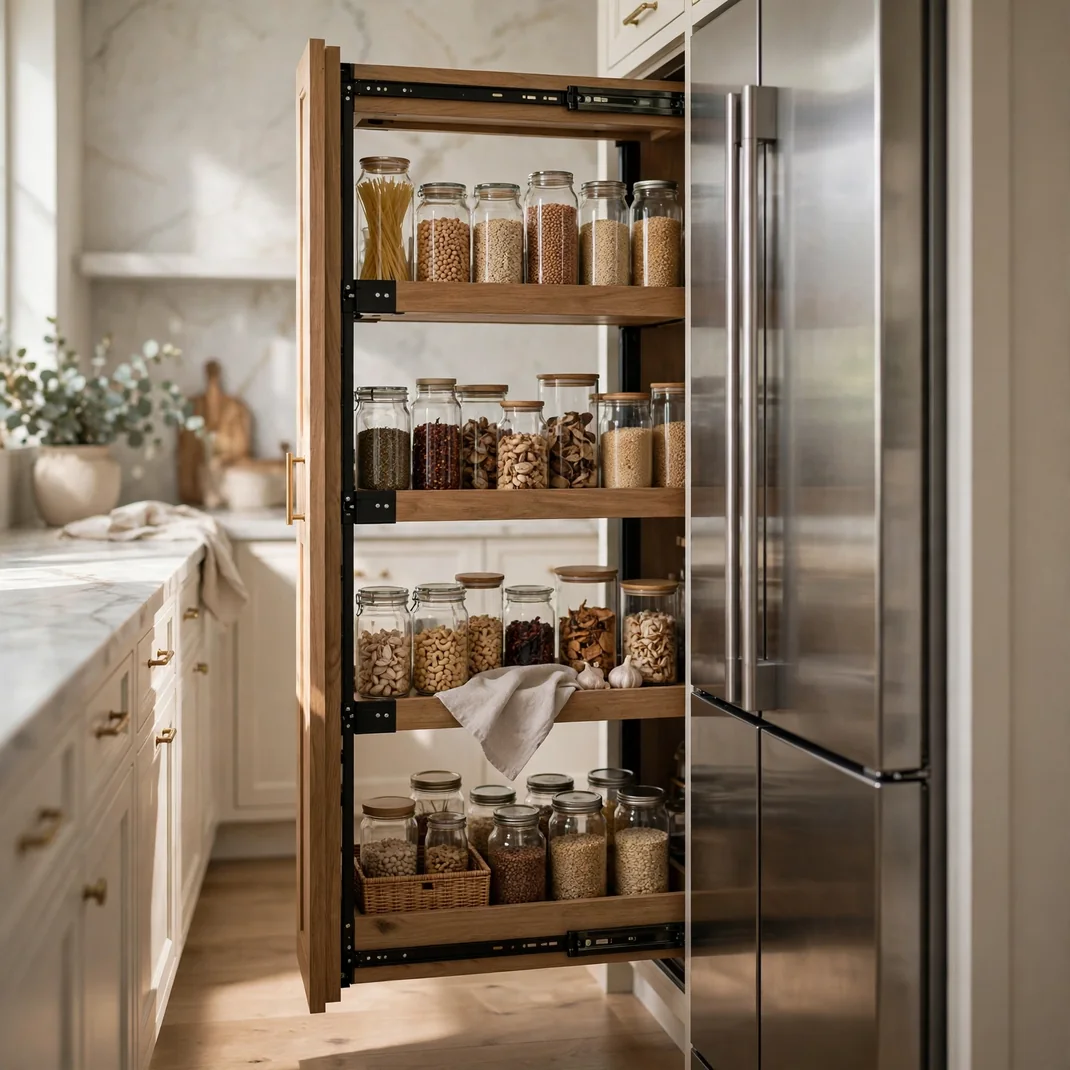
A pull out pantry tower turns a six inch sliver of dead space into a full grocery store aisle. The tall narrow unit glides out on smooth runners, presenting every shelf at once so nothing hides in the dark back. You gain the storage of a walk in pantry without surrendering a single square foot of floor. Spices, cans, and dry goods all stand visible and reachable in a single fluid motion. It ranks as the most satisfying upgrade per inch in this entire list.
What You Need
- Pull out pantry tower unit
- Heavy duty full extension runners
- Filler panels to match cabinetry
- Screwdriver and level
- Shelf liner or small bins
How to Set It Up
Slot the tower into the gap beside the fridge or range, anchoring the frame firmly to adjacent cabinetry and the floor. Load heavier items low and lighter goods up high so the glide stays smooth and balanced. Add small bins on the shelves to stop jars toppling when the unit rolls.
Pro Tip
Measure your largest olive oil bottle before ordering; towers come in depths that fit cans but not tall bottles.
4. Fold Down Wall Mounted Table
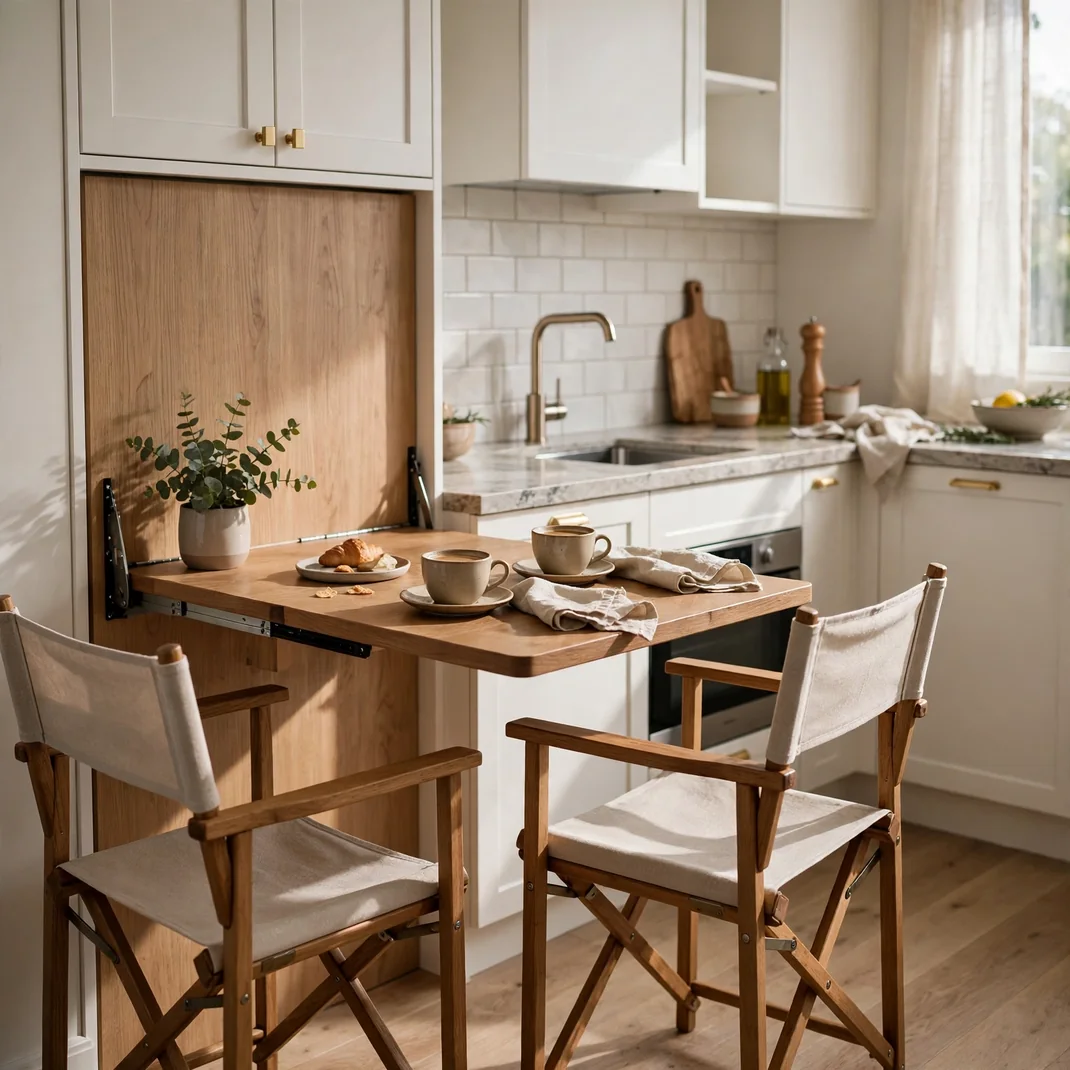
A fold down table gives you a dining spot and a prep surface that vanish when the meal is over. Wall mounted on sturdy hinges, it drops flat in seconds and folds flush when you need the floor back. Two people can breakfast comfortably, and the same surface becomes extra chopping space during big cooking sessions. Choose a top that matches your counters for a bespoke, deliberate look. Small kitchens demand furniture that multitasks, and this is the champion.
What You Need
- Fold down wall table with hinge brackets
- Wall anchors rated for the load
- Matching wood or laminate top
- Two folding chairs or stools
- Stud sensor tool
How to Set It Up
Anchor the hinge brackets directly into wall studs, never drywall alone, since the table must hold dinner weight safely. Mount at standard table height and test the fold mechanism for smooth one handed operation. Store slim folding chairs on wall hooks nearby so the whole setup disappears together.
Pro Tip
Add a slim picture ledge above the folded table; when the table is up, the ledge becomes a handy shelf for condiments.
5. Pale Monochromatic Palette
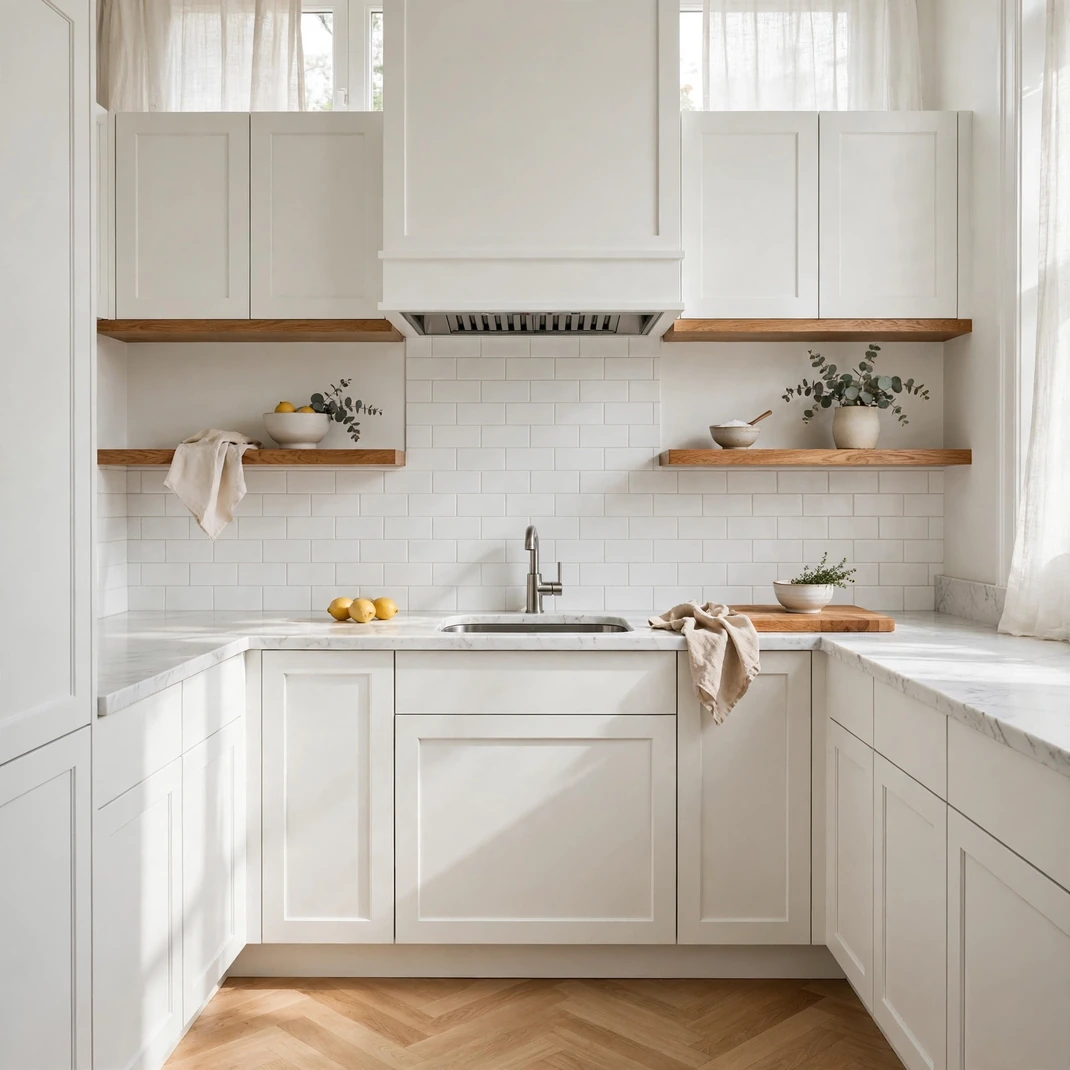
Painting walls, cabinets, and trim in one pale tone erases the visual borders that chop a compact kitchen into pieces. Without contrasting edges shouting for attention, the eye glides across the room, reading it as one continuous generous volume. Warm whites, pale greige, and soft bone all work beautifully and flatter food. Add depth through texture instead of color: linen, wood grain, honed stone. The result feels serene rather than sterile when the materials do the talking.
What You Need
- Pale paint in satin or eggshell finish
- Matching cabinet paint or refacing
- Primer for cabinet surfaces
- Painter’s tape and drop cloths
- Textured natural accessories
How to Set It Up
Choose one pale shade and carry it across walls, ceiling, and cabinetry, testing large swatches in both daylight and evening light first. Prep cabinets thoroughly with degreasing and primer so the new finish bonds properly. Layer in wood, stone, and textile textures afterward so the monochrome feels rich.
Pro Tip
Paint the ceiling to match the walls exactly; the unbroken envelope makes low ceilings feel noticeably higher.
6. Open Shelves Instead of Uppers
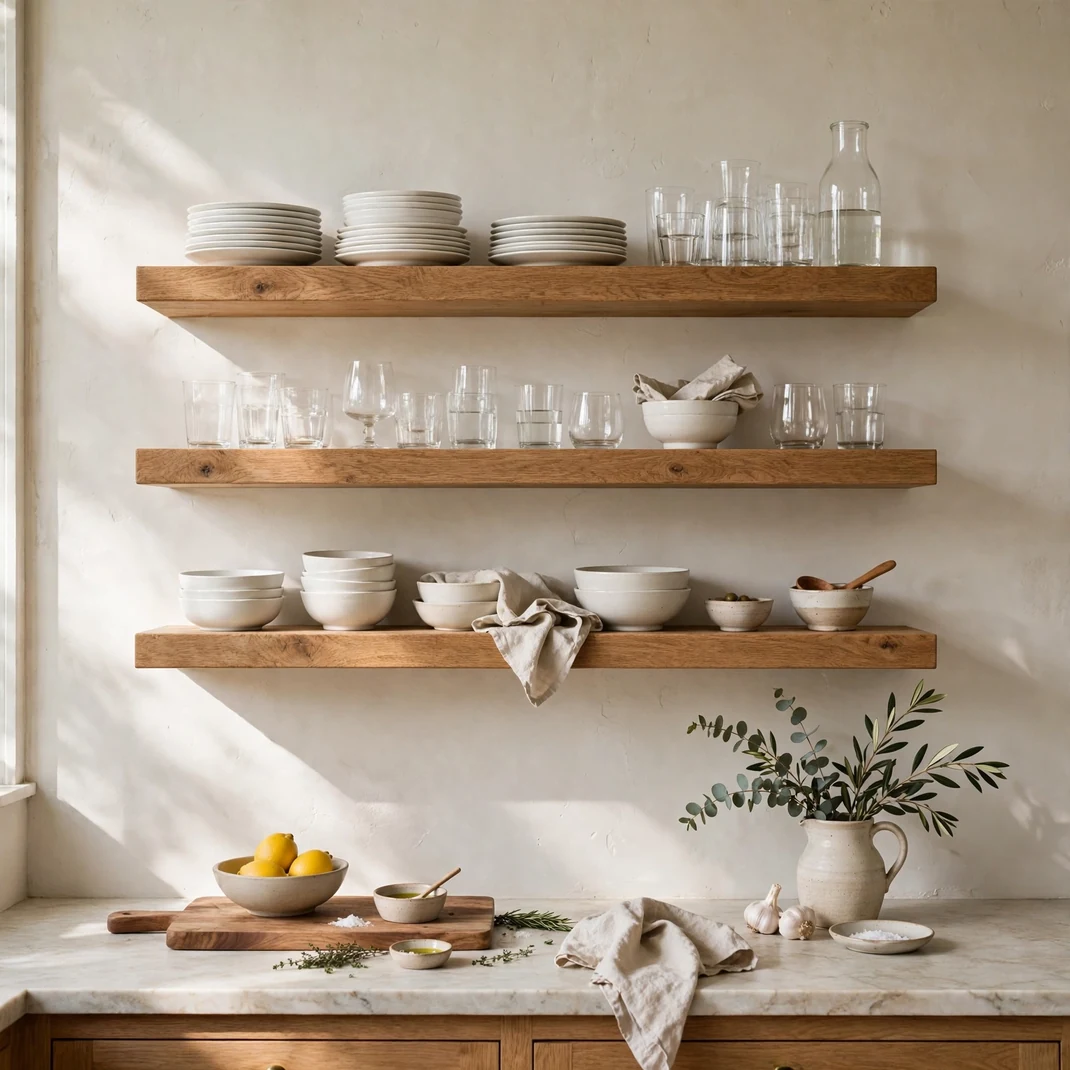
Replacing a run of wall cabinets with open shelves lifts a visual weight off the wall instantly. The eye travels past the shelf edges to the plaster behind, which reads as depth rather than bulk. Styled with restraint, everyday dishes become a light filled display that keeps the kitchen feeling breathable. You also stop losing items in deep dark cabinet corners. The trick is curation: fewer, prettier things, given room to breathe.
What You Need
- Solid wood or metal floating shelves
- Concealed supports rated for dishware
- Attractive everyday dishes and glassware
- Magnetic stud finder
- Small trailing plant
How to Set It Up
Remove them and patch the wall, then mount shelves into studs at heights that suit your reach. Style with breathing room between groupings, keeping the palette tight so the display reads as calm. Reserve one shelf for daily bowls near the sink to make putting away genuinely faster.
Pro Tip
Keep the total shelf styling to about seventy percent full; the empty space is what makes the wall feel larger.
7. Under Cabinet LED Strips
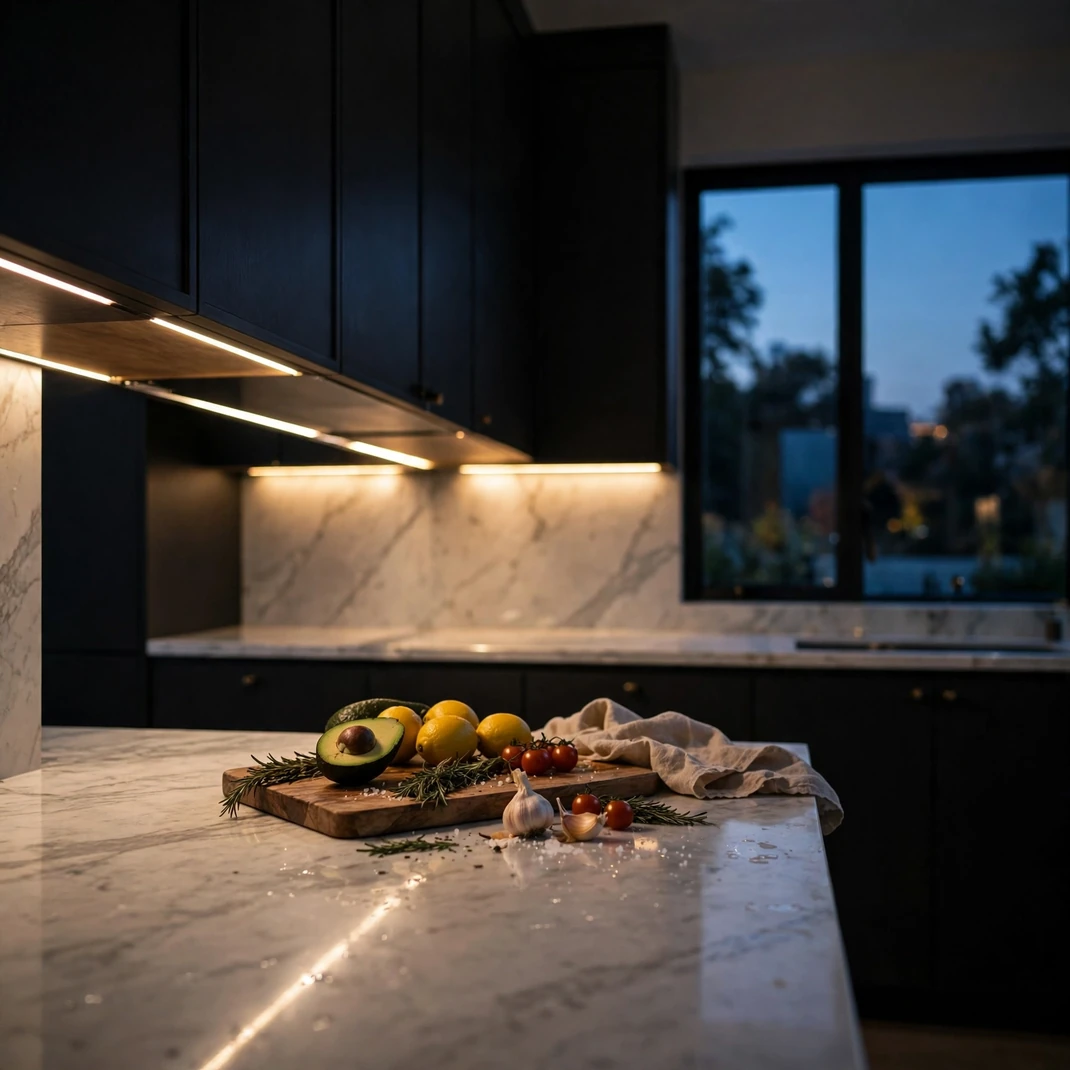
Dark counters under wall cabinets create a cave effect that shrinks the whole kitchen. Slim LED strips tucked beneath the wall cabinets wash the work surface in bright even light, erasing those shadows completely. The illuminated counter reads as a glowing stage that pushes the walls visually outward. Warm white around 3000 kelvin flatters food without feeling clinical. It is a one evening project with a disproportionate payoff.
What You Need
- Dimmable LED strip lights
- Aluminum channels with diffusers
- Plug in driver or hardwire kit
- Cable clips and connectors
- Remote or wall dimmer switch
How to Set It Up
Mount the strips toward the front edge of the cabinet underside so light falls across the full counter depth. Hide the driver inside a cabinet and run cables through discreet clips along the cabinet back. Set the dimmer low in the evening for ambient glow that makes the kitchen feel larger after dark.
Pro Tip
Choose strips with a strong color rendering index so produce and dishes look appetizing under the light.
8. Slim Rolling Kitchen Cart
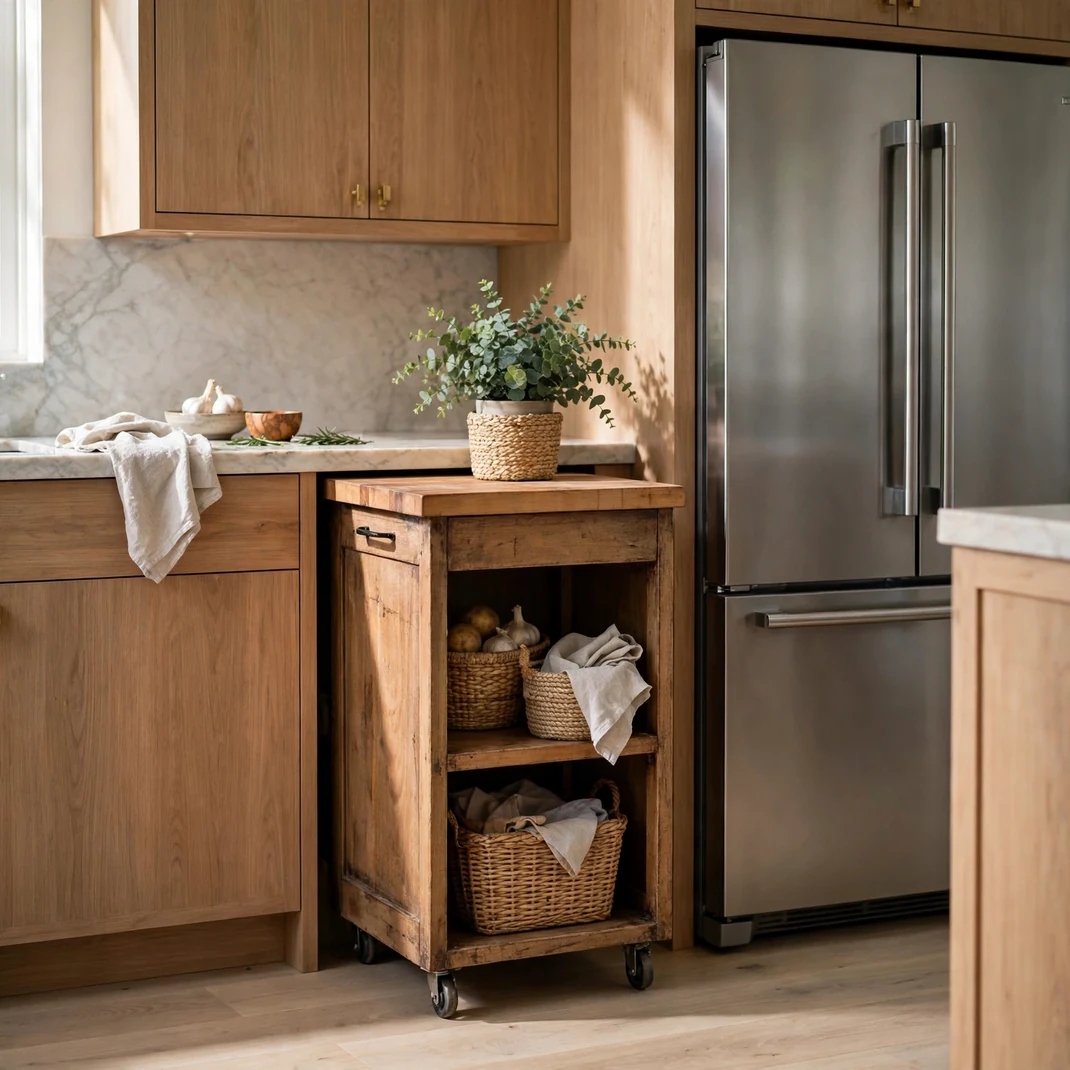
A slim rolling cart is an island that knows when to leave. At fifteen to eighteen inches wide it slides into gaps no fixed island could occupy, then rolls out to serve as prep space, a bar, or a serving station. Lock the casters when chopping and unlock to tuck it beside the refrigerator when guests arrive. The open frame keeps sightlines clear so it never reads as bulky. Flexibility is the small kitchen superpower, and this cart delivers it daily.
What You Need
- Slim rolling cart with locking casters
- Butcher block or stainless top
- Baskets or bins for the shelves
- Non slip shelf liner
- Tape measure
How to Set It Up
Check your narrowest gap first and buy a cart at least an inch slimmer so it glides in without scraping. Style the shelves with bins that conceal clutter while keeping tools reachable. Park it in its home spot every evening so the kitchen resets to open and calm.
Pro Tip
Top the cart with a butcher block slab slightly larger than its frame; the overhang creates a surprisingly generous prep surface.
9. Corner Mounted Sink
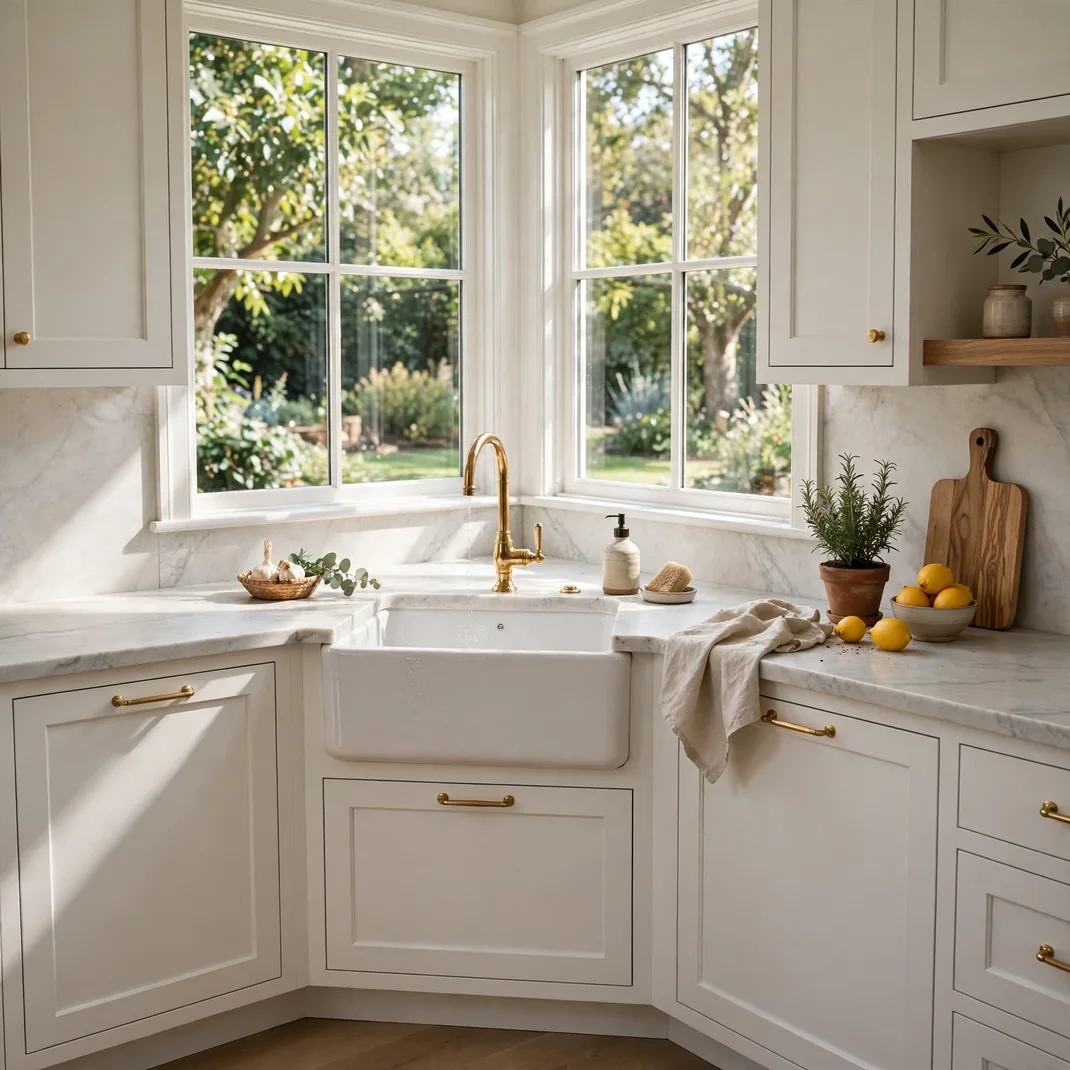
Corners are where small kitchens go to die, so putting the sink there resurrects the deadest zone in the room. A corner mounted sink frees both adjoining walls for uninterrupted counter runs on either side. Standing at an angle, you face outward instead of staring at a wall, which feels remarkably more open. Modern corner sink cabinets are engineered to make pipe access easy. It remains a layout move that rewrites the whole floor plan.
What You Need
- Corner sink base cabinet
- Corner or round sink basin
- Single handle faucet
- Plumber for rough in adjustments
- Lazy susan for the blind corner below
How to Set It Up
Work with a plumber to reroute supply and drain lines into the corner before the cabinet goes in. Choose a sink with an offset drain to maximize usable basin space in the angled footprint. Fit a lazy susan in the cabinet below so the corner storage stays fully accessible.
Pro Tip
Pair the corner sink with a high arc faucet; the vertical line lifts the gaze, making the corner feel taller.
10. Panel Ready Appliances
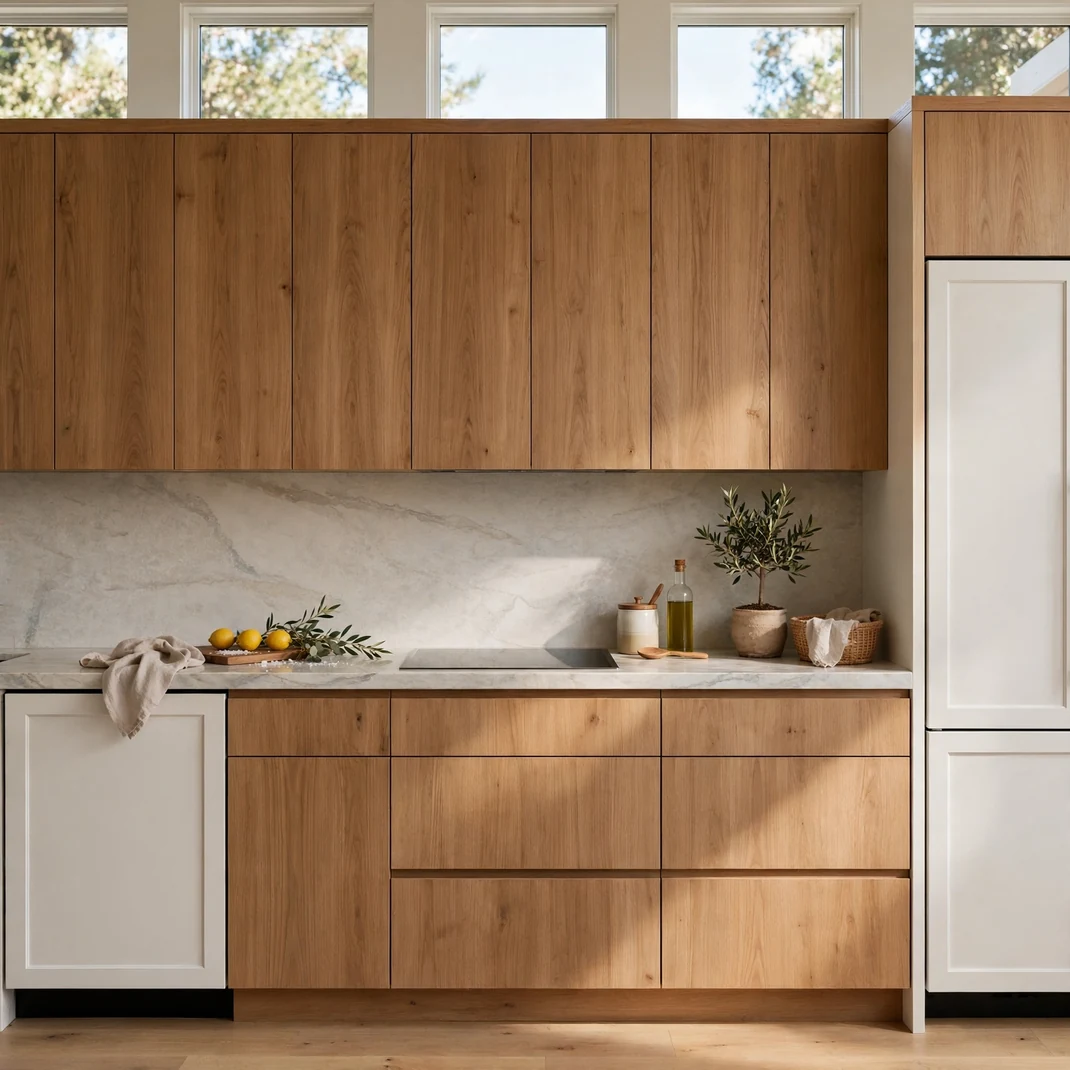
Every stainless steel front in a compact galley interrupts the eye, chopping the room into fragments. Panel ready appliances wear your cabinet fronts instead, so the dishwasher and fridge melt into the surrounding woodwork. The eye sees one continuous run of cabinetry and reads the wall as longer and calmer. The kitchen stops advertising its machinery and starts feeling like a furnished room. Fewer visual breaks means a bigger feeling space, every time.
What You Need
- Panel ready dishwasher and refrigerator
- Matching cabinet front panels
- Installer or skilled handyman
- Integrated handles or push latches
- Ventilation clearances per manual
How to Set It Up
Order appliances and cabinet panels together so finishes match perfectly, then have them installed by someone experienced with integrated units. Use push latches or slim integrated handles for completely flush fronts. Double check ventilation clearances since built in units run warmer than freestanding ones.
Pro Tip
Start with the dishwasher if budget is tight; it sits at eye level in the work zone where the visual payoff is greatest.
11. Wall Mounted Pot Rail
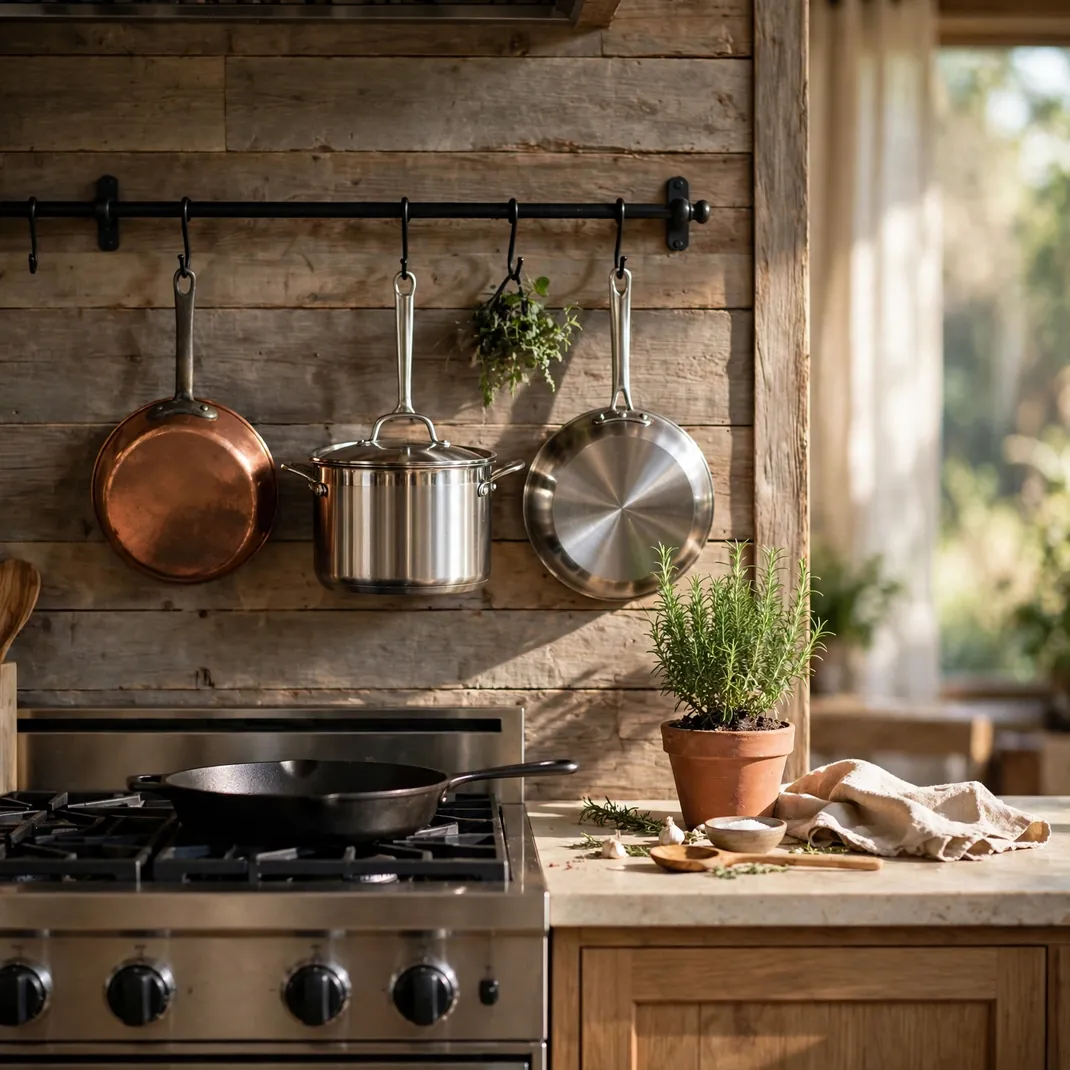
Cabinet space is precious, so let your prettiest pots earn their keep on the wall. A wall mounted rail with S hooks turns cookware into a sculptural display while freeing an entire cabinet for other things. Hung near the range, the tools you grab constantly stay within arm’s reach. The vertical arrangement carries the gaze upward and fills blank wall space with purpose. Choose a rail in black or brass and it doubles as decor.
What You Need
- Wall mounted pot rail with brackets
- Stud finder and heavy duty anchors
- Sturdy S hooks in matching finish
- Favorite pots and pans
- Small shelf above the rail optional
How to Set It Up
Screw the rail brackets straight into studs since loaded cookware is heavy, spacing hooks so pans hang without clanking. Hang the most beautiful and most used pieces at the front of the arrangement. Wipe the rail monthly since kitchen air leaves a film on everything near the stove.
Pro Tip
Hang a small trailing herb plant from one end hook; the green softens the metal and keeps basil within snipping distance.
12. Magnetic Knife Bar
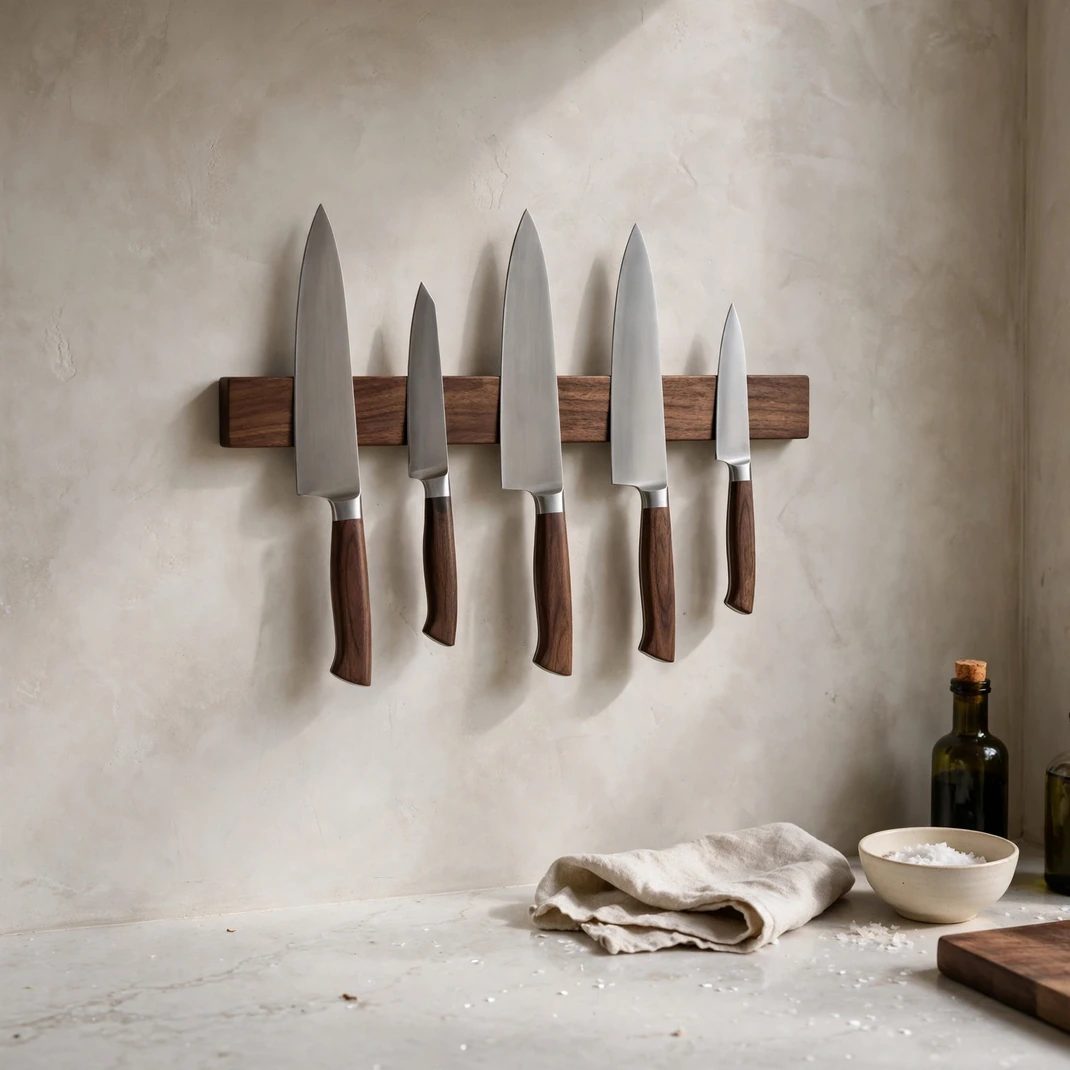
A knife block devours precious counter space where every inch is prime real estate. A wall fixed magnetic bar holds every blade safely aloft and visible, freeing that counter overnight. The floating knives look sharp in both senses, adding a professional culinary edge to the ceramics. Position it near your main prep zone so the workflow stays tight. Just keep it out of small children’s reach.
What You Need
- Magnetic knife bar in wood or steel
- Wall anchors and screws
- Stud finder
- Knife set with flat blades
- Soft cloth for the bar
How to Set It Up
Mount the bar into a stud at a comfortable height beside your main cutting area, checking that the magnet grips each knife firmly before letting go. Slide blades on from the side rather than slapping them flat to protect edges. Wipe the bar occasionally since metal dust gathers along the magnet.
Pro Tip
Use the leftover inches at the bar’s end for metal spice tins; they stick to the magnet and keep seasonings within sight.
13. Over Sink Cutting Board
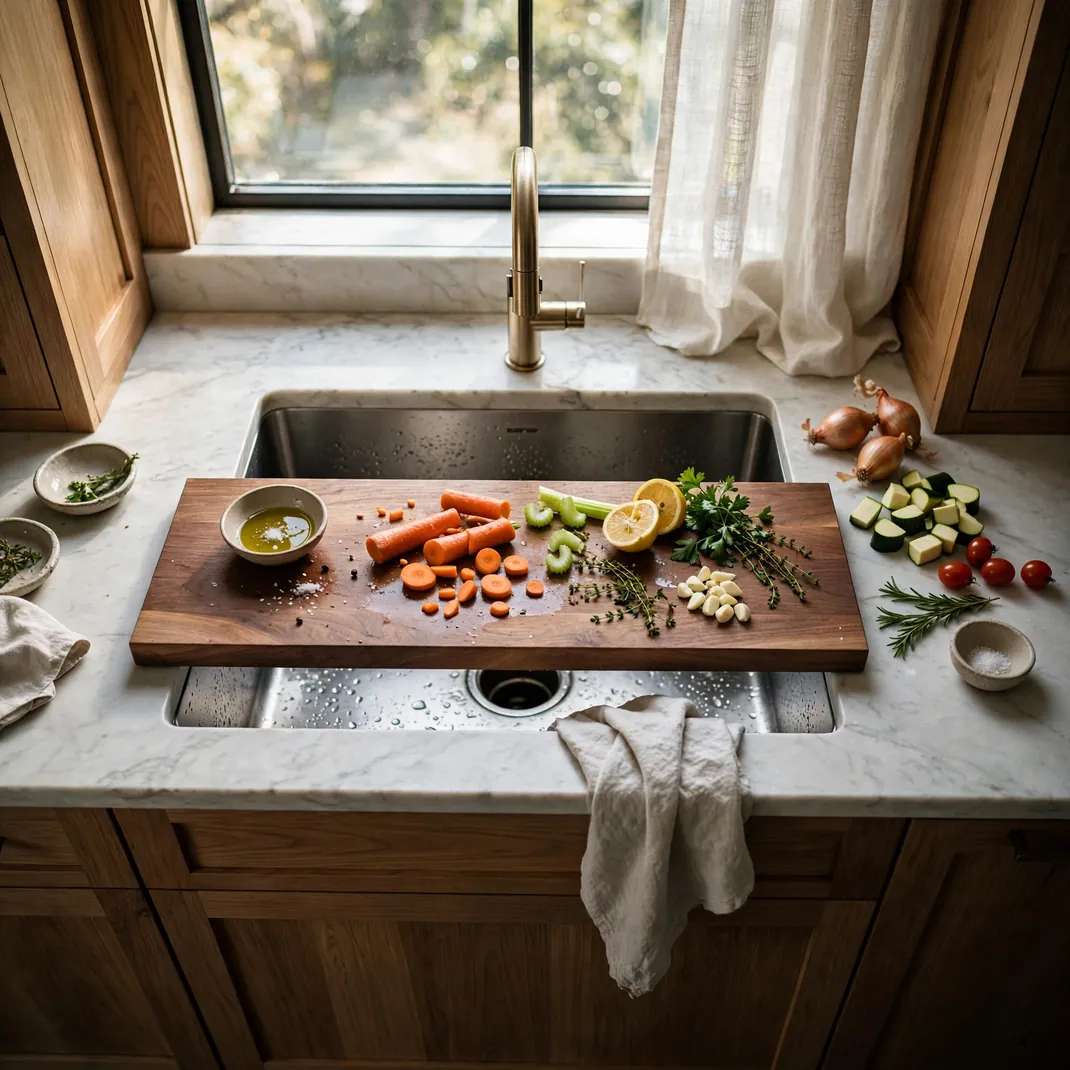
A cutting board milled to sit across your sink instantly manufactures counter space from thin air. It bridges the basin to create a generous prep platform exactly where water and disposal are closest. Slide it aside for sink access and back for chopping. Boards with a colander insert or a juice groove add even more function. In a kitchen with six feet of counter, gaining two more is a revolution.
What You Need
- Over sink cutting board sized to your basin
- Food safe mineral oil
- Sink with flat rim edges
- Non slip feet or rubber grips
- Flexible tape measure
How to Set It Up
Measure the inner rim of your sink precisely and order a board that rests securely without wobbling. Oil the board before first use and monthly after to prevent cracking around the sink moisture. Store it upright in a slim slot beside the stove so it stays handy and dry.
Pro Tip
Choose a board with a routed juice groove on one side and flat on the other; flip it to double as an elegant serving platter.
14. Toe Kick Storage Drawers
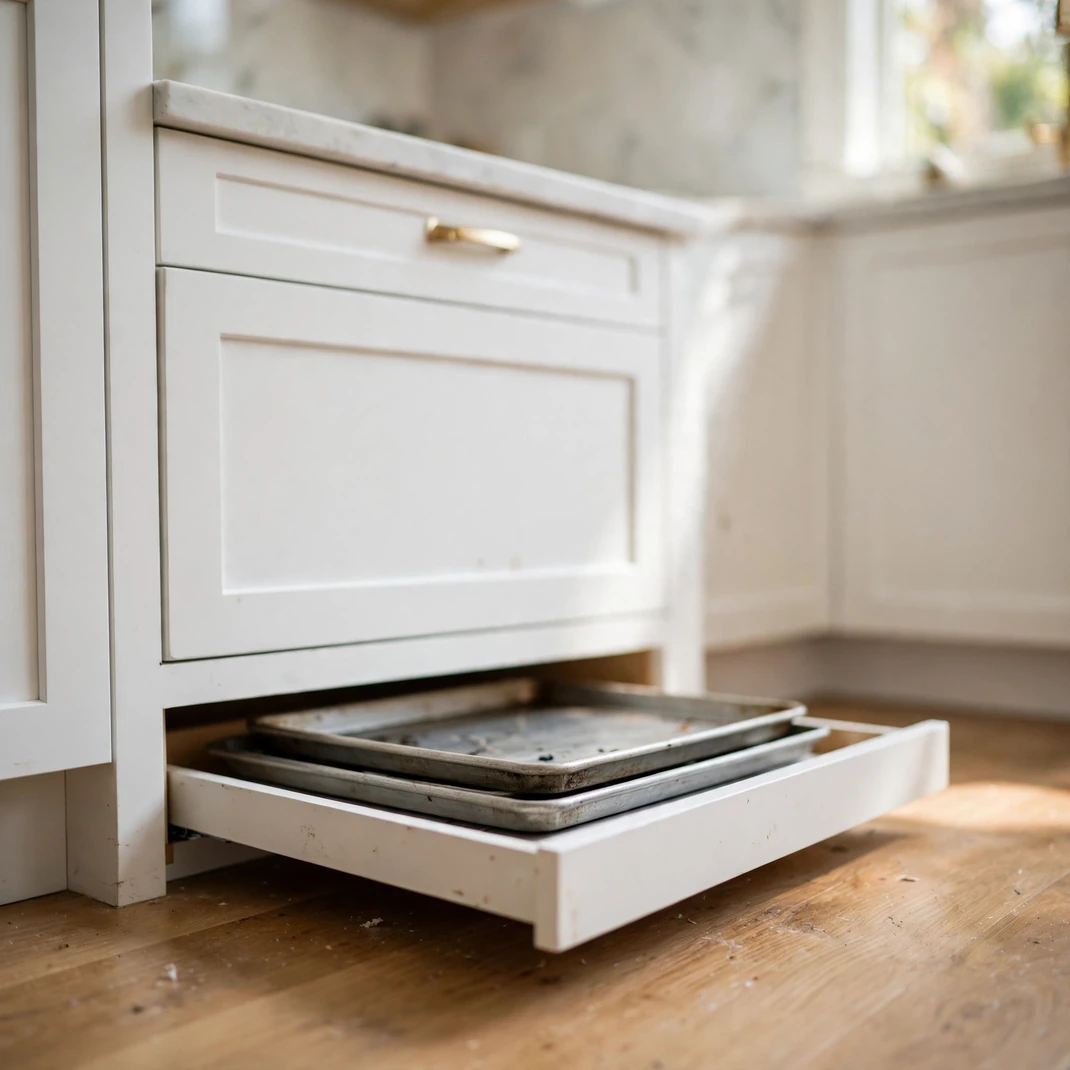
The hollow strip beneath your base cabinets is secret spare inches hiding in plain sight. Toe kick drawers convert that dead zone into slim storage for baking sheets, placemats, and other flat essentials. They glide out with a toe tap and vanish completely when closed, adding zero visual bulk. In a tight corridor layout, three such drawers can absorb an entire cabinet’s worth of clutter. Invisible storage is the ultimate space illusion.
What You Need
- Toe kick drawer conversion kits
- Power driver and measuring tape
- Flat items to store inside
- Adhesive felt pads
- Vacuum for the cavity first
How to Set It Up
Remove the existing toe kick panels and fit the drawer kits into the cavities, checking that flooring is level so each drawer runs true. Load only flat lightweight items since the drawers are shallow by design. Vacuum the cavities before installing to start clean.
Pro Tip
Label nothing and store only categories you will remember; out of sight storage fails the moment you forget what is inside.
15. Vertical Stack Tile
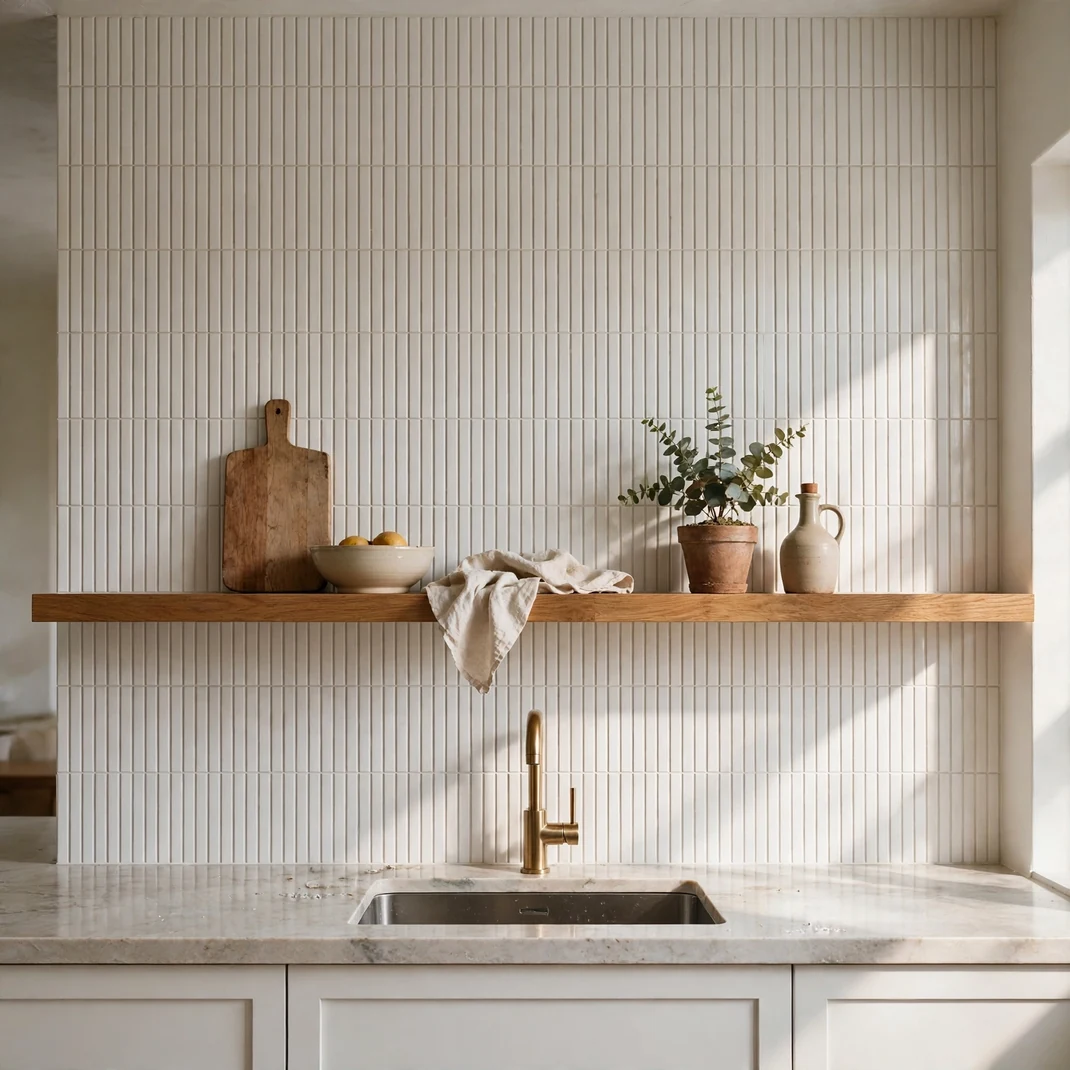
How tile is laid changes how tall a room feels, and vertical stack tile is pure optical lift. Running slim tiles straight up the wall in soldier formation sweeps the eye upward in one unbroken sweep. The strong vertical lines make even standard eight foot walls feel loftier. Keep grout lines tight and tonal so the pattern reads as texture rather than grid. It is wallpaper energy with tile permanence.
What You Need
- Slim rectangular tiles
- Tight tonal grout
- Tile spacers and level
- Wet saw for cuts
- Sealer if using natural stone
How to Set It Up
Dry lay the first column to plan cuts around outlets, then work upward in strict vertical stacks checking plumb constantly. Use minimal grout joints in a tone close to the tile so the verticals dominate. Seal natural stone tiles before grouting to prevent staining.
Pro Tip
Run the vertical tile right up behind open shelves; the unbroken lines make the shelf wall look twice as tall.
16. Large Format Floor Tiles
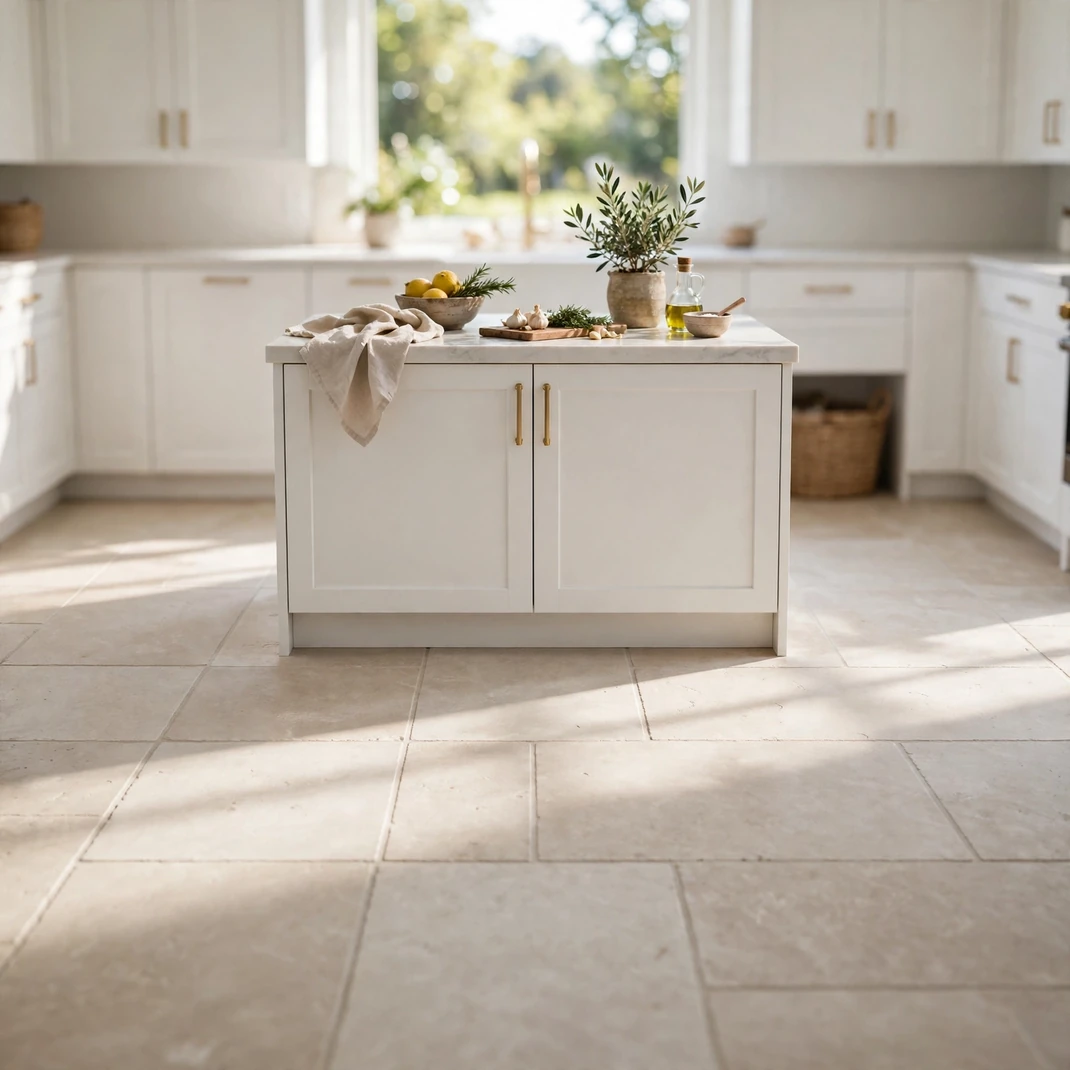
Busy small tiles chop a floor into a patchwork that screams cramped. Large format tiles with minimal grout lines let the floor read as one sweeping surface, which the brain interprets as a larger area. Fewer grout joints also mean less visual noise and easier mopping. Choose a light stone look and lay the tiles in a straight grid for maximum calm. The floor becomes a quiet stage, not a fussy pattern.
What You Need
- Large format floor tiles
- Leveling clips for flat install
- Light grout
- Tile cutter or wet saw
- Professional installer recommended
How to Set It Up
Have the subfloor leveled properly since big tiles telegraph every bump beneath them. Lay the tiles in a straight stacked grid with tight joints, using leveling clips for a perfectly flat surface. Tint the grout to match, so the floor reads as nearly seamless.
Pro Tip
Continue the same tile into an adjoining hallway or nook without a threshold strip; the unbroken run erases the boundary between rooms.
17. Transparent Ghost Stools
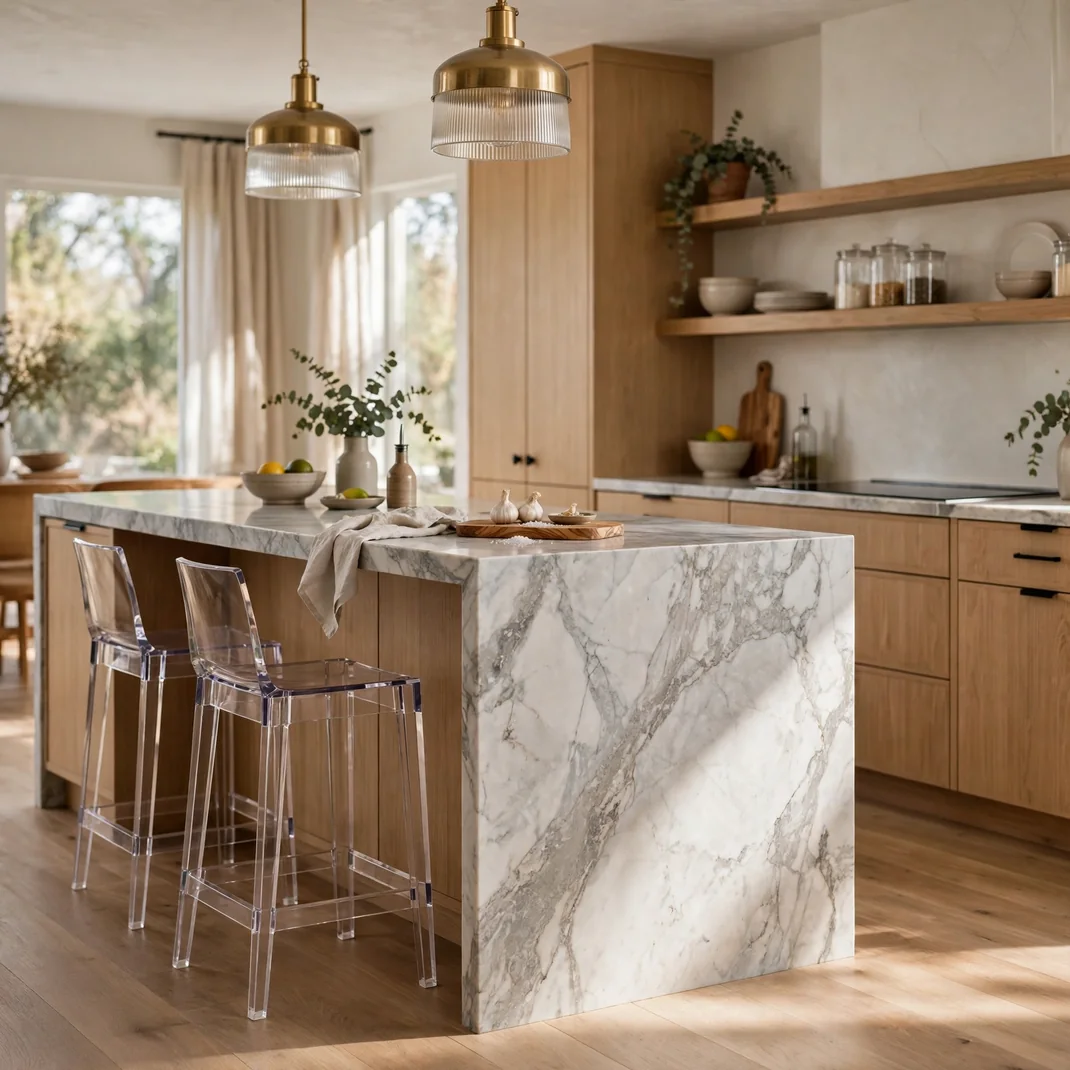
Every solid object in a petite kitchen is a visual roadblock, which is why transparent stools are genius. Molded acrylic seating practically disappears, letting the eye travel straight through to the walls beyond. You keep full seating function with near zero visual weight. Tucked under a counter overhang they vanish completely. The kitchen keeps its chairs and its airiness at the same time.
What You Need
- Transparent acrylic counter stools
- Felt pads for the feet
- Soft lint free cloths
- Acrylic safe cleaner
- Measuring tape for seat height
How to Set It Up
Match stool seat height to your counter, allowing about ten inches between seat and counter underside for comfortable legs. Add felt pads to protect floors since acrylic feet can be hard. Clean with acrylic safe products only, as harsh chemicals cloud the clarity that makes them work.
Pro Tip
Buy stools with a slight tint rather than crystal clear; the subtle smoke or amber looks deliberately chosen and hides scratches.
18. Ditch the Kitchen Door
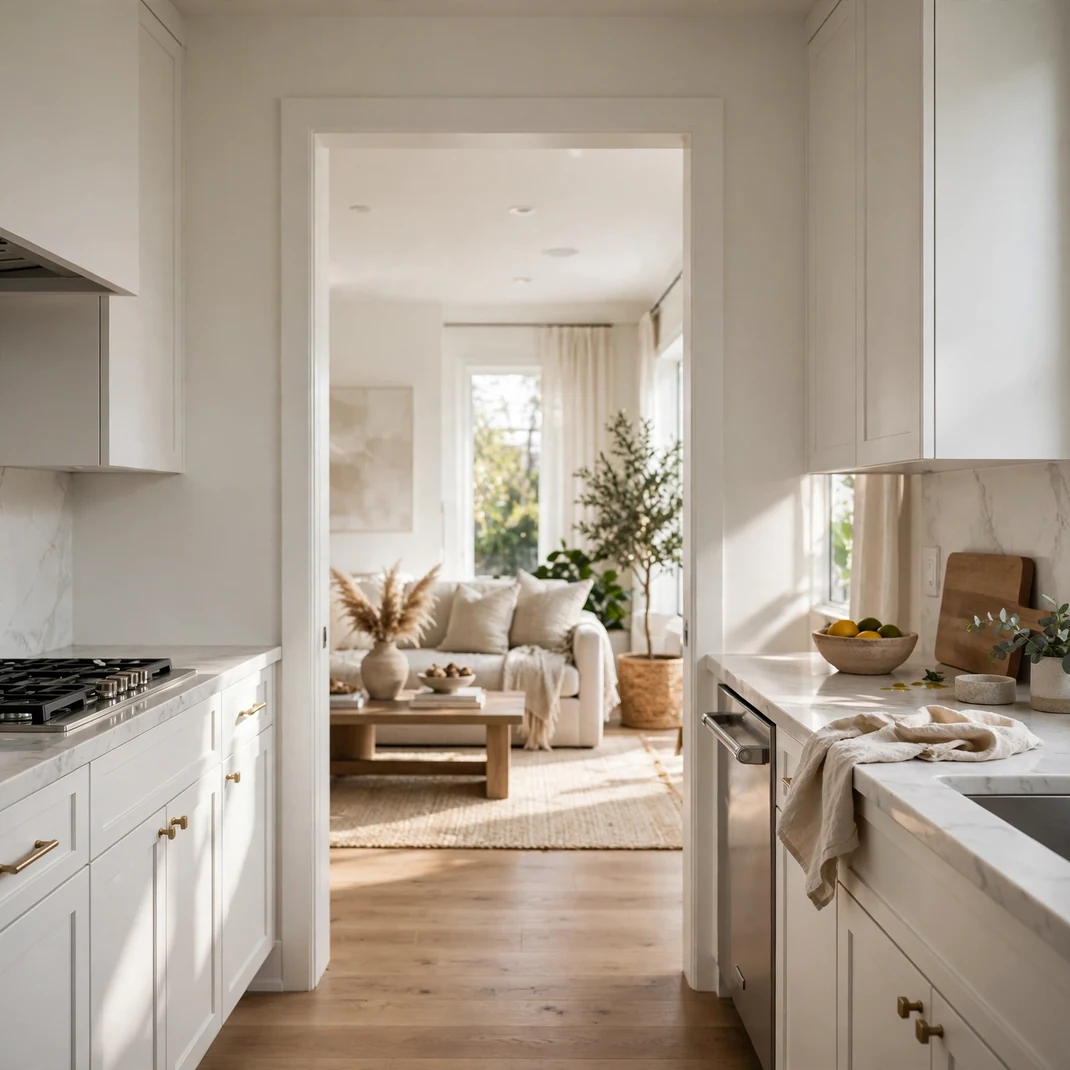
A swinging door devours up to nine square feet of floor every time it opens, in a room that cannot spare an inch. Removing the door and casing the opening instantly merges the kitchen with the neighboring space. Light flows between rooms and sightlines stretch dramatically longer. If privacy or cooking smells matter, a pocket door or a simple curtain gives control without the swing radius. The doorway becomes a portal instead of a barrier.
What You Need
- Screwdriver and pry bar
- Patching compound and paint
- Cased opening trim
- Pocket door kit if desired
- Curtain rod and curtain alternative
How to Set It Up
Lift the door off its hinges and unscrew the hardware, then patch hinge mortises and paint the frame in the trim color. Case the opening with clean trim for a finished portal look. If you want occasional closure, fit a pocket door that slides into the wall and disappears.
Pro Tip
Hang a washable curtain on the kitchen side of the opening; drawn during frying, it catches cooking odors before they reach the living room.
19. Sun Tunnel Skylight
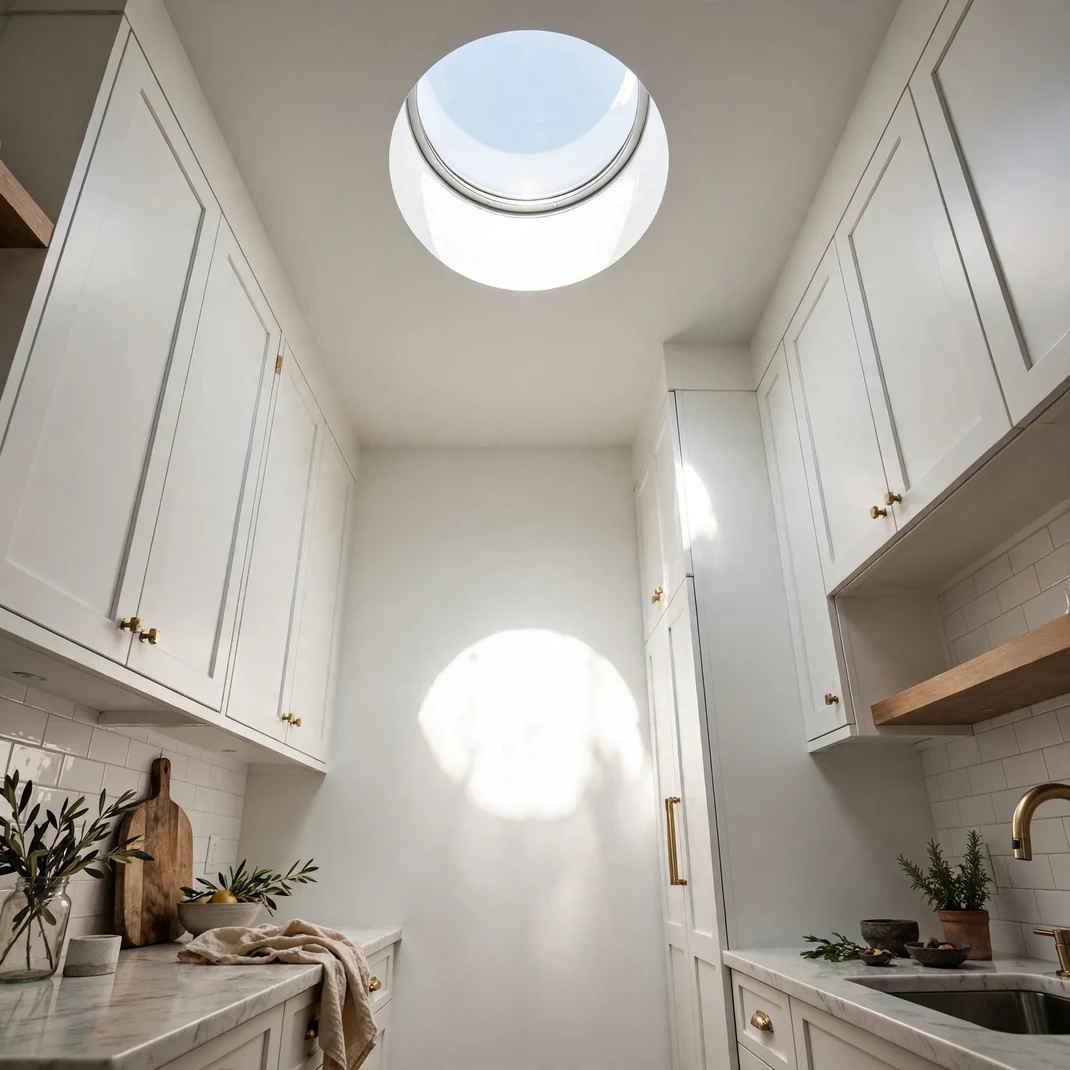
A dark tunnel kitchen feels half its size because shadows swallow the distant corners. A sun tunnel skylight pipes real daylight from the roof straight down through a reflective tube, flooding the room with sun at zero floor cost. The natural light reveals the true colors of the space and lifts the mood of everyone cooking in it. Unlike a window it needs no wall space and fits between joists. Daylight is the cheapest square footage you can buy.
What You Need
- Sun tunnel skylight kit
- Roofer or skilled installer
- Reflective rigid tube
- Ceiling diffuser fixture
- Flashing and roofing cement
How to Set It Up
Have the tunnel installed by a roofer who will flash it properly against leaks, positioning the ceiling diffuser over the darkest part of the kitchen. Choose a rigid reflective tube over flexible for maximum light transmission. Clean the roof dome yearly so the light output stays strong.
Pro Tip
Add a dimmable electric light kit inside the diffuser so the tunnel doubles as a ceiling fixture after sunset.
20. Wall Mounted Faucet
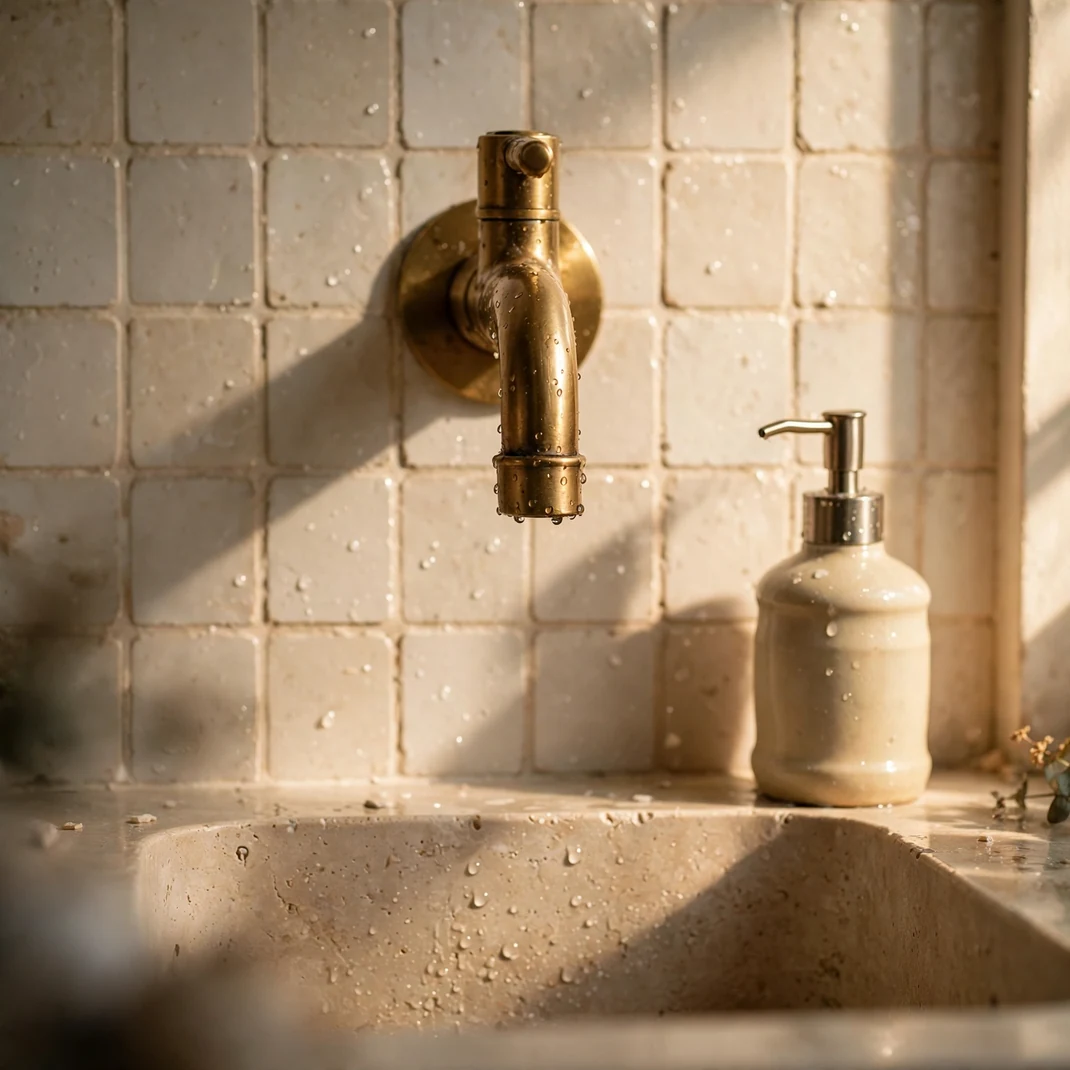
A faucet rising from the wall behind the sink clears the entire deck behind the basin. That reclaimed strip becomes usable landing space for soap, sponges, or a drying rack. The wall mount also reads as sleek and architectural, lifting the sink zone from utilitarian to designed. With the pipes hidden in the wall, the counter line stays clean and unbroken. Small move, strikingly modern result.
What You Need
- Wall mounted faucet with rough in valve
- Plumber for in wall installation
- Backsplash material that hides plumbing
- Teflon tape and fittings
- Access panel planning
How to Set It Up
Have a plumber install the rough in valve inside the wall during any wall tiling work, since retrofitting later means opening the wall. Position the spout to arc precisely over the drain for splash free flow. Tile or clad the wall behind so the mount looks intentional and wipes clean.
Pro Tip
Pair the wall faucet with a shallow undermount sink; the combination maximizes both deck space and basin depth.
21. Compact Single Bowl Sink
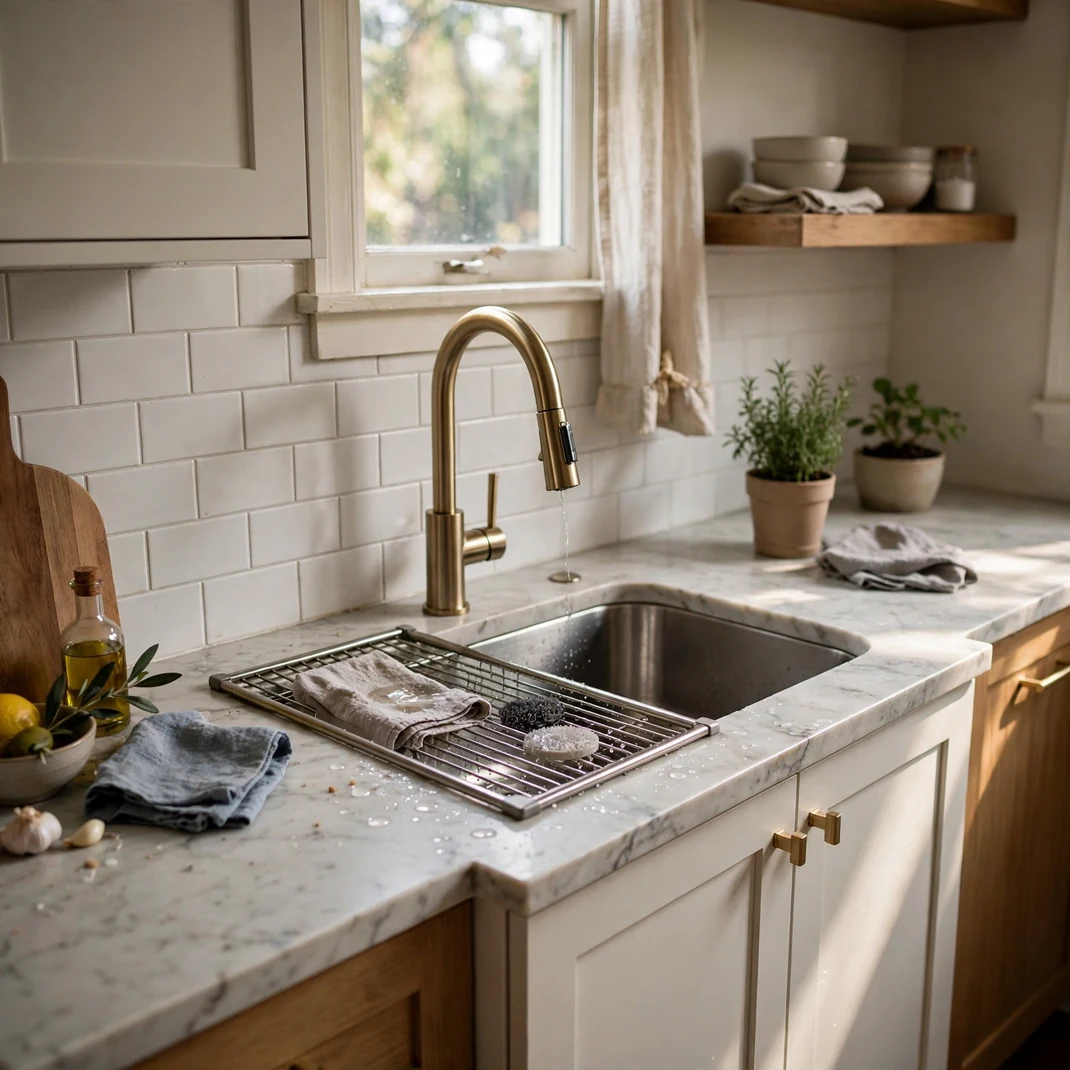
A giant double sink in a snug kitchen steals counter on both sides for very little benefit. One deep single bowl swallows roasting pans and stockpots better while surrendering far less countertop. The extra deck space beside it becomes a genuine work zone rather than a cramped ledge. Undermount it for an effortless wipe down straight into the basin. Downsizing the sink is upsizing the kitchen.
What You Need
- Compact single bowl sink
- Undermount mounting clips
- Tap with pull down sprayer
- Sink cutout template
- Kitchen grade caulk
How to Set It Up
Choose a bowl around twenty four inches wide and at least nine deep so large pots still fit comfortably. Undermount it beneath the counter for a flush edge that wipes clean in one smooth pass. Pair with a pull down sprayer tap so the single bowl rinses as flexibly as two.
Pro Tip
Add a roll up dish drying rack that sits over the bowl; it creates a second level of workspace above the sink.
22. Ceiling Hung Pot Rack
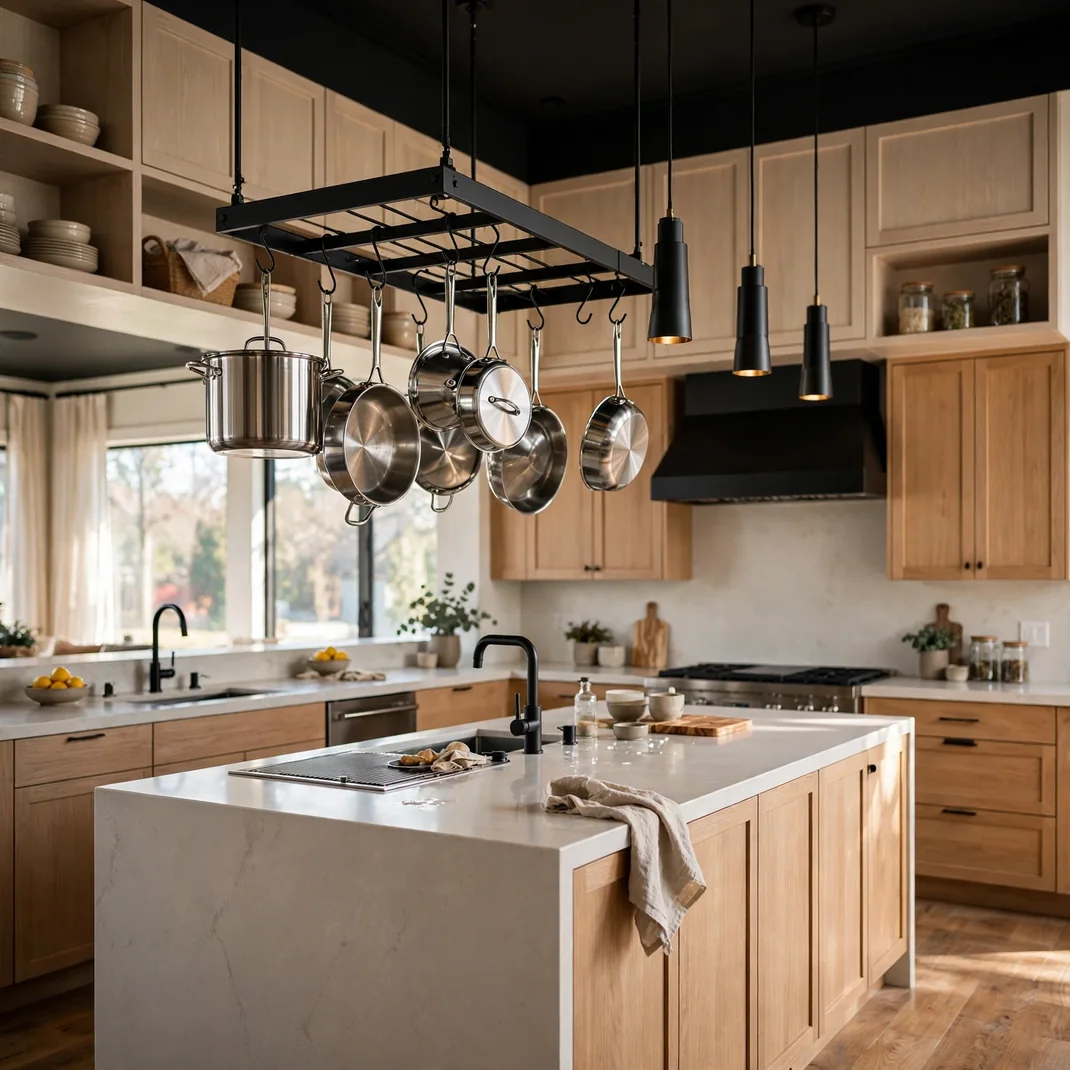
When cabinets and walls are maxed out, the ceiling becomes the last frontier. A ceiling hung rack suspends cookware overhead, liberating an entire base cabinet while keeping everything in easy grab range. Hung over an island or a work aisle, it defines the cooking zone with sculptural purpose. The vertical storage lifts the gaze so the room feels taller. Just hang it high enough that tall cooks never meet it with their foreheads.
What You Need
- Ceiling mounted pot rack
- Heavy duty ceiling anchors or joist mount
- Stud finder
- Vinyl coated hooks in a matching finish
- Everyday pots and pans
How to Set It Up
Lag the rack directly into ceiling joists, never drywall anchors alone, since a loaded rack is seriously heavy. Hang it at least six inches above the tallest user’s head height along the walking path. Balance the load evenly so the rack hangs level and stable.
Pro Tip
Hang pots by size in a graduated row; the tidy cascade looks deliberate and makes the right pan findable at a glance.
23. Slim Line Appliances
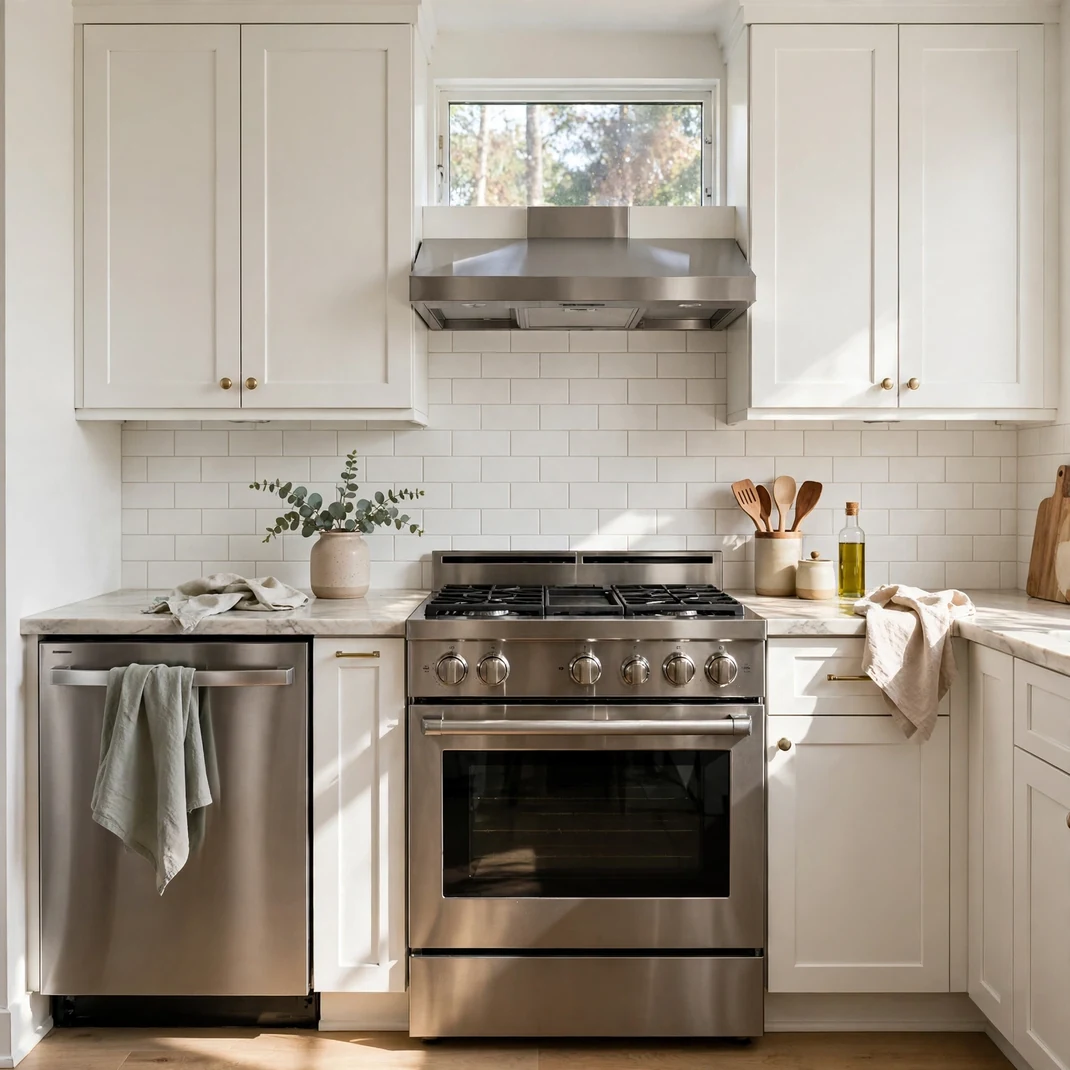
Standard appliances are scaled for suburban palaces, not city kitchens. Slim line versions, an eighteen inch dishwasher or a twenty four inch range, perform beautifully while returning precious inches to counters and walkways. European brands have refined these compact workhorses for decades. The narrower footprints also force a pleasing proportionality, making the whole room feel designed rather than squeezed. Right sizing is the elegant answer to small space living.
What You Need
- Slim line dishwasher or range
- Cabinet filler panels for gaps
- Installer
- Measuring tape
- Updated water and gas lines if moving
How to Set It Up
Measure your openings carefully, then order the slim appliance plus filler panels that bridge any leftover gaps cleanly. Have utilities adjusted by a professional before the unit slides in. Use the reclaimed inches for a wider prep zone or a slim pull out beside the range.
Pro Tip
An eighteen inch dishwasher still holds a full dinner party’s dishes; run it nightly and skip the drying rack entirely.
24. Built In Banquette Bench
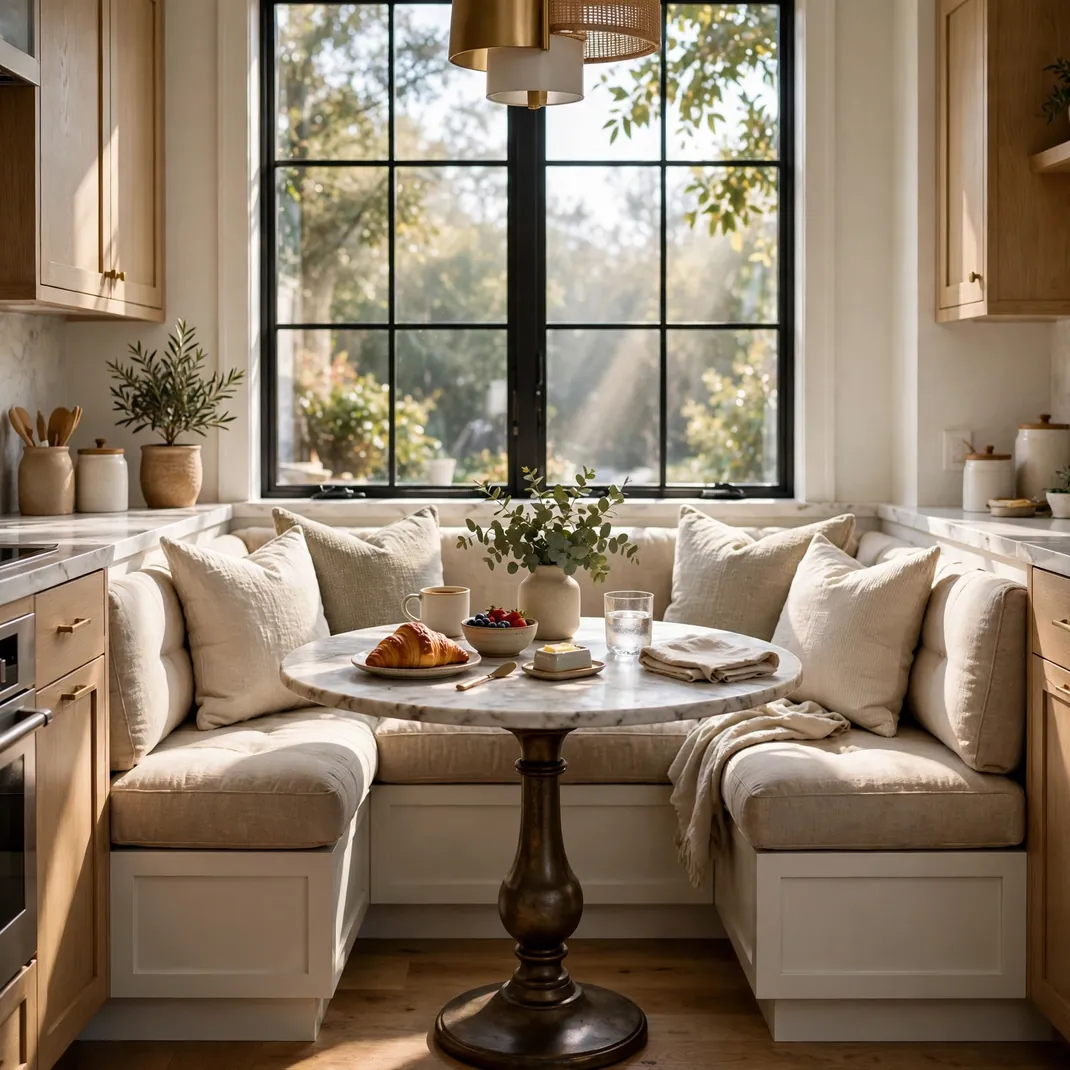
Four chairs around a table need clearance on every side, but a banquette needs it on only three. A bench built against the wall seats the same crowd in a dramatically smaller footprint. The base hides deep storage for bulky items, and the upholstered back invites lingering. It turns an awkward corner into the coziest dining spot in the house. Banquettes are the space planning secret of every great bistro.
What You Need
- Banquette bench with storage base
- Upholstered seat cushion
- Throw pillows for back comfort
- Pedestal table
- Wall paint or paneling behind
How to Set It Up
Build or buy the bench to standard seat height with a depth around twenty two inches for genuine comfort. Hinge the seat or add drawer fronts for access to the storage within. Add a pedestal table so legs and feet clear easily on the open side.
Pro Tip
Upholster the bench in a wipeable performance fabric; banquettes attract crumbs and spills like nowhere else.
25. Glass Interior Partition
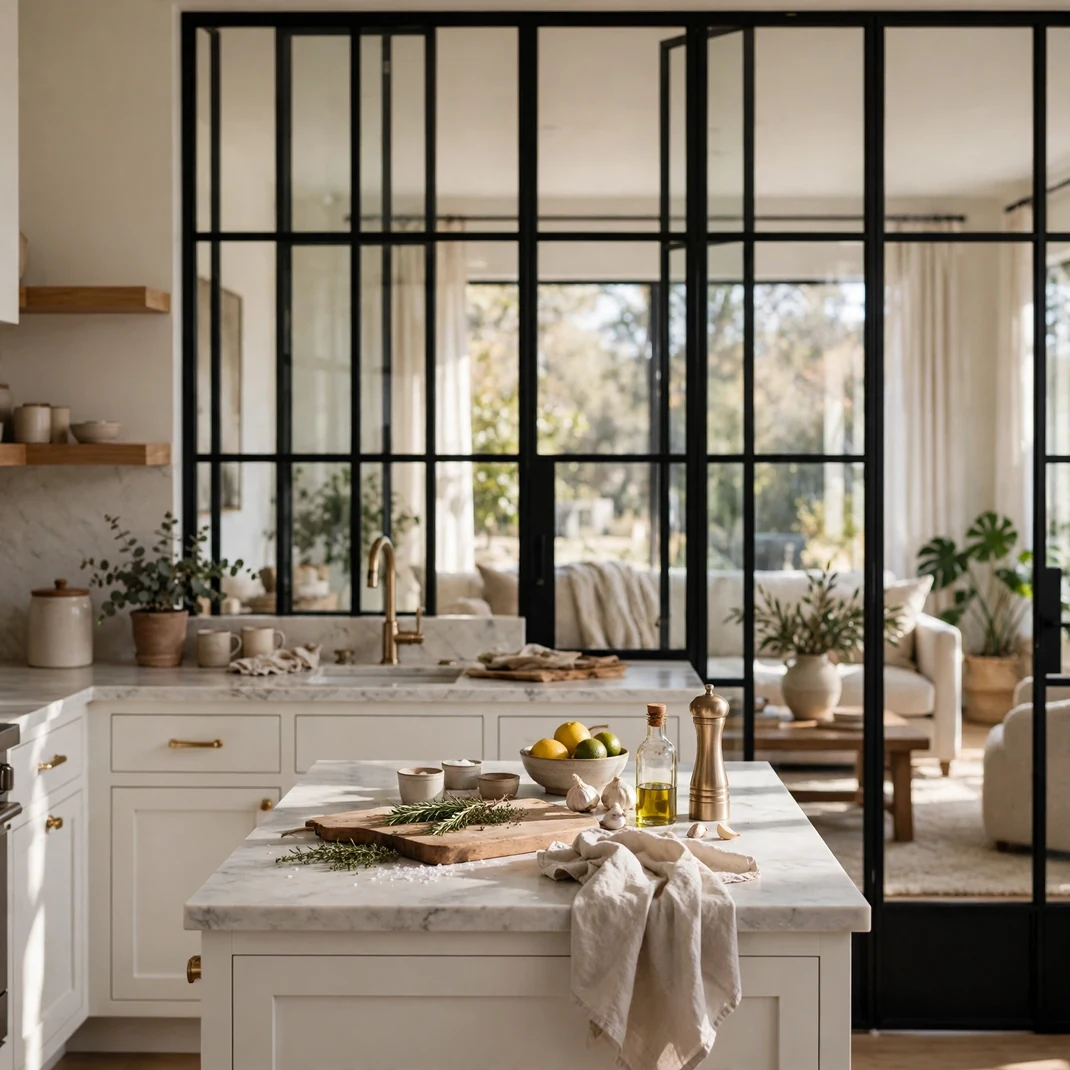
Knocking down the wall between kitchen and living room is not always possible, but a glass partition gives you ninety percent of the openness. Floor to ceiling glass panels borrow light and views from the next room while containing cooking noise and smells. The kitchen instantly feels like part of a larger flowing space. Black framed panels add industrial chic; frameless glass nearly vanishes. You keep the wall’s function and lose its visual weight.
What You Need
- Glass partition panels
- Black steel or minimal framing
- Professional glazier for install
- Door or open gap for passage
- Glass cleaner
How to Set It Up
Have a glazier measure and install the panels with proper structural framing, leaving a generous cased opening for easy passage. Choose low iron glass for maximum clarity without the green tint of standard panes. Keep both sides of the glass clean since smudges show from every angle.
Pro Tip
Add a sheer curtain on a ceiling track across the glass; drawn at night it softens the partition into something cozy.
26. High Gloss Cabinet Finish
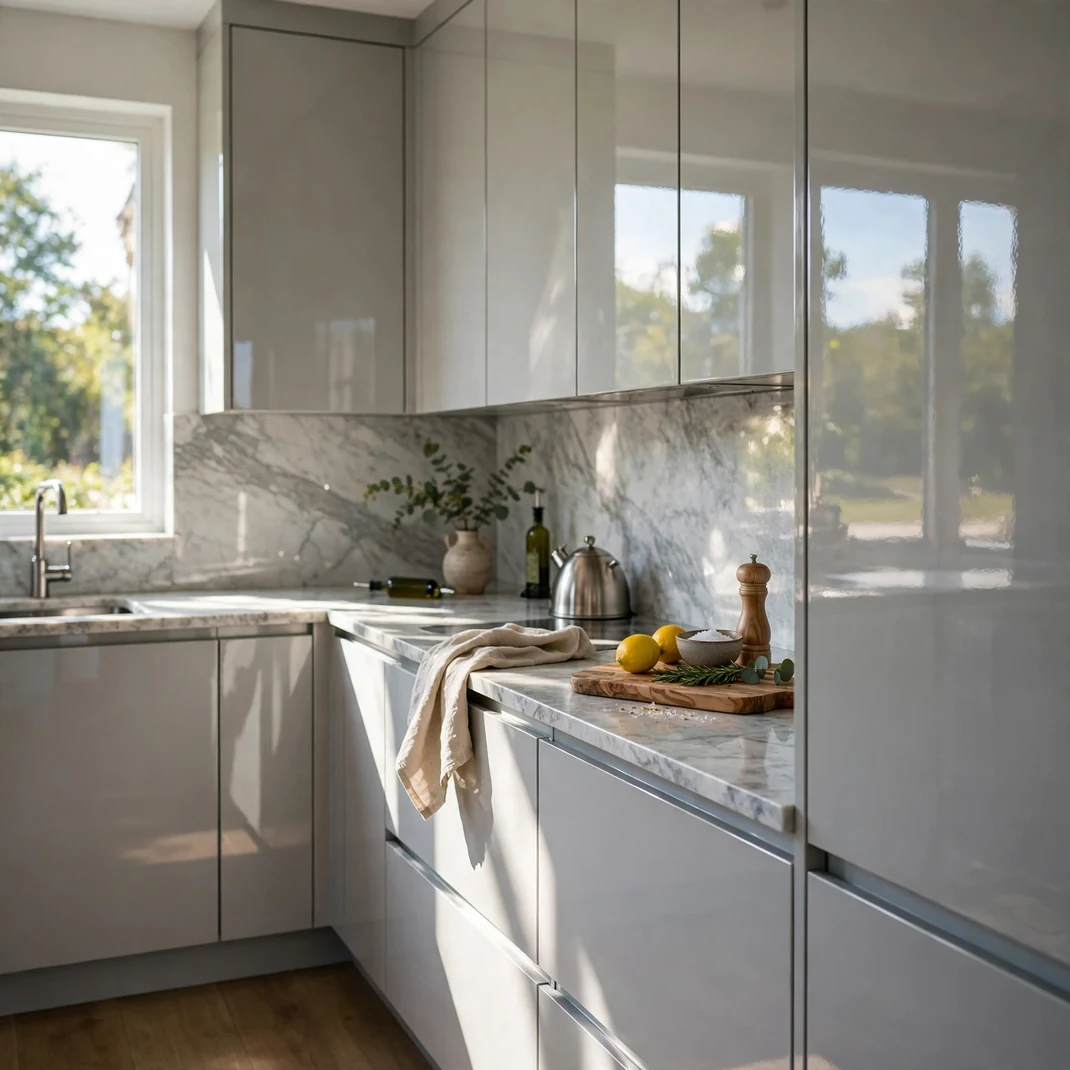
Matte surfaces absorb light while gloss throws it back into the space, which is exactly what a little kitchen craves. High gloss cabinet fronts act like a soft mirror, bouncing daylight into corners and doubling the sense of brightness. The reflective planes blur the cabinet edges so the boxes feel less bulky. Keep the color pale and the hardware minimal to maximize the airy effect. Think of it as the sports car finish of kitchen design: sleek, bright, and fast looking.
What You Need
- High gloss cabinet fronts or refacing
- Pale lacquer color
- Slim minimal handles
- Soft dusting cloths
- Gentle non abrasive cleaner
How to Set It Up
Order factory finished gloss fronts rather than painting on site, since the flawless coat is what creates the reflection. Install with slim handles or touch latches so nothing interrupts the shiny planes. Wipe fingerprints regularly with a dry microfiber, keeping the gloss brilliant.
Pro Tip
Limit gloss to either the top or bottom run, not both; the mix of reflective and matte adds depth while the shine still does its work.
27. Recessed Wall Niche Shelf
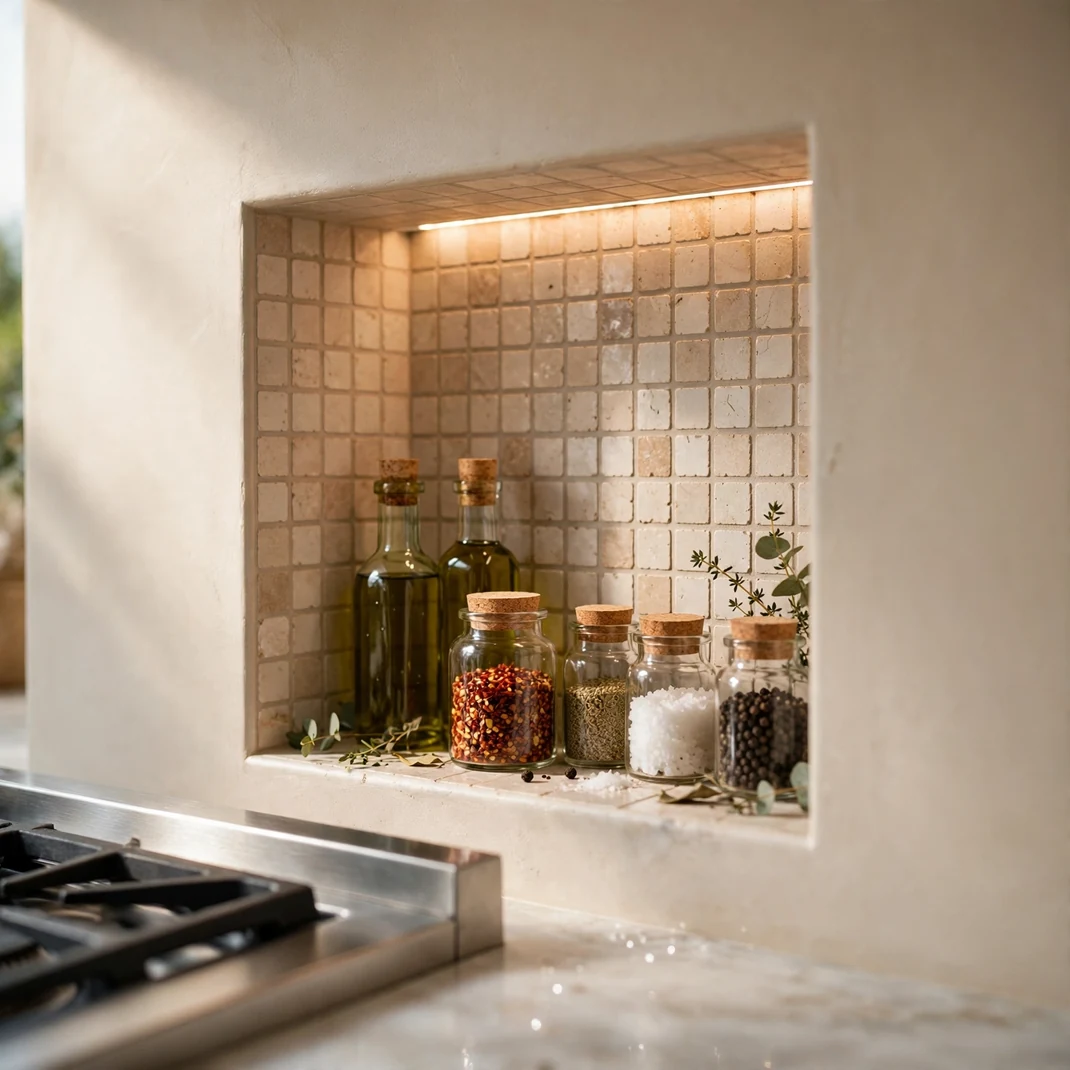
A recessed niche steals storage from within the wall instead of from the room. Set between studs beside the cooktop or sink, it holds oils, spices, and daily tools at arm’s reach with zero protrusion. The shadow line of the recess adds architectural interest that flat walls lack. Tile the niche in an accent finish and it turns into a jewel box moment. Storage that takes no space is the holy grail of small kitchens.
What You Need
- Recessed niche insert or framing kit
- Tiles for the niche lining
- Waterproof membrane if near sink
- Stud finder
- Trim or edge profiles
How to Set It Up
Locate the studs and confirm no pipes or wiring run through the chosen bay before cutting. Frame the niche, waterproof it if it sits in a splash zone, and tile the niche for a polished look. Keep the stored items shallow so nothing pokes past the wall plane.
Pro Tip
Add a tiny LED puck light at the niche top; the glow turns functional storage into a display feature after dark.
28. Continuous Flooring Flow
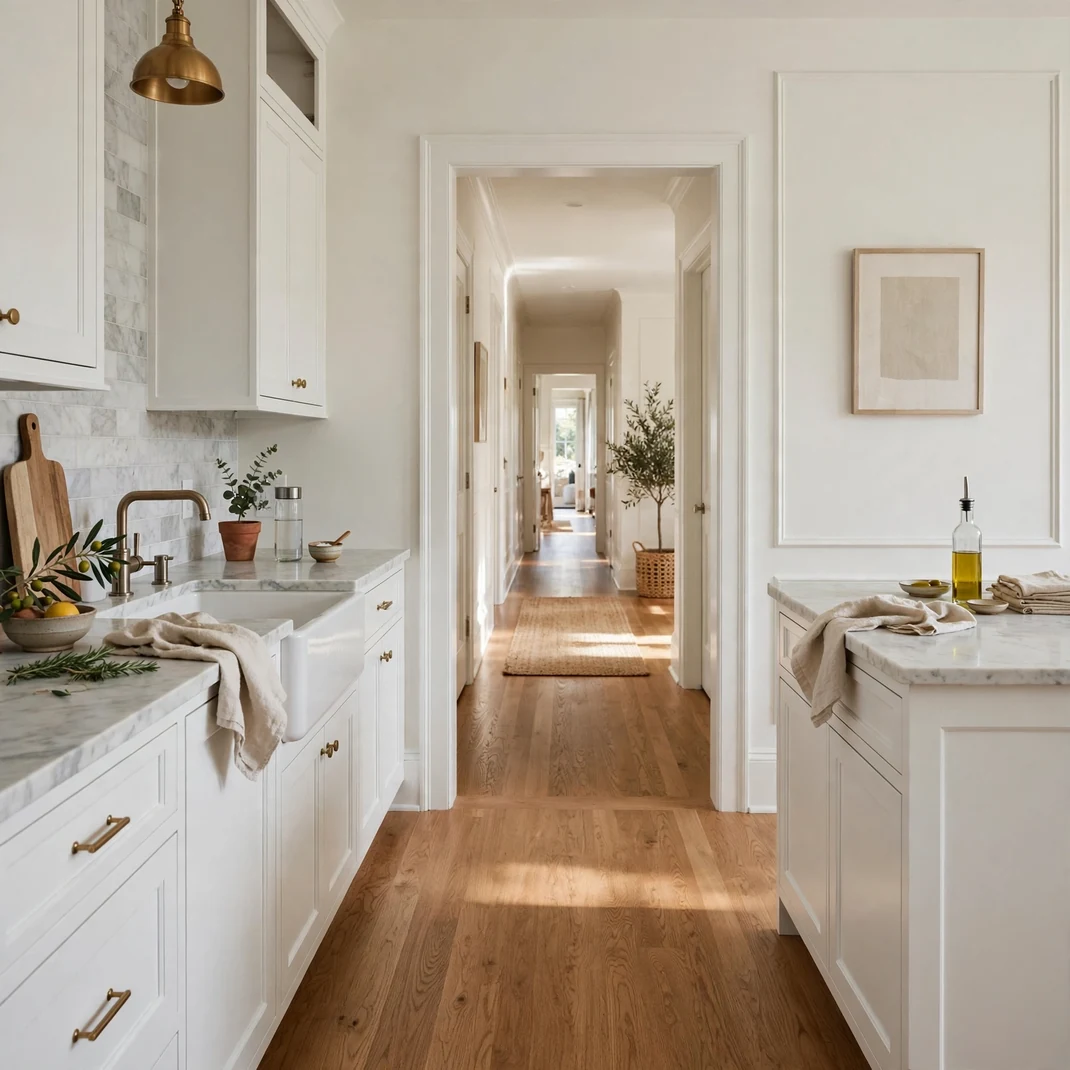
A different floor in the kitchen than the hallway slams a visual border across the doorway. Running one continuous floor through both spaces erases that boundary and lets the gaze travel uninterrupted. The kitchen borrows square footage from its neighbor perceptually, feeling like an extension of a grander whole. Choose a hardwearing wood look or stone look that suits both zones. Threshold strips are tiny details with outsized shrinking power, so eliminate them.
What You Need
- Continuous flooring material
- Transition planning with installer
- Matching grout or stain
- Doorway undercutting if needed
- Professional installer
How to Set It Up
Select a floor rated for both kitchen spills and hallway traffic, then run it wall to wall through the doorway with no break. Undercut door casings so the flooring slides beneath for an unbroken finish. Keep the pattern consistent across the threshold so the eye reads one unbroken field.
Pro Tip
Lay planks or tiles parallel to the longest sightline; the directional lines pull the gaze toward the far end of the home.
29. Appliance Garage Station
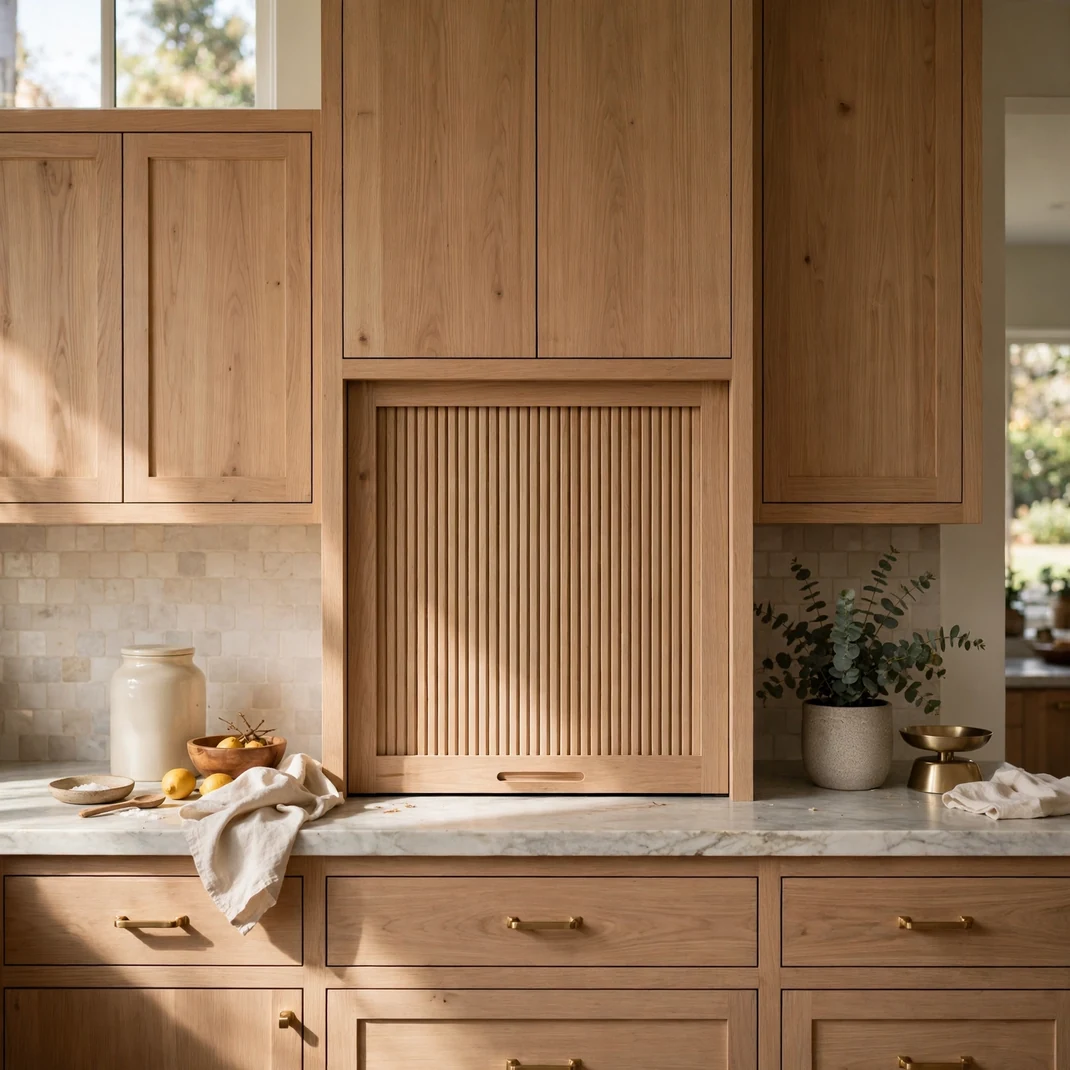
A counter crowded with toaster, kettle, and coffee maker reads as chaos no matter how tidy the rest is. An appliance garage with a lift up or tambour door corrals the small machines into one hidden station. Open it for breakfast, close it after, and the counter returns to serene emptiness. Outlets inside keep everything plugged and ready without cord spaghetti. The kitchen looks twice as big when the counters are clear.
What You Need
- Appliance garage cabinet or retrofit kit
- Tambour or lift up door
- Inside power outlets
- Small gadgets to house
- Cable management clips
How to Set It Up
Dedicate one base or tall cabinet to the garage, fitting the door mechanism and inner outlets before loading the machines. Arrange machines by morning routine order so the sequence feels natural. Close the door religiously after use; the magic only works when the habit sticks.
Pro Tip
Choose a lift up door over a tambour if you hate dusting; tambour slats collect grime in their grooves.
30. Backlit Frosted Glass Uppers
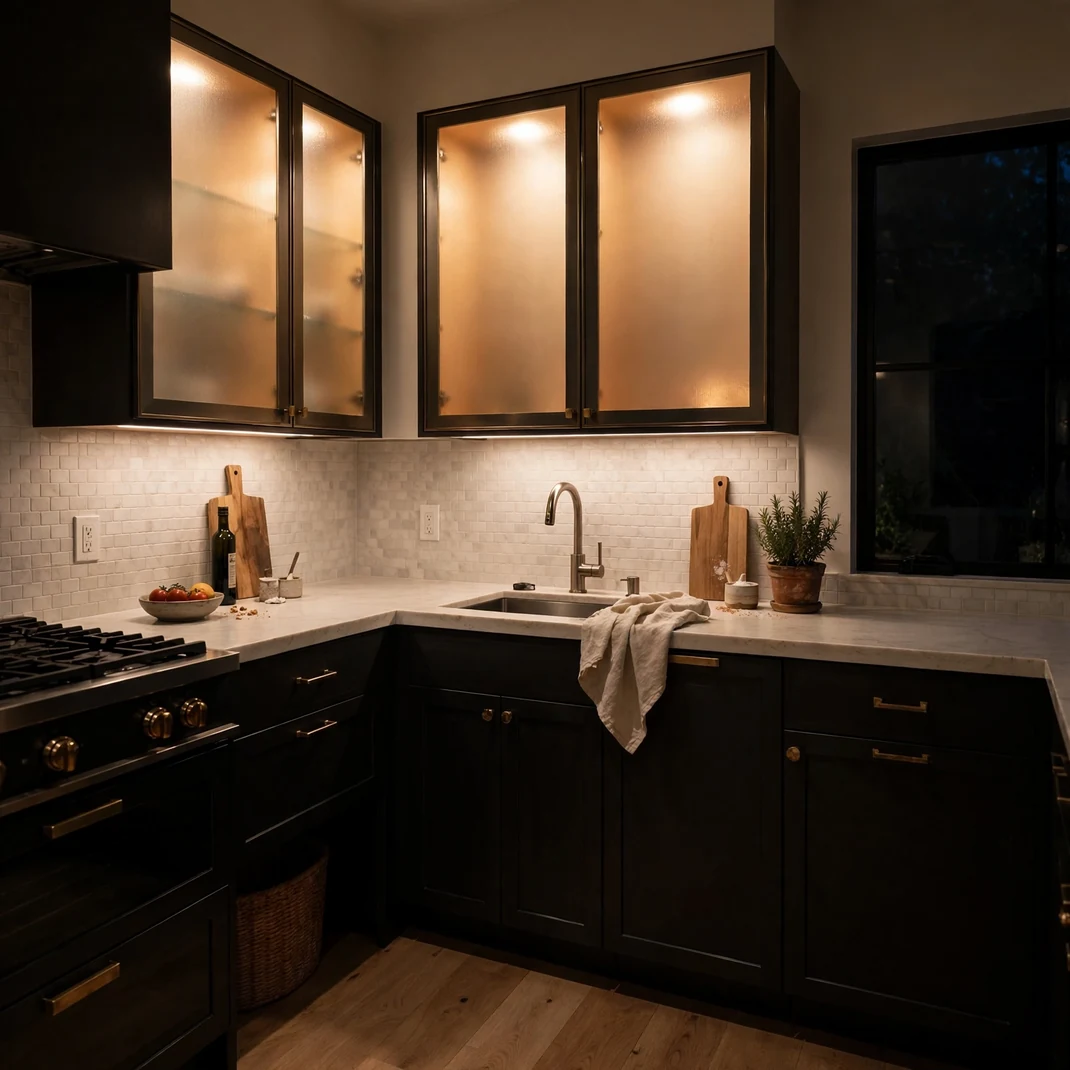
Frosted glass uppers with backlighting turn the top of your kitchen into a glowing horizon. The translucent fronts hide clutter while the light behind them suggests depth beyond, like windows onto a bright elsewhere. At night the cabinets become luminous panels, making the space feel larger and more serene. The glow pulls every gaze skyward, emphasizing ceiling height. It is part storage, part light fixture, pure spaciousness.
What You Need
- Frosted glass upper cabinet doors
- LED panels or strips for interiors
- Diffuser sheets for even glow
- Dimmer switch
- Electrician for wiring
How to Set It Up
Replace solid upper doors with frosted glass versions and line each cabinet interior with LED panels behind diffuser sheets for even illumination. Wire all the cabinet lights to a single dimmer for effortless evening ambiance. Keep the interiors reasonably organized since soft silhouettes will show through.
Pro Tip
Set the backlight to a warm 2700 kelvin; cool light behind frosted glass can feel clinical rather than cozy.
Conclusion
A small kitchen is not a problem to solve but a puzzle to enjoy, and now you hold thirty proven pieces. The transformations that matter most are rarely the most expensive: light borrowed, reflections multiplied, vertical inches claimed, visual noise silenced. Walk through your kitchen tonight and notice where your eye stops short; that is exactly where your first project should begin. Tiny spaces reward the thoughtful cook, and yours is about to feel twice the size.