
25 Creative Pumpkin Carving Ideas Beyond the Basic Jack-o’-Lantern
A drilled star field, a shaved owl and a pumpkin planter are all easy to follow once you know how each technique works. Many of these designs use less cutting than a traditional face and can stay firm for days. The 25 ideas below list tools, bit sizes and design tips, with safety notes for blades, drills and lights.
Drilled Dot Constellation
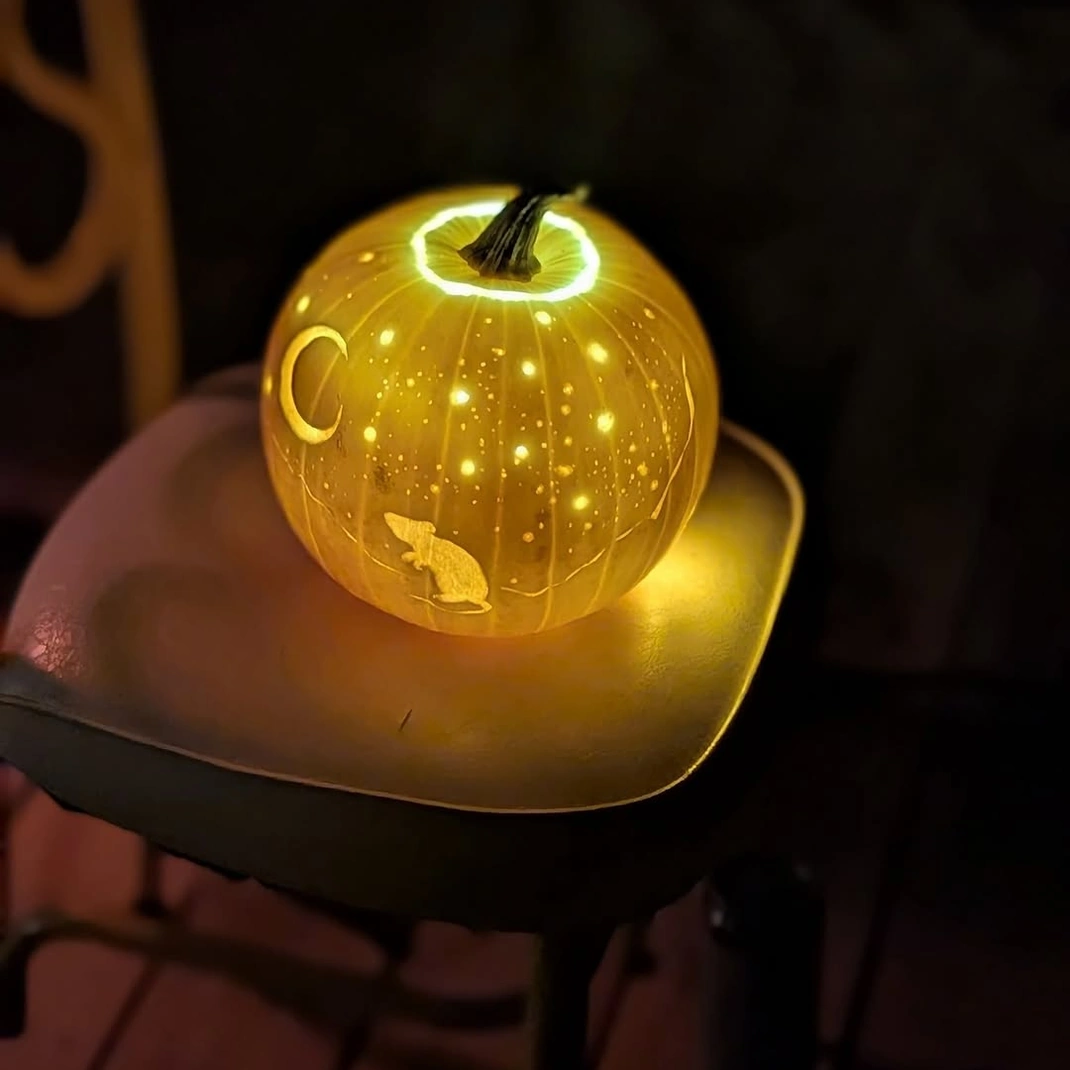
Drilled holes glow like tiny stars and are easier to control than long cut lines. An adult should use a cordless drill with bits from 1/4 to 3/4 inch, drilling straight in until the bit breaks through the wall. Mark the pattern with a washable marker first and vary the hole sizes for depth. A moon crescent needs about 40 holes. Drilling makes less mess than a saw and the holes keep the pumpkin firmer than large openings. Wear eye protection and hold the pumpkin steady on a damp towel. Battery lights glow best inside a drilled pumpkin when planned with Halloween lighting tricks.
Shaved Skin Silhouette
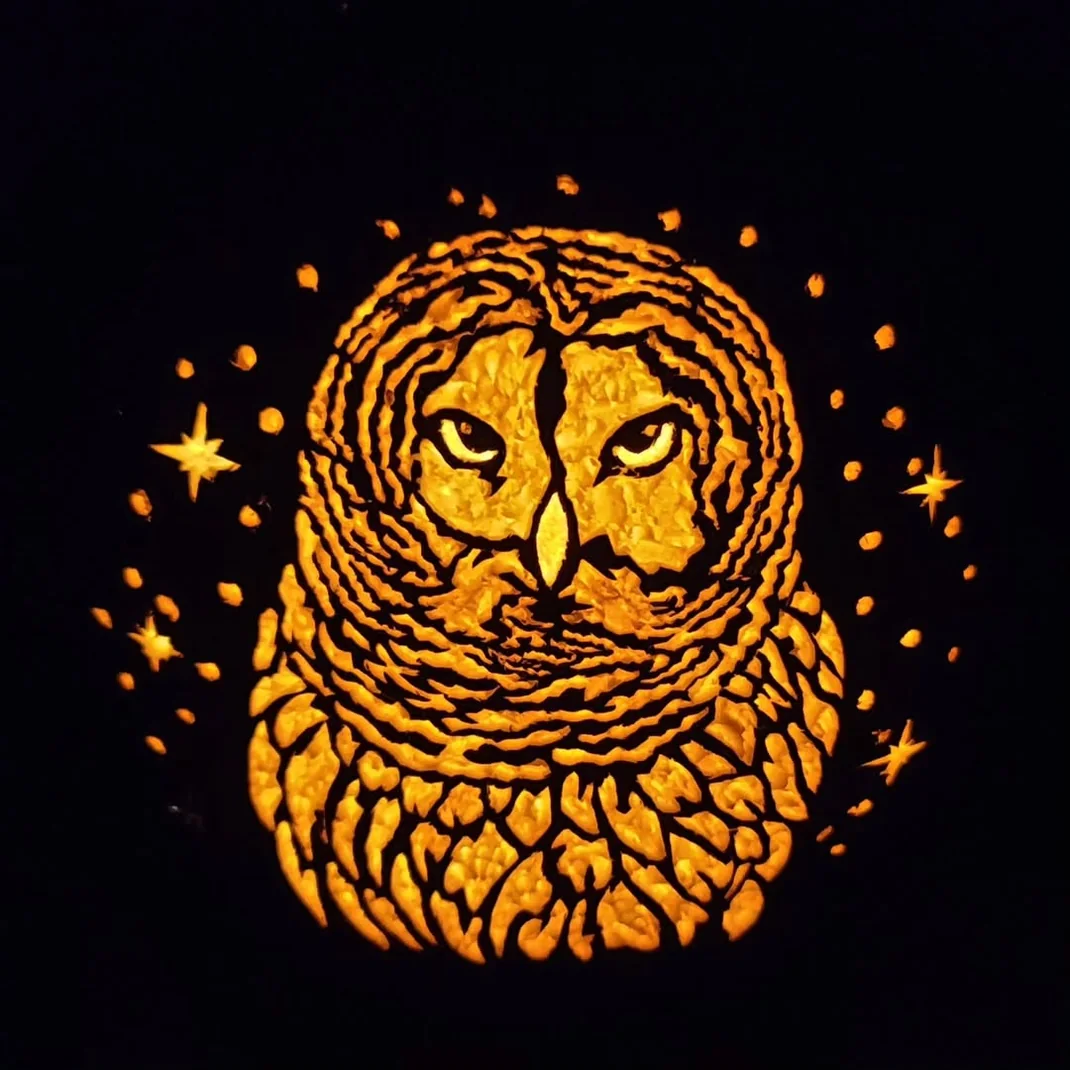
Peeling only the skin lets light pass through the thinner flesh with a soft amber glow. Transfer a simple shape such as an owl or a tree with a pin tool, then use a loop tool or a paring knife to peel the skin inside the outline. Scrape to a depth of about 1/8 inch without cutting through. Deeper areas glow brighter. Let an adult handle the blades and work on a stable table. Shaved areas dry faster than uncut skin, so rub petroleum jelly on them to slow shrinking.
Stencil Transfer Portrait

A printed stencil gives detail that freehand carving cannot match. Print a pattern to fit the pumpkin, tape it flat with small cuts at the edges to follow the curve and poke along the lines every 1/8 inch with a pin tool. Remove the paper and join the dots with a pumpkin saw. Start with the smallest cutouts and work outward so the pumpkin stays firm. A detailed pattern takes about two hours. Choose a smooth pumpkin of 10 to 12 inches, because deep ribs distort a design.
Geometric Spiderweb
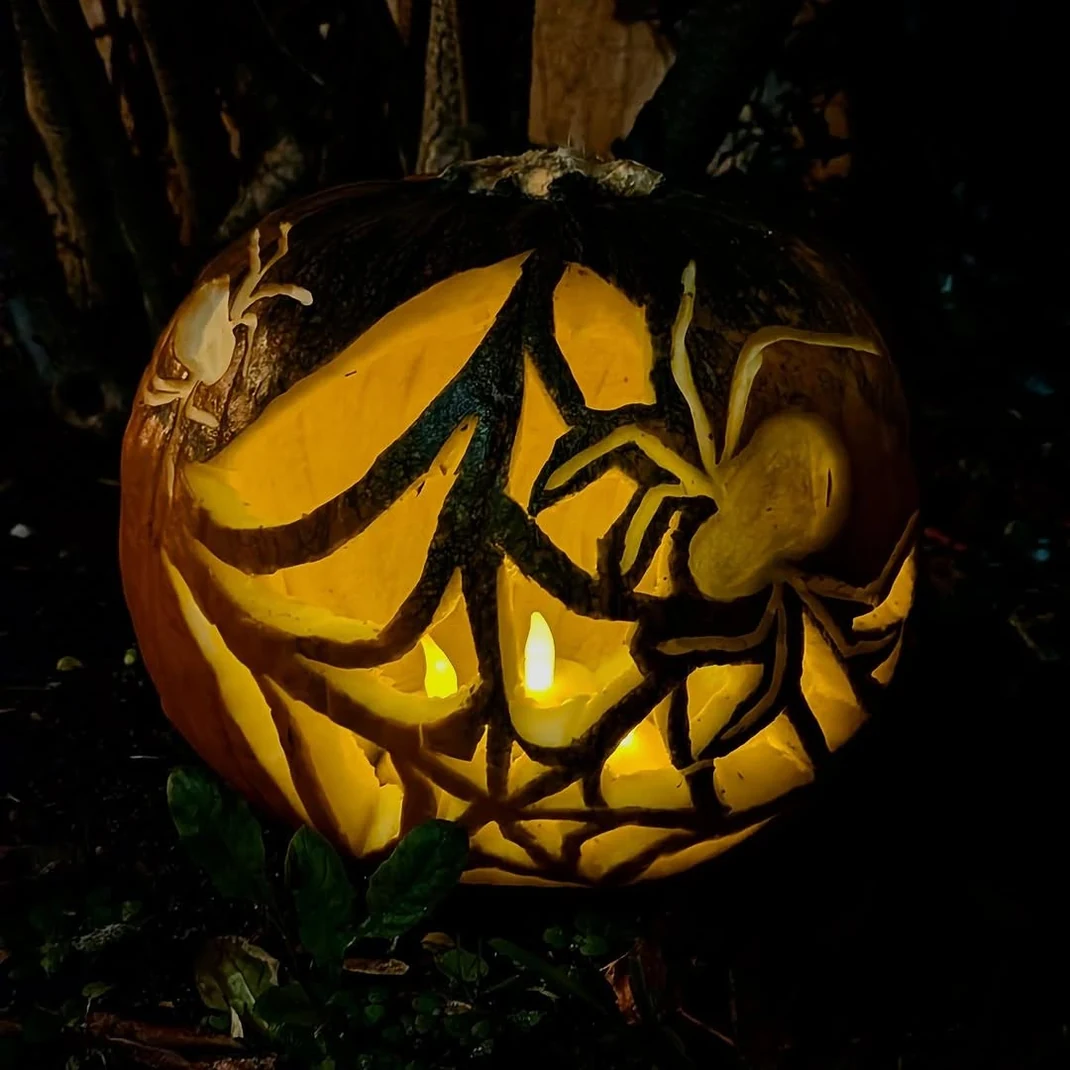
A web uses straight lines, so it is a forgiving first design. Draw six lines from a point near the top to the edges, then connect them with curved rings spaced about 1.5 inches apart. Cut the narrow channels with a small saw and leave a few bridges to hold the shape. Add a small spider by attaching a plastic one on a thread. Web carvings need steady hands near the center, where the lines are close. Keep lines at least 3/8 inch wide so the pumpkin does not fall apart.
Stacked Totem of Mini Pumpkins
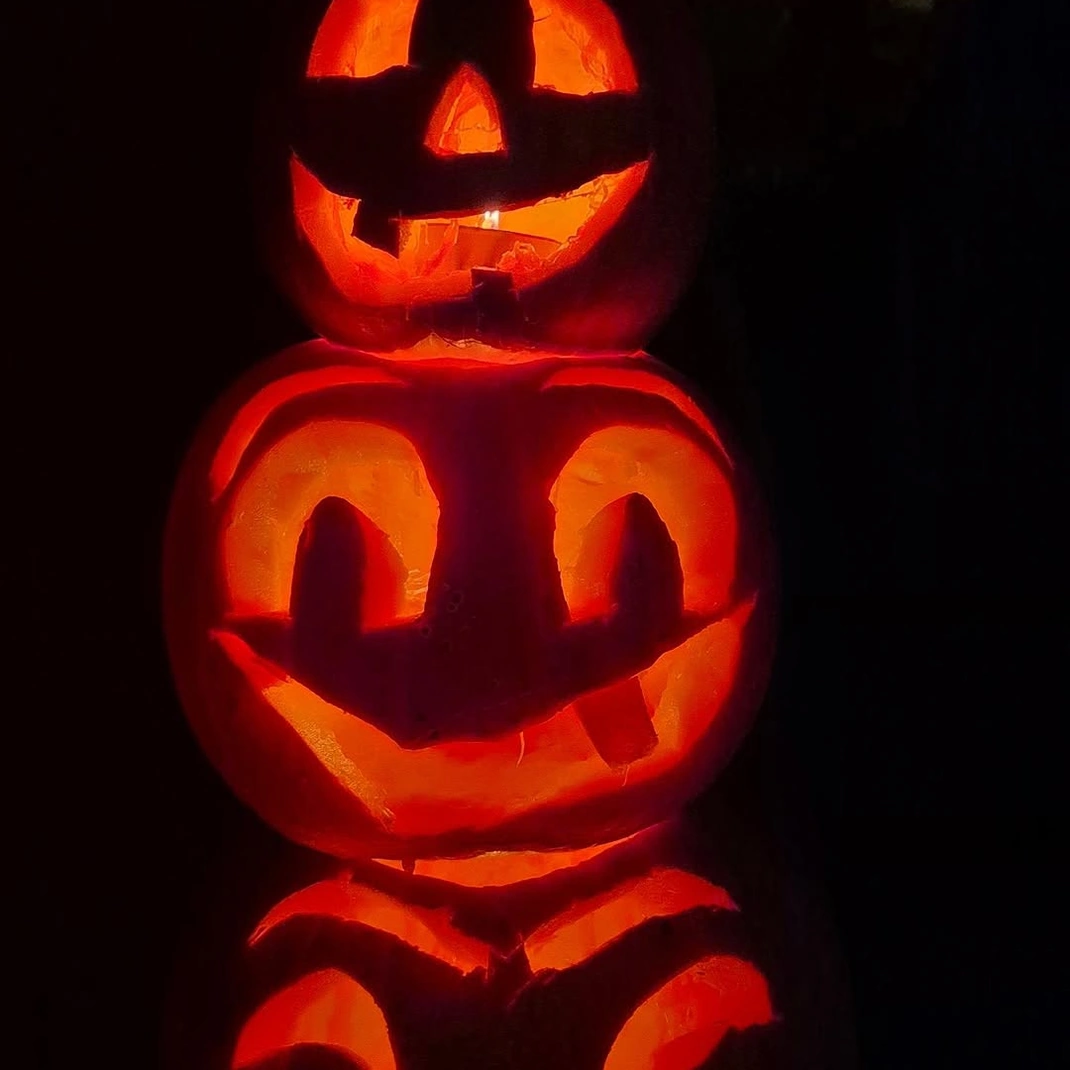
Three pumpkins of different sizes form a totem with a dowel running through the center. Use pumpkins of 5, 7 and 9 inches and carve a different face on each, one happy, one scared and one sleepy. Drill a hole through the center of each and slide them onto a dowel of 1/2 inch set in a pot of soil or sand. Use small battery lights in each. Push the dowel deep enough that wind cannot topple the stack, and set it on a wide base. Keep the tower away from steps.
Haunted House Scene
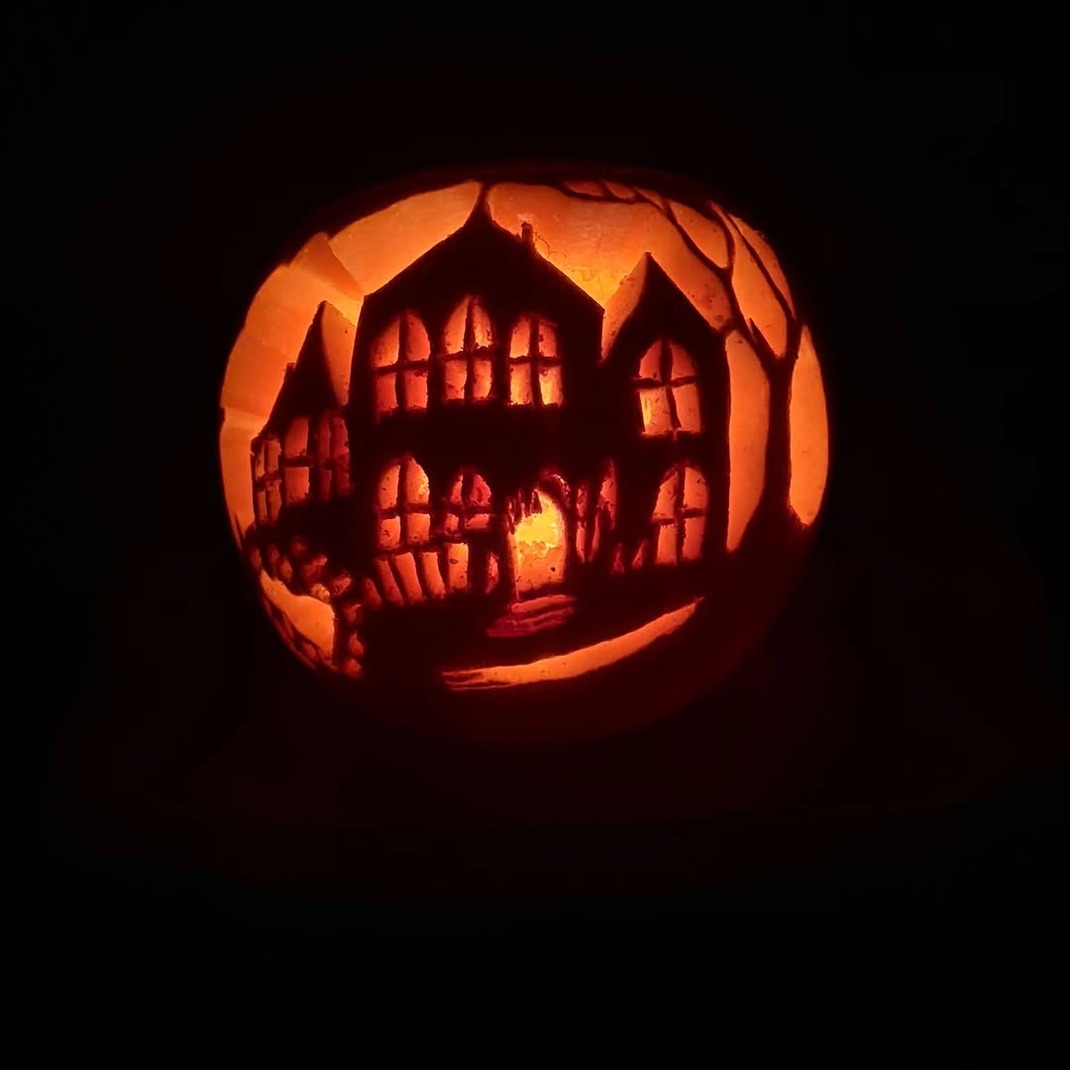
A haunted house scene tells a story on a wide pumpkin. Carve a house outline with a pointed roof, then cut small windows and a door so light can pass through. Shave the skin around the windows for a softer glow and cut thin trees to one side. Choose a wide pumpkin of at least 12 inches so the scene has room. The design uses several small openings, which keeps the pumpkin sturdy. Plan the pattern on paper first and trace it on the pumpkin with a water based marker.
Black Cat on a Fence

The arched back of a cat reads clearly even from the street. Cut a full moon shape of about 6 inches first, then leave the cat as an uncut silhouette in front of it so it appears dark against the glow. Add a short fence line along the bottom with pointed posts. This style needs only one main cut and is a good fit for an adult carving with a child supervising. Use a tall pumpkin of 14 inches or more so the cat looks dramatic.
Feathered Owl Eyes
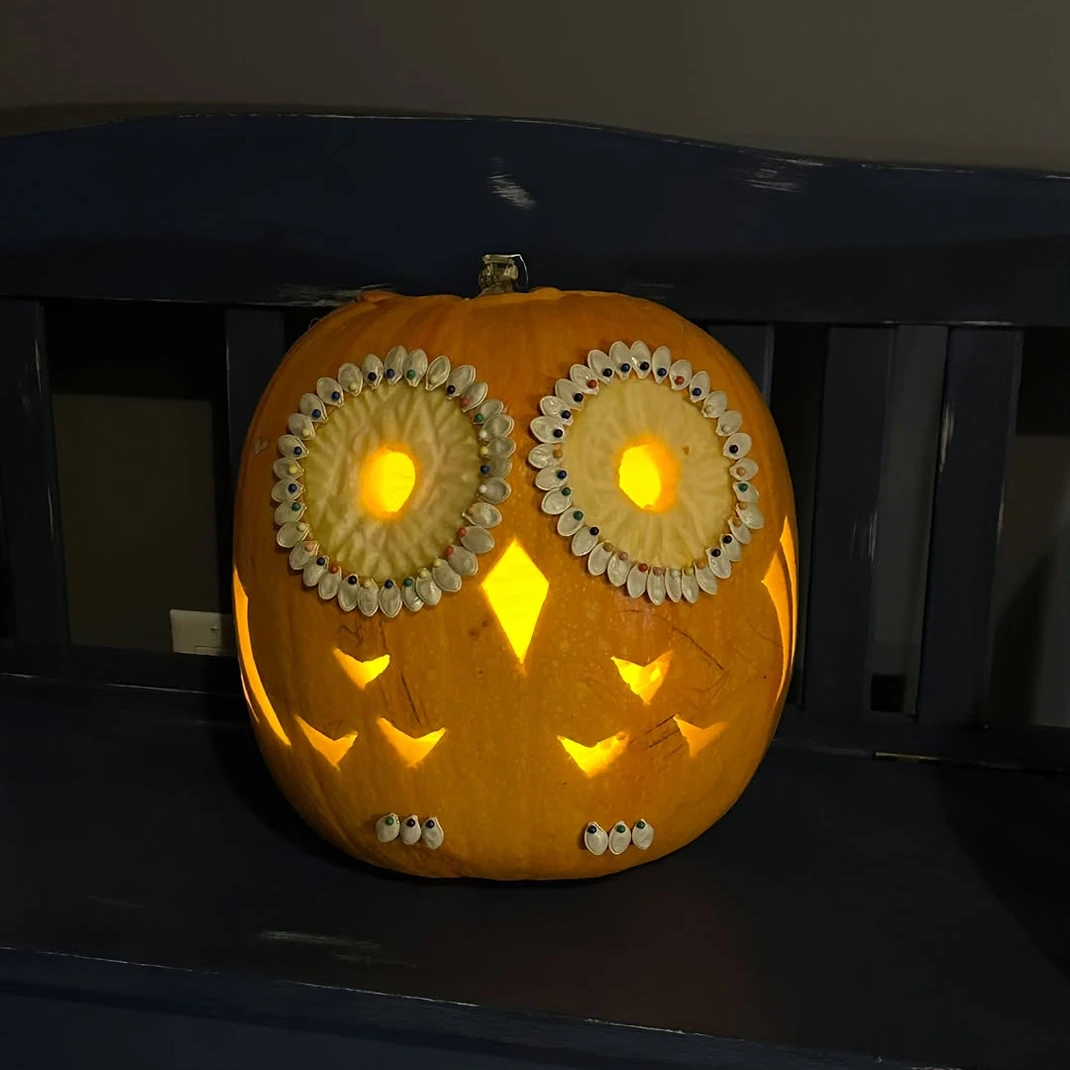
Owls work because they use circles, which are easy to cut with a small saw. Carve two large eyes of 3 inches wide, leave a circle uncut in each for pupils and cut a small triangle for the beak. Below the eyes, shave rows of scallops for feathers. Round pumpkins fit this design best. Keep scallops at least 1/2 inch wide so they hold. A copy of the pattern tucked beside you helps keep the rows even. Light the owl from inside with a battery light that has a warm color.
Starry Night Sky with Moon
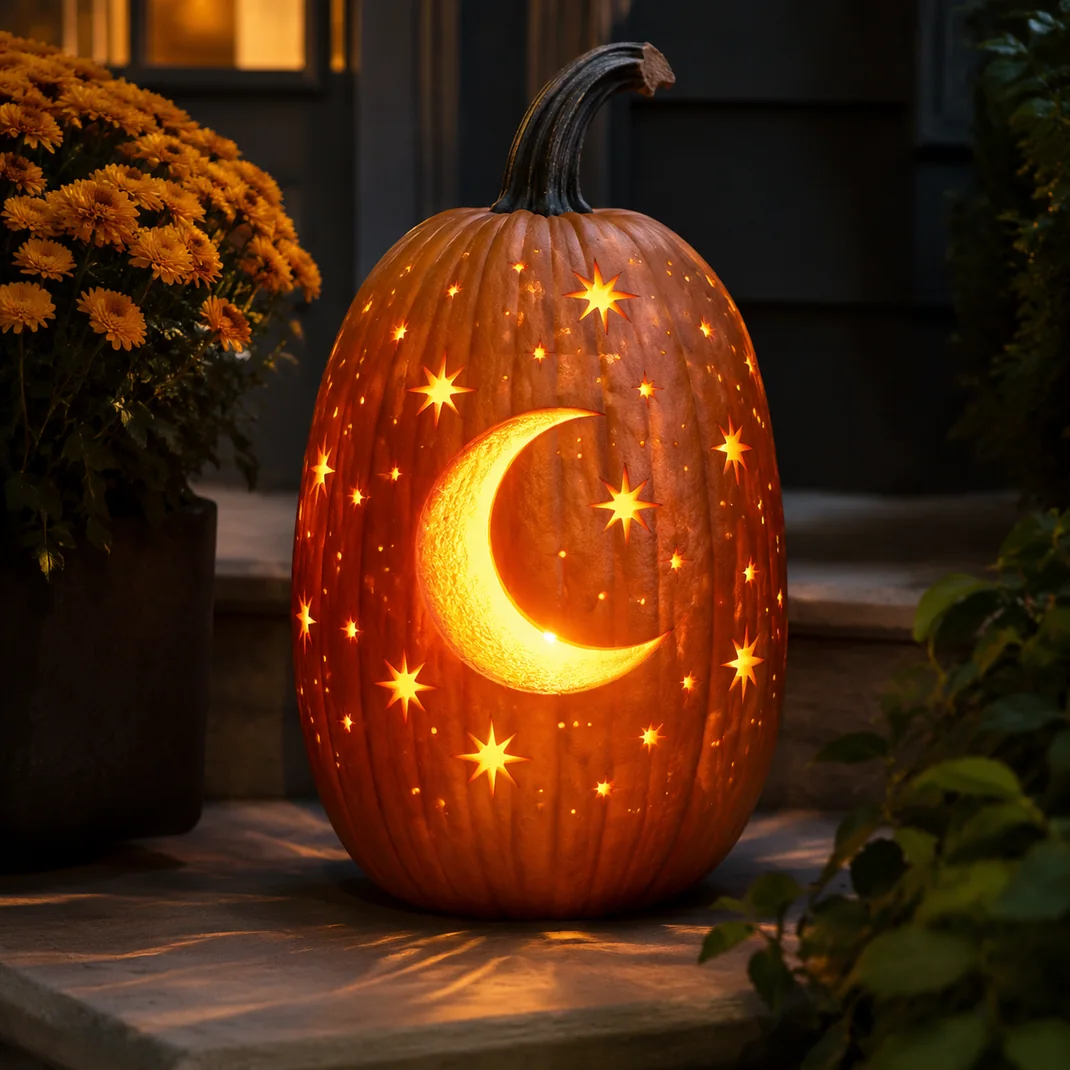
A crescent moon and a scatter of stars give a gentle alternative to a scary face. Cut the moon about 5 inches tall on one side and drill stars in groups across the rest, using three sizes of bit. Keep the holes at least an inch apart so the wall stays strong. Add a few tiny holes near the moon for a twinkling effect. The glow shows nicely in a dark yard. Place the pumpkin on a table out of foot traffic, because a carved pumpkin is fragile once cut.
Mummy Wrap Pumpkin
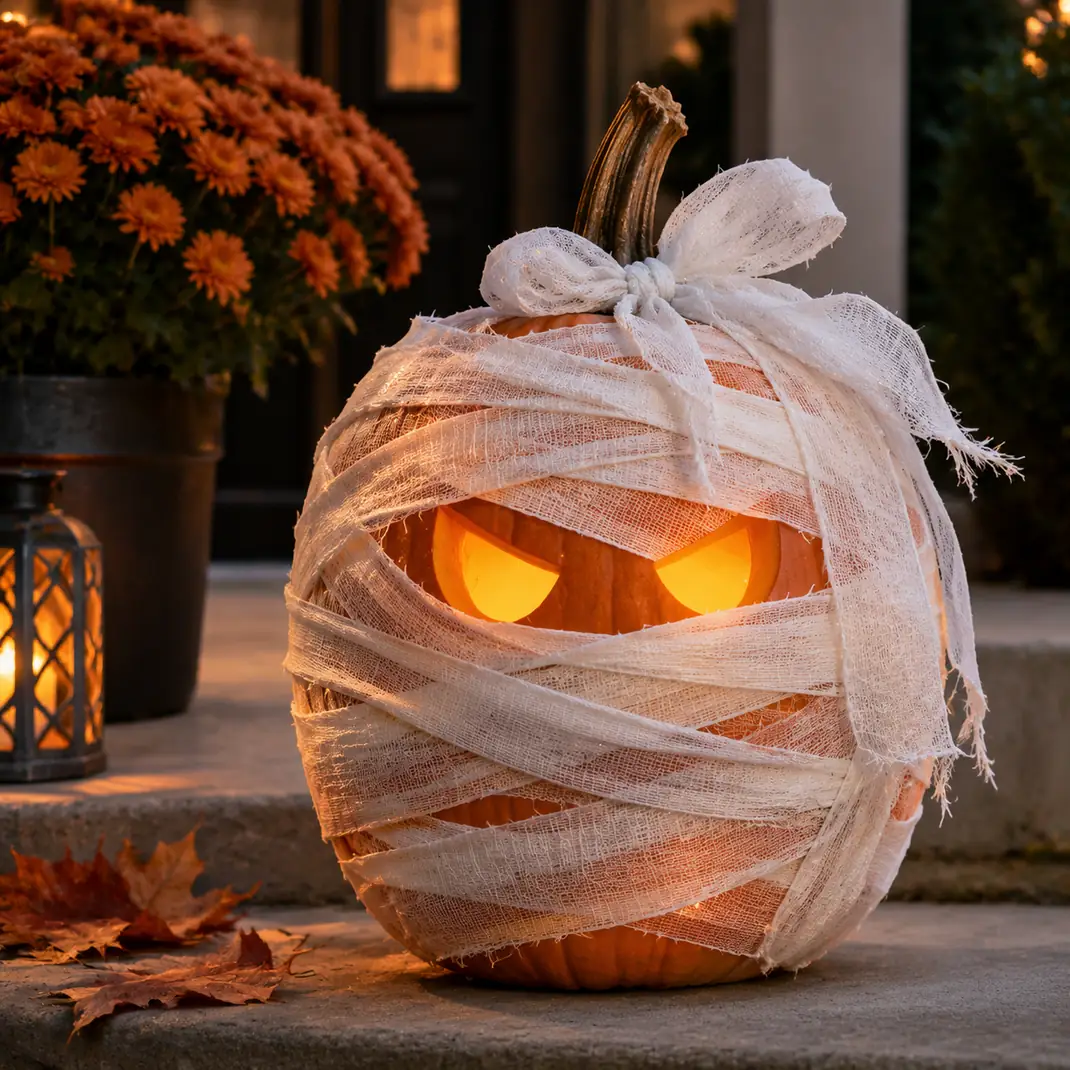
A mummy needs almost no carving. Cut two round eye holes of about 1.5 inches, then wrap the pumpkin in strips of white gauze or torn cotton cloth and secure the ends with pins or small dots of craft glue. Leave small gaps so the glow shows through. The pumpkin stays intact, which helps it last longer. Keep the wrapping away from the light, since fabric near a flame can catch fire. Use a battery light only, and keep the cloth clear of the opening.
Planter Pumpkin
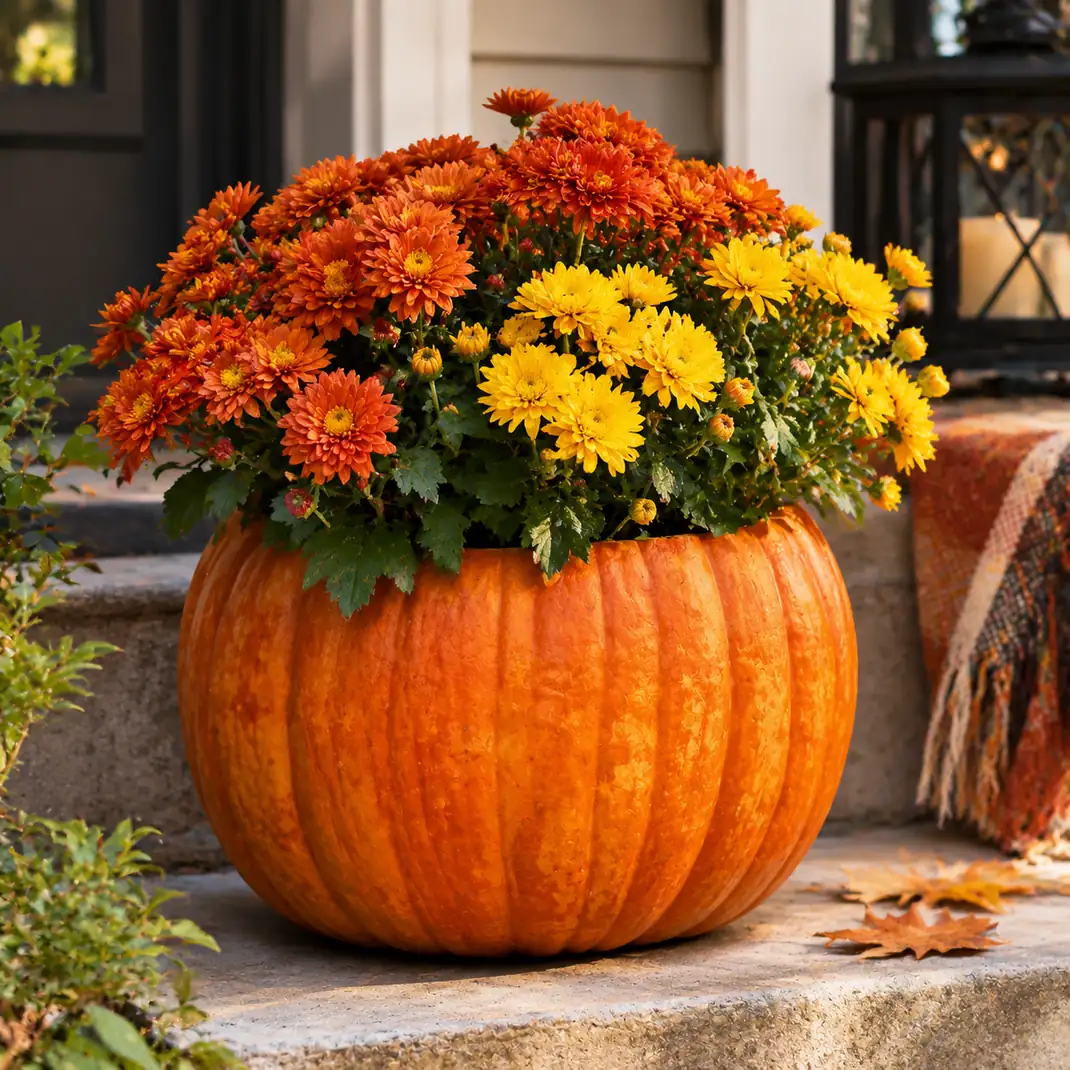
A hollowed pumpkin holds autumn flowers for a week or two. Cut off the top, scoop out the seeds and line the cavity with a plastic bag or a small plastic pot that fits snugly. Fill with potted chrysanthemums or kale plants. Poke two small drainage holes in the bottom of the pumpkin and set it on a dish. Choose a heavy pumpkin of 12 inches or more to hold the weight. Water only a little. Move the plants to the ground or a pot once the pumpkin begins to soften.
Monogram Initial Cutout
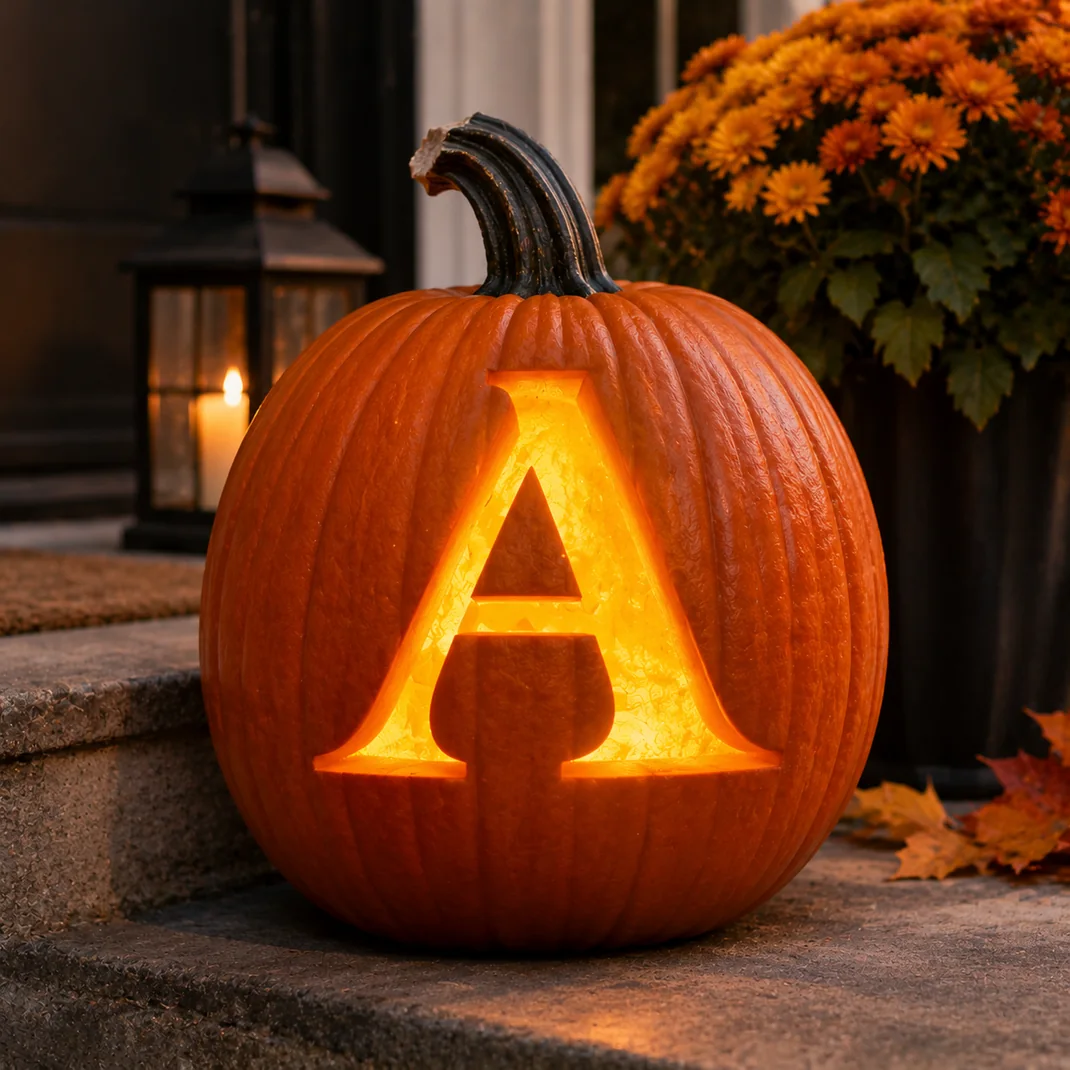
A single letter makes a smart house number or family monogram. Print a bold letter to fit the pumpkin, tape it on and cut along the outline. Choose a thick typeface so the strokes stay strong. Letters like O or A have small islands that can fall out, so leave bridges or use a letter without them, such as L or M. Place the pumpkin by the front door where visitors will see it. The cleanest results come from sharp tools and slow cuts, so take breaks when the saw feels hard to control.
Dragon Scale Pattern

Scales are made by scraping small curves into the skin in rows. Use a loop tool to scrape each scale to a depth of about 1/8 inch, starting at the bottom and working upward so each row overlaps the last. Cut one eye as an open shape near the top. A round pumpkin of 10 to 12 inches takes about three hours. The scraped surface glows from within and also catches the light from outside. Rub petroleum jelly on the scraped areas to keep them from drying.
Pumpkin Wearing Glasses
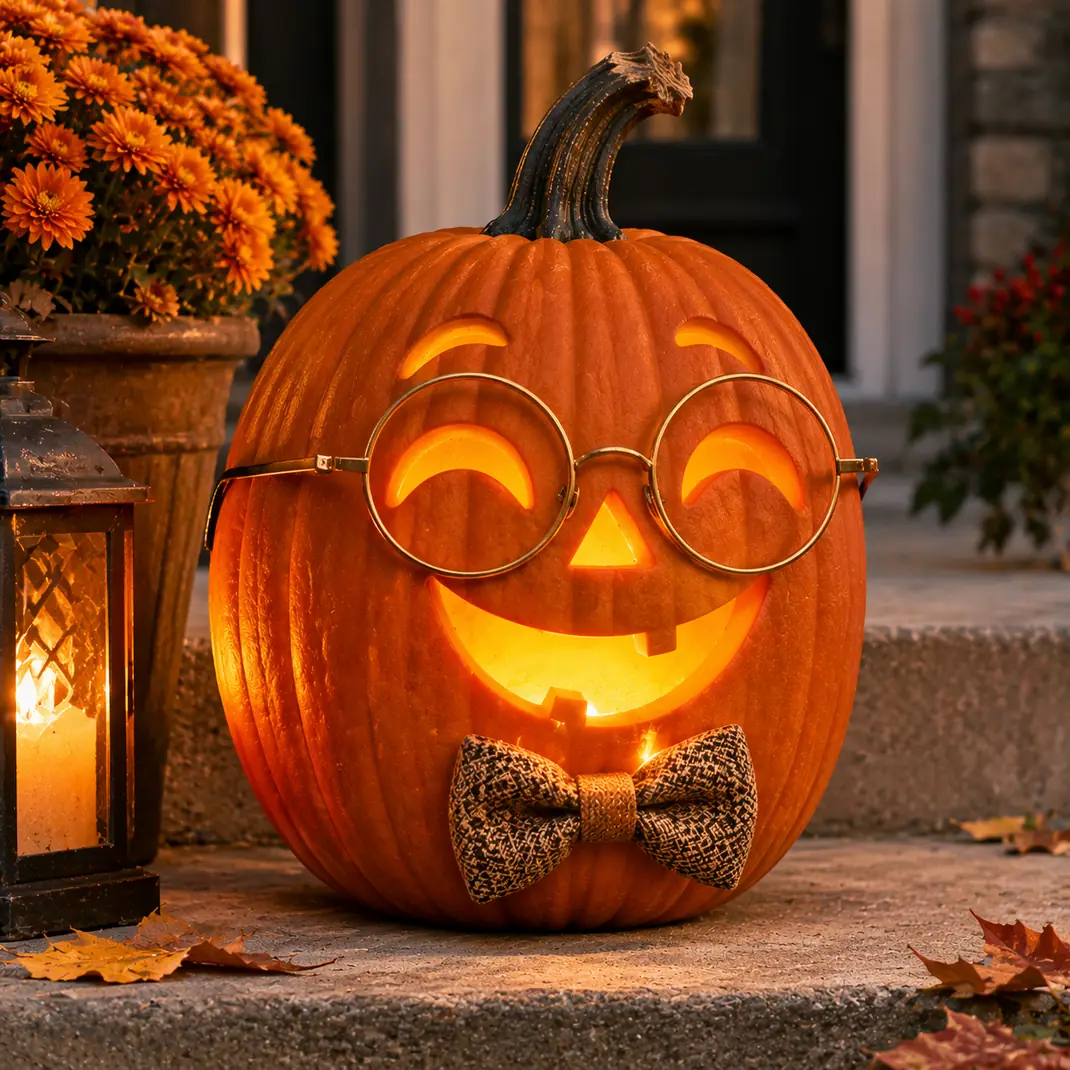
Glasses give a pumpkin personality without more cutting. Carve a friendly face, then bend a piece of craft wire into two circles of 2 inches joined by a bridge. Push the ends gently into the pumpkin at the temples. Add a small fabric bow tie below the mouth. Use a battery light to avoid heat near the fabric. The wire is bendable by hand, so no tools are needed. Wire ends can scratch, so fold them over or cover them with tape. Place the pumpkin indoors on a bookshelf.
Drilled Mandala
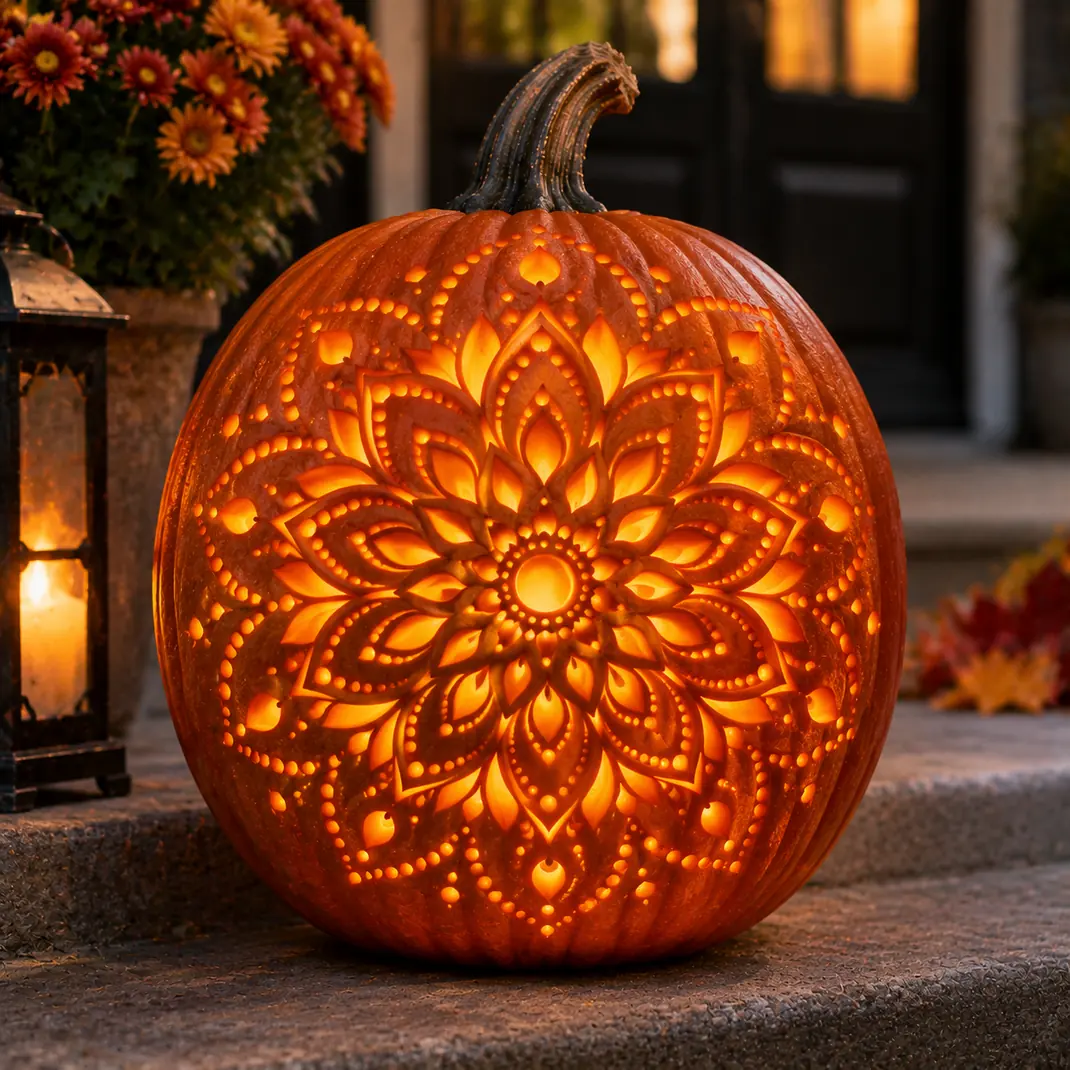
A mandala looks intricate but only uses holes in a repeating pattern. Mark a center and draw six or eight circles around it with a dry erase pen, then drill holes in rings of increasing size outward. Use bits from 1/4 to 1/2 inch. A pattern of 150 holes takes about an hour. Work from the center outward so the pattern stays even. A drill leaves clean holes with no shreds, so no sanding is needed. Wear eye protection and keep the pumpkin braced on a damp towel.
Crescent Moon and Bats
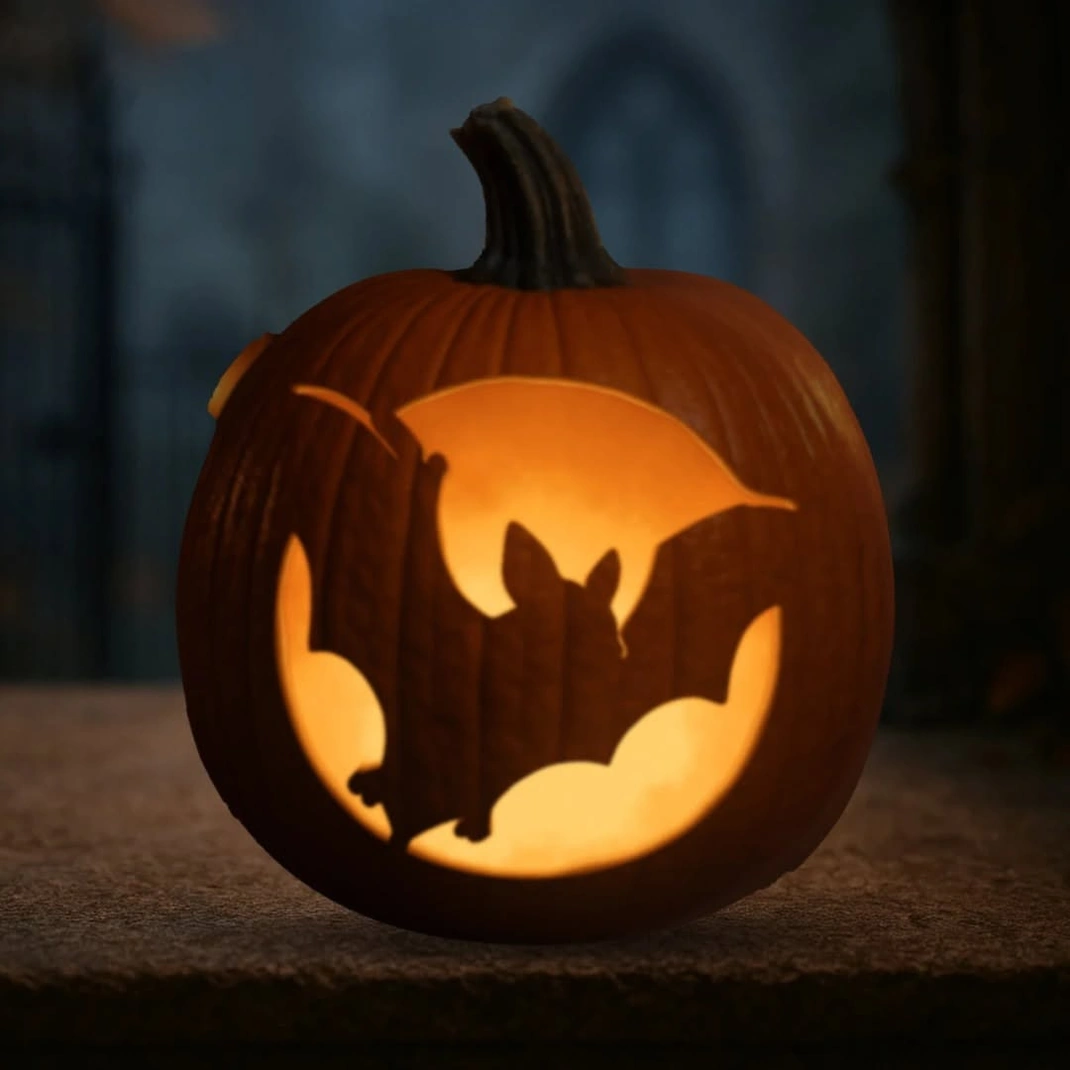
A moon and a flock of bats make a classic spooky scene. Cut the moon about 6 inches tall and cut five or six bats in sizes from 2 to 4 inches around it. Make each bat with simple wings and a small body. Keep bats at least an inch apart so the wall holds. Bats cut well with a small serrated saw and are good practice for beginners. The glow shows each wing shape clearly. Choose a wide pumpkin so the bats have space to spread out around the moon.
Skeleton Rib Cage Etching
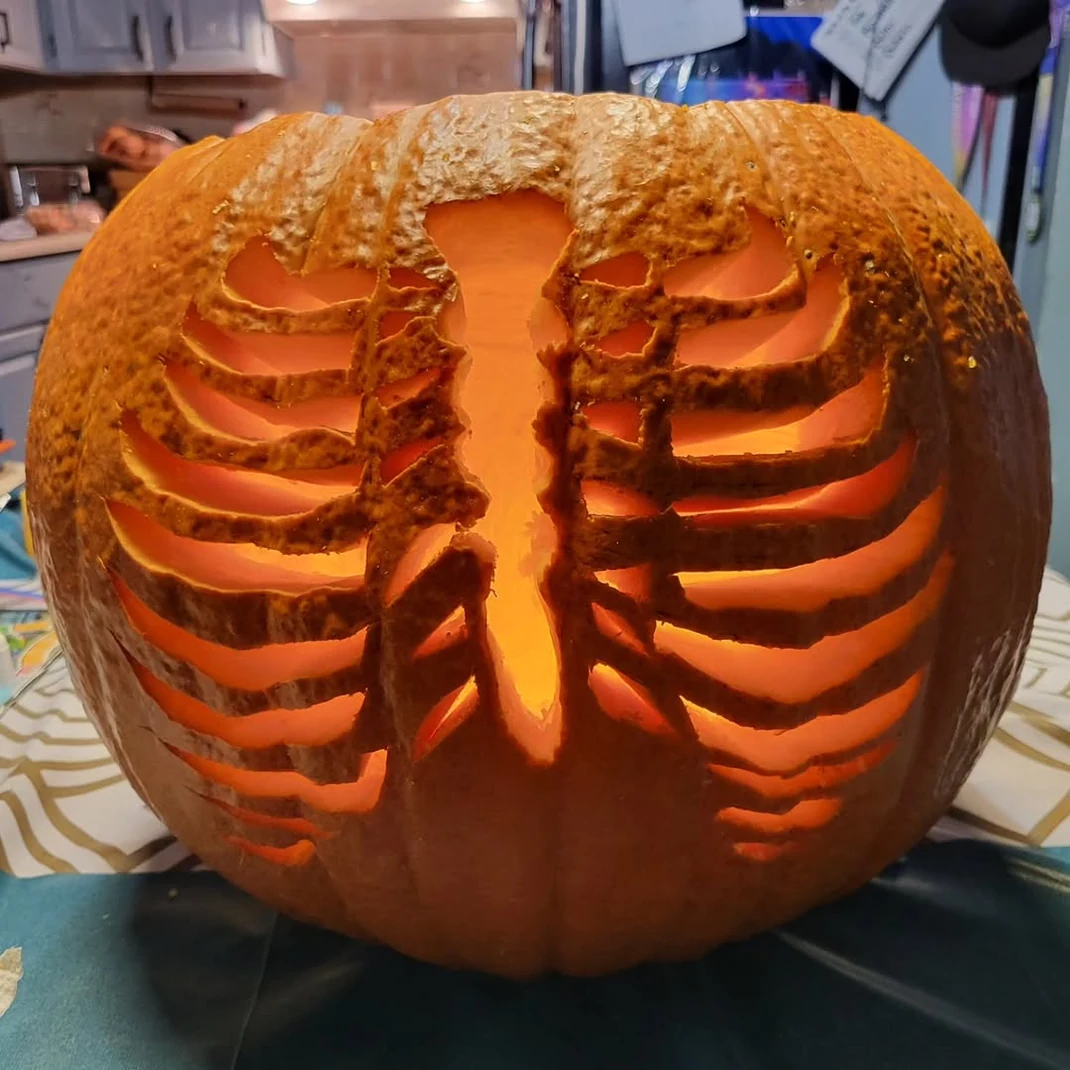
Etching removes only the skin, and thin lines look like bones. Sketch a skull face on the upper half and curved ribs on the lower half. Use a loop tool to scrape along the lines, making the ribs about 1/2 inch wide. The skeleton glows pale yellow against the dark orange skin. A cut free design stays strong and lasts longer than an open one. Use a tall pumpkin of 14 inches. Work in good light and keep a damp cloth nearby to wipe away shavings.
Lace Doily Pattern
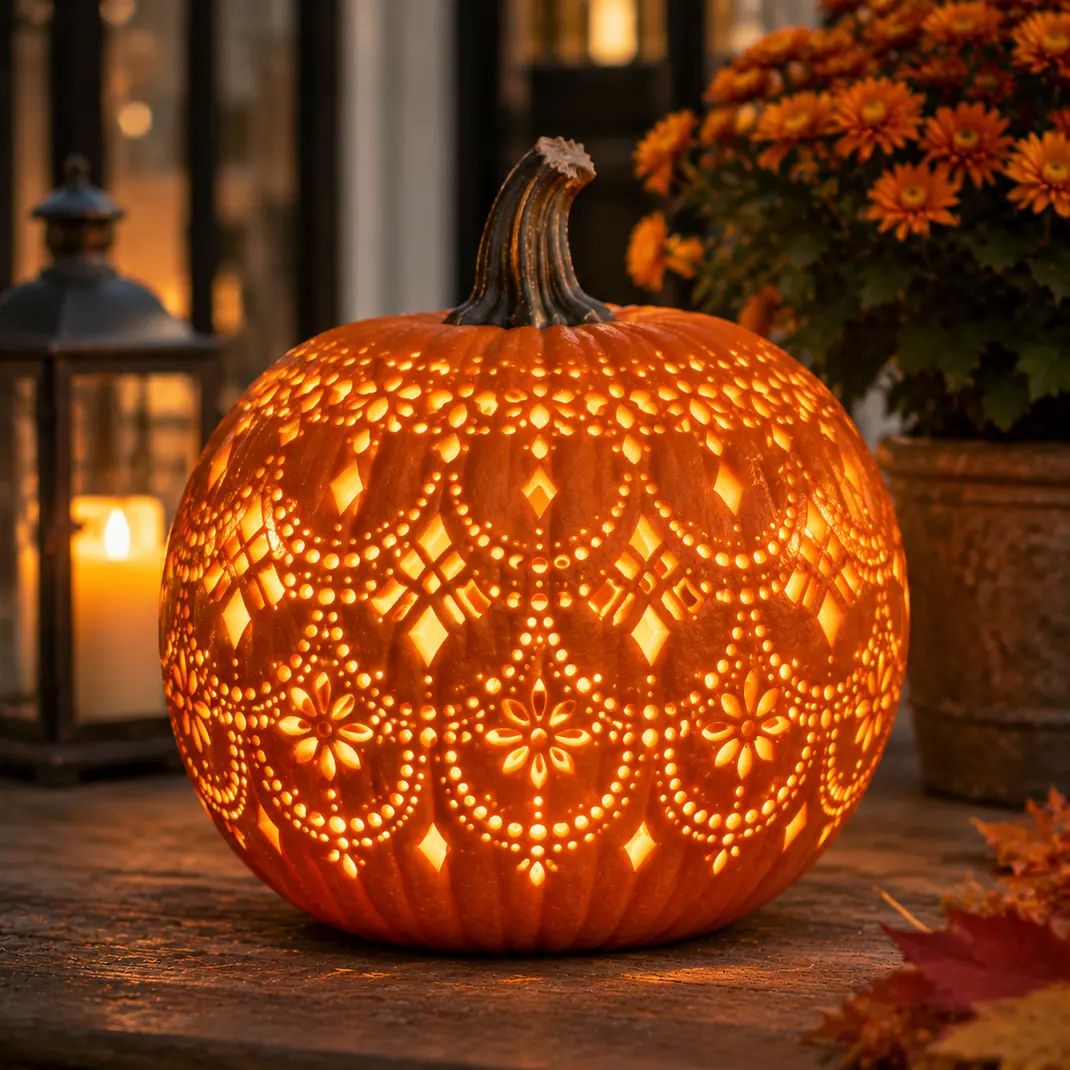
A doily design combines drilled circles and cut diamonds in layered rings. Start with a center circle, then add rings of holes at 1 inch intervals and place small diamonds between them with a craft knife. Keep every cut small so the pumpkin stays solid. Work slowly, because a lacy design needs even spacing. Pale pumpkins of white or cream show the pattern well in daylight. A battery light inside shows it at night. Choose a design of about 8 inches across so it stays crisp.
Friendly White Ghost

White pumpkins offer a pale surface for a gentle ghost. Carve two round eyes of 1.5 inches and an oval mouth of 2 inches and leave the rest uncut. White pumpkins are often harder to cut than orange, so use a sturdy saw and take your time. Place the pumpkin on a white plate with a few pale leaves. A friendly face suits children and works well on a mantel or table. Use a battery light and keep the pumpkin away from heat sources and direct sun, which hastens rot.
Gap Tooth Monster

A monster face is the easiest way to add humor. Carve one large eye of 3 inches and a wide mouth with uneven teeth, leaving one or two gaps for charm. Make the teeth at least an inch wide so they do not break. The cutouts are big enough for a beginner and children can help draw the face. Choose a pumpkin that is tall and wide for plenty of room. Keep the tooth shapes simple, and leave a few bridges in the mouth shape to hold it together.
Daisy Cutout Garden
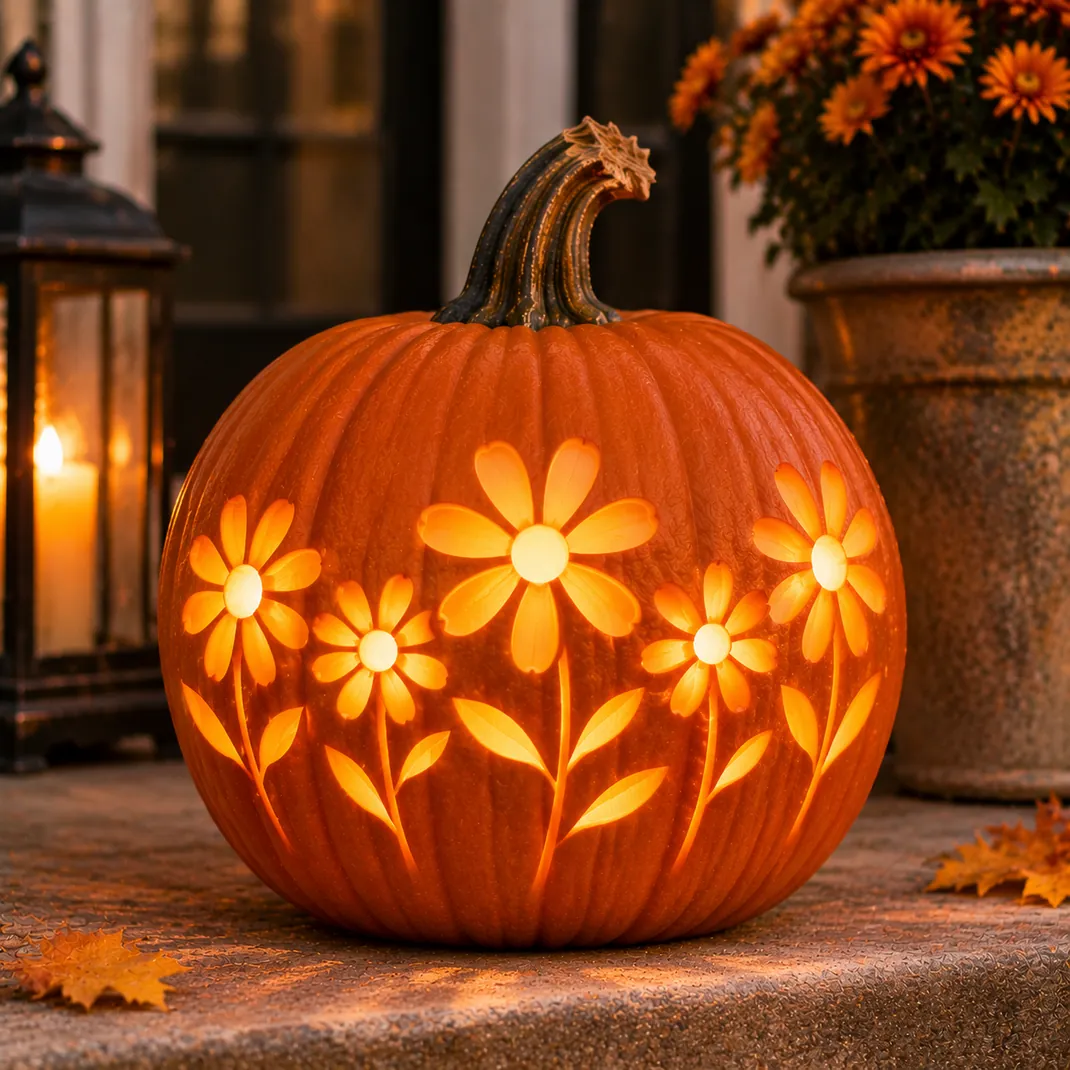
Daisies are an easy flower to cut because the petals are plain ovals. Draw a row of five daisies with centers about 1 inch wide and petals of 1.5 inches. Cut the centers as holes and shave the petals so they glow softly. Add stems with leaves along the bottom. This soft design suits fall as well as Halloween. Use a medium pumpkin of 10 inches. Smaller petals break easily, so keep each at least 1/2 inch wide. Light it with a warm battery light.
Witch Hat Cutout
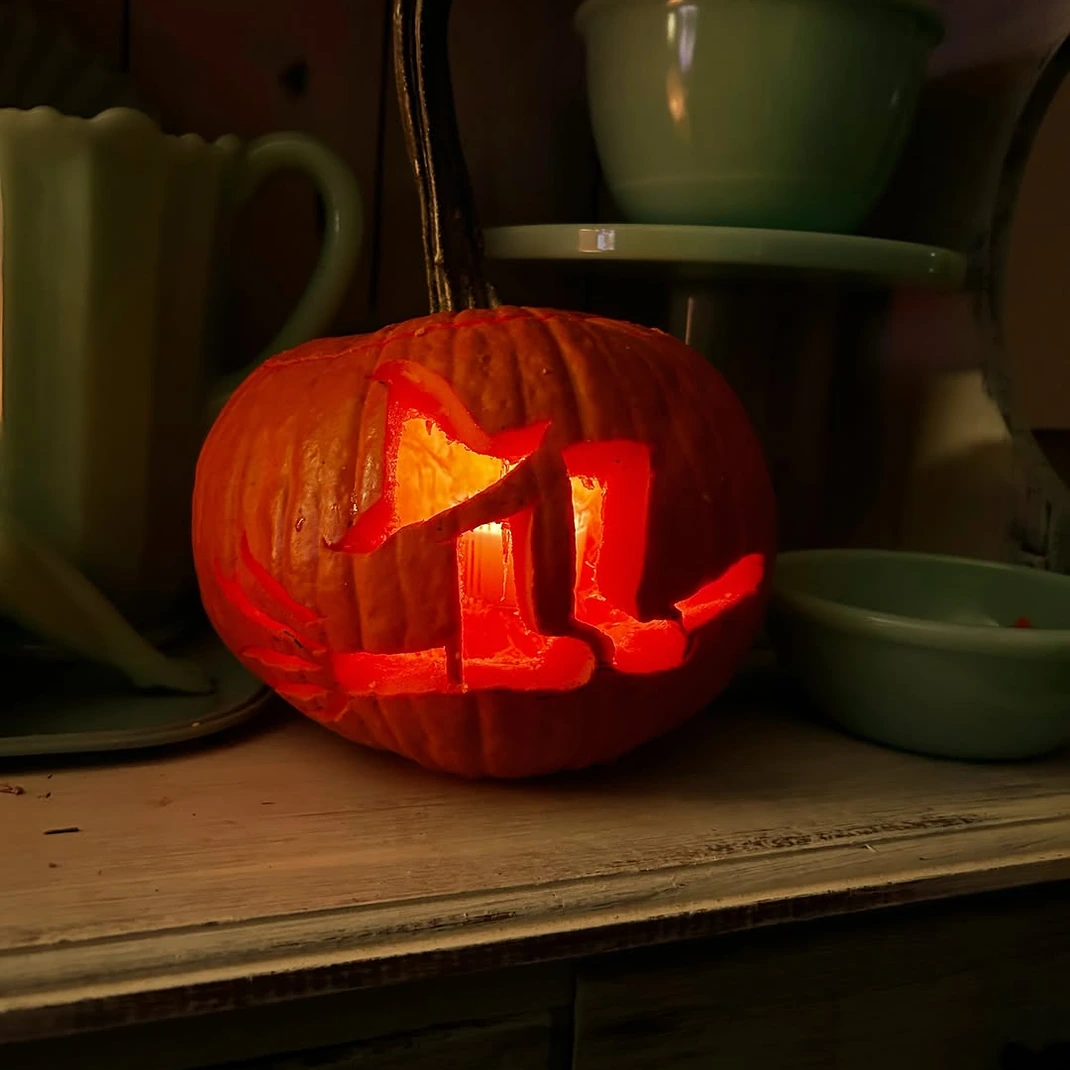
A witch hat is a bold shape that reads at once. Cut the hat in two parts, a tall triangle with a curled tip and a wide brim, and leave the band uncut as a dark strip with a buckle. Make the tip about 2 inches wide at its narrowest so it holds. Use a tall pumpkin of 14 inches or more. Sketch the hat on paper first and trace it with a dry erase marker. Cut the larger area first and the details last, so the pumpkin stays firm.
Pie Slice Wedge Pumpkin
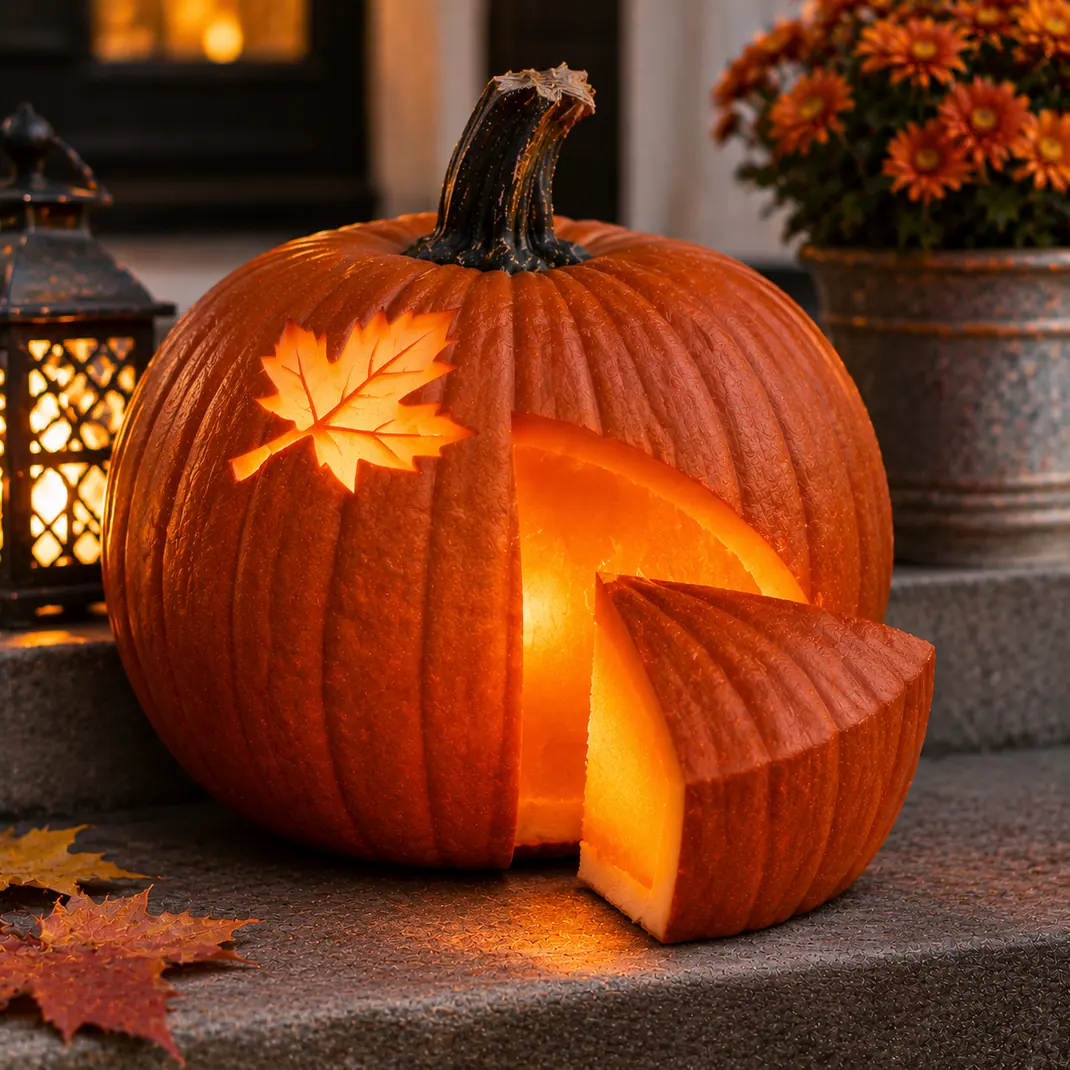
A wedge cut from the front looks like a slice of pie and takes little skill. Mark a triangle that spans about a quarter of the front, cut along the lines with a saw and lift out the piece. Trim the inside edge and shave the cut surface for a clean look. The opening shows the light and lets air in, which dries the inside faster, so use a pumpkin you plan to display for only a few days. Add a small shaved leaf nearby for charm.
Crying Pumpkin with Teardrops
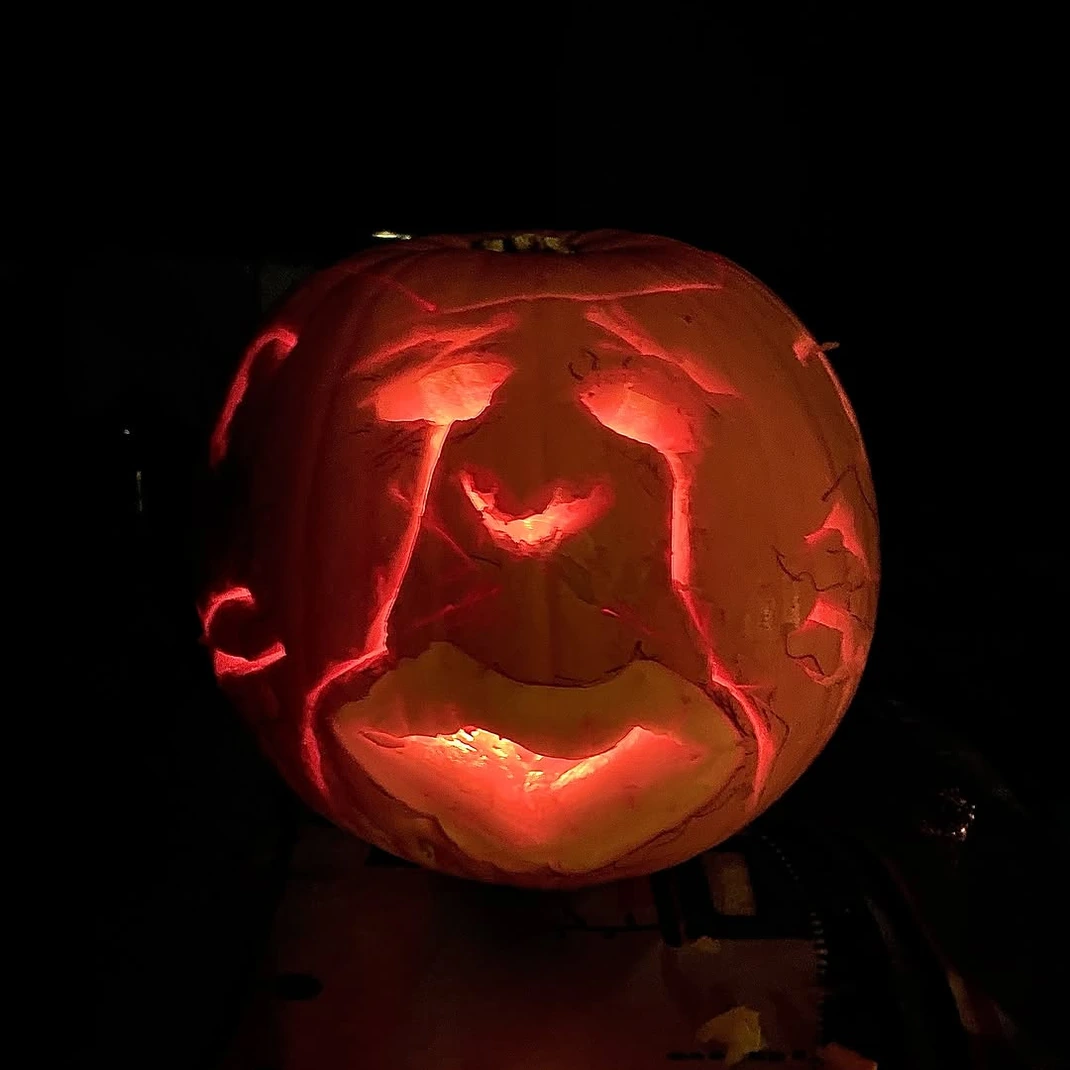
A sad face with tears adds humor. Carve two droopy eyes of 2 inches and a downturned mouth, then cut three teardrops of about 1.5 inches long down each cheek, spaced 2 inches apart. Each tear is a small opening, which keeps the wall sturdy. Drill tiny holes beneath the tears as drips of water. Choose a round pumpkin of 10 to 12 inches. The design suits children because the shapes are simple to draw and cut, and adults handle the saw. Place a battery light inside.
Ocean Wave Pattern

Wave lines are a calm alternative to faces. Draw rows of curling waves about 2 inches high across the pumpkin, then scrape along each line with a loop tool to a depth of 1/8 inch. Cut a small boat or sun in the center if you want a focal point. The scraped lines glow softly, giving a gentle seaside mood. A smooth pumpkin of 10 inches works best. Keep scraping consistent for even brightness, and wipe away shavings with a damp cloth as you go.
Pumpkin Carving Questions
When should I carve a pumpkin?
Carve two to four days before you want to display it. A carved pumpkin usually lasts three to five days in cool weather, and warm days speed up rot. Keep it in the shade and bring it inside on hot afternoons.
Is it safe to put a candle inside?
A battery operated light suits homes with children, pets and decorations. Real candles can scorch the lid and spread fire to nearby materials, so skip them if the pumpkin sits near anything flammable.
Which tools work best?
Small pumpkin saws, a scoop, a loop tool and a pin tool make carving easier than a kitchen knife. Adults should do the cutting, and children can scoop seeds or draw the design with a marker.
How can I make a carved pumpkin last longer?
Rub the cut edges with petroleum jelly and keep the pumpkin cool and out of direct sun. A quick dip in water mixed with a little bleach can slow mold, but keep it away from pets and food. Throw it out when it becomes soft or smelly.