Hello Kitty Halloween decor works best when the room still feels restful, useful, and personal—not like a character shop moved into the bedroom. The sweetest schemes borrow a few recognizable cues, such as a sculptural bow, rounded silhouettes, blush pink, pumpkin orange, and crisp black, then give each one enough breathing room to be noticed. These 16 ideas focus on a different part of the room, so you can choose one memorable detail or combine two or three without repeating the same styling move.
1. Crown the Bed with a Bow-Tufted Headboard
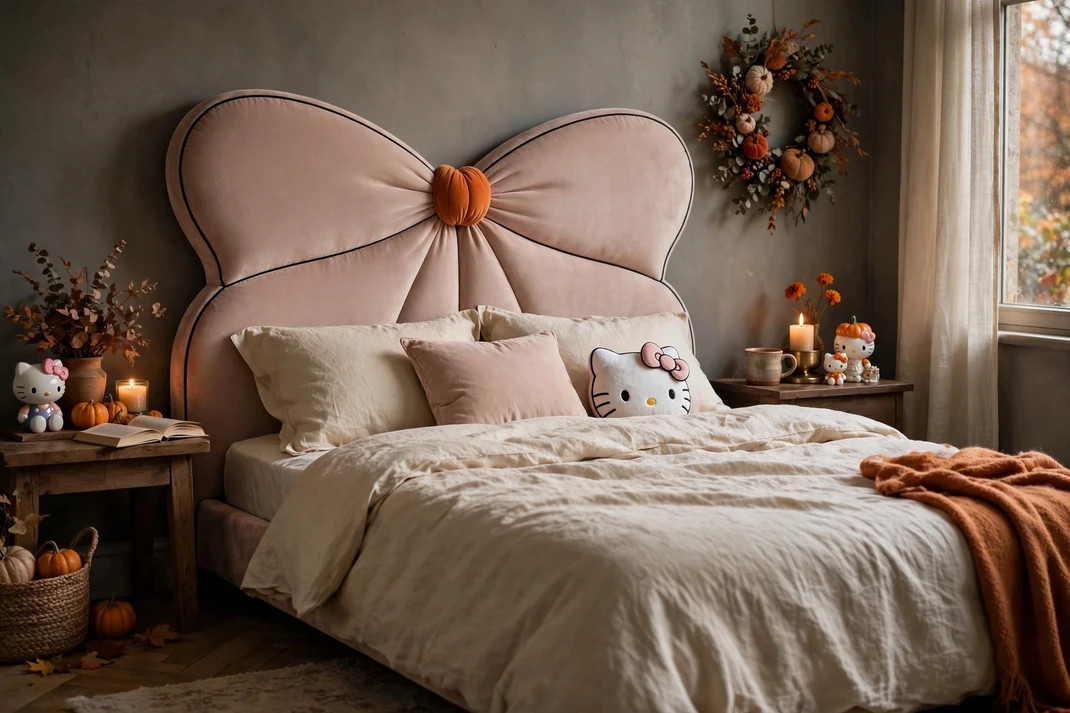
An oversized bow-shaped headboard gives the room an unmistakably Hello Kitty-inspired focal point without covering every surface in character prints. Blush velvet keeps the silhouette sweet, while slim black piping and a pumpkin-orange center knot bring in a polished Halloween contrast. The result feels collectible and special, yet calm enough to leave in place after October.
The Setup:Choose a low-profile upholstered headboard with a softly curved top, or have a simple plywood form padded and professionally upholstered in blush performance velvet. Outline the bow with narrow black welt cord, use burnt orange only on the center knot, and dress the bed in plain ivory cotton so the shape remains readable. Keep the headboard 6 to 10 inches wider than the mattress, and repeat the orange only once in a folded throw at the foot.
Why It Photographs Well:The centered bow creates an immediate visual anchor, while the pale bedding provides clean negative space around its outline. Velvet catches window light differently across the loops and knot, giving the headboard depth in both full-room photographs and close detail shots.
Pro Tip:Skip printed character bedding beside a sculptural headboard; it competes with the silhouette. If you want a licensed Hello Kitty detail, use one small character cushion positioned off-center so the styling feels collected rather than packaged.
2. Build a Pumpkin-Plush Window Bench
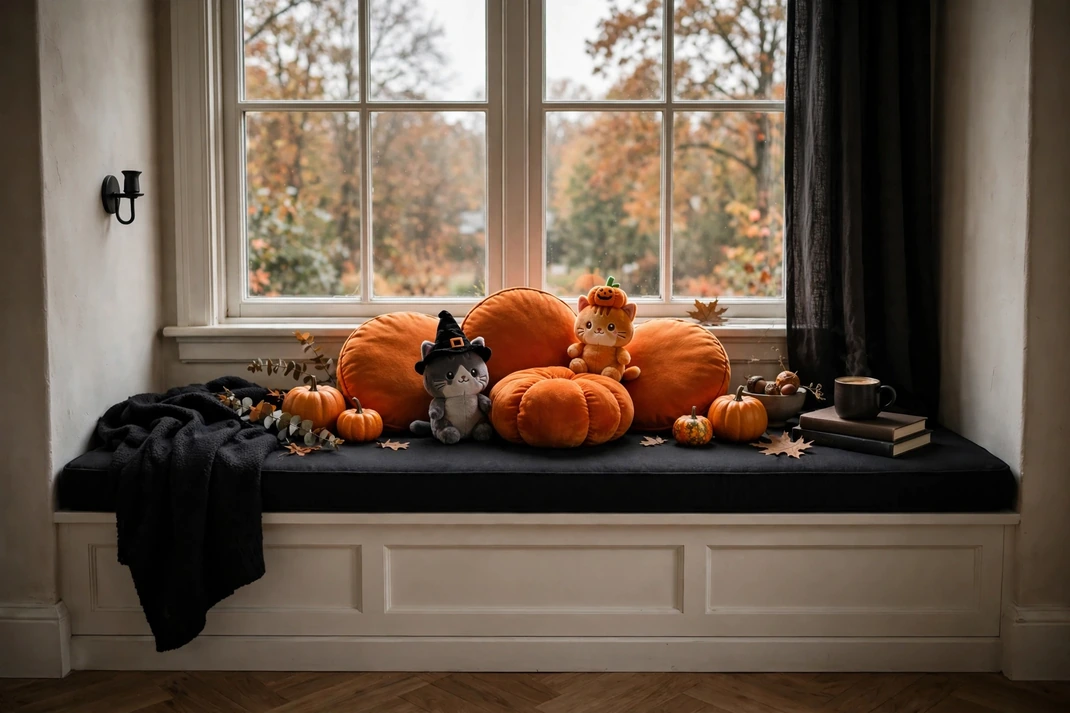
A window bench arranged like a tiny pumpkin patch turns a neglected corner into the room’s cutest seasonal seat. The scene combines round orange cushions, one or two licensed Halloween Hello Kitty plush pieces, and a tailored black seat pad, creating a playful display that still functions for reading. Soft daylight prevents the orange and black palette from feeling heavy.
The Setup:Fit the bench with a solid black or charcoal cushion, then cluster three round pumpkin cushions in varied sizes toward one end rather than lining them up evenly. Nestle one medium Hello Kitty Halloween plush between the pumpkins and leave at least half of the seat clear for use. Add an ivory throw over the opposite corner and keep the window treatment pale and simple.
Why It Photographs Well:The rounded forms create an appealing rise-and-fall composition, and side light reveals the contrast between plush, linen, and smooth cotton. Keeping open space on the bench makes the vignette look editorial instead of crowded with toys.
Pro Tip:Use odd-numbered groupings and vary the cushion heights by at least 3 inches. Place the character plush slightly behind the front pumpkin so it appears naturally tucked into the patch rather than presented like store merchandise.
3. Turn a Slim Rail into a Halloween Pajama Display
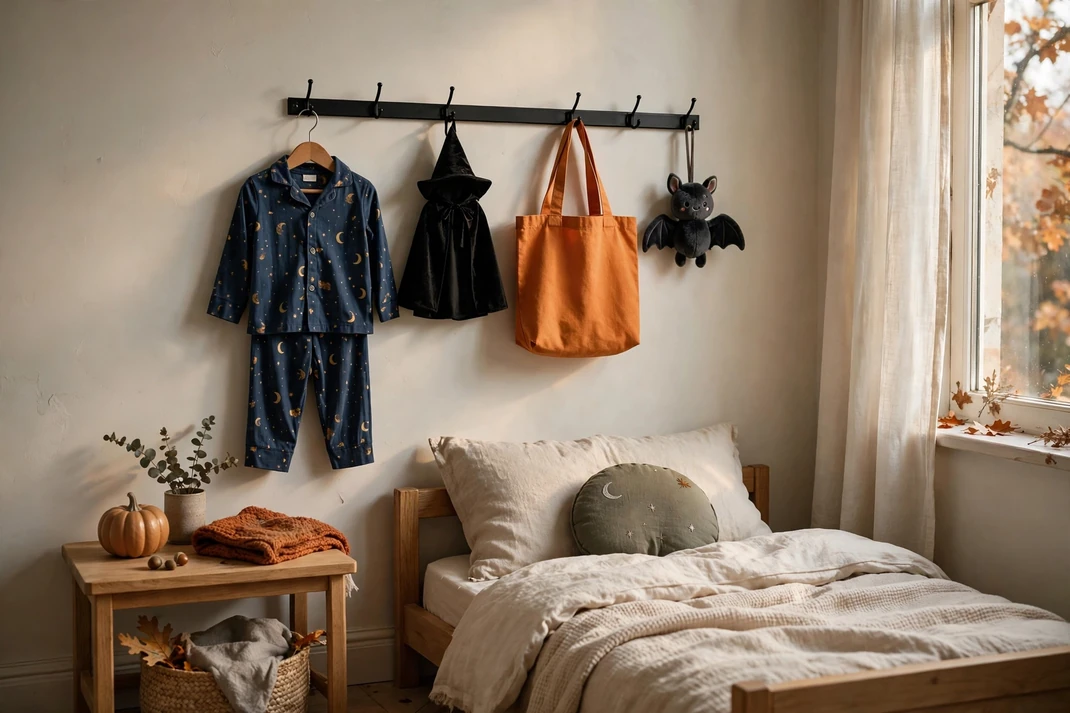
A single wall rail can make seasonal pajamas, a tiny witch cape, and a pumpkin-orange tote part of the decor instead of bedroom clutter. Against a pale wall, the hanging pieces create a boutique-like arrangement with a cozy sleepover mood. This idea is especially useful in children’s rooms and small bedrooms where every decorative feature should earn its space.
The Setup:Mount a short black rail or use a renter-safe over-door bar, then hang no more than four coordinated pieces on matching pale wood hangers: licensed Hello Kitty Halloween pajamas, a black robe, an orange tote, and one soft costume cape. Keep hems staggered, place a lidded basket beneath for slippers, and maintain clear floor space around the display. Use child-safe hardware and keep cords, sharp hooks, and long ties out of reach.
Why It Photographs Well:The vertical arrangement adds movement without filling the whole wall, and the fabric hangs in soft folds that photograph beautifully in angled daylight. Matching hangers and a controlled color palette turn practical clothing into a composed lifestyle scene.
Pro Tip:Steam every piece before styling and remove visible retail tags. Face the most recognizable character detail toward the camera, but let the black robe and orange tote frame it so the display does not become visually flat.
4. Style a Bedside Trick-or-Treat Cart
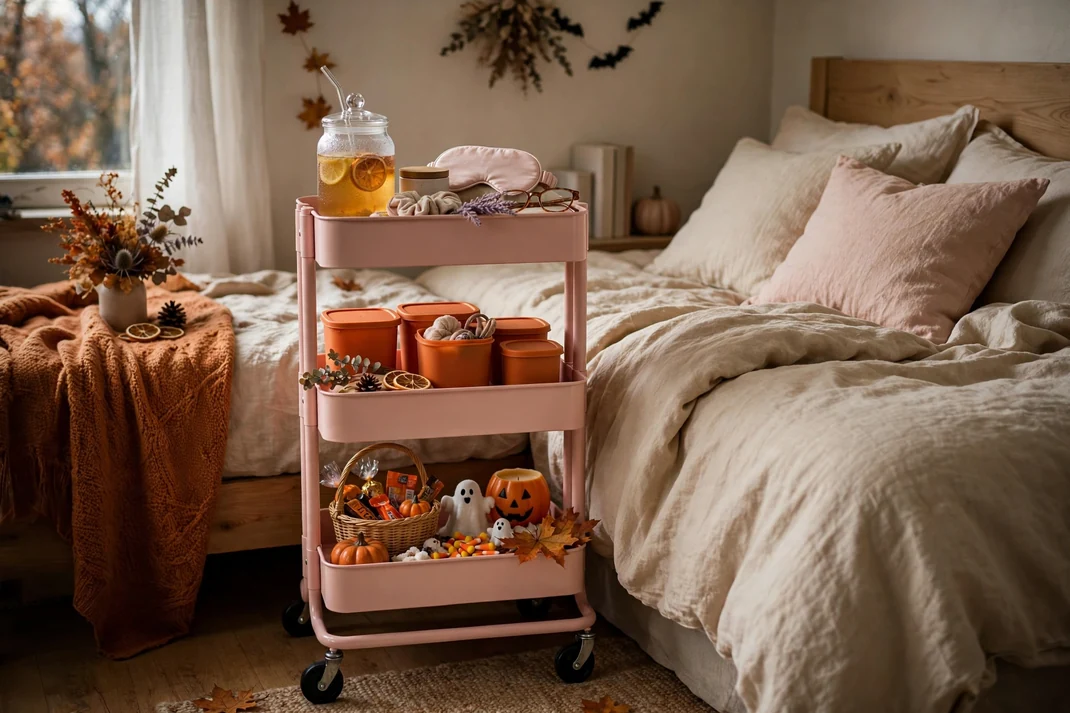
A compact rolling cart beside the bed becomes a cheerful trick-or-treat station with candy-colored storage, a lidded drink, and a few bedtime essentials. Pink shelves soften the Halloween palette, while black wheels and orange containers give the setup a graphic edge. It is playful, mobile, and far more useful than a purely decorative candy display.
The Setup:Choose a narrow three-tier cart in blush or cream and reserve each level for one purpose. Place a licensed Hello Kitty cup and a sealed snack jar on top, bedtime books and a rechargeable lamp in the middle, and folded socks or a small blanket in the bottom basket; use orange and black bins to conceal loose items. Keep actual candy in closed containers and move food out overnight if the room attracts pests.
Why It Photographs Well:The tiered structure creates a naturally balanced vertical composition, while small pops of orange lead the eye from top to bottom. A three-quarter camera angle shows both the character details and the practical organization without making the cart look overfilled.
Pro Tip:Leave roughly one-third of each shelf visible. That breathing room makes inexpensive accessories read as deliberate, and it keeps the top tier safe enough for a lamp or water cup.
5. Organize a Bow-and-Bat Vanity Pegboard
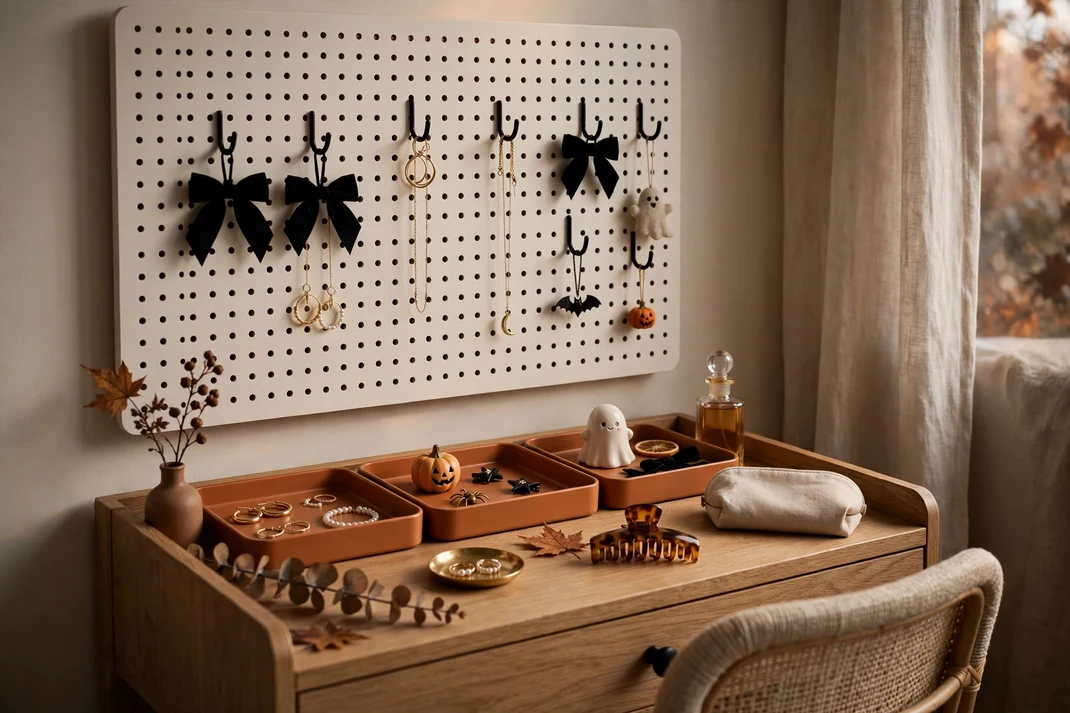
A neat vanity pegboard can hold bows, costume jewelry, and small Halloween accessories like a curated getting-ready station. The strongest version pairs a warm-white board with black hooks, orange trays, and just a few Hello Kitty pieces, keeping the arrangement crisp instead of juvenile. It brings personality to the room while solving the problem of scattered clips and bracelets.
The Setup:Mount a smooth pegboard above a compact vanity and center a small frameless mirror in the lower half. Use black metal hooks for bow clips, two shallow pumpkin-orange cups for brushes, and one narrow shelf for an officially licensed Hello Kitty trinket dish; keep cosmetics in a closed drawer below. Arrange accessories by size and color, and leave a clear zone around the mirror so the station remains practical.
Why It Photographs Well:Tiny accessories provide detail, but the pegboard grid keeps the image orderly and gives the camera a clear rhythm. A side lamp or nearby window produces small highlights on jewelry and glossy trays without creating glare across the mirror.
Pro Tip:Repeat each accent color at least twice but never in adjacent spots. Distributing black and orange diagonally across the board creates visual balance and prevents one corner from looking heavier than the rest.
6. Sew a Treat-Bag Patchwork Bed Runner
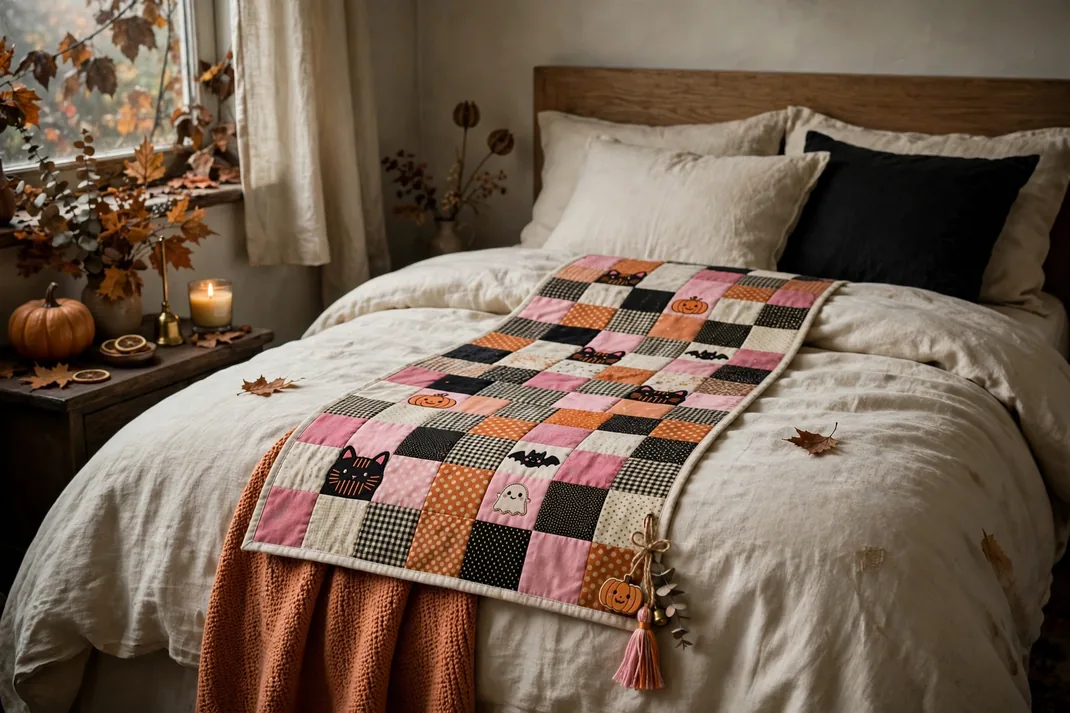
A narrow patchwork runner made from pink, orange, black, and cream fabrics gives the bed the handmade charm of a treasured Halloween keepsake. Small licensed Hello Kitty fabric panels can be mixed with solids, dots, and tiny checks, so the character motif appears in moments rather than taking over the entire bed. The runner adds color exactly where it is needed and stores easily when the season ends.
The Setup:Create or commission a washable runner roughly one-third the length of the bed, using medium-size blocks and a thin cotton batting so it lies flat. Limit character fabric to about one block in four, balance it with solid pumpkin orange and black gingham, and back the piece in plain blush cotton. Fold it across the lower third of an ivory or pale-pink duvet, with one straight edge aligned to the mattress.
Why It Photographs Well:Patchwork supplies rich close-up texture, while the narrow proportion keeps the wider bed photograph clean. Repeated squares guide the eye horizontally and allow the character prints to register as charming details rather than visual noise.
Pro Tip:Before cutting licensed fabric, isolate complete motifs so faces, bows, and outlines do not disappear into seams. Use a consistent binding color—black is the sharpest choice—to make mixed fabrics feel like one designed piece.
7. Stack a Tower of Bow-Handled Hatboxes
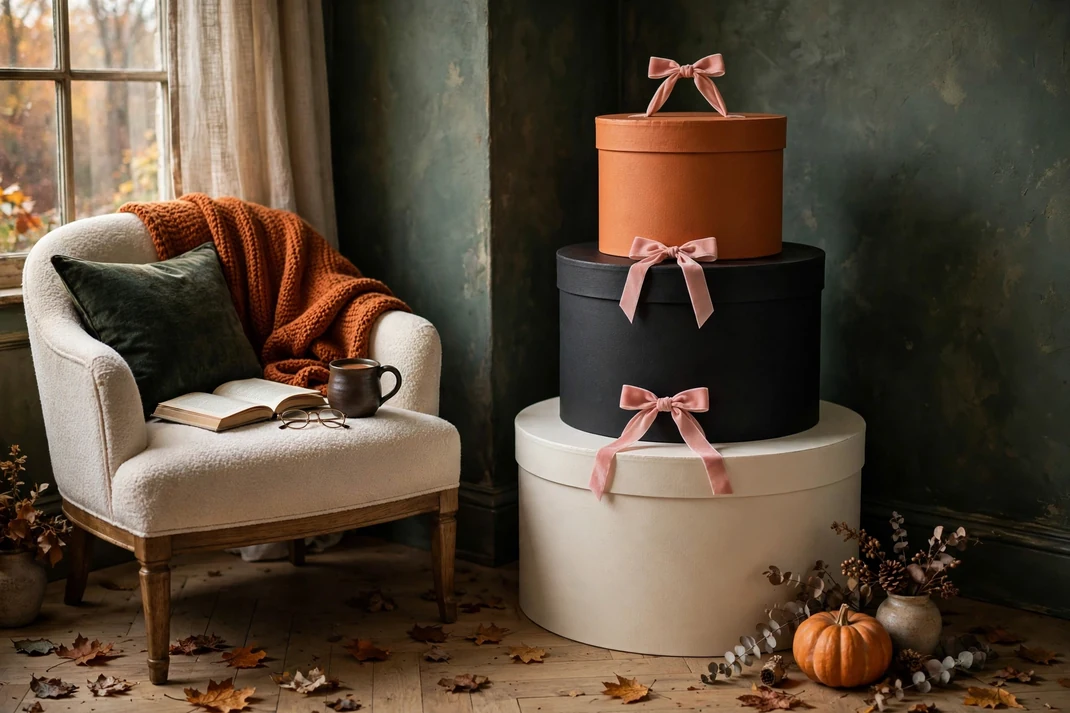
Three round hatboxes stacked beside a reading chair create storage that feels like a whimsical gift tower. Matte cream, black, and pumpkin-orange boxes tied with pink bow handles suggest Hello Kitty’s signature sweetness without relying on another printed surface. The sculptural stack adds height to an empty corner and hides small seasonal items beautifully.
The Setup:Select three sturdy nesting hatboxes with diameters that step down by 2 to 4 inches, and arrange the darkest box at the bottom for visual weight. Replace standard pulls with wide grosgrain ribbon loops in blush, then add one small licensed character charm to the top handle only. Keep the stack below the chair back, and store lightweight items such as hair accessories, spare pillow covers, or costume pieces inside.
Why It Photographs Well:The circular boxes contrast with the room’s rectangular furniture and create a strong vertical silhouette. Ribbon loops cast delicate shadows, while the alternating neutral and orange surfaces remain legible even in a tightly cropped photograph.
Pro Tip:Weight the lowest box with a folded blanket rather than heavy loose objects so the stack stays stable. Rotate the seams and labels toward the wall before photographing; the clean fronts will look custom-made.
8. Anchor the Room with a Scalloped Bow Rug
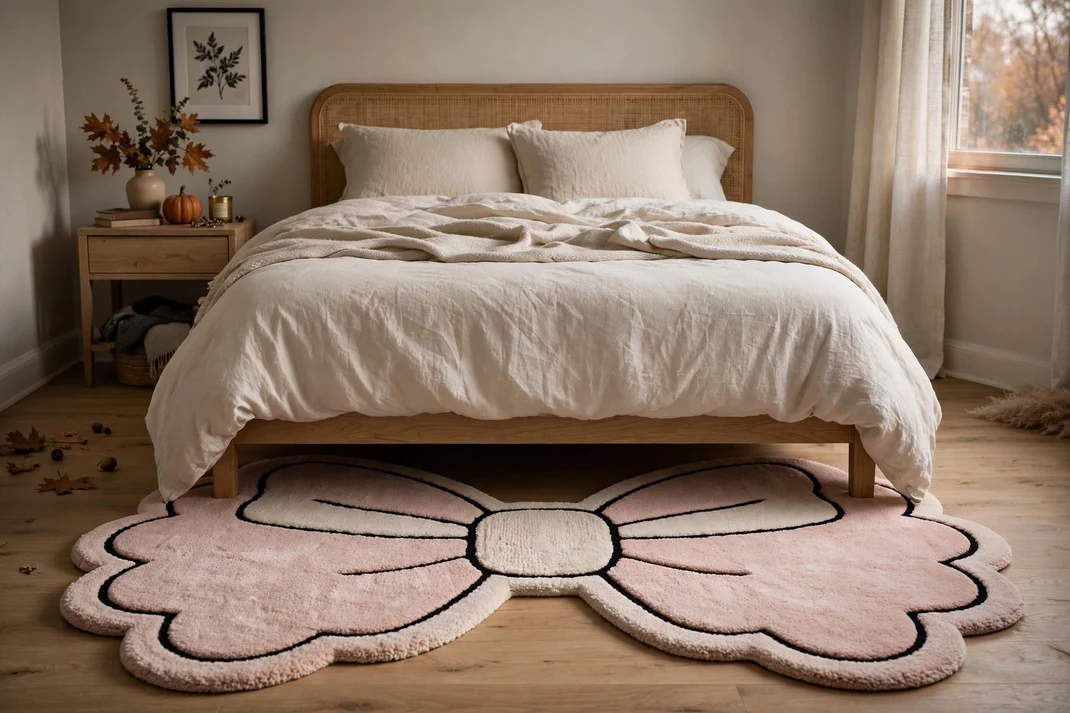
A scalloped rug shaped like an abstract bow brings kawaii character to the floor while leaving the walls and bedding quiet. Blush loops, a cream center, and a thin black outline create enough definition for Halloween, while the soft pile keeps the room cozy. It is a smart choice for renters who want one high-impact piece with no paint or mounting required.
The Setup:Place the rug across the lower half of the bed so the bow loops extend evenly on both sides, or center a smaller version in front of a dresser. Choose a low-to-medium pile with a nonslip backing, keeping the palette to blush, cream, and a narrow black edge; add a removable pumpkin-orange ribbon band around the center only if the room needs more seasonal color. Leave 8 to 12 inches of visible floor around the shape.Why It Photographs Well:The recognizable silhouette reads instantly from a doorway or elevated angle, and the dark outline separates it cleanly from pale flooring. A neatly made solid-color bed allows the rug to become the photograph’s surprise focal point.
Pro Tip:Trace the rug’s dimensions on the floor with painter’s tape before buying. Bow shapes are visually wider than standard rectangles, so this quick test prevents the loops from colliding with nightstands or circulation paths.
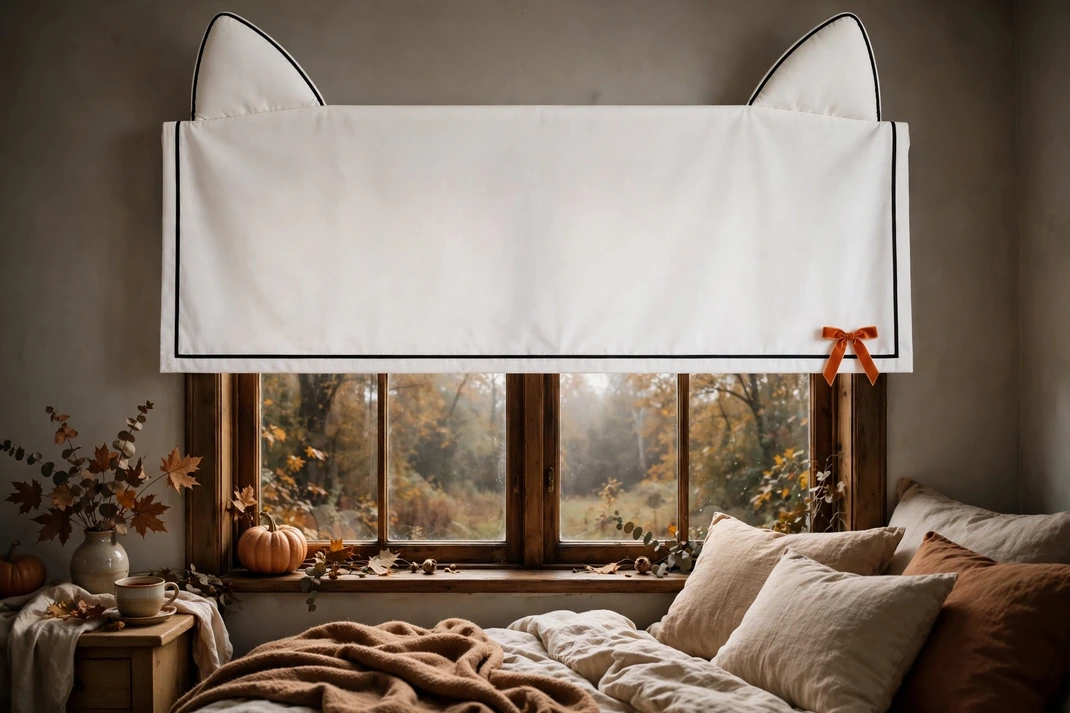
9. Frame the Window with Cat-Ear Corners
A tailored white valance with two subtle cat-ear corners turns the window into a playful architectural feature. Black edge binding sharpens the outline, while a tiny orange bow at one corner introduces Halloween color with restraint. The reference feels unmistakably cute but avoids the busy look of novelty curtains.
The Setup:Have a flat valance made to the exact window width with two padded triangular corners rising 5 to 7 inches above the main panel. Finish the perimeter in slim black tape, attach one removable pumpkin-orange bow near the left ear, and hang plain white curtains below on a concealed track. Keep the fabric opaque enough to hold its shape and use a separate blind for privacy and light control.
Why It Photographs Well:Backlighting turns the ear silhouette into a crisp graphic line, while the white fabric reflects soft daylight into the room. The off-center bow gives the camera a small point of color without interrupting the symmetry of the window.
Pro Tip:Make the ears shallow rather than tall; exaggerated triangles can look costume-like. If the room has low ceilings, mount the valance 2 to 3 inches above the window frame to visually lengthen the wall.
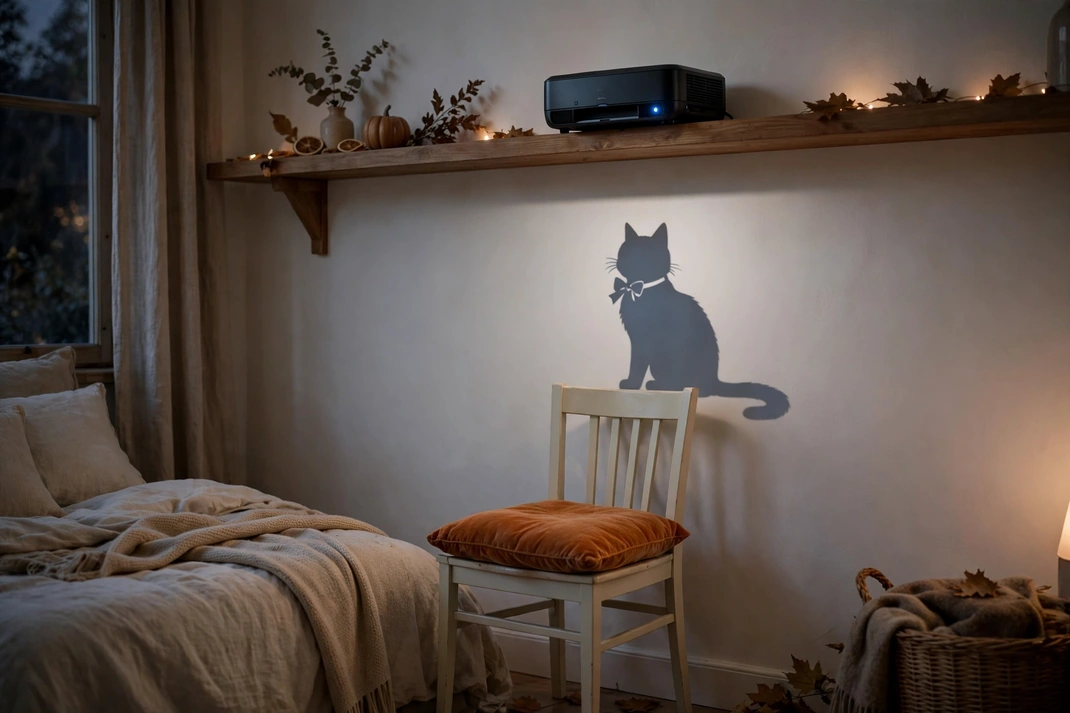
10. Light a Ghost-Kitty Shadow Corner
A rechargeable projector lamp can cast one gentle cat-and-bow silhouette onto a blank wall, creating Halloween atmosphere without permanent artwork. The room stays soft and sleep-friendly because the effect appears only after dusk. Paired with a pale chair and an orange cushion, the glowing shadow becomes a tiny evening scene rather than a harsh party light.
The Setup:Position a low-wattage, cool-running LED projector on a high stable shelf aimed at an uncluttered side wall, and choose a simple licensed or personal-use-safe slide rather than a busy moving pattern. Set the light to warm white, place a cream boucle chair beneath the projection, and add one burnt-orange cushion for color. Conceal the charging cable and keep the beam away from sleepers’ eyes.
Why It Photographs Well:The soft-edged silhouette introduces depth and a sense of magic, especially when photographed during blue hour with a little ambient window light remaining. A sparse wall lets the shape stay recognizable and prevents the image from becoming muddy.
Pro Tip:Move the projector closer to the wall for a sharper, smaller image and farther away for a dreamier edge. Test exposure on the wall before styling the chair; blown highlights will erase the bow and whisker details.
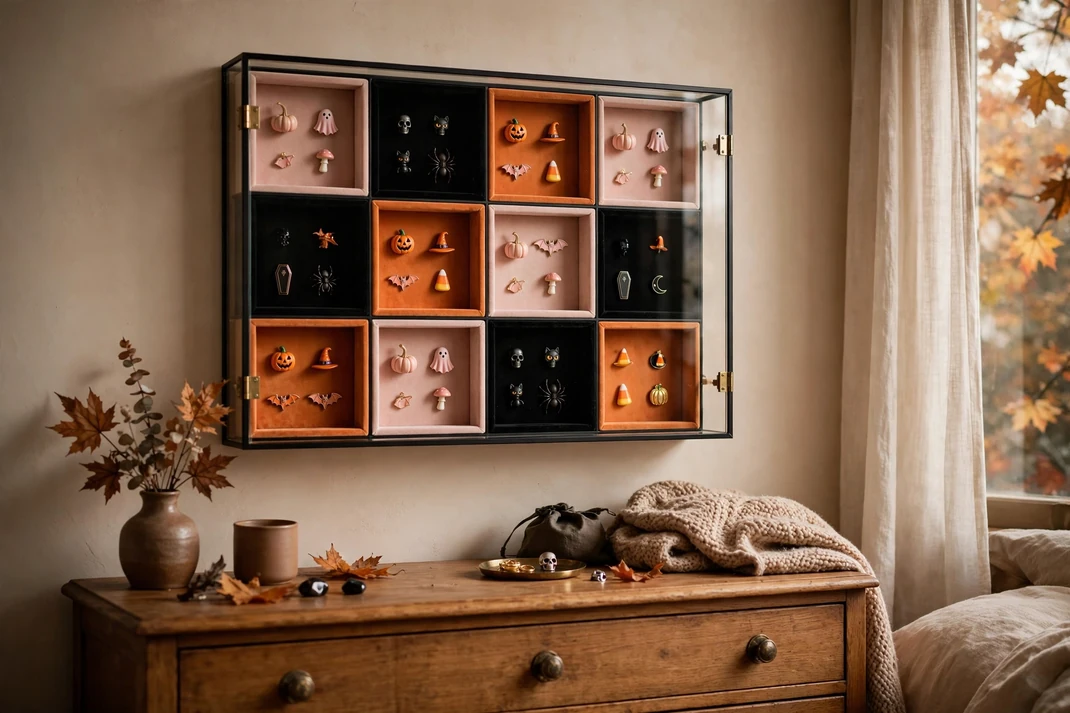
11. Create a Collectors’ Cubby for Halloween Charms
A shallow wall cubby gives tiny Hello Kitty Halloween charms, figurines, and pins the presence of a miniature gallery. Warm-white compartments lined in alternating blush, black, and orange make each piece feel intentional rather than lost in a crowded shelf. The display is compact, dust-conscious, and ideal for a genuine collector’s room.
The Setup:Use a glass-fronted case with 9 to 12 small compartments and mount it at adult eye level or securely above a dresser. Line only the back panels with removable colored card, place one collectible per cubby, and leave at least two compartments empty to create breathing room. Use museum putty under figures, keep original packaging stored elsewhere, and choose officially licensed pieces when purchasing new items.
Why It Photographs Well:The grid provides instant structure, while the alternating backdrops separate pale figures from pale shelves. Shooting straight on keeps the cubbies square, and the glass door produces subtle highlights that reinforce the treasured-object mood.
Pro Tip:Arrange the smallest, lightest pieces near the upper corners and the visually heaviest pieces around the lower center. This creates a stable triangular composition even when the collection includes mixed shapes.
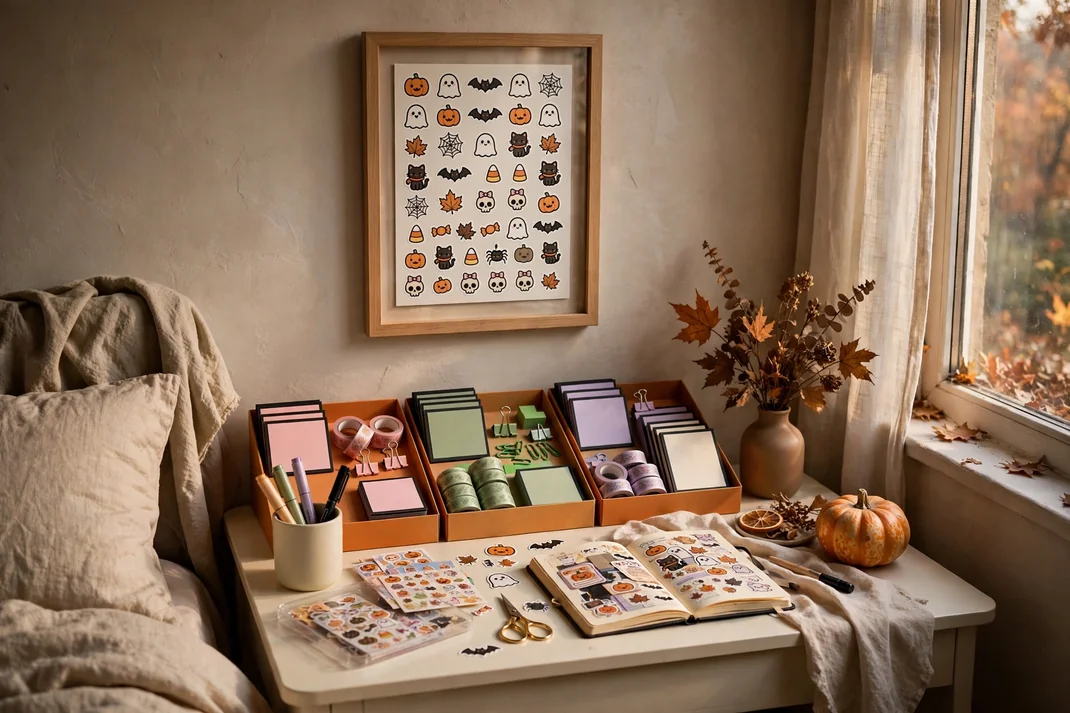
12. Turn the Desk into a Kawaii Sticker Atelier
A compact desk can become a polished sticker-and-journaling atelier with framed character sheets, orange paper trays, and black-edged stationery. The look celebrates Hello Kitty through creative materials rather than another bedding set, giving the bedroom a personal, actively used focal point. Neat zones keep the colorful supplies from overwhelming the room.
The Setup:Center a cream desk under one framed sheet of licensed Halloween stickers or removable decals, leaving the sheet intact as display art if it is collectible. Add two stackable orange trays for paper, a black pencil cup, a blush desk mat, and one clear lidded box for loose stickers; keep the desktop at least 50 percent clear. Store scissors and craft tools in a drawer, especially in a child’s room.
Why It Photographs Well:Flat paper, glossy stickers, and matte desk accessories create layered detail without adding bulky decor. An overhead or three-quarter photograph captures the organized color blocks, while the framed sheet connects the work surface to the wall.
Pro Tip:Choose one sticker scale for the framed display and a different scale for the supplies in use. This prevents the small motifs from merging into visual static and gives the camera a clear hierarchy.
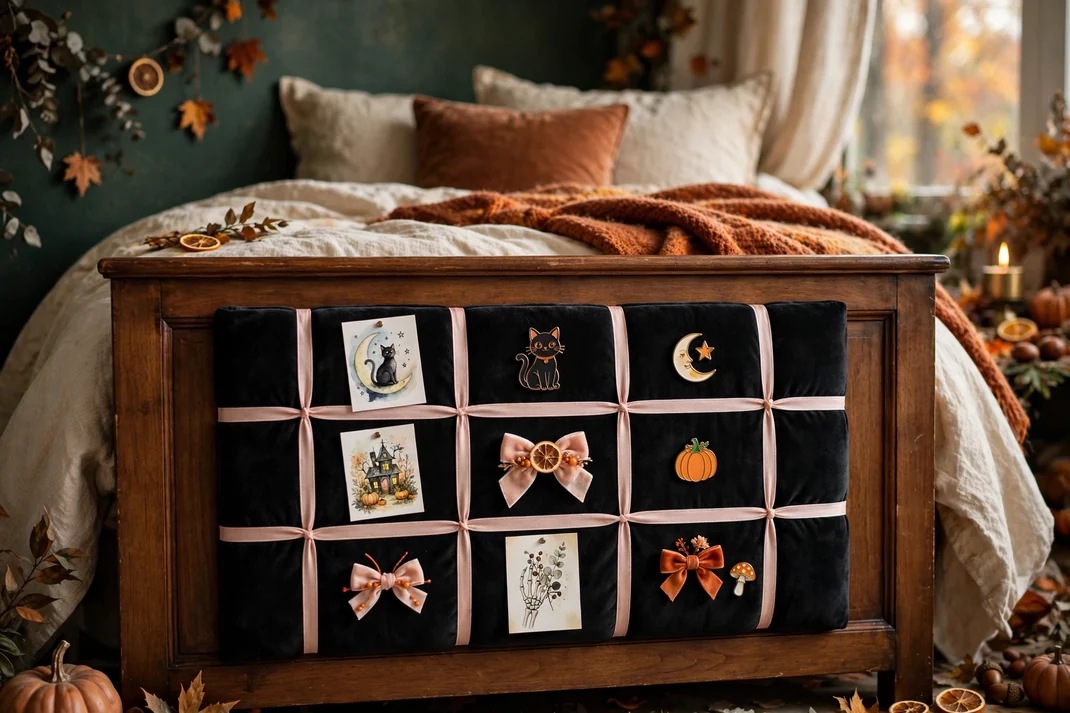
13. Dress the Footboard with a Ribbon Display Grid
A padded ribbon grid at the foot of the bed offers a charming place to display Halloween cards, enamel pins, and mini bows. Black velvet beneath crisscrossed blush ribbon creates a jewel-box effect, while small orange details keep the panel seasonal. It functions like a soft inspiration board without taking over the headboard wall.
The Setup:Attach a lightweight padded panel to the outer face of a solid footboard using removable furniture-safe fasteners, ensuring it does not interfere with bedding or movement. Wrap the panel in black velvet, form a wide diamond grid with blush grosgrain ribbon, and tuck in five to seven flat items—licensed art cards, bows, or fabric badges—leaving several diamonds empty. Use locking pin backs and avoid loose small parts in young children’s rooms.
Why It Photographs Well:The diagonal ribbon creates depth and guides the eye across the display, while the dark velvet makes pale cards and shiny pins stand out. Because the detail sits low in the frame, it adds interest to a full-bed photograph without competing with the pillows.
Pro Tip:Treat the grid as a composition, not storage: place the largest card just off-center and echo its orange tone twice in smaller pieces. Remove anything that overlaps the footboard edge for a clean silhouette.
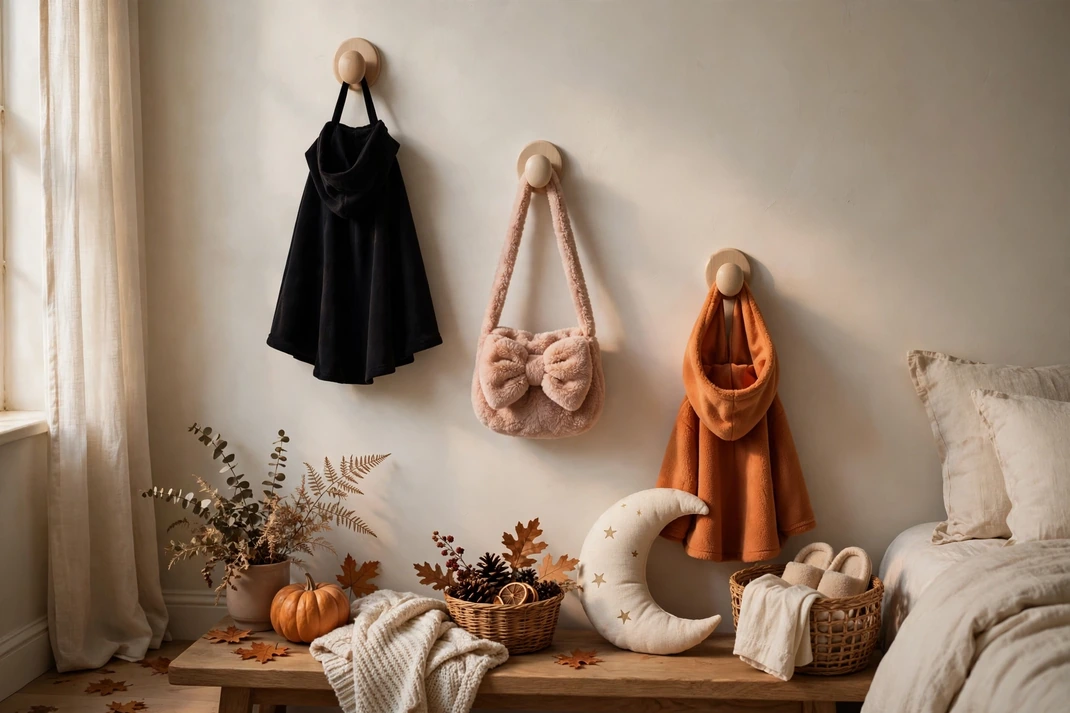
14. Style a Costume Cape and Bow Hook Wall
Three sculptural hooks can turn a tiny black cape, plush bow bag, and pumpkin-orange hood into a playful dressing vignette. The arrangement hints at Halloween costumes while keeping the bedroom floor free and the pieces ready to use. A pale wall and generous spacing make it feel like decor rather than an overflowing closet.
The Setup:Install three rounded child-safe hooks in a staggered line, spaced 10 to 14 inches apart, or use an over-door rack in a rental. Hang one lightweight item per hook: a short black cape, a licensed Hello Kitty bow bag, and an orange hood or scarf; place a small lidded basket below for gloves or costume ears. Keep long ties looped up safely and mount every hook according to its weight rating.
Why It Photographs Well:The staggered heights create movement, and each garment contributes a different texture—matte fabric, plush, and soft knit. Open wall space around the trio keeps the character bag visible and gives the scene the clarity of a styled editorial wardrobe shot.
Pro Tip:Stuff the bow bag lightly with tissue and shape the cape shoulders before hanging. Garments photograph best when they have a little volume instead of collapsing flat against the wall.
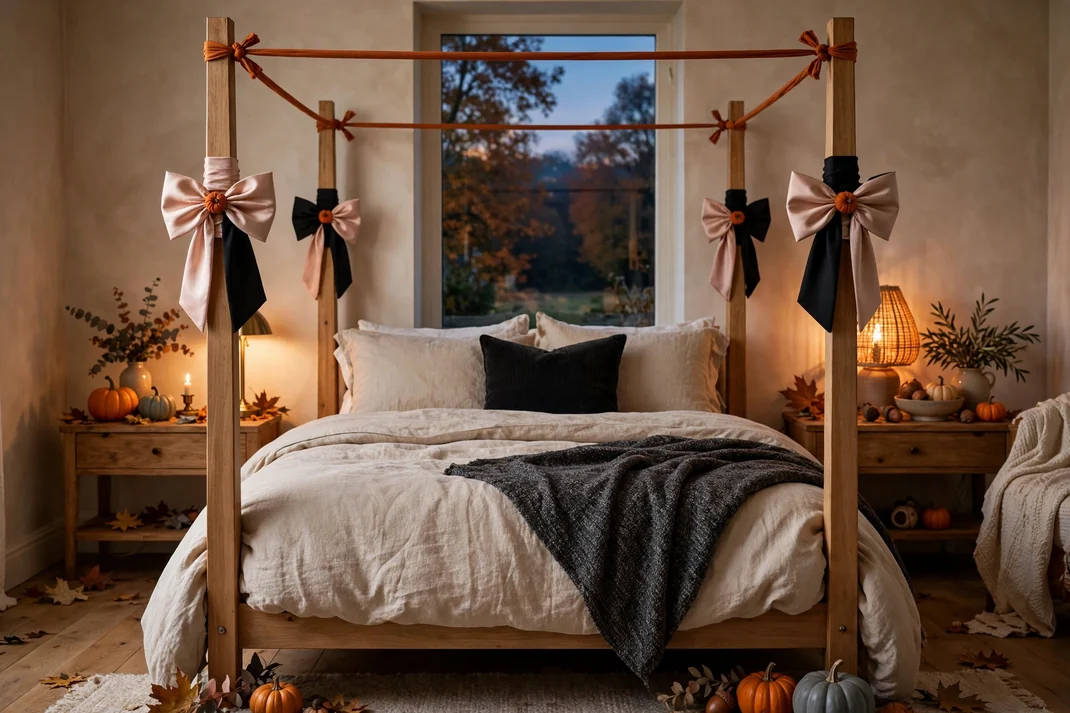
15. Wrap the Bedposts in Reversible Bow Bands
Wide reversible bands wrapped around simple bedposts add Hello Kitty-inspired bows by day and a darker Halloween face by night. Blush satin on one side and matte black on the other allow the mood to shift without replacing the bedding. Small pumpkin-orange center knots keep the styling connected across all four corners.
The Setup:Make four removable bands from double-sided ribbon or fabric, each secured with hidden snaps rather than long trailing ties. Wrap them at the same height on the bedposts, turn the blush side forward for a sweeter room or the black side forward for a moodier evening, and attach a compact orange knot to each center. Keep the bands away from moving joints, lights, and children’s reach; use them only on stable posts with smooth surfaces.
Why It Photographs Well:Repeated bows create a clear rhythm around the bed, and the reversible material gives the edges a subtle two-tone line. A corner camera angle can capture three bands at once, making the idea immediately understandable without a close-up collage.
Pro Tip:Scale the bows to the posts: each loop should be no wider than twice the post’s width. Oversized loops sag and obscure the bed frame, while compact structured loops look tailored.
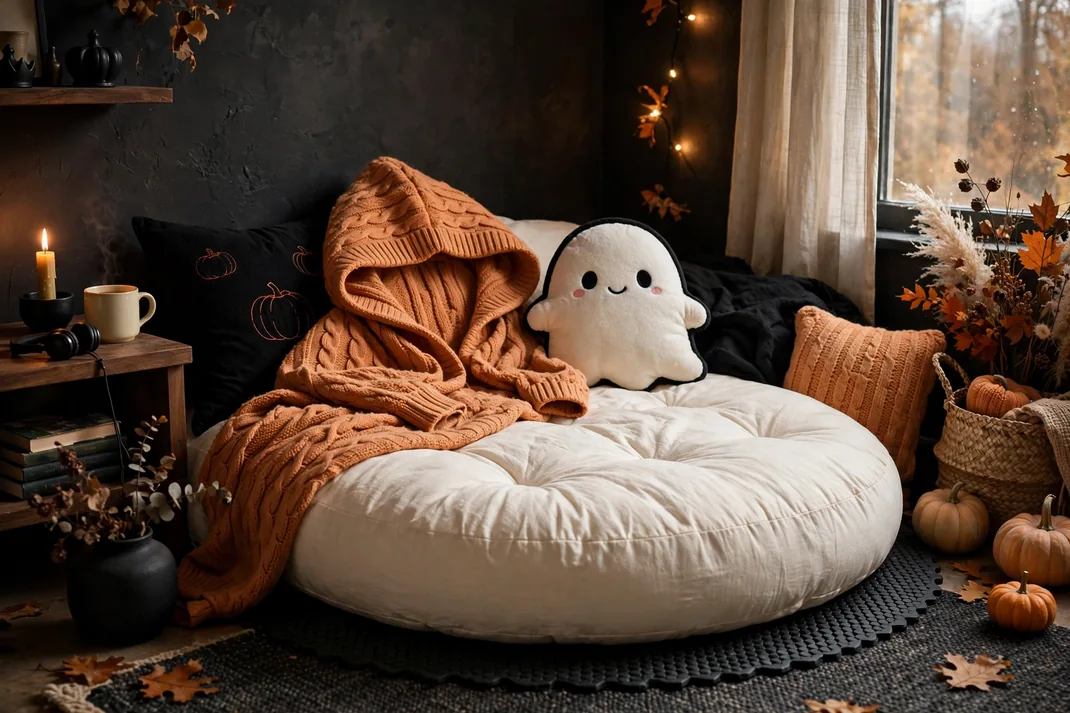
16. Finish with a Midnight-and-Marshmallow Sleep Nest
A floor-level sleep nest in marshmallow white, inky black, and soft pumpkin creates a cozy final layer for Halloween movie nights or a visiting friend. Instead of repeating the main bed, the nest uses a round mat, one character cushion, and a hooded throw to form its own compact zone. The palette feels cute and comforting, with enough darkness to suit October.
The Setup:Place a thick round cream floor mattress or foldable lounge pad on a nonslip base in a clear corner, then layer one black quilt, one pumpkin-orange hooded throw, and a single licensed Hello Kitty Halloween cushion. Add a rechargeable warm LED lantern on a stable nearby surface and keep at least 30 inches of circulation space between the nest and the bed. Fold the pad away during the day if the room is small, and never block doors, vents, or heaters.
Why It Photographs Well:The circular base breaks up the straight lines of the bedroom, while the black quilt frames the pale character cushion with strong contrast. Low, warm light creates a cozy pool around the nest and makes the separate sleep zone feel inviting rather than improvised.
Pro Tip:Build height at the back with one firm cushion and let the throw fall diagonally toward the front. This creates a clear triangular silhouette and prevents the layers from looking like bedding dropped on the floor.
Keep the Cute Details Curated
A convincing Hello Kitty Halloween bedroom does not need character prints on every wall. Start with one hero piece, support it with a controlled palette, and let solid fabrics and open space keep the room restful. Whether you choose the bow headboard, collector cubby, pajama rail, or compact sleep nest, the result will feel cuter—and more thoughtfully designed—when every decorative piece also has a practical role.
Bella Hart here, founder and senior editor of StyleGlowly.I love cozy homes on real budgets simple decor ideas, easy DIYs and seasonal touches that make a house feel like yours. I started this site to share the inspiration I always wanted to find. Practical, no fuss inspiration. Learn More!