26 Christmas Craft Projects to Make This Weekend
Clear the dining table, put on your favorite holiday playlist, and give yourself one glorious weekend of making things with your hands. There is something deeply satisfying about a home dressed in decorations you created yourself, and these twenty six projects are designed for real life: simple supplies, honest instructions, and results you will be proud to hang, gift, or photograph. Some take twenty minutes, a few deserve a whole cozy afternoon, and every single one fills the house with that unmistakable handmade Christmas feeling. Grab your glue gun and let us begin.
1. Dried Orange Slice Garland
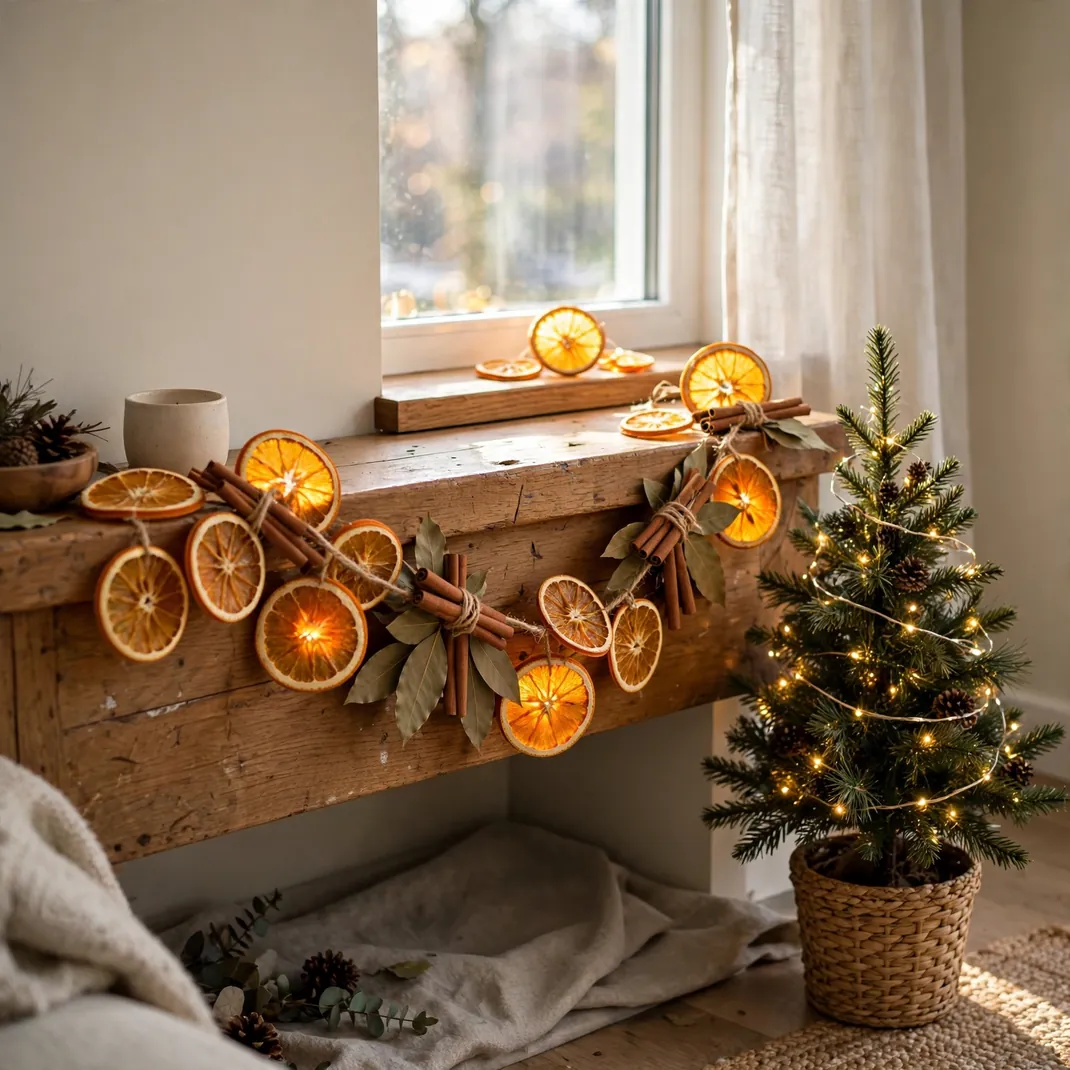
Few decorations smell as wonderful as they look, and this garland does both. Thin orange slices dry into translucent amber discs that glow like stained glass when hung near a window. String them with twine, tuck in cinnamon sticks and bay leaves, and drape the finished strand along a mantel or doorway. It looks like something from a heritage farmhouse and costs almost nothing to make.
What You Gather Fresh oranges, a sharp knife, twine, a large needle, cinnamon sticks, and whole cloves for studding a few slices.
How You Make It Slice oranges a quarter inch thick, pat them dry, and bake low and slow until fully dried, flipping once. Thread them onto twine with knots between slices so they stay spaced.
Make It Yours Alternate orange slices with dried apple rings or small pinecones for a garland that looks collected over years.
2. Pinecone Gilded Ornaments
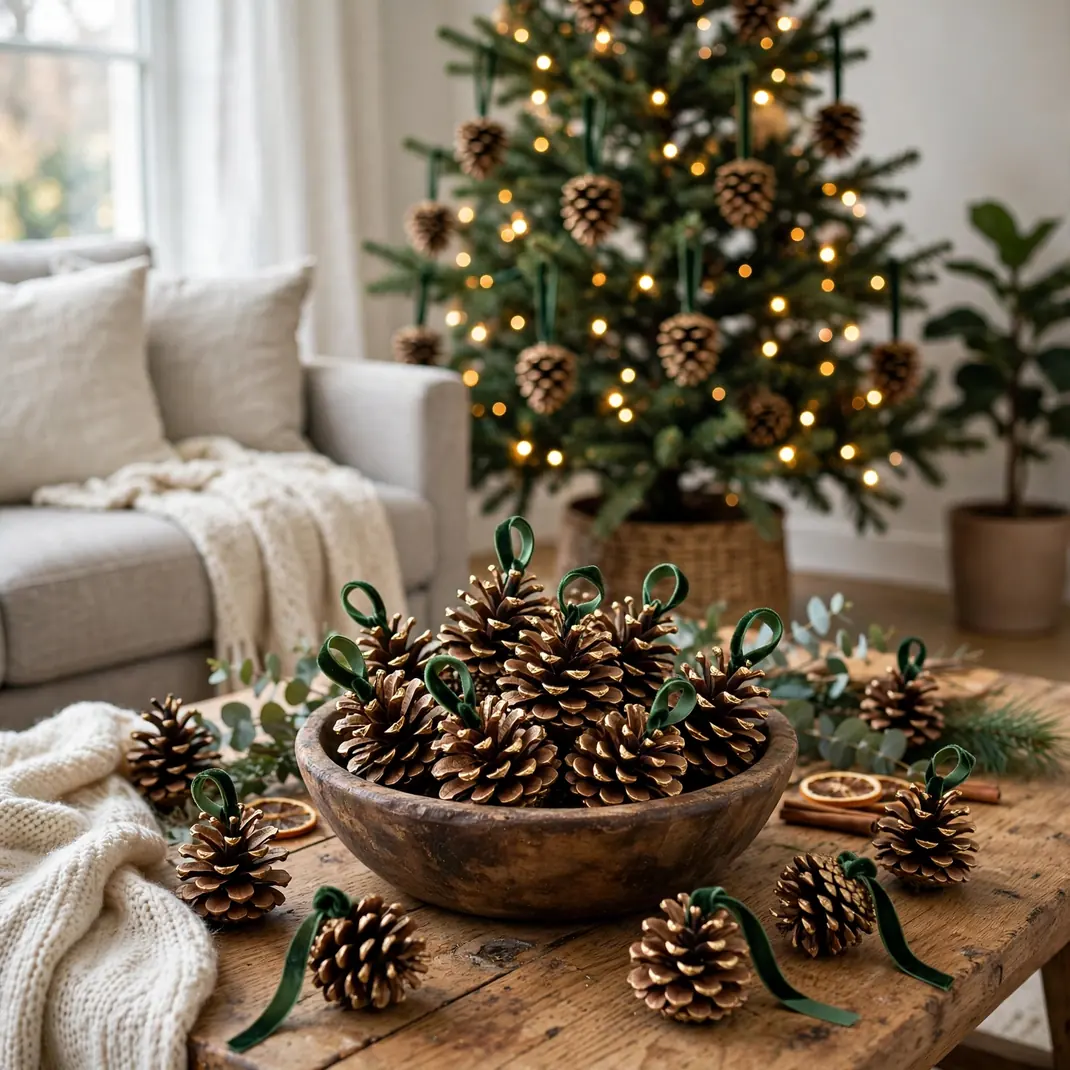
A basket of plain pinecones becomes a bowl of treasure with a little paint and patience. Brush the outer tips with gold or copper paint, leaving the centers natural for contrast. Tie a velvet ribbon loop to the top of each. Hung on the tree or piled in a dough bowl, they catch the light like tiny sculptures.
What You Gather Clean dry pinecones, metallic craft paint, a small stiff brush, velvet ribbon, and a hot glue gun.
How You Make It Bake the cones briefly to open them fully and remove any residents. Dry brush paint onto just the scale tips, then glue a ribbon loop at the crown.
Make It Yours Dust the wet paint with fine glitter before it dries for ornaments that sparkle from across the room.
3. Salt Dough Keepsake Ornaments
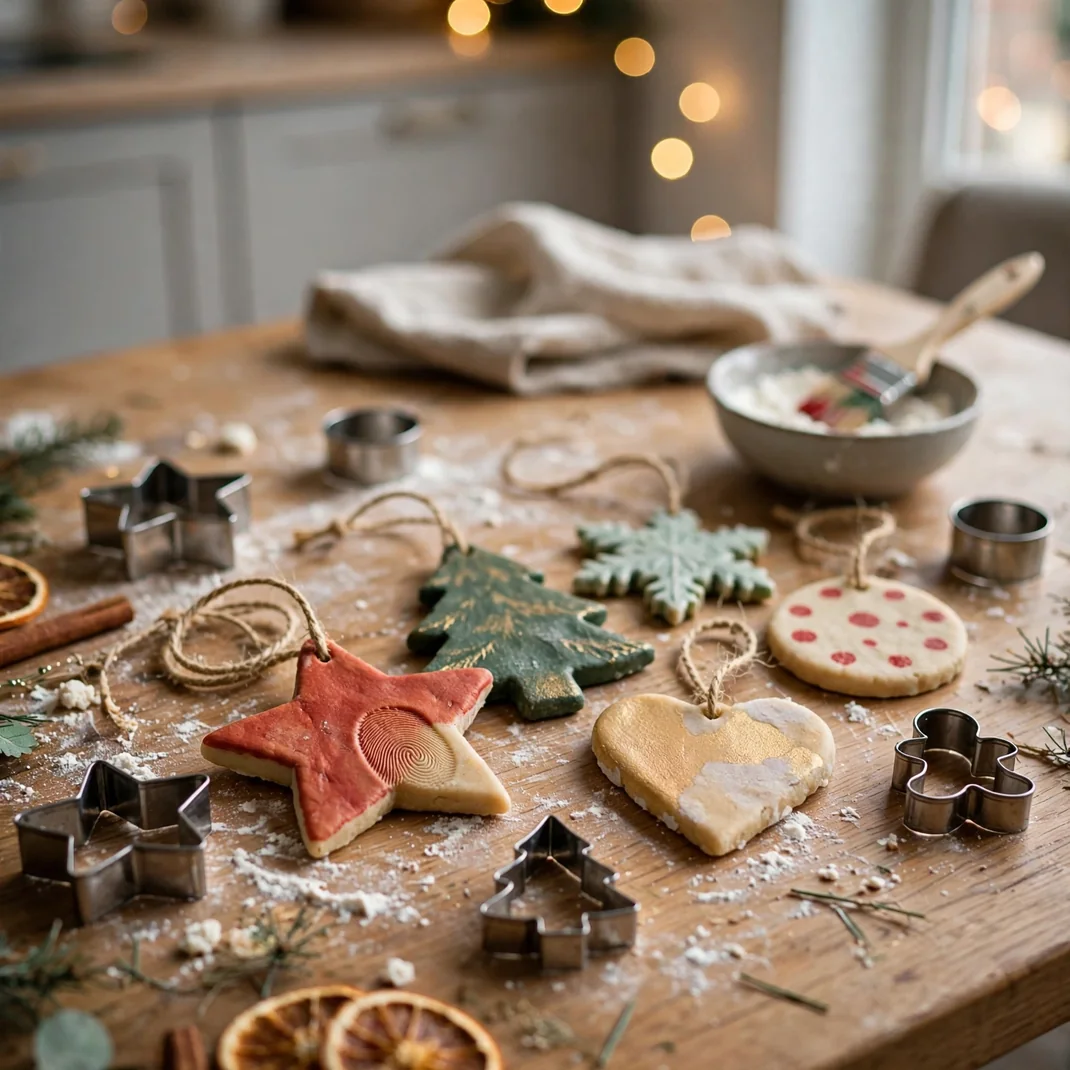
This is the craft that becomes a family tradition without anyone planning it. Mix a simple dough, roll it out, and cut shapes with cookie cutters while little hands press fingerprints and names into the soft surface. Once baked and painted, these ornaments carry more meaning than anything store bought. Date the back of each one.
What You Gather Flour, salt, water, cookie cutters, a straw for hanging holes, acrylic paints, and clear sealer.
How You Make It Knead the dough smooth, roll to a quarter inch, cut shapes, and poke a hole near the top of each. Bake low until hard, cool completely, then paint and seal.
Make It Yours Press a sprig of rosemary or a lace doily into the dough before baking for beautiful natural texture.
4. Mason Jar Snow Lanterns
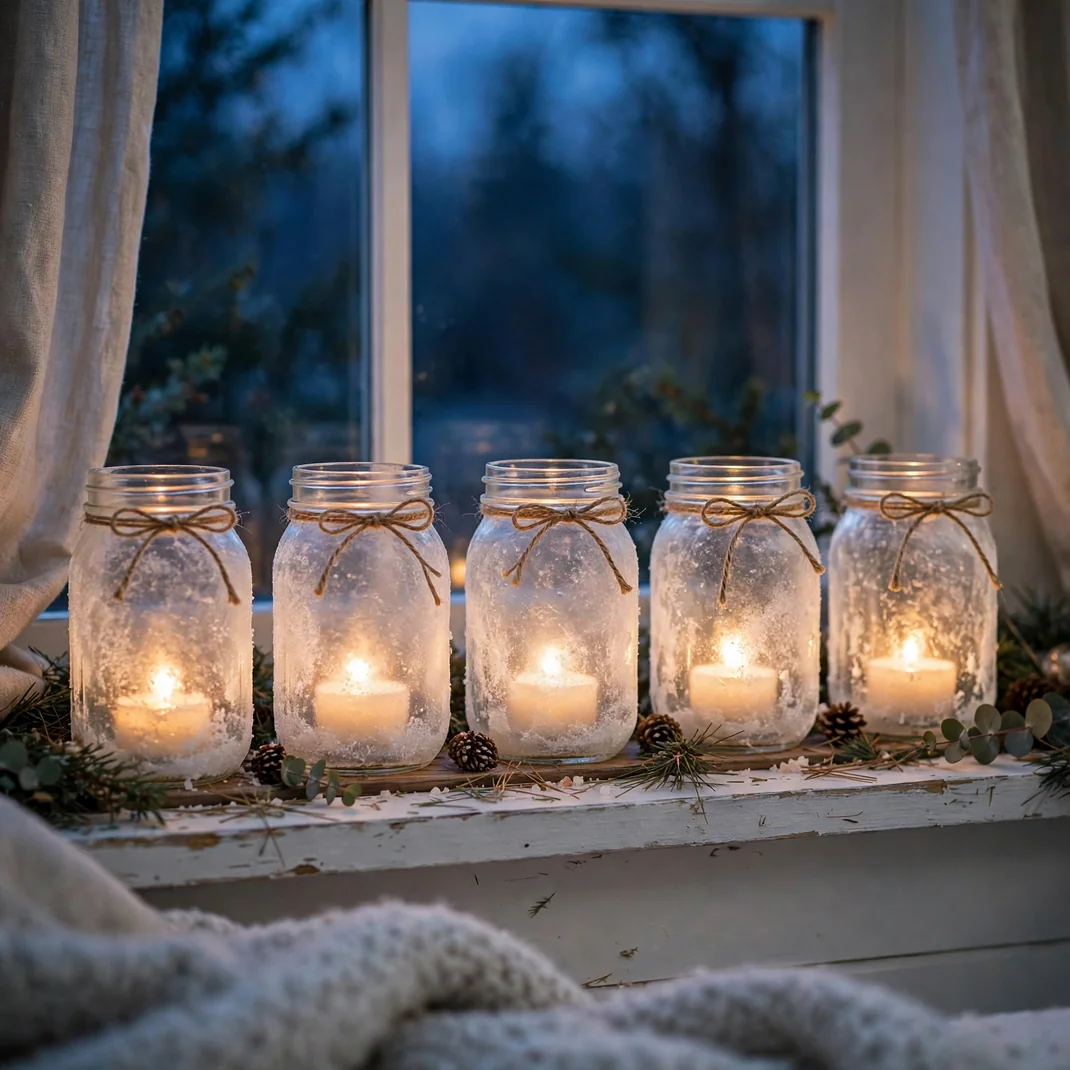
An ordinary mason jar turns into a miniature snowstorm with a coat of faux snow and a flickering candle inside. Brush the outside with adhesive and roll it in epsom salt for a frosted finish that glitters in candlelight. Drop in a flameless tea light and line a few along the windowsill. At dusk they look like captured winter evenings.
What You Gather Mason jars, epsom salt, craft glue or mod podge, a foam brush, flameless tea lights, and twine for the rims.
How You Make It Coat the jar exterior with glue, roll in epsom salt, and let dry fully before handling. Wrap twine around the neck and set a tea light inside.
Make It Yours Glue a tiny bottle brush tree inside one jar before frosting for a snow globe effect.
5. Cinnamon Stick Candle Wraps
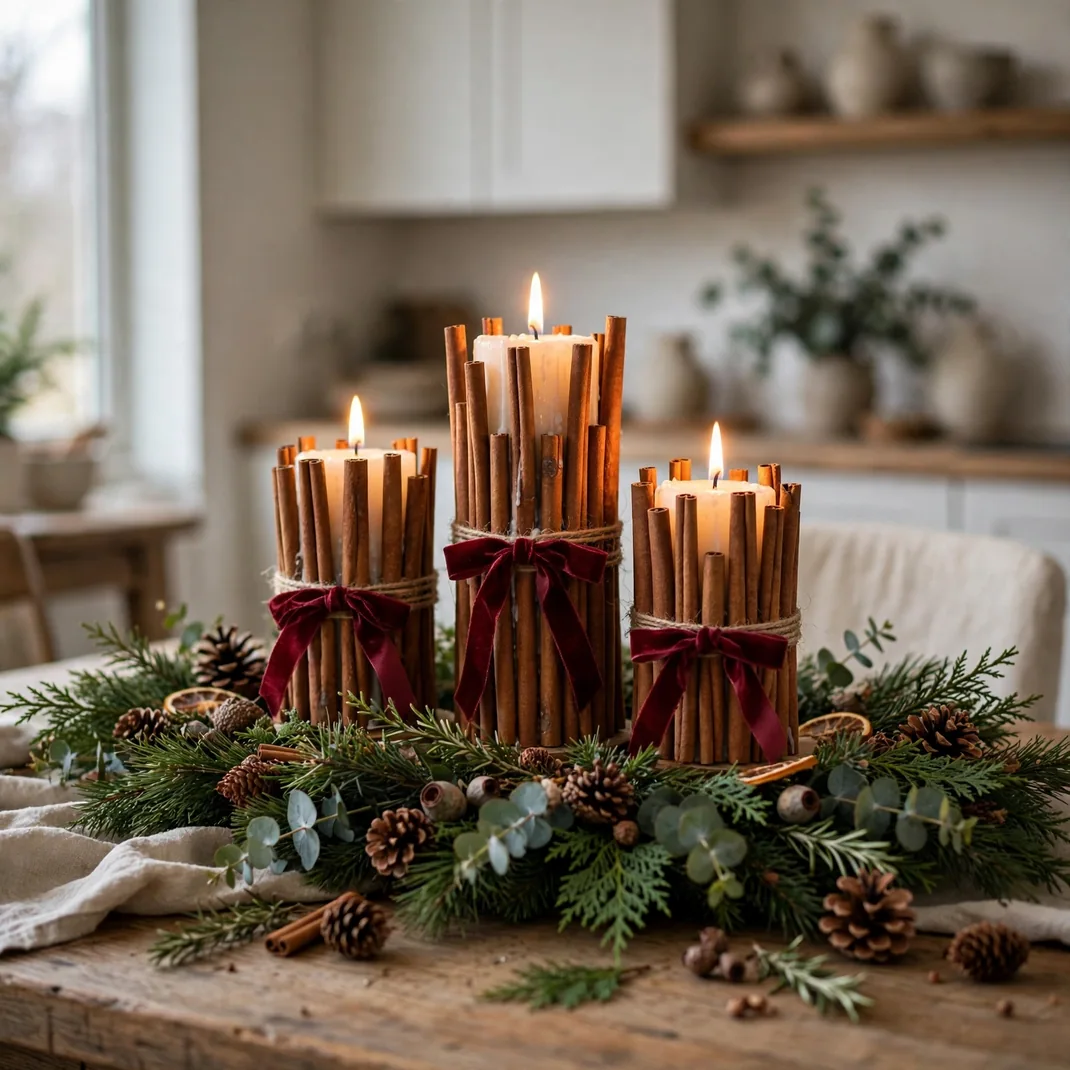
Plain pillar candles get a fragrant upgrade when wrapped in a ring of cinnamon sticks. Stand the sticks upright around the candle and bind them with rustic twine or a velvet ribbon. As the candle burns, gentle warmth releases the cinnamon scent into the room. They make stunning table centerpieces and even better gifts.
What You Gather Pillar candles, bundles of cinnamon sticks, twine or ribbon, and a hot glue gun.
How You Make It Stand sticks upright around the candle and glue each in place, keeping tops even, then tie twine twice around the middle for a secure rustic band.
Make It Yours Tuck a sprig of dried lavender or rosemary into the twine for a second layer of scent.
6. Paper Star Lanterns

These glowing Moravian style stars look impossibly intricate but fold from simple paper strips. The finished lantern throws star patterned light across the walls when a small LED light sits inside. Hang a cluster at different heights in a hallway or over the dining table. Guests will assume you bought them at a boutique.
What You Gather Sturdy kraft or white paper bags, scissors, glue, string for hanging, and small LED fairy lights.
How You Make It Trim the bags into matching points, glue them in a radial stack, then fan open and join the ends into a star. Hang with the light tucked inside.
Make It Yours Use vintage sheet music or old book pages for stars with literary charm.
7. Felt Ball Garland
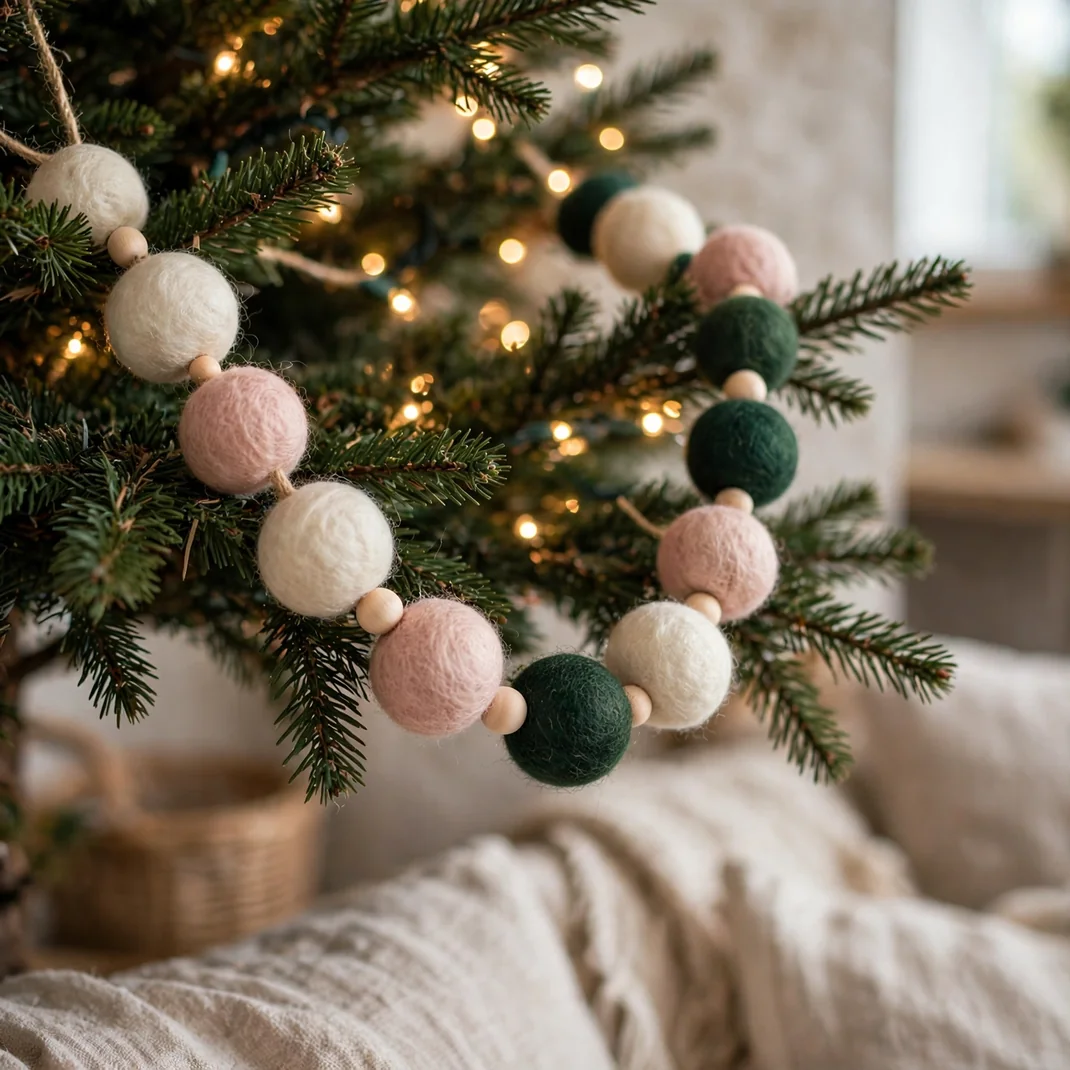
Soft wool felt balls in cream, blush, and deep green strung on a simple thread make the sweetest garland. It drapes beautifully over a tree, a mantel, or a headboard, and the texture invites touching. Kids can help with the threading, which makes this a perfect family afternoon project.
What You Gather Wool felt balls in your chosen palette, a long sharp needle, and sturdy cotton thread.
How You Make It Push a threaded needle straight through the center of each ball, spacing them evenly with a simple knot between if you like gaps.
Make It Yours Mix in a few wooden beads or tiny bells for texture and a faint jingle.
8. Twig Star Wall Decor
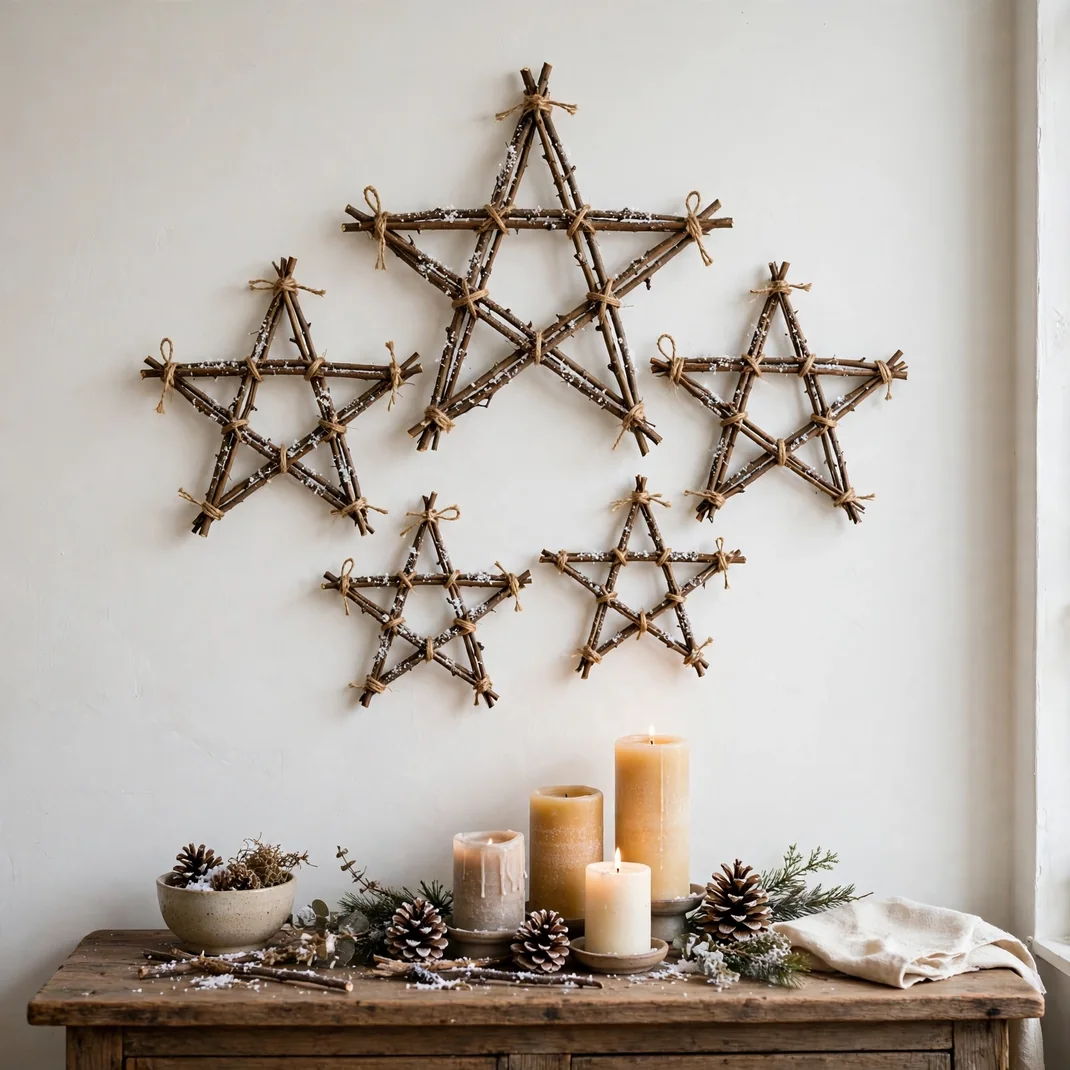
Gathered garden twigs become rustic stars that look right at home on a wall or leaning on a mantel. Lash five twigs into a star shape with twine, then wrap the joints with a little extra for strength. A light dusting of faux snow finishes the woodland look. Make them in several sizes for a gallery style arrangement.
What You Gather Straight dry twigs, garden twine, wire cutters, and faux snow spray.
How You Make It Lay five twigs in a star outline and bind each joint tightly with twine. Trim the ends evenly and mist lightly with snow spray.
Make It Yours Weave a strand of micro fairy lights through the twigs for stars that glow after dark.
9. Embroidered Hoop Ornaments
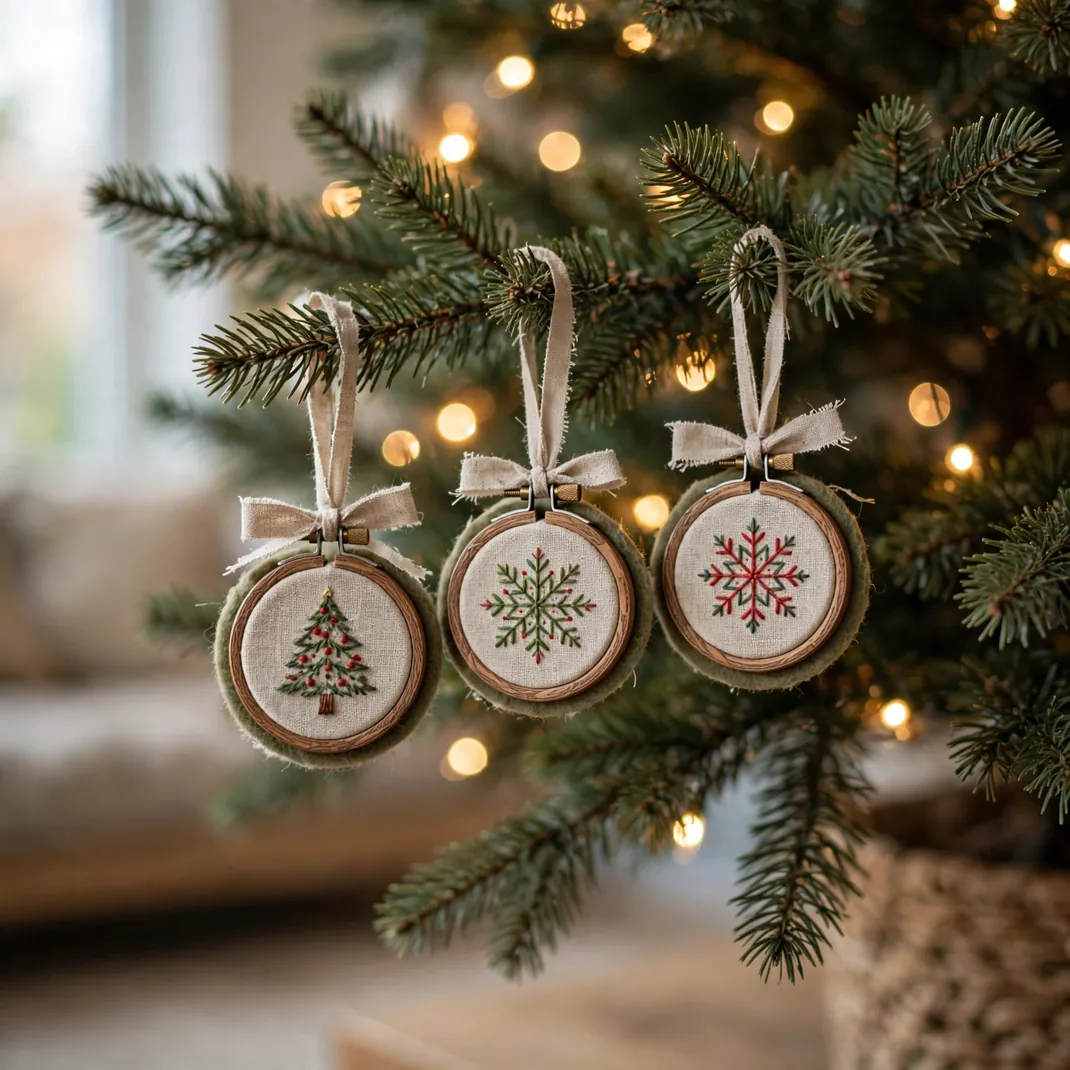
Tiny embroidery hoops holding stitched Christmas motifs make ornaments with heirloom soul. Stretch linen in a two inch hoop, stitch a simple tree, star, or snowflake in red and green thread, and finish the back with felt. They look beautiful clustered on the tree or tied onto wrapped gifts.
What You Gather Small wooden hoops, linen fabric, embroidery floss, a needle, felt circles, and ribbon for hanging.
How You Make It Trace a simple motif on the linen, stitch with basic backstitch or French knots, then trim and glue a felt backing inside the hoop.
Make It Yours Stitch family initials or the year into one corner for ornaments that become keepsakes.
10. Dried Flower Christmas Wreath
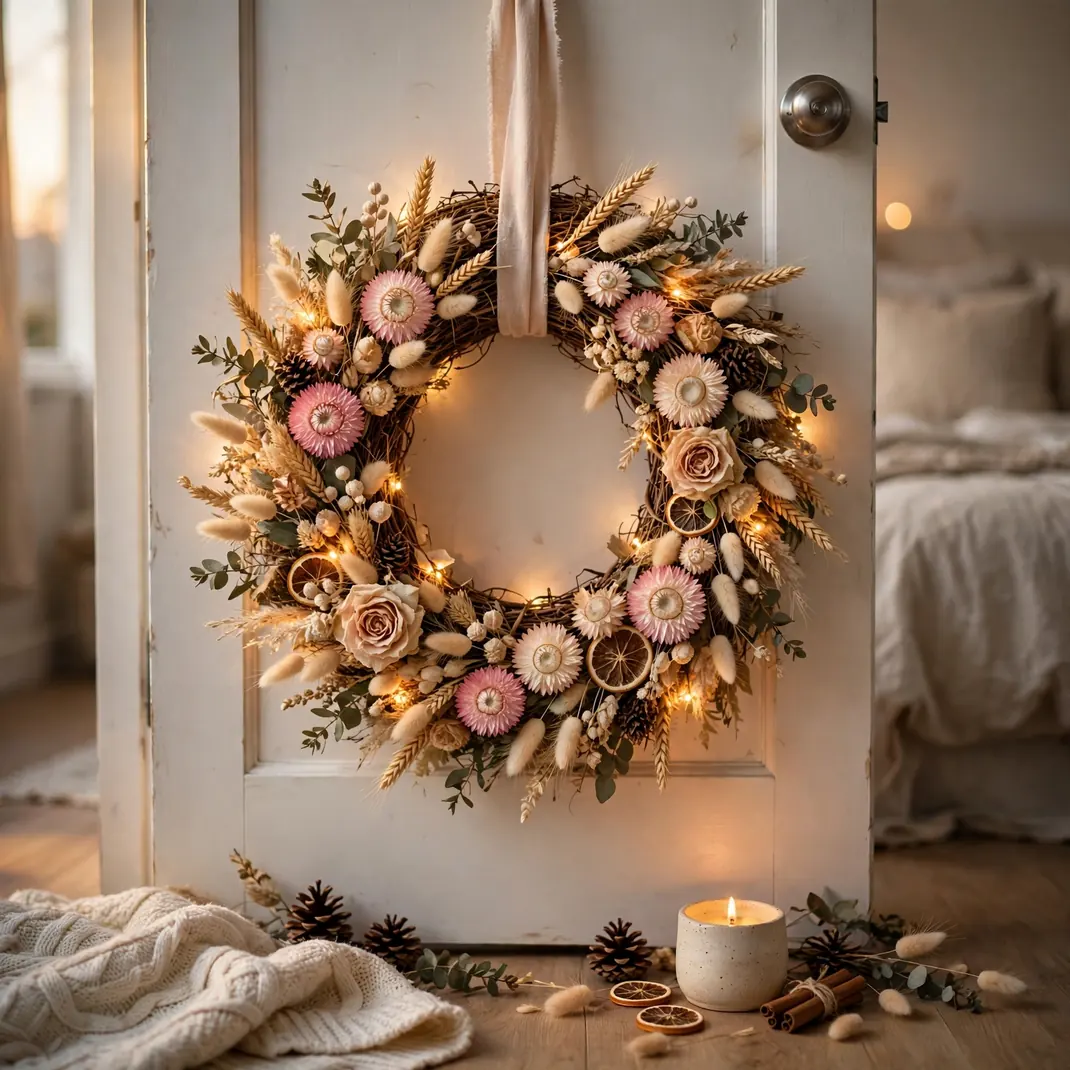
Skip the evergreen this year and build a wreath from dried blooms in blush, cream, and wheat tones. Strawflowers, dried roses, and bunny tail grass hold their color for months and never drop needles on the floor. The result feels romantic and a little unexpected, perfect for a bedroom door or a gallery wall.
What You Gather A grapevine wreath base, dried flowers and grasses, floral wire, wire cutters, and a wide ribbon.
How You Make It Build small bundles of stems, wire each bundle to the base, and work around the circle overlapping in one direction. Fluff and fill any gaps.
Make It Yours Wire in a few dried orange slices or cinnamon bundles to tie it to the season.
11. Hand Painted Wood Slice Ornaments
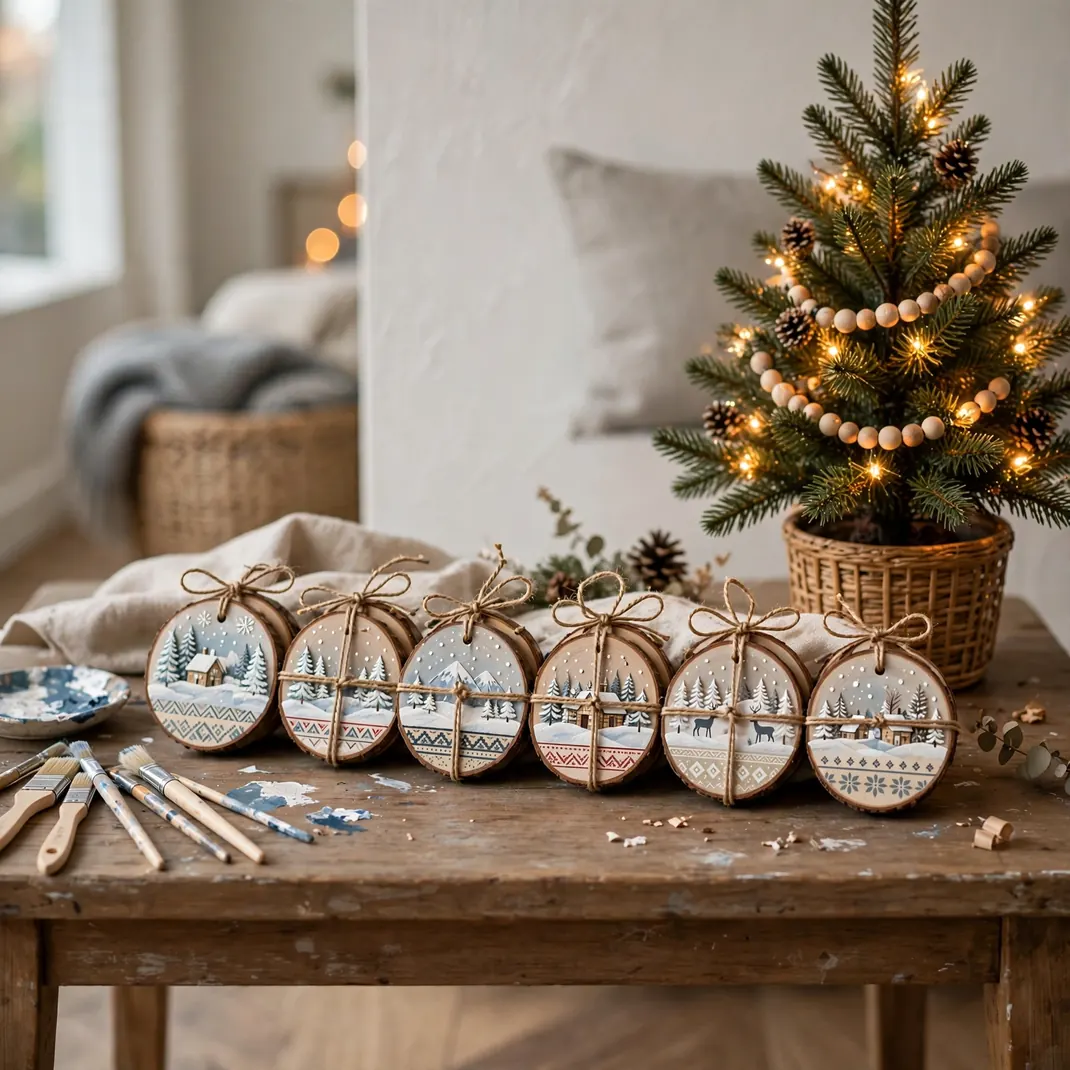
Slices of birch or pine become tiny canvases for winter scenes. Sand them smooth, paint simple snowy landscapes or Scandinavian patterns, and seal with a clear coat. Each one is a miniature piece of art, and a set of six tied with twine makes a gift that looks far more expensive than it was.
What You Gather Wood slices with drilled holes, fine sandpaper, acrylic paints, small brushes, sealer, and twine.
How You Make It Sand the face smooth, paint your design in thin layers, let dry fully, then seal both sides so the wood never warps.
Make It Yours Paint simple white snowflakes on the bark edge side for a two sided ornament.
12. Beeswax Dipped Pinecones
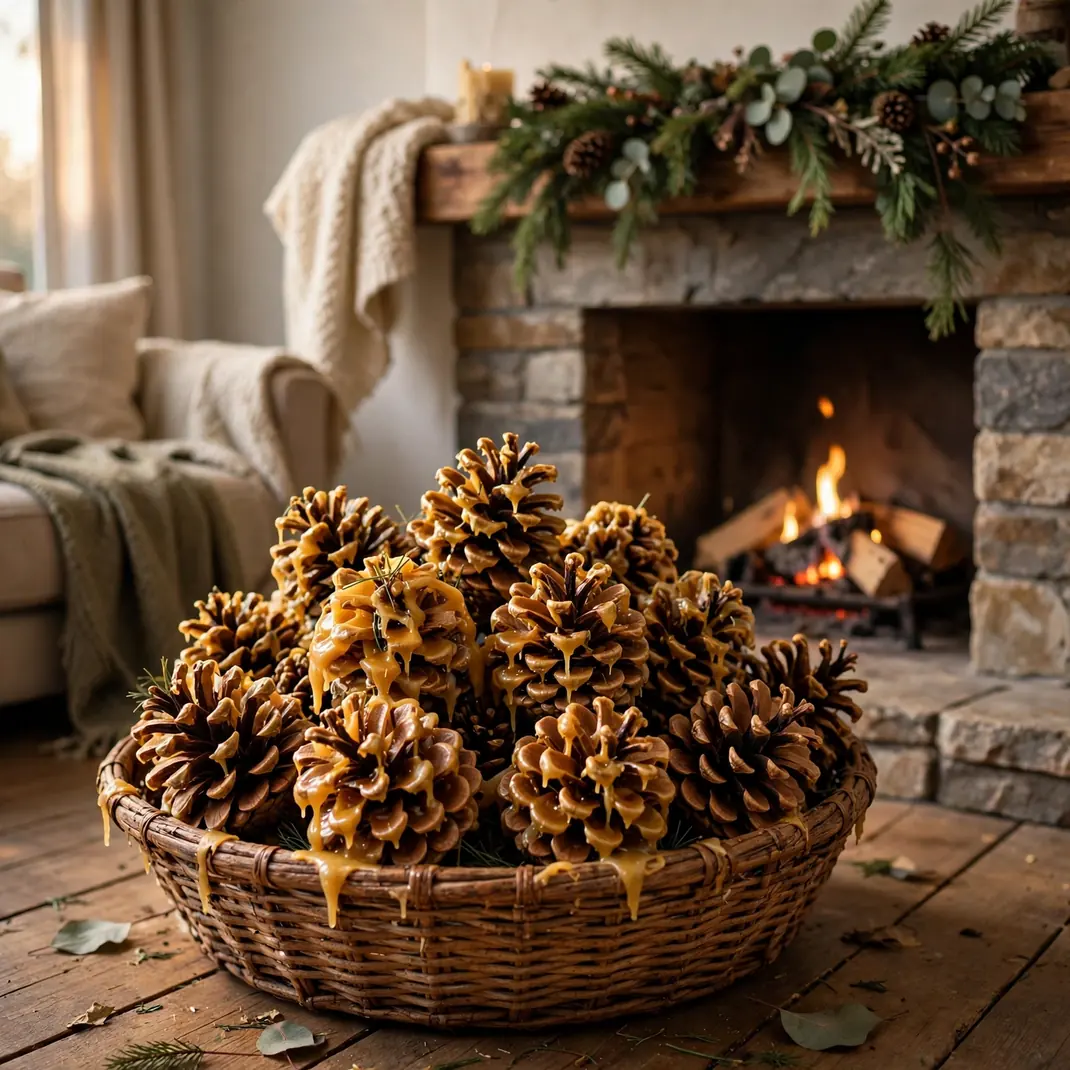
Dip pinecones in melted beeswax and they transform into golden fire starters that double as decor. The wax gives them a rich honeyed glow and a subtle sweet scent, and they look gorgeous piled in a basket by the fireplace. Tuck one into a gift bag and you have a present and a favor in one.
What You Gather Clean pinecones, beeswax pellets, a double boiler, tongs, and parchment paper.
How You Make It Melt the wax gently, dip each cone with tongs, let the excess drip off, and set on parchment to harden. Two dips give the richest coat.
Make It Yours Stir a drop of pine or cinnamon essential oil into the wax for scented fire starters.
13. Fabric Scrap Tassel Garland
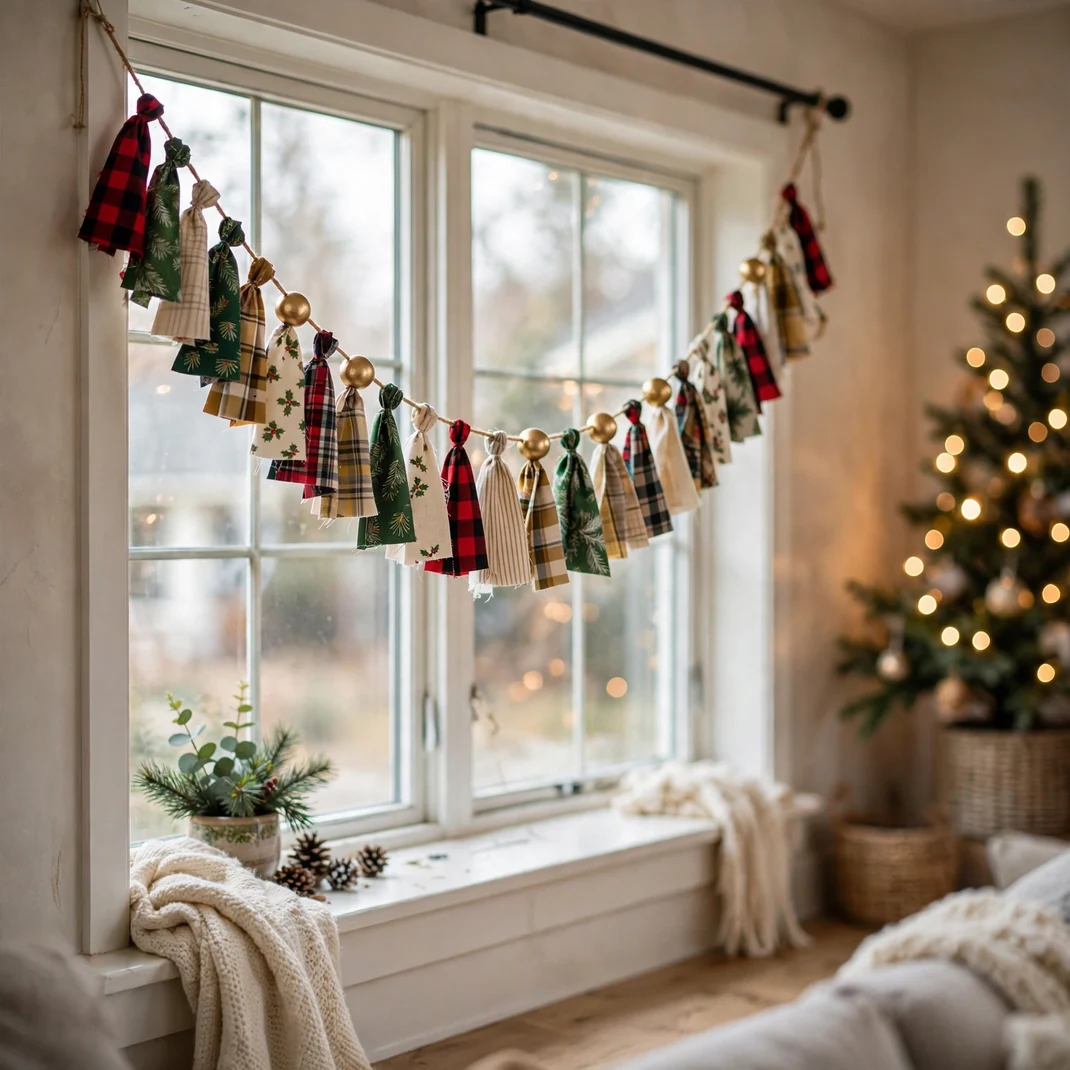
That bag of fabric scraps finally gets its moment. Cut strips of holiday fabric, fold them into tassels, and string them along a cord for a garland with wonderful movement and texture. It works on a tree, across a window, or along a staircase banister. Every tassel can be different, which is exactly the charm.
What You Gather Fabric scraps in holiday prints, scissors, cord or ribbon, and small rubber bands.
How You Make It Cut strips, fold each over the cord, and bind the fold with a rubber band hidden under a fabric wrap. Slide tassels to space them.
Make It Yours Thread a few gold painted wooden beads between tassels for a more finished look.
14. Stenciled Linen Table Runner
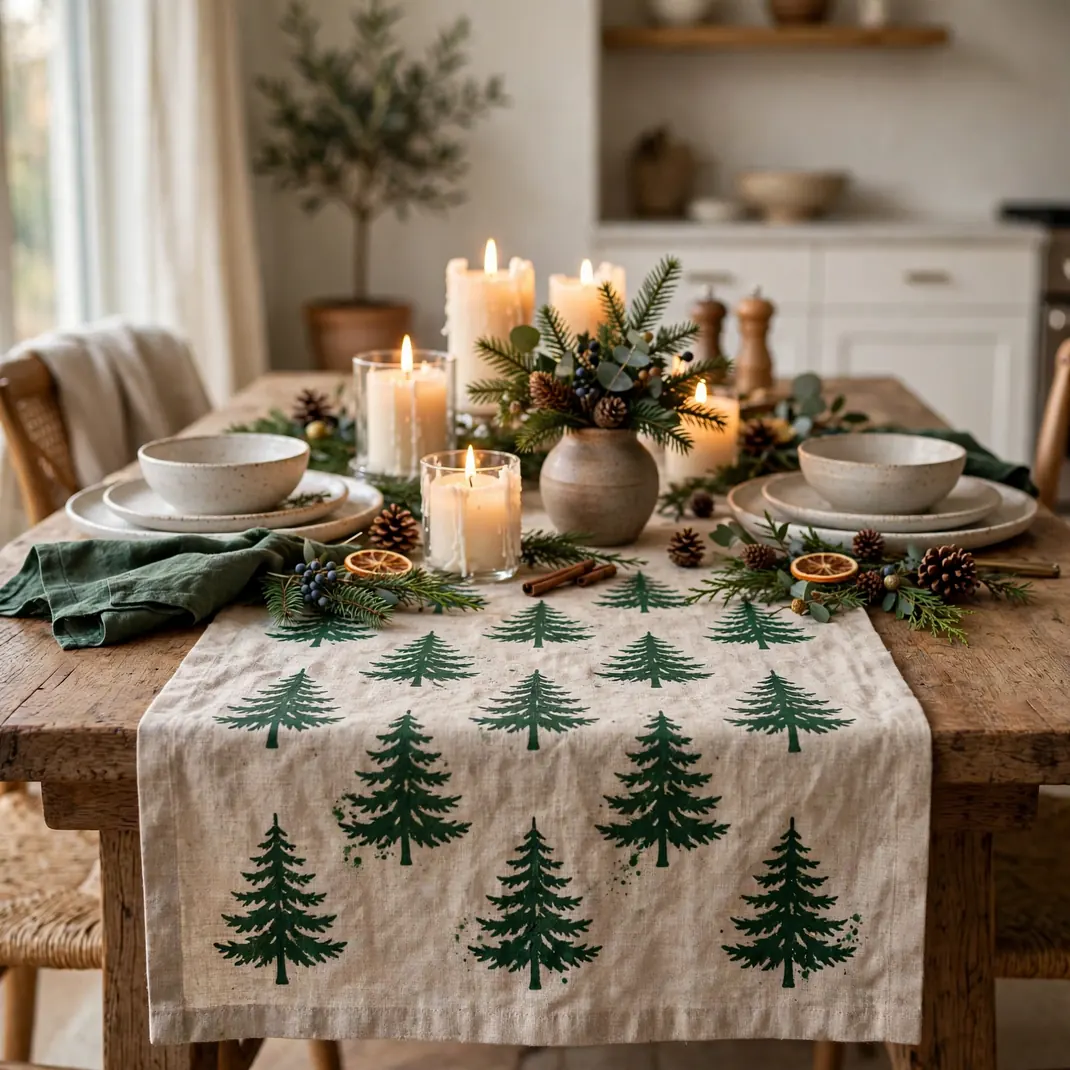
A plain linen runner becomes a custom holiday textile with a stencil and fabric paint. Repeat a simple spruce or star motif down the center in deep green or warm gold. The handmade pattern has a relaxed elegance that printed runners never quite achieve. It will grace your table for years.
What You Gather A natural linen runner, a reusable stencil, fabric paint, a stencil brush, and painter’s tape.
How You Make It Tape the runner flat, position the stencil, and pounce paint lightly in thin layers. Lift straight up and repeat down the length.
Make It Yours Sign and date one end with a fabric pen for a personal family touch.
15. Walnut Shell Mini Ornaments
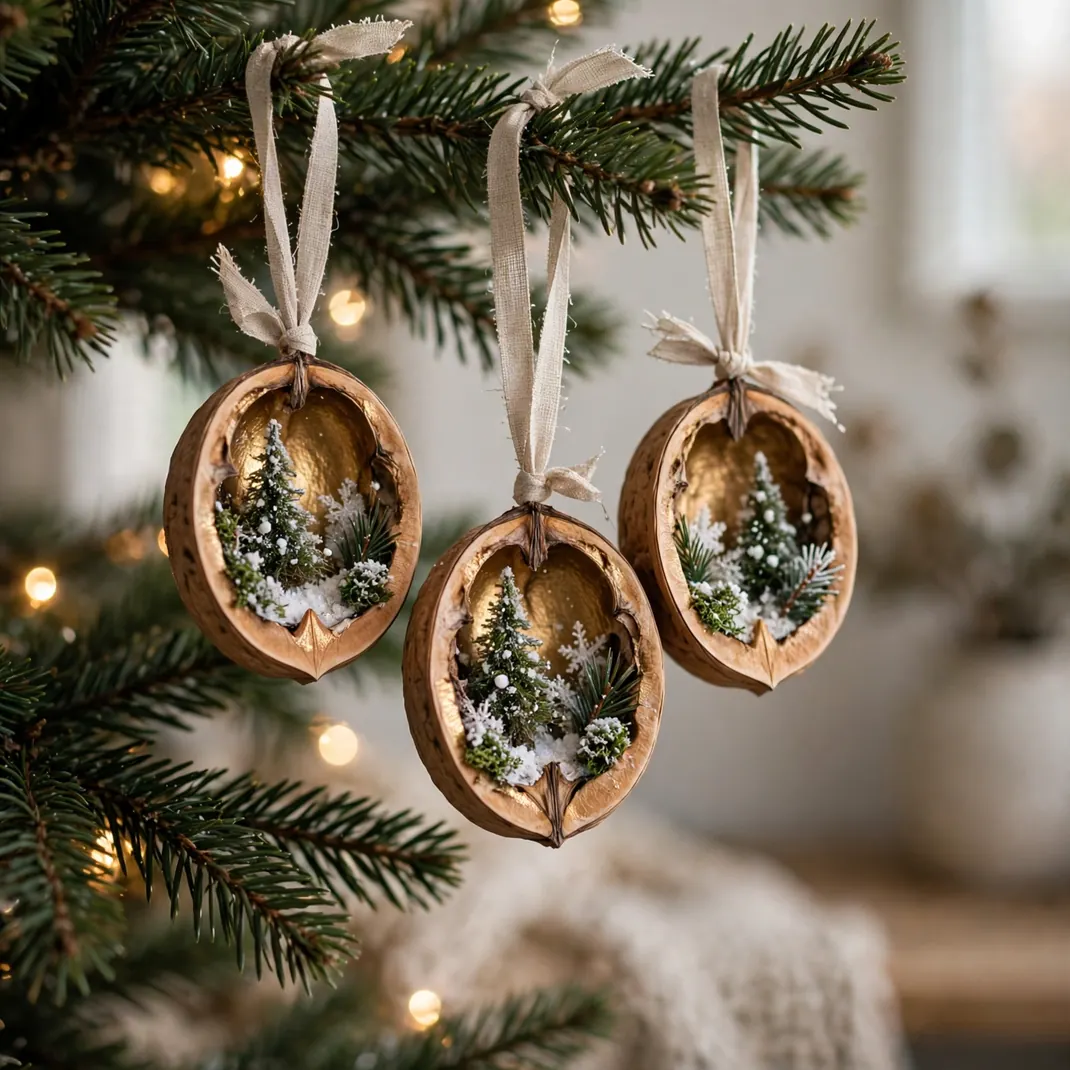
Cracked walnut halves become the tiniest cradles for miniature winter scenes. Paint the inside gold or deep blue, glue in a speck of faux snow and a tiny bottle brush tree, then join the halves with a ribbon hinge. They hang on the tree like little secrets waiting to be discovered.
What You Gather Walnut halves, acrylic paint, faux snow, miniature trees, narrow ribbon, and tacky glue.
How You Make It Paint the shell interiors and let dry. Glue the scene inside one half, then attach a ribbon loop joining both halves at the top.
Make It Yours Hide a tiny rolled note with a wish inside one walnut for a lucky finder.
16. Pressed Flower Christmas Cards
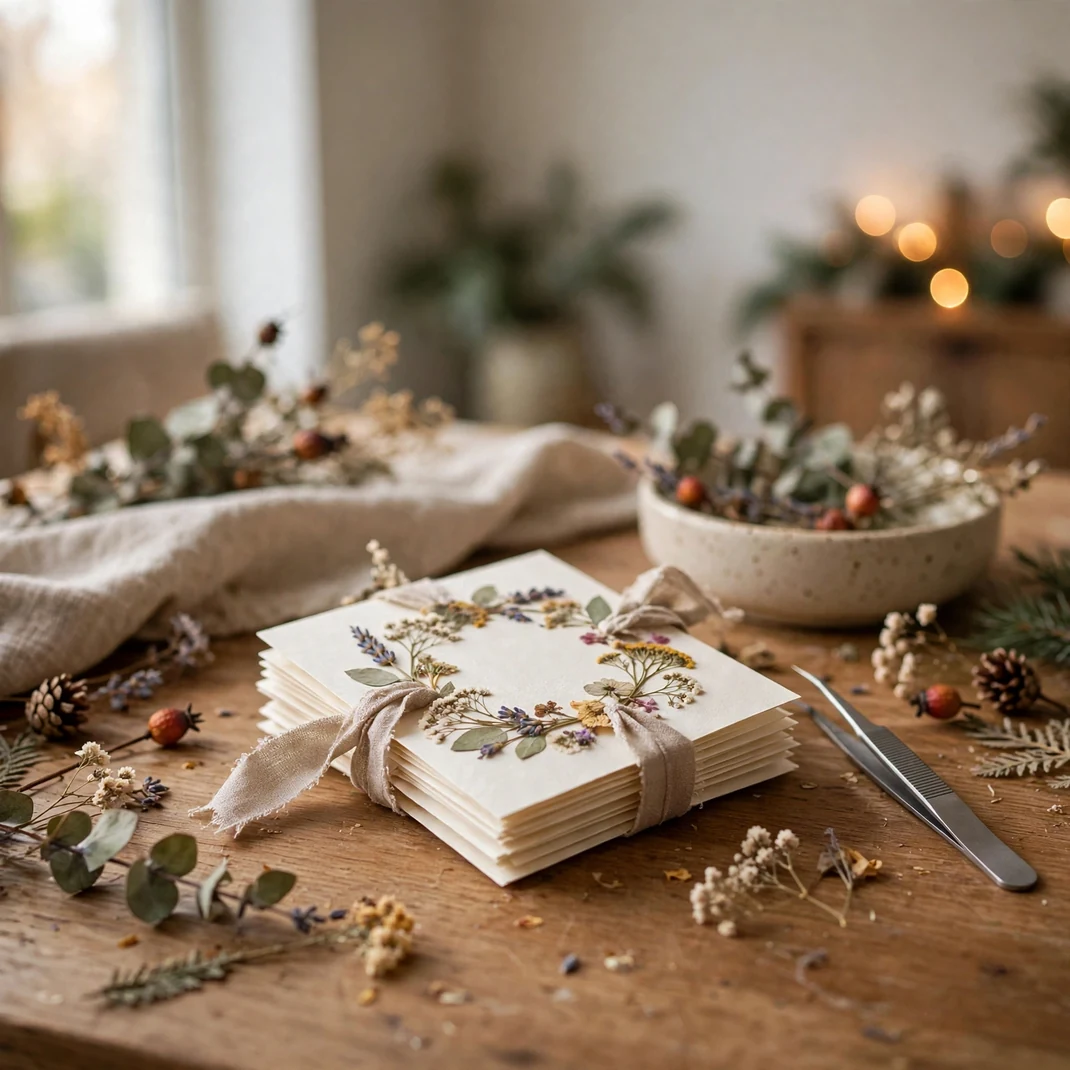
Handmade cards still make people gasp, especially when they hold real pressed flowers. Arrange dried blooms on blank card stock in wreath or tree shapes, seal with a thin layer of decoupage, and write your message inside. A set of these outshines any box of store cards.
What You Gather Pressed or dried flowers, blank cards, tweezers, decoupage medium, and a soft brush.
How You Make It Plan the layout first, then place each bloom with tweezers and brush a thin sealing coat over the design. Let dry flat.
Make It Yours Save a few cedar sprigs pressed in autumn so you have greenery ready for December cards.
17. Yarn Wrapped Cone Trees
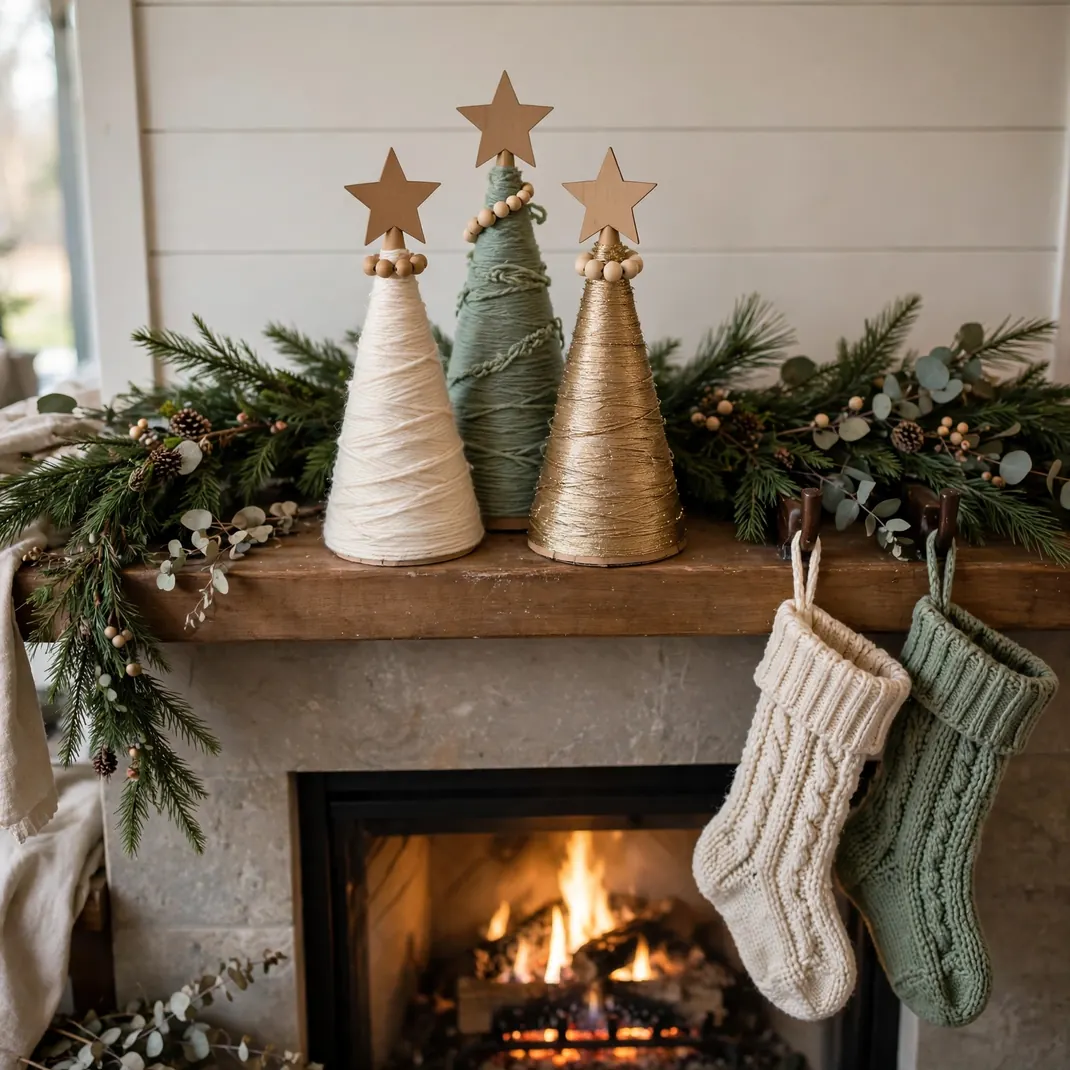
Cardboard cones wrapped in yarn become a forest of modern Christmas trees in any color you love. Start at the base and spiral upward, keeping each row snug against the last. A wooden bead or star tops each one. Group them in threes on a mantel or sideboard for instant holiday styling.
What You Gather Cardboard cones, yarn in chosen colors, a hot glue gun, and small toppers like beads or stars.
How You Make It Glue the yarn end at the base and wrap upward in tight touching rows, gluing every few inches. Trim and glue the top end, then add the topper.
Make It Yours Wrap one cone in metallic gold yarn for a glamorous standout among matte companions.
18. Gingerbread Playdough Ornaments

These smell like real gingerbread but last for years on the tree. A spiced dough of applesauce and cinnamon rolls out like cookie dough and cuts into perfect gingerbread shapes. Once dried, they hold their warm brown color and spicy scent beautifully. Hang them with gingham ribbon for full cottage charm.
What You Gather Applesauce, ground cinnamon, cookie cutters, a straw, gingham ribbon, and white puff paint.
How You Make It Mix a stiff dough, roll thick, cut shapes, and poke hanging holes. Air dry for two days, flipping once, then pipe icing details.
Make It Yours Refresh the scent each year with a drop of cinnamon oil on the back.
19. Bottle Brush Tree Snow Village
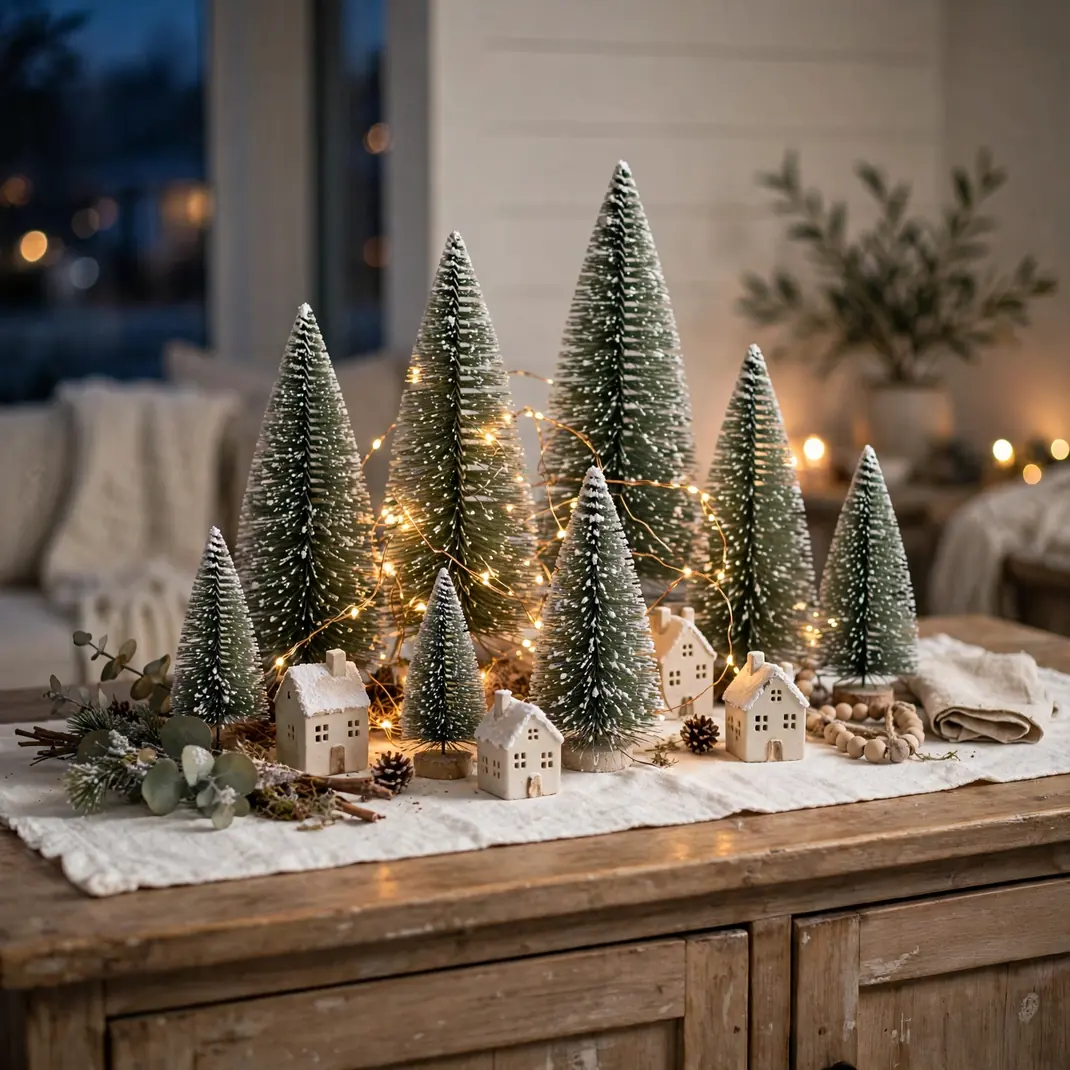
A handful of bottle brush trees in different sizes becomes a whole village on a sideboard. Dust them with faux snow, set them on a white runner, and tuck tiny houses and a string of warm lights between them. The whole scene takes an afternoon and looks like a department store window.
What You Gather Bottle brush trees in varied sizes, faux snow, a white fabric runner, miniature houses, and warm fairy lights.
How You Make It Arrange the tallest trees at the back, weave lights through the middle, and nestle houses at different depths. Dust everything with snow last.
Make It Yours Dye some trees blush pink or icy blue for a village with a modern twist.
20. Painted Glass Ball Ornaments

Clear glass balls become custom art when you paint the inside instead of the outside. Swirl two or three colors of paint inside, let the excess drip out, and the result is a marbled finish protected forever behind glass. No two ever look alike, which makes them wonderful gifts.
What You Gather Clear glass ornaments, acrylic paints in coordinating colors, paper cups, and ribbon.
How You Make It Remove the cap, squirt in small amounts of each color, and roll the ball slowly to marble. Drain excess upside down in a cup overnight.
Make It Yours Swirl a pinch of fine glitter into the paint for ornaments that shimmer from within.
21. Rosemary Wreath Place Cards
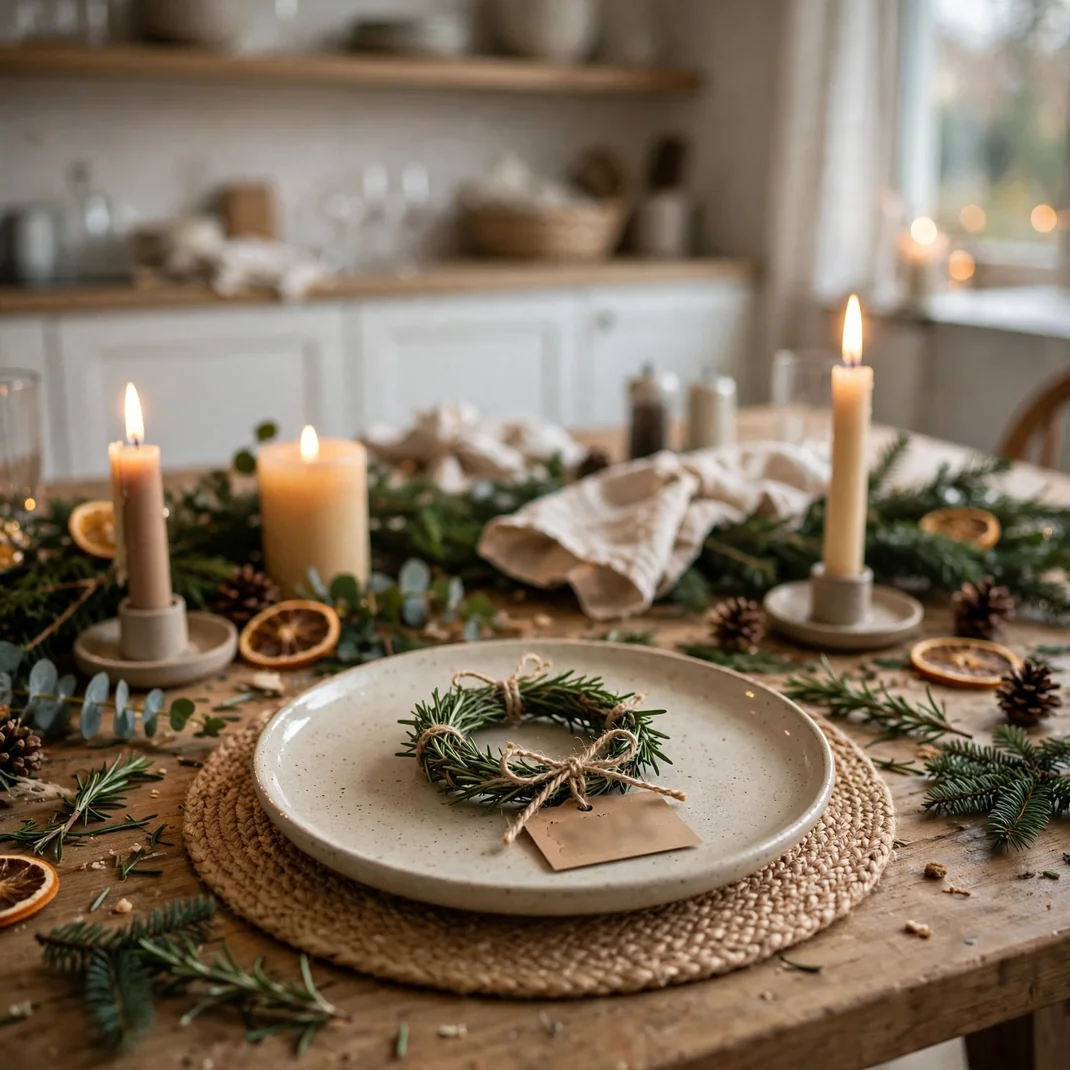
Dinner guests get a fragrant favor when their place card is a tiny rosemary wreath. Bend fresh rosemary into a circle, tie with twine, and tuck in a handwritten name tag. They scent the whole table and guests can take them home. It is the kind of detail people remember for years.
What You Gather Fresh rosemary sprigs, thin twine, small kraft tags, and a pen.
How You Make It Bend a sprig into a small circle, overlap the ends, and tie securely with twine. Attach the name tag with a second tiny tie.
Make It Yours Nestle a single dried cranberry or tiny pinecone into each wreath for color.
22. Wooden Bead Star Ornaments
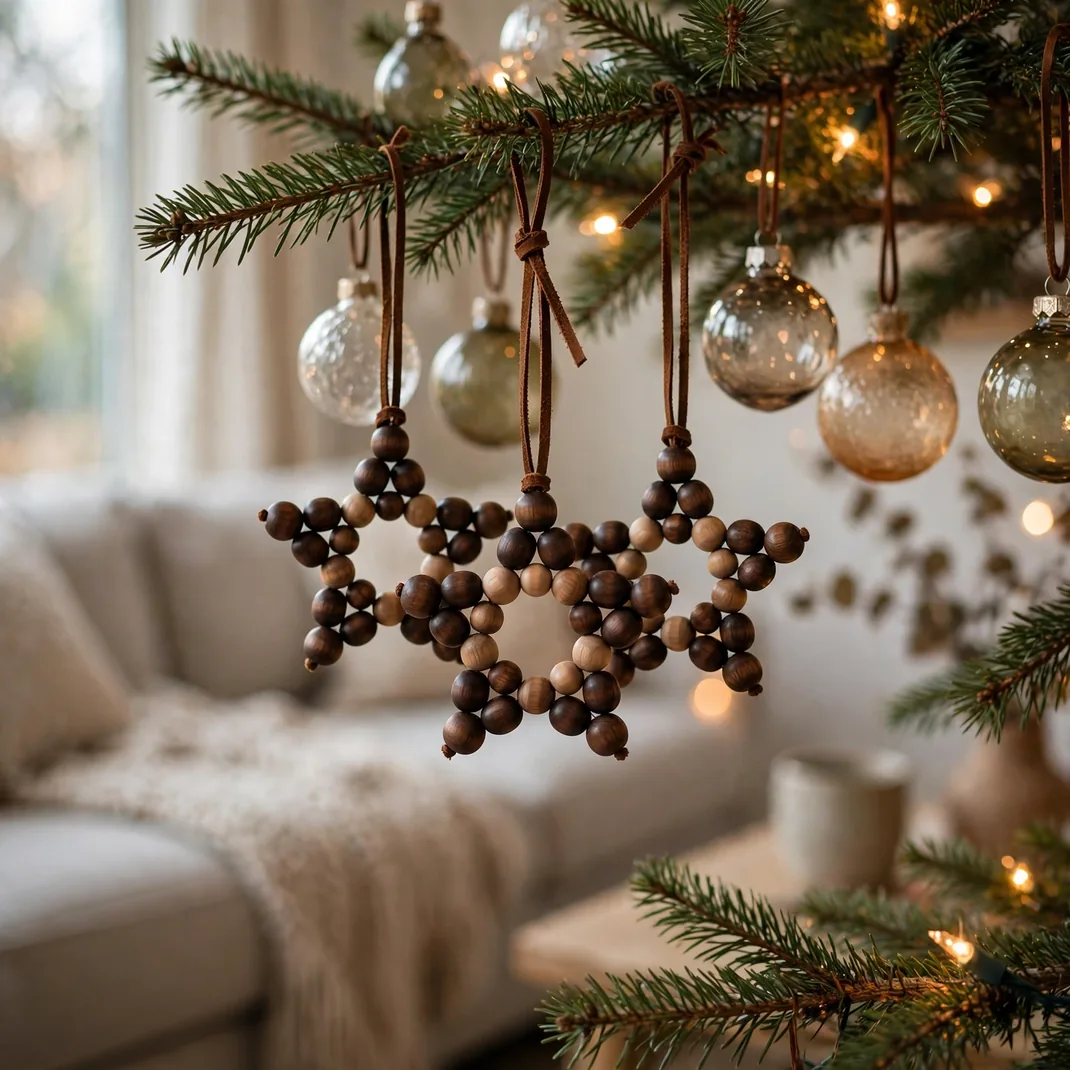
Wooden beads threaded on wire form stars with beautiful Scandinavian simplicity. The natural wood warms up a tree full of glass and glitter, and the project is so simple that kids can make a whole set. Hang them with leather cord for a modern rustic finish.
What You Gather Wooden beads in two sizes, thin craft wire, wire cutters, and leather cord.
How You Make It Thread beads onto wire in a five pointed star path, twist the ends to close, and shape the points evenly. Tie on a cord loop.
Make It Yours Stain half the beads dark walnut for stars with striking contrast.
23. Vintage Sheet Music Cones

Old sheet music rolled into cones and filled with greenery makes decorations with instant nostalgia. Roll each page into a cone, glue the seam, and fill with cedar sprigs, berries, and a candy cane. Hang them on the tree by their ribbon handles or line them along a mantel. They look like they came from another century.
What You Gather Vintage style paper or printed sheet music, glue, ribbon, cedar sprigs, berries, and candy canes.
How You Make It Roll each sheet into a cone and glue the overlap. Punch holes near the rim, thread ribbon for a handle, and fill with greenery.
Make It Yours Slip a small handwritten carol lyric inside each cone as a hidden surprise.
24. Clay Star Garland

Air dry clay stars strung on jute make a garland with lovely handmade weight. Cut the stars, stamp a simple pattern into each with a bottle cap or lace, and let them dry until bone hard. The matte white finish looks elegant against dark green garlands and mantels.
What You Gather Air dry clay, a rolling pin, star cutters, a straw, jute twine, and white paint.
How You Make It Flatten the clay evenly, cut stars, stamp texture, and poke hanging holes. Dry flat for two days, paint white, and string on jute.
Make It Yours Leave a few stars unpainted for a natural terracotta accent in the strand.
25. Pine Sprig Napkin Rings
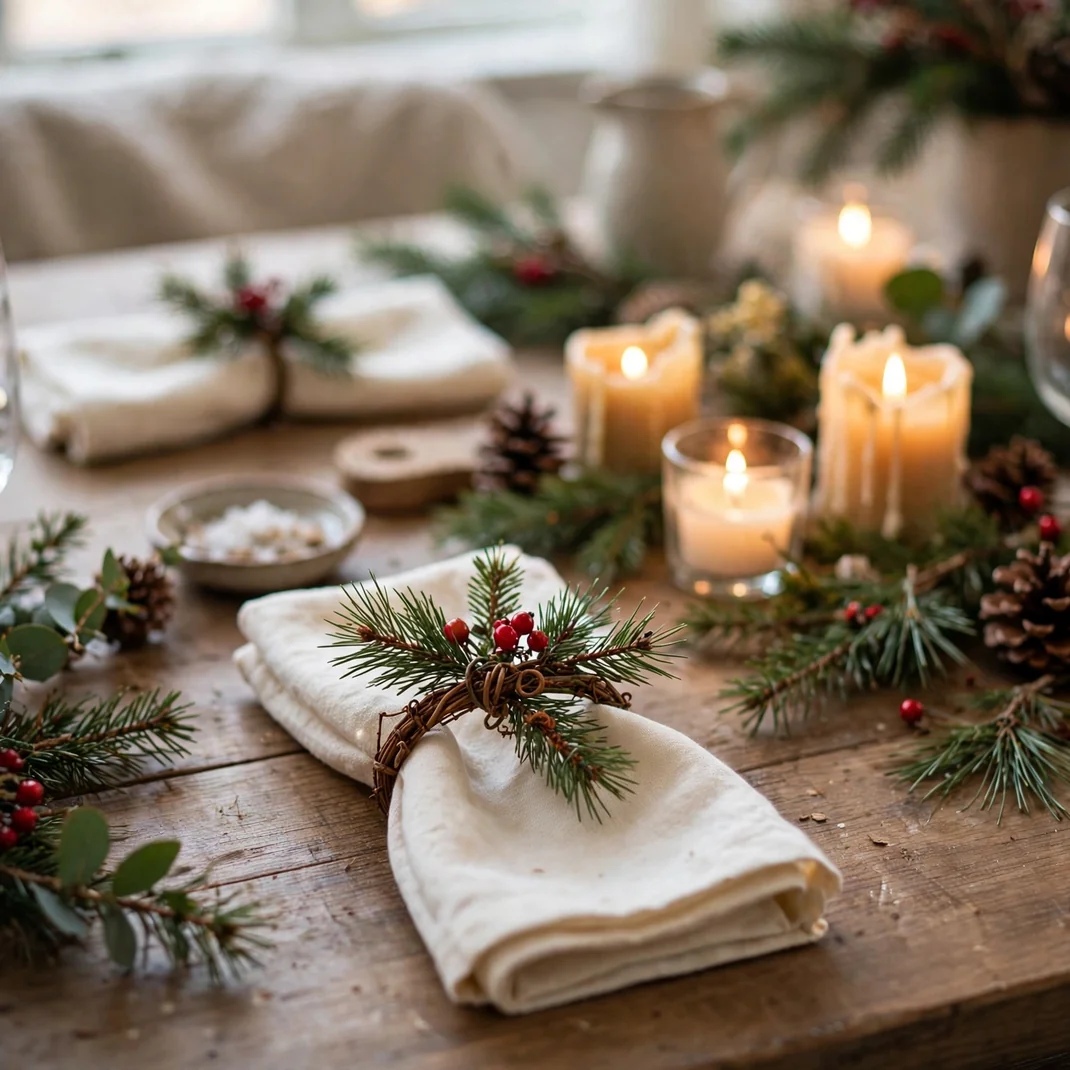
Fresh pine sprigs wired into napkin rings bring the outdoors to the Christmas table. Each ring takes minutes: a small sprig, a loop of grapevine wire, and a berry or two. They perfume the place settings and cost nothing if you have a pine tree nearby. Your table will smell like a forest.
What You Gather Fresh pine sprigs, thin grapevine wire, small berries or seed pods, and wire cutters.
How You Make It Form the wire into a napkin sized loop and twist closed. Wire the sprig and berries onto the loop, trimming the ends neatly.
Make It Yours Tie a tiny name tag to each ring and skip separate place cards entirely.
26. Keepsake Photo Baubles

The most meaningful ornament on any tree holds a face you love. Roll a favorite photo into a clear bauble, add a sprinkle of faux snow and a curl of ribbon inside, and cap it. Every year when it comes out of the box, the whole family gathers round. Make one per year and watch the collection grow.
What You Gather Clear fillable baubles, printed photos, faux snow, narrow ribbon, and tweezers.
How You Make It Curl the photo gently and slide it through the bauble opening with tweezers. Add snow and ribbon, then replace the cap.
Make It Yours Write the year on the cap with a metallic pen so the timeline stays clear.
However your weekend crafting goes, the best decoration will always be the one made with love. Pick your favorites, make a joyful mess, and enjoy a Christmas that looks and feels completely yours.