21 Pink Christmas Bedroom Accents Too Pretty to Miss
Pink at Christmas is no longer a novelty — it is a full-blown decorating direction, and the bedroom is where it shines brightest. These pink christmas bedroom ideas lean soft and grown-up: blush velvet, rose gold, mercury glass, and candlelight, all chosen to feel festive without tipping into candy-land. Every accent below is a real, buyable-or-makeable piece with honest notes on materials, placement, and care, so the look survives the whole season. Pour something warm and pick your favorites.
1. Blush Velvet Tree Collar
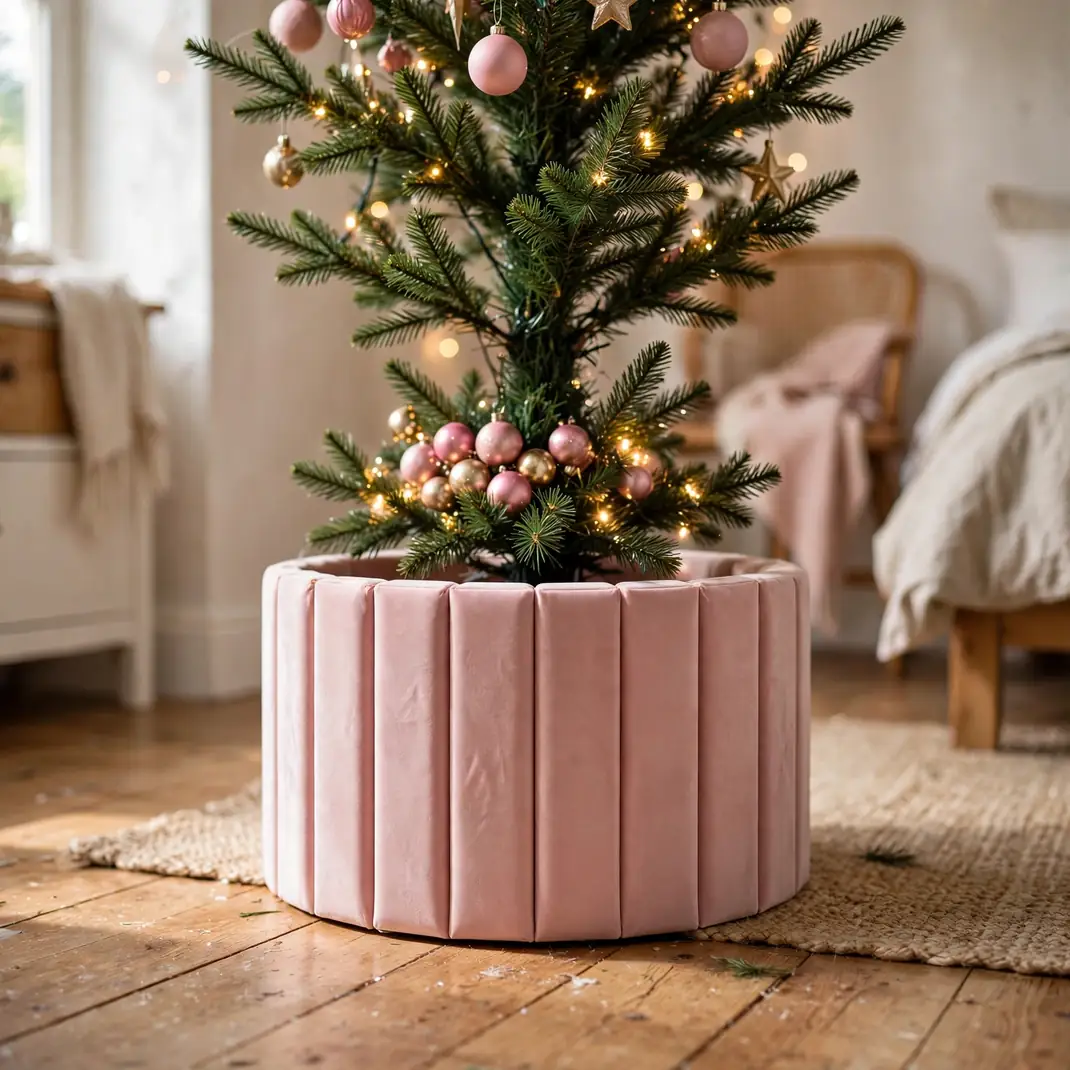
A tree collar is the tailored cousin of the tree skirt — a structured ring that hides the stand with crisp lines instead of pooling fabric. In blush velvet it reads instantly premium, like something from a boutique hotel lobby, and it takes up zero floor space, which matters in a bedroom. Most collars come as four hinged panels that fold flat for storage. Measure your stand first; collars typically fit trunks up to about 28 inches around.
How to Style It: Set the collar around the stand before fluffing the lowest branches so greenery drapes just over its rim. Pair it with a slim tree in the corner and let the velvet pick up the warm light from nearby fairy lights. Keep the palette tight — blush, cream, and one metallic — so the collar stays the star.
Why It Photographs Beautifully: Velvet absorbs light instead of reflecting it, which gives photos that soft, matte richness phone cameras love. The clean geometry of the collar frames the tree base the way a mat frames a print.
Pro Tip: Velvet shows every fingerprint and dust mote — keep a lint roller in the nightstand drawer and give the collar a quick pass before guests arrive. Store it flat, never folded, or the pile will crease permanently.
Budget-Smart Swap: Wrap a plain galvanized collar in blush velvet ribbon or a cut length of velvet fabric secured with fabric tape — the structured shape does most of the visual work.
2. Rose-Gold Fairy Light Canopy Over the Bed
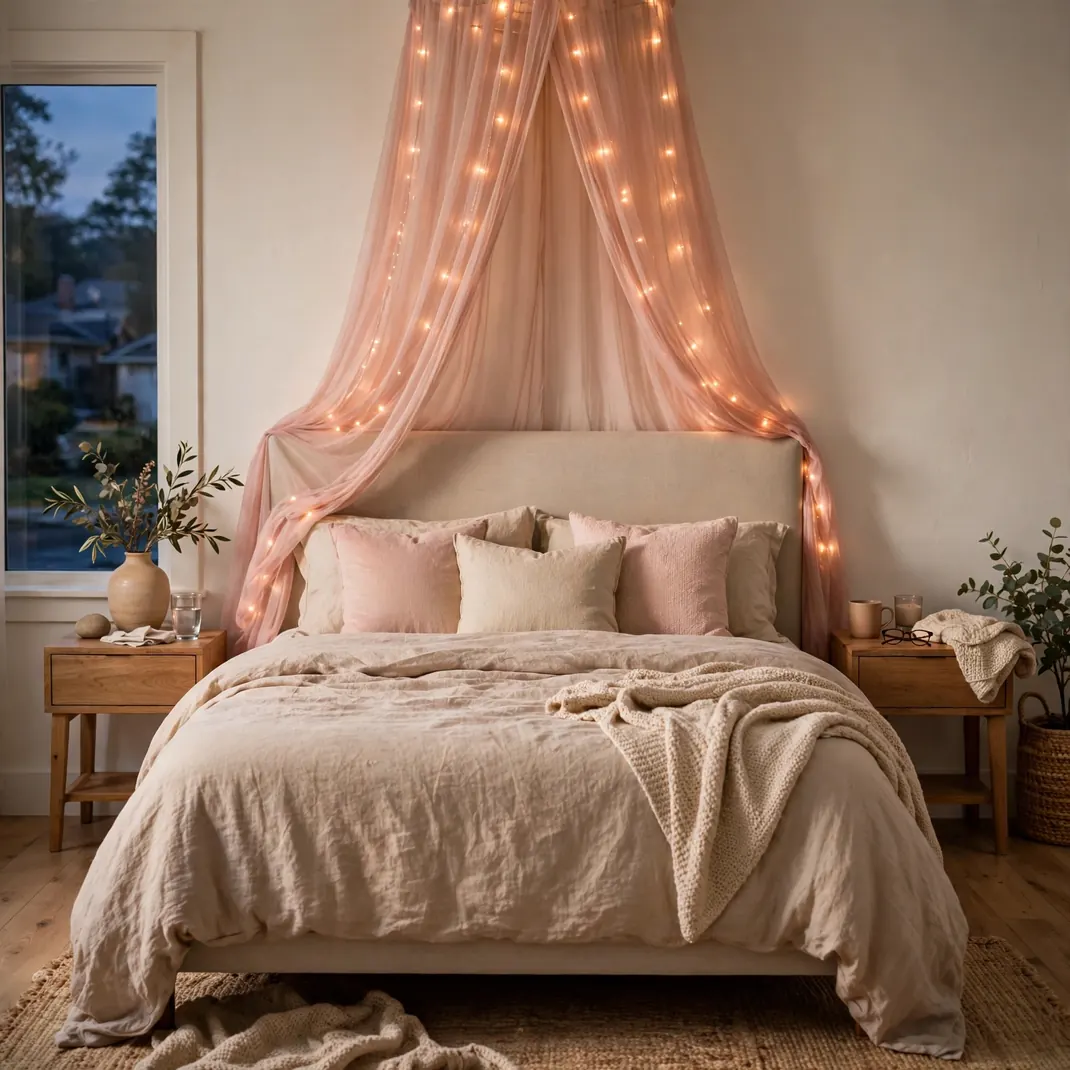
Nothing changes a bedroom faster than light, and a canopy of rose-gold fairy lights turns an ordinary headboard wall into the prettiest corner of the house. Drape a sheer blush canopy or a length of voile from the ceiling, then weave two or three strands of warm-white LED fairy lights through it so the glow diffuses softly. Use indoor-rated lights only, and choose battery packs with built-in timers so they switch themselves off after six hours. Anchor everything with removable ceiling hooks rated for the weight — most canopies plus lights stay well under two pounds.
How to Style It: Hang the canopy slightly off-center so it cascades over one side of the headboard rather than tenting the whole bed — it looks intentional, not dorm-room. Let a few strands of lights trail lower than the rest for depth. Keep bedding simple and pale so the rose-gold glow is the main event.
Why It Photographs Beautifully: Diffused fairy light through sheer fabric creates natural bokeh with zero editing. Shoot from the foot of the bed at dusk with the room lights off and the image practically styles itself.
Pro Tip: Copper-wire fairy lights photograph warmer and more delicate than thicker plastic-strand versions, and they bend into prettier shapes. Check the wire for kinks before hanging — a sharp bend is where cheap strands fail.
Budget-Smart Swap: Skip the canopy hardware and drape blush tulle from a single ceiling hook, letting it fall behind the headboard — the lights do the heavy lifting.
3. Dusty Pink Velvet Stockings with Gold Trim
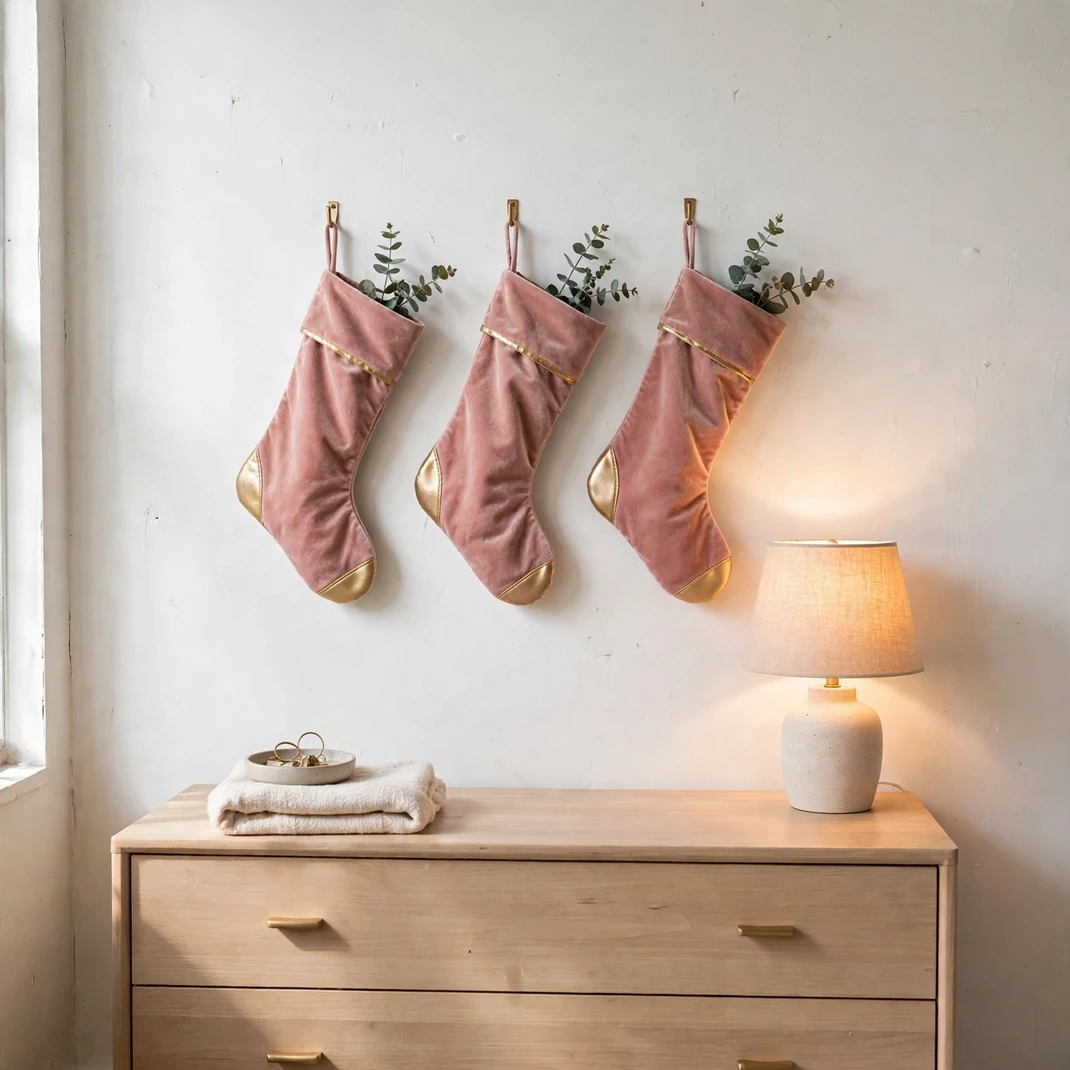
Stockings are the fastest way to say Christmas in a bedroom, and dusty pink velvet with gold trim keeps them firmly in grown-up territory. Hang them from the headboard posts, a wall-mounted peg rail, or the footboard — anywhere they catch the light. Velvet stockings hold their shape better than knit ones, so they look good even half-empty. If you fill them, keep gifts light; a sagging stocking ruins the line.
How to Style It: Hang an odd number — three or five — for a styled look rather than a matched set. Loop them over small brass hooks so the gold trim echoes the hardware. Tuck a sprig of dried eucalyptus into each cuff for a finished detail that costs almost nothing.
Why It Photographs Beautifully: The contrast of matte velvet against metallic gold trim gives the camera two textures to play with, and the repetition of three or five identical shapes is naturally pleasing in a frame.
Pro Tip: Hang stockings from removable adhesive hooks rather than hammering nails into the headboard — most hooks hold up to three pounds, plenty for a filled stocking. Press the adhesive strip firmly for a full thirty seconds or it will let go overnight.
Budget-Smart Swap: Buy plain pink velvet stockings and hand-stitch or glue a row of gold rickrack along the cuff — ten minutes of work for the boutique look.
4. Pink Mercury-Glass Ornament Bowl
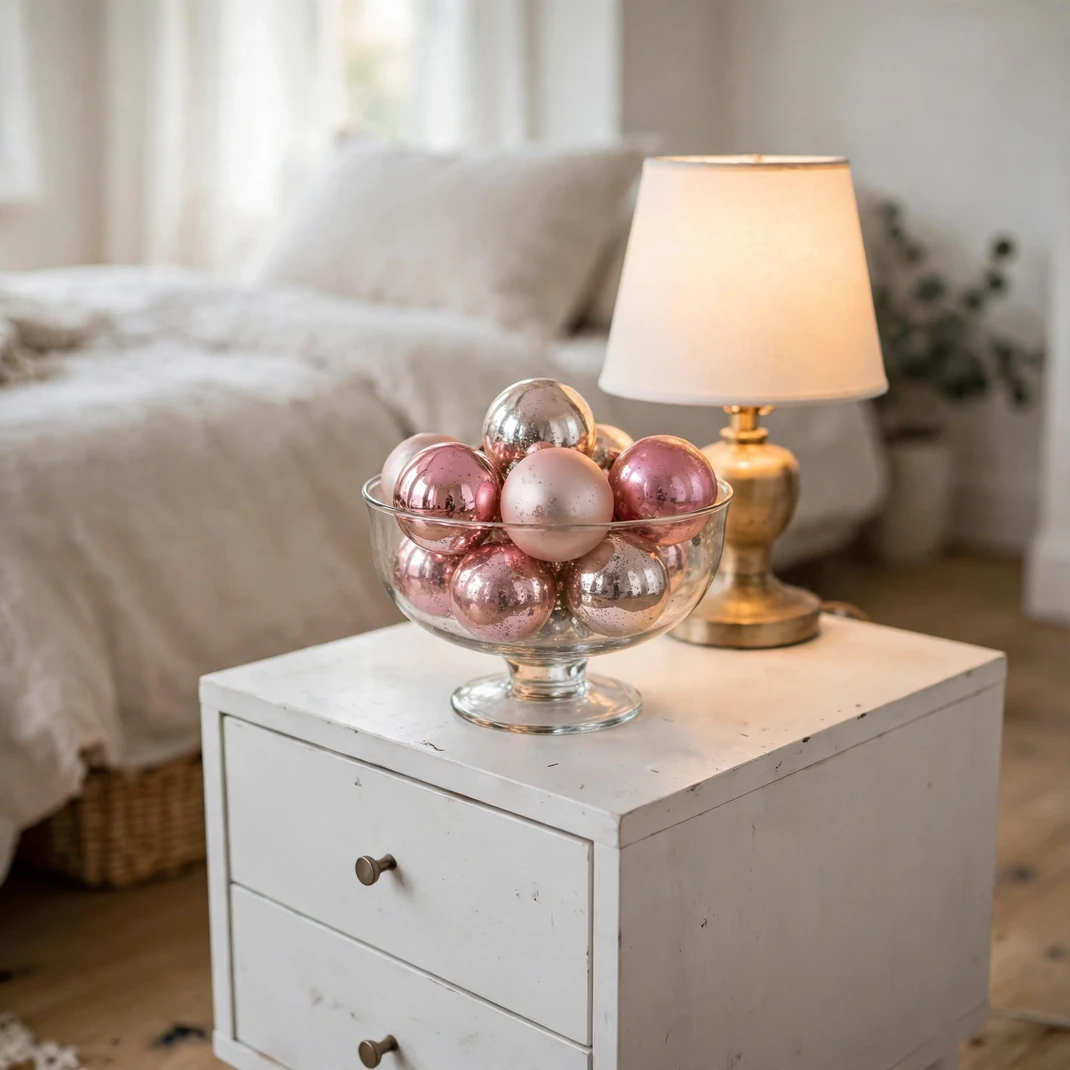
Mercury glass has that antique, candlelit shimmer that makes everything around it look more expensive. Fill a footed glass bowl or compote with pink and blush mercury-glass ornaments in mixed sizes and set it on the dresser where lamplight can hit it. The mottled silver-pink finish hides fingerprints far better than glossy ornaments. This is a five-minute styling move with a jewelry-box payoff.
How to Style It: Nestle the ornaments in a loose bed of faux snow or blush tulle so they sit at different heights. Place the bowl where a lamp or fairy lights will strike it from the side — raking light is what makes mercury glass glow. One bowl is enough; two starts to look like a store display.
Why It Photographs Beautifully: Mercury glass throws soft, dappled reflections that read as luxury in photos without any harsh glare. Shoot slightly from above to catch the full bowl.
Pro Tip: Real mercury glass contains no mercury — the name refers to the vintage technique — but the silvering scratches easily, so hand-wash the bowl and store ornaments individually wrapped in tissue.
Budget-Smart Swap: Spray-paint clear glass ornaments blush pink, then dab the wet paint lightly with a sponge for a mottled mercury effect at a fraction of the price.
5. Blush Faux-Fur Throw
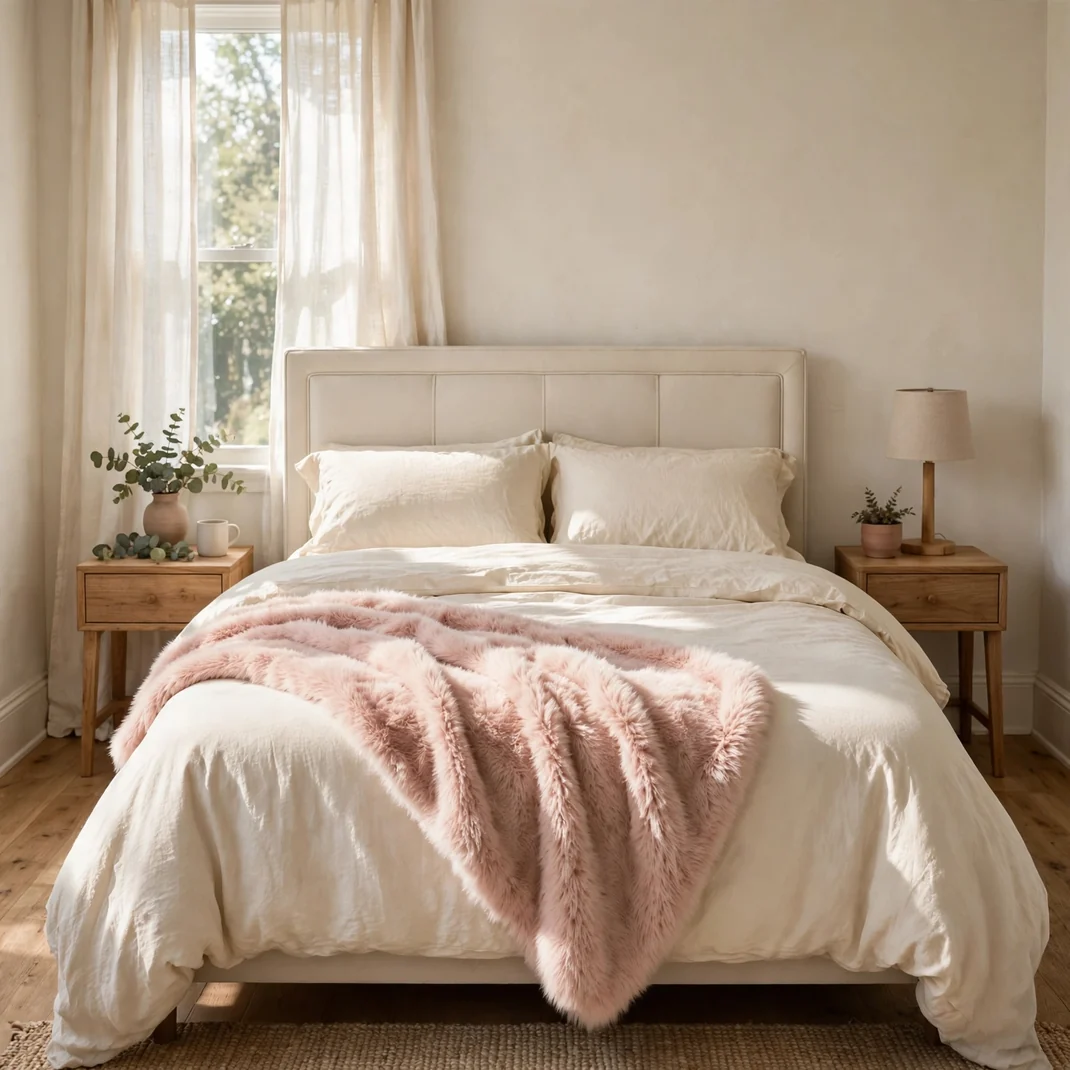
If pink Christmas has a signature textile, it is blush faux fur — soft, light-catching, and unapologetically cozy. Drape one diagonally across the foot of the bed over your regular bedding for instant holiday texture. Look for a dense pile at least an inch long; thin faux fur mats down and looks cheap within weeks. Most quality throws are machine washable on cold, which matters because December is peak hot-chocolate-spill season.
How to Style It: Fold it in thirds lengthwise and lay it across the lower third of the bed so the fur edge is the visible line. Layer it over crisp white or cream bedding — the contrast makes the blush pop. Avoid pairing it with other high-pile textures nearby or the bed looks overstuffed.
Why It Photographs Beautifully: Long-pile fur catches directional light in a way flat fabrics never do, creating natural highlights and shadows that give bedroom photos depth and softness.
Pro Tip: Shake the throw outdoors when you unbox it — factory shedding is normal for the first week. If you have pets, choose a shorter pile; long fur traps pet hair relentlessly.
Budget-Smart Swap: A blush faux-fur throw pillow or a fur runner across the footboard gives the same texture note for much less than a full throw.
6. Pink-and-Gold Wreath Above the Headboard
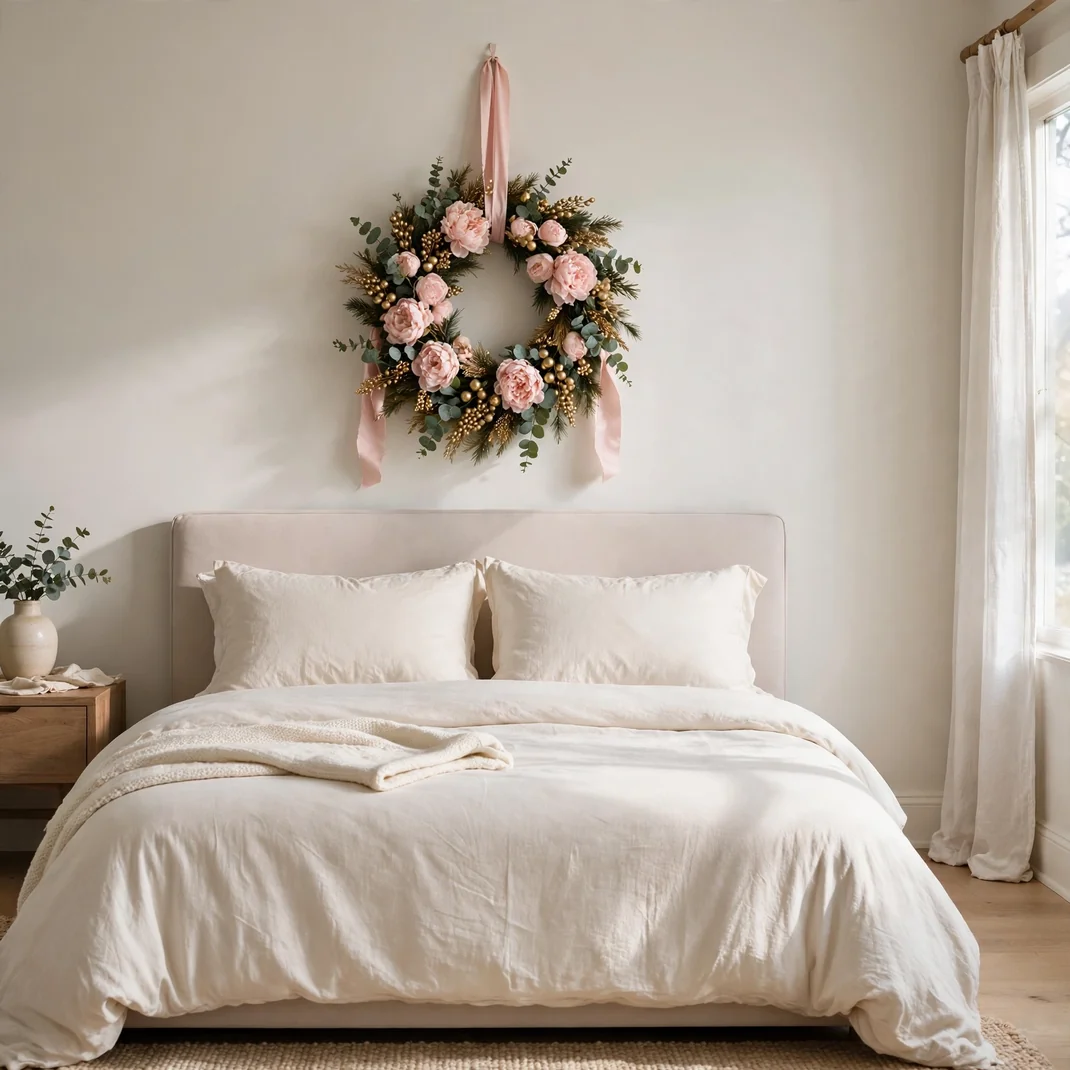
A wreath over the bed is a classic Christmas move, and the pink-and-gold version feels like it was designed for this exact moment. Start with a faux eucalyptus or pine base and wire in blush peonies or roses, gold berries, and a few cream blooms for balance. Faux is the practical choice here — a real wreath above a bed sheds needles onto your pillows for weeks. Hang it from a wide blush ribbon looped over a removable hook, and check the hook’s weight rating; a full 24-inch wreath can weigh three to four pounds.
How to Style It: Center the wreath on the wall space above the headboard, leaving at least six inches of breathing room on each side. Let the ribbon tail hang long behind it for an elegant line. Keep the bedding quiet — white or cream — so the wreath reads as art, not clutter.
Why It Photographs Beautifully: A round wreath against the strong horizontal line of a headboard is a compositional gift — circles and lines always photograph well together. The gold berries catch light and sparkle on camera.
Pro Tip: Fluff a faux wreath before hanging — the branches arrive compressed and need a good ten minutes of bending outward to look full. Store it in a wreath bag hung on a hook, never stacked under other decor, or the shape crushes.
Budget-Smart Swap: Buy a plain faux pine wreath after the holidays on clearance and add your own blush picks and gold berry sprays each December — the base lasts for years.
7. Rose-Gold Taper Candles in Crystal Holders
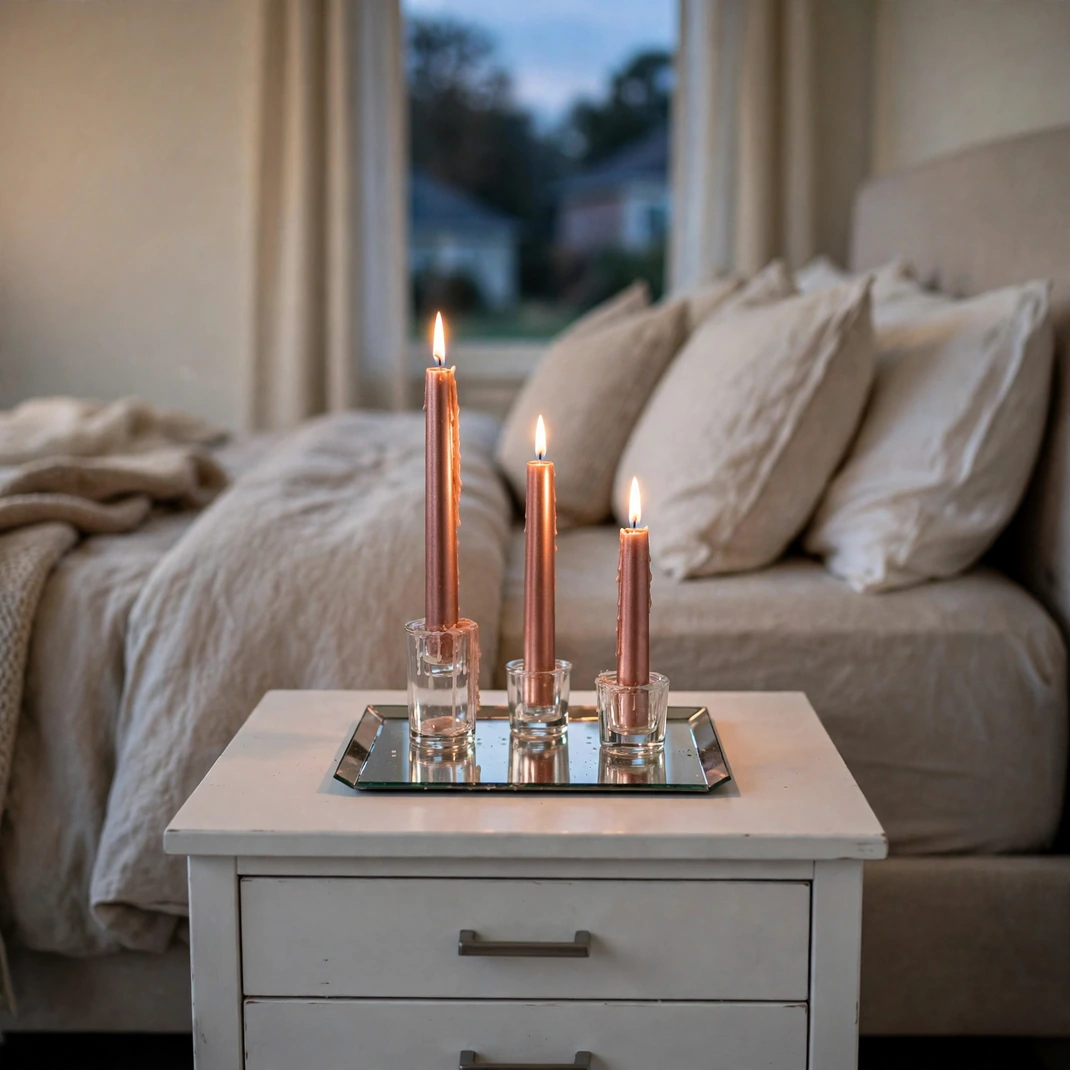
Taper candles are the jewelry of tabletop styling, and rose-gold tapers in cut-crystal holders bring a formal, festive gleam to a nightstand. Group them in threes at staggered heights — 10, 12, and 14 inches reads best. Real tapers give unmatched ambiance, but never leave them burning unattended in a bedroom; flameless LED tapers with a warm 2200K glow are the worry-free alternative and look convincing from a few feet away. Keep any open flame at least a foot from bedding, curtains, and that faux-fur throw.
How to Style It: Cluster the trio on one nightstand rather than splitting them across both — asymmetry looks styled, symmetry looks staged. Set them on a small mirrored tray to double the candlelight. Pair with a low stack of books for height contrast.
Why It Photographs Beautifully: Crystal holders fracture candlelight into tiny prisms, and rose-gold wax adds a warm color cast you cannot fake with a filter. Photograph them lit at dusk for maximum glow.
Pro Tip: Rub a little petroleum jelly inside the holder cup and tapers slide in without wobbling — and slide back out without snapping when you replace them. Trim real-taper wicks to a quarter inch before every lighting to prevent smoking.
Budget-Smart Swap: Thrift stores are full of crystal candle holders for a dollar or two — the candle color is what reads pink, not the holder.
8. Blush Satin Bows Tied on the Headboard
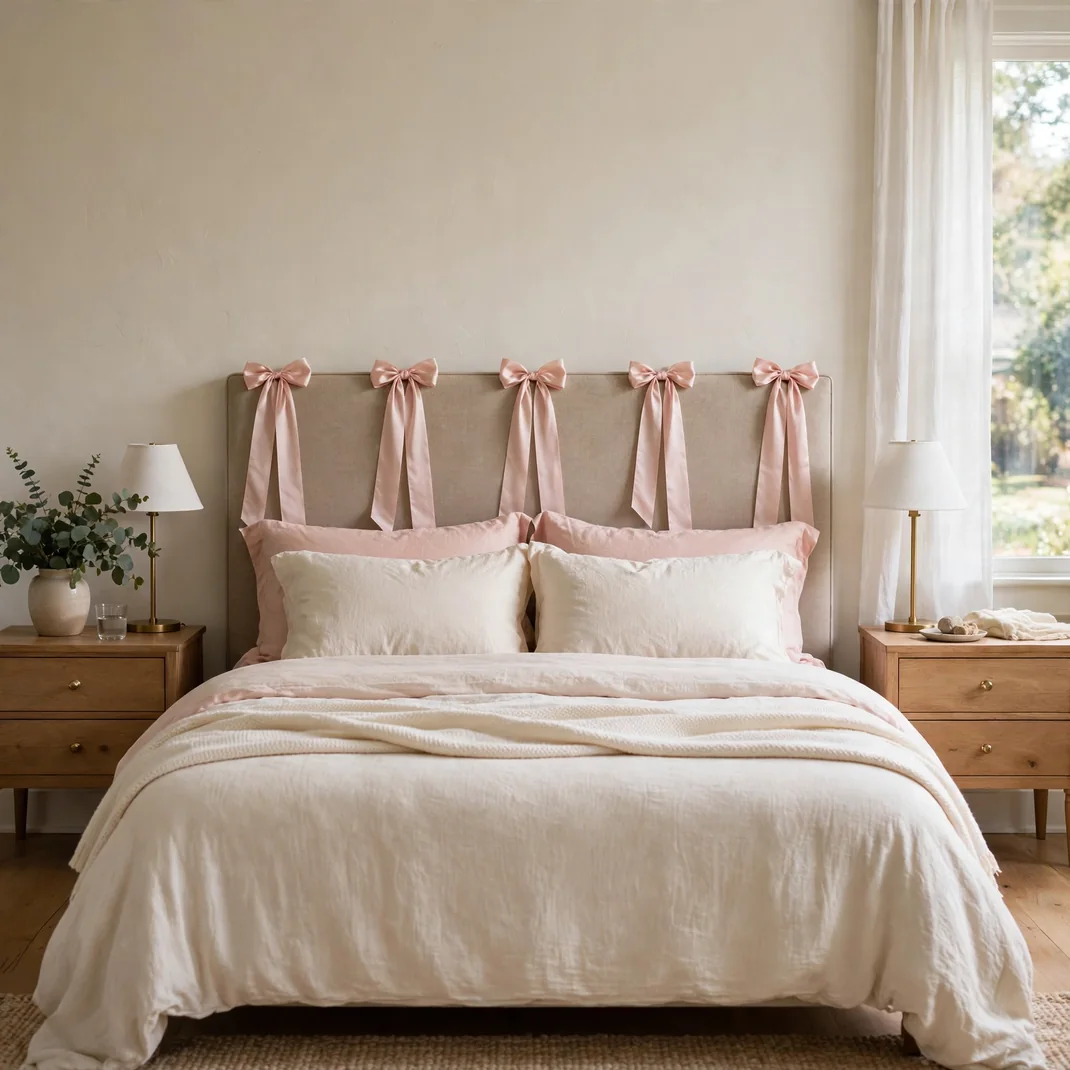
Sometimes the prettiest accent is the simplest: generous blush satin bows tied at intervals along the headboard. Use wired ribbon at least two and a half inches wide — the wire is what keeps the loops standing proud instead of flopping. Tie one bow per headboard post or spindle, and let the tails hang twelve to eighteen inches for that gift-wrapped look. This is a twenty-minute project with the visual impact of a full restyle.
How to Style It: Space the bows evenly and keep them all the same size for a tailored feel, or cluster three at the center of a solid headboard for a focal point. Match the ribbon’s blush tone to your throw pillows so the color repeats around the room. Snip the tails into a dovetail for a finished edge.
Why It Photographs Beautifully: Satin’s sheen picks up highlights that matte fabrics miss, so bows read as luminous points of interest even in flat daylight photos. Repetition of the same shape down the headboard creates rhythm.
Pro Tip: Make each bow around a cardboard template so they come out identical — freehand bows always end up with one sad lopsided sibling. Store bows stuffed with tissue so the loops keep their shape for next year.
Budget-Smart Swap: One spool of wired satin ribbon makes six to eight bows, making this the cheapest idea on this list per unit of visual impact.
9. Pink Bottle-Brush Tree Trio on the Dresser
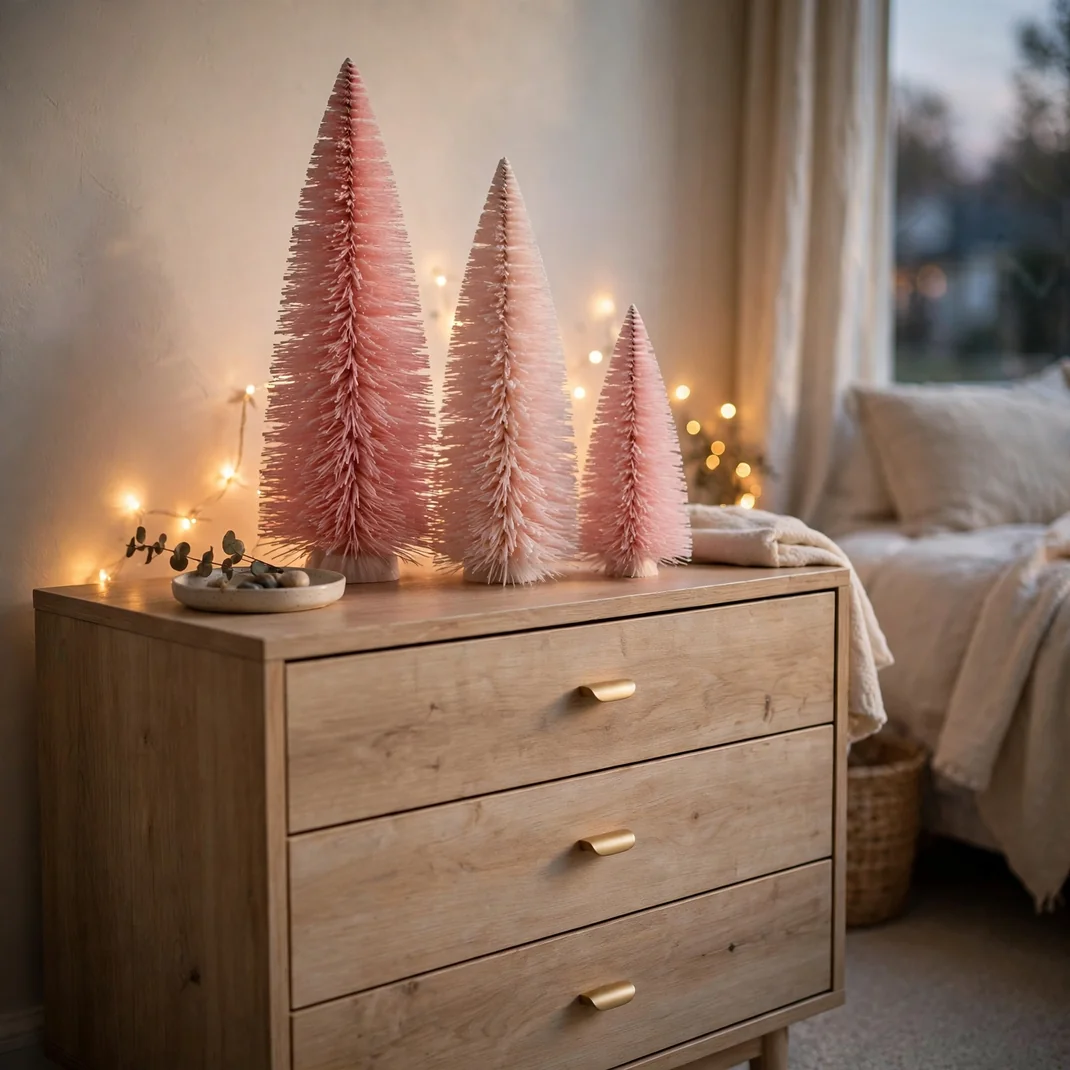
Bottle-brush trees are a Christmas staple, but the blush and rose-pink versions feel made for this palette. Group three in graduated heights — roughly 8, 12, and 16 inches — on the dresser or a bookshelf, mixing solid pink with one snowy-tipped tree for depth. Set them on small brass or marble coasters to give each tree a visual base. A short string of warm fairy lights woven loosely behind them makes the pink bristles glow at dusk.
How to Style It: Arrange the trio in a tight triangle rather than a straight row — triangles read as a composed vignette. Tuck a few pink ornaments or a sprig of faux eucalyptus at their feet. Keep the background simple so the silhouettes stay crisp.
Why It Photographs Beautifully: The fine bristle texture of bottle-brush trees catches side light beautifully, and three graduated heights create a natural leading line for the eye in photos.
Pro Tip: Bottle-brush trees shed glitter if they were made with it — give new ones a firm shake outside before styling. Store them upright in their original boxes; laying them sideways bends the bristles permanently.
Budget-Smart Swap: Spray-paint classic green bottle-brush trees blush pink with two light coats of matte spray paint — a dollar-store trio becomes a custom set.
10. Dusty Rose Cable-Knit Throw Pillows
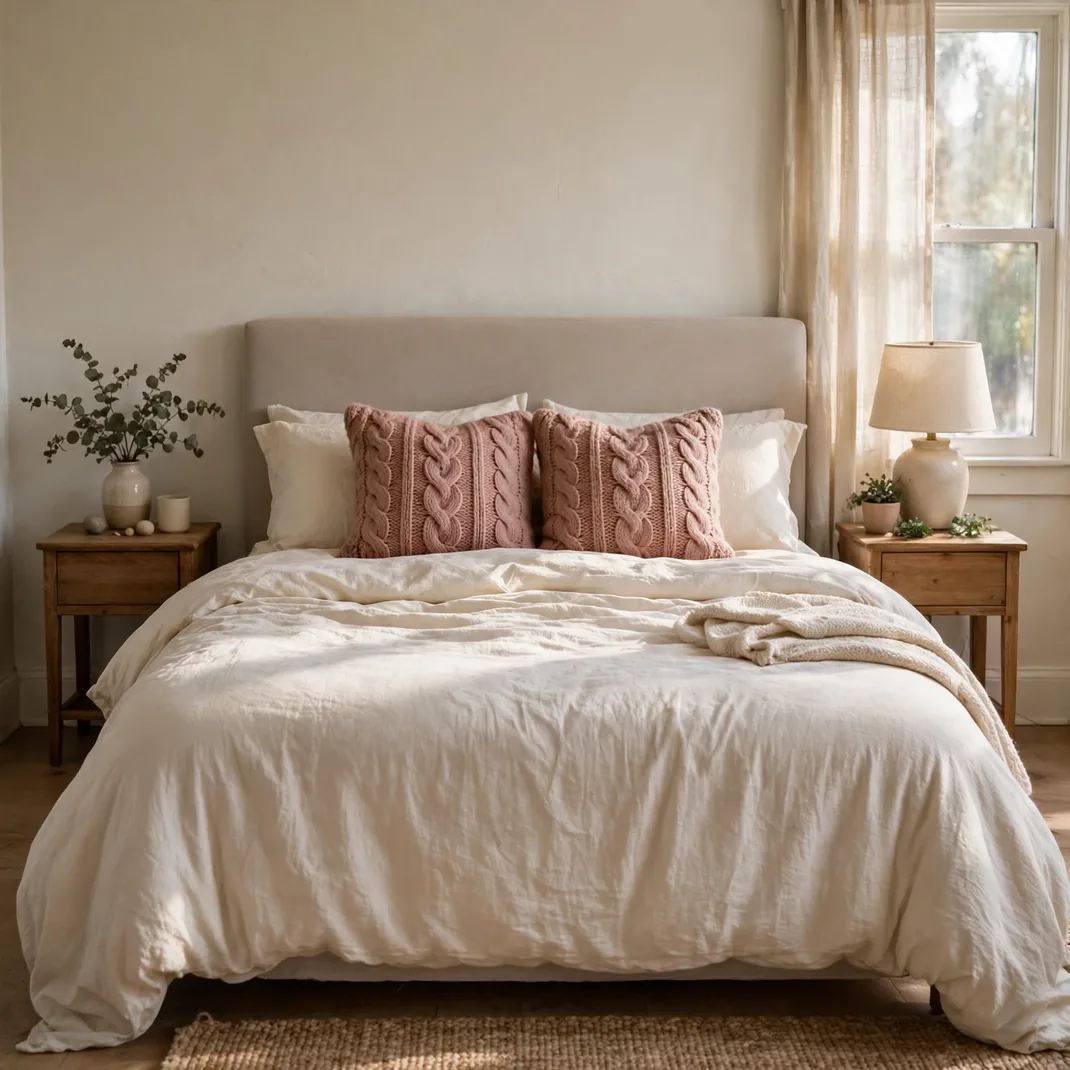
Cable knit is winter’s coziest texture, and in dusty rose it brings Christmas warmth without a single motif. Two 20-inch square pillows in a chunky cable pattern layered in front of your sleeping pillows change the whole bed. Choose covers with hidden zippers so you can swap them seasonally without buying new inserts. Acrylic knits pill less than wool blends and survive the washing machine, which is worth knowing before you invest.
How to Style It: Place the cable-knits front and center, flanked by simpler pillows in cream or blush behind them — texture in front, calm behind. Karate-chop the tops for that styled indent. Two is plenty; four starts to look like a pillow store.
Why It Photographs Beautifully: Chunky cables create deep shadows and highlights that give flat-lay bed photos the dimension they usually lack. The dusty rose tone photographs true in both daylight and warm lamplight.
Pro Tip: Buy inserts two inches larger than the cover — a 22-inch insert in a 20-inch cover is what gives that plump, designer look. Spot-clean knits rather than machine-washing when you can; agitation is what causes pilling.
Budget-Smart Swap: Knit-look covers in a jersey fabric give the cable visual at half the price and resist snagging better around jewelry.
11. Pink Glass Ornaments in a Tall Apothecary Jar
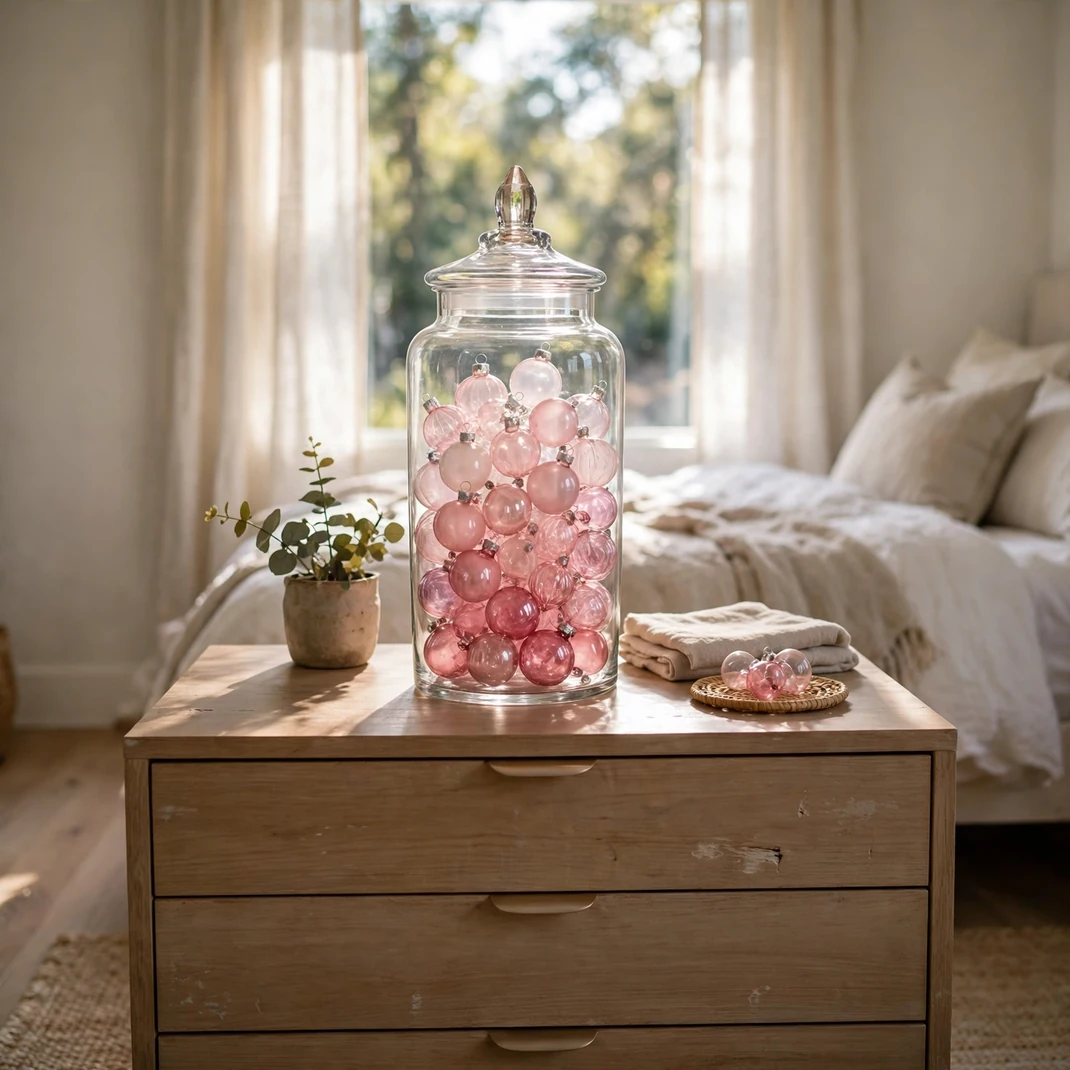
An apothecary jar filled with pink ornaments is part decor, part candy store — it draws the eye the way a beautiful object on a vanity does. Choose a tall jar with a lid, around 14 to 18 inches, and layer ornaments in ombre shades from pale blush at the top to deep rose at the bottom. Shatterproof ornaments are the smart pick if the jar sits anywhere it could be knocked. Set it on the dresser or nightstand where it catches daylight.
How to Style It: Remove the ornament caps and hooks before filling so the jar’s silhouette stays clean. Place the jar on a small stack of coffee-table books to give it height among lower dresser items. One jar is a statement; pair it with nothing busier than a candle.
Why It Photographs Beautifully: Glass-on-glass layering creates refractions and color blending that look expensive and intricate on camera, especially backlit by a window.
Pro Tip: Put a layer of blush tissue paper at the very bottom so no ornament sits directly on glass — it prevents chipping and fills gaps for a fuller look. Keep the lid on; dust inside a jar is miserable to clean.
Budget-Smart Swap: A large glass vase or even a clear storage canister gives the same effect — the ornaments are the star, not the vessel.
12. Blush Velvet Ribbon Garland on the Tree
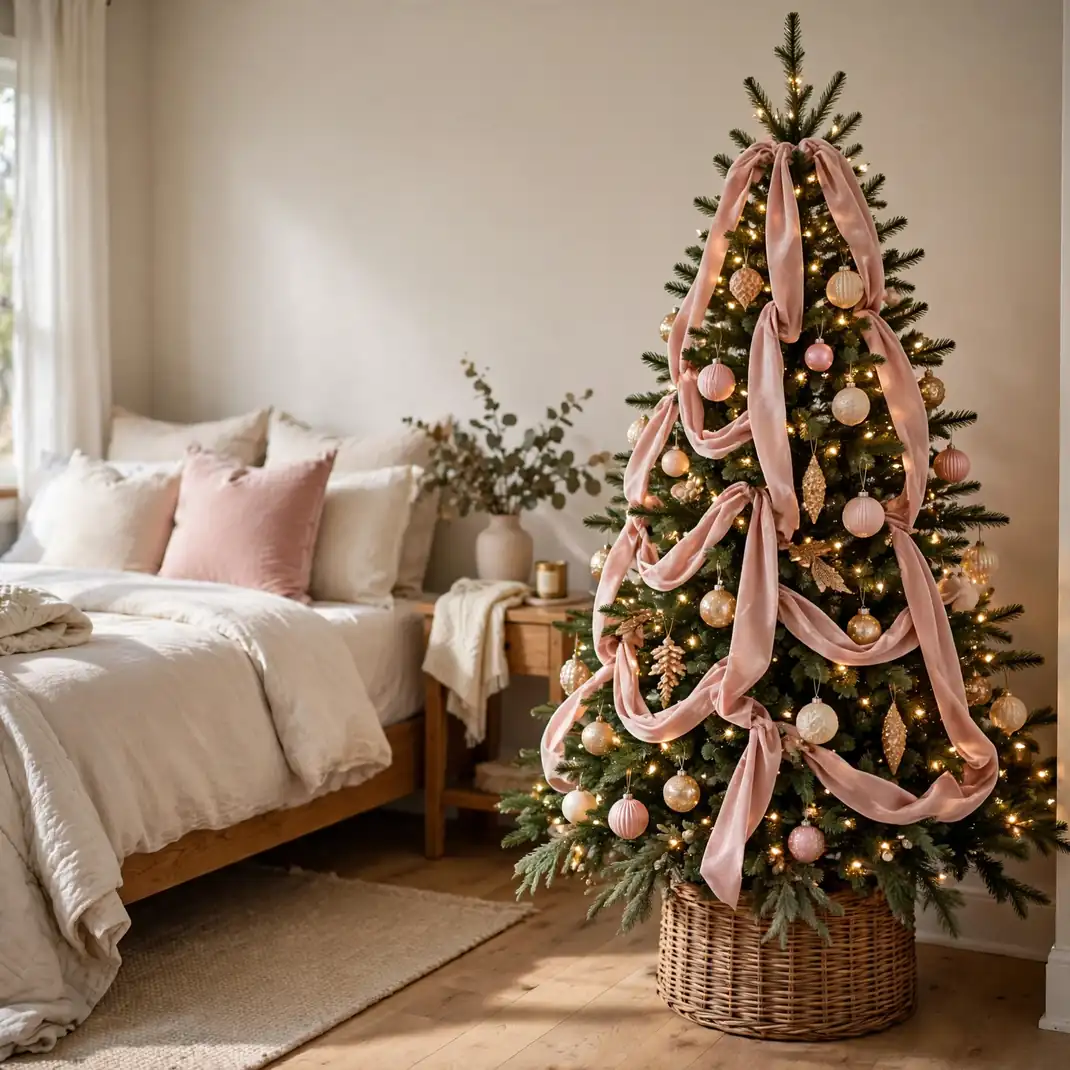
Forget tinsel — wide blush velvet ribbon woven through the tree is how stylists get that lush, designer-tree look. Start at the top and cascade the ribbon down in loose vertical waves, tucking it into the branches every eight inches or so rather than wrapping in rings. Two and a half to four-inch wired ribbon holds its shape best. You will need roughly ten yards for a six-foot tree, so buy an extra spool; running short mid-tree is the classic frustration.
How to Style It: Use three separate ribbon lengths rather than one continuous piece — it is far easier to adjust. Let the ends trail onto the lower branches for a waterfall effect. Keep ornaments in the same blush, cream, and gold family so the ribbon leads the palette.
Why It Photographs Beautifully: Vertical ribbon lines draw the eye up the tree and make it look taller and fuller in photos — the oldest stylist trick for slim trees.
Pro Tip: Cut ribbon ends at an angle to prevent fraying, and store each length rolled around a cardboard tube — folded velvet ribbon creases and never quite recovers.
Budget-Smart Swap: Blush satin ribbon gives a similar cascade for less, though it slips more — secure it with floral wire tucked invisibly into the branches.
13. Rose-Gold Star String Lights at the Window
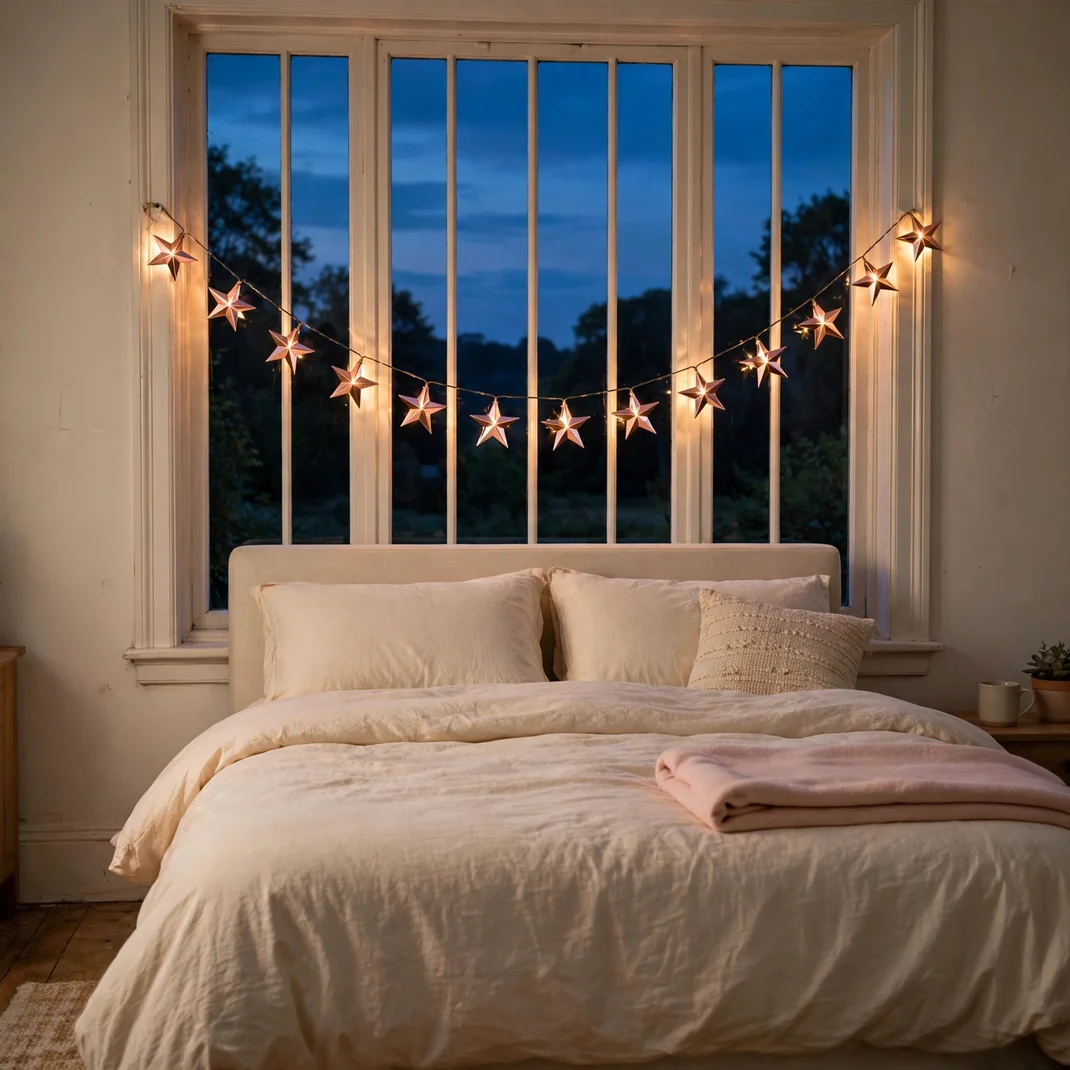
Star-shaped string lights strung across the bedroom window turn the glass into a glowing frame after dark. Choose indoor-rated LED stars in rose gold or warm white, and hang the strand from small suction-cup or adhesive hooks so the window frame stays damage-free. Battery-operated strands with timers are ideal here — no cord trailing to an outlet. From the street, the window reads as pure Christmas; from the bed, the stars make a dreamy focal point.
How to Style It: Drape the strand in two gentle swags rather than pulling it taut — swags look festive, straight lines look like a border. Let the battery pack hide behind the curtain panel. Pair with sheer curtains so the stars glow through the fabric.
Why It Photographs Beautifully: Window lights shot from inside at dusk give you a glowing subject against a deep blue evening sky — the single most atmospheric bedroom photo you can take in December.
Pro Tip: Confirm the lights are rated for indoor use — outdoor strands run hotter and the rating matters for insurance as much as safety. Wipe suction cups with vinegar before sticking; they hold twice as long on truly clean glass.
Budget-Smart Swap: Ordinary warm-white fairy lights clipped into star shapes with tiny clothespins give a similar silhouette for less.
14. Pink Plaid Flannel Duvet Set
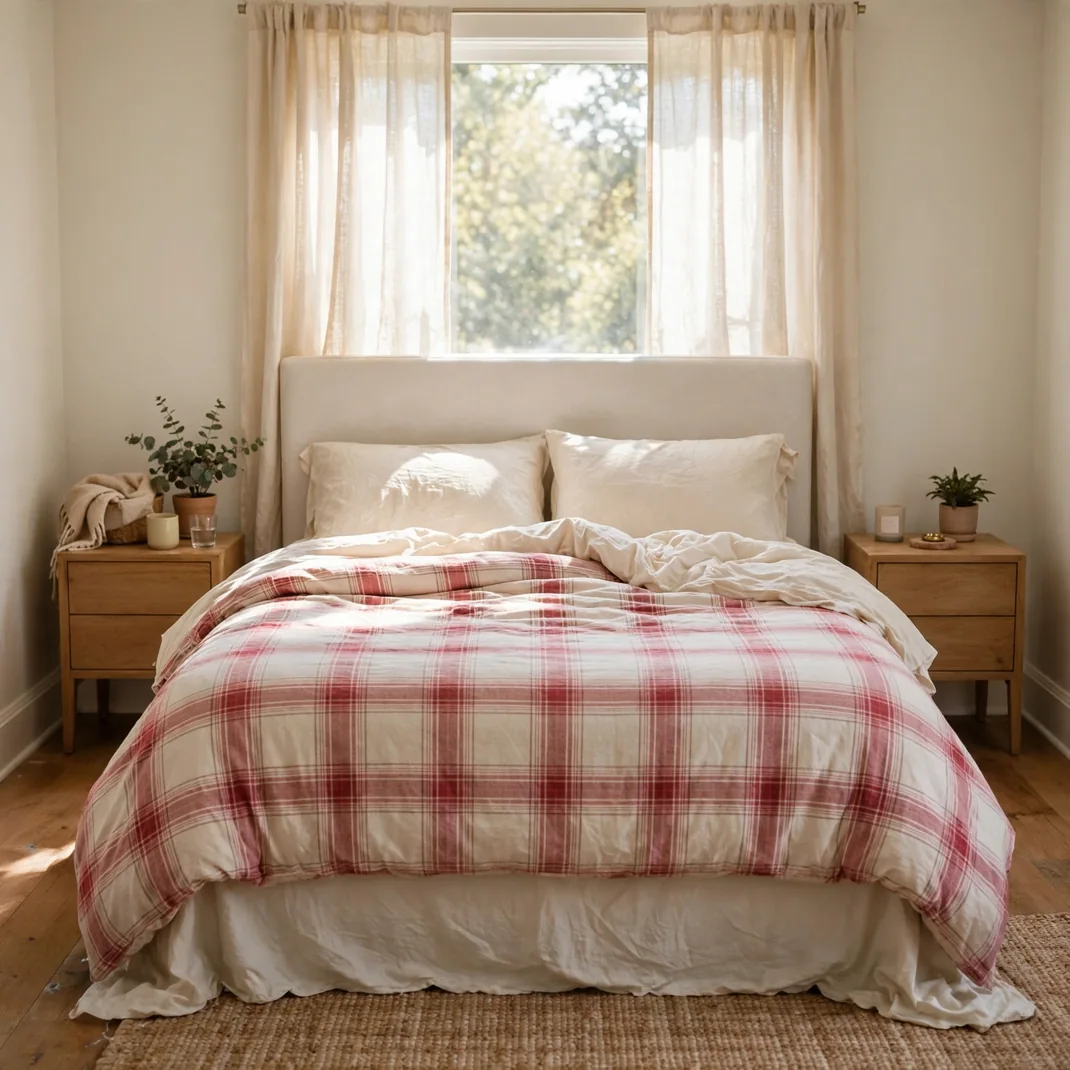
Bedding is the largest surface in the room, so a pink plaid flannel duvet set does more for the Christmas mood than any accessory. Look for a pink, cream, and soft-red tartan in brushed cotton flannel — warm to sleep under and classic enough to feel festive rather than themed. Wash flannel before first use; it softens considerably and the initial lint in the dryer is normal. Flannel wrinkles, so pull the duvet smooth each morning and embrace the relaxed look.
How to Style It: Let the plaid be the pattern and keep everything else solid — cream sheets, a blush throw, one velvet pillow. Fold the duvet down a third to show the sheet layer; it breaks up the pattern so it doesn’t overwhelm the bed.
Why It Photographs Beautifully: Plaid gives bedroom photos instant structure and coziness — it reads as “winter” in a thumbnail before any other detail registers.
Pro Tip: Buy the set a size up if you like an overhanging, hotel-style drape — flannel’s weight makes a generous duvet look especially luxurious. Wash in cold water and skip the fabric softener; it coats flannel fibers and reduces softness over time.
Budget-Smart Swap: A pink plaid flannel flat sheet layered over your existing duvet gives the pattern hit for the price of a single sheet.
15. Blush Faux Poinsettia Arrangement
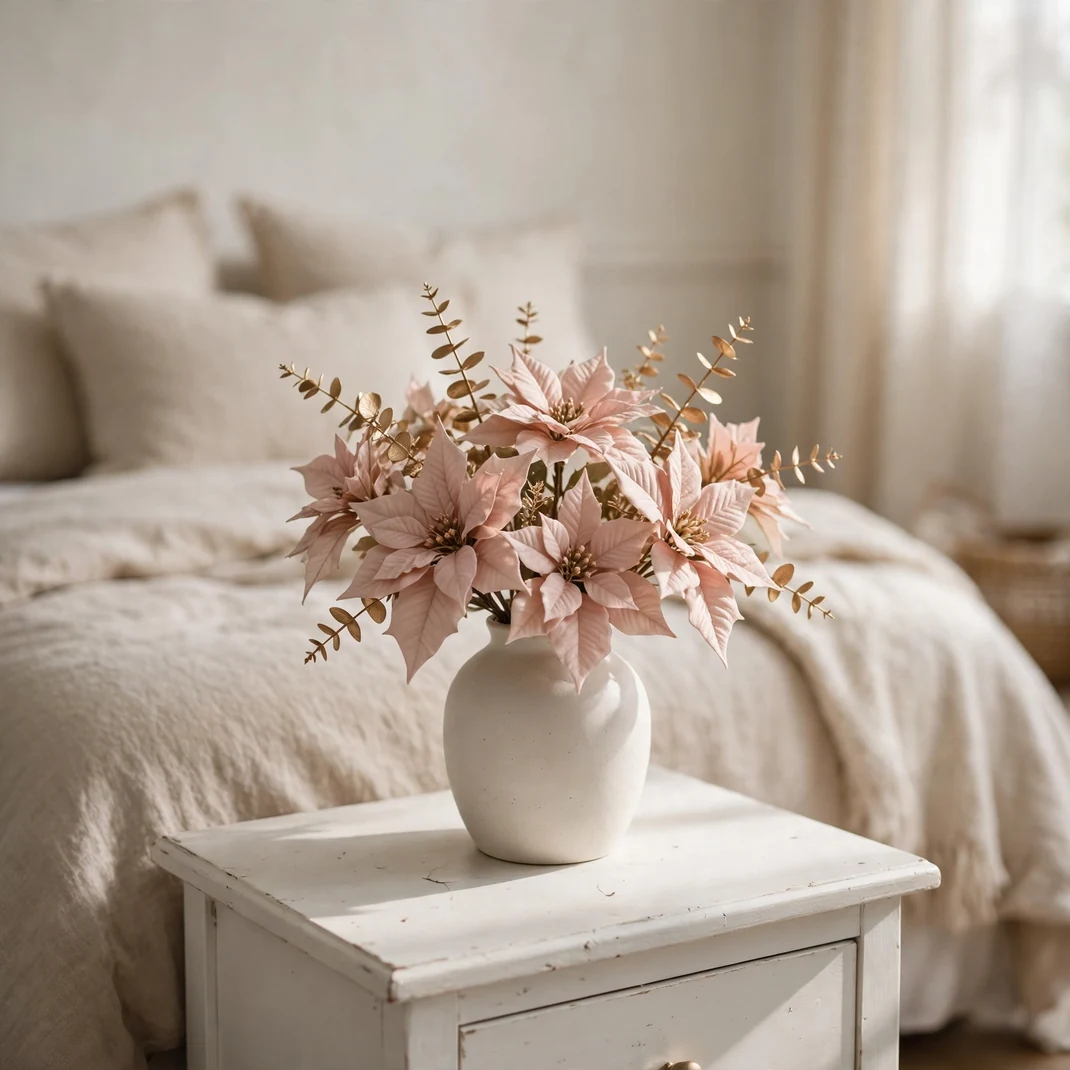
Poinsettias dyed or bred in blush pink are the quiet luxury of Christmas florals — all the festive recognition, none of the expected red. A small arrangement of faux blush poinsettias in a ceramic vase needs no water, never drops leaves on the nightstand, and looks identical year after year. Quality matters enormously here: cheap faux poinsettias look plasticky, so choose stems with fabric petals and realistic veining. Keep them away from heat vents, which fade and warp faux florals over time.
How to Style It: Use an odd number of stems — five or seven — cut to staggered heights in a low, wide vase so the arrangement looks gathered, not stuck. Add a few gold-painted eucalyptus sprigs for contrast. A nightstand or dresser corner is the natural home.
Why It Photographs Beautifully: The layered petals create natural depth and shadow that cameras love, and blush pink against a ceramic vase is a soft, tonal composition that needs no styling help.
Pro Tip: Bend each stem’s lowest leaves downward at the vase rim to hide the mechanics — visible bare stems are what give away faux arrangements. Dust petals monthly with a cool hairdryer; wiping crushes them.
Budget-Smart Swap: A single blush poinsettia stem in a bud vase on the nightstand captures the idea for the price of one stem.
16. Pink Nutcracker Pair on the Dresser
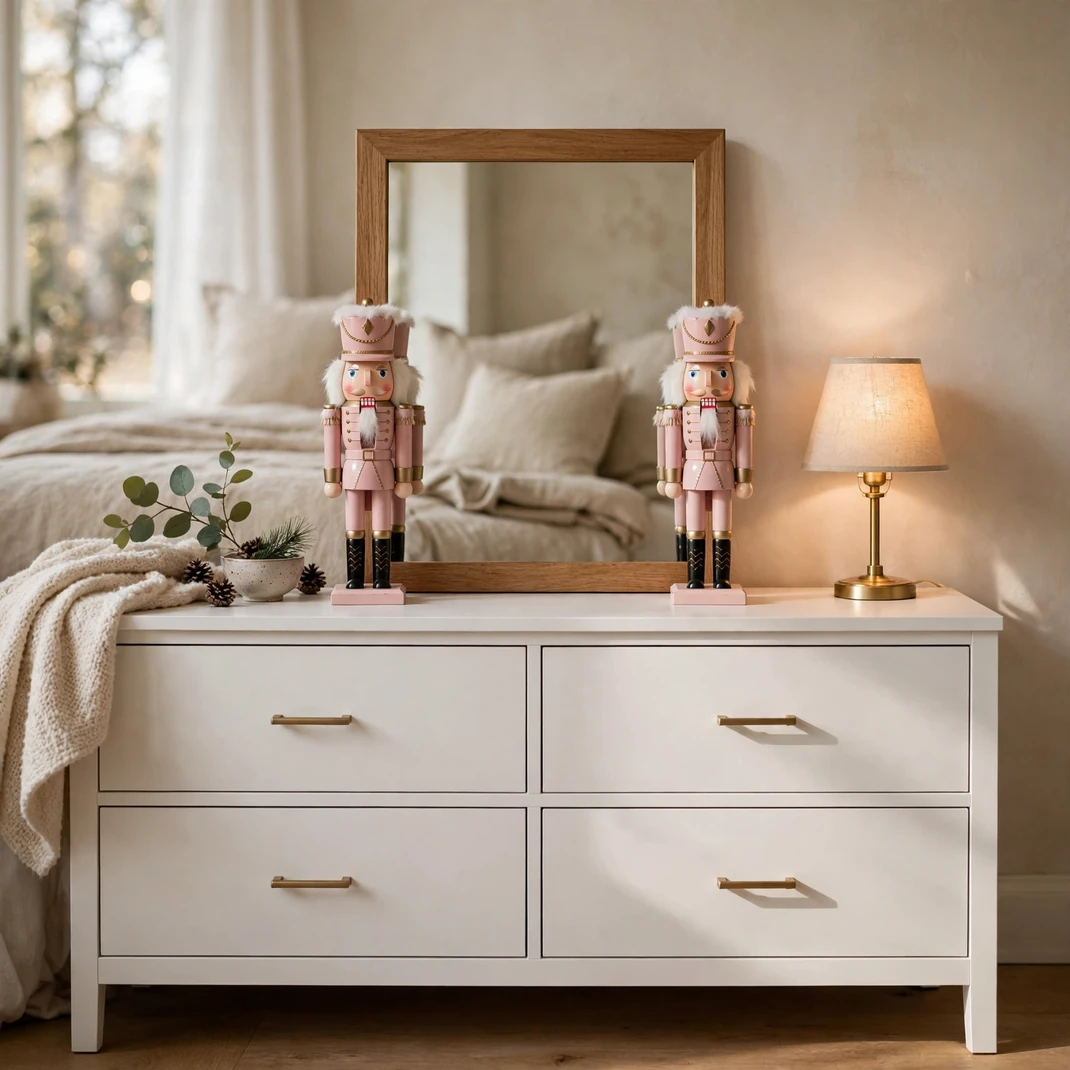
Nutcrackers are Christmas royalty, and the blush-pink painted versions feel fresh without losing the tradition. Flank the dresser mirror with a matched pair — symmetry is the whole point of nutcrackers, so buy them as a set. Fourteen to sixteen inches is the sweet spot for a dresser; taller ones belong on a mantel. Look for hand-painted details rather than decals — the price difference is small and the quality gap is enormous.
How to Style It: Place them equidistant from the mirror with a low arrangement — a candle cluster or small garland — centered between them. Keep the dresser top otherwise calm; nutcrackers are visually busy and need negative space around them.
Why It Photographs Beautifully: Perfect symmetry photographs with an almost editorial formality, and the mirror between them doubles the visual interest by reflecting the pair.
Pro Tip: Nutcrackers are top-heavy — set them on museum putty if you have kids or pets who bump the dresser. Store them standing upright wrapped in acid-free tissue; laying them down snaps the delicate painted rifles and staffs.
Budget-Smart Swap: Paint classic red-and-green nutcrackers blush pink with chalk paint and a clear wax topcoat — a weekend project that looks genuinely custom.
17. Rose-Gold Beaded Garland Draped on the Mirror
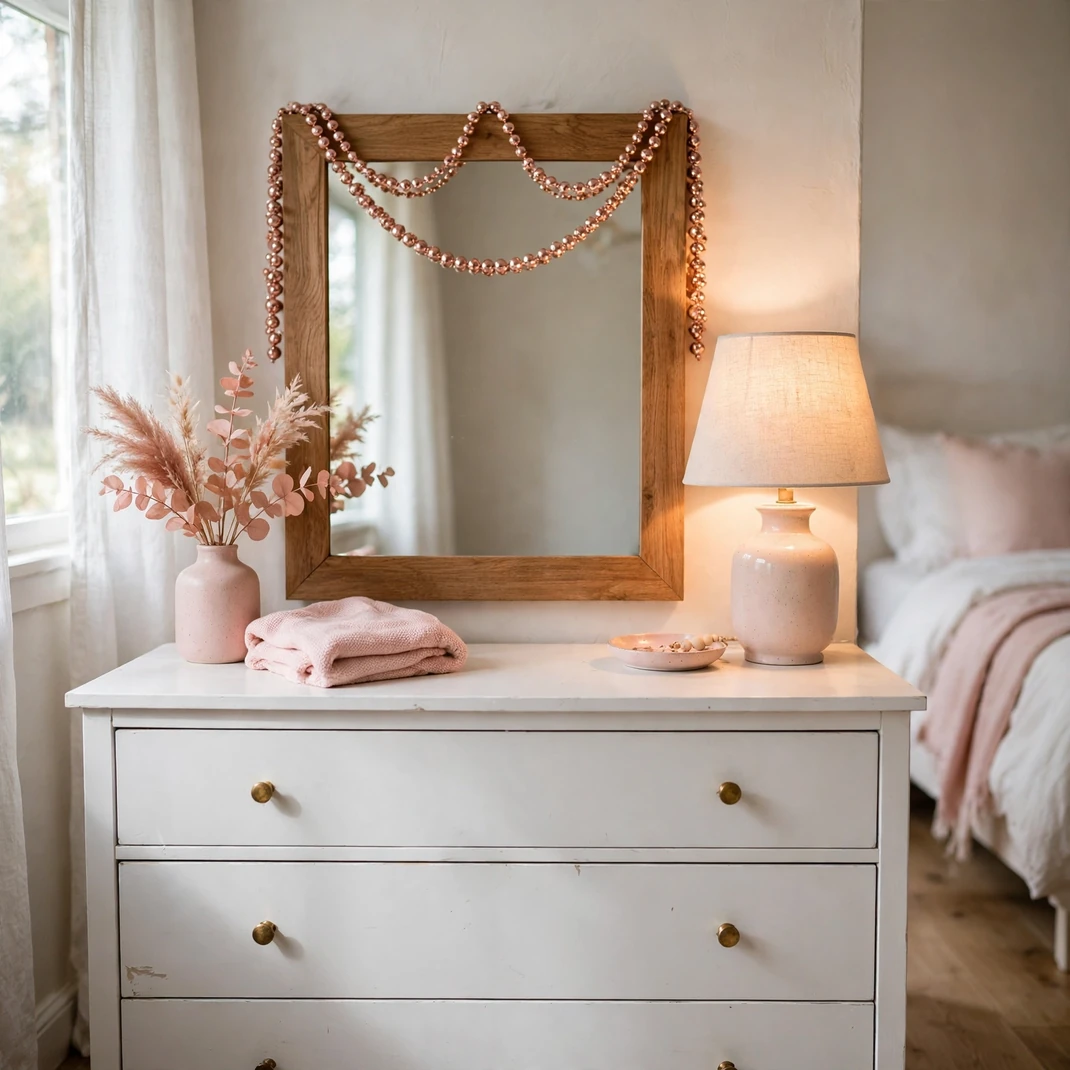
A strand of rose-gold beads swagged across the top of a mirror is the kind of detail interior stylists add at the last minute — small, but it pulls the whole room together. Wooden beads painted metallic rose gold keep it light enough to hang from two small adhesive hooks without stressing the frame. Drape it in a single shallow swag, or double it for a fuller look. Six feet is usually enough for a standard dresser mirror.
How to Style It: Let the swag dip about eight inches at center — deeper looks droopy, shallower looks accidental. Tuck a tiny sprig of faux pine at each hook point to hide the hardware. The beads will catch and scatter lamplight across the mirror beautifully.
Why It Photographs Beautifully: Metallic beads against a mirror create doubled sparkle — the reflection multiplies every bead — which gives photos a festive shimmer with no extra styling.
Pro Tip: If the metallic paint chips, touch up with a rose-gold paint pen rather than respraying the whole strand. Hang the garland on the mirror frame, never on the glass — adhesive fails on glass as temperature shifts.
Budget-Smart Swap: String large wooden beads yourself and spray them rose gold — one can of metallic spray paint covers several garlands.
18. Rose-Gold Jingle Bell Garland on the Headboard
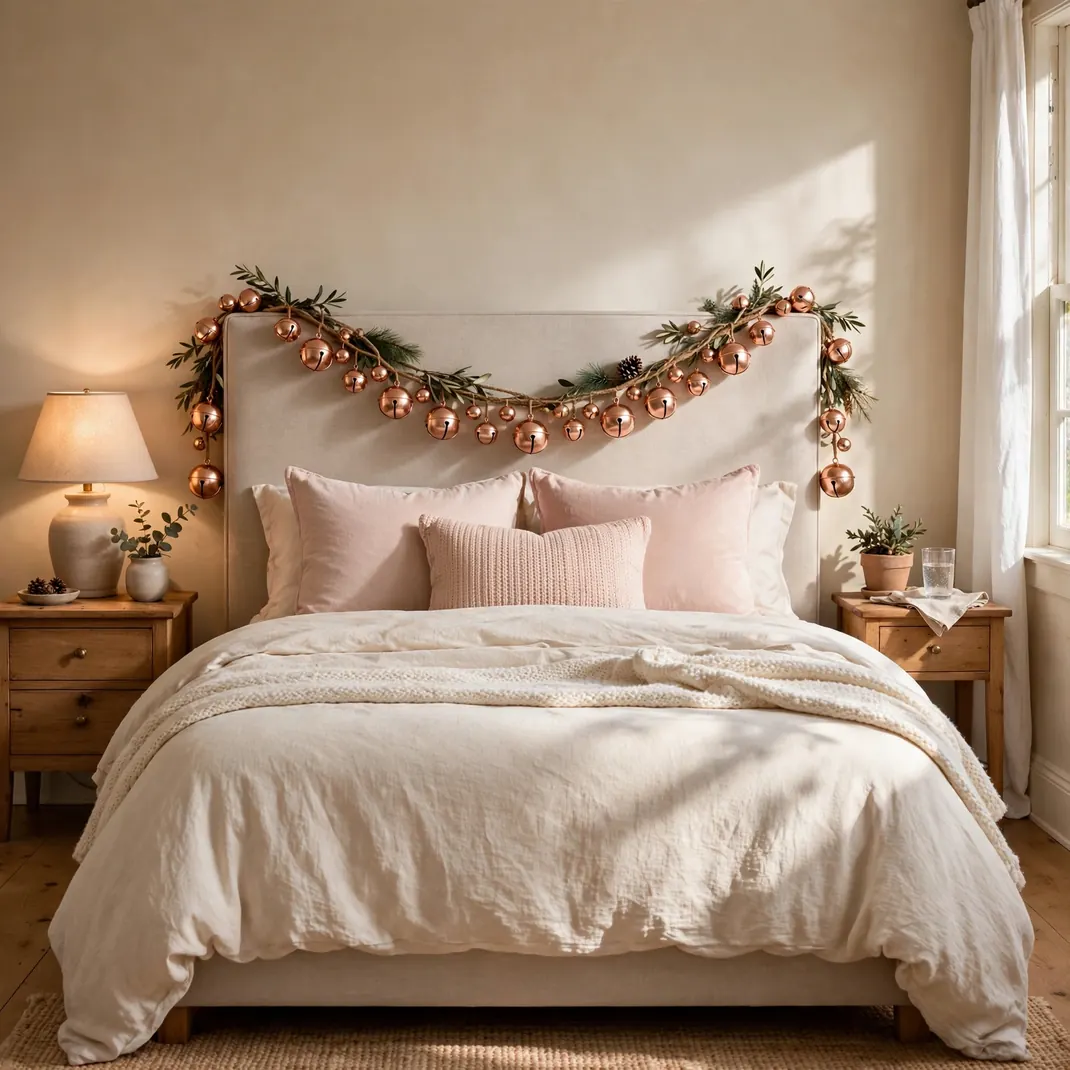
A garland of rose-gold jingle bells strung along the headboard brings sound into your decorating — the softest chime every time you plump a pillow. Thread graduated bells onto sturdy twine or velvet ribbon, mixing one-inch and half-inch bells for rhythm. Secure both ends firmly to the headboard posts; a garland that slides down overnight is a common annoyance. This is a nostalgic accent that feels handmade even when it isn’t.
How to Style It: Swag the garland across the top rail of the headboard in one or two dips, letting it sit just above the pillows. Intertwine a thin strand of fairy lights if you want it to glow as well as chime. Keep the rest of the headboard styling minimal so the bells are the jewelry, not the noise.
Why It Photographs Beautifully: Metallic bells catch pinpoint highlights that read as sparkle even in daylight photos, and the graduated sizing creates a pleasing visual rhythm across the frame.
Pro Tip: If the chiming keeps light sleepers awake, stuff a tiny cotton ball into each bell in the bedroom — you keep the look and lose the midnight jingle. Wipe bells with a dry cloth before storing; moisture tarnishes the finish.
Budget-Smart Swap: Spray-paint an inexpensive gold bell garland rose gold — the bell shape is identical, only the finish changes.
19. Dusty Pink Velvet Lumbar Pillow with Gold Botanical Embroidery
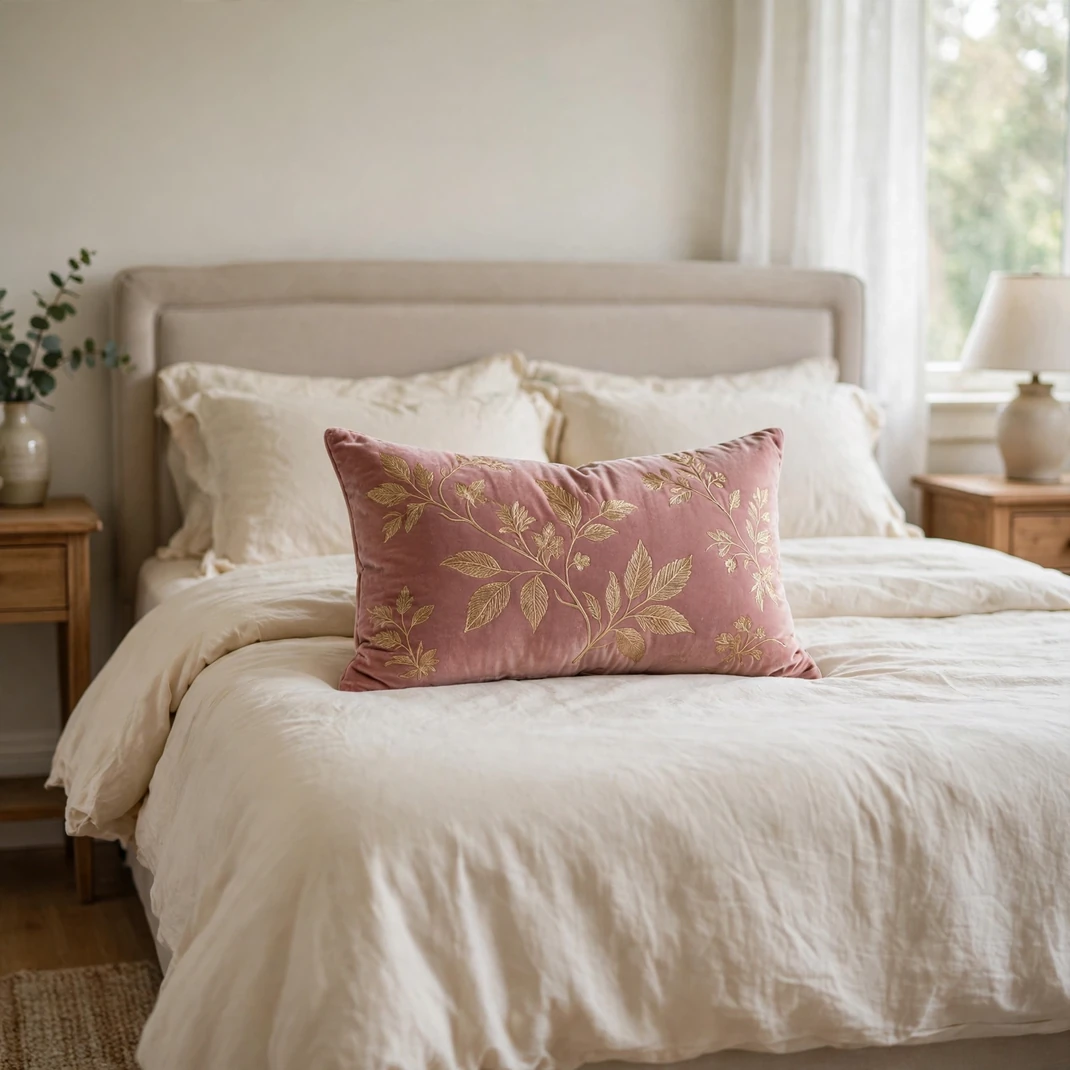
Every pink Christmas bedroom needs one investment piece, and this is it: a dusty pink velvet lumbar pillow embroidered with gold botanicals — eucalyptus, pine, berries — in metallic thread. The long lumbar shape (around 14 by 36 inches) sits perfectly across the front of stacked sleeping pillows and instantly reads as custom. Real metallic-thread embroidery has a sheen printed designs can’t match, so check product photos closely before buying. Dry-clean only, and keep it out of direct afternoon sun, which fades velvet unevenly.
How to Style It: Center it on the bed as the front layer, flanked by nothing — a hero piece needs a clear stage. Let it pick up the gold from your stocking trim, candle holders, or wreath berries so the metallic thread feels repeated, not random. Rotate it occasionally so the velvet pile wears evenly.
Why It Photographs Beautifully: Metallic embroidery on matte velvet is a texture contrast that looks rich at any distance — it photographs like a detail from a design magazine, because it is one.
Pro Tip: Brush the velvet with a soft clothes brush in one direction before photographing or hosting — it evens the pile and deepens the color noticeably. Never iron embroidered velvet; steam from the reverse side only.
Budget-Smart Swap: A plain dusty pink velvet lumbar plus iron-on gold botanical patches gives a similar look — place patches asymmetrically for a designed feel.
20. Pink Ceramic Christmas Village Houses
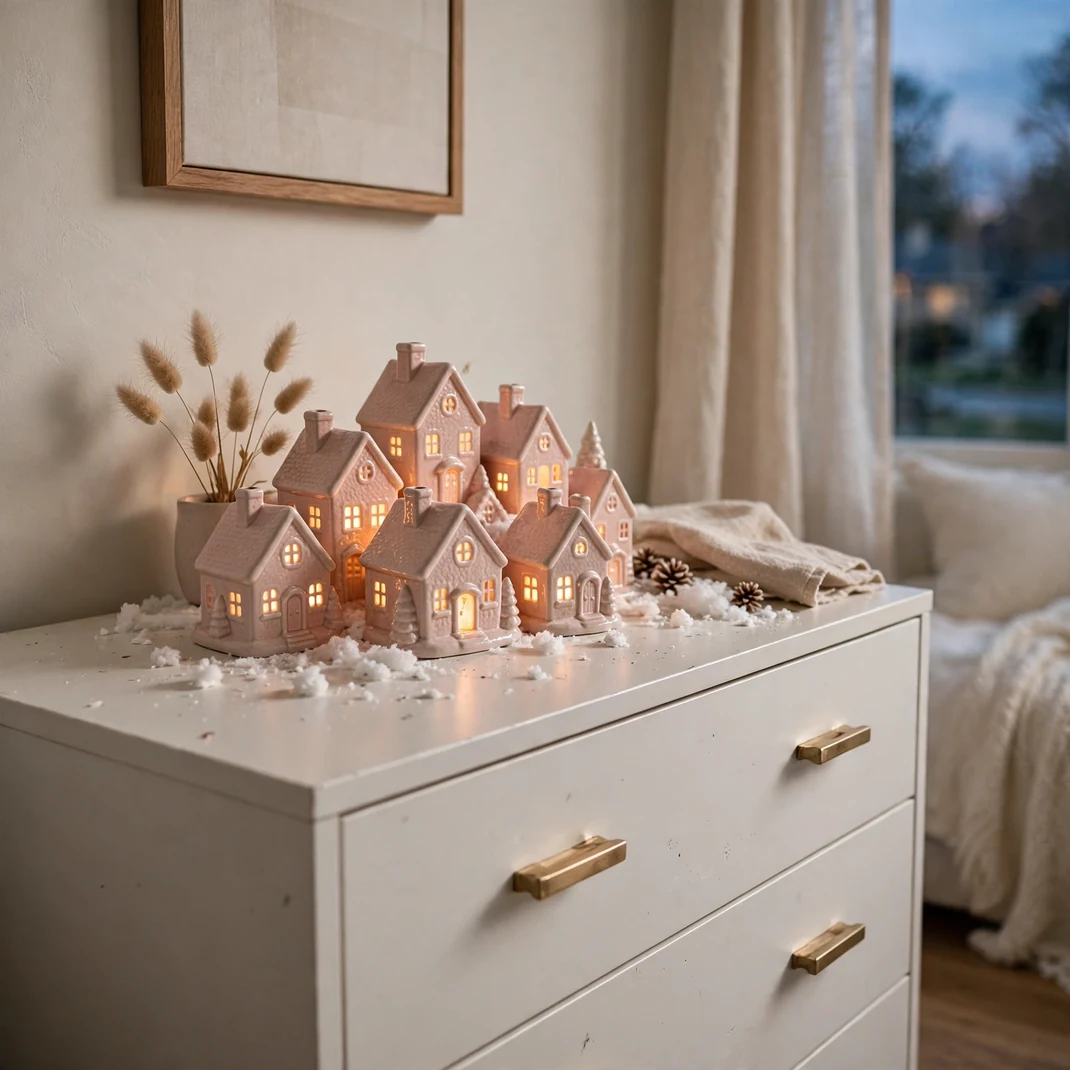
Ceramic village houses are a beloved Christmas tradition, and the blush-pink glazed versions feel like they were made for this palette. Group three to five houses of varying heights on the dresser or a deep windowsill, each lit from within by a battery-operated tea light so the windows glow amber at dusk. LED tea lights with timers are essential — real tea lights inside glazed ceramic get hot and soot the interiors. A dusting of faux snow around the base finishes the scene.
How to Style It: Arrange the houses in a loose cluster with the tallest at the back, like a real streetscape. Tuck bottle-brush trees or faux snow between them for scale. Turn the lights on at dusk and let the village be the room’s nightlight.
Why It Photographs Beautifully: Glowing windows against pink ceramic at blue hour is pure atmosphere — shoot with the room lights off and the village becomes the entire composition.
Pro Tip: Put all the tea lights on the same timer schedule so the village lights up as one scene. Wrap each house individually in bubble wrap for storage — glazed ceramic chips at the roof edges first.
Budget-Smart Swap: Paint plain white ceramic houses blush pink with ceramic-safe paint, or start with just two houses — a village grows beautifully one December at a time.
21. Rose-Gold Lantern with LED Candle
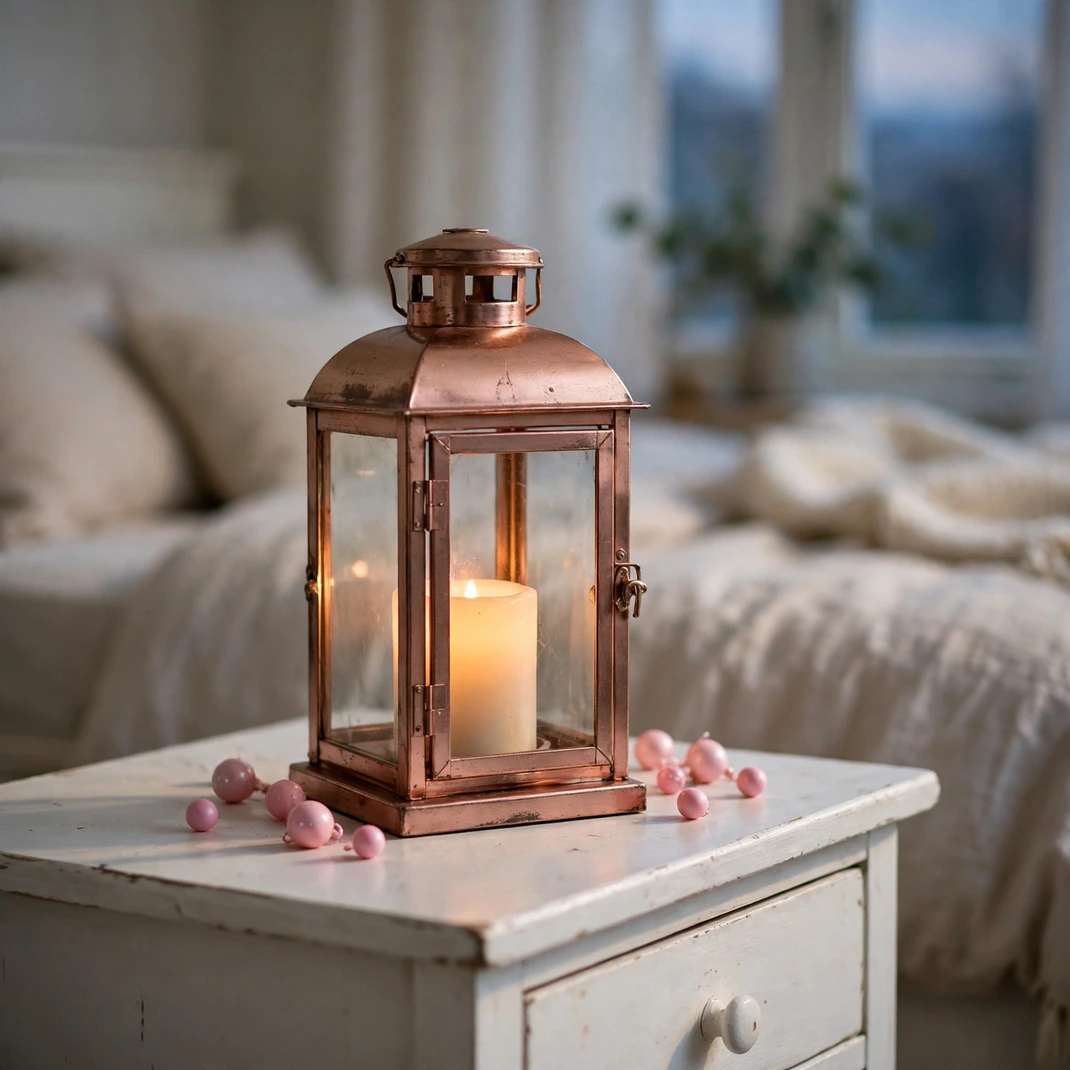
A rose-gold metal lantern holding a flameless LED candle is the finishing touch — part lighting, part sculpture. Set one on the nightstand or a pair flanking the bedroom door. Choose a lantern with glass panels rather than open cutwork; the glass diffuses the LED glow into something genuinely candlelike. Timer-function LED candles that run six hours on and eighteen off mean you set it once in December and forget it. Keep the scale modest — an 8 to 10-inch lantern suits a nightstand without crowding it.
How to Style It: Place the lantern where you’ll see it glowing as you fall asleep — the nightstand corner or a low bookshelf works beautifully. Surround the base with a few pink ornaments or a sprig of faux pine. If using a pair, keep them identical for a formal, finished look.
Why It Photographs Beautifully: A glowing lantern in a dim room creates a natural vignette — bright center, soft falloff — that makes any bedroom photo feel intimate and intentional.
Pro Tip: Look for LED candles with a “flicker” mode rather than steady glow — the moving flame reads as real even up close. Replace the batteries at the start of the season; dimming LEDs flicker unnaturally and ruin the effect.
Budget-Smart Swap: A rose-gold lantern is a year-round piece — style it with a plain LED candle after the holidays and the cost spreads across twelve months.
Pink Christmas decorating works because it commits — a little blush here and there reads as an accident, but a room that layers velvet, rose gold, and candlelight reads as a decision. Start with the biggest surface, usually the bedding or the tree, and let the smaller accents echo those tones around the room. However you mix these 21 ideas, keep the palette to blush, cream, and one metallic and the whole bedroom will feel cohesive, calm, and quietly festive all season long.