22 Kitchen Wall Decor Ideas to Fill That Blank Space
Every kitchen harbors a wall that the eye slides past: the bare stretch beside the refrigerator, the empty run behind the breakfast table, the wide plaster field between two doorways. Left undecorated, even handsome cabinetry looks unfinished, and the whole room feels smaller, colder, less loved. The encouraging truth is that a wall asks far less of you than a renovation, since one considered object, hung with intent, can retune the entire atmosphere.
The twenty two notions below span every taste, from farmhouse nostalgia to gallery minimalism, and suit every budget from flea market finds to investment pieces. Each idea arrives with a supply list, a plain spoken setup sequence, and one professional trick for a flawless result. None of them demands a contractor, a paint sprayer, or more than a single afternoon.
Ready to give those bare walls the attention they deserve? Open with the notion that mirrors your style, hang it well, and let the room rise to meet it.
1. Oversized Wall Clock
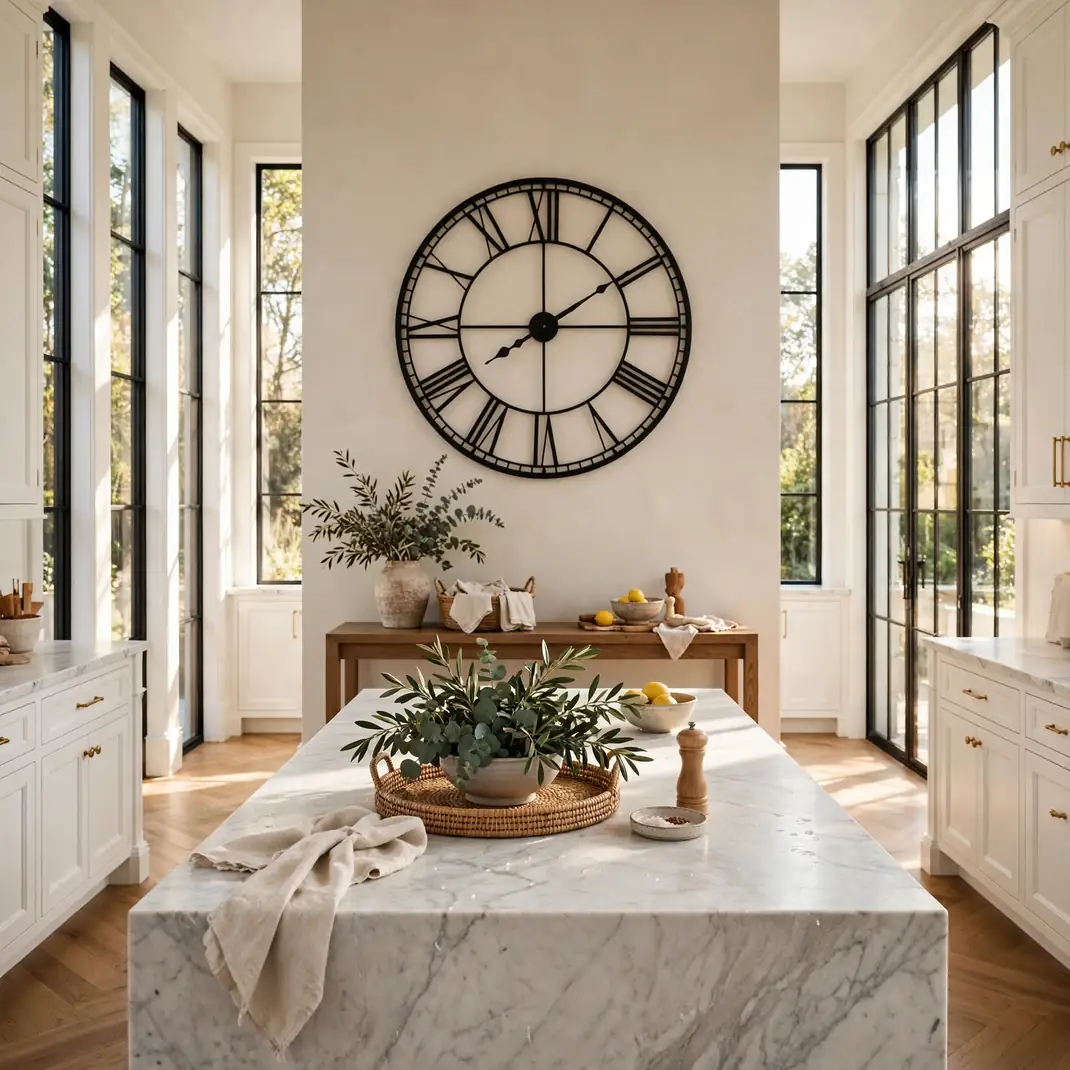
A monumental timepiece swallows the emptiest stretch of plaster and hands the room a heartbeat. Chase a colossal dial of openwork iron or sun kissed oak, its numerals legible clear across the chamber. Hung at sight level above a sideboard or along the breakfast nook’s vacant flank, the piece marries utility with sculpture. A lone grand circle also loosens the rigid geometry of cabinetry and appliances encircling it. After dusk, a softly glowing face becomes a gentle lantern in the darkened interior.
What You Need
- One oversized clock, 24 inches or broader
- A stud finder and a weight rated anchor
- A small level for true alignment
How to Set It Up
- Map the stud position and mark the mount height with painter’s tape
- Sink the rated anchor dead center on the mark
- Lift the clock onto the anchor and settle it flush
- Nudge with the level until the numerals sit perfectly upright
Pro Tip
Silence purists favor a sweep movement so the chamber ticks in peace, never clicking into the night.
2. Floating Timber Shelves
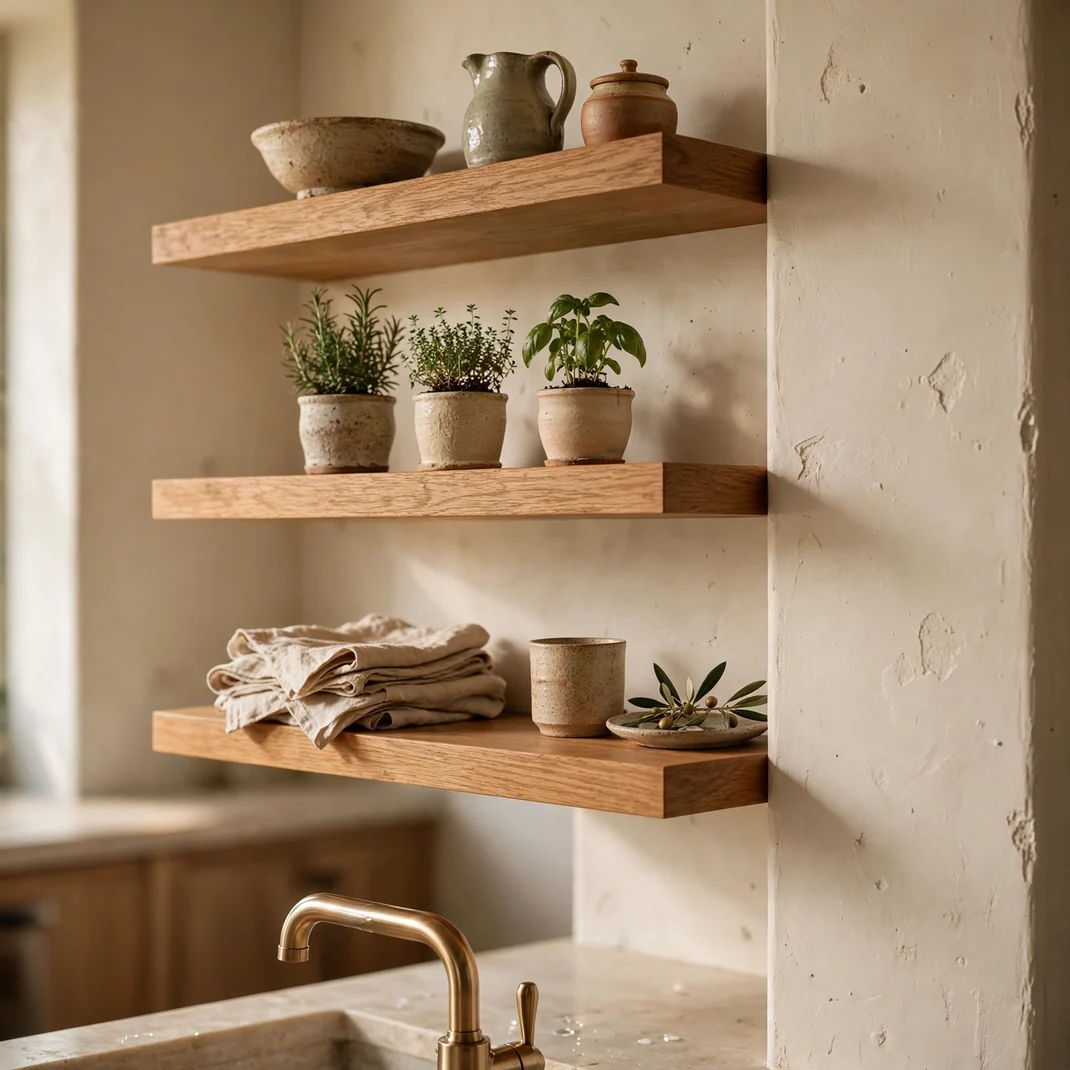
A pair of hefty timber planks floats off the plaster and instantly manufactures a stage for beautiful objects. Favor thick oak or reclaimed pine slabs with concealed brackets, spaced generously so each vignette breathes. Dress them with ironstone pitchers, potted thyme, and a leaning cookbook or two, keeping one shelf sparser than the other for cadence. The horizontal lines draw the gaze sideways, stretching a slim galley into something grander. Redress with the calendar and the wall never grows stale.
What You Need
- Two solid timber shelves with hidden bracket kits
- A drill, wall scanner, and spirit level
- Curated objects: crockery, greenery, small photos
How to Set It Up
- Mark bracket lines at stud marks, checking level twice
- Bore pilot holes and drive the brackets firmly home
- Slide each slab onto its rods until fully home
- Style the lower shelf fuller, the upper one quieter
Pro Tip
Corral tiny items on a tray so the display reads as one composed still life, not scattered clutter.
3. Botanical Print Gallery
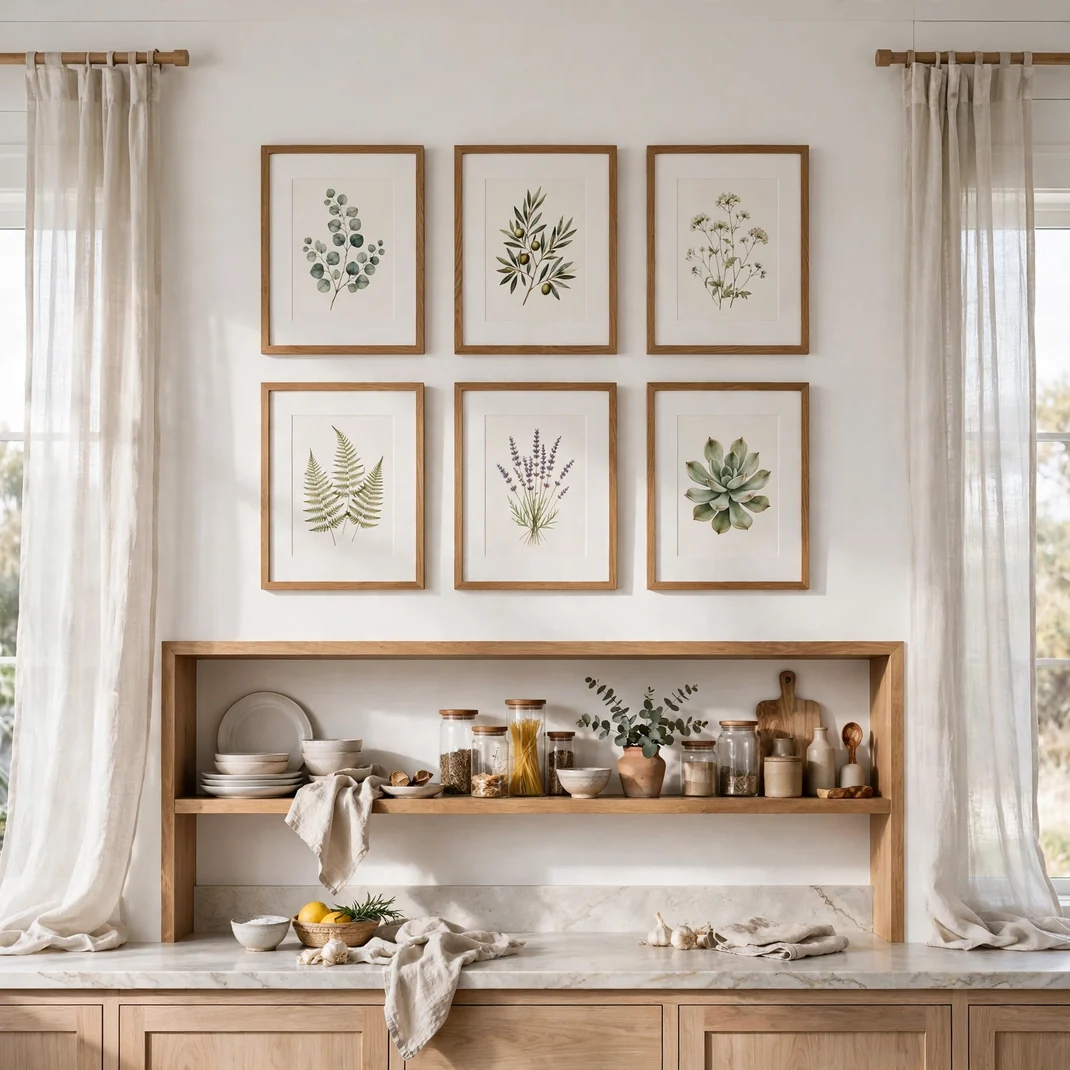
A salon of botanical etchings lends the cookery the poise of a nineteenth century herbarium. Gather seven to nine prints of ferns, figs, and citrus boughs, then frame them uniformly in slim black or gilt wood with generous linen mats. Hang the grid with narrow, even gutters so the ensemble feels deliberate, not accidental. Green inkwork flatters every cabinet finish, from milky lacquer to walnut stain. This is the fastest route from blank to botanical without a solitary live leaf.
What You Need
- Six to nine botanical art prints
- Matching slim frames with linen matting
- A paper template and painter’s tape for layout
How to Set It Up
- Trace each frame onto kraft paper and tape the shapes onto the wall
- Shuffle the paper ghosts until the grid pleases the eye
- Hammer nails into the template centers, then tear the paper away
- Hang frames and micro adjust the gutters by hand
Pro Tip
Source prints from one publisher or artist so the illustration style stays coherent across the whole wall.
4. Copper Cookware Rail
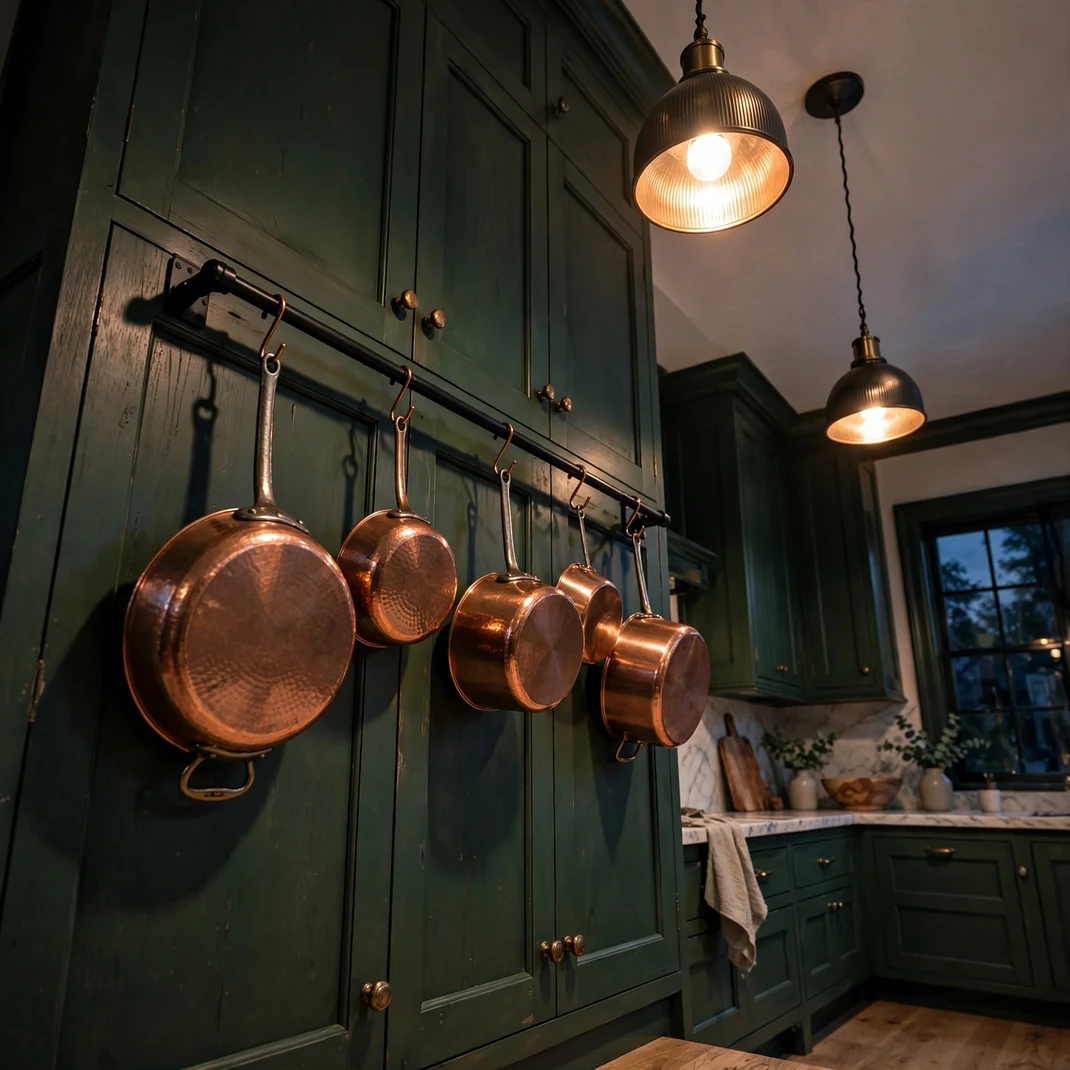
A burnished copper rail turns everyday pans into gleaming sculpture. Fix a stout brass or blackened steel bar to the backsplash wall, then suspend ladles, skillets, and a colander from S hooks in descending size order. The warm metal catches lamplight and throws it dancing around the room, while a slow developing patina only deepens the charm. Everything hangs within arm’s reach, so beauty and utility share one address. Few statements feel this honestly culinary.
What You Need
- One metal rail with mounting flanges
- A set of sturdy S hooks
- Copper or copper toned pans and utensils
How to Set It Up
- Anchor the rail into studs above the work zone
- Thread S hooks along the bar at even intervals
- Hang weightiest skillets nearest the flanges
- Polish quarterly; edges patina gracefully on their own
Pro Tip
Slip silicone sleeves over hook tips where metal meets metal to hush the clink.
5. Chalkboard Menu Board
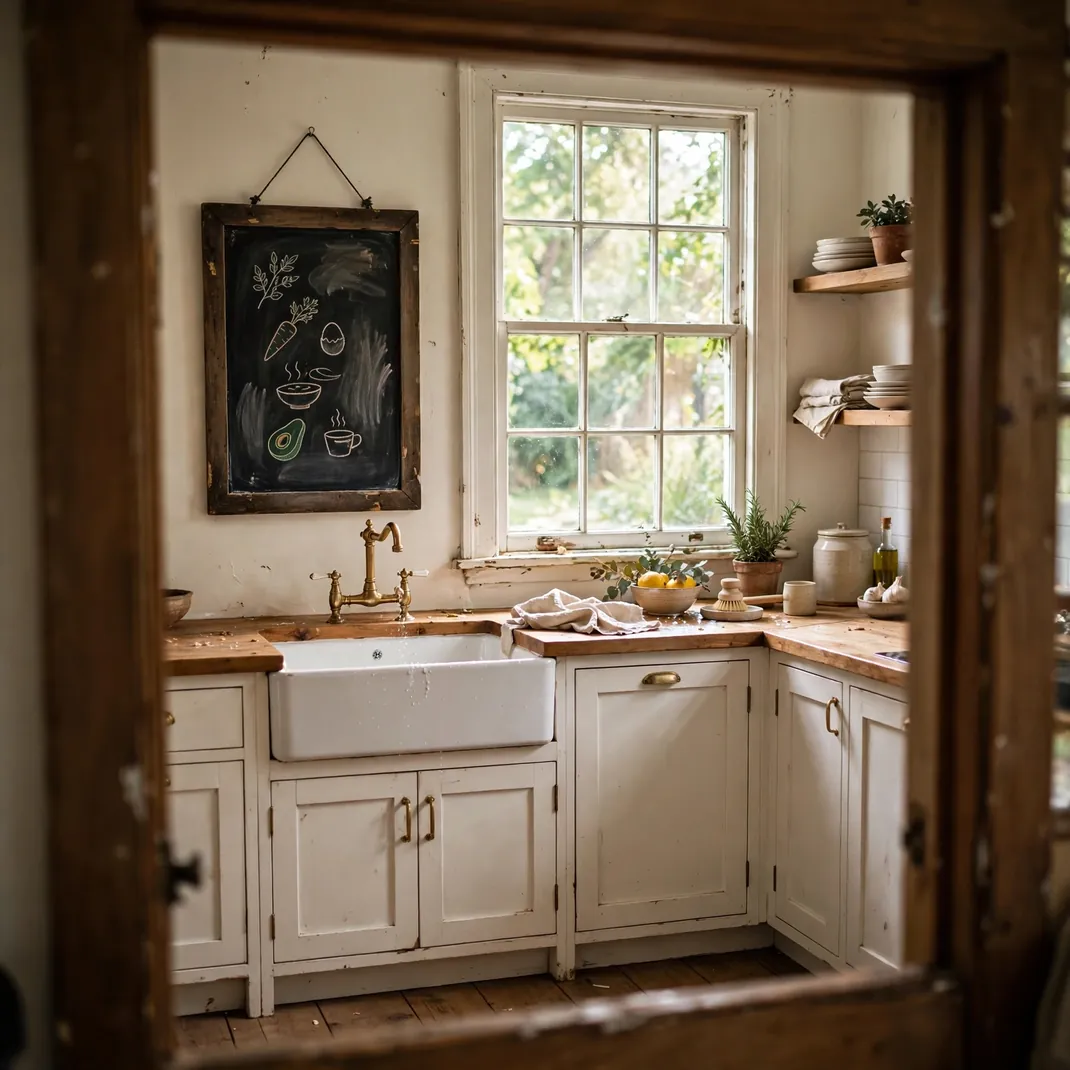
A grand framed chalkboard recruits the wall for the household’s daily theatre. Choose an arched or rectangular board with a substantial timber frame, then letter the week’s menu, a beloved recipe, or a rotating quotation in confident chalk script. Rest it on a plate rail or hang it beside the pantry door where the family naturally gathers. The surface invites constant reinvention, so the decor refreshes itself with every shopping list. Children adore it, and dinner guests photograph it.
What You Need
- One large framed chalkboard
- Dustless chalk sticks and a felt eraser
- Chalk markers for crisper lettering
How to Set It Up
- Season the board by rubbing chalk over the whole face, then wiping
- Sketch the layout lightly before committing to final lines
- Letter the centerpiece text first, flourishes after
- Mist finished work with hairspray to fix it for the week
Pro Tip
Keep a damp cloth nearby and embrace imperfection, for slightly wobbly lines read as handmade warmth.
6. Decorative Plate Wall
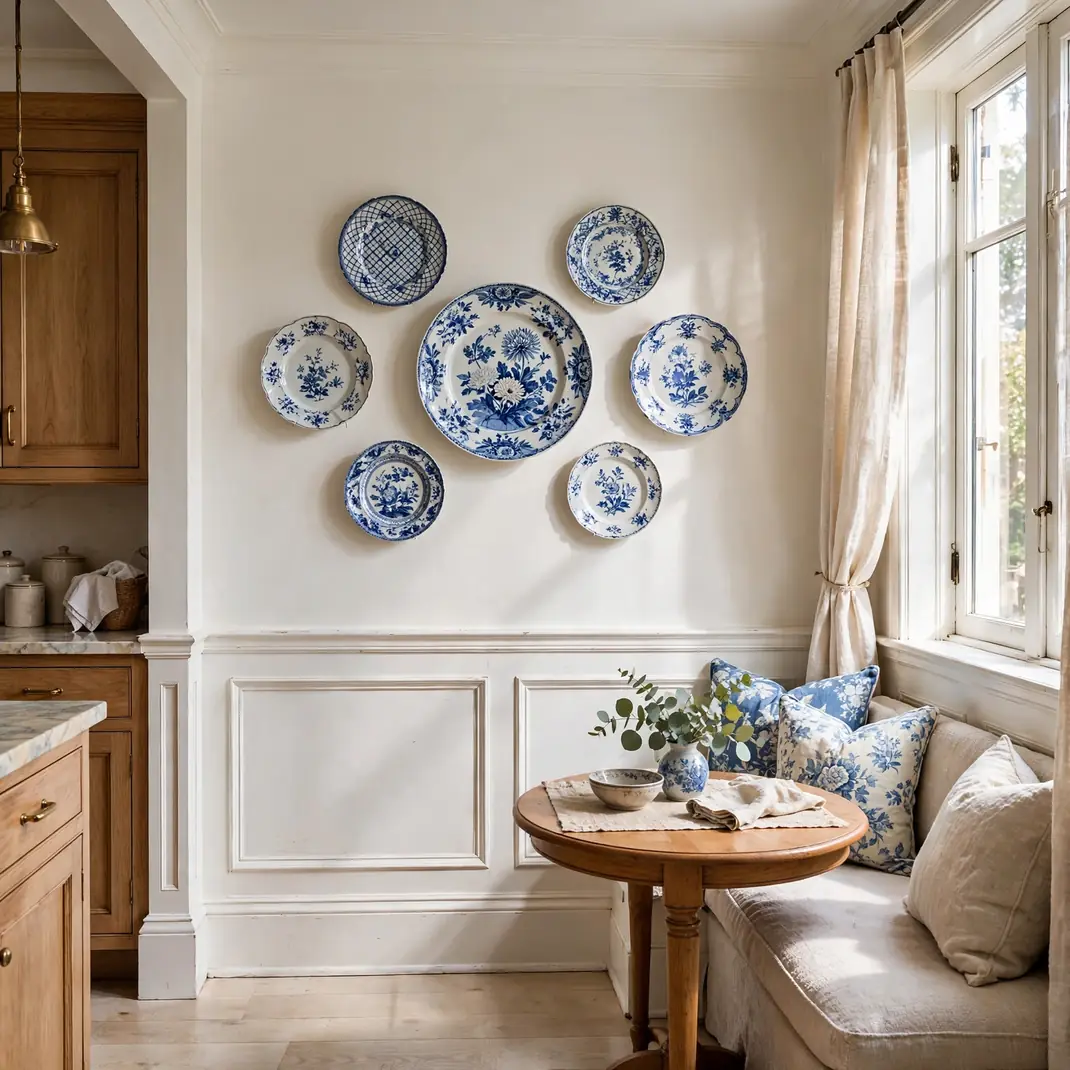
A constellation of patterned plates converts bare drywall into a ceramics gallery. Assemble dessert plates, chargers, and saucers in one color story, delft blue perhaps, or sunbaked terracotta, and mount them on discreet disc hangers. Compose an organic cluster, not a rigid grid, letting rims nearly kiss. The arrangement delivers pattern and pigment at zero depth, ideal where a walkway runs tight. From the doorway the wall shimmers like a well set table stood on end.
What You Need
- Seven to eleven decorative plates
- Adhesive disc hangers sized to each plate
- Kraft paper for mapping the cluster
How to Set It Up
- Lay the plates on the floor and audition cluster shapes
- Transfer the winning shape to paper templates on the wall
- Affix hangers to plate backs and let adhesive cure overnight
- Lift each plate onto its nail and fine tune the spacing
Pro Tip
Tuck one small round mirror among the plates to throw light through the cluster.
7. Macramé Wall Hanging
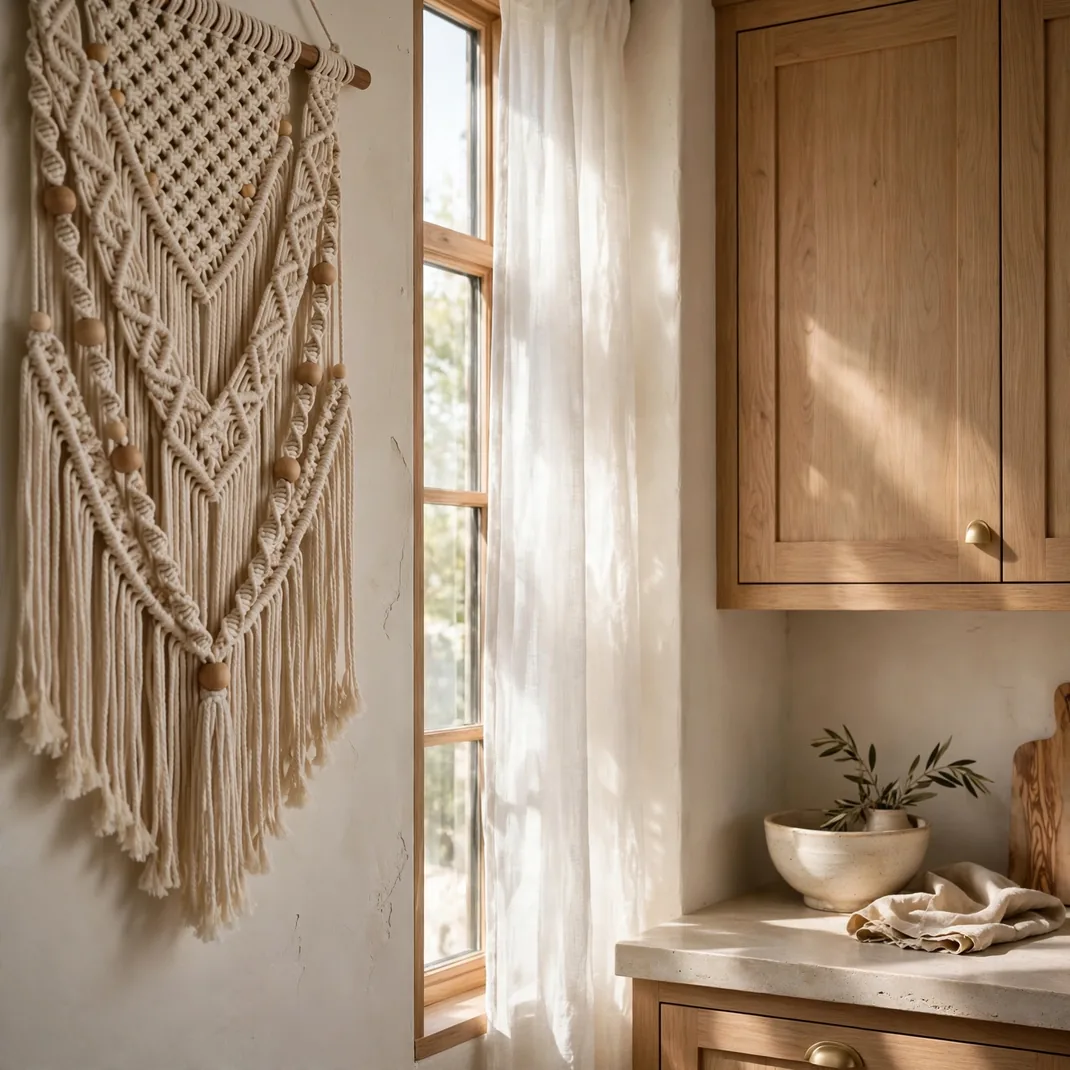
A sweeping macrame panel drapes softness over hard cookspace geometry. Knotted from undyed cotton cord on a driftwood dowel, its tassels and open weave introduce a bohemian hush that paint alone cannot summon. Hang it tall between two windows or ground it over a console, letting the fringe graze the furniture line. The textile absorbs visual noise the way a rug steadies a floor. Against tile and steel, it feels like a deep exhale.
What You Need
- One big handmade macrame hanging
- A sturdy wall hook or wood dowel mount
- A lint roller for occasional freshening
How to Set It Up
- Pick a hook rated well above the textile’s weight
- Hang the dowel and allow the piece to settle for a day
- Steam out transit creases from a safe distance
- Trim stray fibers with sharp scissors
Pro Tip
Mist the fibers lightly with water and finger comb the fringe back into soft alignment.
8. Pegboard Task Wall
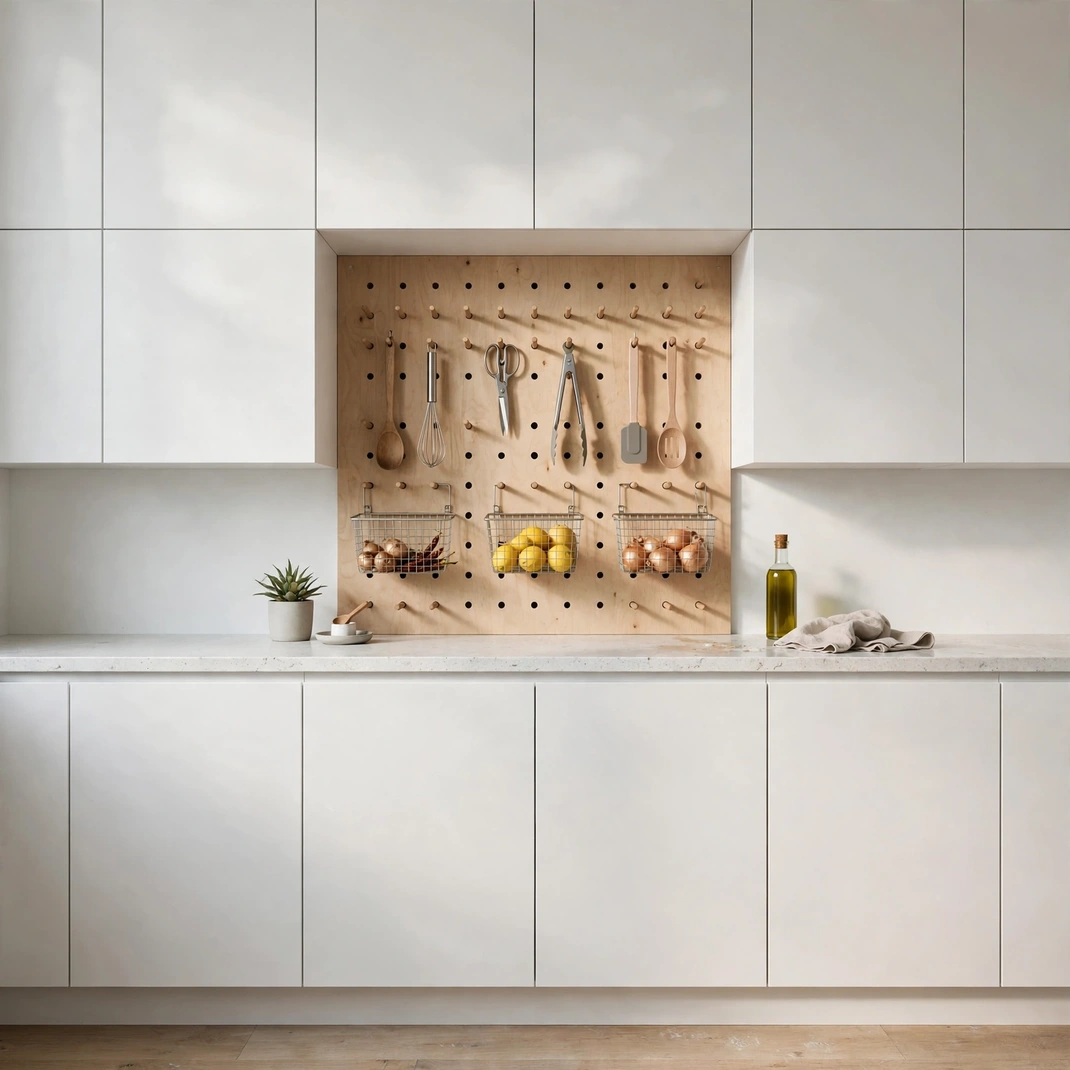
A stained pegboard panel turns dead wall into the busiest square footage in the home. Cut a birch sheet to fit between cabinets, stain it espresso or paint it inky, then populate it with dowel pegs holding whisks, aprons, and measuring cups. The modular grid rearranges in minutes as routines evolve, and everything earns its visibility. Painted a moody tone, the board reads as intentional design, not workshop salvage. Form follows function here, and both look splendid.
What You Need
- One birch pegboard panel with spacer frame
- Assorted dowel pegs and small shelf brackets
- Wood stain or matte paint plus sealant
How to Set It Up
- Mount a slim spacer frame so pegs clear the wall
- Fix the panel onto the frame with countersunk screws
- Coat with stain or paint and let cure fully
- Load pegs heaviest at the bottom, prettiest at eye level
Pro Tip
Outline each tool’s silhouette in paint behind its peg for a chef’s kitchen flourish that also enforces tidiness.
9. Vintage Market Posters
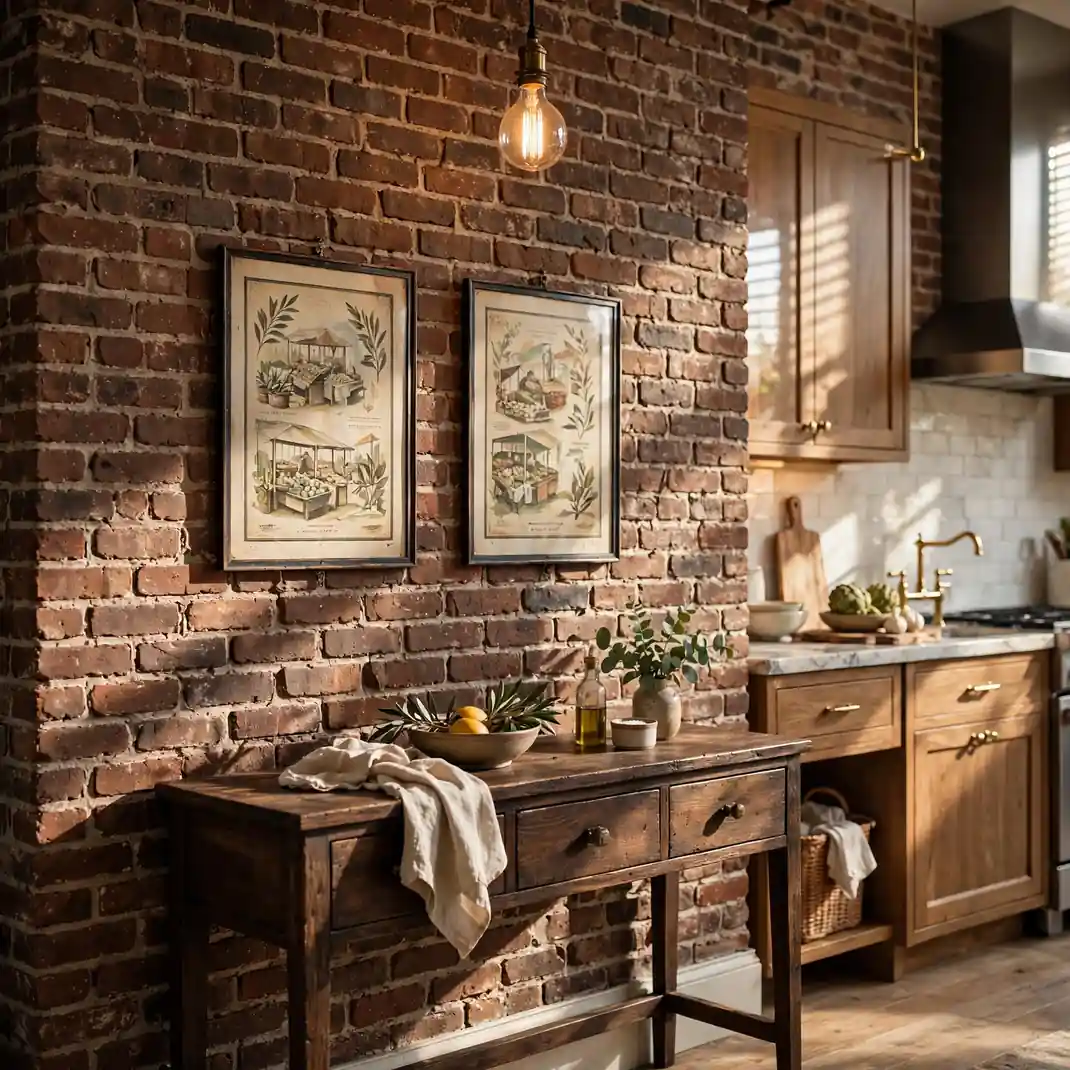
Sun faded market posters pour old world romance straight onto the limewash. Hunt flea stalls and print shops for stone litho style advertisements, Provencal olives, Neapolitan citrus, Parisian patisserie, and frame them simply so the artwork carries the day. Two large pieces flanking a casement, or a trio marching down a hallway wall, conjure a European street reverie. The typography and patina supply instant history no new print can fake. Kitchens, more than any room, forgive and flatter this kind of nostalgia.
What You Need
- Two or three vintage style food posters
- Simple thin frames with UV protective glazing
- Steel wire and D rings
How to Set It Up
- Fit each poster with wire strung taut on D rings
- Hang the largest piece first, middle of the trio
- Flank with companions at equal sightlines
- Step back to the room’s entry and judge the flow
Pro Tip
Age brand new prints convincingly by steeping them briefly in strong black tea, then drying flat.
10. Ceramic Pocket Planters
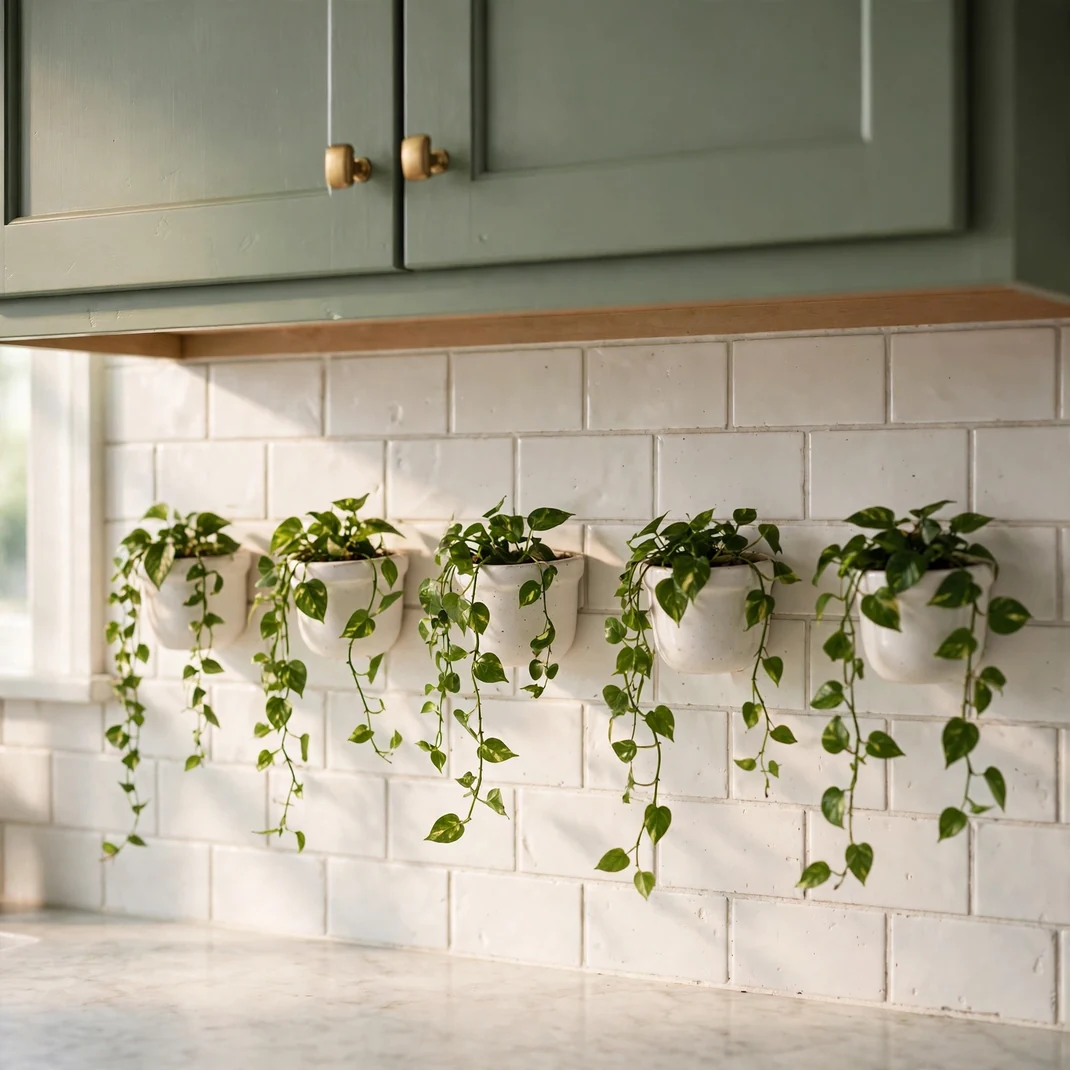
Sculptural ceramic pockets march up the wall in a living frieze of green. These half vessel planters, glazed in chalky white or speckled stone, cradle pothos, philodendron, and trailing rosemary with their runners spilling downward. Mount five or seven in a loose vertical rhythm near a sunlit window. The planting softens the wall’s severity while the ceramics themselves read as pure art. Watering takes seconds with a narrow spout can, and the display matures more beautiful monthly.
What You Need
- Five to seven ceramic wall pocket planters
- Trailing plants: pothos, philodendron, rosemary
- Narrow spout watering can
How to Set It Up
- Map pocket positions on paper before drilling
- Set wall anchors rated for damp soil heft
- Seat each planter and check it sits level
- Pot the trailers high so runners cascade freely
Pro Tip
Rotate each pocket a quarter turn monthly so growth stays even on all sides.
11. Rustic Ladder Styling
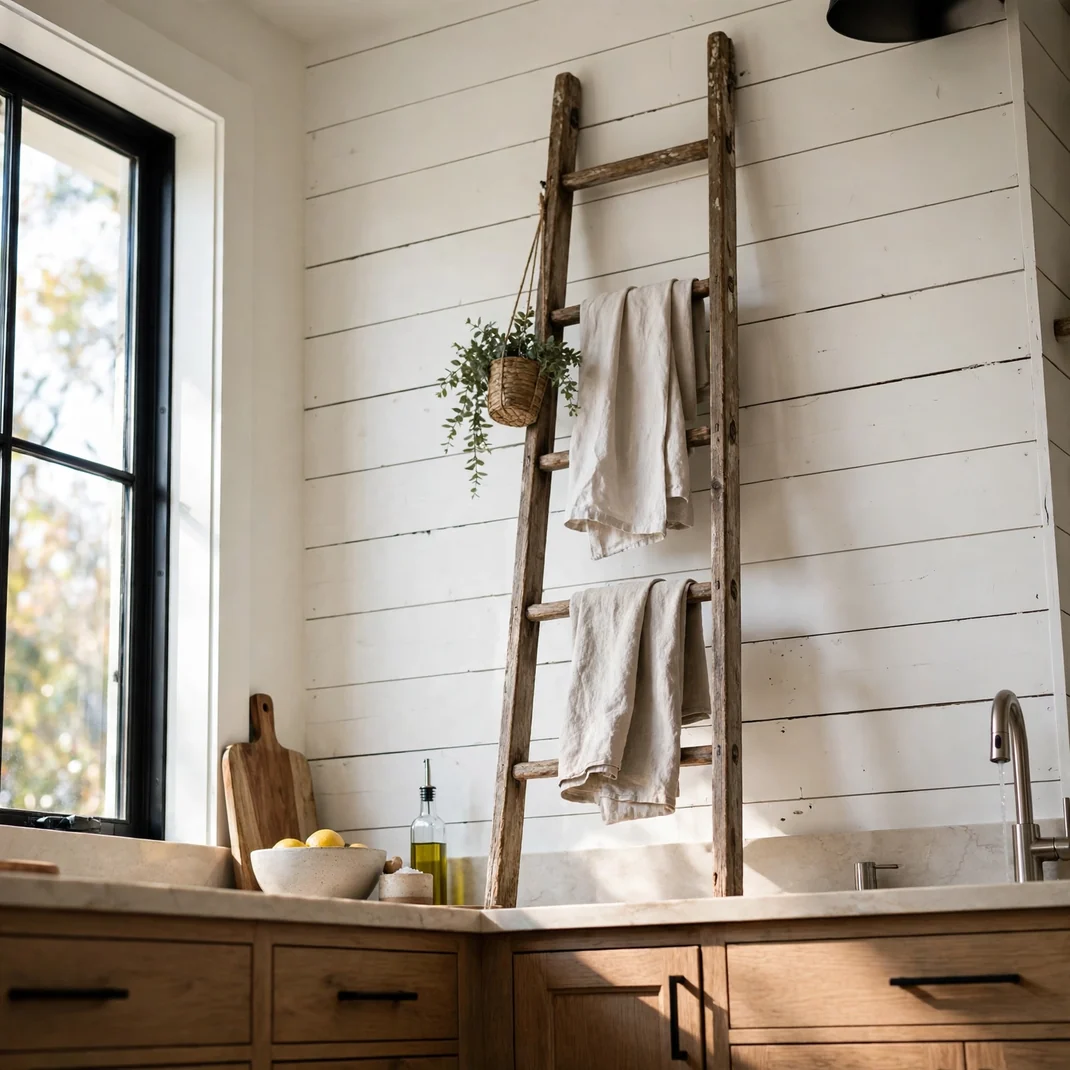
A weathered wooden ladder leaned at a gentle angle brings farmhouse soul to an empty corner. Drape its rungs with a eucalyptus garland, a striped grain sack towel, and one small wreath, keeping the dressing asymmetrical and light. The tall diagonal breaks the room’s boxy outline and draws the eye upward into neglected upper air. Nothing about it is precious, which is precisely its power. Swap the garland with the seasons and the corner reinvents itself quarterly.
What You Need
- One vintage style wooden ladder
- A faux eucalyptus garland and small wreath
- Two linen look tea towels
How to Set It Up
- Pad the ladder feet with felt to protect flooring
- Lean it at a safe shallow angle, top near the ceiling
- Drape the garland as a loose diagonal swag
- Hook the towels over alternating rungs
Pro Tip
Secure the top with a discreet L bracket if small children or large dogs rule the household.
12. Bold Abstract Canvas
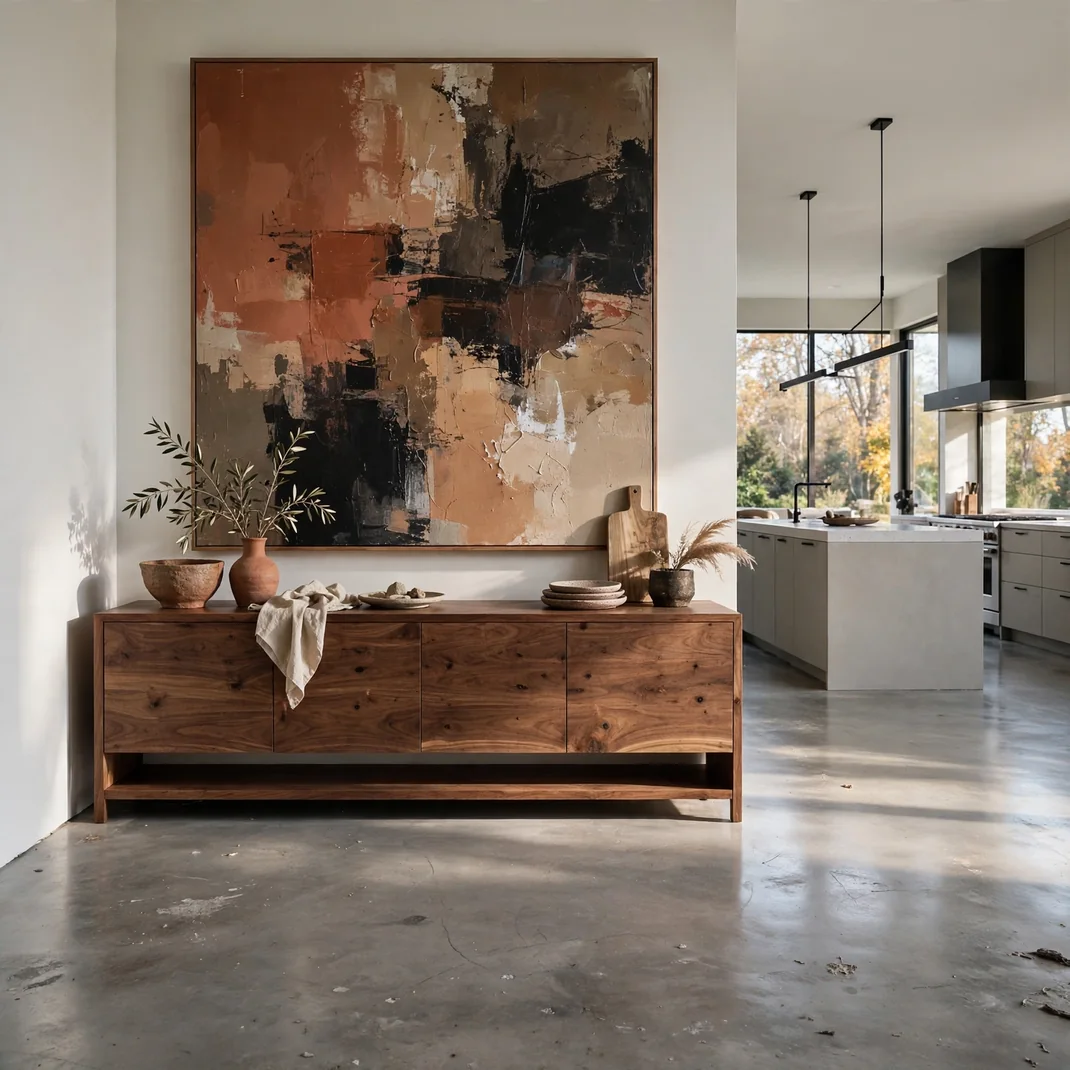
One commanding abstract canvas can outdecorate a dozen small objects. Select a sizable piece where ochre, indigo, and bone sweep in broad gestural arcs that echo your cabinet hardware’s finish. Hung alone on the largest bare expanse, it behaves like a doorway onto another temperament. The scale does the talking, so the rest of the wall may rest in honorable silence. Modern loft or rustic farmhouse alike, a brave painting never apologizes.
What You Need
- One grand abstract canvas, 36 inches or wider
- A heavy duty wall cleat
- A picture light if the nook runs dim
How to Set It Up
- Hang the canvas with its midpoint at roughly 57 inches
- Fix the cleat into two studs for bombproof support
- Rest the canvas on the cleat and check for tilt
- Aim the light to graze the texture
Pro Tip
Pull one minor color from the painting into a dishtowel or crock so the art feels rooted in the room.
13. Vertical Herb Garden
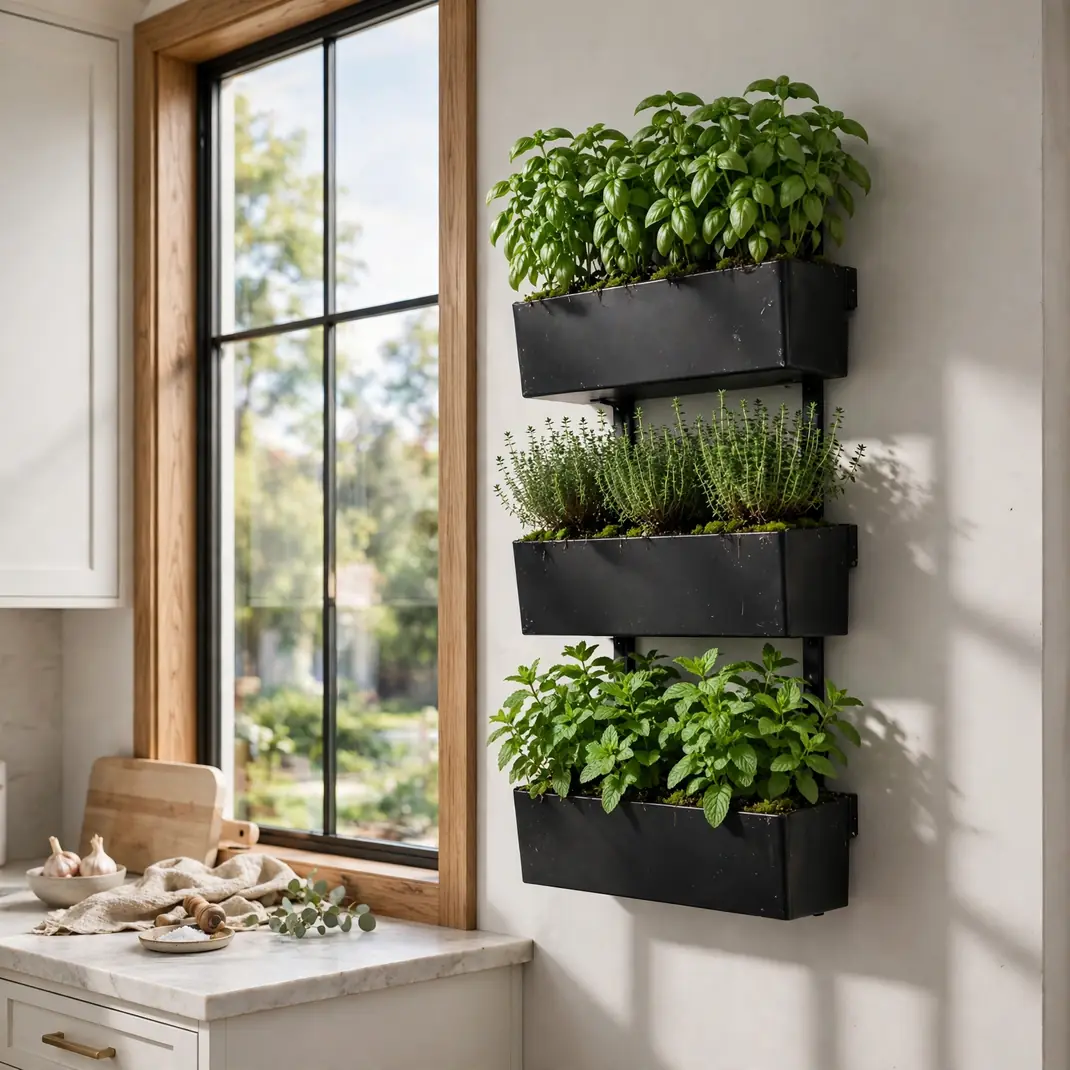
A living wall of culinary herbs keeps flavor literally at your fingertips. Mount a grid of small galvanized pockets or a slatted cedar panel near the prep zone, then fill it with basil, thyme, mint, and chives in nursery pots slipped inside. Snip as you saute and the planting pays delicious dividends. The green tapestry perfumes the air and animates the wall better than any static thing could. Even a rent friendly freestanding version earns its footprint.
What You Need
- A wall hung pocket planter grid or slatted panel
- Eight to twelve small potted herbs
- A mister bottle and small snips
How to Set It Up
- Mount the grid where daylight lingers longest
- Slip potted herbs into pockets, tallest at the top
- Label each pocket with a cedar marker
- Mist mornings, snip evenings, rotate weekly
Pro Tip
Keep mint quarantined in its own pocket, since its roots colonize neighboring soil with cheerful ruthlessness.
14. Woven Basket Medley
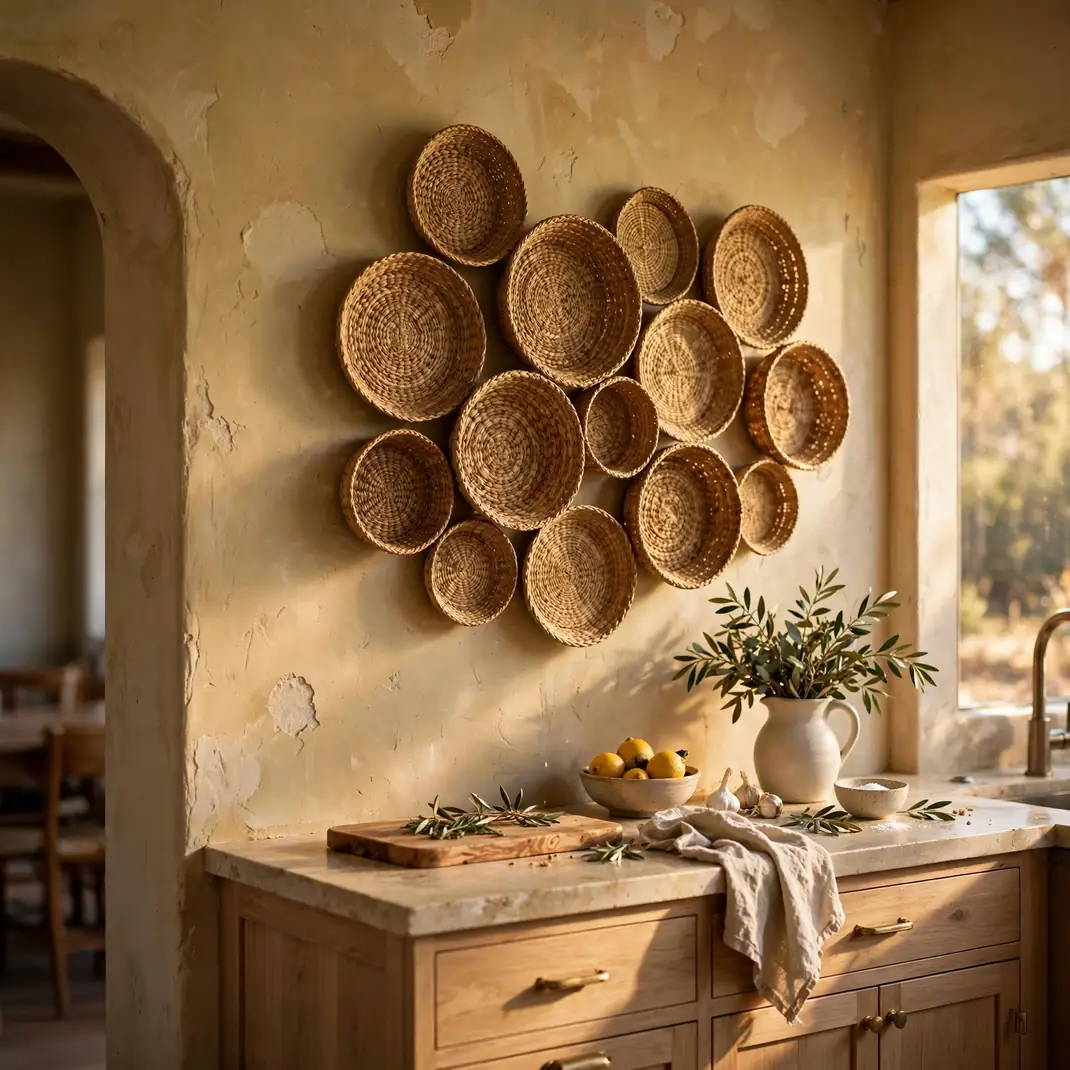
A cluster of shallow woven baskets warms the wall with honeyed, hand hewn texture. Collect flatweave discs in seagrass, jute, and palm, varying diameters from salad plate to charger size. Pin them into a loose sunburst above the dining table, biggest at the core. The nubby fibers drink in light and return it softly, flattering both modern and country rooms. This composition costs little, weighs less, and hangs in under an hour.
What You Need
- Seven to ten flat woven baskets
- Small brass nails or adhesive hooks
- A kraft paper guide for the sunburst
How to Set It Up
- Arrange baskets on a table into a pleasing sunburst
- Tape the paper guide up
- Drive nails through the guide marks
- Hang baskets deepest weave at the center
Pro Tip
Weave one strand of dried lavender into one basket’s rim for scent and story.
15. Twin Industrial Sconces
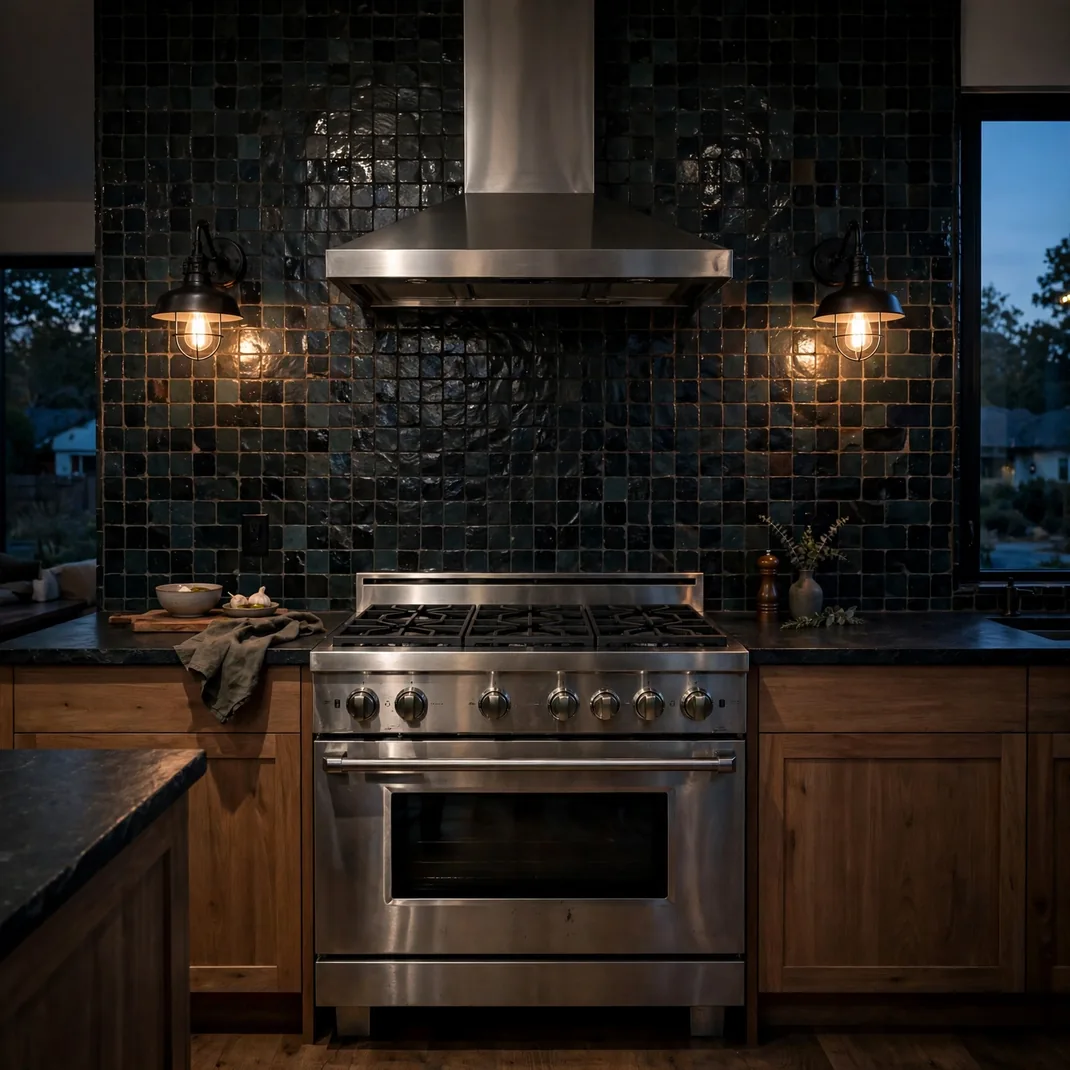
A matched pair of industrial sconces flanks the range hood or a bare chimney breast with sculptural symmetry. Favor blackened metal shades or seeded glass cages on articulated arms, wired to a dimmer for moods from prep bright to candle soft. Light washing down the wall creates pools of warmth that overhead cans never achieve. The fixtures read as jewelry for the wall, functional long after the styling fades. Few upgrades photograph better at dusk.
What You Need
- Two hardwired or plug in wall sconces
- A dimmer switch or remote dimmer module
- An electrician’s hour if hardwiring
How to Set It Up
- Mark sconce positions equidistant from the centerline
- Have wiring run by a licensed electrician
- Mount fixtures and fit warm 2700K bulbs
- Tune the dimmer to its most flattering glow
Pro Tip
Plug in sconces with cord covers grant renters the same drama with zero drywall surgery.
16. Wine Bottle Wall Rack
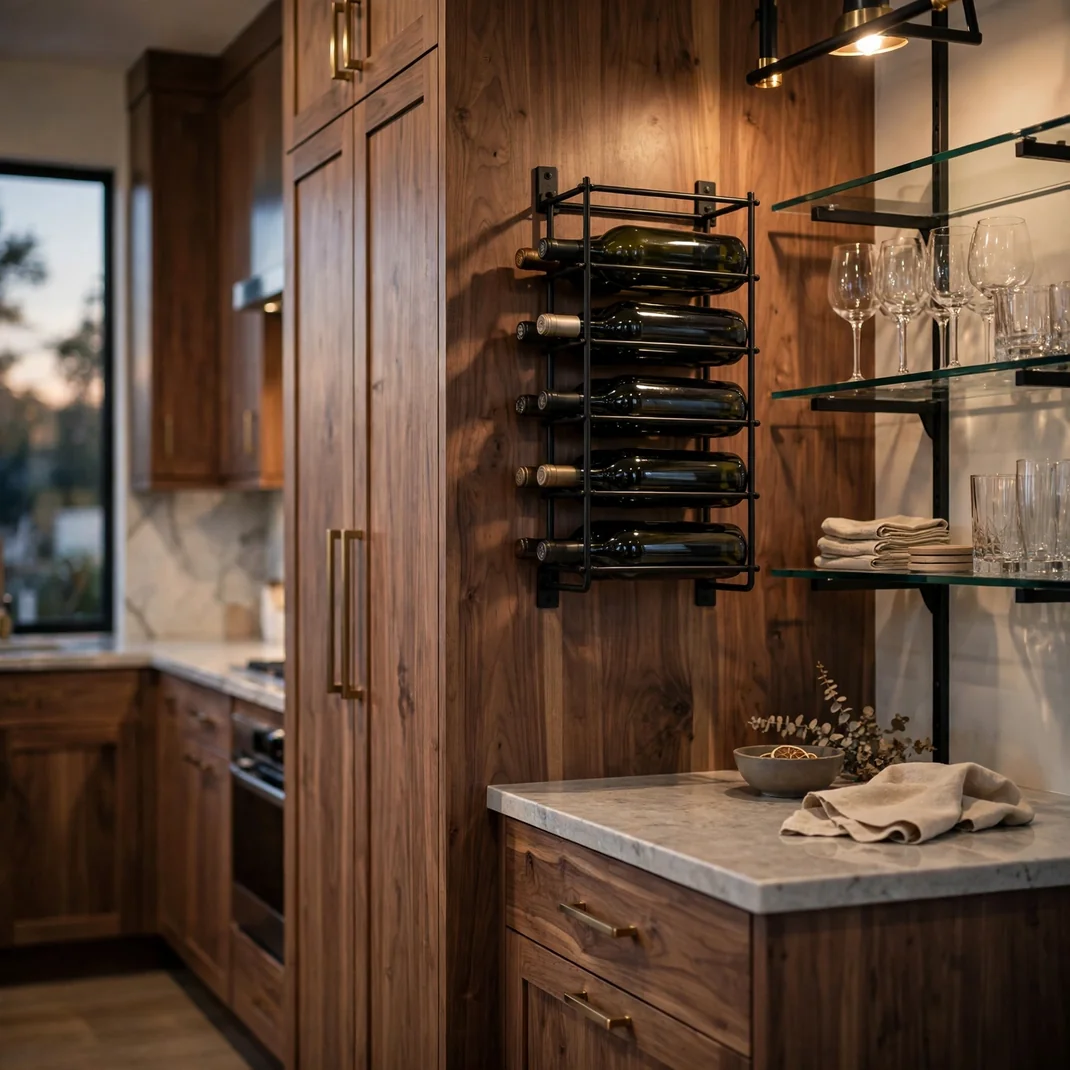
This wall mounted wine rack stages your bottles like a sommelier’s library. Iron or teak rails cradle a dozen vintages label forward, transforming a blank run beside the dining nook into a cellar vignette. The bottles’ glass and capsule colors supply ready made chromatic rhythm. Keep everyday pours at hand height and reserve the crown for a special occasion magnum. Guests invariably drift toward it, glass in hand, conversation kindled.
What You Need
- One wall rack for 8 to 14 bottles
- A stud sensor and heavy duty anchors
- A mini level
How to Set It Up
- Locate two studs spanning the rack’s width
- Level the rack and mark all fixing points
- Drive anchors and seat the rack rock solid
- Load bottles label out, heaviest bottles at the base
Pro Tip
Store the rack away from the oven’s heat plume so prized vintages age gracefully instead of cooking.
17. Removable Wallpaper Accent
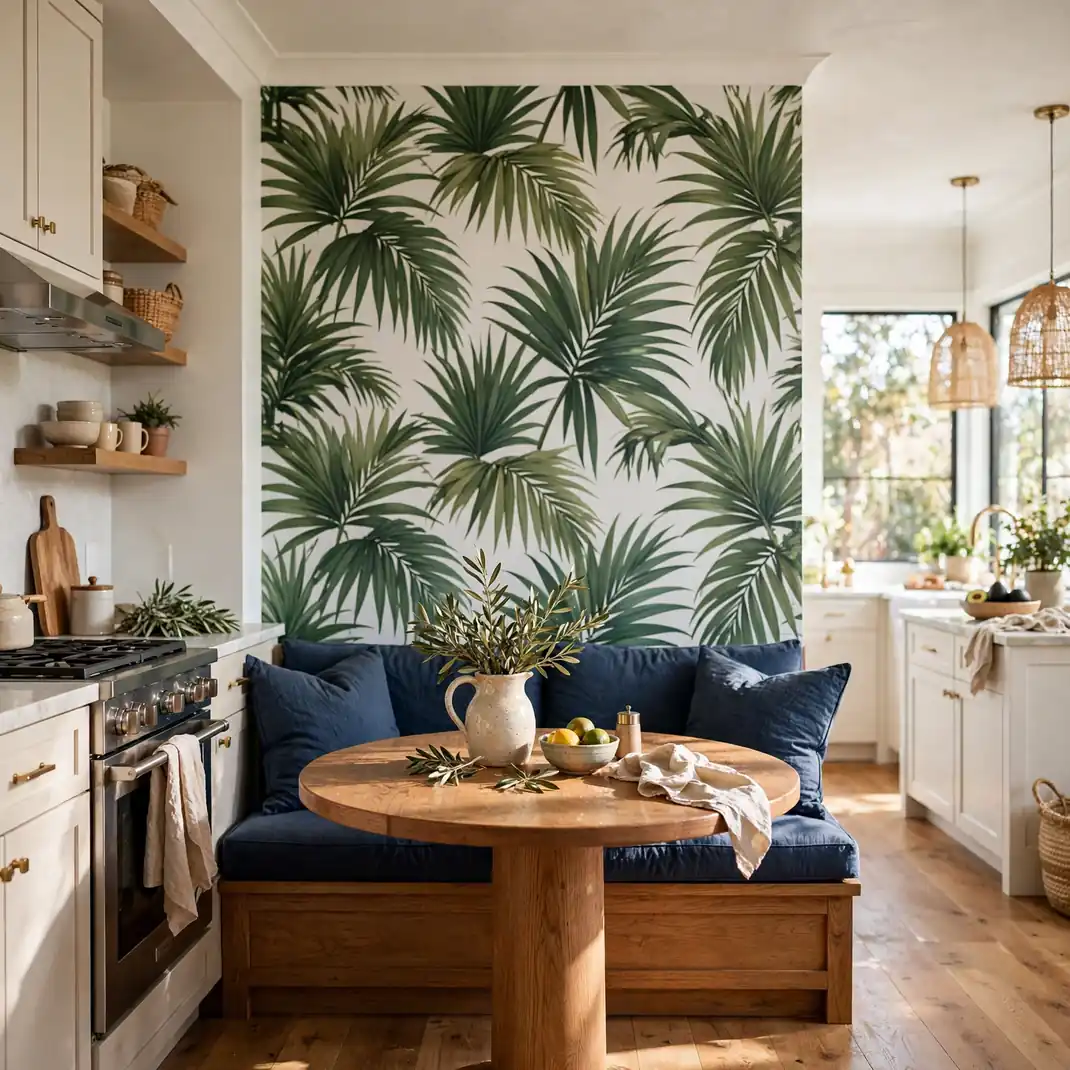
A single wall dressed in removable wallpaper delivers the drama of a renovation in one afternoon. Unfurl a large scale botanical mural, a hand drawn stripe, or a moody chinoiserie over the morning nook’s backdrop. Peel and stick papers forgive mistakes and vacate cleanly, so commitment phobes may decorate boldly. The pattern’s scale should suit the wall, grand motifs for broad runs, dinkier repeats for tight corners. Come evening the printed wall glows like a stage set.
What You Need
- Removable wallpaper, measured plus ten percent
- A plastic smoother and snap blade knife
- A step stool
How to Set It Up
- Wipe the wall clean and let it dry utterly
- Plumb a straight guideline with a level
- Hang the first panel to the line, smoothing outward
- Trim excess along the top edge and baseboard with the snap blade
Pro Tip
Order all rolls from one dye lot, and buy the spare roll, since running short midwall is a special heartbreak.
18. Cutting Board Arrangement
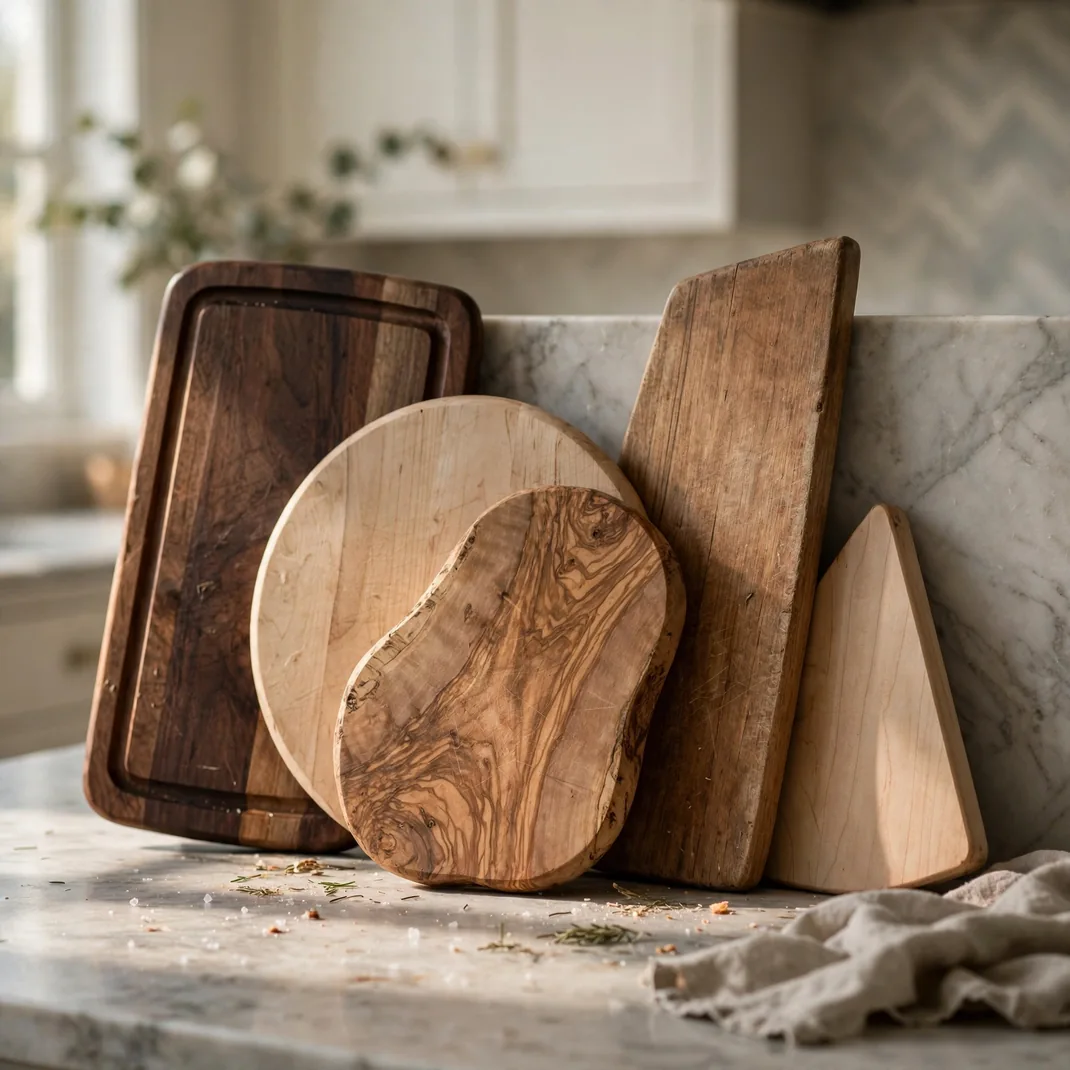
An assembly of handsome cutting boards leans into the kitchen’s working soul. Collect olivewood, walnut, and acacia boards in varied silhouettes, rounds, paddles, rectangles with leather loops, and overlap them along a slim picture ledge. The wood grains read as abstract art while every piece stays grabbable for service. Tonal variation matters more than matching, so let honey meet espresso. This is decor that earns its keep at every meal.
What You Need
- Five to eight maple cutting boards
- One slim plate rail
- Leather loop cords
How to Set It Up
- Mount the ledge high enough to clear the backsplash
- Lean the biggest board at the rear middle
- Overlap smaller boards toward the front in descending scale
- Angle one paddle board for insouciant asymmetry
Pro Tip
Rub boards every month with food safe mineral oil so the grains stay lustrous instead of thirsty.
19. Leaning Floor Mirror
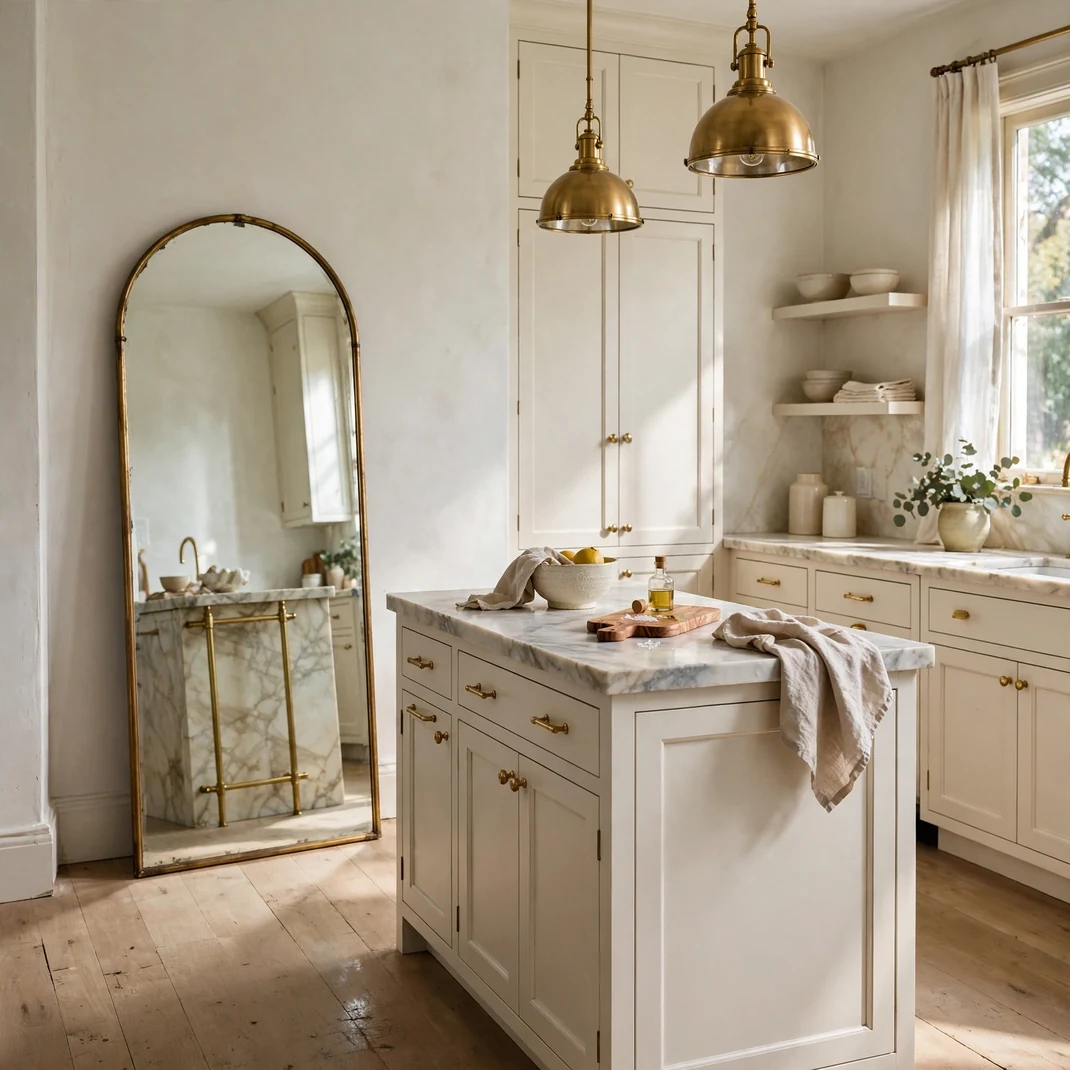
A tall arched mirror tipped against the wall doubles daylight and visually annexes extra room. Select a slim brass or black frame that echoes nearby hardware, and rest it where it catches a window’s reflection without facing the cooktop’s splatter zone. The borrowed view stretches a compact galley into airier territory. Mirrors also multiply candlelight beautifully after dark. Strap the top rail to a stud and the illusion stands safely for years.
What You Need
- One tall leaning mirror with a slim frame
- Felt pads for the base
- A wall tether strap for safety
How to Set It Up
- Pad the base and lean the mirror at a slight recline
- Confirm the reflection captures window, not clutter
- Lash it to its stud
- Polish the glass with a vinegar solution
Pro Tip
Tilt the mirror a degree or two forward to bounce light deeper into the room, not onto the ceiling.
20. Woven Textile Tapestry
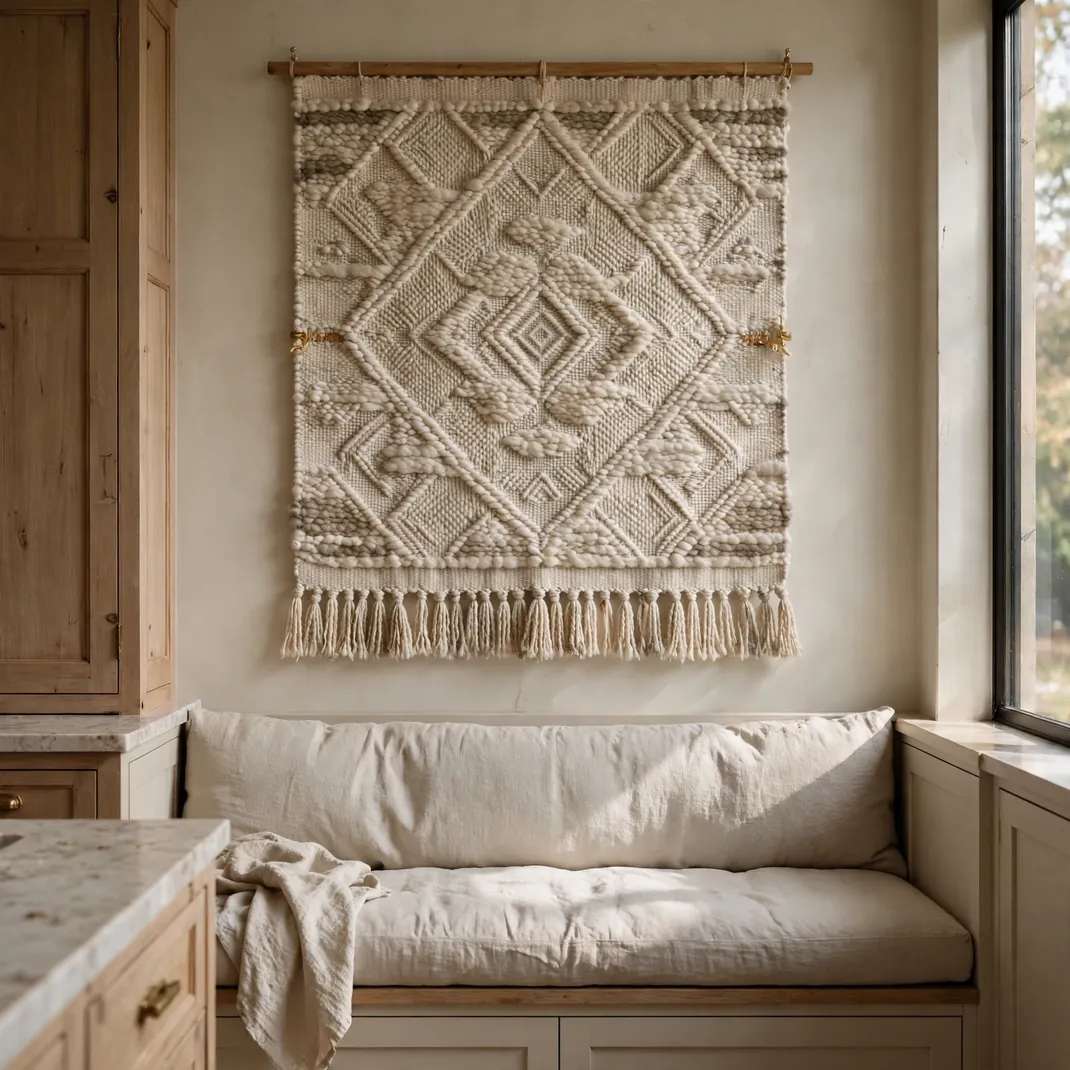
A handloomed textile softens the busiest wall of the cookspace. Seek a kilim style runner or a contemporary fiber piece in rust, ochre, and charcoal, colors that flatter both oak and iron. Suspend it from a brass rod with ring clips so the weave hangs true. Unlike framed art, fabric drinks sound as well as sight, hushing the room’s clatter. The loom’s irregularities guarantee no neighbor owns its twin.
What You Need
- One textile wall piece, about 3 by 5 feet
- A slender brass hanging rod
- Two wall cleats
How to Set It Up
- Fix cleats wider than the textile
- Slide the rod into its clips
- Clip the textile’s top edge evenly
- Hang and coax the lower corners level
Pro Tip
Back the textile with a cotton dust sheet if the wall behind it runs damp or dusty.
21. Drying Herb Wall Rack
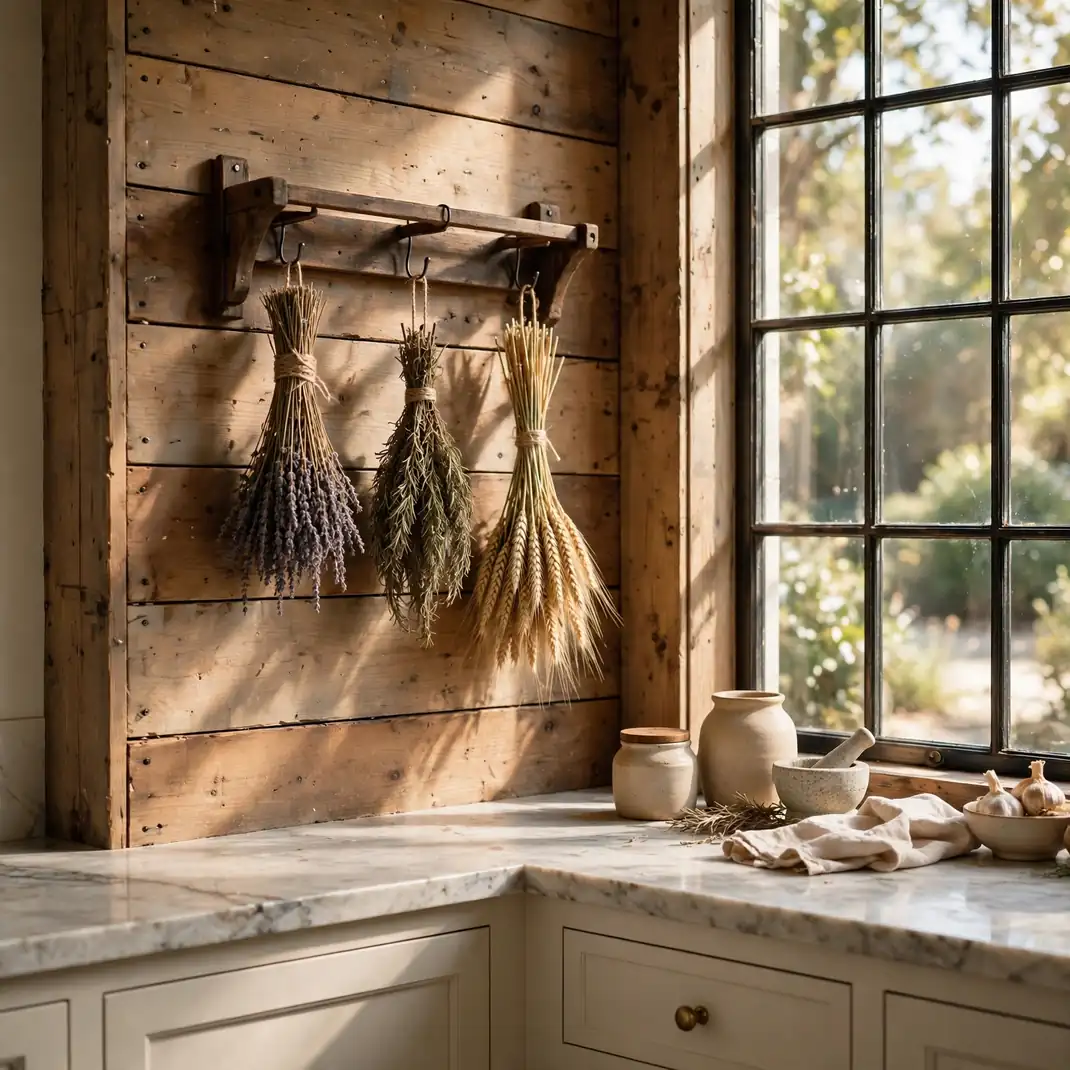
A wall fixed drying rack turns humble herbs into aromatic artistry. Fix a slim wood batten closest to the stove and dangle small bundles of lavender, thyme, and bay from twine loops on small brass hooks. As the bundles desiccate they perfume the room and deepen in color. The rack costs almost nothing yet looks plucked from a Provencal country kitchen. Snip directly from the bundle into the pot and dinner tastes of summer.
What You Need
- One wood batten, two to three feet long
- Six to eight small brass cup hooks
- Natural twine and fresh herb bundles
How to Set It Up
- Screw the batten to two studs
- Twist cup hooks along its face at even spacing
- Bind herbs into loose small bundles with twine
- Hang bundles upside down with air around them
Pro Tip
Harvest herbs just as they flower, when their oils run strongest, for the most fragrant drying.
22. Script Lettering Sign
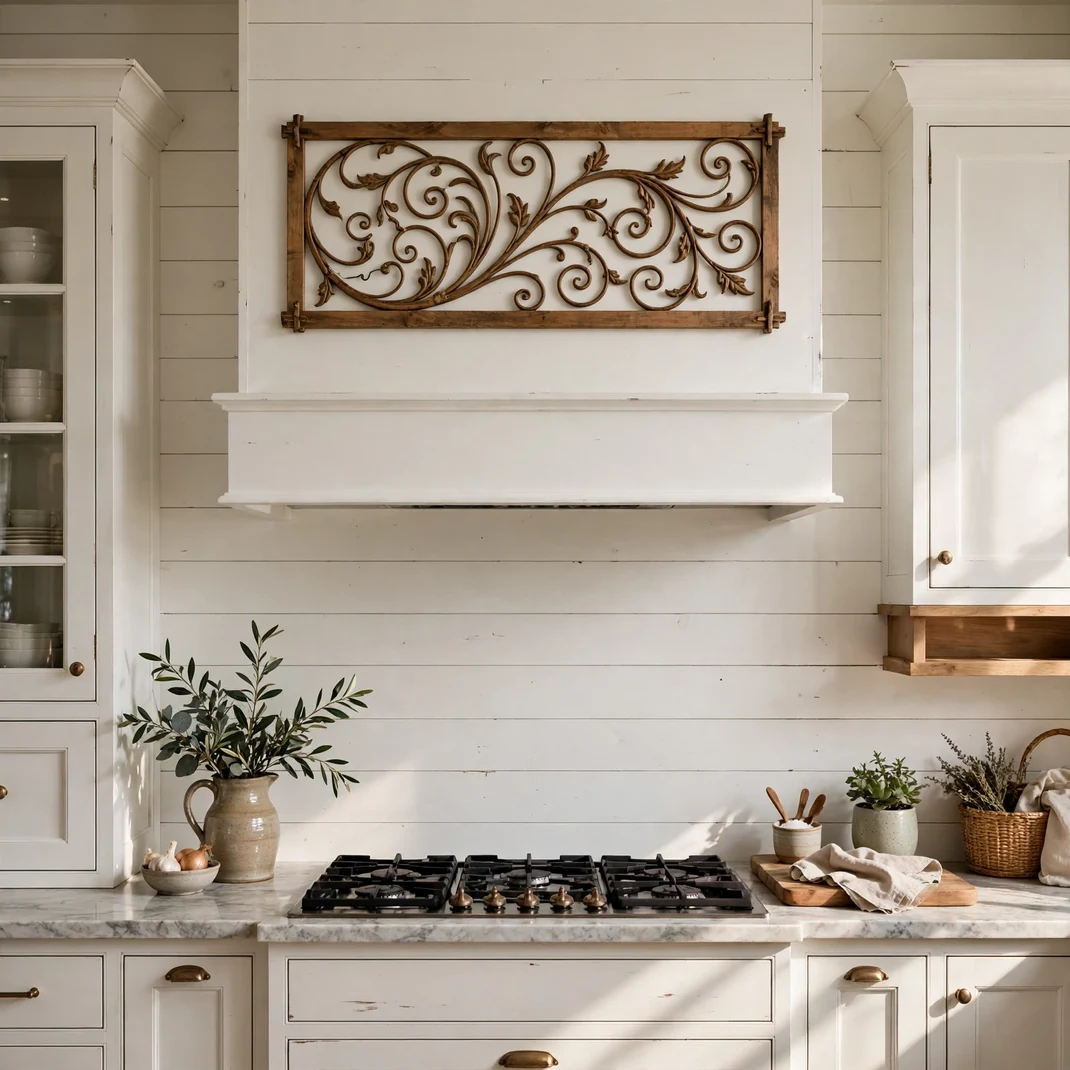
A single scripted word in warm neon or bent beechwood lends the wall a wink of personality. Commission gather, savor, or the family name in flowing lettering, then mount it where the room’s sightlines naturally land, above the coffee station perhaps. The glow or grain becomes an instant focal point, especially handsome in evening light. Keep surrounding walls quiet so the message owns its moment. Equal parts signage and sentiment, it signs the room like an artist’s flourish.
What You Need
- One custom word sign in neon LED or wood
- A dimmer plug for neon versions
- Concealed mounting hardware
How to Set It Up
- Hold the sign to the wall and mark fixing points
- Install the standoffs or suspension chain
- Seat the sign and connect power if needed
- Dim to a candlelike glow for evenings
Pro Tip
Size the word to span roughly two thirds of the furniture below it, since timid scale is the only real mistake.
Conclusion
Those empty walls have waited long enough for their moment. Whether you reach for the sweep of a mural, the warmth of woven fiber, or the humble help of a pegboard, each idea here asks little and returns plenty: more light, more character, more of the feeling that this room is truly yours. Start with the single notion that quickened your pulse, live with it for a week, and add only what the space still seems to request.
The loveliest part is how forgiving walls are. Paint washes off, nails fill in minutes, and nearly everything above rents its place lightly, ready to move when your taste does. So choose your favorite, fetch the level and the tape measure, and give that empty stretch the striking ending it deserves.