17 Kid-Friendly Halloween Bedroom Setups They’ll Adore
A child’s Halloween bedroom should feel exciting at first glance and reassuring once the lights go down. The most successful setups use friendly scale, soft materials, clear storage, and just enough seasonal color to spark imagination without making bedtime feel unsettled.
These 17 ideas are built around different parts of the room—from wardrobe doors and window seats to floor play and bedtime reading—so every concept creates its own scene. Choose one hero setup, repeat two or three colors elsewhere, and keep sleep zones and walking paths calm, clear, and comfortable.
1. Turn the Wardrobe into a Friendly Monster Face
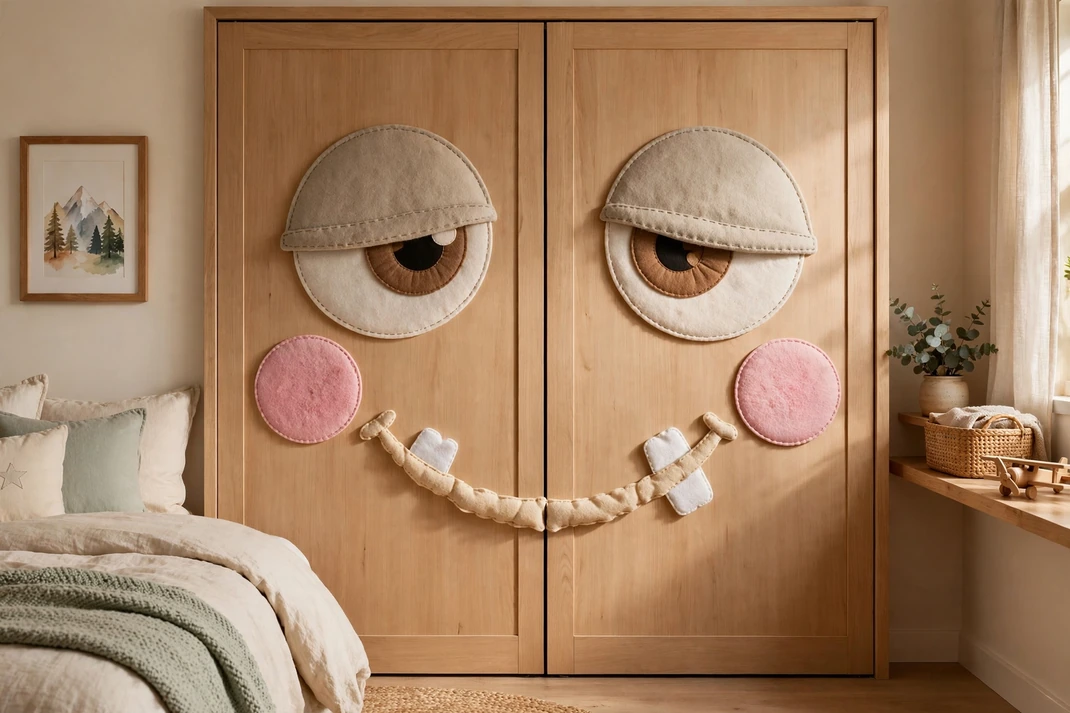
Wide closet doors become a cheerful character with sleepy eyes, rosy cheeks, and one wonderfully crooked smile. Because the design is concentrated on a surface children already see every day, the room feels festive without adding floor clutter.
The Setup: Cut large facial features from removable matte vinyl or stiff felt backed with painter-safe tape, scaling the eyes to roughly one quarter of each door’s width. Place the pupils slightly off-center, add two soft felt teeth along the door split, and keep handles, hinges, and ventilation completely uncovered.
Why It Photographs Well: The oversized features read instantly in a wide room shot, while the seam between the doors becomes a convincing mouth. A simple palette—sage, cream, coral, and charcoal—keeps the face crisp instead of visually noisy.
Pro Tip: Tape the full face together on the floor first, then lift each piece to the doors; adjusting the expression at full scale is much easier before adhesive touches the finish.
2. Create a Bedside Shadow-Puppet Theater
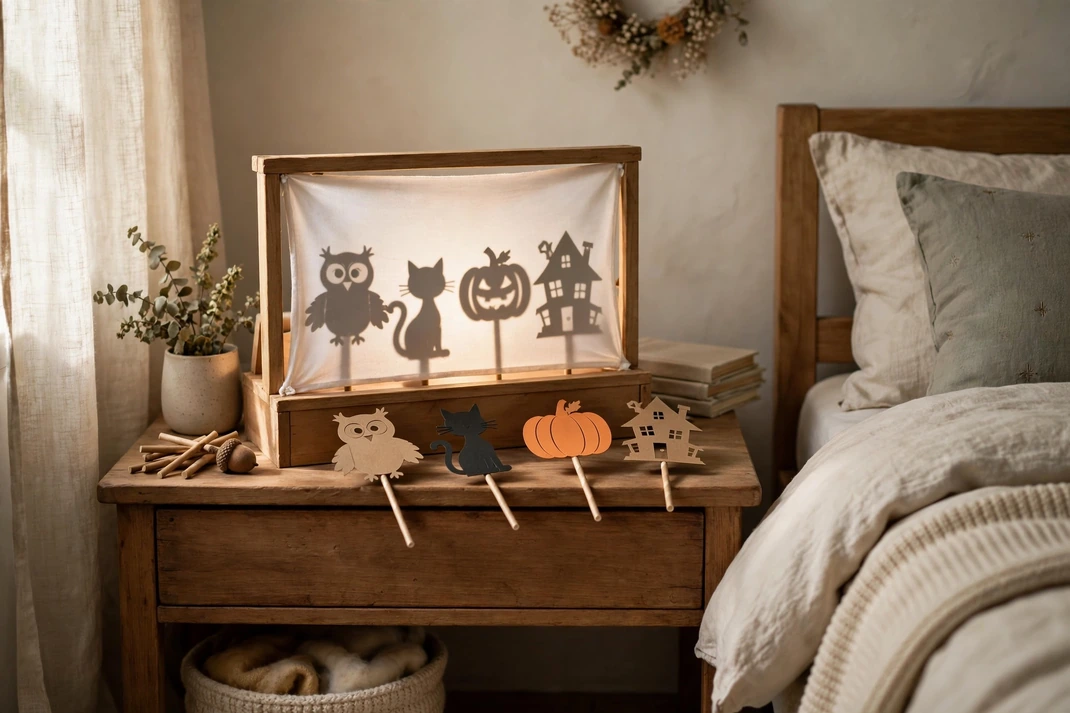
A tiny shadow theater turns the blank wall beside the bed into a place for gentle Halloween stories. Friendly owls, cats, pumpkins, and crooked houses feel magical in silhouette, especially when the rest of the room stays softly lit.
The Setup: Set a tabletop puppet frame on a low, stable cabinet and stretch white tracing cloth tightly across its opening. Use blunt-edged cardstock puppets on paper straws and a cool-running, battery-operated LED placed behind the screen; supervise play and store small pieces in a lidded box afterward.
Why It Photographs Well: The illuminated rectangle creates a natural focal point, and the dark silhouettes stay legible even in an evening photograph. Shooting from the child’s eye level captures both the glowing scene and the cozy edge of the bed.
Pro Tip: Keep each puppet shape bold and no smaller than a child’s palm; intricate cutouts disappear once the light diffuses through the screen.
3. Build a Plush Pumpkin-Patch Window Seat
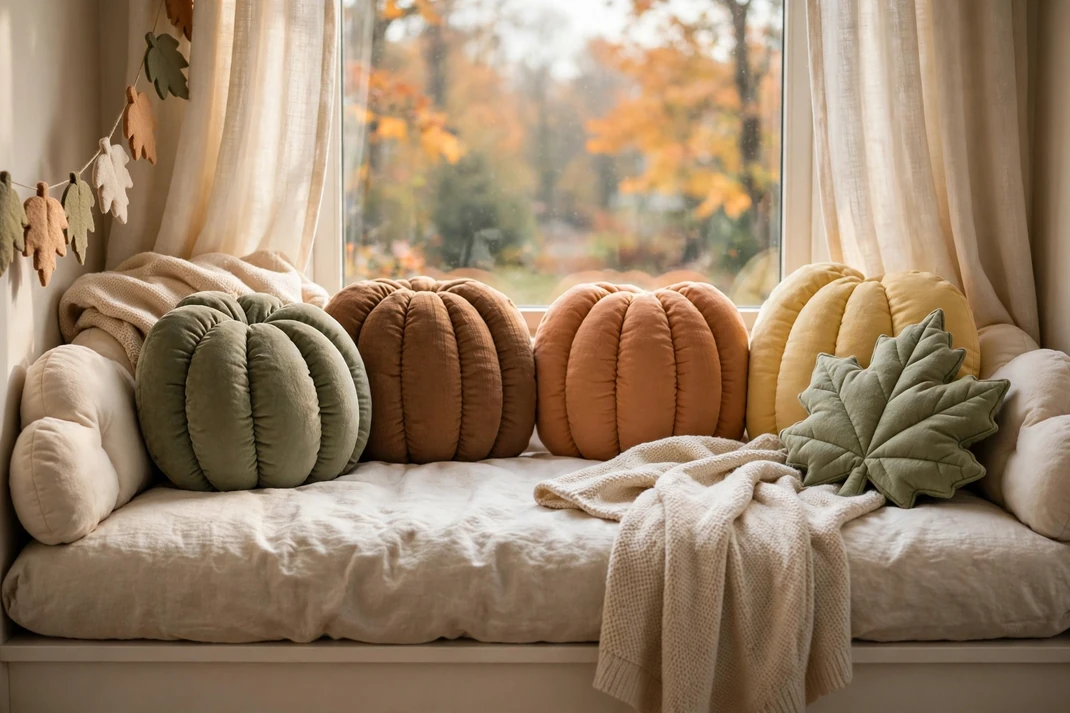
A window bench layered with squash-shaped cushions feels like a miniature pumpkin patch made for reading. Muted orange, butter yellow, moss, and cinnamon create autumn warmth without the hard surfaces or sharp stems of real gourds.
The Setup: Start with a washable bench cushion, then arrange three to five plush pumpkins in different sizes along the back, leaving enough clear seat depth for a child. Add one leaf-shaped cushion and a short oatmeal throw, and secure any freestanding bench to the wall according to the manufacturer’s instructions.
Why It Photographs Well: Rounded forms catch window light beautifully, and the graduated sizes give the composition an easy storybook rhythm. The view through the glass adds depth while the restrained palette keeps the setup cozy rather than toy-like.
Pro Tip: Choose pumpkins in different fabrics—corduroy, fleece, and brushed cotton—but repeat one color twice so the mix feels collected, not random.
4. Set Up a Costume Launch Station
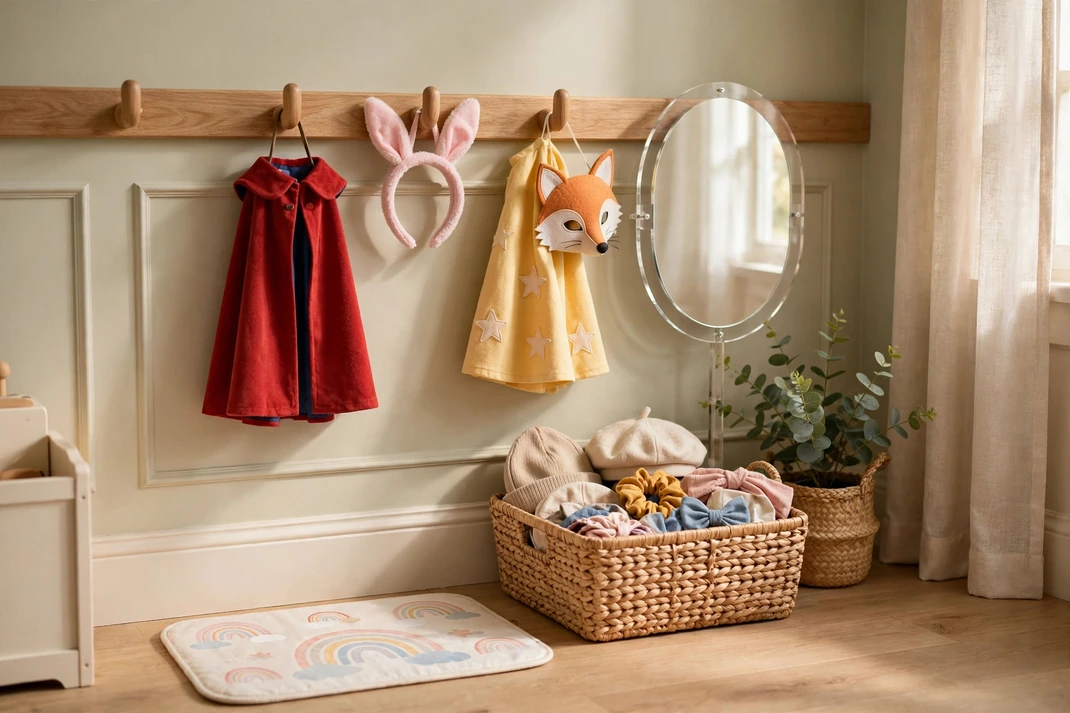
A low dress-up station makes Halloween costumes part of the room while keeping morning routines organized. Capes, animal ears, and soft masks become a neat color story instead of a heap on the floor.
The Setup: Mount three rounded hooks at the child’s reach on a wall-mounted rail, following its load rating, and place a wide basket below for hats and fabric accessories. Add an acrylic safety mirror beside the hooks and a small washable mat that clearly marks the dressing spot.
Why It Photographs Well: Hanging fabrics create movement and color, while the mirror doubles the scene in a photograph. The vertical hooks, low basket, and floor mat form a complete composition that still looks useful after October.
Pro Tip: Limit the visible costumes to three coordinated color families and rotate the rest; fewer pieces make independent cleanup easier and photographs much calmer.
5. Scatter a Confetti-Spot Accent Wall
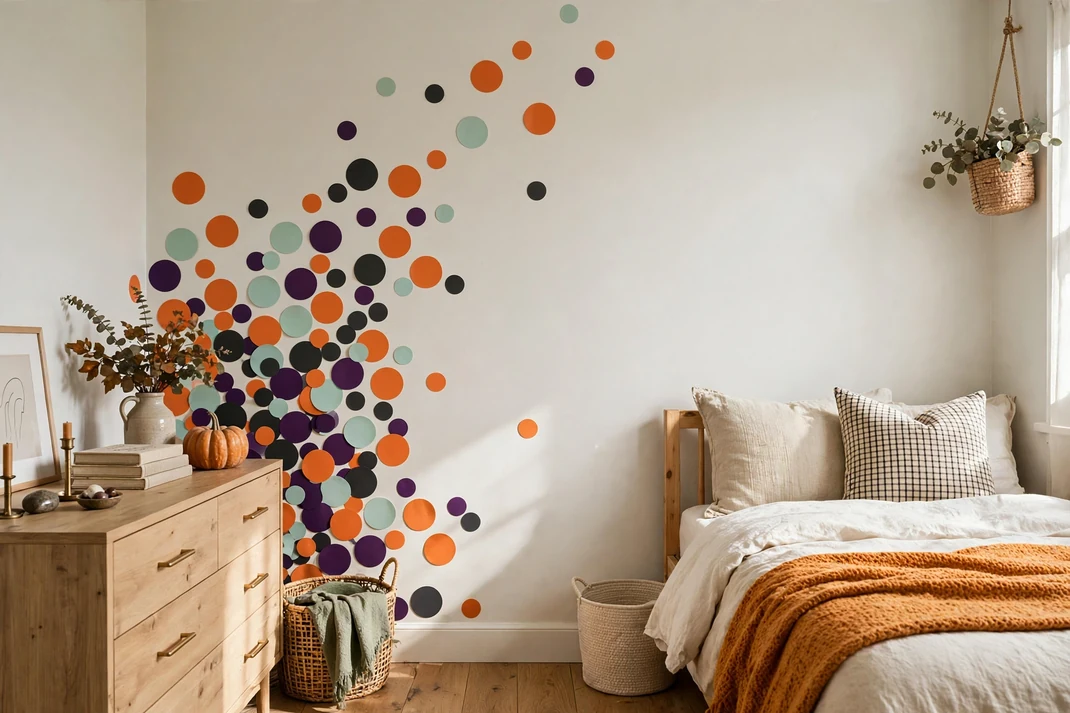
An offbeat mix of oversized dots gives a child’s room Halloween energy without a single spooky character. Tangerine, grape, mint, and charcoal spots feel like party confetti frozen across one wall, with plenty of pale background left visible.
The Setup: Cut removable vinyl circles in three sizes—about three, five, and eight inches—and cluster them loosely from one lower corner toward the ceiling. Keep the densest section beside a dresser or play table, then taper the pattern before it reaches the bed wall.
Why It Photographs Well: The changing scale creates depth on camera, and the diagonal drift leads the eye through the room. Matte vinyl avoids glare, so the colors stay saturated in both window light and lamplight.
Pro Tip: Place the largest circles first and photograph the wall with your phone before adding small ones; the snapshot makes empty patches and accidental straight lines easier to spot.
6. Turn Cubby Storage into Monster Apartments
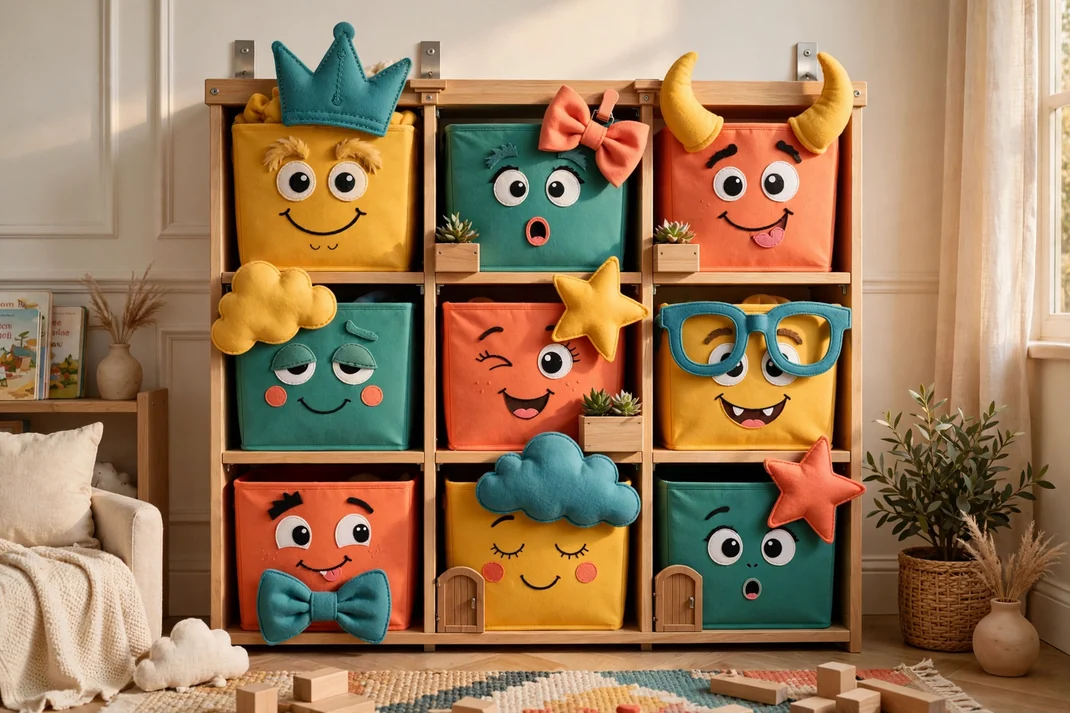
A row of open cubbies becomes a cheerful apartment building where each fabric bin has its own monster personality. The idea combines pretend play with real storage, giving blocks, pajamas, and craft supplies a designated home.
The Setup: Fit solid-color fabric bins into a securely anchored cubby unit, then attach large felt eyes, brows, and mouths with washable fabric fastener. Give each bin a different expression but repeat the same three colors across the unit, and keep detachable pieces oversized for the child’s age.
Why It Photographs Well: The repeated square openings create strong structure, while the varied faces provide character in close photographs. Keeping the cabinet neutral lets the colorful bins read clearly without making the entire wall feel busy.
Pro Tip: Match expressions to contents—a sleepy face for pajamas, a toothy grin for building blocks—so the decoration quietly helps children remember where things belong.
7. Mark a Glow-in-the-Dark Bedtime Trail
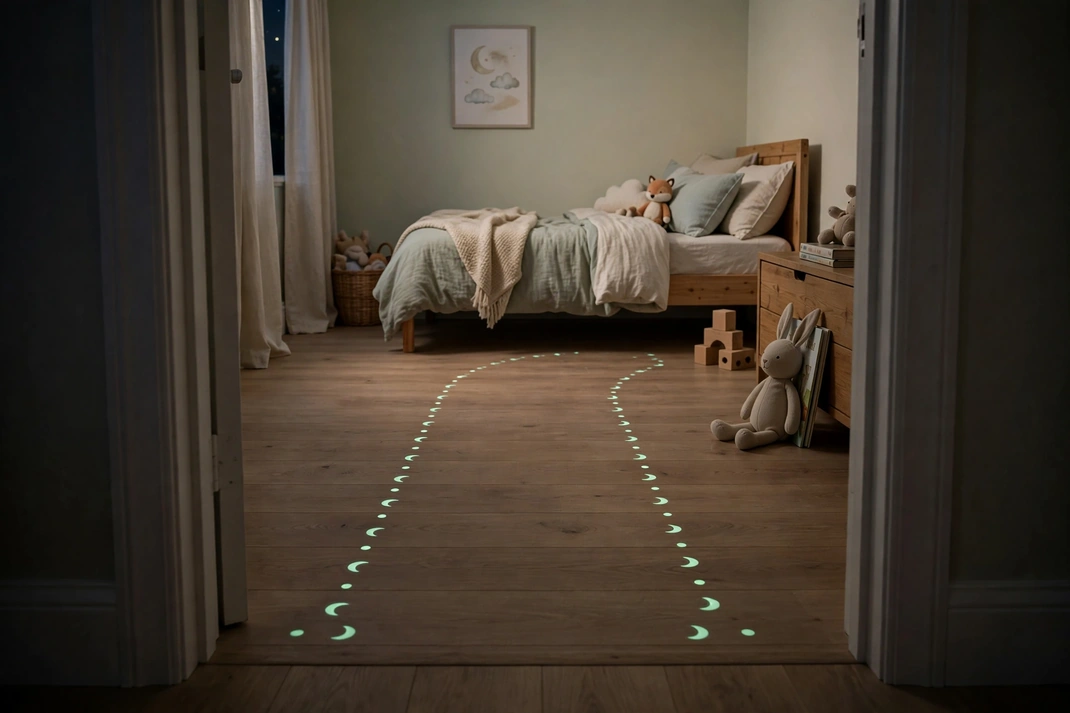
A dotted path from the doorway to the bed adds a small lights-out surprise and helps the nighttime route feel intentional. In daylight it reads as a neat row of pale shapes; after the lamp goes off, it becomes a gentle trail rather than a bright themed display.
The Setup: Use low-tack, photoluminescent floor decals rated for the exact flooring type, placing them along the edge of the walking route rather than underfoot. Keep the path clear of furniture and cords, test that every decal lies completely flat, and remove any piece that begins to lift.
Why It Photographs Well: A low camera angle captures the trail as a leading line toward the dressed bed. Photographing at blue hour preserves detail in the room while allowing the soft glow to register naturally.
Pro Tip: Alternate two simple shapes—dots and tiny paw prints—rather than mixing many icons; the restrained sequence feels playful without looking like signage.
8. Roll In a Halloween Story Cart
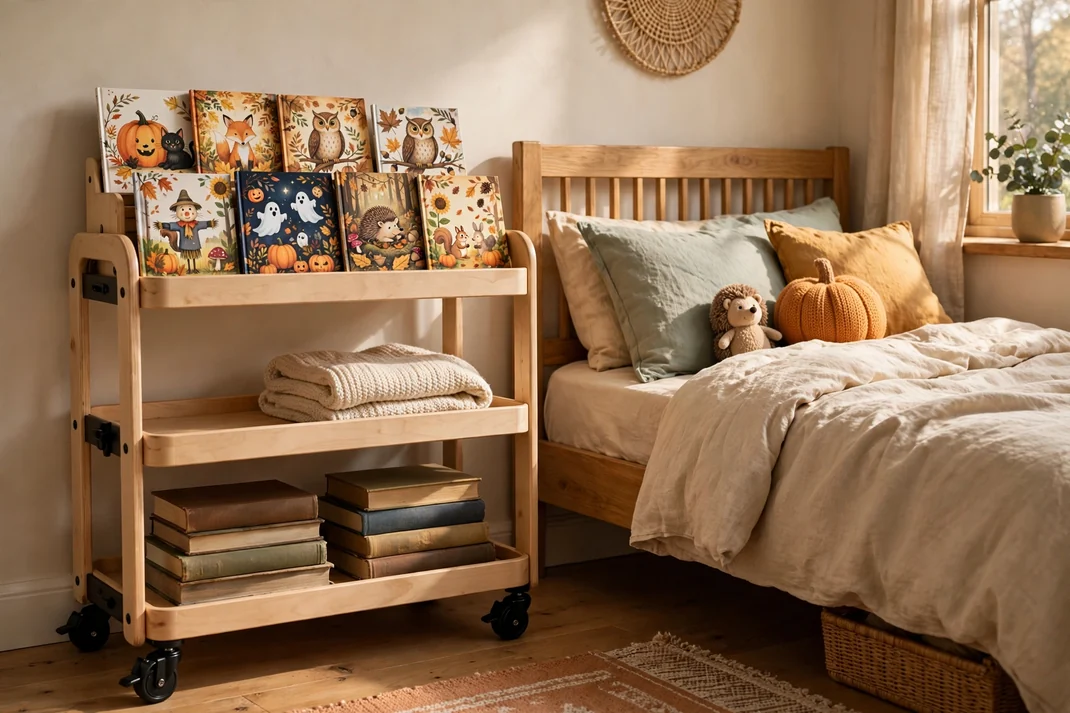
A compact book cart turns bedtime reading into a seasonal ritual without requiring new shelving. Picture books face forward in the top tier, while a soft toy and folded blanket make the lower levels feel like a complete mobile library.
The Setup: Choose a stable cart with locking casters and rounded edges, then place six to eight Halloween or autumn books cover-out in the top tray. Store a small blanket in the middle tier and heavier books at the bottom; park the cart beside the bed only after the wheels are locked.
Why It Photographs Well: Book covers create a colorful, layered backdrop, and the narrow cart fits naturally into vertical photographs. Its handle and tiers frame the arrangement while leaving enough negative space for the eye to rest.
Pro Tip: Rotate only the front two books every few days; a small visible change renews interest without restyling the whole cart.
9. Give a Reading Lamp a Googly-Eyed Shade
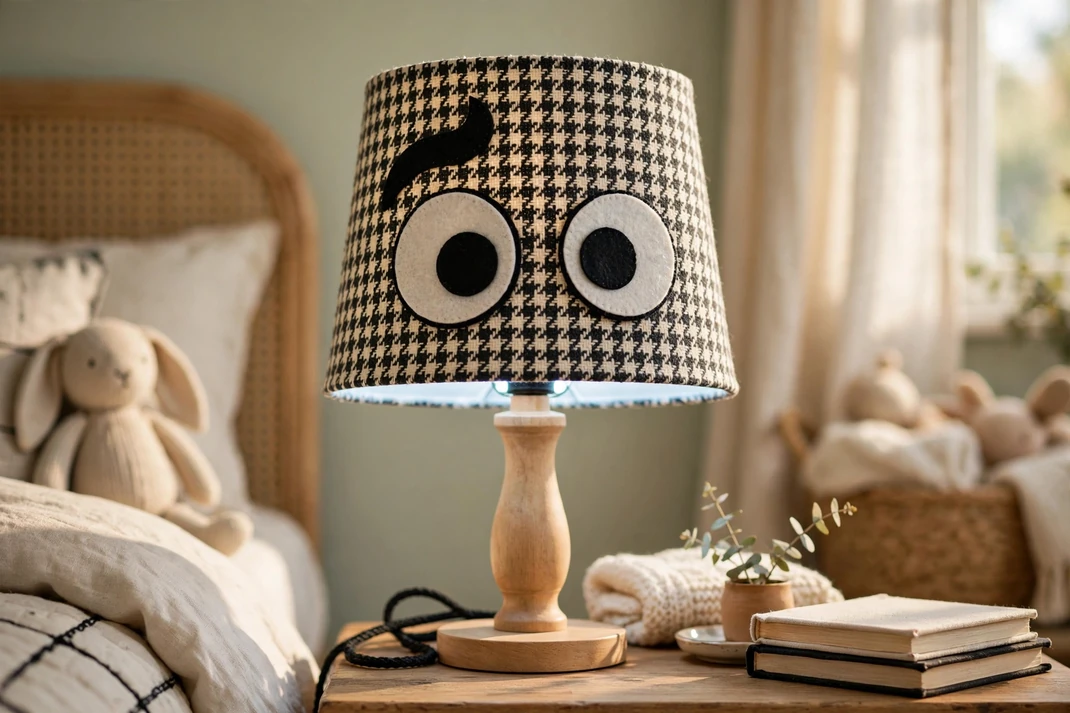
A plain drum-shade lamp becomes a wide-eyed bedtime companion with one reversible fabric sleeve. The expression is silly rather than scary, and the soft black-and-cream palette works with colorful children’s bedding.
The Setup: Sew or fasten a snug sleeve from flame-resistant shade material, then add two large flat felt eyes and an off-center eyebrow to the outside. Use only the bulb type and wattage approved by the lamp maker, keep decorations away from openings, and choose a cool-running LED.
Why It Photographs Well: The circular eyes echo the shade’s shape, producing a simple face that reads immediately in a bedside close-up. Warm light creates a halo around the silhouette and reveals the felt texture without exposing a harsh bulb.
Pro Tip: Make one eye slightly smaller than the other; that tiny asymmetry gives the lamp personality while keeping the design graphic and polished.
10. Frame the Bed with a Candy-Shop Valance
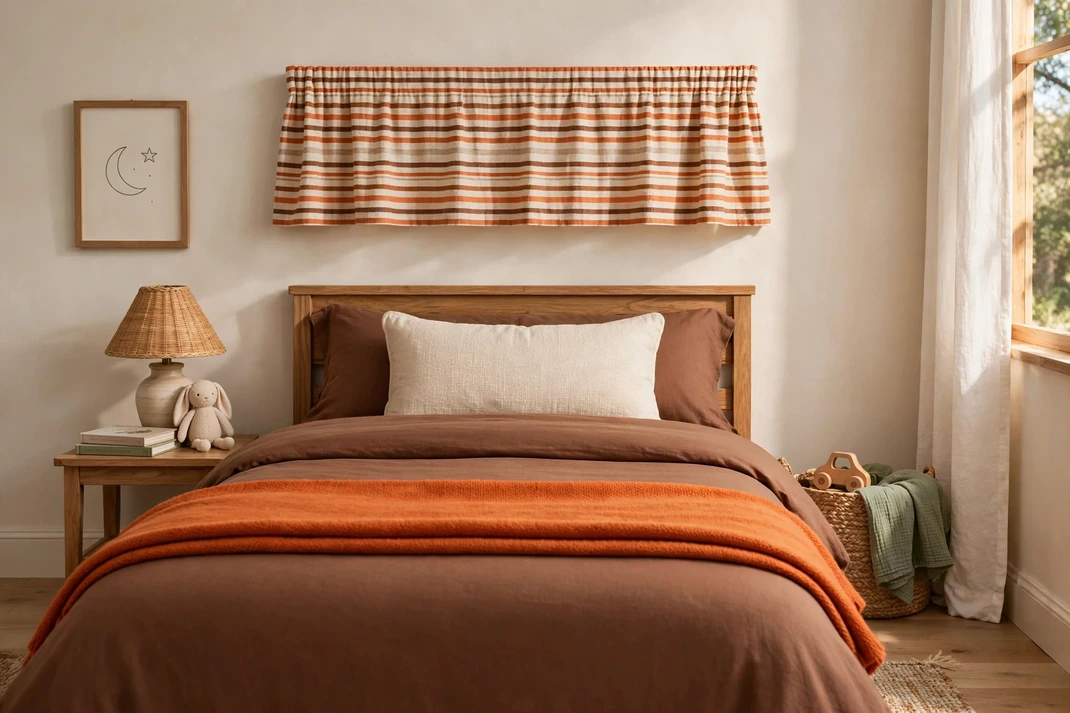
A striped fabric valance above the headboard makes the bed resemble a tiny October candy counter. Pumpkin orange, cream, and cocoa stripes bring sweetness to the room without repeating candy-corn triangles or covering the bedding in novelty prints.
The Setup: Mount a shallow, lightweight fabric valance to the wall—not the bed—using hardware suitable for the surface, keeping it well above reach and no wider than the mattress. Pair it with plain cocoa bedding, a cream lumbar cushion, and one orange throw folded across the foot.
Why It Photographs Well: The valance creates a crisp frame around the bed and introduces a strong stripe that photographs cleanly from the doorway. Solid bedding beneath it prevents the composition from becoming overly patterned.
Pro Tip: Run the stripes vertically on the short front panel and horizontally on the narrow side returns; the change in direction makes the simple structure look custom made.
11. Mount a Giant Tic-Tac-Boo Wall Game
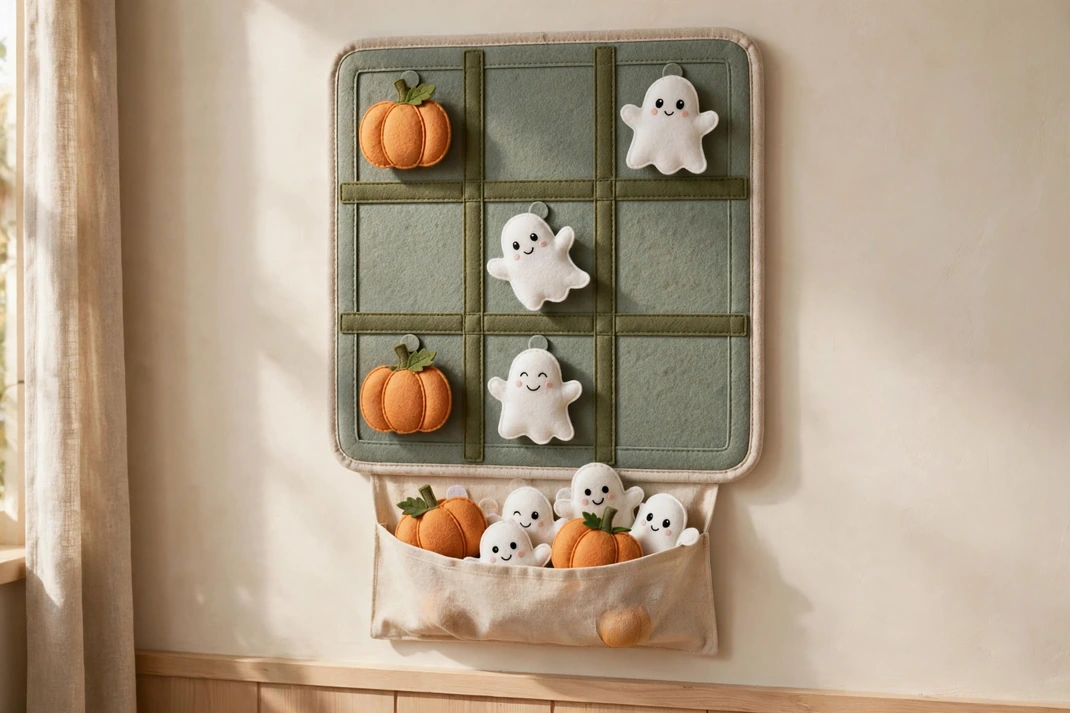
An oversized fabric game board turns one empty wall into a quiet, screen-free activity. Soft pumpkin and friendly ghost pieces attach with hook-and-loop dots, allowing children to reset the board without pins, magnets, or hard game pieces.
The Setup: Stretch a washable felt grid over a lightweight foam board and secure the finished panel at child height with wall fasteners rated for its weight. Cut ten palm-sized game pieces from layered felt, sew their edges, and store extras in a flat fabric pocket attached below the grid.
Why It Photographs Well: The bold nine-square layout gives photographs instant order, while the rounded pieces add a handmade softness. A slight side angle shows the tactile layers and the storage pocket in one shot.
Pro Tip: Use two colors with similar intensity—rust and deep teal, for example—so neither team visually dominates the board when a game is half finished.
12. Stage a Dinosaur Costume Sleepover
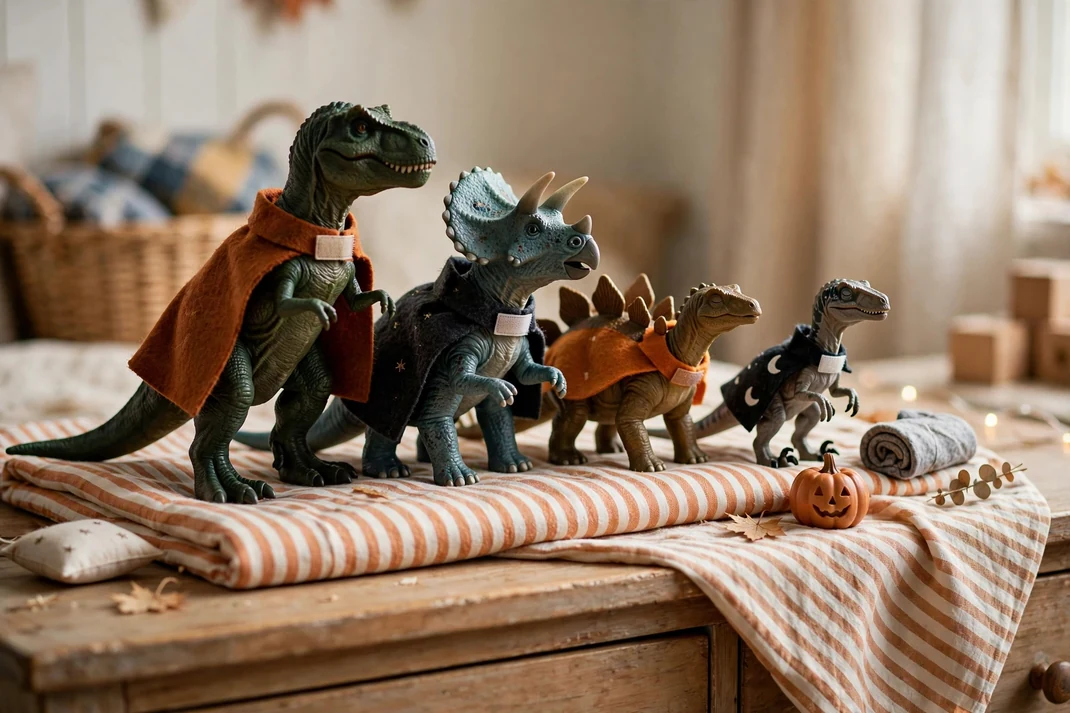
A line of favorite toy dinosaurs in tiny felt capes creates a playful Halloween sleepover across a low bench or dresser. The familiar toys keep the display personal, while coordinated costumes make it look styled rather than scattered.
The Setup: Choose three to five sturdy dinosaurs large enough for age-appropriate play and make simple capes that close with hook-and-loop tabs rather than ties. Arrange them from tallest to shortest on a low surface, place a folded striped cloth beneath them, and return all toys to a basket before sleep if the child is very young.
Why It Photographs Well: Repeating dinosaur shapes at different heights creates a lively silhouette, and the capes add just enough motion. Side light exaggerates the scales and felt texture, making the scene charming in both wide and detail shots.
Pro Tip: Cut every cape from the same fabric but vary the collar color; that one repeated material turns mismatched toys into a convincing little group.
13. Place a Halloween Mailbox at the Foot of the Bed
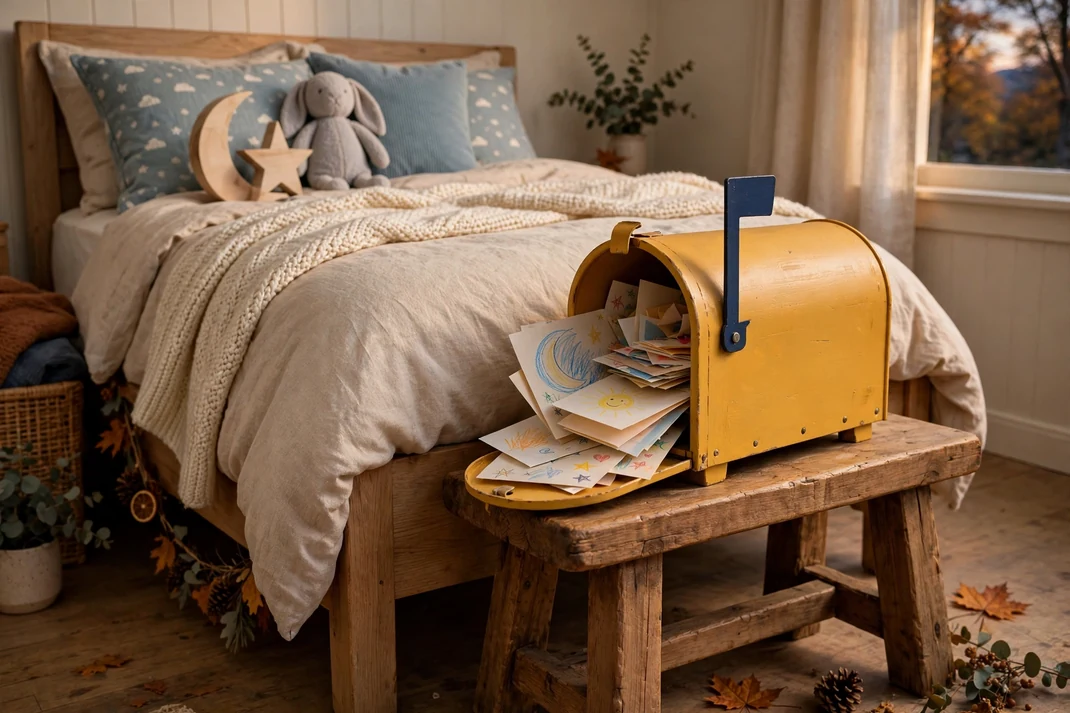
A child-sized mailbox gives family members a place to leave jokes, drawings, and bedtime notes throughout October. Painted marigold with a navy flag, it adds one sculptural accent and a ritual children can look forward to each evening.
The Setup: Use a lightweight wooden or sturdy cardboard mailbox with smooth edges, set it on a broad, stable stool outside the main walking path, and label contents with removable picture symbols rather than loose tags. Fill it only with paper notes or flat drawings, not sweets, and check that the lid cannot pinch fingers.
Why It Photographs Well: The curved box and raised flag stand out against rectangular bedroom furniture, creating a strong focal point near the bed. A few colorful envelopes peeking from the open door give the photograph a clear story.
Pro Tip: Choose a mailbox color already found in one small room detail, such as a book spine or blanket stripe; that echo makes the new piece feel integrated immediately.
14. Build a Foam-Block Moon Base
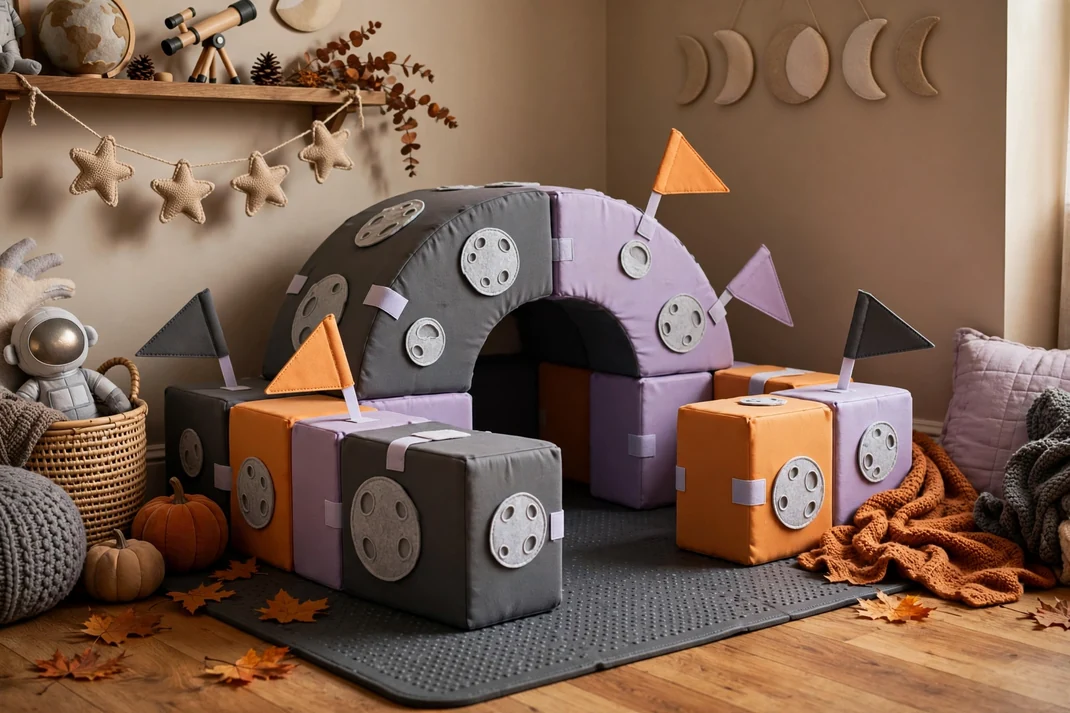
Chunky foam blocks in charcoal, lilac, and orange become a make-believe moon base by day and stack neatly away before bedtime. Removable crater circles and little flag shapes give the construction an October-space mood without repeating a star-covered room.
The Setup: Cover large soft play blocks with washable fitted cases, then add flat felt crater patches that attach securely with fabric fastener. Keep the building zone on a nonslip mat away from windows and furniture edges, and store every block in a low basket when active play ends.
Why It Photographs Well: The stepped block forms create dramatic shadows and a strong miniature skyline at floor level. Photographing from just above the mat makes the construction feel immersive while keeping the bedroom visible behind it.
Pro Tip: Use only three block colors and make the crater circles one consistent gray; a limited palette helps even an elaborate child-built arrangement look cohesive.
15. Map a Pretend Trick-or-Treat Route on a Pin-Free Board
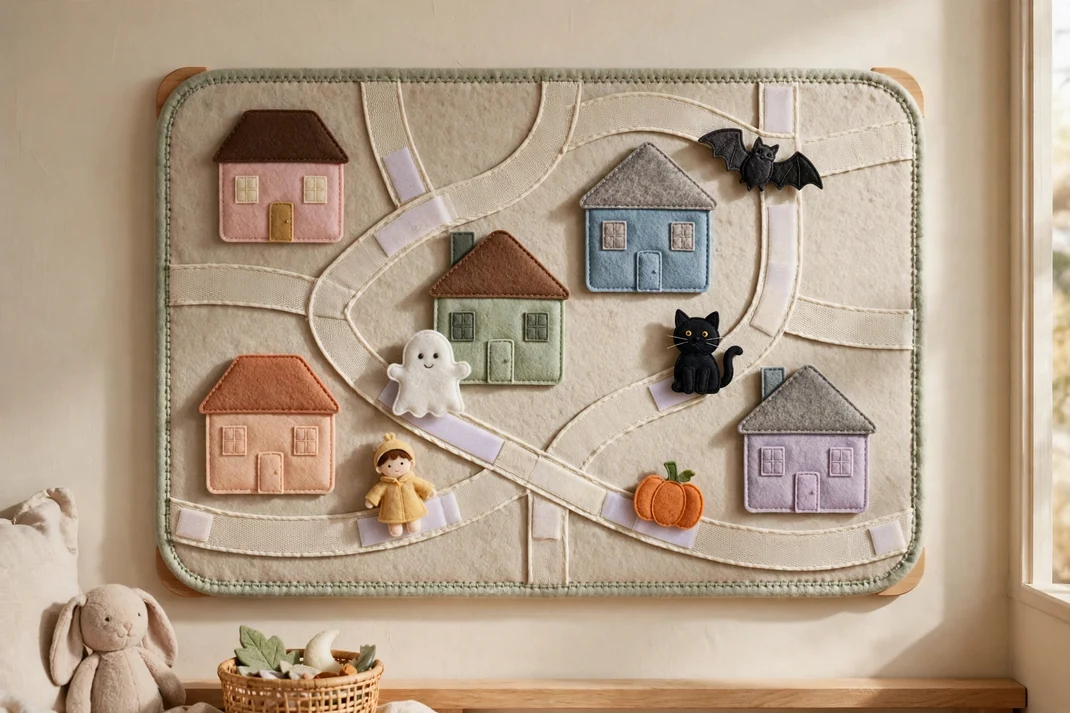
A fabric neighborhood map lets children plan an imaginary trick-or-treat route with houses, trees, and cheerful landmarks. It brings storytelling to the wall while keeping the palette soft enough for a bedroom.
The Setup: Cover a cork-free lightweight board with felt and add large stitched house shapes, wide ribbon roads, and hook-and-loop character markers. Mount it securely at a comfortable reach, round every corner, and keep all movable markers generously sized for the child’s age.
Why It Photographs Well: The looping roads lead the eye across the board, and layered houses cast subtle shadows in angled daylight. One bright marker placed along the route provides a natural focal point for close photographs.
Pro Tip: Leave about one-third of the board as open background; children need visual room to move the characters, and the finished map will photograph more clearly.
16. Fan Out an Accordion-Paper Party Corner
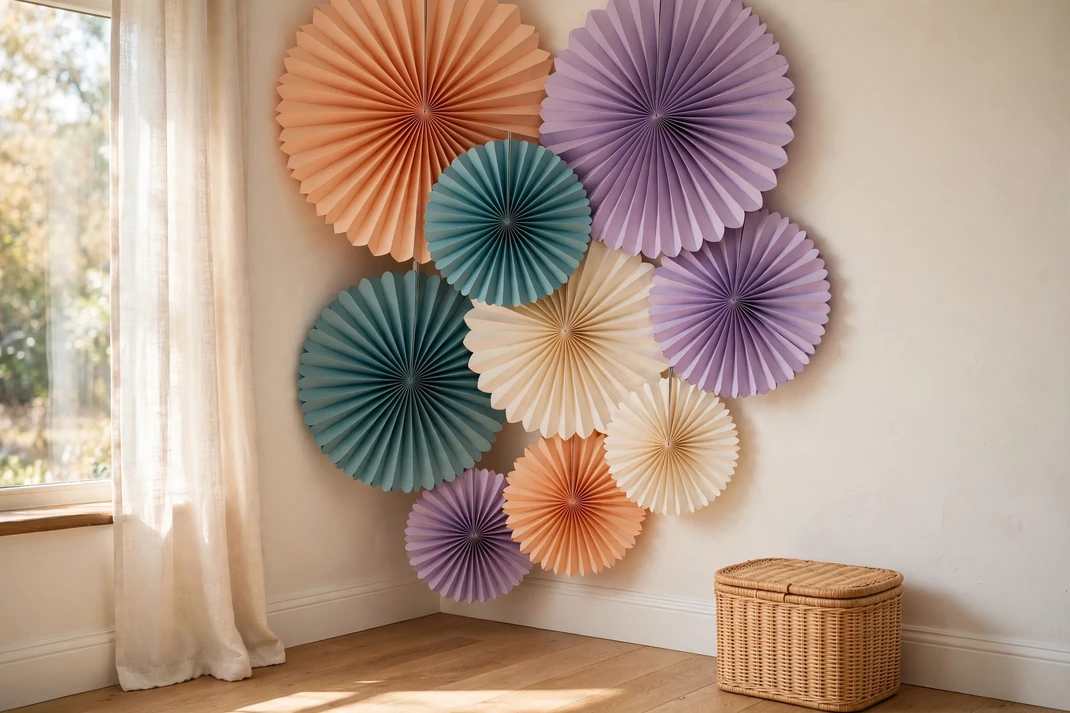
One neglected corner becomes a joyful Halloween backdrop with oversized accordion fans in apricot, lavender, teal, and cream. The circular forms feel celebratory and light, offering seasonal impact without introducing frightening imagery.
The Setup: Choose sturdy premade paper fans in three diameters and mount them high on one wall with fasteners suited to both the fan weight and wall finish. Overlap the edges slightly, keep the lowest fan beyond a young child’s reach, and leave the adjacent floor open except for one lidded toy basket.
Why It Photographs Well: Layered circles create depth and cast delicate folded shadows that shift through the day. The cluster fills a vertical crop beautifully, while the clear floor keeps wide images balanced.
Pro Tip: Start with the largest fan off center, then tuck smaller ones around only two-thirds of its edge; a crescent-shaped cluster looks more natural than a perfectly round target.
17. Create a Monster Hotel Check-In Desk
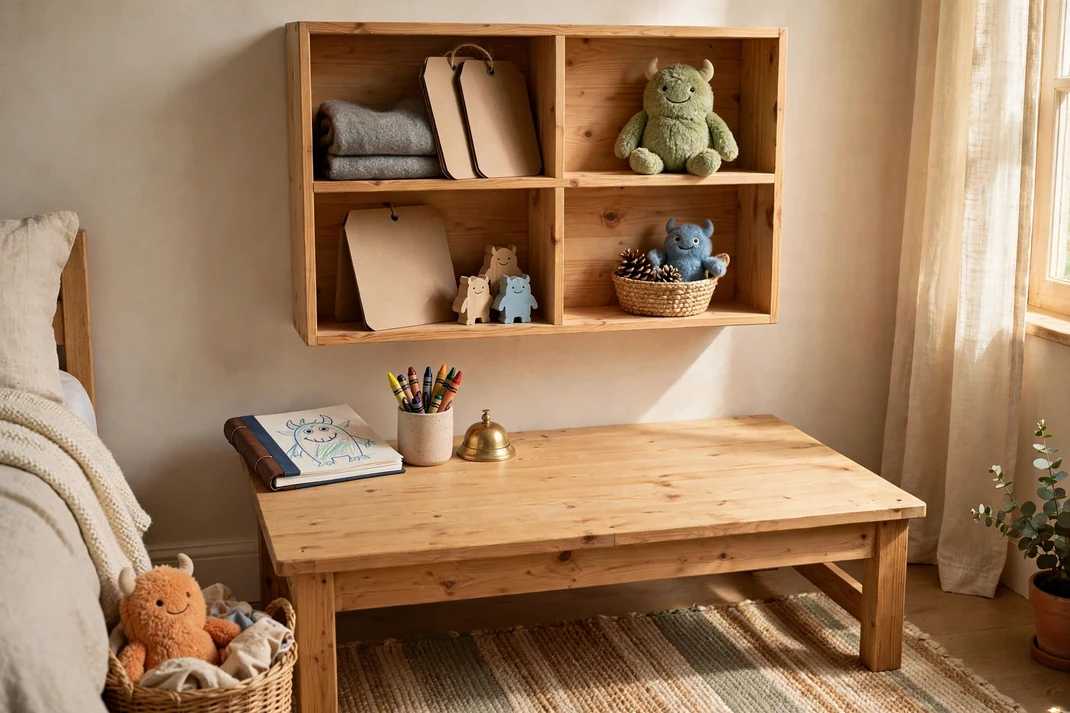
A small desk becomes the reception counter for a friendly monster hotel, complete with pretend room cards, a guest book, and orderly key cubbies. The setup encourages imaginative play while remaining polished enough to function as a real drawing station.
The Setup: Place a low desk against the wall and mount a shallow, securely fixed grid of four open cubbies above it. Add oversized cardboard room cards, a bound sketchbook, chunky crayons in a cup, and a desk bell with no detachable parts; keep at least half the work surface clear.
Why It Photographs Well: The cubby grid forms a strong backdrop, and the open guest book gives the scene a lived-in narrative. A small pool of warm task light separates the desktop from the wall while preserving the cozy October palette.
Pro Tip: Give each cubby a simple color-and-shape symbol instead of written room numbers; the system stays playful for pre-readers and avoids visual clutter.
Kid-friendly Halloween decor works best when play and practicality share the same plan. A single interactive feature, one organized display, and a warm layer of light can make October memorable while leaving the bedroom easy to use, tidy, and restful.