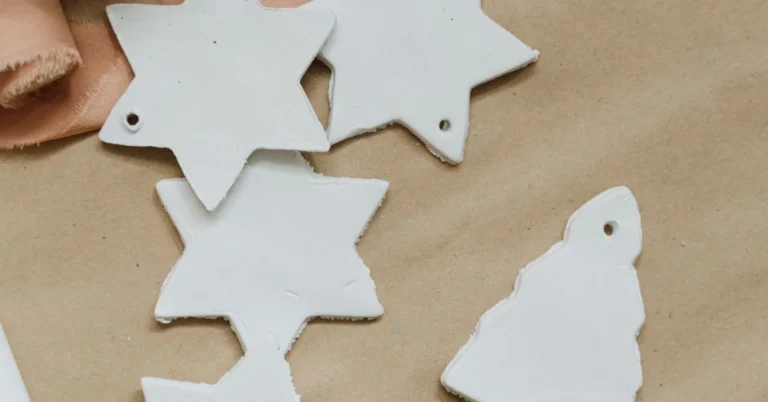
22 White and Pink Christmas Combos for a Soft Bedroom
There is something quietly magical about a bedroom dressed in white and pink for Christmas. The white keeps everything calm and wintry, while blush pink adds the warmth of candlelight and sugarplums, and together they create a holiday look that feels soft instead of loud. These 22 combos lean into that pairing in practical, followable ways, from ombré bedding and ribbon-woven headboards to tiny glowing details you can finish in an afternoon. Every idea below is built for a real bedroom, with notes on materials, safety, and storage so the look lasts the whole season and packs away neatly in January.
1. White-to-Blush Ombré Bedding Layers
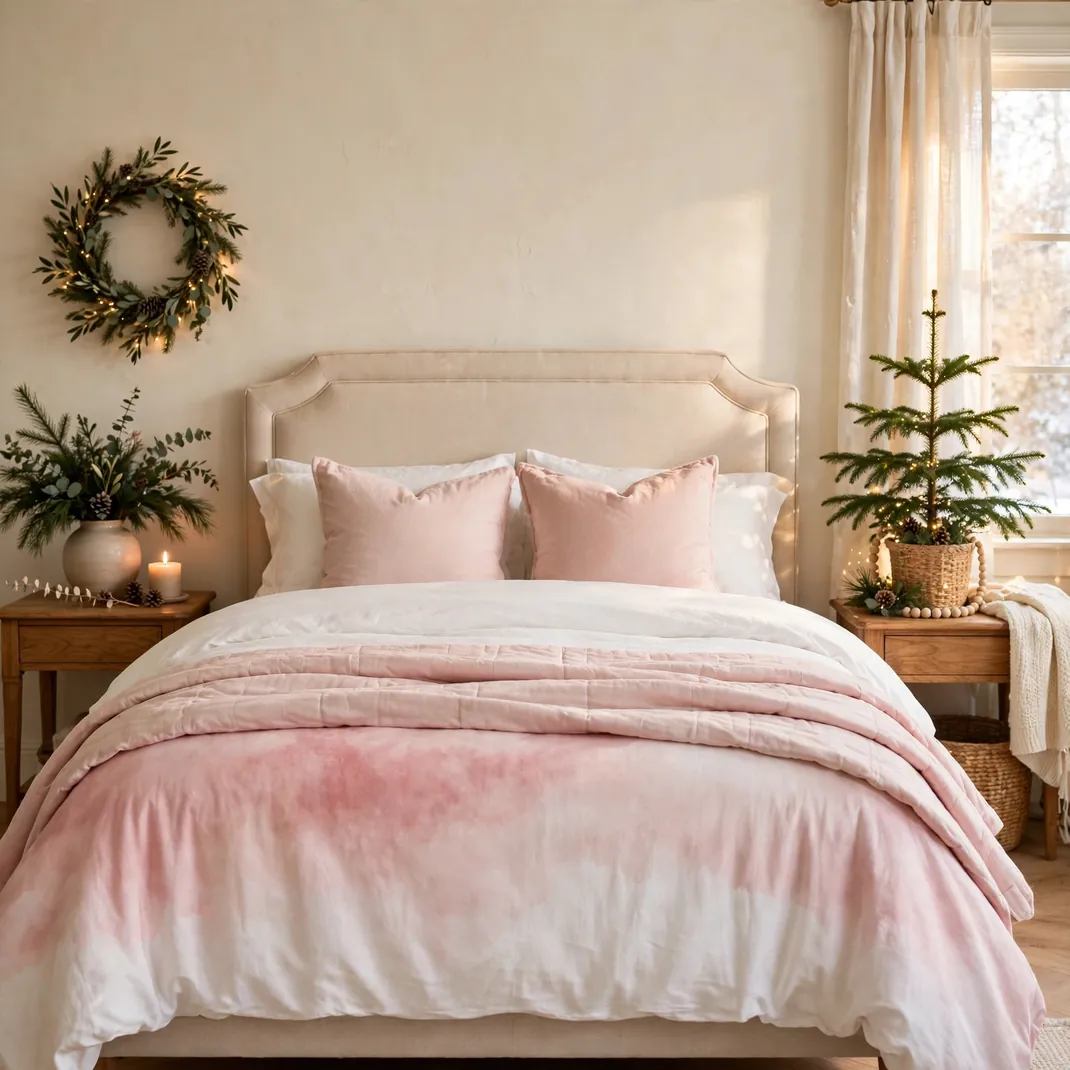
Start with crisp white sheets, add a white duvet, then layer a blush pink quilt folded across the lower third of the bed so the color melts downward like a watercolor wash. The ombré effect works because the eye reads the gradient as one continuous soft surface rather than two competing colors. Use cotton or cotton-blend pieces in similar weights so the layers lie flat together, and finish with a mix of white and blush pillow shams to echo the fade at the top of the bed.
How to Style It: Fold the blush quilt at a slight diagonal so the color break looks intentional, and tuck one white throw pillow in front of the blush ones to soften the transition.
Why It Photographs Beautifully: The gradient reads as a single dreamy wash of color in photos, giving the bed a styled, editorial softness with almost no effort.
Pro Tip: Keep the pink in the lighter blush family; deeper rose tones break the ombré illusion and read as a separate block of color.
Budget-Smart Swap: Lay a blush flat sheet over the foot of a white duvet instead of buying a quilt, and let the white border peek out as the pale end of the gradient.
2. Pink Ribbon Crisscross Woven Through a White Slatted Headboard
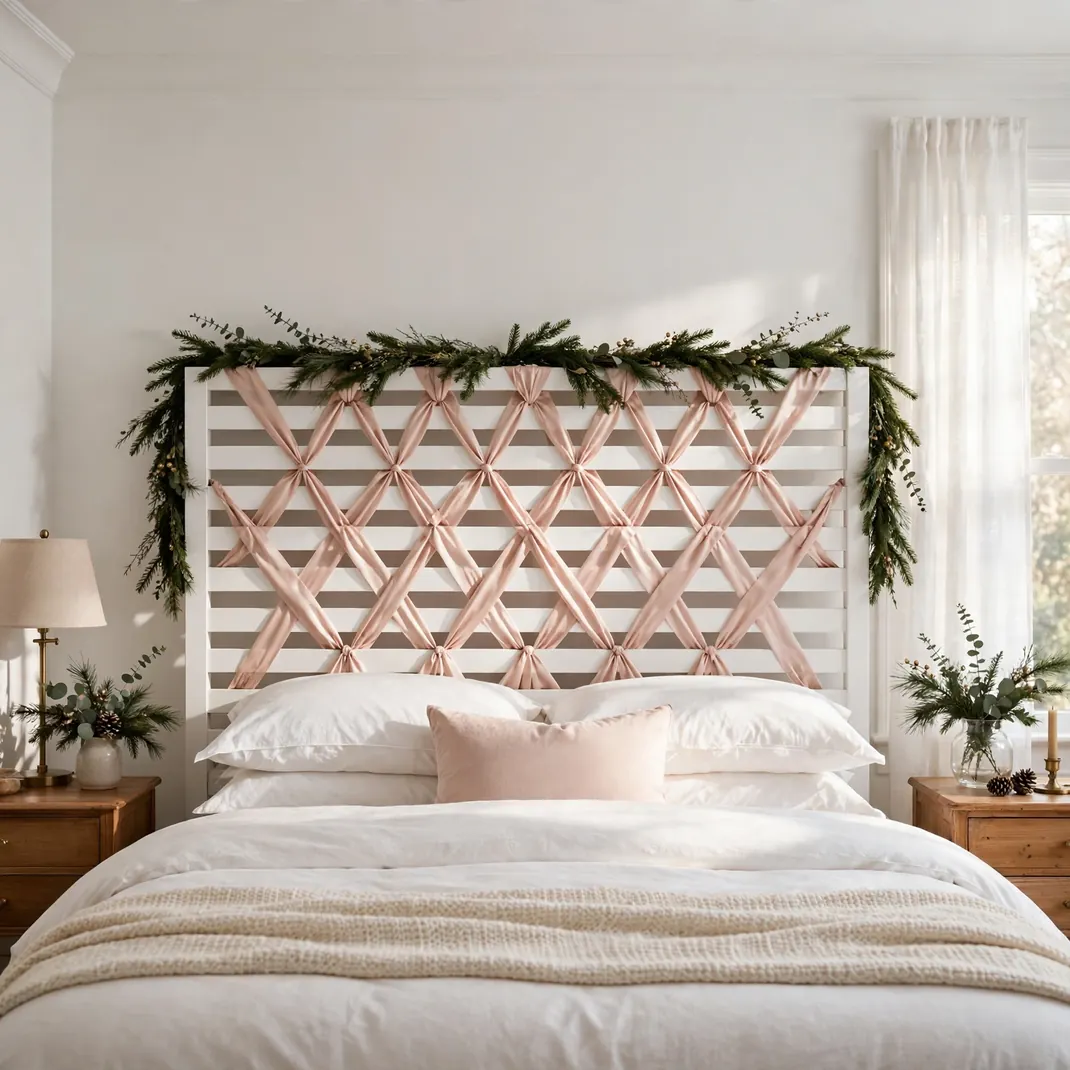
If your headboard has vertical slats, you have a built-in loom waiting for the holidays. Weave wide blush satin ribbon in and out of the slats in a crisscross lattice, pulling each pass snug so the ribbon lies flat against the wood. The pink lines against white-painted slats look like a giant candy ribbon, and because the ribbon is only woven, not glued, the whole thing lifts out in minutes after the season. Choose a 2-inch satin or grosgrain ribbon so the weave shows up from across the room.
How to Style It: Anchor the ribbon ends behind the headboard with small pieces of painter’s tape so nothing slips, and space the passes evenly for a tidy lattice.
Why It Photographs Beautifully: The repeating diagonal lines create a graphic pattern that makes even a simple white headboard look custom-designed on camera.
Pro Tip: Iron the ribbon first; creased ribbon from the spool will kink the lattice and catch the light unevenly.
Budget-Smart Swap: Use wired craft ribbon from the dollar store; the wire edge holds the weave’s shape even better than plain satin.
3. White Tabletop Tree Dressed in Pastel Pink Ornaments

A small white artificial tree on the dresser or a side table becomes the room’s pink-and-white anchor when dressed only in pastel pink ornaments. Keep the palette tight: blush, ballet pink, and one metallic rose for sparkle, with no more than two ornament finishes so the tree looks curated rather than cluttered. A 2-foot tree needs only 15 to 20 mini ornaments, and a simple white or blush tree skirt made from a folded napkin finishes the base. Use indoor-rated LED fairy lights with a battery pack tucked behind the tree so no cords trail across the furniture.
How to Style It: Hang ornaments on the outer branch tips first, then tuck a few deeper inside for depth, and finish with a small blush bow as the topper.
Why It Photographs Beautifully: The all-pink-on-white tree glows like a frosted dessert in photos, especially with warm-white fairy lights twinkling through it.
Pro Tip: Store the decorated tree in a tall gift bag in January; next year it comes out fully dressed and ready.
Budget-Smart Swap: Spray-paint a thrifted green mini tree white with matte spray paint, then decorate; the pink ornaments hide any imperfect coverage.
4. Pink-and-White Striped Canopy Drapes Over the Bed

Drape striped pink-and-white fabric over a simple canopy frame, a ceiling-mounted hoop, or even two wall hooks above the headboard to build a soft tent of color over the bed. Wide awning-style stripes read playful and festive, like a vintage candy shop, while thin pinstripes feel more delicate and romantic. Use lightweight cotton voile or curtain panels so the fabric hangs in soft folds without pulling the hardware down, and let the ends puddle slightly on the mattress for a cozy, enclosed feeling. Two curtain panels per side is usually enough for a queen bed.
How to Style It: Gather each panel with a pink ribbon tie at mattress height so the canopy opens like curtains and doesn’t block your reading light.
Why It Photographs Beautifully: The stripes frame the bed like a stage set, drawing the camera straight to the pillows and making the whole room feel intentional.
Pro Tip: Check adhesive hook weight ratings and use two hooks per side; curtain panels are light, but gathered fabric concentrates the load.
Budget-Smart Swap: Use striped twin flat sheets from a discount store; they are pre-hemmed, wide enough, and cost a fraction of decorator fabric.
5. Blush Pom-Pom Trim Sewn on a White Duvet Edge
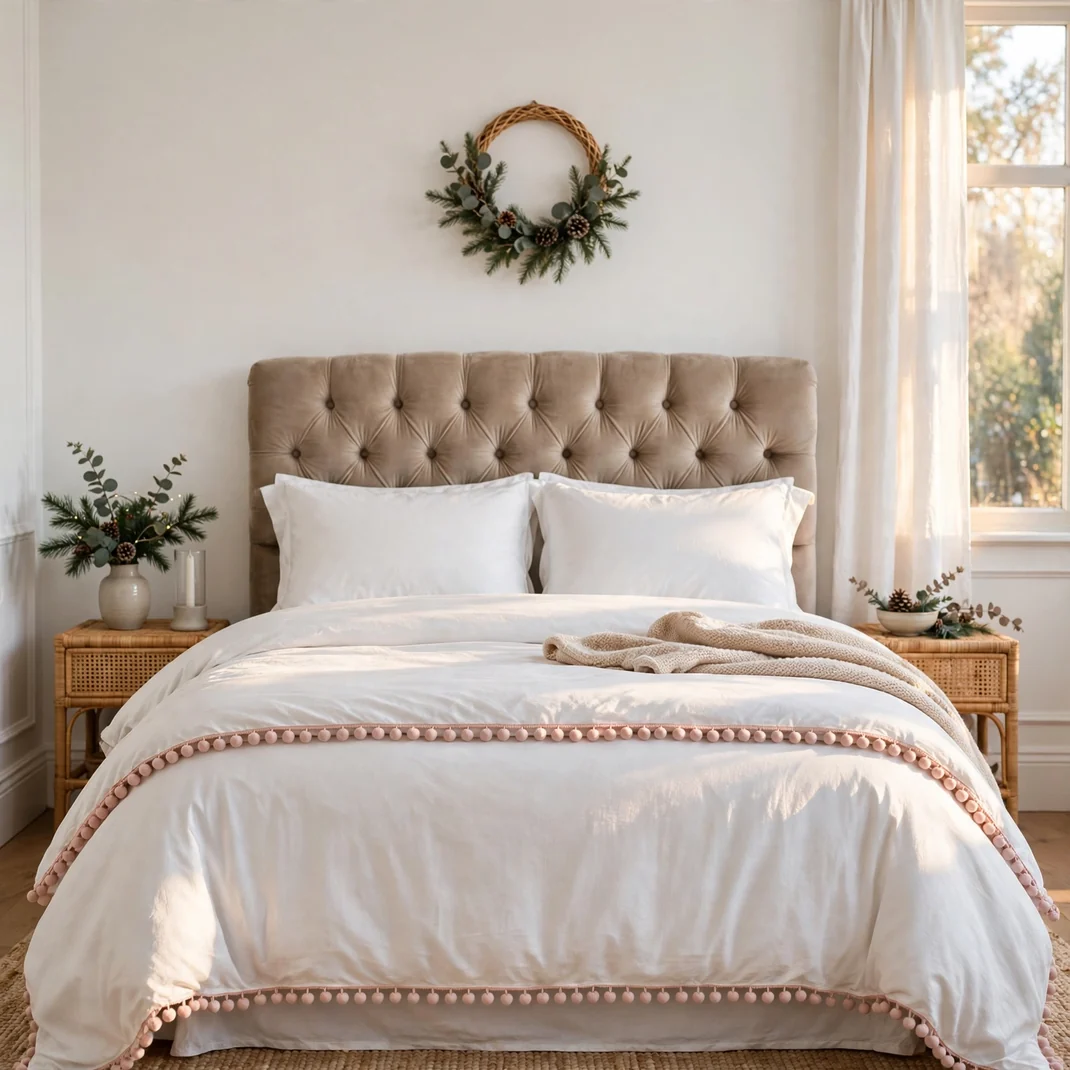
Sew or hand-stitch a row of blush pom-pom trim along the top folded edge of a plain white duvet cover, and an ordinary duvet turns into a festive statement piece. The trim’s soft balls of color trace a playful pink line right where the eye lands when you walk in. Use large 1-inch poms for a bold look or small half-inch poms for something subtler, and stitch through the trim’s woven header tape rather than the poms themselves. If sewing isn’t your thing, fabric glue applied in dots along the tape holds through the season and peels off the cover later.
How to Style It: Fold the duvet down once so the pom-pom edge sits on display, and keep the pillows simple so the trim stays the star.
Why It Photographs Beautifully: The dotted pink line photographs as a crisp graphic detail against the white bedding, adding texture and color in one move.
Pro Tip: Wash the duvet cover before attaching trim; cotton covers shrink slightly and you want the final fit before you stitch.
Budget-Smart Swap: Skip stitching and lay a pom-pom garland across the folded duvet edge each morning; it reads the same in photos and stores flat.
6. Snow-Flocked White Wreath with Pink Berry Clusters
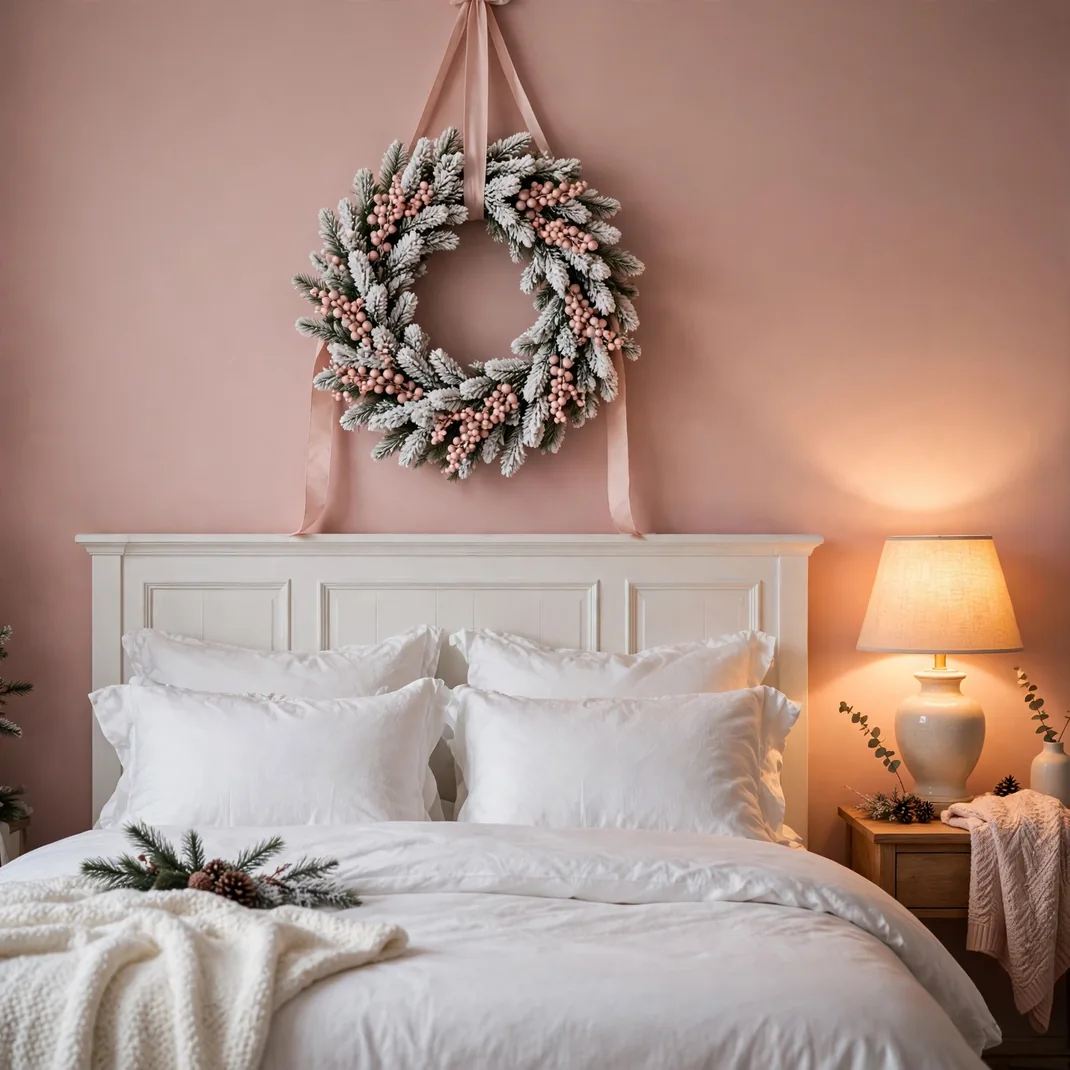
Hang a snow-flocked white wreath above the headboard and tuck in clusters of blush pink faux berries, letting a few trail over the bottom edge. The flocked branches give you the snowy Christmas feel while the pink berries supply the only color the wreath needs, which keeps it perfectly on-palette. Push berry picks into the wreath from the front so the wire stems hide inside the flocking, and vary the cluster sizes for a natural look. A 24-inch wreath suits a queen headboard; scale down to 18 inches for a twin.
How to Style It: Hang it from a blush satin ribbon looped over a small nail or adhesive hook, letting the ribbon tail show above the wreath as part of the design.
Why It Photographs Beautifully: The white-on-white wreath glows softly against a wall while the pink berries pop as tiny jewels of color, a perfect focal point above the pillows.
Pro Tip: Shake the flocked wreath outside before hanging; loose flocking sheds once and then stays put for the season.
Budget-Smart Swap: Buy a plain green wreath on clearance and dust it with white spray snow, then add the pink berry picks from the craft aisle.
7. Pink Frosted-Glass Bud Vases on White Nightstands

Group three small frosted pink glass bud vases on each white nightstand and fill them with white baby’s breath, pink carnations, or even bare snowy twigs. The frosted glass softens the pink to a gentle glow that looks lit from within when the bedside lamp is on. Odd-numbered groupings in mixed heights look best, so choose vases of 4, 6, and 8 inches. Fresh flowers need water changes every few days, but dried gypsophila or bleached ruscus lasts the entire season with zero care.
How to Style It: Place the tallest vase at the back and angle the stems outward like a tiny bouquet so the grouping reads as one arrangement.
Why It Photographs Beautifully: The frosted pink glass catches lamplight and blooms into soft halos of color that make the nightstands look styled and expensive.
Pro Tip: Put a small felt pad under each vase; frosted glass can leave faint rings on painted nightstand tops over time.
Budget-Smart Swap: Frost clear thrift-store vases with a light coat of sea-glass spray paint in blush pink for the same effect at a fraction of the price.
8. White Faux-Fur Bed Runner Scattered with Pink Sequin Stars

Lay a white faux-fur runner across the foot of the bed and scatter a handful of pink sequin star ornaments over it like confetti that landed mid-celebration. The plush white fur gives the bed a luxurious winter texture while the sequin stars catch every bit of light and throw tiny pink sparkles across the room. Use flat sequin shapes rather than bulky ornaments so they sit naturally in the fur, and keep them to the runner so they don’t migrate into the sheets at night. A dozen stars is plenty; restraint keeps it chic.
How to Style It: Toss the stars casually rather than placing them in a pattern; the random scatter is what makes it look effortlessly festive.
Why It Photographs Beautifully: The camera loves the contrast of matte white fur against mirror-bright pink sequins, and the sparkle reads beautifully even in daylight.
Pro Tip: Corral the stars in a small dish on the nightstand at bedtime so none end up underfoot or in the wash.
Budget-Smart Swap: Cut star shapes from pink metallic gift wrap and scatter those; they photograph nearly identically and cost almost nothing.
9. Pink-and-White Snowflake Throw Pillow Set
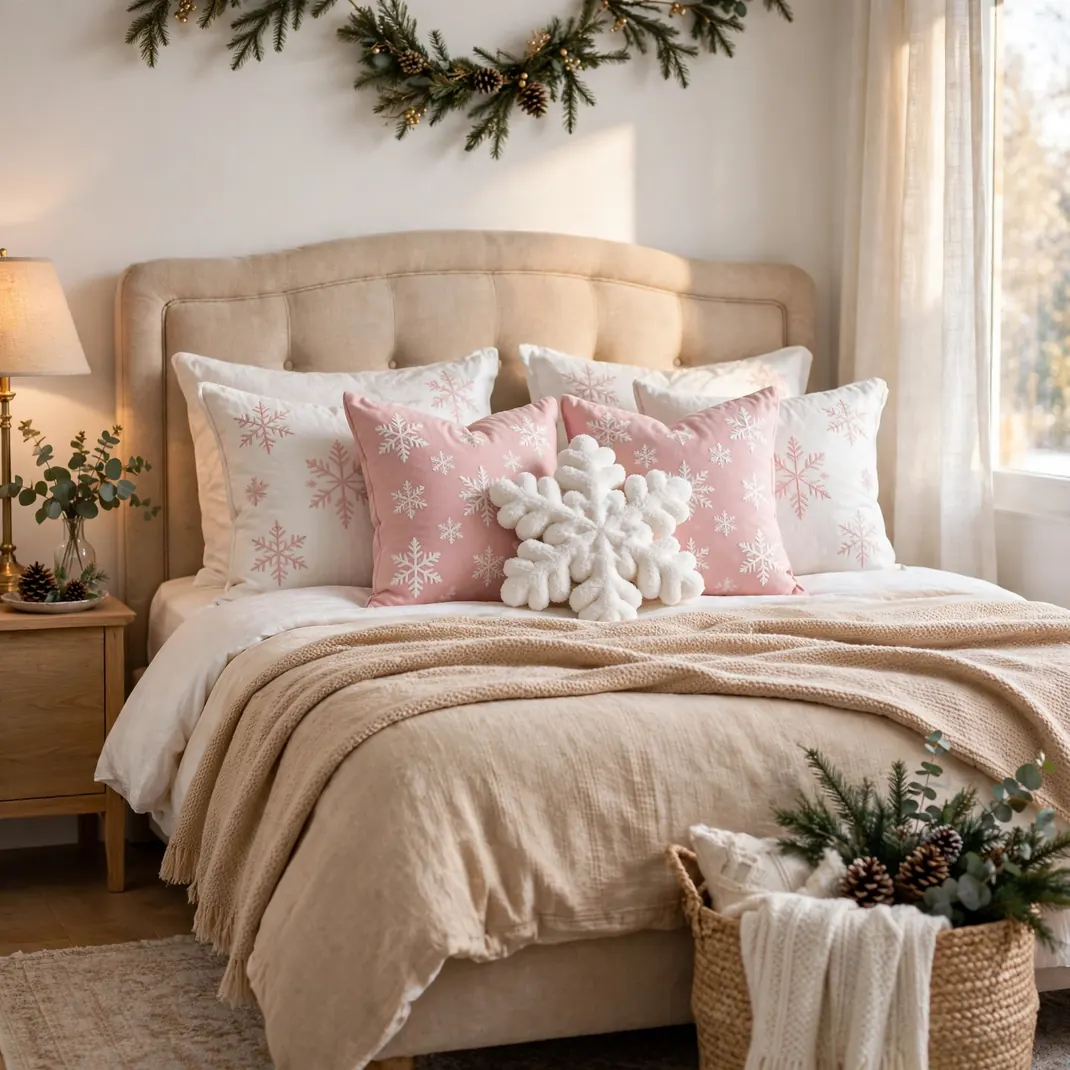
Build a small collection of throw pillows that all speak the same snowflake language: white pillows with pink snowflakes, pink pillows with white snowflakes, and one plush snowflake-shaped pillow as the centerpiece. Keeping every pillow in the two-color palette makes even five or six pillows look curated instead of chaotic. Mix textures across the set, like knit, velvet, and smooth cotton, so the pillows feel rich and touchable. Arrange them in two staggered rows, tallest at the back, with the shaped pillow front and center.
How to Style It: Use 18-inch squares at the back and 16-inch squares in front; the size step-down creates the layered, full look without overcrowding a queen bed.
Why It Photographs Beautifully: The repeating snowflake motif ties the whole bed together in photos, and the two-tone palette keeps the arrangement crisp and readable.
Pro Tip: Buy pillow covers rather than full pillows; they store flat in January and you can rotate seasonal sets on the same inserts.
Budget-Smart Swap: Stencil white snowflakes onto pink pillow covers with fabric paint for a custom set at the cost of one bottle of paint.
10. White Ceramic Reindeer with Blush Pink Antler Wraps
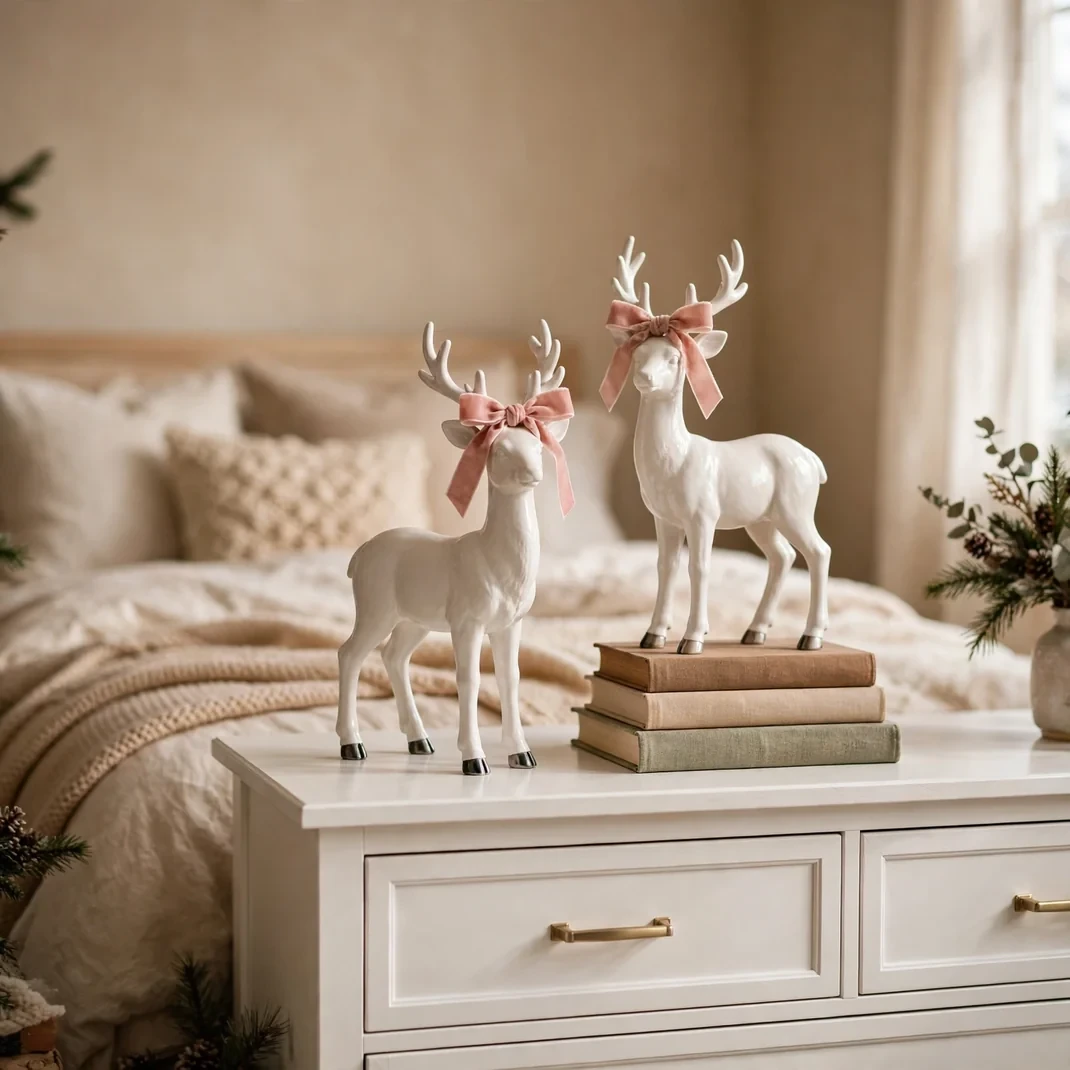
Take a pair of simple white ceramic reindeer figurines and wrap their antlers loosely with thin blush pink velvet ribbon, tying tiny bows where the ribbon ends. The ribbon softens the sculptural white shapes and pulls the figurines straight into your pink-and-white story. Place the pair on the dresser or bookshelf at slightly different heights, using a stack of white coffee-table books under one for the lift. The ribbon unwraps in seconds after the holidays, so the reindeer return to year-round decor.
How to Style It: Angle the two reindeer toward each other so they feel like a pair in conversation, and let one ribbon tail drape naturally.
Why It Photographs Beautifully: The matte white ceramic against the soft pink ribbon gives the camera a perfect study in texture contrast, elegant and festive at once.
Pro Tip: Use quarter-inch ribbon; wider ribbon overwhelms small figurine antlers and hides their shape.
Budget-Smart Swap: Wrap the antlers of any white animal figurines you already own; the trick works on deer, rabbits, or even a ceramic horse.
11. Blush Tulle Table Skirt on the Nightstand
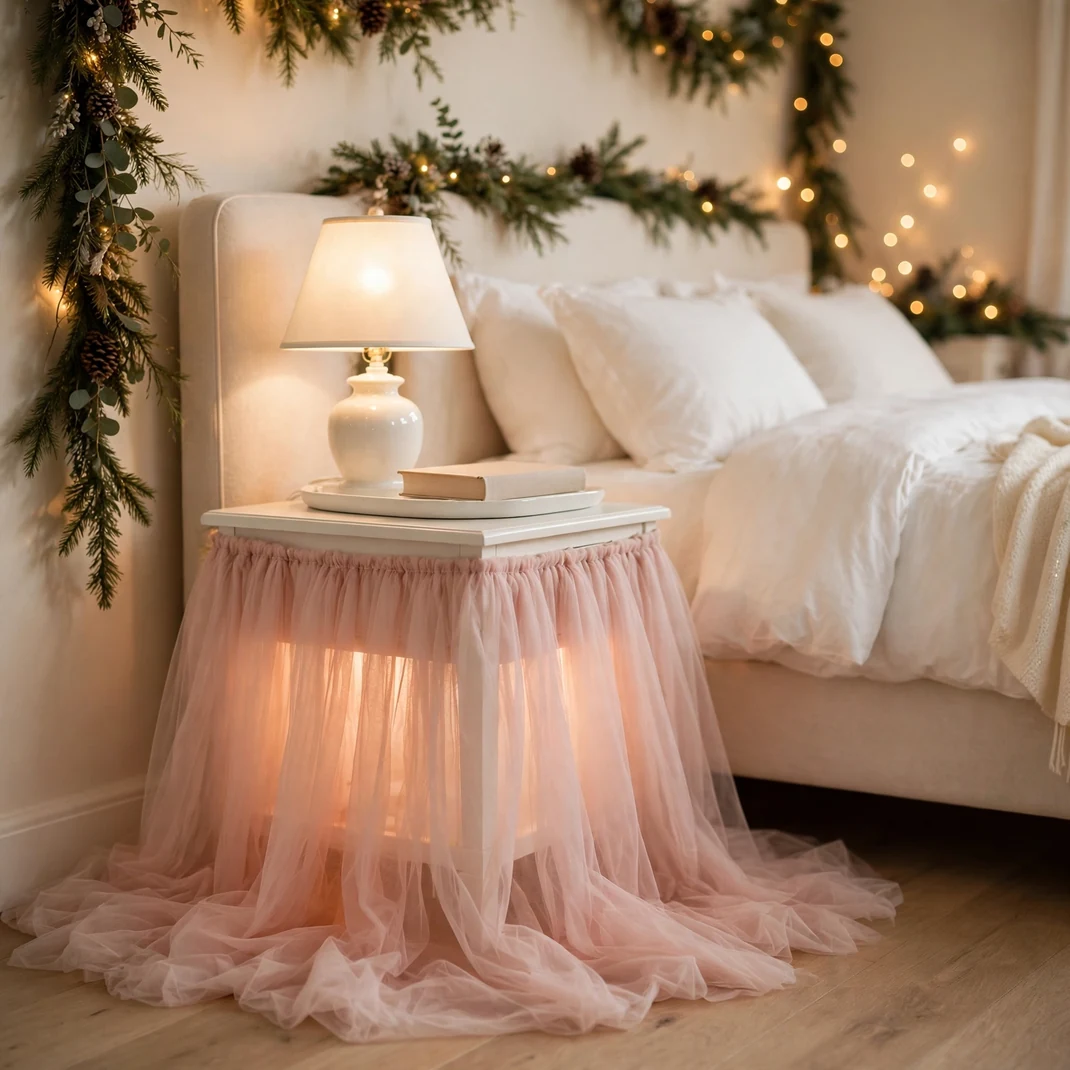
Turn an ordinary nightstand into a ballerina’s dressing table by wrapping it in a gathered blush tulle skirt. Cut tulle into strips twice the height of the table, gather them onto a length of elastic or ribbon, and tie the finished skirt around the tabletop edge so the tulle falls in soft pleats to the floor. The sheer pink layers glow when the bedside lamp shines through them, and they hide whatever clutter lives on the lower shelf. Tulle doesn’t fray, so no hemming is needed, and the whole skirt folds into a drawer in January.
How to Style It: Use three to four layers of tulle for fullness, and top the table with a white tray so the lamp and book sit steady on the soft surface.
Why It Photographs Beautifully: Backlit tulle photographs like a pink cloud, adding dreamy volume to the bedside that plain furniture could never give you.
Pro Tip: Keep the tulle away from real candle flames entirely; pair this look with LED candles only for safety.
Budget-Smart Swap: Use pink sheer curtain panels instead of tulle yardage; they are pre-finished and often cheaper per yard.
12. Mini White-and-Pink Stocking Advent String
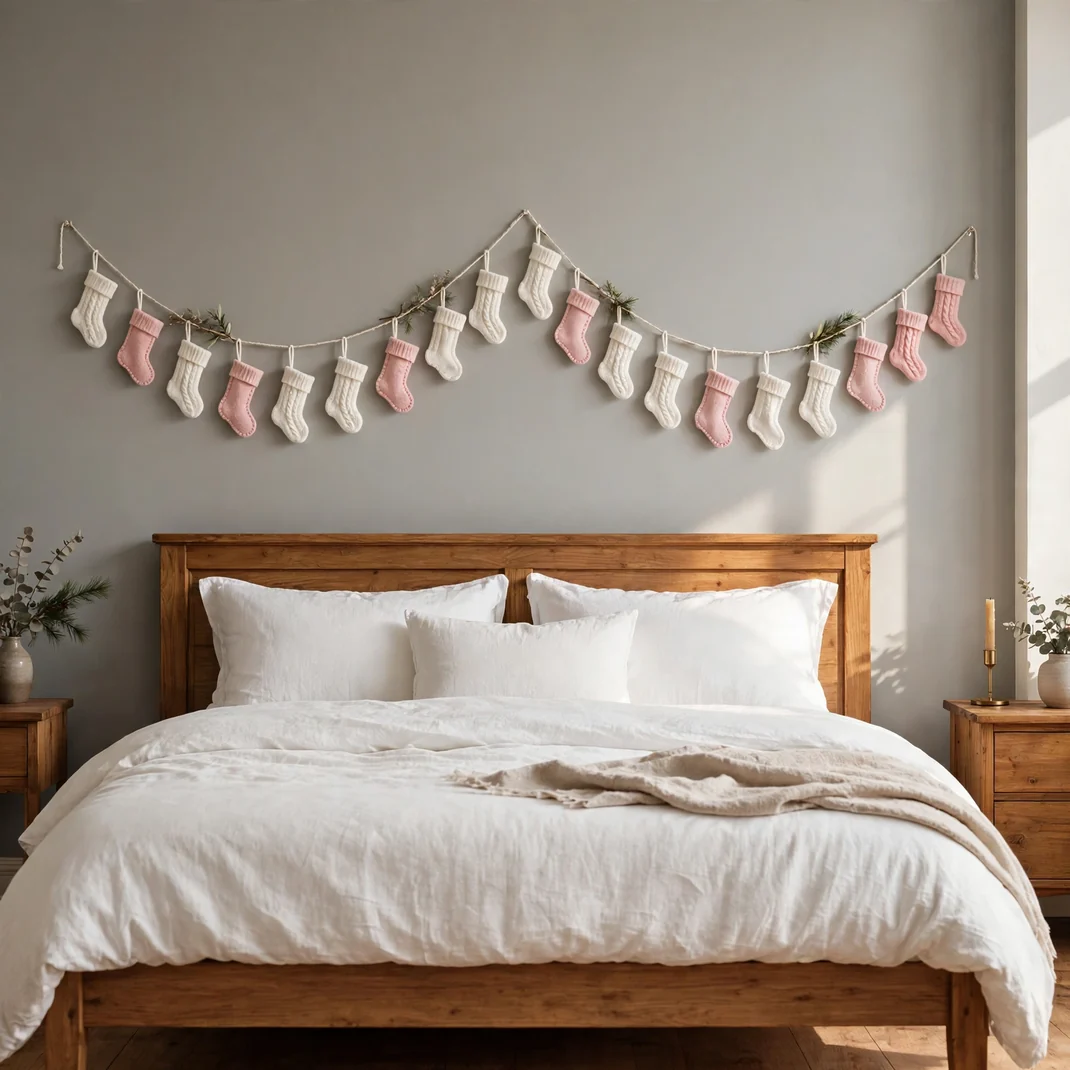
String twenty-five tiny stockings, alternating white knit and blush pink felt, along a length of white twine and hang it across the wall or along the footboard as a countdown garland. Number the stockings with small white gift tags and tuck a chocolate, a note, or a tiny ornament into each one for a daily December surprise. Mini stockings weigh almost nothing, so a single strand of small adhesive hooks or a tension rod holds the whole display. The alternating colors keep the long garland feeling light and rhythmic instead of heavy.
How to Style It: Let the twine swoop in two gentle swags rather than pulling it taut; the drape looks festive and takes pressure off the hooks.
Why It Photographs Beautifully: The long repeating rhythm of tiny pink-and-white stockings makes a charming horizontal band of color that photographs like bunting.
Pro Tip: Clip the stockings on with tiny wooden clothespins so you can refill or rearrange them without retying anything.
Budget-Smart Swap: Cut stocking shapes from white and pink felt and glue the edges; no sewing needed and a pack of felt makes all twenty-five.
13. Pink Glass Votive Holders Clustered on a White Tray
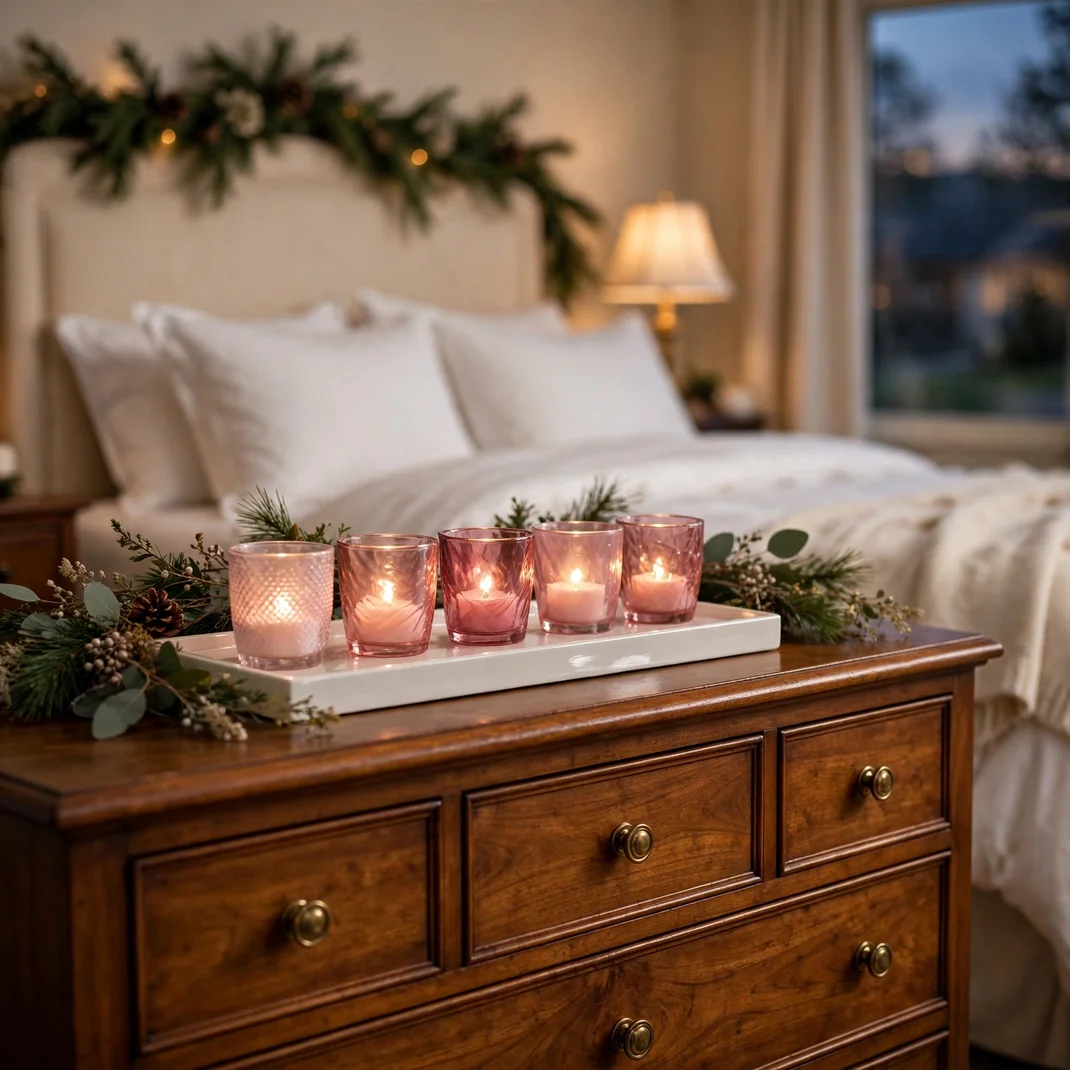
Gather five or six pink glass votive holders in mixed shades of blush and rose on a white lacquered tray, and fill each with a flameless LED tea light. When evening comes and the LEDs flicker on, the whole cluster glows like a bed of pink embers, casting the softest warm light across the dresser or nightstand. The white tray corrals the group into one intentional display and protects the furniture from any wax-free mess. LED tea lights with built-in timers switch themselves on at dusk, so the glow greets you every evening without a thought.
How to Style It: Vary the holder heights and cluster them tightly so the pink glass reads as one glowing mass rather than separate cups.
Why It Photographs Beautifully: The layered pink glass creates depth and luminosity on camera, turning a simple dresser corner into the room’s evening focal point.
Pro Tip: Choose tea lights with a warm-white color temperature around 2700K; cool-white LEDs turn pink glass an unflattering blue.
Budget-Smart Swap: Tint clear glass votives with a thin wash of pink acrylic paint mixed with water for a sea-glass effect that glows just as nicely.
14. White Faux-Fur Pillow Covers with Pink Stitched Snowflakes
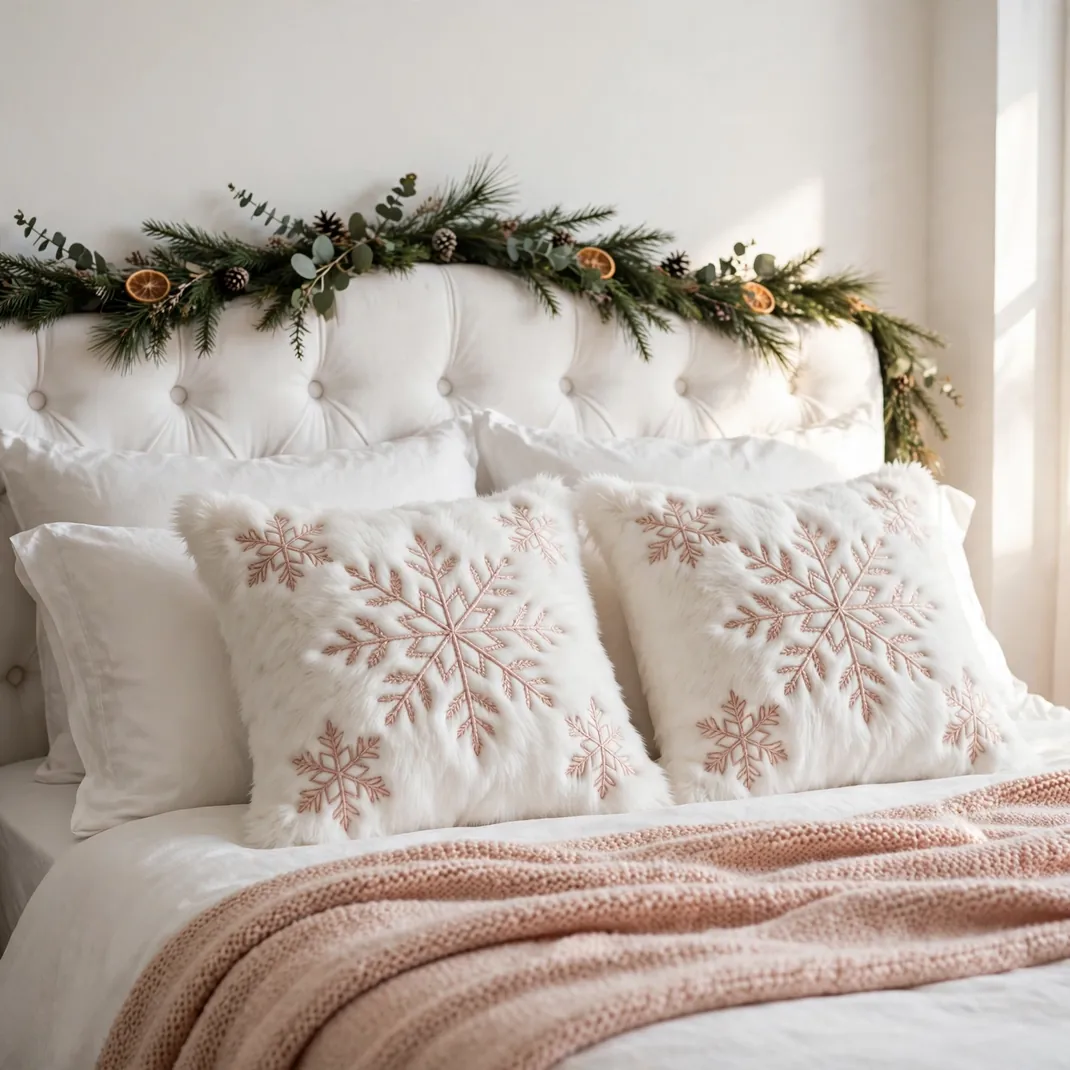
Take plain white faux-fur pillow covers and hand-stitch simple six-point snowflakes onto them in blush pink embroidery floss. The stitching sinks slightly into the plush pile, so the pink snowflakes look soft and dimensional rather than printed on. You don’t need embroidery skill; straight stitches radiating from a center point read perfectly as snowflakes at arm’s length. Two stitched pillows layered against plain white sleeping pillows give the bed a handmade holiday touch that looks far more expensive than the evening it takes to make.
How to Style It: Stitch one large centered snowflake per pillow rather than many small ones; the bold single motif shows up best against the fur.
Why It Photographs Beautifully: The pink stitching against white fur creates a subtle, tactile detail that rewards a closer look in photos and feels genuinely handmade.
Pro Tip: Sketch the snowflake on the fur with a water-soluble fabric marker first; the lines vanish with a damp cloth if your spacing drifts.
Budget-Smart Swap: Use a pink fabric marker to draw the snowflakes instead of stitching; on faux fur the marker sinks in and mimics thread surprisingly well.
15. Pink-and-White Marbled Ornaments in a White Footed Bowl

Fill a white ceramic footed bowl with glass ornaments swirled in pink-and-white marble patterns for a centerpiece that looks like peppermint candy. The marbled finish means no two ornaments match, which keeps the bowl interesting from every angle. Pile them generously so they mound above the rim, mixing 3-inch statement balls with smaller ones to fill the gaps. Set the bowl on the dresser or a bookshelf where it catches daylight; the glass swirls glow when light passes through them.
How to Style It: Nestle a short string of battery fairy lights into the bowl under the ornaments so the whole arrangement glimmers after dark.
Why It Photographs Beautifully: The marbled pink swirls photograph like artisan candy, and the white bowl frames them as a deliberate, gallery-worthy display.
Pro Tip: Line the bowl with tissue paper first; it cushions the glass and stops the ornaments from clinking or scratching the ceramic.
Budget-Smart Swap: Marble plain white ornaments yourself with pink nail polish swirled in a bowl of water; dip, dry, and you have custom marbled balls.
16. Blush Pink Drum Shade Swap on the Bedside Lamp
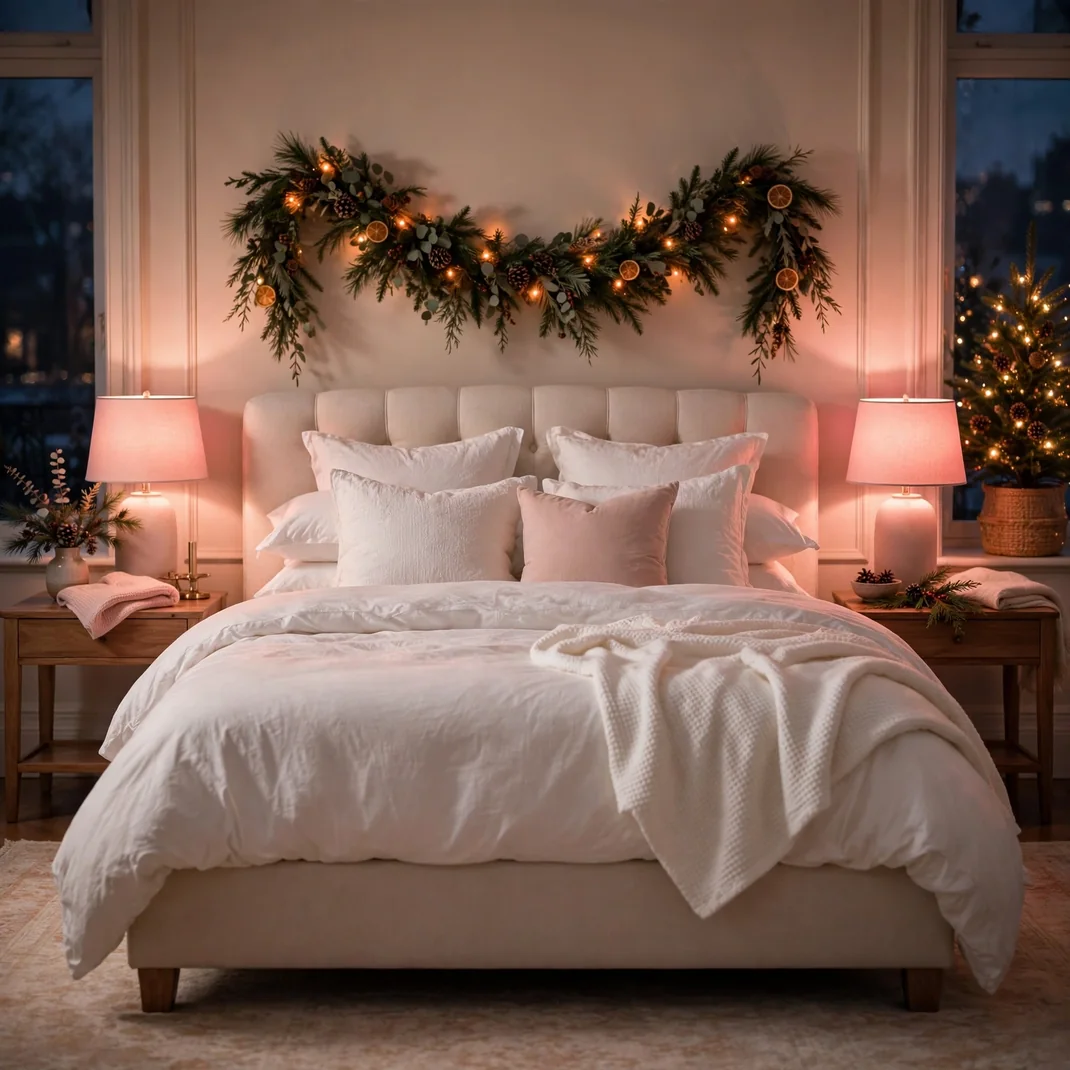
Swap your regular lampshade for a blush pink drum shade, and your existing bedside lamp becomes a Christmas light source in the softest sense. The pink shade tints everything it touches with a warm rosy glow that makes white bedding look lit by sunset, even at midnight. Keep the shade in the same size as the original so the lamp’s proportions stay right, and use an LED bulb to keep heat low against the fabric. When the season ends, the original shade goes back on and the pink one stores flat-ish in a closet.
How to Style It: Do the swap on both nightstand lamps for symmetry; a single pink shade can look like a mistake, while a pair looks like a design choice.
Why It Photographs Beautifully: The rosy lamplight washes the whole bedside in a flattering pink glow that makes evening photos feel warm and cinematic.
Pro Tip: Choose a shade with a white inner lining; it bounces more light outward so the lamp stays bright enough to read by.
Budget-Smart Swap: Wrap your existing shade in blush fabric with double-sided tape for the season; it peels off cleanly in January.
17. White Paper Star Lanterns with Pink Fairy Lights Inside
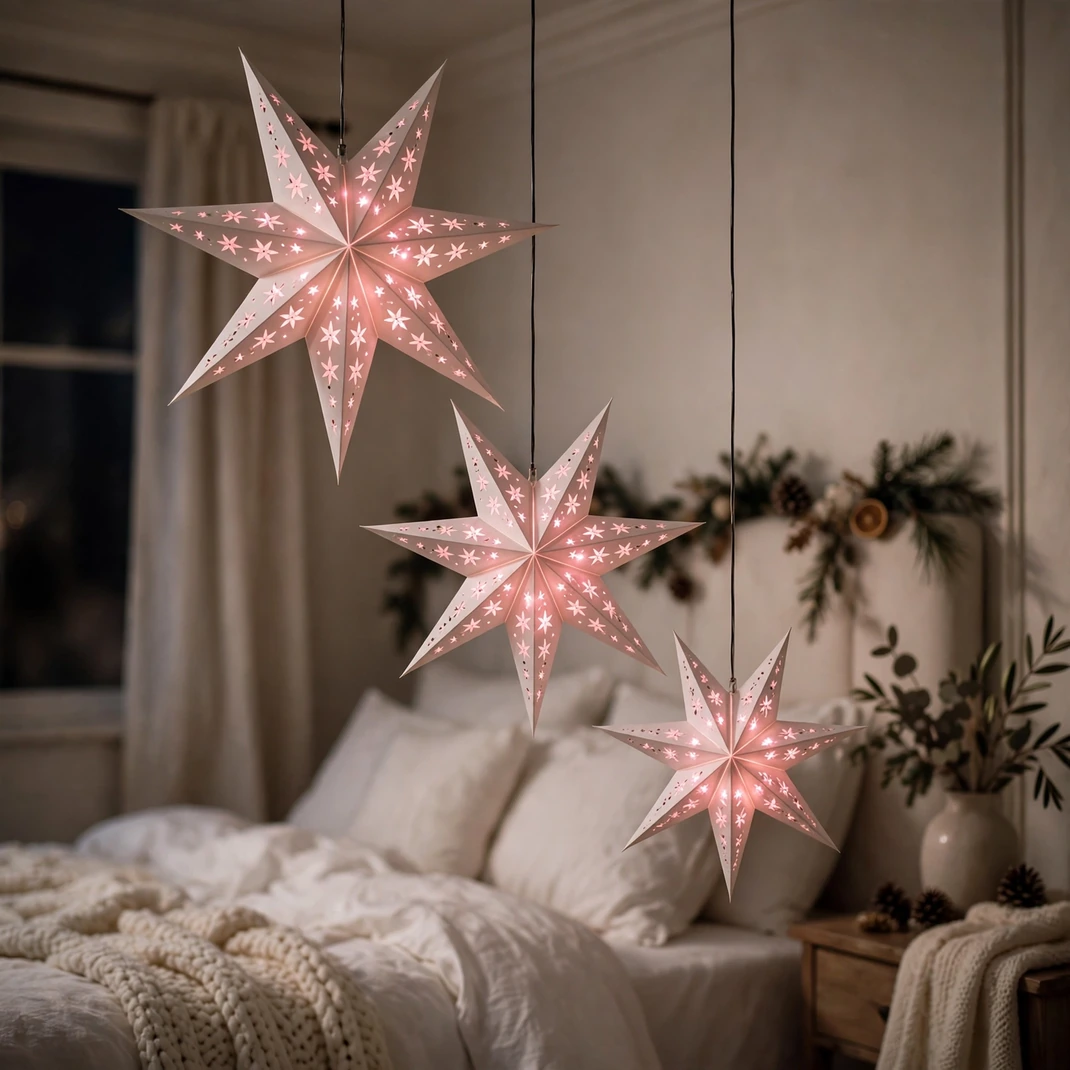
Hang white paper star lanterns at varying heights in a bedroom corner and tuck a short strand of pink fairy lights inside each one. The white paper diffuses the pink light into a soft rosy halo, turning each star into a glowing ornament floating in the room. Use battery-operated lights with timers so the stars light themselves each evening, and hang them from ceiling hooks or a tension rod with clear fishing line for an invisible support. Three stars in graduated sizes make the most charming cluster.
How to Style It: Hang the largest star lowest and the smallest highest, like a constellation rising toward the ceiling, for a natural-looking arrangement.
Why It Photographs Beautifully: Glowing pink stars against a dim room photograph like pure magic, giving you the article’s most shareable image with minimal effort.
Pro Tip: Use LED fairy lights only, never incandescent; paper lanterns and hot bulbs are a dangerous combination.
Budget-Smart Swap: Make the stars from white printer paper using a simple origami star tutorial; a pack of paper yields a whole constellation.
18. Pink Velvet Ribbon-Tied White Gift Boxes in the Corner
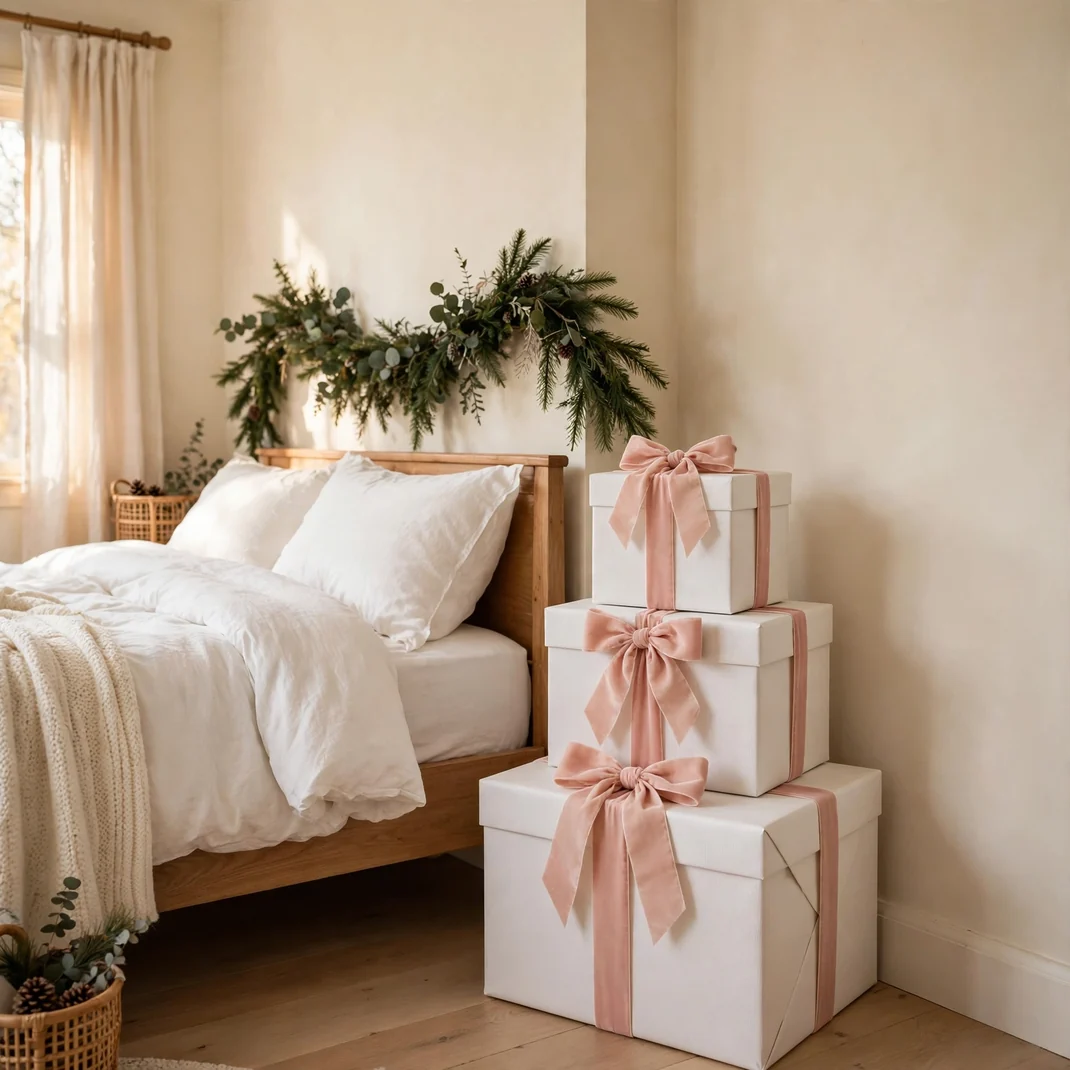
Stack three white gift boxes in graduated sizes in an empty bedroom corner and tie each with wide blush pink velvet ribbon in a full bow. The stack reads as decor from day one of December and does double duty hiding actual presents as wrapping finishes. Use sturdy boxes that hold their shape, and tie the ribbon around the lid and base together so the bow stays put when the box is opened. Vary the ribbon width slightly between boxes for a styled, boutique-window look.
How to Style It: Offset the stack slightly rather than centering each box perfectly; the casual lean looks more like a real holiday home.
Why It Photographs Beautifully: The crisp white boxes with plush pink bows photograph as the picture of Christmas anticipation, especially tucked beside the bed or tree.
Pro Tip: Weigh the bottom box with books inside so the whole stack stays stable if bumped by pets or small feet.
Budget-Smart Swap: Wrap empty shipping boxes in white kraft paper; the matte paper looks chic and costs pennies per box.
19. Pink-and-White Candy-Stripe Knit Throw

Drape a chunky knit throw in pink-and-white candy stripes across the foot of the bed or over a reading chair for an instant peppermint twist. The bold stripes deliver the Christmas reference without a single ornament, and the chunky knit adds the cozy texture a soft bedroom needs in December. Look for throws with wide, even stripes rather than thin pinstripes; the candy-cane read depends on stripe scale. Fold it in thirds lengthwise so the stripes run in one clean band across the bed.
How to Style It: Let one corner of the throw puddle onto the floor for a relaxed, lived-in drape that invites you to pick it up.
Why It Photographs Beautifully: The high-contrast stripes create a bold graphic moment that anchors the whole bed in photos, balancing all the soft blush tones.
Pro Tip: Wash the throw before first use; chunky knits often soften considerably and drape better after one gentle cycle.
Budget-Smart Swap: Knit or crochet a simple striped lap blanket in blush and white yarn; garter stitch stripes are a perfect beginner project.
20. Blush Sheepskin-Covered Vanity Stool
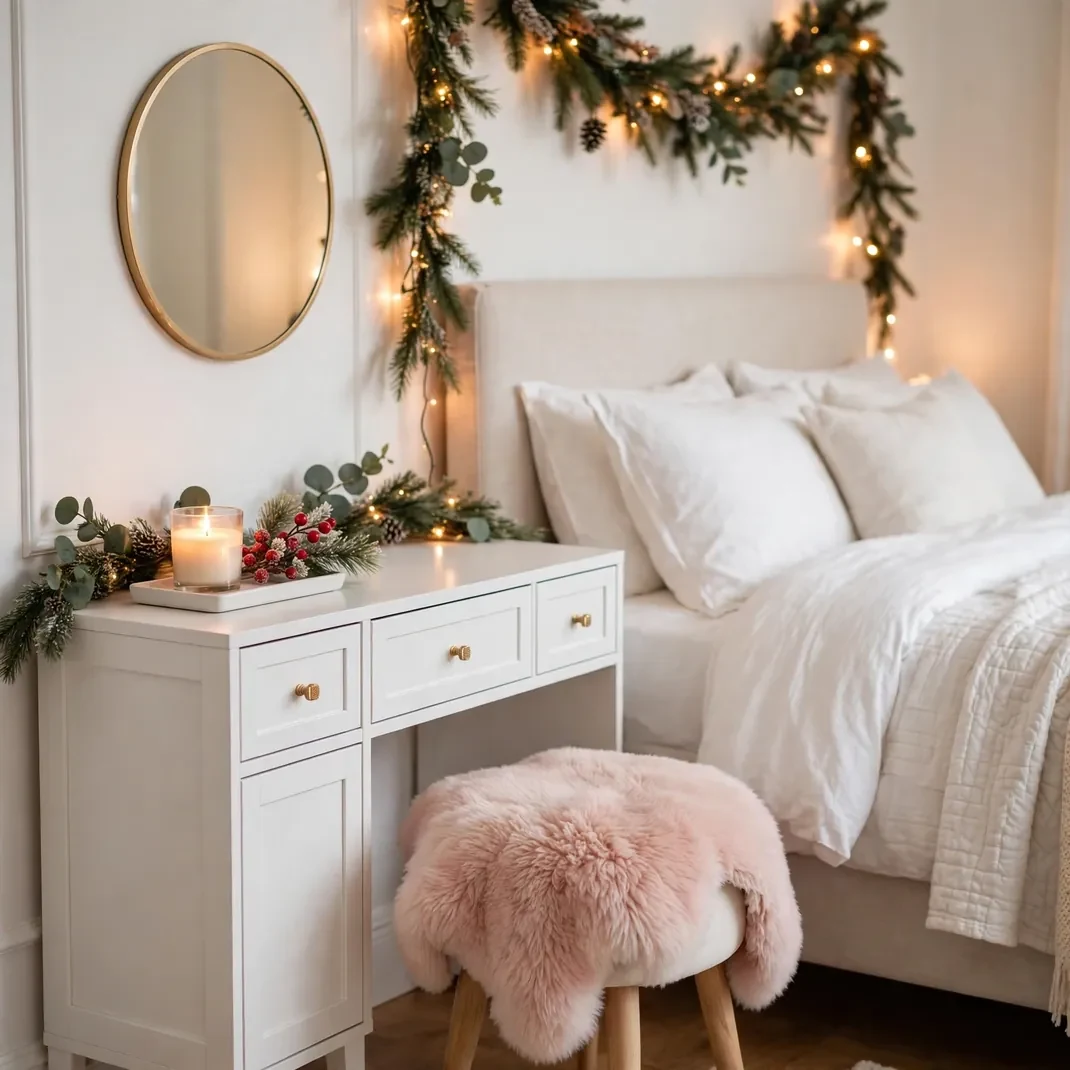
Drape a blush pink sheepskin throw over your vanity stool or bedroom bench for a touch of winter luxury that takes ten seconds to style. The soft pink pelt against white or wood furniture adds warmth exactly where the room needs it, and it doubles as the coziest seat in the house on cold December mornings. Genuine sheepskin regulates temperature beautifully, but a good faux version gives the same look and washes easily. Tuck the skin’s edges under the seat so it looks tailored rather than tossed.
How to Style It: Pair the stool with a small white tray holding a candle and a sprig of faux berries so the vanity corner feels finished.
Why It Photographs Beautifully: The cloud-soft pink texture against hard furniture lines creates a gorgeous material contrast that elevates the whole corner on camera.
Pro Tip: Shake the sheepskin outside monthly and brush it with a pet slicker brush to keep the fibers fluffy all season.
Budget-Smart Swap: Use a blush bath mat with a plush pile; the dense, soft texture mimics sheepskin surprisingly well at a tenth of the price.
21. Layered White-and-Blush Sheer Curtains with Pink Tiebacks
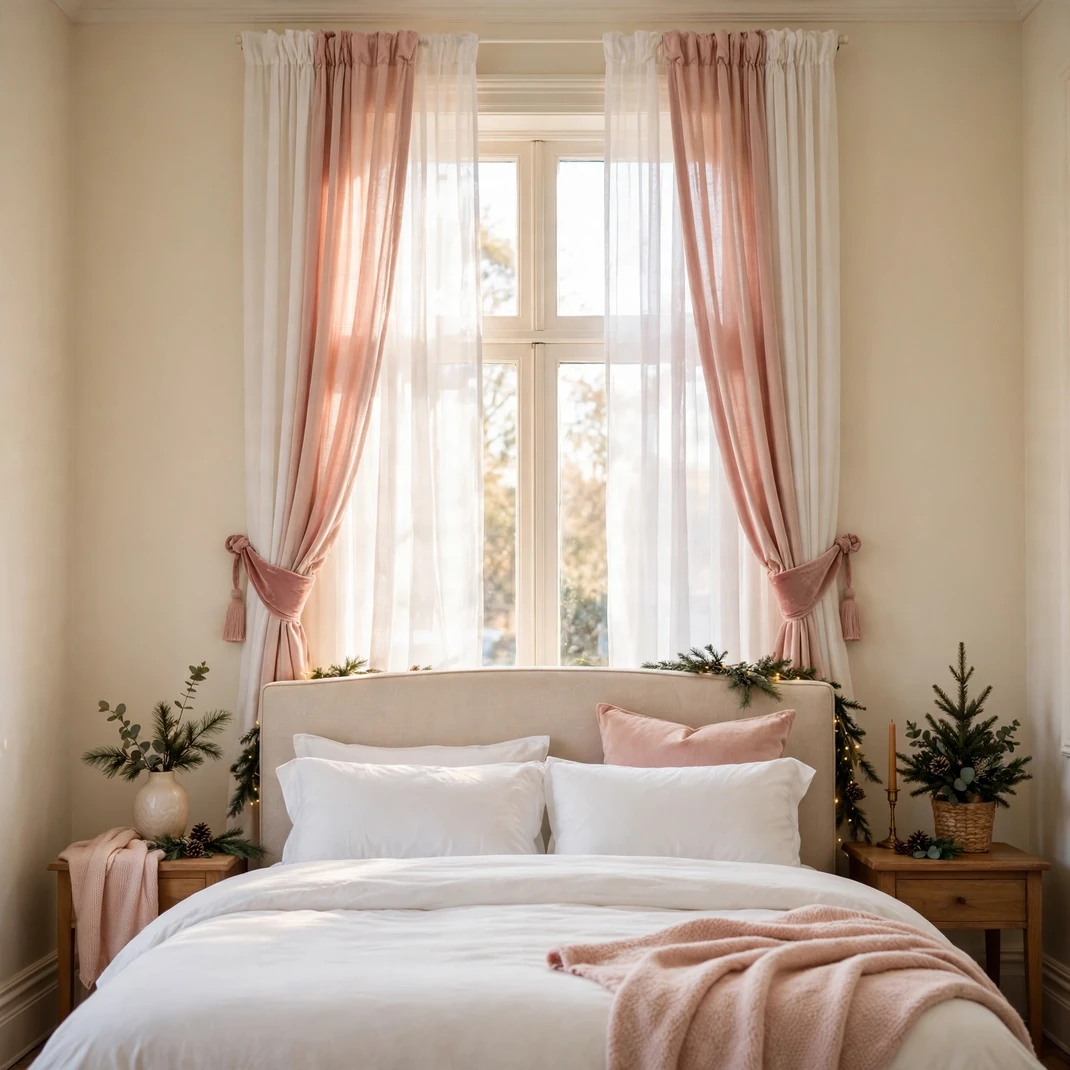
Layer blush sheer curtains behind your existing white sheers so the window glows with a double veil of pink and white whenever daylight filters through. The two sheer layers soften the room’s light and tint it faintly rosy, which makes the whole bedroom feel like it’s wrapped in tissue paper. Gather both layers with blush velvet tiebacks during the day to frame the window, and let them fall closed at night for privacy with a pretty glow. Use a double curtain rod or add a tension rod behind the main one; sheers weigh almost nothing.
How to Style It: Hang the sheers high and wide, a few inches above the frame and beyond its edges, so the window looks larger and the light spreads wider.
Why It Photographs Beautifully: Backlit layered sheers photograph as luminous veils of color, giving window shots an airy, romantic quality no filter can fake.
Pro Tip: Steam the sheers after hanging; wrinkles in sheer fabric catch the light and show up clearly in photos.
Budget-Smart Swap: Use blush sheer scarves or table runners as curtain panels; clip them to rings and they hang beautifully for the season.
22. White Wax Warmer with Pink Sugar-Plum Melts

Set a white ceramic wax warmer on the dresser and melt pink sugar-plum scented wax cubes for a bedroom that smells like Christmas and looks the part too. The warmer itself becomes decor, glowing softly as the wax pools pink in the dish, and the scent does the heavy lifting of making the room feel festive without any visual clutter. Choose a warmer with an auto-shutoff timer and keep it on a heat-safe tray away from bedding and curtains. One or two cubes scent a bedroom for hours; store the rest in a small lidded jar beside the warmer.
How to Style It: Display the warmer on a small white doily or tray with the jar of spare melts beside it, like a tiny fragrance station.
Why It Photographs Beautifully: The softly glowing warmer with its pool of pink wax gives detail shots a warm, sensory richness that makes the room feel alive.
Pro Tip: Never leave a warmer running when you leave the house or fall asleep; use the timer function so it switches off on its own.
Budget-Smart Swap: Simmer a small pot of water with cranberries, orange slices, and cloves on the stove before bed; the whole home picks up the scent for free.
White and pink turn out to be one of the easiest Christmas palettes to live with, because every combination stays soft no matter how much of it you use. Start with one or two of these ideas, like the ombré bedding or the ribbon-woven headboard, and add more pink as December deepens. However you mix them, your bedroom will feel calm, festive, and entirely your own.