22 DIY Christmas Bedroom Projects for a Festive Makeover
Store-bought decor is fine, but the pieces guests ask about are always the handmade ones. These diy christmas bedroom ideas are all real projects you can build in an evening or a weekend — gnomes, garlands, ornaments, and cozy textiles — with materials that cost little and techniques that forgive beginners. Every project below lists exactly what you need, how to make it, and the pro tip that saves you from the classic mistake. Grab the scissors; December is short.
1. Scandinavian Sock Gnomes

These bearded little gnomes show up everywhere each December because they’re genuinely easy — a sock, some rice, and a scrap of faux fur, no sewing machine required. A needle and thread (or even hot glue) closes the top, and the whole build takes about twenty minutes per gnome. They look charming clustered on a dresser or peeking from a bookshelf. Kids can help with everything except the hot glue step.
What You’ll Need: A crew sock for the body, rice or poly pellets for weight, a faux fur scrap for the beard, a wooden bead for the nose, a rubber band, needle and thread or hot glue, and a second sock or felt for the hat.
How to Make It: Fill the sock two-thirds full with rice, band it closed, and shape the round body. Glue the fur beard below the center, press the bead nose into the top of the beard, then fit the second sock as a floppy hat over the top and secure it. Fluff the beard downward with your fingers.
Pro Tip: Use low-temp hot glue if kids are helping — standard hot glue causes real burns. Store gnomes in a sealed bag; rice filling attracts pantry moths if left open in storage.
2. Pinecone Mini Christmas Trees
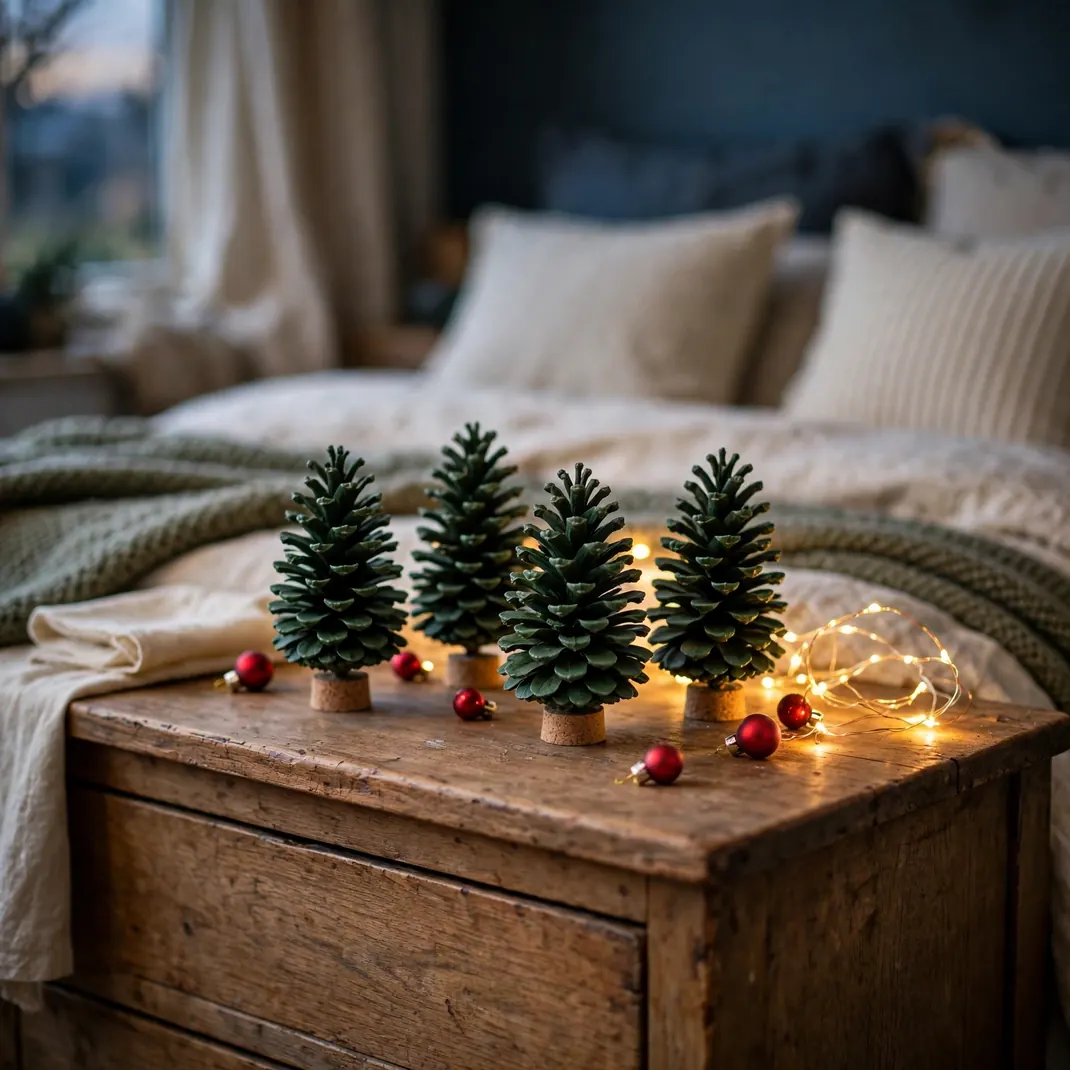
A pinecone already wants to be a Christmas tree — you’re just helping it along. Painted deep green and set on a tiny pot or wine cork, a large pinecone becomes a convincing miniature tree for the nightstand or windowsill. This is a genuinely kid-friendly craft since painting is the whole job. If you gather your own pinecones, bake them at 200°F for 30 minutes first to evict insects and open the scales.
What You’ll Need: Large open pinecones, green acrylic or chalk paint, a small brush, tiny terracotta pots or wine corks, hot glue, and optional tiny pom-poms or glitter for ornaments.
How to Make It: Brush paint onto the scale tips without drenching them — tip-highlighting looks more natural than full coverage. Let dry two hours, then hot-glue the pinecone’s base into the pot or onto the cork. Dot the tips with glue and press on pom-poms as ornaments if you like.
Pro Tip: Chalk paint needs no primer and dries matte, which reads more like a real tree than glossy acrylic. Make them in batches — a row of five in graduated sizes beats a single one.
3. Yarn-Wrapped Cardboard Stars
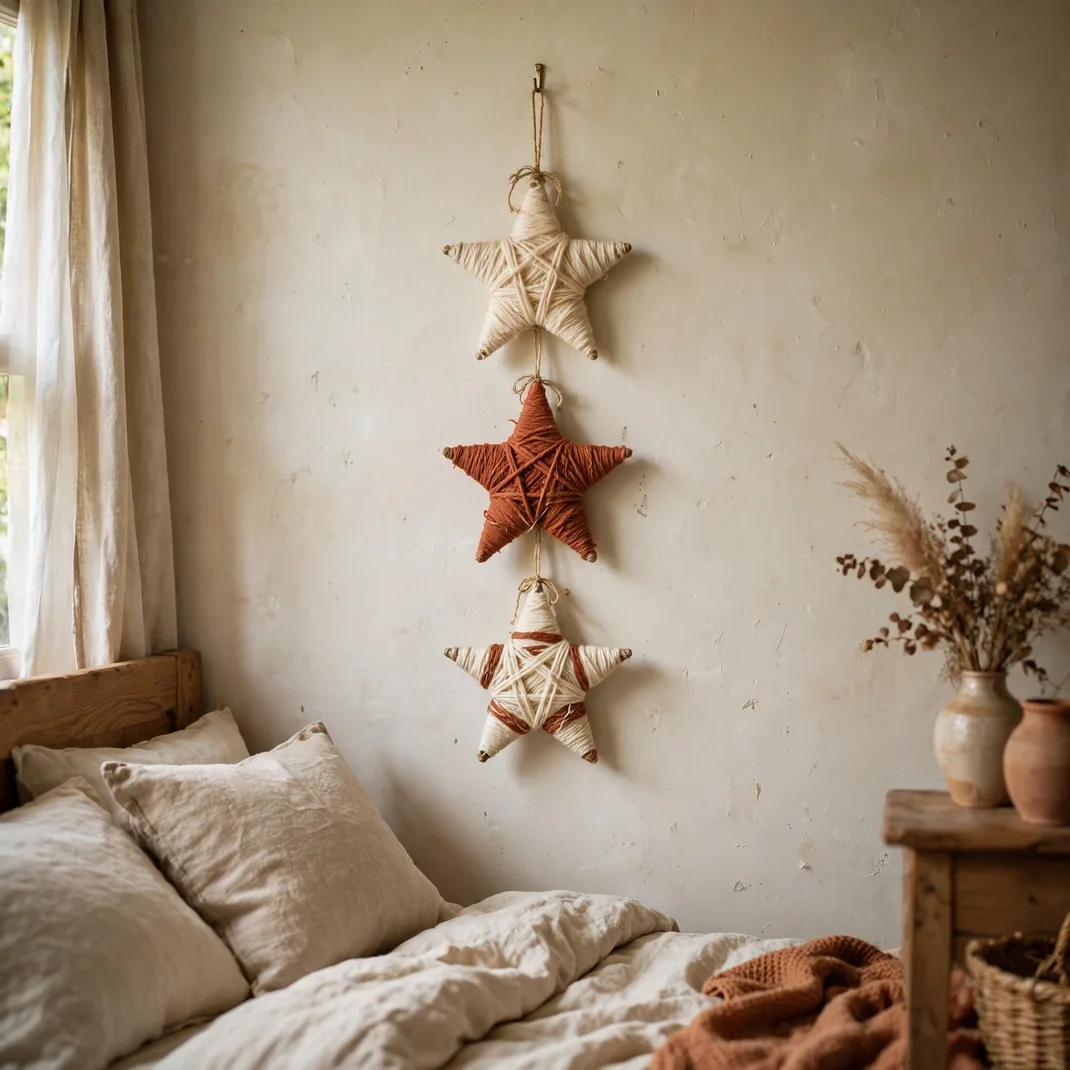
Cardboard stars wrapped in yarn have a rustic texture that looks far more expensive than the materials suggest. Cut the star shapes from any sturdy cardboard — shipping boxes are perfect — and the wrapping itself is meditative, ideal for an evening in front of a Christmas movie. Vary the yarn colors across a set: cream, rust, forest green. Hang them on the wall with removable hooks or string them into a garland.
What You’ll Need: Corrugated cardboard, a star template (printed or hand-drawn), scissors or a craft knife, yarn in two or three colors, and hot glue or tape.
How to Make It: Cut out the star, tape the yarn end to the back, and wrap evenly around all five points, turning at each tip. Keep the tension firm but not warping. Glue the tail at the back and add a twine loop for hanging.
Pro Tip: Wrap in the same rotational direction on every star for a consistent look. If the cardboard warps, the wrapping is too tight — ease off and the star flattens back out.
4. Photo-Clip Fairy Light Garland
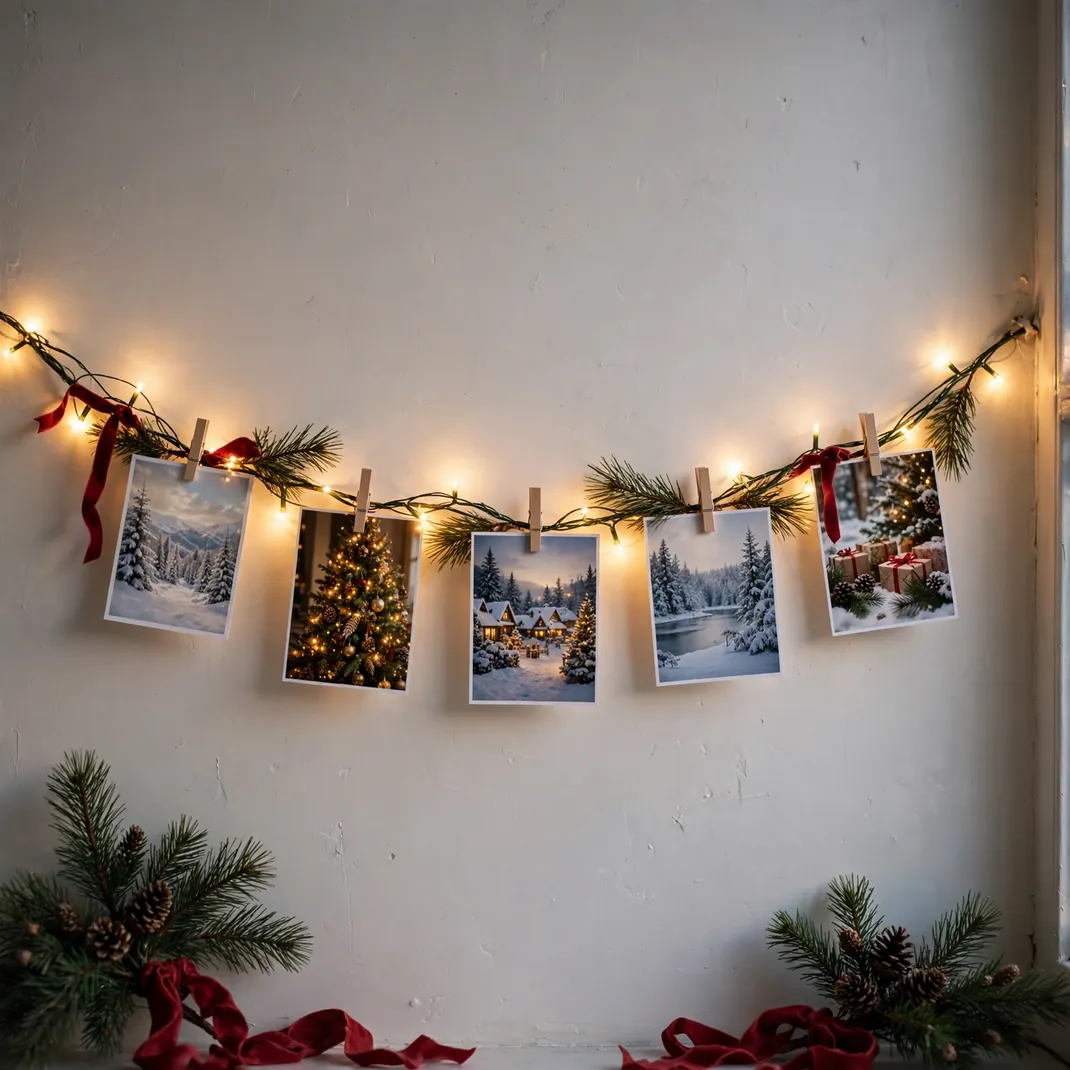
This one doubles as decor and a walk down memory lane: your favorite photos clipped along a lighted garland. Print photos small (2×3 inches) at home or reuse last year’s Christmas cards, and wooden mini clothespins are the classic clip. The whole thing hangs on a bedroom wall or across a mirror. One non-negotiable rule: LED fairy lights only — paper and photos near hot bulbs are a fire risk, full stop.
What You’ll Need: One LED fairy-light strand (battery or USB), ten to fifteen small prints, mini wooden clothespins, and removable wall hooks.
How to Make It: Hang the light strand in a loose swag with the hooks, then clip photos at intervals, alternating sides of the wire so it doesn’t twist. Keep paper at least an inch from each LED.
Pro Tip: Print on matte paper — glossy prints glare under the lights in photos. In January the prints go straight into an album and the lights get reused elsewhere.
5. Old-Sweater Pillow Covers

That shrunken or stained sweater in the back of the closet has a second life as a Christmas pillow cover. Cable-knit and Fair Isle sweaters give instant holiday texture, and the envelope closure means no zipper to sew. Felt the sweater first (hot wash, hot dryer) and the knit won’t unravel when you cut it. One adult sweater makes one 16-inch cover with fabric to spare.
What You’ll Need: An old wool or wool-blend sweater, a pillow insert, scissors, pins, a needle and thread or sewing machine, and a measuring tape.
How to Make It: Felt the sweater, cut two rectangles (a full-size front and a back in two overlapping pieces for the envelope), pin right sides together, and stitch a half-inch seam. Turn, press, and slip over the insert.
Pro Tip: Cut so the sweater’s most interesting pattern lands centered on the front — plan the placement before cutting, because there is no undo. Store flat; folded knit covers crease permanently.
6. Mason Jar Snow Globes (LED)
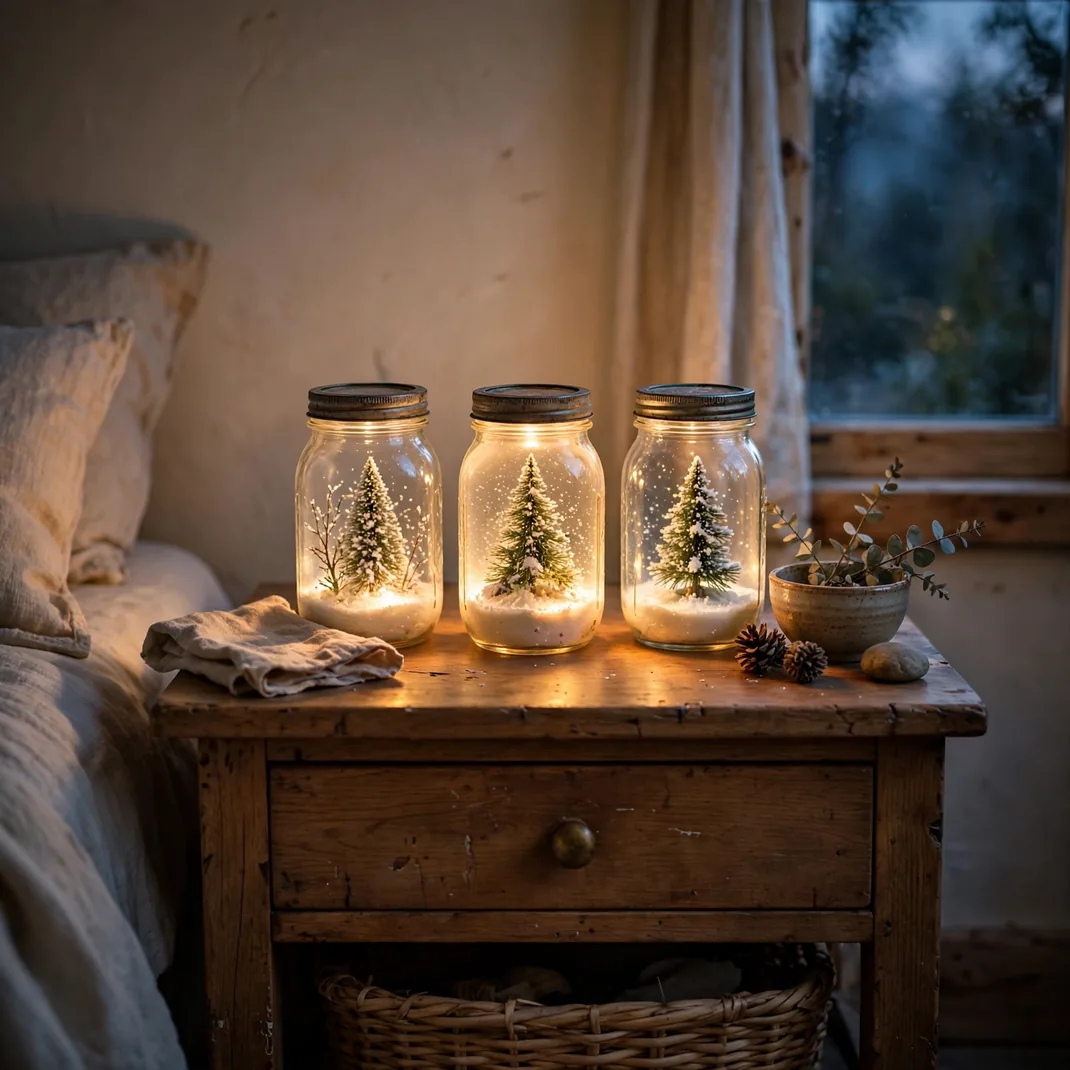
Real snow globes with water are fiddly and leak; the LED version gives the same magic with none of the mess. A mason jar, a pinch of faux snow, and a miniature tree or house inside, lit from below by a tea light. They look wonderful on a nightstand — a tiny glowing world beside the bed. Keep the tea light LED; a real flame inside a nearly sealed jar is dangerous.
What You’ll Need: Wide-mouth mason jars, faux snow or Epsom salt, miniature trees or houses, LED tea lights, and hot glue.
How to Make It: Glue the miniature to the inside of the lid, add two tablespoons of faux snow to the jar, set the LED tea light in the snow, and screw the lid on. The miniature hangs downward into the jar.
Pro Tip: Epsom salt looks more like real snow than plastic faux snow and costs pennies. Shake gently — the “snow” settles back slowly, which is the whole charm.
7. Cinnamon-Stick Candle Wraps
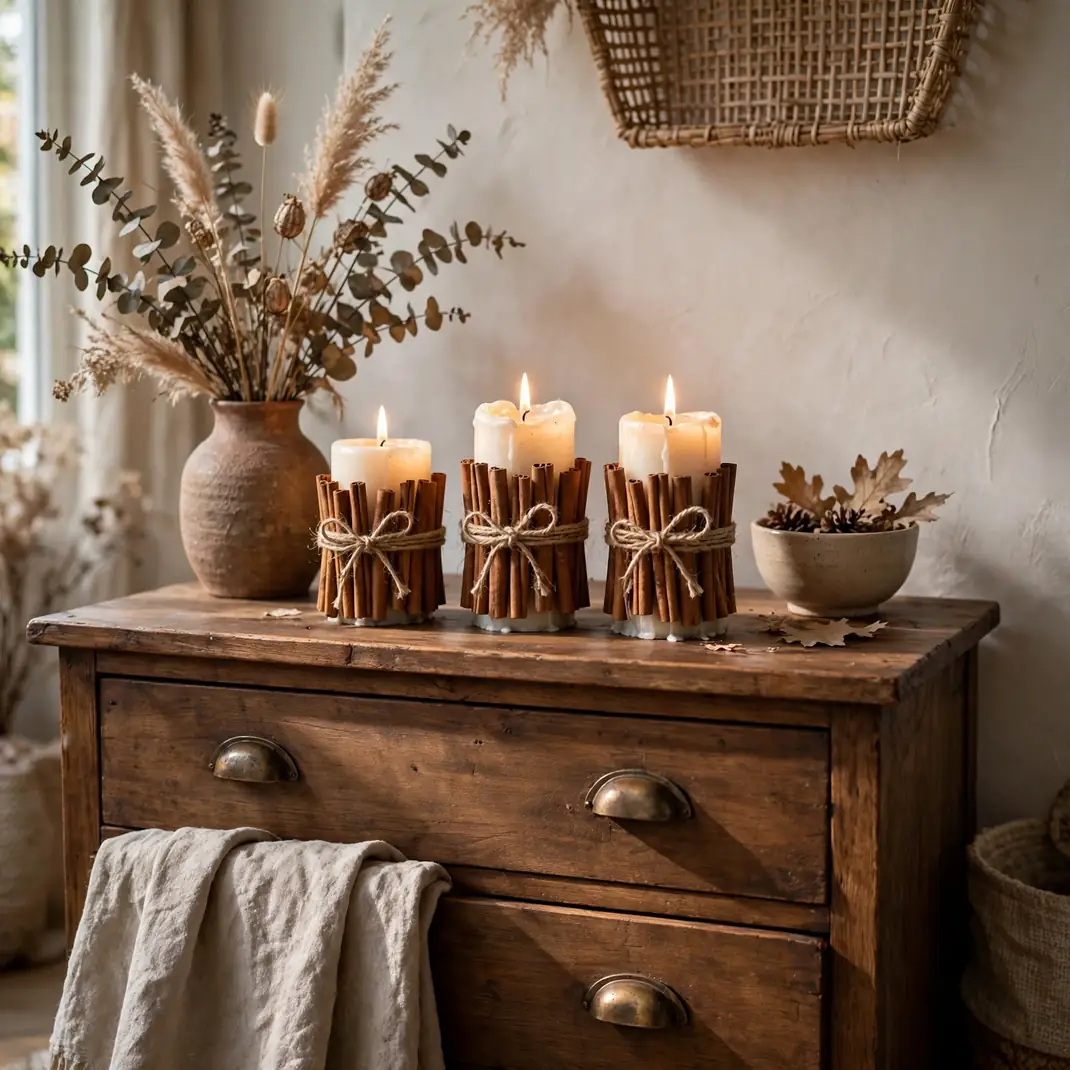
Bundle cinnamon sticks around a pillar candle and the room smells like a bakery every time it glows — or even when it doesn’t. This is strictly an LED-candle project: real flame plus dried cinnamon is a fire hazard, no exceptions. The wrap itself takes ten minutes: sticks, twine, done. Make a few as gifts; they look artisanal tucked into a cellophane bag.
What You’ll Need: LED pillar candles, whole cinnamon sticks (about twenty per candle), jute twine, scissors, and an optional dried orange slice.
How to Make It: Stand the sticks upright around the candle, hold the bundle tight, and wrap twine three times around the middle, knotting firmly. Trim the twine ends and tuck in an orange slice if using.
Pro Tip: Buy cinnamon in bulk bags, not the little grocery jars — you’ll need far more sticks than you think, and bulk is a fraction of the price. Refresh the scent yearly with a drop of cinnamon oil on the back sticks.
8. Felt-Ball Garland
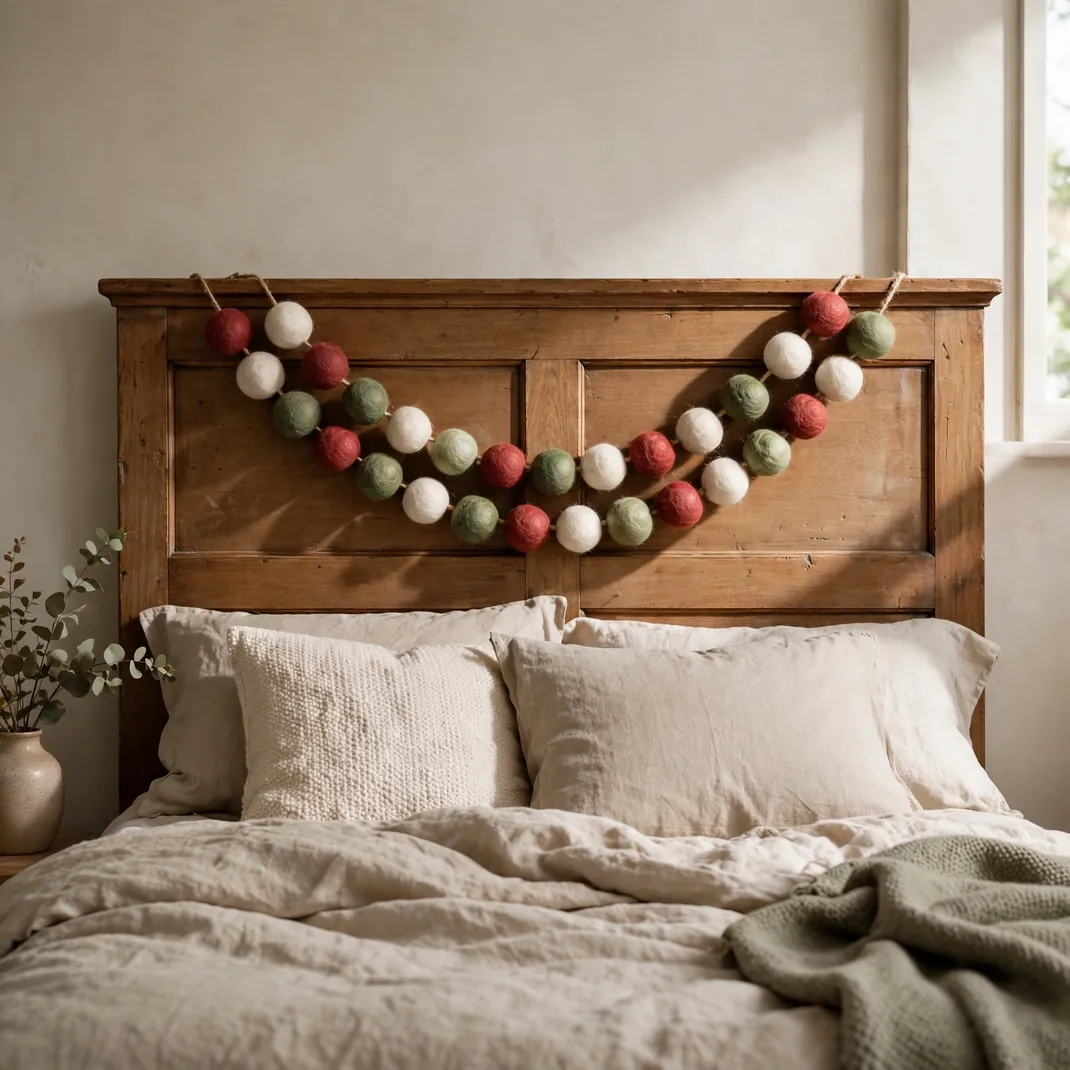
Strung felt balls in Christmas colors are the easiest garland you’ll ever make — the only skill is threading a needle. Buy the balls pre-made (needle-felting a hundred of them is a different hobby) and the project is pure assembly. Drape it over the headboard, the mirror, or a bookshelf. Wool felt balls last for years and the colors don’t fade.
What You’ll Need: Forty to sixty wool felt balls (one inch), an embroidery needle with a large eye, sturdy twine or yarn, and scissors.
How to Make It: Thread the twine and push the needle straight through each ball’s center, spacing them an inch apart (or clustered, your call). Knot the ends with loops for hanging.
Pro Tip: A tiny drop of glue on the first and last ball stops the whole strand sliding. If balls arrive compressed, roll them between your palms — they spring back round.
9. Cardboard Christmas Village
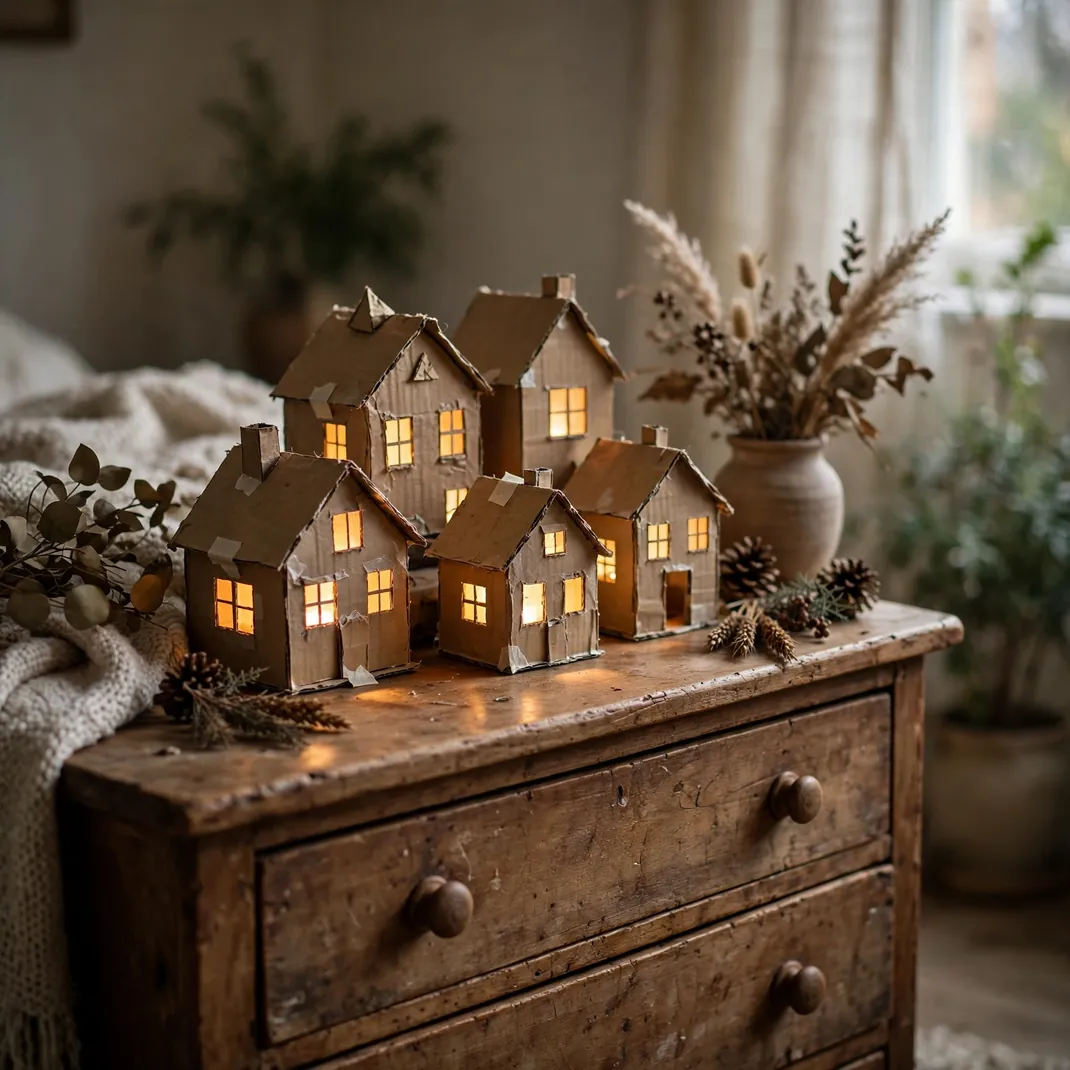
A glowing village doesn’t require ceramic collectibles — small cardboard houses with cut-out windows do the job beautifully. This is the big-kid craft of the list: drawing, cutting, and painting a little street. LED tea lights inside each house make the windows glow. It takes an afternoon, and the result is genuinely charming on a dresser.
What You’ll Need: Small cardboard boxes or heavy cardstock, a craft knife, ruler, pencil, acrylic paints, LED tea lights, and glue.
How to Make It: Cut house shapes (a square plus a triangle roof works), cut out small window and door shapes, paint, fold and glue into 3D houses, and set an LED tea light inside each. Arrange on a faux-snow blanket.
Pro Tip: Cut the windows BEFORE assembling — trying to cut them on a finished 3D house crushes it. An adult should handle the craft knife; kids can paint and arrange.
10. Twig Star Wall Decor

Five straight sticks, some twine, and you have a rustic star that looks like it came from a boutique. Gather fallen twigs (straight ones, roughly the same thickness) or buy a bundle of craft sticks. Lash the joints tightly — loose lashings are why these fall apart. Hang one large star over the bed or a cluster of three small ones on a wall.
What You’ll Need: Five straight sticks per star (twelve to eighteen inches), jute twine, scissors, and optional small pine sprigs or berries for the center.
How to Make It: Lay out the five-point star shape, overlap the stick ends at each point, and lash each joint with twine in a figure-eight, knotting firmly. Trim the twine and add a hanging loop at the top point.
Pro Tip: Soak fresh twigs in water for an hour before lashing — dry twigs snap. These store flat forever; stack with tissue between them.
11. Framed Wrapping-Paper Art

Some wrapping paper is too pretty to crumple — frame it instead. A sheet of quality Christmas paper in a simple frame reads as intentional seasonal art, and it costs almost nothing if you already own both. This is the fastest project on the list: ten minutes, including hanging. Choose papers with small repeating patterns; giant motifs get awkwardly cropped by the frame.
What You’ll Need: Attractive wrapping paper, picture frames (thrifted is fine), scissors, and removable hanging strips.
How to Make It: Cut the paper a half-inch larger than the frame opening on all sides, lay it over the backing board, and assemble the frame. Hang in a pair or trio for gallery impact.
Pro Tip: Iron the paper on low (no steam) before framing — creases from the roll show through glass. Save the leftover roll for actual wrapping.
12. Simmer-Pot Scent Gift Jars
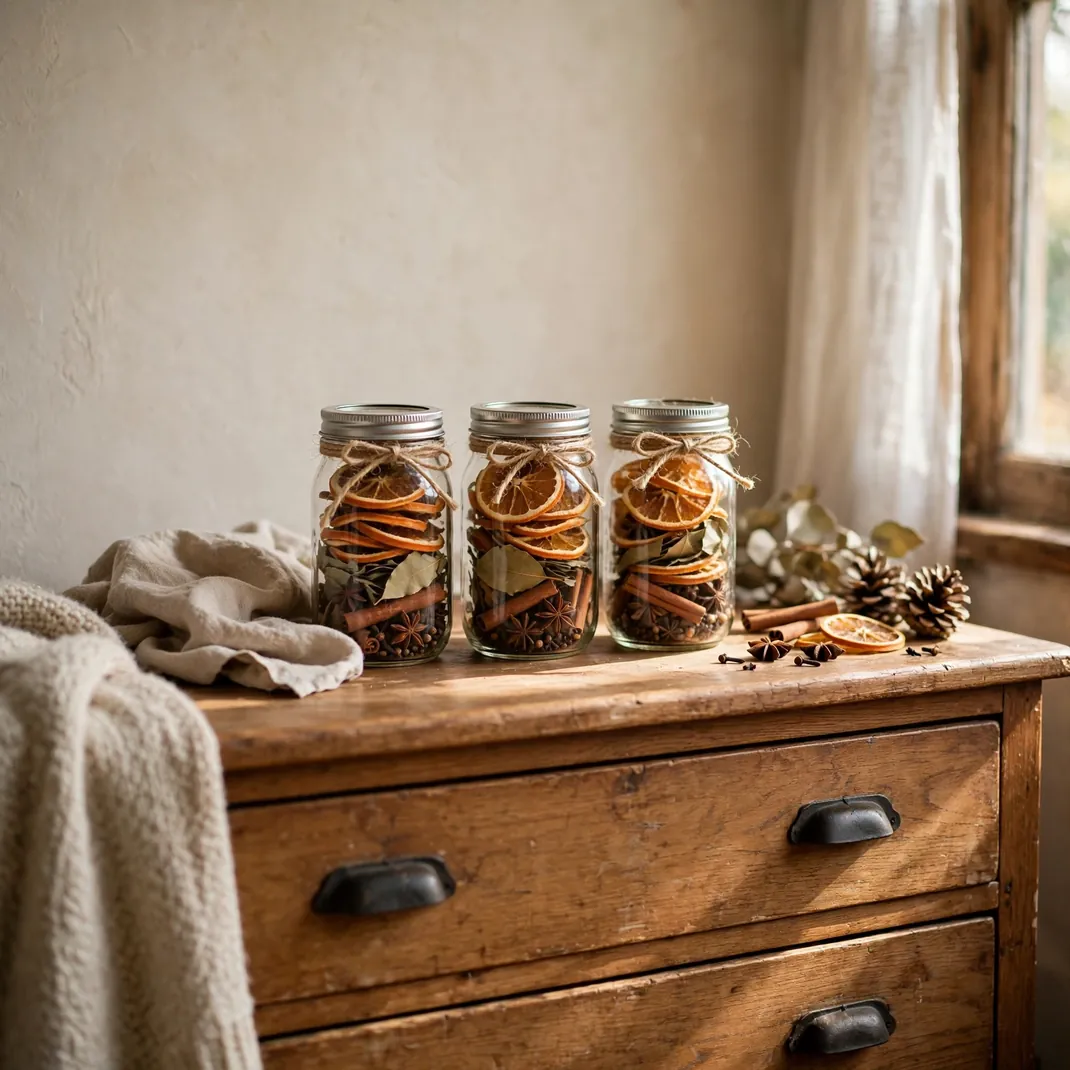
These jars are two gifts in one: a pretty object now, and a house-filling scent later. Layer dried orange slices, cinnamon sticks, whole cloves, and star anise in a mason jar, and the recipient simmers the contents in water on the stove. They scent a bedroom beautifully as decor before they’re ever used. Tie the recipe to the jar with twine so nobody has to guess.
What You’ll Need: Mason jars, dried orange slices, cinnamon sticks, whole cloves, star anise, twine, and small kraft tags.
How to Make It: Layer the ingredients for color (orange against the glass, spices in the middle), seal the jar, and tie on a tag reading “Simmer in 4 cups water on low.” That’s the whole project.
Pro Tip: Never leave a simmer pot unattended and keep the water topped up — a boiled-dry pot scorches fast. These keep a full year sealed; the scent is actually stronger after a month of mingling.
13. Yarn Pom-Pom Garland

Pom-poms are the gateway craft for a reason: they’re nearly impossible to mess up and the result is irresistibly cheerful. A garland of cream, red, and green pom-poms over a headboard or doorway is pure Christmas joy. A pom-pom maker tool (a few dollars) makes uniform sizes; the fork method works free. This is an excellent movie-night craft — you’ll have twenty done before the credits roll.
What You’ll Need: Yarn in two or three colors, a pom-pom maker or dinner fork, sharp scissors, long twine or yarn for stringing, and a large-eye needle.
How to Make It: Wind yarn generously (more wraps means a fuller pom-pom), tie the center brutally tight, cut the loops, and fluff. Trim into a sphere, then thread onto the stringing twine with the needle.
Pro Tip: The center tie is everything — if it’s loose, the pom-pom sheds and falls apart. Double-knot it. Store the garland in a bag, not a box; compression flattens pom-poms.
14. Air-Dry Clay Star Ornaments
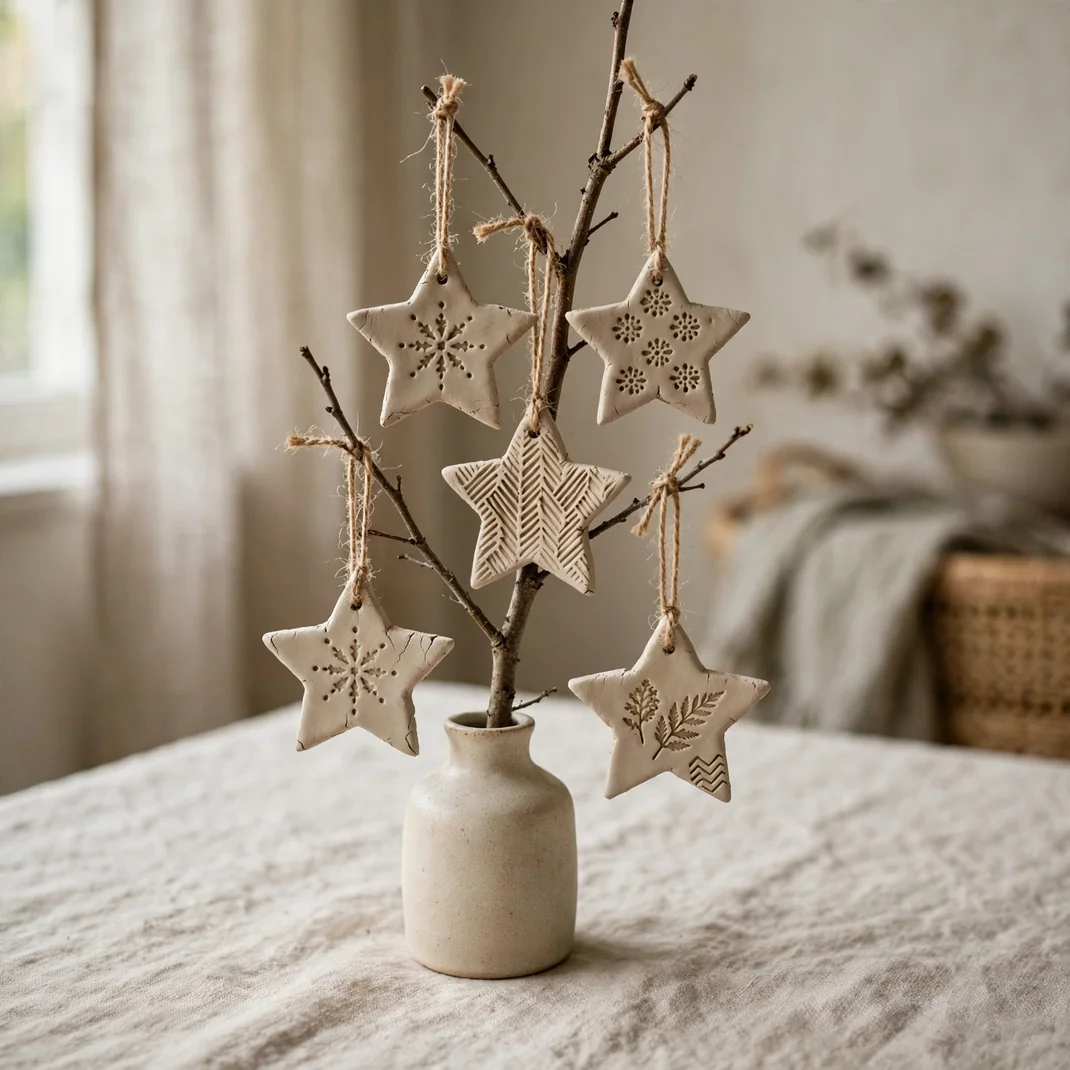
Air-dry clay gives you the look of ceramic ornaments with no kiln and no baking. Roll, cut with cookie cutters, stamp a pattern, poke a hanging hole, and walk away — the air does the rest over 48 hours. Stars, trees, and mitten shapes all work. Paint them after drying or leave the natural clay white for a minimalist look.
What You’ll Need: Air-dry clay, a rolling pin, cookie cutters, a straw for holes, rubber stamps or lace for texture, twine, and optional acrylic paint.
How to Make It: Roll to a quarter-inch thick, cut shapes, press the stamp gently for texture, poke the hole with the straw, and dry flat on parchment for 48 hours, flipping once. Thread twine through the holes.
Pro Tip: Clay shrinks slightly as it dries — cut the hanging hole generously or the twine won’t fit later. If an edge cracks, smooth it with a damp finger before it fully dries.
15. Folded Book-Page Trees
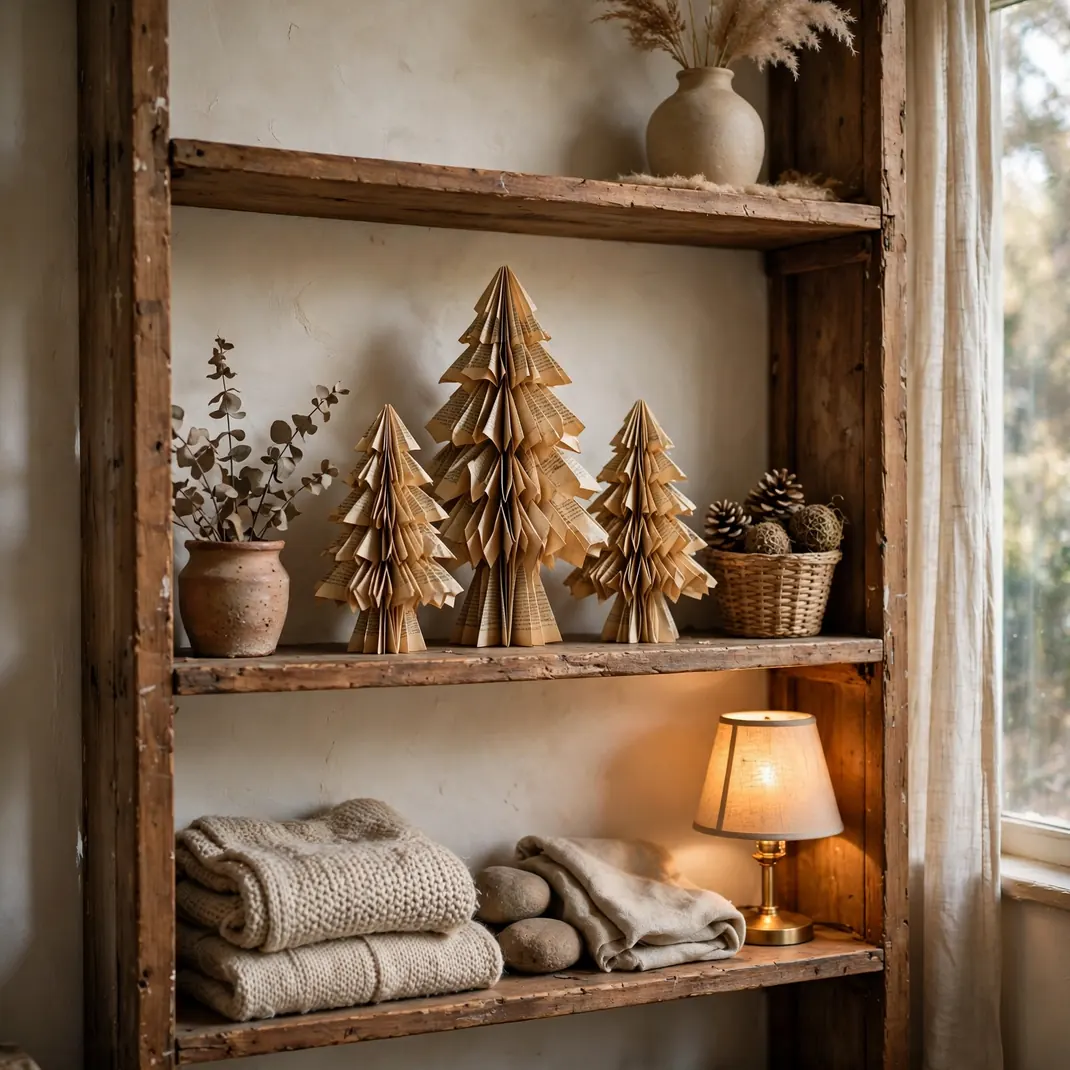
An old paperback nobody will read again becomes a sculptural little tree — this is upcycling at its most satisfying. Every page gets folded the same way, so it’s repetitive in a relaxing way, and the finished tree has a beautiful layered texture. Use books you own and have finished with; library books are not craft supplies. A light dusting of spray glitter at the end is optional but festive.
What You’ll Need: An old paperback (200+ pages), a bone folder or ruler edge, optional spray glitter, and a small wooden disc or cork for the base.
How to Make It: Fold each page’s top corner to the spine, then fold the resulting triangle in half toward the spine, repeating for every page. Stand the book upright, fan the covers, and glue to the base.
Pro Tip: Remove the book’s cover first — it’s too stiff to fold and the pages alone look cleaner. Work in batches of fifty pages to save your wrists.
16. Embroidered Hoop Ornaments
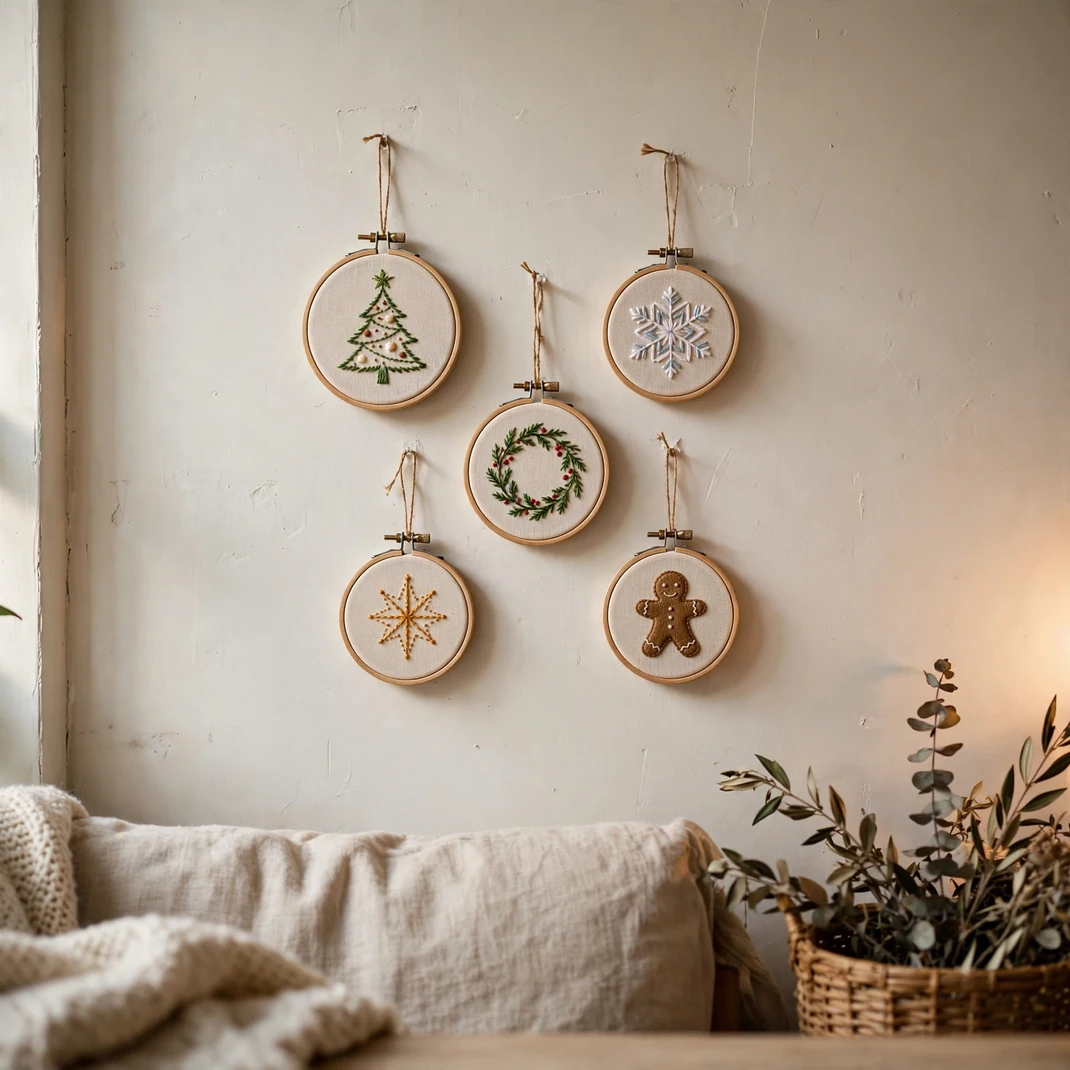
A mini embroidery hoop with a simple stitched design — a tree, a star, a snowflake — is a sweet handmade ornament that hangs on the tree, the wall, or a doorknob. The running stitch and French knot are the only skills involved, and both take five minutes to learn. This is a genuinely portable project for travel or waiting rooms. Keep designs simple; tiny hoops punish ambition.
What You’ll Need: Three-inch wooden embroidery hoops, plain cotton fabric, embroidery floss, a needle, scissors, and ribbon for hanging.
How to Make It: Sketch the design lightly in pencil on the fabric, stitch it with running-stitch outlines and French-knot dots, then mount in the hoop, trim the excess fabric, and glue the back edge down. Tie ribbon through the hoop’s screw.
Pro Tip: Iron the fabric before stitching — wrinkles distort the design. Back the finished hoop with a felt circle glued on; it hides the messy reverse and looks professional.
17. Wine-Cork Reindeer
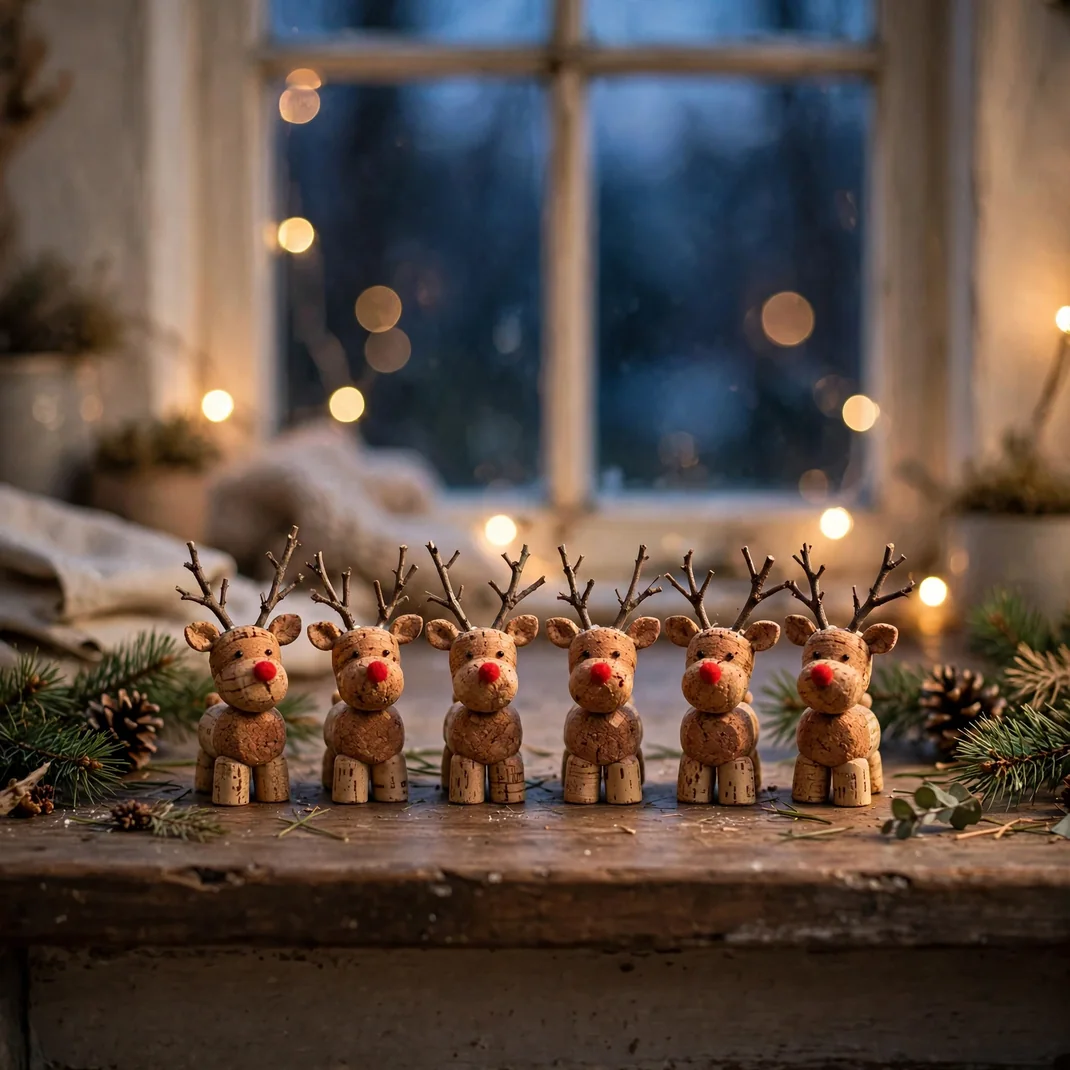
Save those corks all year and December turns them into a tiny reindeer herd. Two corks, some twig antlers, and a red pom-pom nose — that’s the whole animal. They’re the perfect kid craft: no sharp tools, nothing breakable, and every reindeer comes out with personality. Line them along a windowsill or bookshelf for maximum charm.
What You’ll Need: Wine corks, small twigs, red pom-poms, googly eyes, brown paint (optional), and hot glue or craft glue.
How to Make It: Glue one cork horizontal for the body with a second cork vertical at the front for the head. Glue twig antlers to the top of the head, eyes on the sides, and the red nose on the front. Let dry fully before standing.
Pro Tip: Slice a thin flat off the body cork’s bottom so the reindeer stands instead of rolls — the single most common frustration with this craft. Low-temp glue for little hands.
18. Fabric-Scrap Triangle Bunting
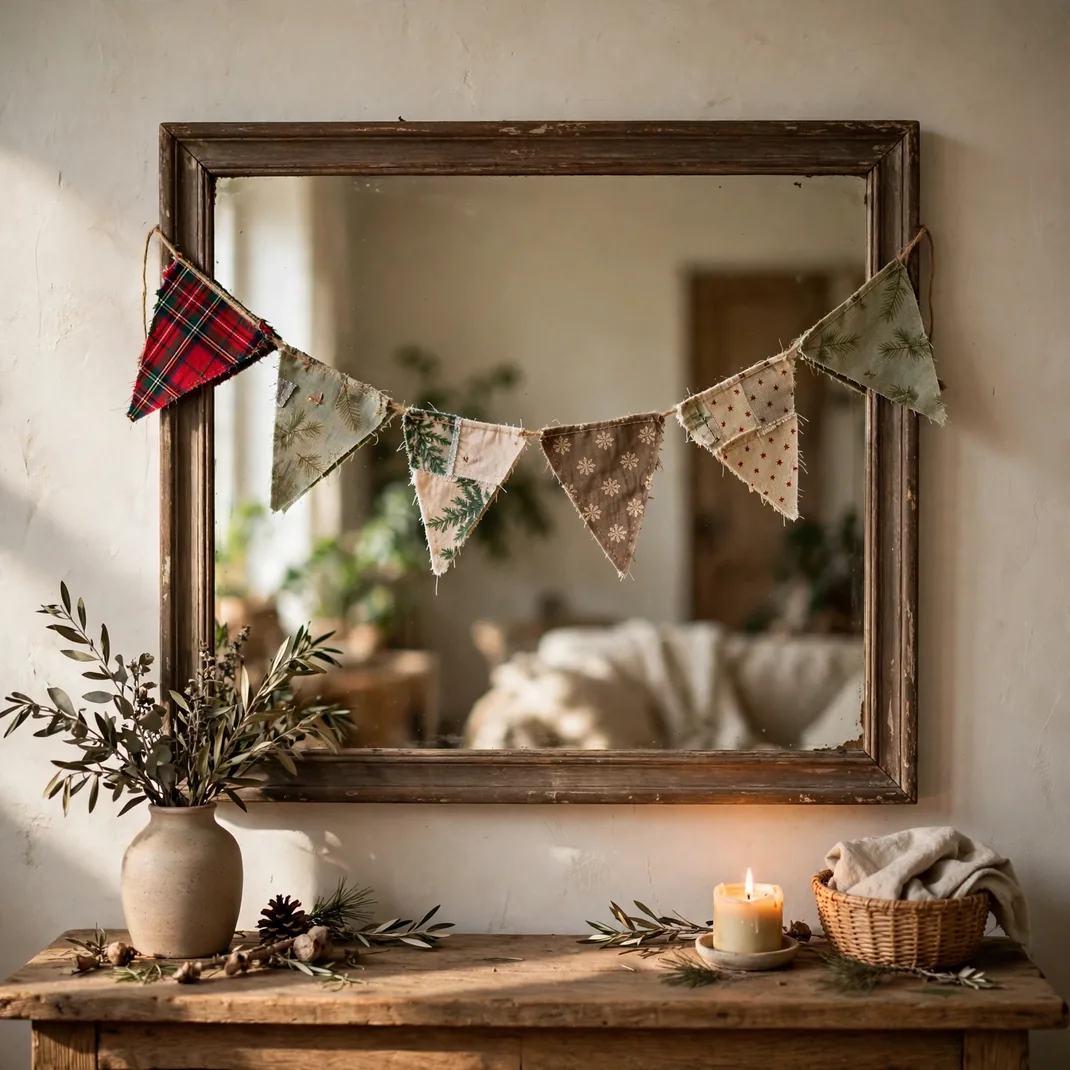
Every sewist’s scrap bin can become Christmas bunting, and non-sewists can do the no-sew version with pinking shears and fabric glue. Triangles of festive fabric strung on ribbon dress up a headboard, mirror, or doorway in an afternoon. The charm is in the mix — plaids, dots, and solids together look collected, not chaotic. Cut all triangles from one cardboard template for consistency.
What You’ll Need: Fabric scraps, a cardboard triangle template, scissors or pinking shears, ribbon or bias tape, and fabric glue or a needle and thread.
How to Make It: Cut the triangles, fold the ribbon over each triangle’s top edge, and glue or stitch in place, spacing evenly. Leave long ribbon tails at both ends for tying.
Pro Tip: Pinking shears stop woven fabric fraying without any hemming — worth borrowing a pair. Press the ribbon fold before gluing for a crisp line that holds.
19. Salt-Dough Ornaments
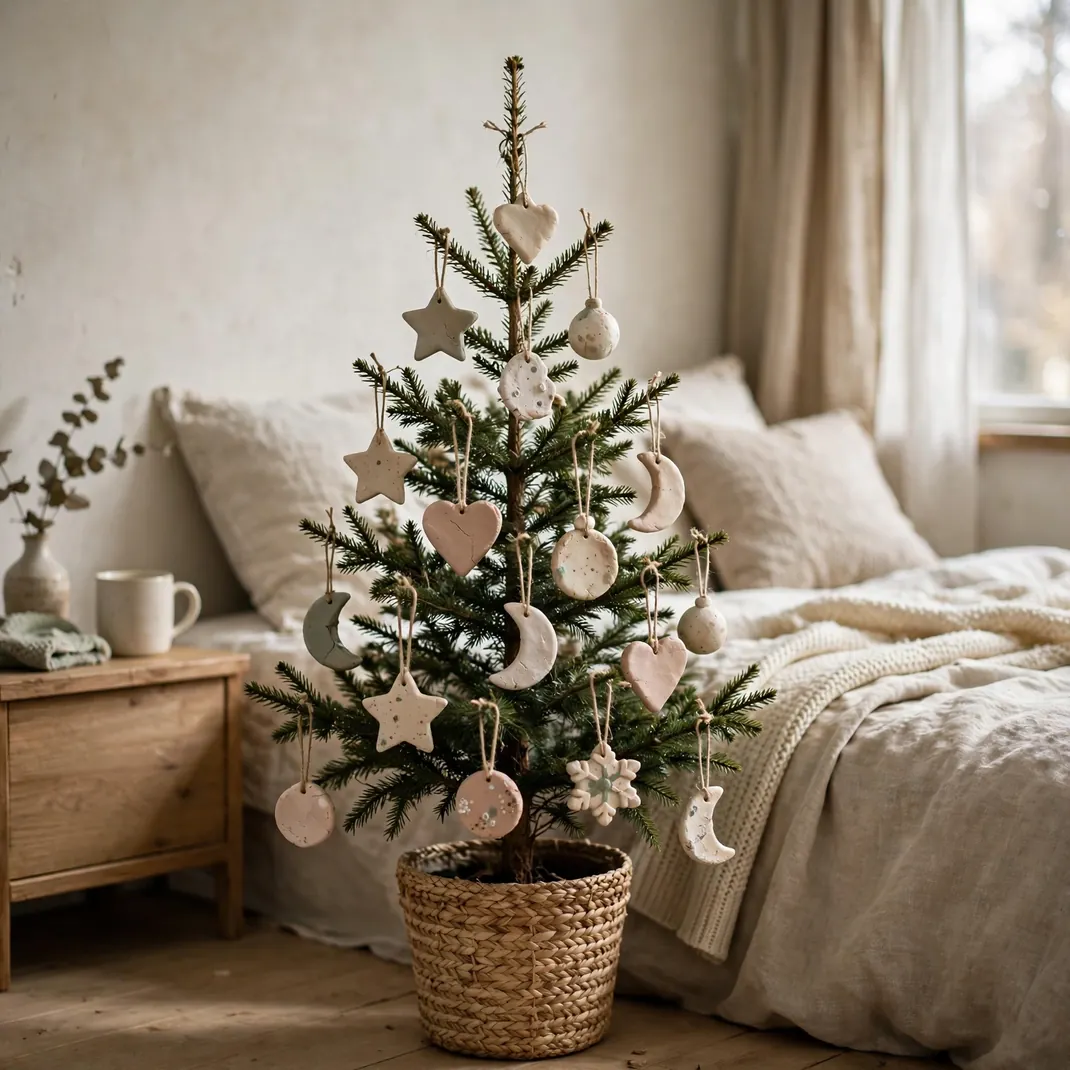
Flour, salt, and water — the cheapest craft on this list, and one of the most satisfying. Salt-dough ornaments bake hard as wood and take paint beautifully. Kids can do every step except the oven. Roll to a consistent quarter-inch thickness; thin spots burn and thick spots stay doughy in the middle. These last for years if kept dry.
What You’ll Need: Two cups flour, one cup salt, one cup water, a rolling pin, cookie cutters, a straw, acrylic paints, ribbon, and optional clear sealer.
How to Make It: Mix and knead ten minutes until smooth, roll quarter-inch thick, cut shapes, poke hanging holes, and bake at 200°F for two to three hours until hard. Cool fully, paint, and seal.
Pro Tip: Salt dough is NOT edible despite smelling like bread — keep it away from toddlers and pets, and label the storage box. If ornaments puff in the oven, the heat was too high; low and slow is the rule.
20. No-Sew Tie-Fringe Fleece Throw
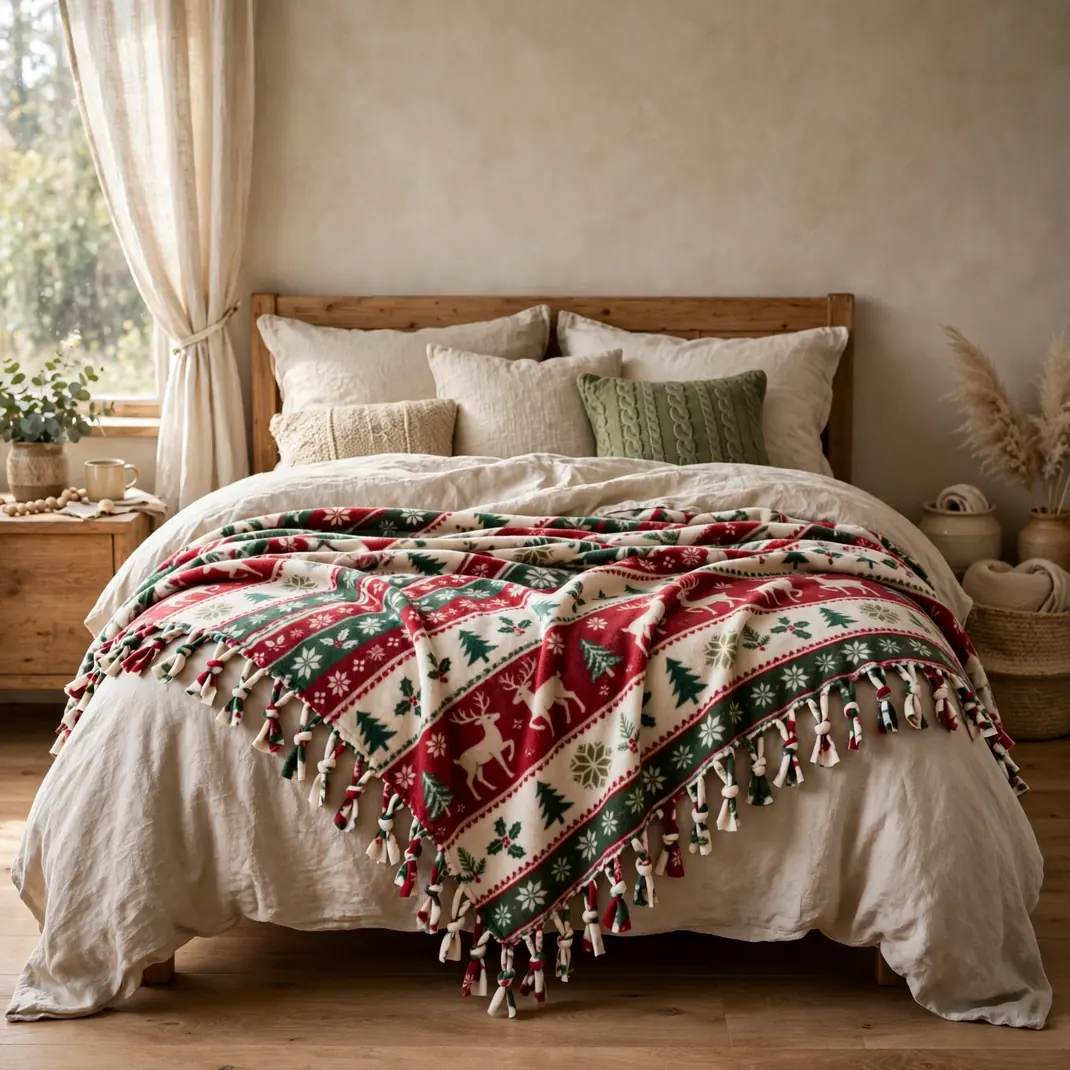
Two pieces of fleece, a pair of scissors, and an hour — that’s a custom Christmas throw with zero sewing. Cut fringe around all four edges and tie the top and bottom layers together in knots. Choose one Christmas print and one solid so it’s reversible. Fleece doesn’t fray, which is why this works; don’t try it with woven fabric. It washes and dries like a dream.
What You’ll Need: Two 1.5-yard cuts of anti-pill fleece, sharp scissors, and a ruler or tape measure.
How to Make It: Lay the fleeces together, trim to match, cut four-inch fringe strips (one inch wide) around all edges, then tie each top strip to its bottom partner in a double knot. Work your way around.
Pro Tip: Cut the corner squares out first (four by four inches) — otherwise the corners bunch into ugly lumps. Sharp scissors matter; ragged cuts make ragged knots.
21. 3D Paper Snowflake Garland
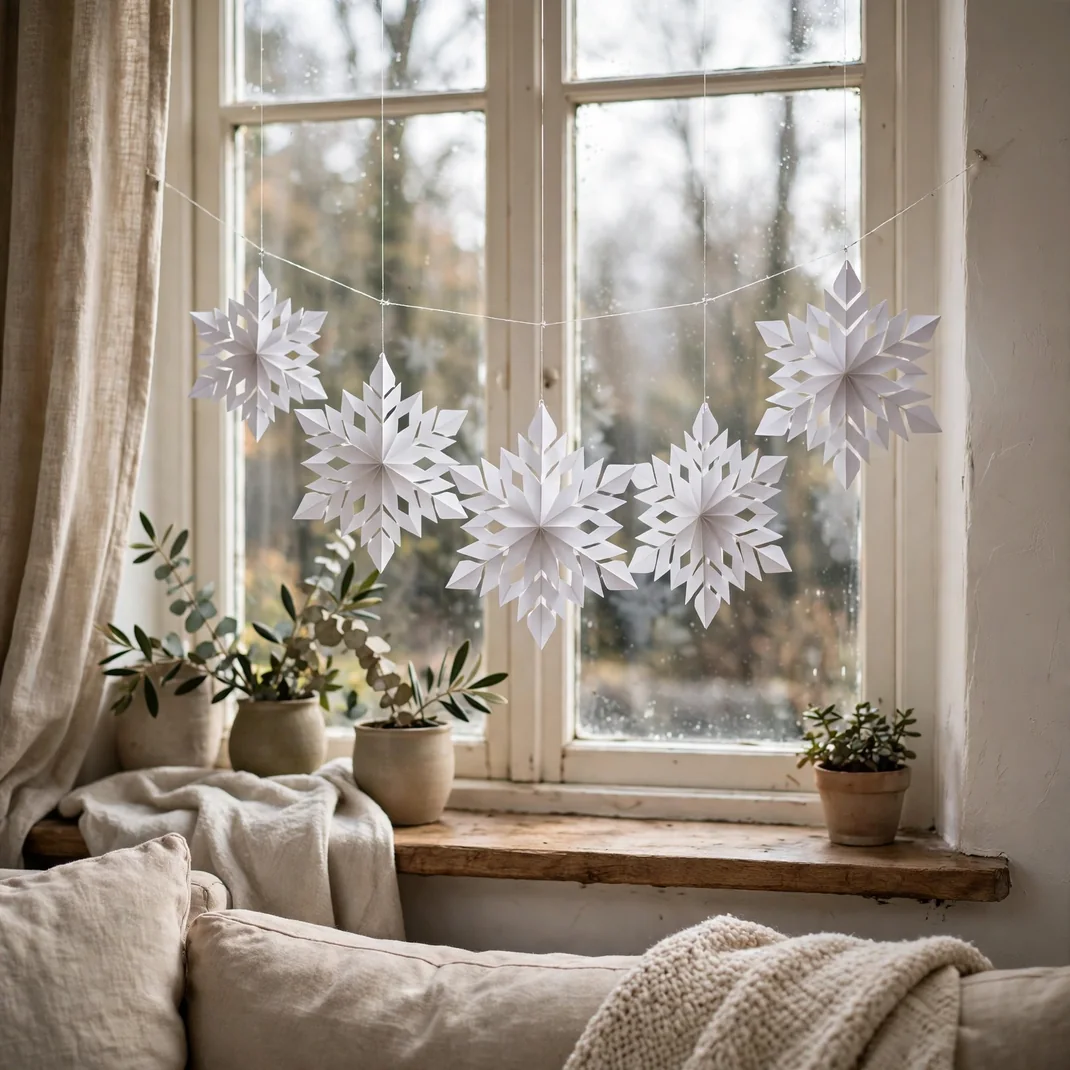
Flat paper snowflakes are kindergarten; the 3D kind — six curled arms joined into a sphere — look genuinely impressive hanging in a bedroom. String five or six on fishing line at different heights in front of a window and they turn slowly in the draft, catching the light. White printer paper works, but slightly heavier paper (24 lb) holds the curl better. This is a great teen craft: fiddly enough to be interesting, simple enough to succeed.
What You’ll Need: White paper, scissors, a stapler, ruler, pencil, clear fishing line or thread, and tape.
How to Make It: For each snowflake, fold six squares diagonally, cut parallel slits, unfold, and roll the strips to the center, stapling. Join the six arms at the center, then thread onto fishing line with knots holding each flake’s height.
Pro Tip: Keep the slit cuts even and don’t cut through the folded edge — one slip and the arm falls apart. Store flat between cardboard sheets; crushed 3D flakes don’t recover.
22. Scented Drawer Sachets
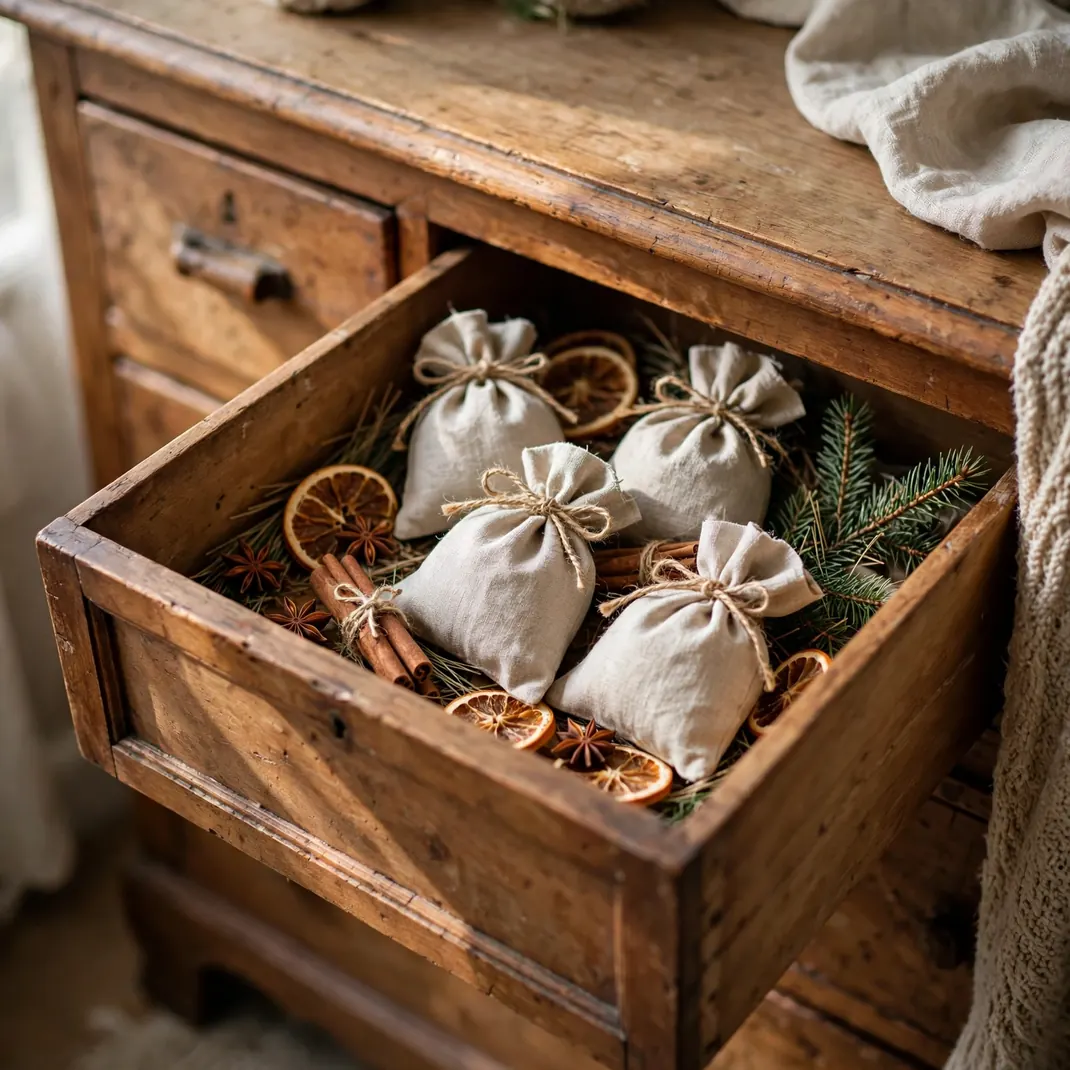
Tuck Christmas into your dresser drawers with little scented sachets — dried lavender, pine needles, or cloves in fabric pouches. Every opened drawer releases a small puff of December. They’re also genuinely useful: cedar and lavender deter moths from woolens. Make a batch in an hour and gift the extras; everyone loves these and nobody buys them for themselves.
What You’ll Need: Small fabric squares (four by four inches), dried lavender, pine, or cloves, uncooked rice as filler, ribbon or twine, and a needle and thread or fabric glue.
How to Make It: Mix one part botanicals with two parts rice, spoon into the fabric center, gather the edges, and tie tightly with ribbon. Or sew three sides of a pouch, fill, and stitch closed.
Pro Tip: Refresh faded sachets with two drops of essential oil — good for another season. Keep clove-heavy sachets away from light fabrics; the oils can spot over months.
Twenty-two projects, zero excuses — there’s something here for every skill level, every budget, and every free evening between now and Christmas. Start with one small win (the sachets or the framed paper), and don’t be surprised when it turns into a full crafting weekend. The best-dressed bedrooms this December will be the handmade ones.