
23 Kid-Friendly Christmas Bedroom Setups They’ll Treasure
Kids don’t remember perfect styling — they remember magic. The mailbox that got a reply, the tree they decorated themselves, the paper chain that made December feel endless. These 23 setups are built for small hands and big imaginations: everything shatterproof, reachable, and touchable, with the kind of Christmas warmth they’ll still talk about when they’re grown.
1. Felt Christmas Tree They Decorate Themselves
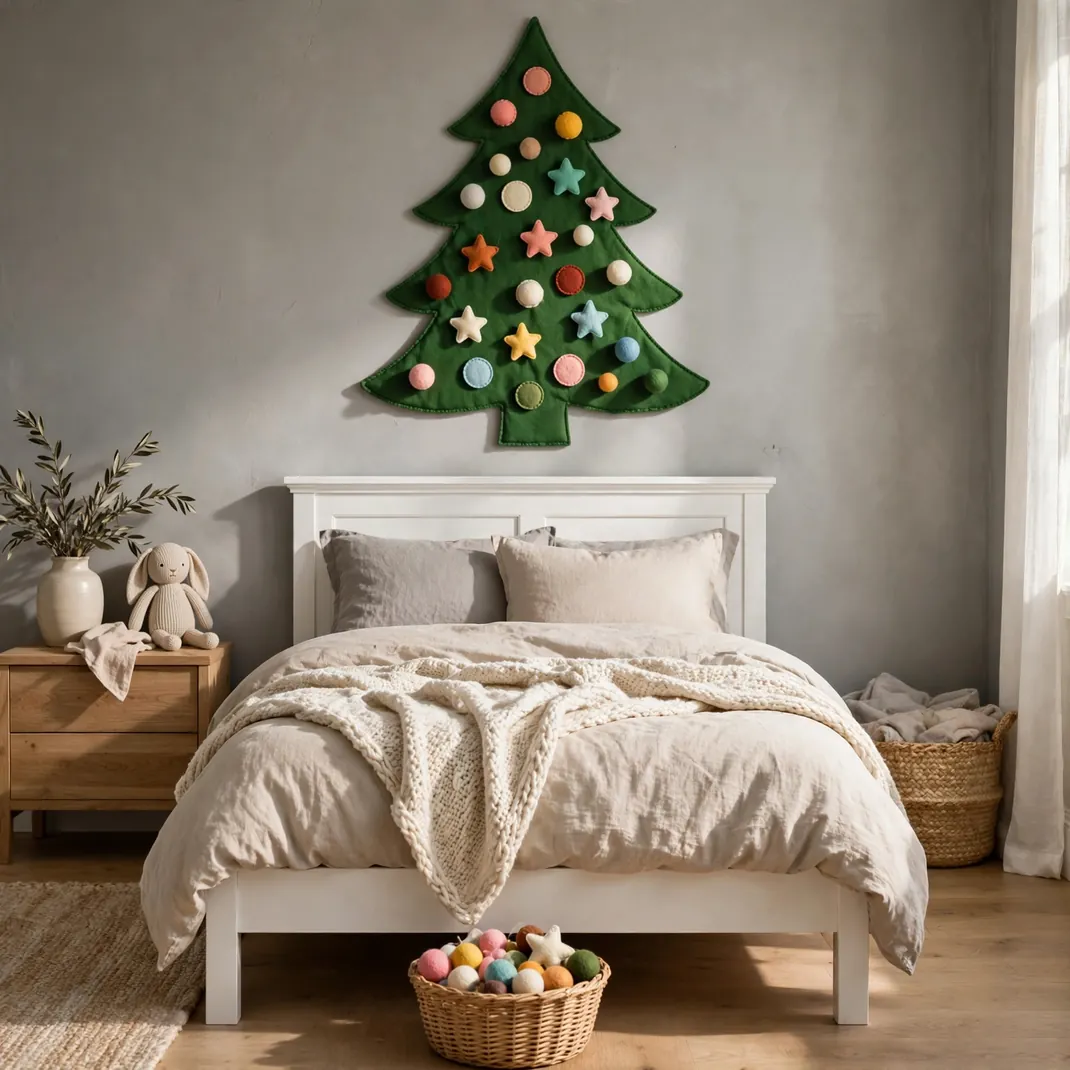
Hand them the decorating job. A big felt Christmas tree stuck to the wall with removable strips becomes your child’s very own tree — and the felt ornaments attach with simple Velcro dots, so they can redecorate it seventeen times a day without breaking a single thing. It keeps little hands off the real tree while giving them full creative control. Fair warning: you will find ornaments in very surprising arrangements.
How to Style It Mount a 3 to 4-foot felt tree on the wall at your child’s eye level using removable adhesive strips (never nails at kid height). Hand them a set of felt ornaments with sewn-on Velcro dots — stars, balls, candy canes — and let them arrange freely. Keep a small basket nearby to corral ornaments that migrate.
Why It Photographs Beautifully Action shots of tiny hands placing ornaments are the heart-melting photos of the season. The flat green felt reads as a bold graphic shape on camera, and the colorful ornaments pop against it.
Pro Tip Buy or make twice as many ornaments as you think you need — half will end up under the bed, and a sparse felt tree looks sad. Felt ornament sets are inexpensive and washable.
Budget-Smart Swap Cut a tree shape from a $5 green felt yard and cut ornaments from craft felt scraps. A dot of hot glue and a Velcro dot per ornament finishes the whole project for under $10.
2. Santa’s Mailbox for Letters to the North Pole

Every kid needs a direct line to Santa. A small decorative mailbox on the dresser or bookshelf — labeled “Letters to Santa” — turns wish lists into a whole December ritual. They write, they post, and (if you’re feeling ambitious) Santa writes back. The mailbox itself becomes decor: red, cheerful, and unmistakably Christmas. Pro parent move: keep a few “Santa reply” letters ready in your nightstand.
How to Style It Place a small red metal or wooden mailbox on the dresser or a low bookshelf, with a little flag they can raise when a letter is inside. Stack blank cards, crayons, and envelopes beside it, and add a festive label — chalkboard tags work perfectly.
Why It Photographs Beautifully The mailbox is a perfect still-life subject: red box, scattered crayons, a half-written letter. Candid shots of kids solemnly posting their letters are pure gold.
Pro Tip Anchor the mailbox with museum putty so enthusiastic posting doesn’t send it flying off the dresser. If you do reply letters, match Santa’s “handwriting” to nothing else in the house.
Budget-Smart Swap A red shoebox with a slot cut in the top and “SANTA MAIL” written in gold marker works just as well — kids care about the ritual, not the price tag.
3. Elf on the Shelf Arrival Scene
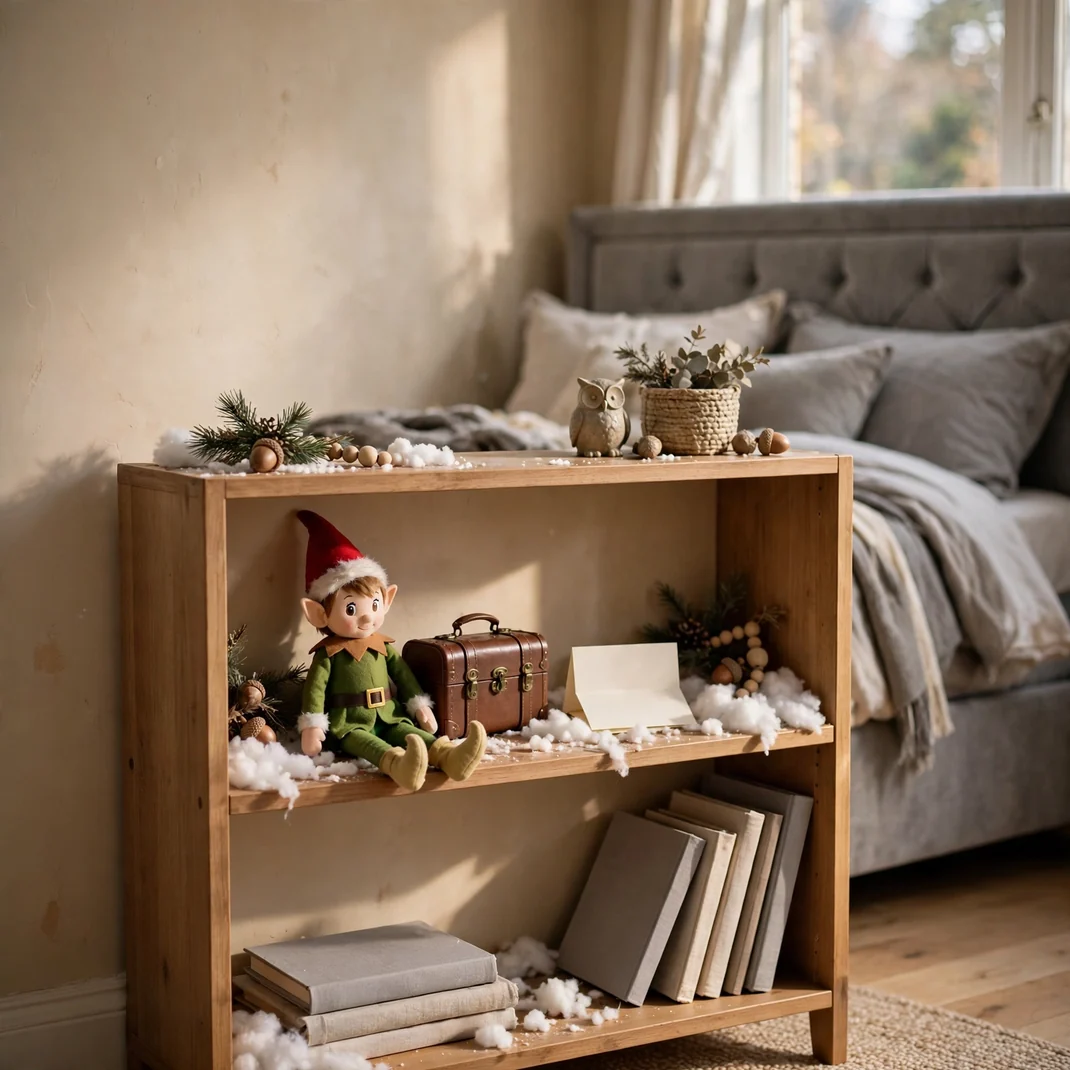
Whether your elf is a seasoned December veteran or making its first appearance, give it a proper arrival moment in the bedroom. A little staged scene on the bookshelf — the elf “arriving” with a tiny suitcase, a sprinkle of “North Pole snow” (cotton balls), and a welcome note — kicks off the season with a gasp. Kids will check that shelf every single morning. You know what you signed up for.
How to Style It Stage the elf on a low bookshelf or the dresser with a tiny suitcase (a decorated matchbox works), a folded “I’m back!” note, and a scattering of cotton-ball snow. Keep the scene contained to one shelf so nightly repositioning stays a two-minute job.
Why It Photographs Beautifully Miniature scenes are irresistible on camera — the tiny suitcase next to the elf creates a story in one frame. Morning discovery photos, complete with bedhead, are the ones you’ll frame.
Pro Tip Set a phone reminder for 10 PM labeled “MOVE THE ELF.” Future you, exhausted on the couch, will be grateful. Keep a stash of five-minute scene ideas on your phone for low-energy nights.
Budget-Smart Swap No official elf? Any small plush toy can be the “scout.” The magic is in the nightly movement and the note, not the brand.
4. Christmas Countdown Paper Chain

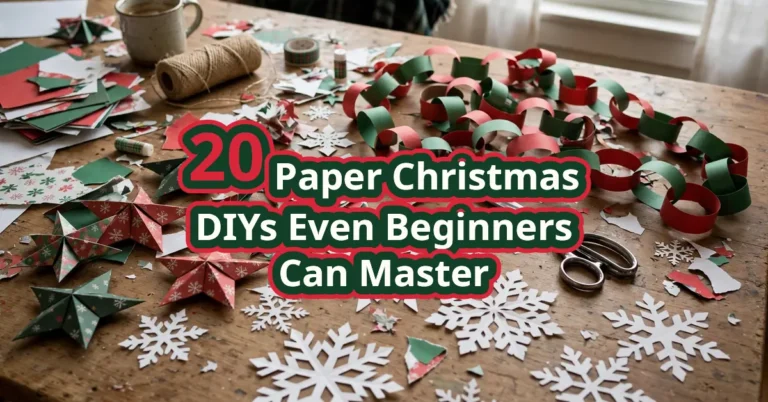
There is no better way to make December feel real to a kid than tearing a link off a paper chain every morning. Make it together on December 1st — red and green construction paper strips, one for each day — and string it across the wall or window. Each link can hold a tiny written surprise: “candy cane day,” “drive to see lights,” “bake cookies.” It doubles as handmade decor and a daily ritual they’ll beg to continue.
How to Style It Cut 1×8-inch strips from red, green, and white construction paper and loop them into a chain with a glue stick or tape, numbering each link if you like. Drape the finished chain in swags across the bedroom wall or window using removable hooks.
Why It Photographs Beautifully The long swagging chain adds a festive garland line across the room that photographs as pure childhood Christmas. Progress photos — full chain versus the last lonely link — tell the whole month’s story.
Pro Tip Write the daily surprises on the inside of each link before assembling, so they’re hidden until tear-off day. Keep surprises simple and free — the ritual matters more than the reward.
Budget-Smart Swap This is already nearly free — one pack of construction paper makes chains for the whole house. Use last year’s holiday cards cut into strips for an extra-sentimental version.
5. Santa-and-Reindeer Novelty Bedding Set
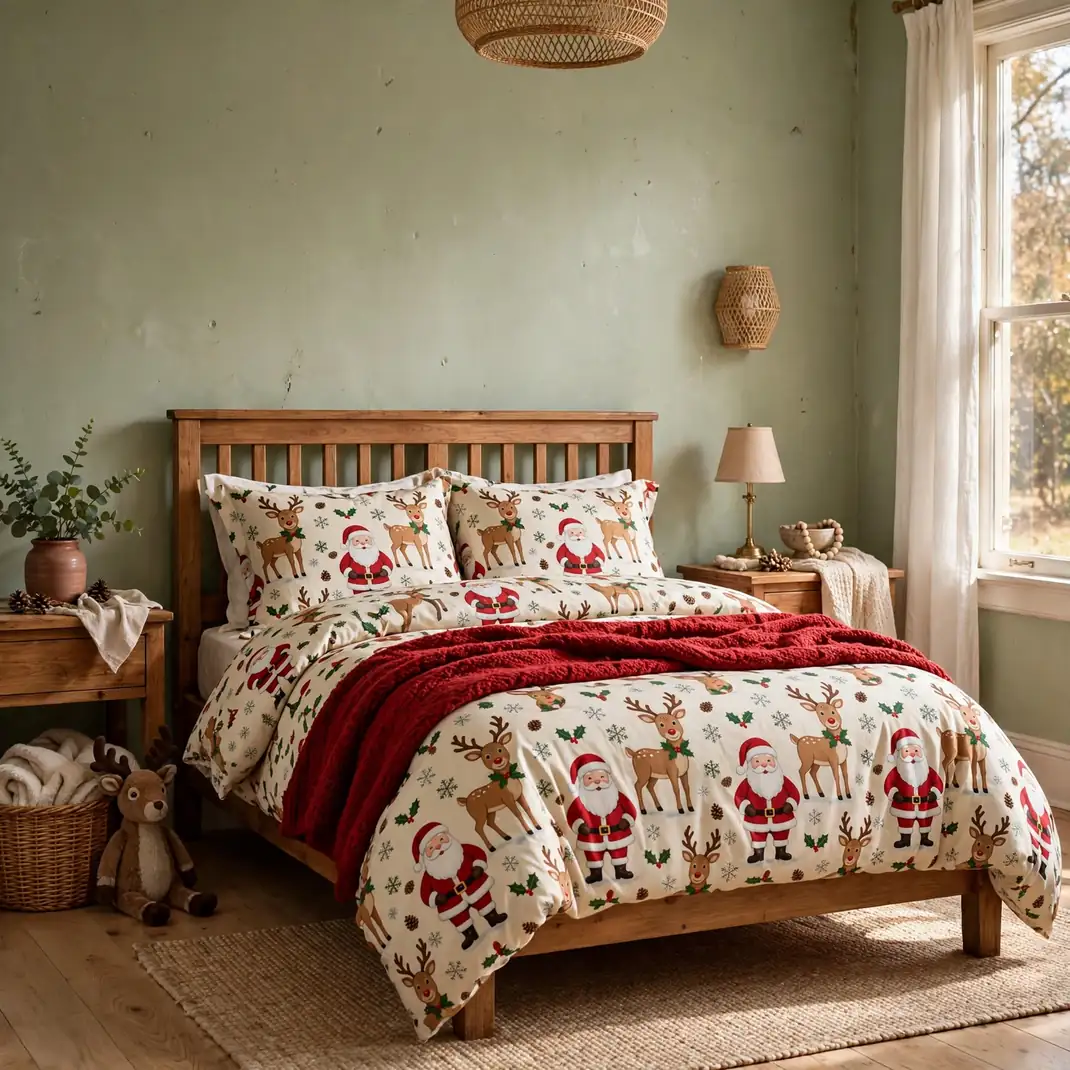
Grown-up Christmas bedding whispers; kids’ Christmas bedding shouts with joy. A duvet set covered in Santas, reindeer, and snowmen turns bedtime into the best part of December — kids genuinely get excited to climb into a bed that’s part of the holiday. Pick a set in classic red, green, and white so it still looks cheerful rather than chaotic. Come January it folds away, and its reappearance next year will get an actual cheer.
How to Style It Dress the bed fully in the novelty set — duvet, pillowcases, and flat sheet — and keep everything else in the room calm so the bedding is the star. Add one solid-colored throw in red or green at the foot for layering on cold nights.
Why It Photographs Beautifully Bold novelty prints make the bed the undeniable hero of every photo. Kids posed mid-bounce on Santa bedding capture exactly the energy Christmas is supposed to have.
Pro Tip Wash the set once before first use — novelty bedding is often stiff from packaging, and one wash makes it noticeably softer for sensitive kid skin.
Budget-Smart Swap Just the pillowcases in a Christmas print, swapped onto their regular bedding, deliver 70 percent of the excitement for a fraction of the cost.
6. Glow-in-the-Dark Christmas Tree Wall Decal

Bedtime in December should come with a little magic. A glow-in-the-dark Christmas tree wall decal beside the bed charges up during the day and glows softly all night — a nightlight that never needs batteries and never gets unplugged. Kids fall asleep under a glowing tree, and the soft green glow is dim enough not to disturb sleep. It peels off cleanly in January, leaving only good memories.
How to Style It Apply the decal on the wall beside or above the bed where it’s visible from the pillow — smooth it flat with a soft cloth as you go. Add a few matching glow-in-the-dark star decals scattered around it like a night sky.
Why It Photographs Beautifully Lights-off photos of the glowing tree are genuinely enchanting — the kind of image that stops thumbs mid-scroll. Daytime shots show a cheerful graphic tree; nighttime shots show the magic.
Pro Tip The decal needs direct light exposure to charge — make sure daylight or the room light hits it for a few hours daily, or the glow will be faint by bedtime.
Budget-Smart Swap Glow-in-the-dark star stickers arranged in a tree shape on the wall give the same bedtime glow for a couple of dollars — let the kids design the tree themselves.
7. Stuffed Animal Christmas Parade on the Bed
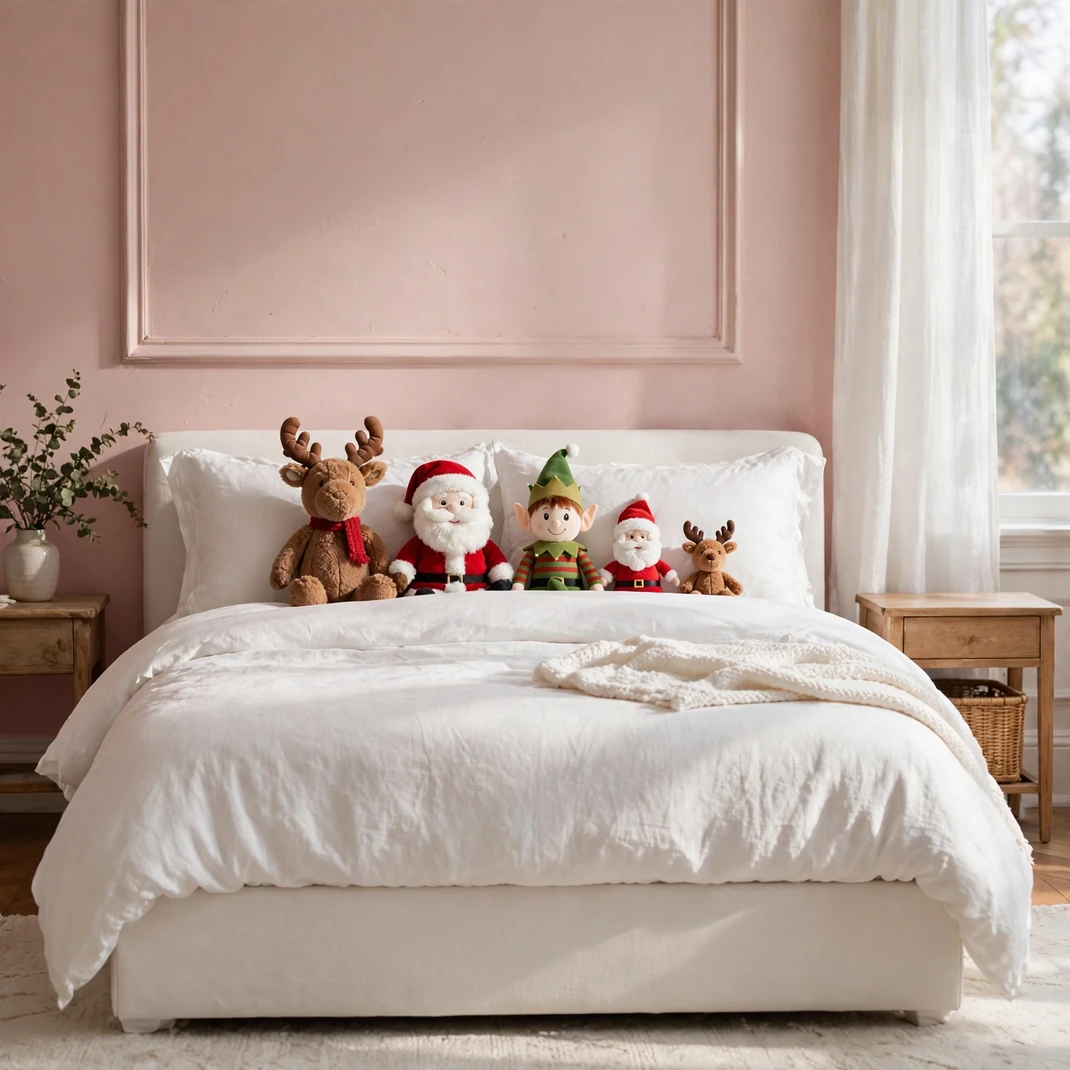
Gather every plush reindeer, elf, Santa, and snowman in the house and stage a parade across the pillows. It costs nothing, takes two minutes, and transforms the bed into a toy shop window that makes kids shriek with delight. Let them arrange the lineup themselves — the curation is half the fun — and rotate in a new “grand marshal” each week of December. This is the setup they’ll photograph in their memories forever.
How to Style It Line up Christmas plush toys across the pillows from tallest to smallest, like a parade formation, with the biggest Santa or reindeer in the center. Tuck a few mini ornaments or a short tinsel strand among them for extra festivity.
Why It Photographs Beautifully A row of plush faces staring at the camera is irresistibly cute. Kids posed as the “parade leader” in front of their lineup make for the year’s best candid portraits.
Pro Tip Designate a basket for the parade members so bedtime cleanup is one scoop, not a treasure hunt. Parade by day, cuddle crew by night — let them pick two to sleep with.
Budget-Smart Swap Already own the plush? This one’s free. If you’re short on Christmas plush, thrift stores in December are overflowing with them for a dollar or two each.
8. North Pole Directional Sign on the Wall

“Santa’s Workshop 1 mile, Reindeer Stables 2 miles, North Pole straight ahead.” A wooden directional sign on the bedroom wall turns the room into a little outpost of the North Pole, and kids absolutely believe in it — at least with the part of their brain that matters. Point the arrows in silly directions and watch them giggle. It’s the kind of whimsical touch that makes a kid’s room feel like it belongs to the season.
How to Style It Hang a wooden arrow sign — store-bought or DIY from craft boards — on the wall near the door at kid eye level. Include three to five destinations with playful distances, painted in red, green, and white.
Why It Photographs Beautifully The sign adds a storybook element that makes bedroom photos feel narrative rather than just pretty. Kids pointing at the arrows, “reading” the destinations, are natural photo moments.
Pro Tip Hang it with removable strips rather than nails — kids will want to touch and “read” it daily, and a light sign on strips survives grabbing far better than one on a nail.
Budget-Smart Swap Paint arrows on cardboard, distress the edges with sandpaper, and mount on a dowel — a convincing rustic sign for the cost of craft paint you probably own.
9. Christmas Eve Box at the Foot of the Bed
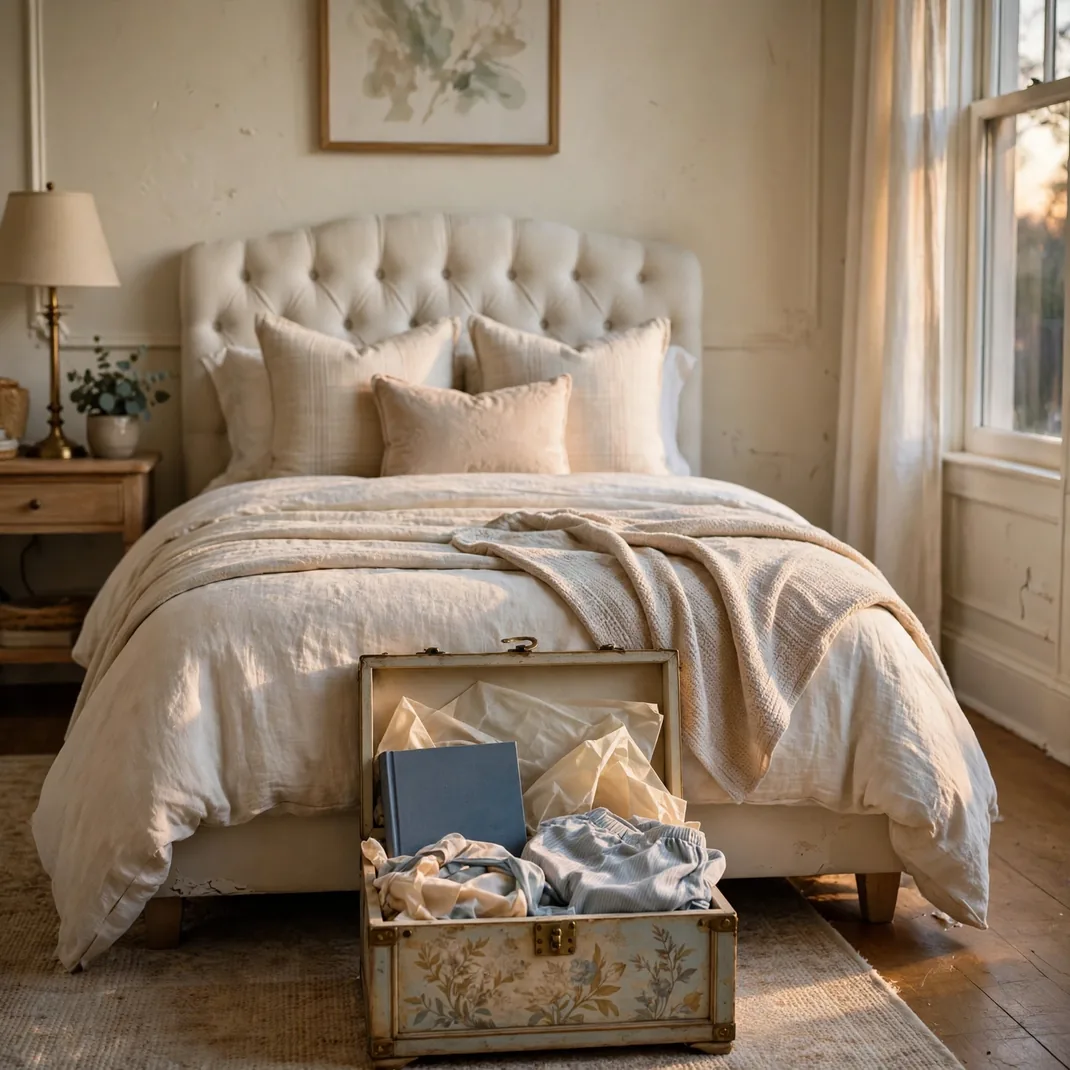
Start the tradition they’ll demand every year: a Christmas Eve box waiting at the foot of the bed. New pajamas, a Christmas book, a packet of cocoa, and one small treat — opened on Christmas Eve night as the official kickoff to the big day. The box itself, decorated with their name, becomes a keepsake that comes out every December. Years from now, they’ll remember the box as clearly as the presents.
How to Style It Use a sturdy keepsake box or small crate decorated with their name in festive lettering, and nestle the pajamas, book, cocoa packet, and treat inside with tissue paper. Place it at the foot of the bed on Christmas Eve morning so the anticipation builds all day.
Why It Photographs Beautifully The styled box — name visible, tissue peeking out — is a beautiful still life. But the real photos are Christmas Eve night: kids in new PJs, reading the new book, cocoa in hand.
Pro Tip Keep the box contents consistent year to year — PJs, book, cocoa, treat. The repetition is what turns it into a tradition rather than just a gift.
Budget-Smart Swap A decorated cardboard box works beautifully for the first year. Thrift a wooden crate for a permanent version that lasts through childhood.
10. Framed “Official Nice List” Certificate

Nothing motivates December behavior like official documentation. A framed “Nice List” certificate with your child’s name, stamped with a gold seal and signed by “S. Claus,” hung where they’ll see it every day, is both hilarious and weirdly effective. Print it at home on nice paper, pop it in a dollar-store frame, and watch them stand a little taller. Refill the motivation as needed with strategically timed “list updates.”
How to Style It Print a certificate design (free templates abound online) with their name in fancy script, add a gold star sticker as the “official seal,” and frame it simply. Hang it on the bedroom wall or prop it on the dresser at their eye level.
Why It Photographs Beautifully Kids posing proudly next to their Nice List certificate — beaming, thumbs up — are instant classics. The certificate itself, with its curly script and gold seal, looks wonderfully official on camera.
Pro Tip Print two copies. One mysteriously “arrives from the North Pole” mid-December with an updated rank like “Nice List — Gold Tier.” The commitment to the bit is everything.
Budget-Smart Swap Hand-letter it yourself on nice paper with a gold pen — kids find the handmade version even more convincing, and it costs nothing.
11. Snowman Table Lamp on the Nightstand
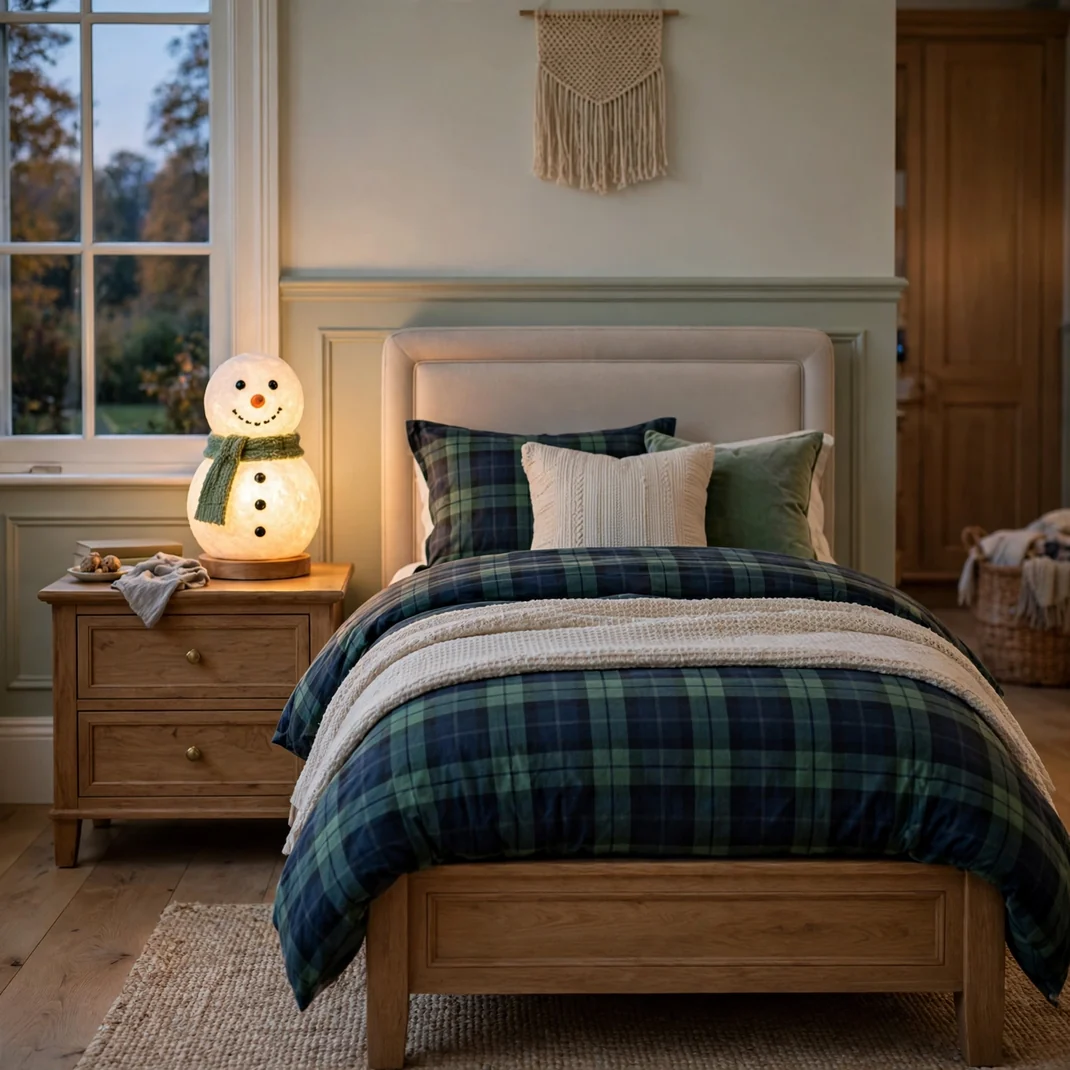
Swap the regular nightstand lamp for a snowman in December and watch bedtime get easier. A cheerful snowman lamp gives off the same warm reading light, but now it’s a friend keeping watch — and kids who fear the dark negotiate far better with a snowman than a plain lampshade. Choose one with a sturdy base and a warm bulb, and it doubles as the room’s Christmas mascot all month.
How to Style It Replace the usual nightstand lamp with a ceramic or resin snowman lamp, keeping it in the same spot so the room’s light layout stays familiar. Use a warm-white LED bulb — bright enough to read by, cozy enough to wind down with.
Why It Photographs Beautifully A glowing snowman on a nightstand is an adorable focal point in evening bedroom shots. The lamp’s cheerful face adds personality that plain decor can’t match.
Pro Tip LED bulbs stay cool to the touch — important for a lamp kids will inevitably hug. Check that the base is tip-resistant or add museum putty underneath for wobbly nightstands.
Budget-Smart Swap Top their existing lamp with a snowman lampshade cover, or simply perch a plush snowman beside the regular lamp — the glow behind it creates a similar buddy effect.
12. Fuzzy Reindeer Slippers Waiting by the Bed
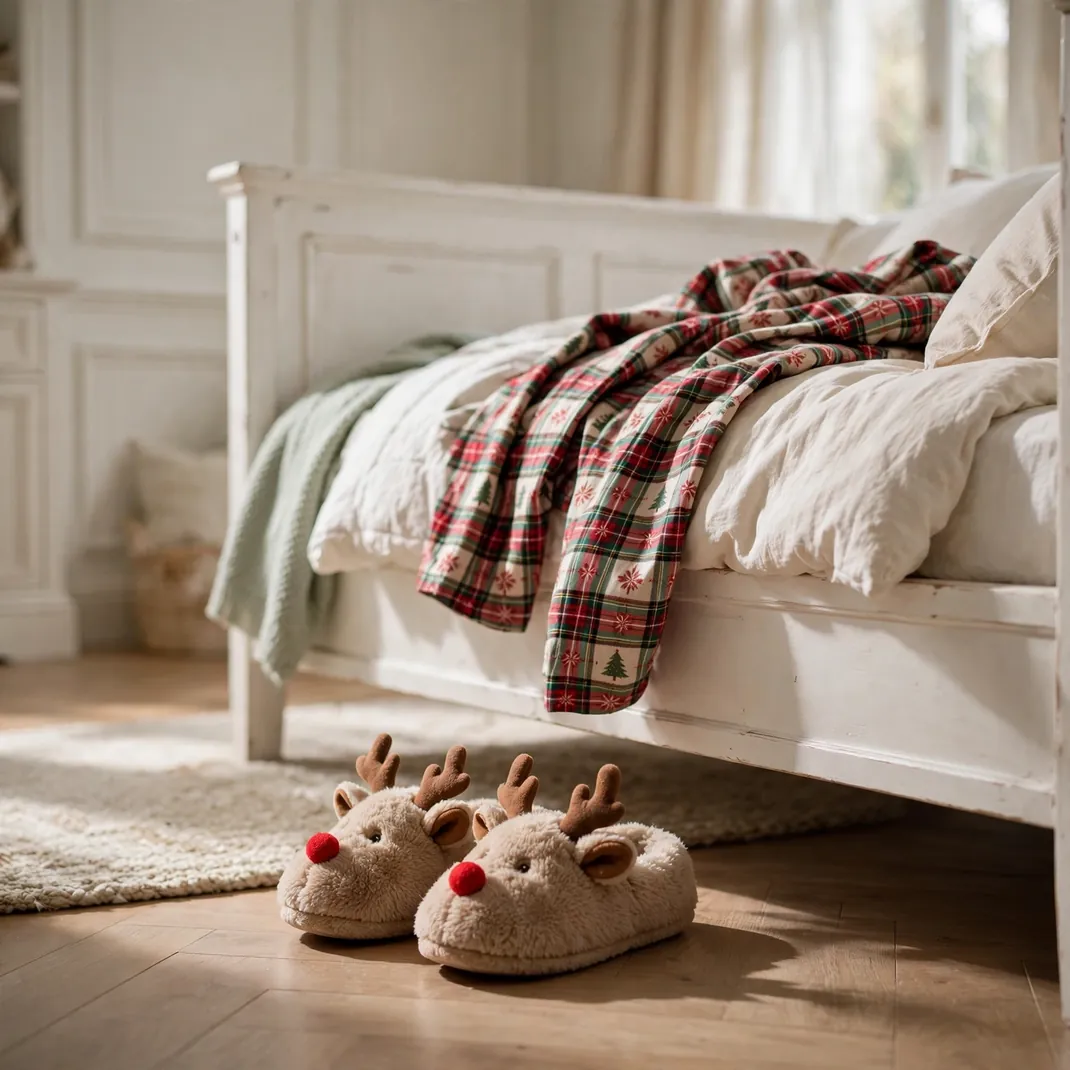
Some magic is tiny. A pair of fuzzy reindeer slippers — complete with antlers and red noses — waiting by the bed each morning turns the ordinary act of getting up into a small delight. Kids will wear them everywhere, all December, long after the novelty should have worn off. It’s the smallest idea on this list and one of the most loved. Cold floors don’t stand a chance.
How to Style It Place the slippers side by side at the bedside each evening — antlers up, noses forward — like they’re parked and ready. Pair with Christmas pajamas for the full effect in morning photos.
Why It Photographs Beautifully Tiny reindeer slippers on little feet, shot from floor level with the Christmas bed behind, are the definition of heart-melting. The antlers and red noses read instantly even in a quick phone snap.
Pro Tip Choose slippers with grippy soles — reindeer antlers plus hardwood floors plus a running child is a combination that needs traction.
Budget-Smart Swap Kids’ holiday slippers go on deep clearance right after Christmas — buy next year’s pair in January for a few dollars and stash them away.
13. Indoor Christmas Light Projector on the Ceiling
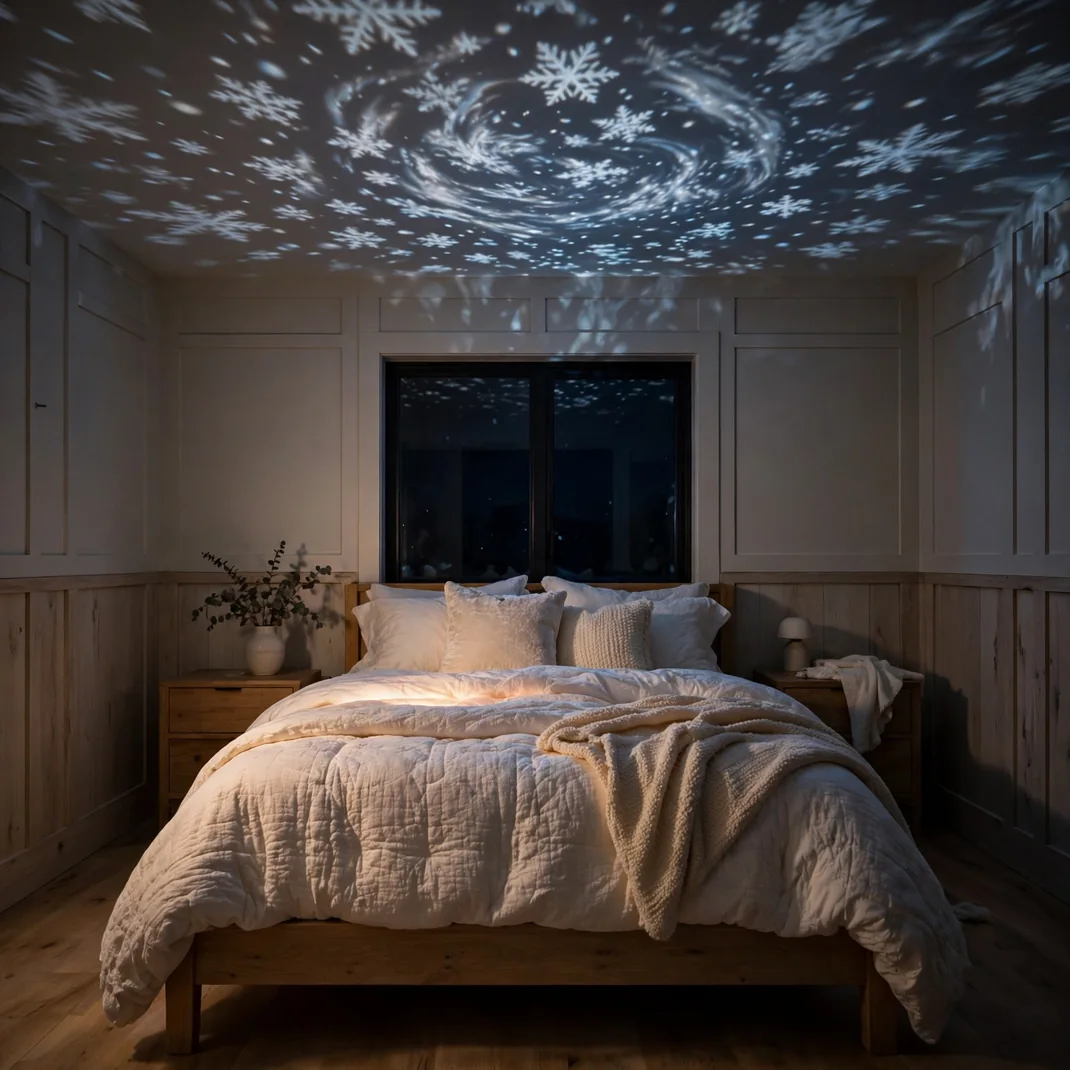
Turn off the lights, switch on the projector, and the bedroom ceiling becomes a swirling snowstorm. An indoor Christmas light projector — the kind that throws moving snowflakes or stars across the room — gives kids a private planetarium every single night of December. It’s mesmerizing at bedtime, completely cool to the touch, and requires zero installation skill. This is the “whoa” moment of the whole room.
How to Style It Set the projector on the dresser or a shelf aimed at the ceiling above the bed, and run it on its timer setting so it switches off after they fall asleep. Choose the snowflake or star pattern in cool white or multicolor — avoid red-green-only modes, which can feel harsh in a bedroom.
Why It Photographs Beautifully Long-exposure phone shots of the swirling patterns on the ceiling look like actual magic. Even simple photos of the lit ceiling with the bed below capture the wonder.
Pro Tip Use the built-in timer (most have 2, 4, or 6-hour settings) so it doesn’t run all night — better for sleep and for the projector’s lifespan. Keep the lens dust-free for the sharpest patterns.
Budget-Smart Swap A simple star-nightlight projector (the domed kind) costs under $15 and creates a similar ceiling show on a smaller scale — perfect for little bedrooms.
14. Gingerbread Man Bunting Across the Window

A string of smiling gingerbread men across the window is about as cheerful as decor gets. Whether you buy a felt set or cut them from brown craft paper with the kids, the little cookie people bring instant bakery-window charm to the bedroom. Let the kids draw the faces — wonky smiles are mandatory and perfect. Hang it where the daylight backlights them and they glow like real cookies.
How to Style It String 8 to 12 gingerbread men on twine with mini clothespins or thread them directly, spacing them 4 to 5 inches apart. Hang the bunting across the window frame with removable hooks, letting it swag gently in the middle.
Why It Photographs Beautifully Backlit against the window, the gingerbread shapes become warm silhouettes — simple, graphic, and adorable. Close-ups of the hand-drawn faces show off your little artists.
Pro Tip If cutting with kids, trace one good gingerbread man onto cardboard to make a template — then even toddlers can trace and “help” cut with safety scissors.
Budget-Smart Swap Brown paper grocery bags cut into gingerbread shapes cost literally nothing. White crayon or paint pen makes the icing details.
15. Giant Plush Santa-Hat Pillow
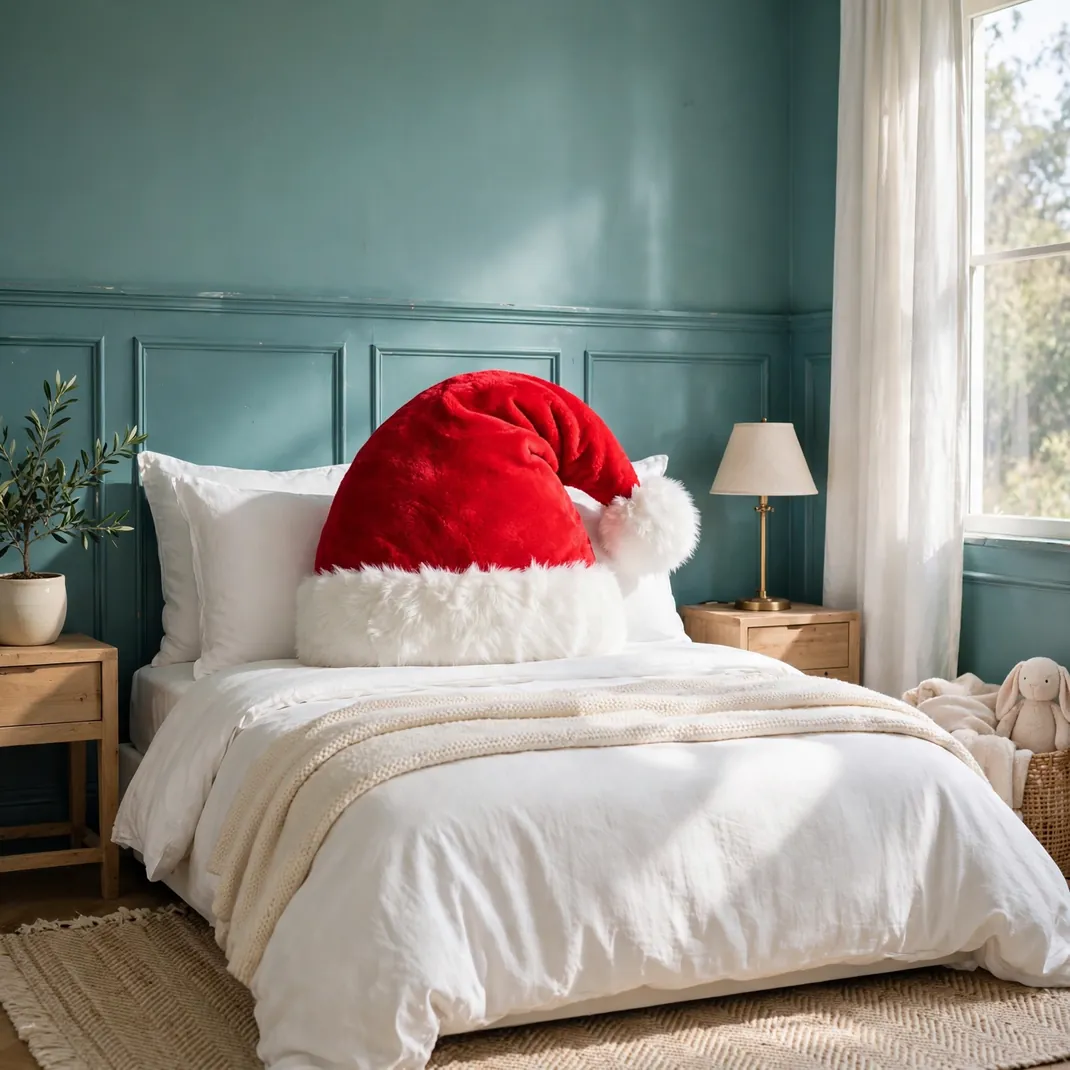
One oversized pillow shaped like Santa’s hat — floppy, soft, and ridiculous — and the bed is instantly a Christmas bed. Kids will fight over who gets to hug it, use it as a reading backrest, and dramatically place it “just so” every morning. It’s the kind of single statement piece that does more work than ten small decorations. Bonus: it photographs like a dream and survives being launched across the room.
How to Style It Prop the Santa-hat pillow front and center against the sleeping pillows, slightly tilted for that casual just-tossed look. Keep other pillows simple and solid-colored so the hat stays the undisputed star.
Why It Photographs Beautifully The bold red-and-white shape is an instant focal point — every bed photo gets a clear Christmas signal. Kids wearing it as an actual hat (they will) make the best photos of all.
Pro Tip Check that the filling is washable or that the cover removes — a much-loved plush pillow will need a mid-December wash. Air-dry to keep the hat’s flop intact.
Budget-Smart Swap Sew a simple cone from red fleece, stuff with polyfill, and add a white brim and pom — a 20-minute project that costs less than lunch.
16. Reindeer Antler Wall Hooks for Christmas PJs
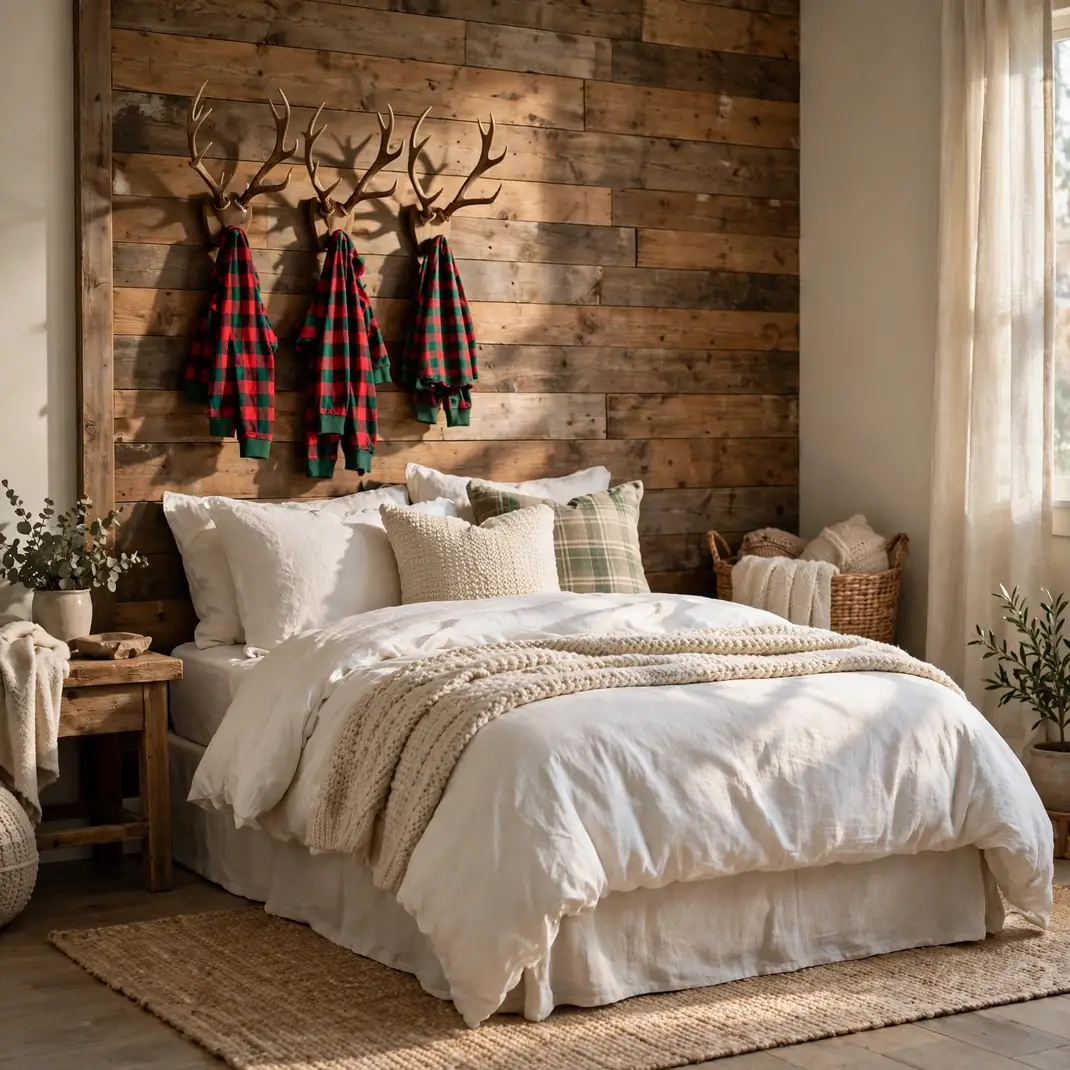
Bedtime routines need a little ceremony in December. A pair of reindeer antler wall hooks — the rustic wooden kind — mounted at kid height gives their Christmas pajamas an official parking spot. Hanging up the PJs becomes part of the nightly ritual instead of a floor-dwelling afterthought. It’s functional decor at its cutest, and the antlers look fantastic even in July if you leave them up.
How to Style It Mount two antler hooks side by side on the wall near the bed at your child’s shoulder height — one for tonight’s PJs, one for the robe or tomorrow’s outfit. Hang the Christmas pajamas on them each morning so they’re “ready” by bedtime.
Why It Photographs Beautifully The antlers create a charming vignette — folded or hanging PJs on rustic antlers is the kind of detail shot that makes a room feel thoughtfully styled. Morning “getting dressed” photos write themselves.
Pro Tip Choose hooks with rounded, smooth antler tips and mount into a stud or with proper anchors — kids will hang, swing, and test these daily. Shoulder height keeps them reachable without climbing.
Budget-Smart Swap Twist antler shapes from brown pipe cleaners and mount on a painted wooden plaque — a fun kid craft that becomes the actual decor.
17. Plush Christmas Tree Floor Cushion for Story Time

December bedtime stories deserve special seating. A big floor cushion shaped like a Christmas tree — soft, squishy, and green — dragged next to the bed becomes the official story-time throne. Kids will claim it instantly and defend it fiercely. It’s decor by day (leaned against the bed, adorable) and the best seat in the house by night. Choose one big enough to actually sit on, not just look at.
How to Style It Lean the tree cushion against the side of the bed or a wall during the day as decor. At story time, pull it to the bedside or the reading spot — pair it with a small basket of Christmas books within arm’s reach.
Why It Photographs Beautifully A kid curled on a tree-shaped cushion, book in lap, is the December photo you didn’t know you needed. The tree shape reads clearly even in wide room shots.
Pro Tip Look for cushions with removable, washable covers — story-time snacks and tree cushions will meet, and it’s better to plan for it.
Budget-Smart Swap Two green throw pillows stacked and tied with ribbon approximate the tree triangle surprisingly well — call it the “abstract” version.
18. Felt Nativity Scene on the Dresser
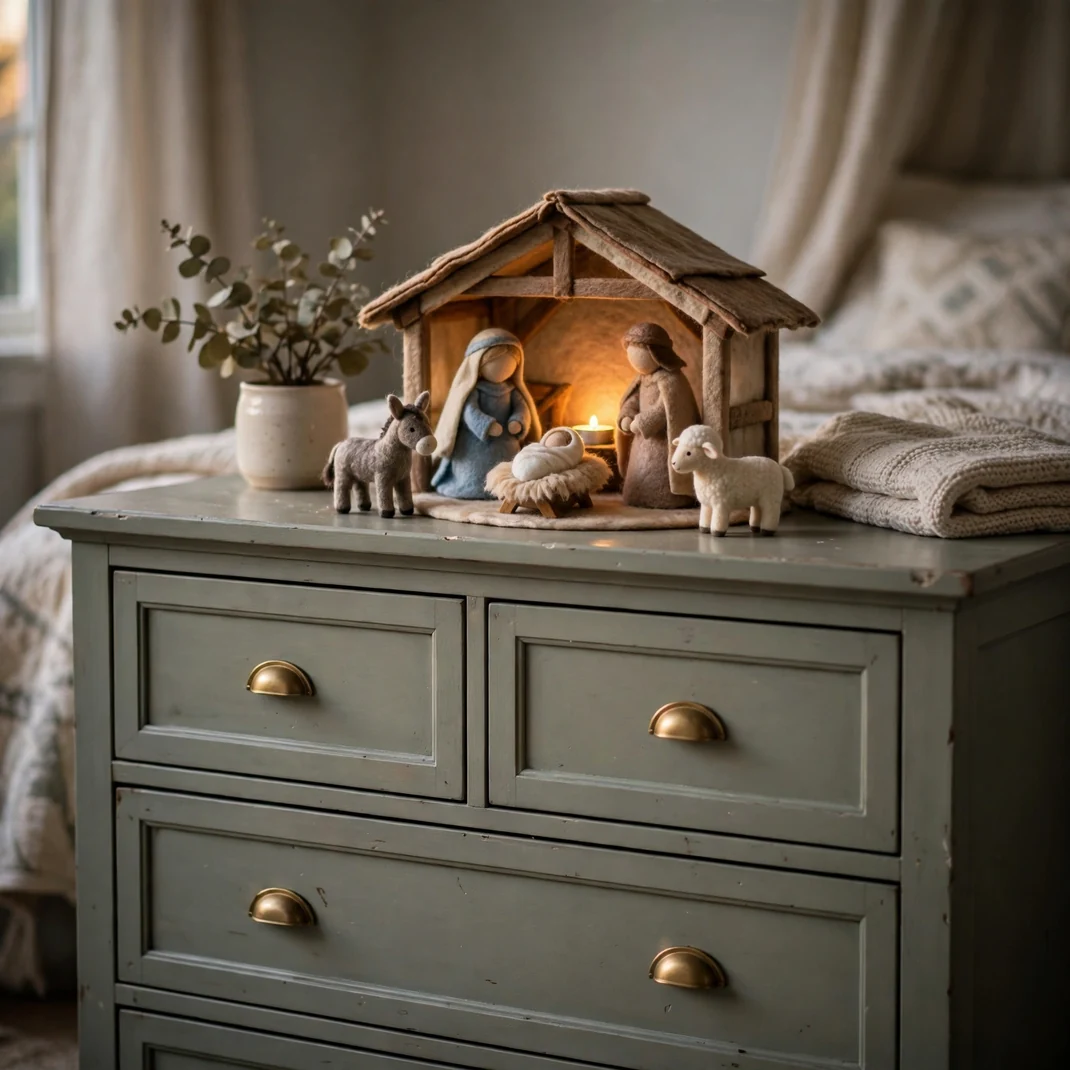
For families who celebrate the reason for the season, a soft felt nativity on the dresser lets kids hold the Christmas story in their hands — literally. Unlike fragile ceramic sets, felt figures survive being carried around, rearranged, and loved hard. Set up the stable scene together and let them move the figures through the story all month. It’s meaningful decor that doubles as quiet play.
How to Style It Arrange the felt stable and figures on the dresser or a low shelf — Mary, Joseph, baby Jesus, animals, and a star above. Leave space around it for little hands to rearrange the scene, and add a small battery tea light inside the stable for a gentle glow.
Why It Photographs Beautifully The soft textures and simple shapes photograph with a gentle, storybook quality. Candlelit (battery, of course) evening shots of the little stable are deeply peaceful images.
Pro Tip Keep the tiniest figures (looking at you, baby Jesus) in a small pouch when not in “scene mode” if you have toddlers — they’re exactly the size that ends up in mouths.
Budget-Smart Swap Printable nativity figures on cardstock, cut out and stood in slits cut into a cardboard stable, make a charming version for the cost of printing.
19. Personalized Name Ornament on the Bedroom Door
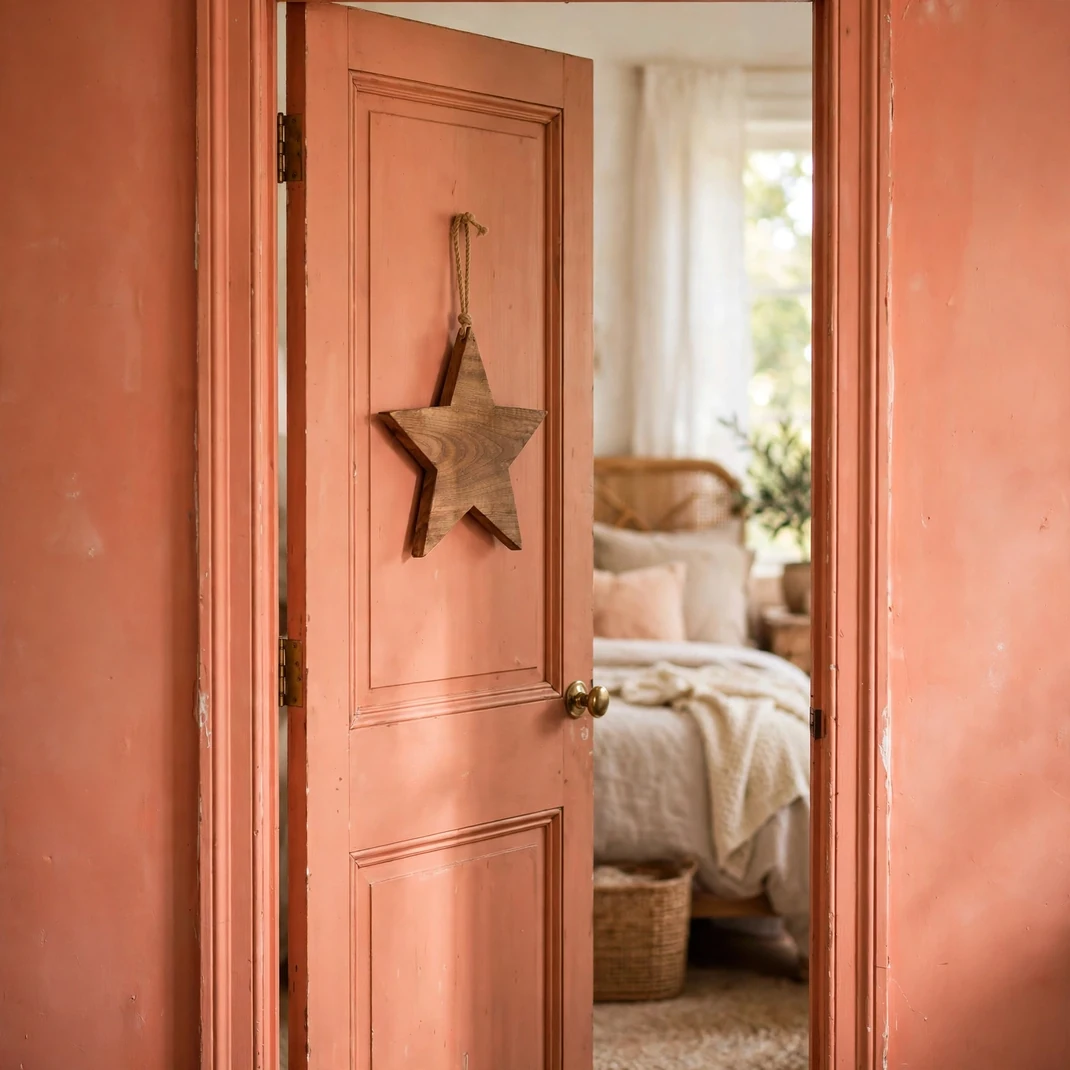
A big wooden ornament with their name on it, hung on the bedroom door, tells every kid that this Christmas is specifically theirs. It’s part nameplate, part decoration, and entirely beloved — kids point it out to every visitor with enormous pride. Personalize it with paint pens together as a craft, or order one engraved for a keepsake feel. Either way, it comes out every December for years.
How to Style It Hang a 6 to 8-inch wooden or shatterproof ornament — round or star-shaped — on the bedroom door at kid eye level using a ribbon loop over a removable hook. Add their name in bold lettering with the year, so it becomes a dated keepsake.
Why It Photographs Beautifully A name ornament on a door is a perfect “welcome to my room” photo — especially with the proud owner standing beside it, arms crossed, grinning. The personalization makes every photo feel like a time capsule.
Pro Tip Use shatterproof or wood — never glass — on a kid’s door. Doors get slammed, and a shattered ornament is a December memory nobody wants.
Budget-Smart Swap A plain wooden ornament blank and paint pens cost a few dollars total — and the handmade lettering, wobbles and all, is what makes it treasure-worthy.
20. Tiny Stockings for Their Stuffed Animals

If the kids get stockings, the stuffed animals get stockings — those are simply the rules. A row of tiny stockings hung along the bed frame or a low shelf, one per beloved plush, is the detail that makes kids gasp. Fill each with a single small treat or note on Christmas morning and watch them distribute the loot with intense seriousness. It’s silly, it’s sweet, and it’s the thing they’ll tell their own kids about.
How to Style It Hang 4 to 6 mini stockings (4 to 6 inches) in a row along the footboard, a bed rail, or a low wall shelf using small removable hooks. Match them to the room’s palette — or let each one be wildly different, the way kids prefer.
Why It Photographs Beautifully The tiny scale is inherently adorable — mini stockings photograph as pure whimsy. Christmas morning shots of kids “helping” their stuffed animals open stockings are legendary.
Pro Tip Keep the treats inside plush-safe: stickers, crayons, or a note “from Santa.” Avoid anything sticky or crumbly that will live in fur forever.
Budget-Smart Swap Mini stockings come in multi-packs for a few dollars at craft stores. Or sew simple ones from felt scraps in an afternoon — kids can help stuff them.
21. Kids’ Christmas Artwork Gallery Wall
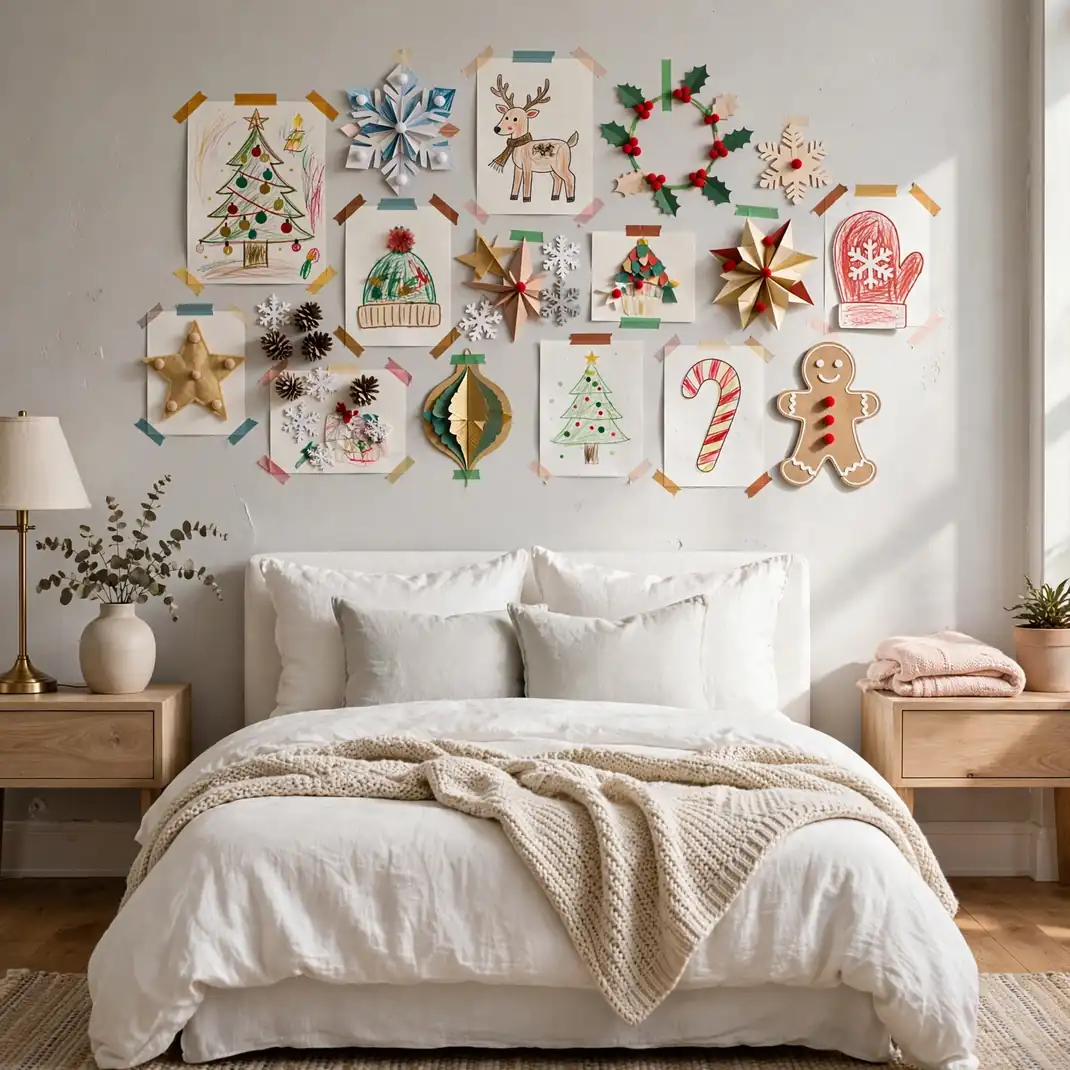
Forget store-bought art — the best December gallery wall is made of their own creations. Frame (or washi-tape) their Christmas drawings, handprint reindeer, and cotton-ball Santas in a cluster on the bedroom wall, and watch their chests puff out. It costs nothing, celebrates their creativity, and honestly looks fantastic — kid art has a color confidence no adult decorator can fake. Rotate in new pieces as the month goes on.
How to Style It Cluster 6 to 10 pieces on one wall using washi tape frames or lightweight clip frames — keep the arrangement loose and salon-style rather than grid-perfect. Mix drawings, paintings, and 3D crafts for texture, and leave one empty spot labeled “coming soon.”
Why It Photographs Beautifully A wall of kid art is bursting with color and personality — it photographs as pure joy. The artist posing proudly beside their gallery is a portrait you’ll treasure.
Pro Tip Photograph each piece before it goes up — you’ll want the digital archive when the paper originals inevitably get loved to pieces. Date the backs for future nostalgia.
Budget-Smart Swap Washi tape “frames” straight on the wall cost pennies and look intentionally crafty-chic. The art is free — it comes home in backpacks daily.
22. “Santa Stop Here” Door Hanger They Make Themselves
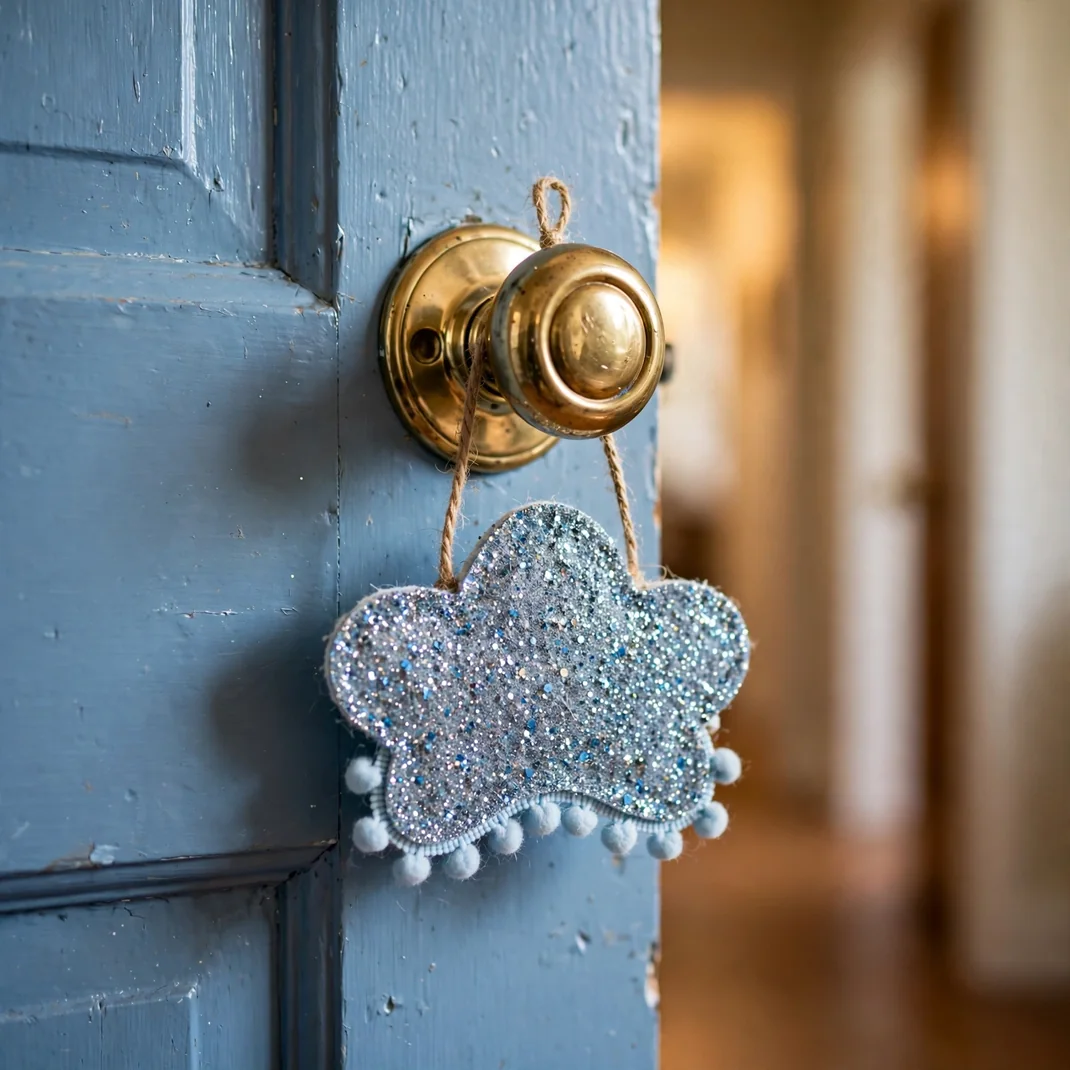
Every kid old enough to worry has worried: what if Santa can’t find my room? Solve it with a handmade “Santa Stop Here” door hanger, crafted together and hung with great ceremony on December 1st. Paint, glitter, stickers — the more gloriously overdone, the better. It hangs on the doorknob all month as both decor and deeply serious logistics. Santa, obviously, will see it.
How to Style It Cut a door-hanger shape from sturdy craft foam or wood, let the kids decorate it with paint, glitter glue, and stickers, and write “SANTA STOP HERE” in big letters with their name underneath. Hang it on the inside doorknob so it’s the last thing they see at bedtime.
Why It Photographs Beautifully The handmade hanger, in all its glittery glory, is a wonderful detail shot — and kids demonstrating it (“see, Santa can’t miss it”) make for the most earnest photos of the season.
Pro Tip Seal glitter projects with a clear spray or Mod Podge — otherwise you’ll be finding glitter in the bedding until approximately Easter. Craft foam is quieter than wood on a doorknob at midnight.
Budget-Smart Swap A paper plate with the center cut out makes a perfectly good door hanger base — decorate and go. Total cost: basically zero.
23. Mini Workbench “Santa’s Workshop” Corner
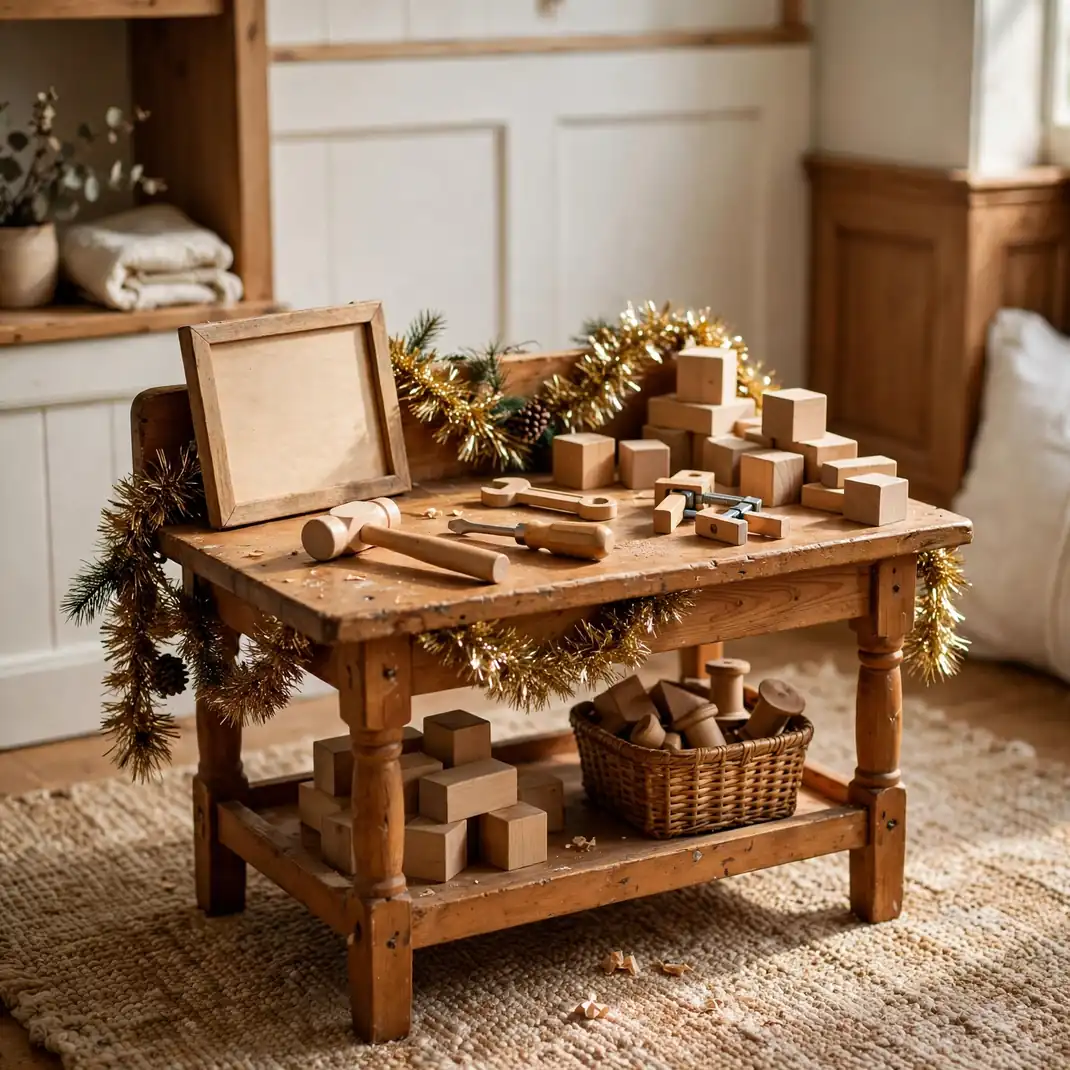
Turn a corner of the bedroom into Santa’s workshop with a small kid-sized workbench — and suddenly December play has a headquarters. Stock it with toy tools, wooden blocks “in production,” and a little sign, and kids will spend hours “building toys for the nice list.” It’s imaginative play dressed as Christmas decor, and it keeps the toy chaos beautifully contained in one magical zone. Santa’s helpers need a workspace too.
How to Style It Set a small workbench or play table in a bedroom corner with a “Santa’s Workshop” sign above it. Arrange toy tools on a pegboard or in cups, add a bin of wooden blocks as “toy parts,” and drape a short tinsel garland along the bench’s front edge for festivity.
Why It Photographs Beautifully Kids “at work” in their workshop — tongue out in concentration, tiny hammer in hand — are storytelling photos at their finest. The little sign and organized tools make the corner look like a real miniature world.
Pro Tip Anchor the workbench to the wall with anti-tip straps — kids lean, climb, and test furniture in ways engineers never imagined. Keep small parts in bins if toddlers share the room.
Budget-Smart Swap A cardboard box “workbench” with drawn-on tools delights kids just as much for exactly one December. Upgrade to wood when the tradition sticks.
The most magical kid Christmas bedrooms aren’t the most styled ones — they’re the ones kids get to touch, rearrange, and live in. Pick the setups that match your child’s age and imagination, build a few together, and let December do the rest. These are the rooms they’ll describe to their own children someday, right down to the tiny stockings on the stuffed animals.





One Comment