25 DIY Halloween Decor Ideas to Craft This Season
The best Halloween decor is the kind you make yourself, and this season’s craft list is all about projects that look genuinely beautiful, not just handmade. These twenty-five DIY ideas use simple materials, think pumpkins, clay, tin cans, book pages, and yarn, and each one is designed to earn its place in a styled home. Every idea is unique to this list, so craft through them knowing nothing here repeats.
1. Drill Patterned Pumpkin Luminaries
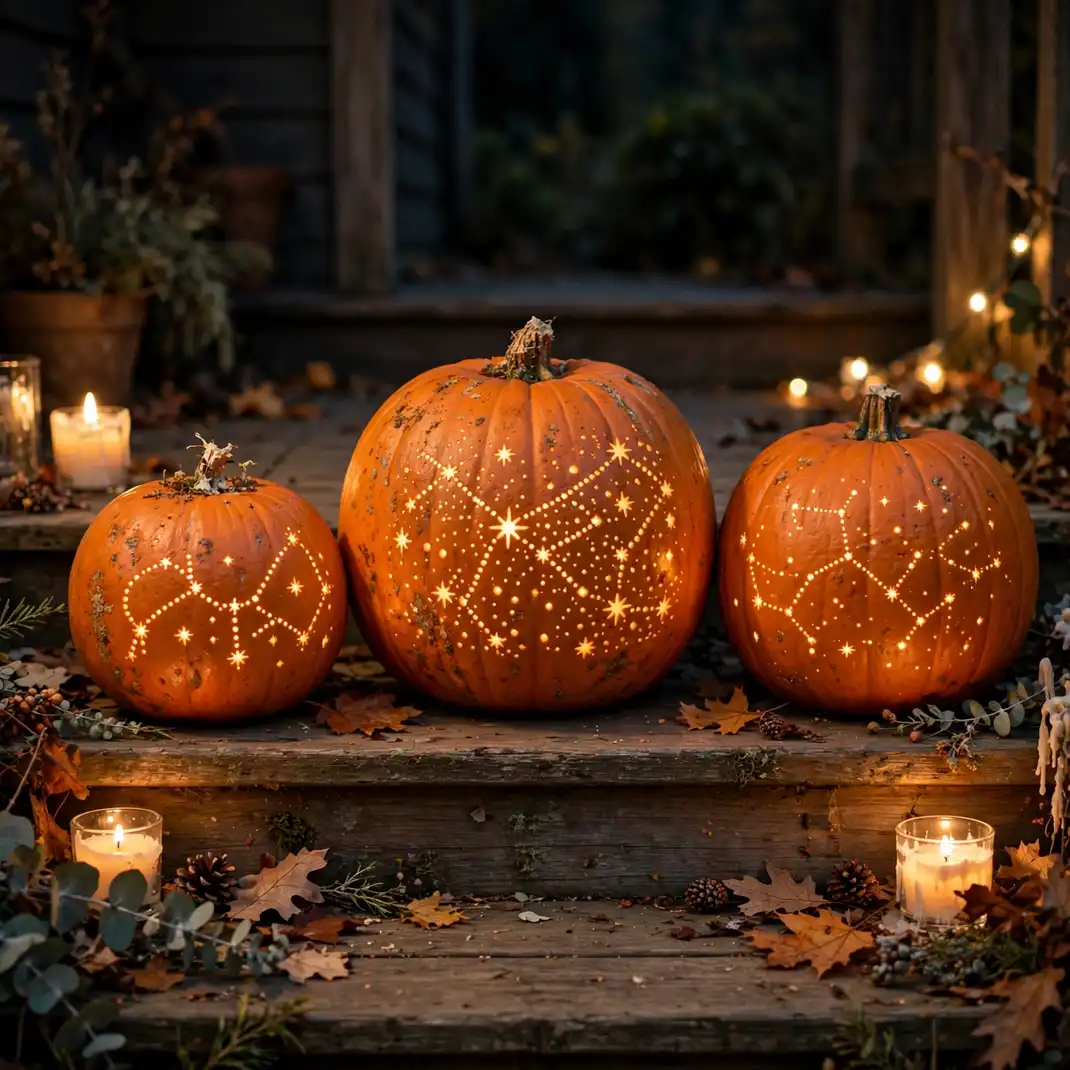
A power drill turns an ordinary pumpkin into a glowing constellation: drill small holes in dotted spirals, stars, or geometric bands, and the light inside shines through in perfect pinpricks. Unlike carved faces, drilled patterns look modern and intricate, and the technique works on real or craft pumpkins alike. Line three of them down the porch steps for a professional-looking light installation.
How to Style It: Sketch your pattern in chalk first, drill with a 1/8-inch bit for fine dots and a 1/4-inch bit for accents, and light each pumpkin with a warm LED candle.
Why It Photographs Beautifully: The drilled dots create a starry-night effect that photographs like a high-end lighting fixture.
Pro Tip: Drill from the outside in with the pumpkin on a towel; drilling from inside out tears the skin around each hole.
Budget-Smart Swap: Practice the pattern on one small pumpkin before committing to the big porch showpiece.
2. Drape a Cheesecloth Ghost Garland
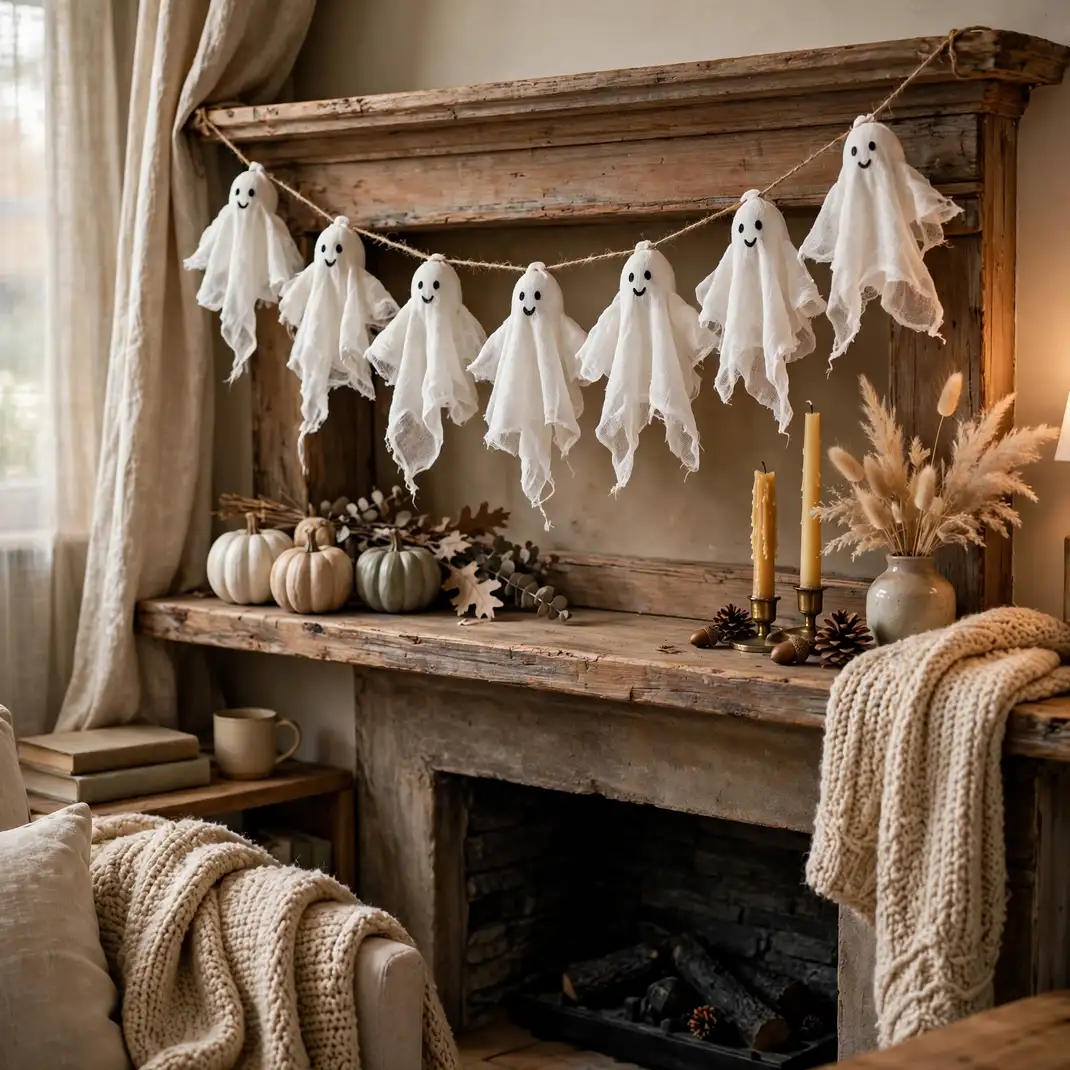
Cheesecloth ghosts strung along a garland are the lightest, airiest Halloween craft you can make: tiny foam balls wrapped in draped cheesecloth, tied with twine, and hung in a row. They drift in the slightest breeze and look handmade in the most charming way. Hang the garland across a mantel, a window, or the front porch beam.
How to Style It: Make seven to nine ghosts, dot simple faces with a black fabric marker, and string them on jute twine with knots between each ghost.
Why It Photographs Beautifully: The translucent fabric layers photograph with a soft, ethereal quality that heavier crafts cannot match.
Pro Tip: Stiffen the cheesecloth with a light spray starch so the ghosts hold their drape instead of collapsing.
Budget-Smart Swap: White cotton scraps or old pillowcases cut into squares work just as well as new cheesecloth.
3. Fold Book-Page Pumpkins
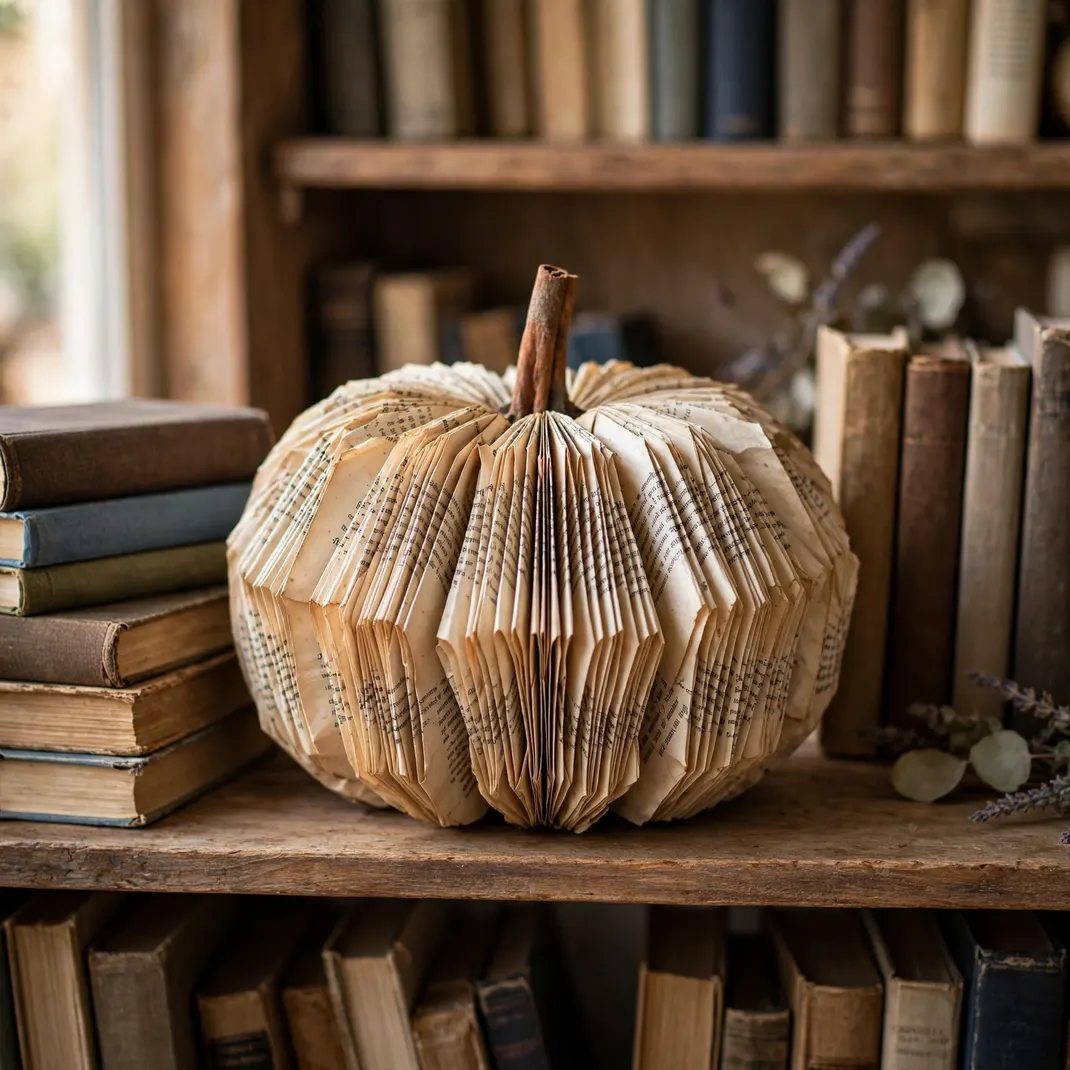
An old paperback becomes a sculptural pumpkin when you fold every page toward the spine and bind the covers together. The fanned pages form a perfect ribbed pumpkin shape, no carving and no mess, and a cinnamon stick stem finishes the illusion. It is the ideal craft for book lovers, and the paper pumpkin looks stunning on a shelf of real books.
How to Style It: Fold each page in half toward the spine, glue the front and back covers together, and hot-glue a cinnamon stick and a faux leaf at the top.
Why It Photographs Beautifully: The fanned page edges create a ribbed texture that catches light beautifully in close-up photos.
Pro Tip: Lightly sponge the page edges with diluted orange watercolor for a vintage pumpkin tint.
Budget-Smart Swap: Thrift-store paperbacks cost pennies and rescue books nobody wanted into something beloved.
4. Punch Tin-Can Lanterns
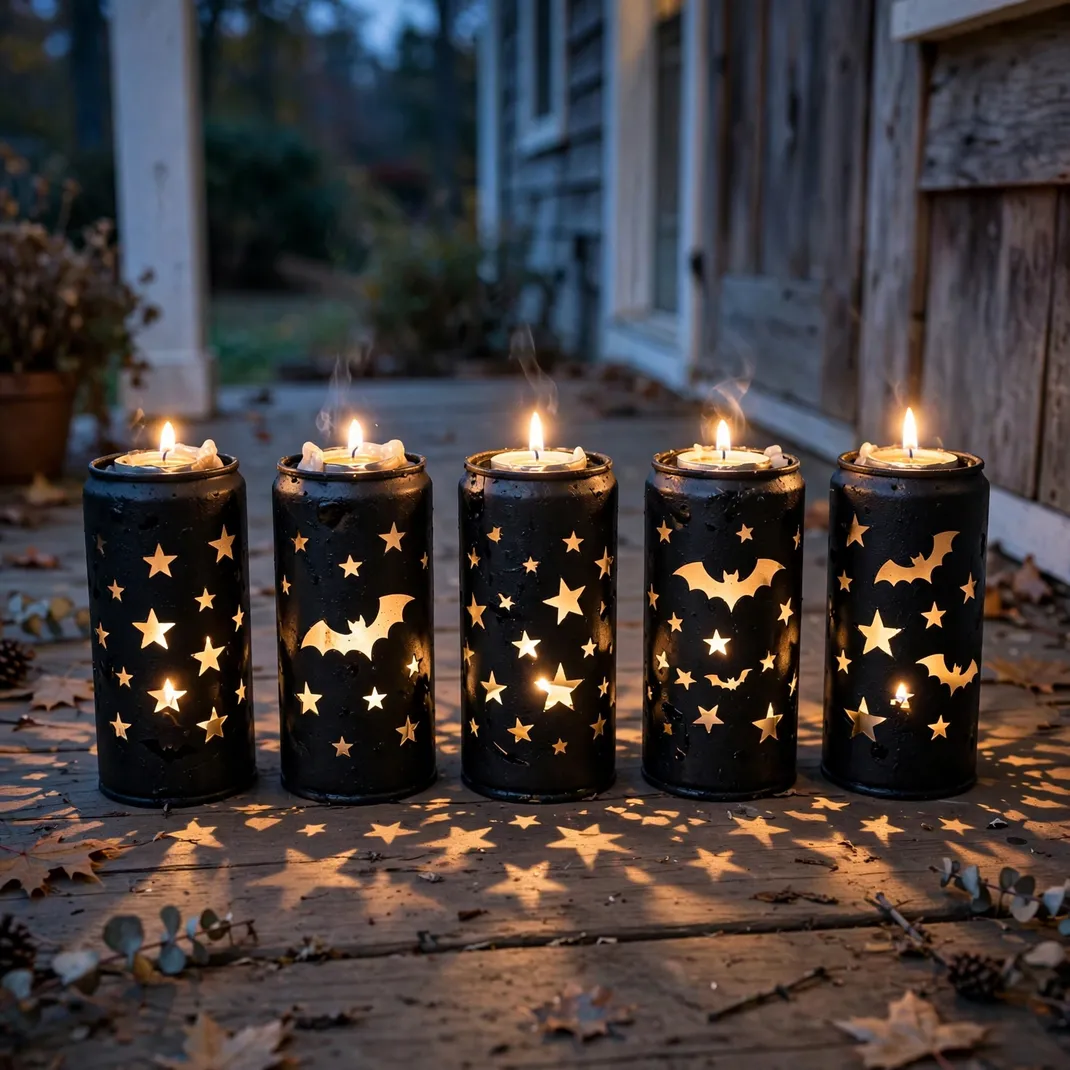
Empty tin cans become pierced-metal lanterns with a hammer, a nail, and a printed pattern: fill the can with water and freeze it first so the walls do not dent, then punch dots and shapes through the frozen-solid can. The lit lanterns throw patterned light across porches and patios like Moroccan lamps gone Halloween. They are nearly free and genuinely beautiful.
How to Style It: Tape a paper pattern of stars or bats around each frozen can, punch along the lines, then spray-paint the cans matte black.
Why It Photographs Beautifully: The punched patterns project giant soft shapes onto surrounding surfaces, doubling the visual impact.
Pro Tip: Freeze the cans solid overnight; half-frozen cans dent, fully frozen ones punch cleanly.
Budget-Smart Swap: Large coffee cans make dramatic oversized lanterns from something you were recycling anyway.
5. Sculpt Air-Dry Clay Ghost Tea Light Holders
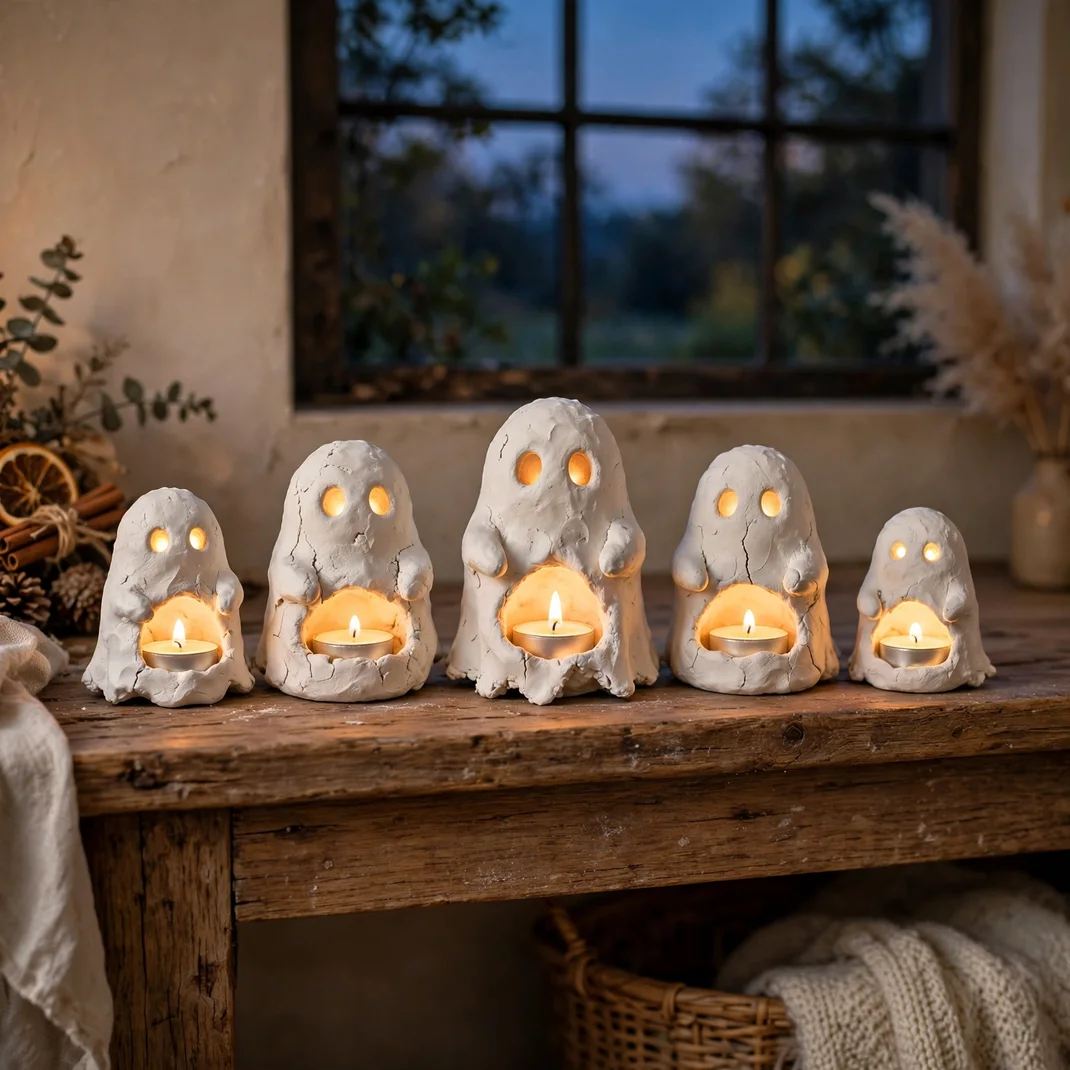
Air-dry clay draped over a small cup forms a ghost shape that hardens into a tea light holder: poke two eye holes, let it cure, and the LED candle inside glows through the eyes and the thin clay. Each ghost comes out slightly different, which is exactly the charm. Make a family of them in graduated sizes for the mantel.
How to Style It: Roll the clay to a quarter-inch thickness, drape it over an upside-down cup, trim the wavy hem, and poke eyes with a straw before drying.
Why It Photographs Beautifully: The glowing eyes in the matte white clay make for irresistibly cute close-up shots.
Pro Tip: Use LED tea lights only; real flames heat the clay and can crack thin spots.
Budget-Smart Swap: One block of air-dry clay makes five or six ghosts, so a single purchase covers the whole mantel.
6. Wrap Yarn Balloon Pumpkins
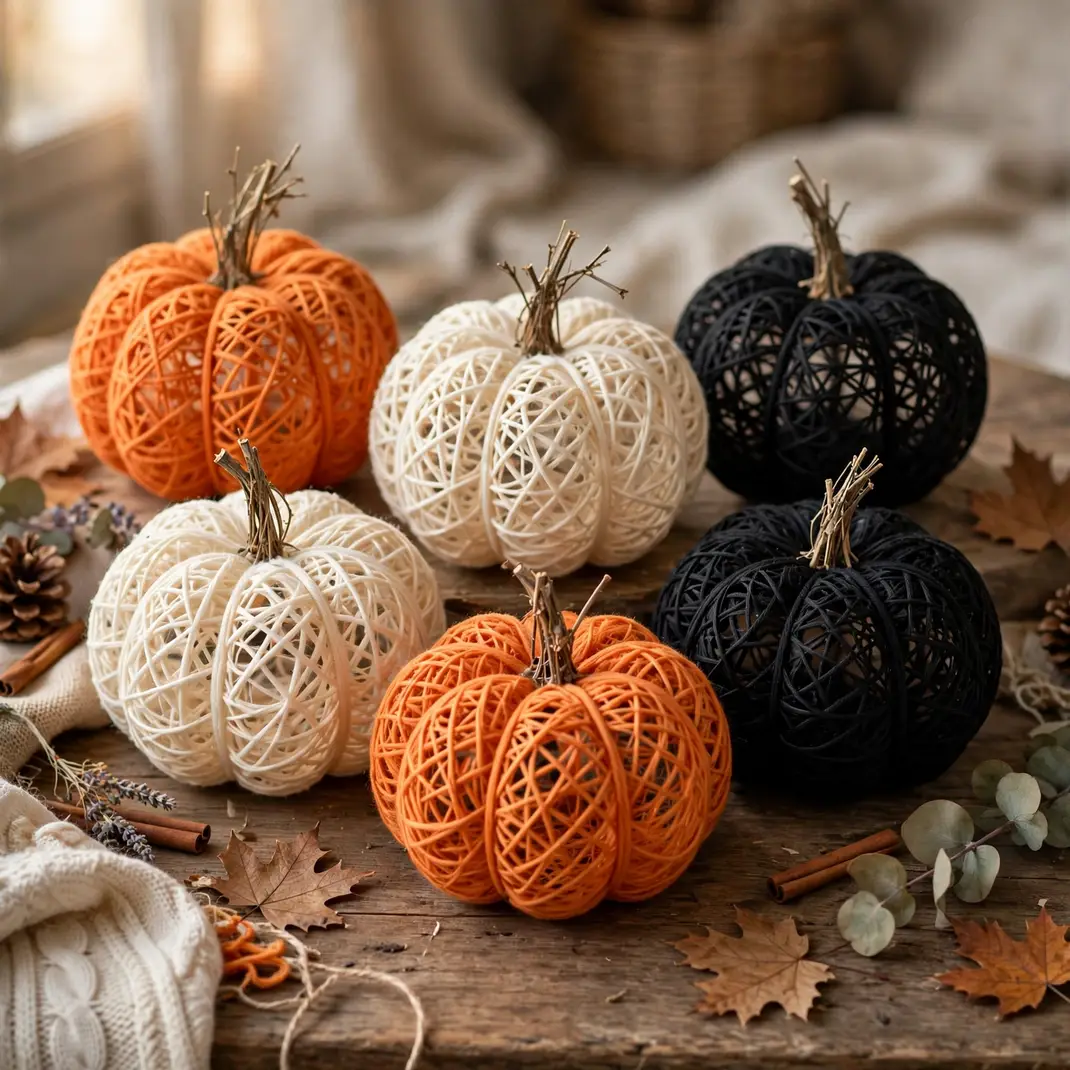
Orange yarn wrapped around an inflated balloon, stiffened with glue and popped once dry, leaves a hollow yarn pumpkin that is light as air and endlessly versatile. Make them in orange, cream, and black, and scatter them across mantels, tables, and porch steps. They never rot, weigh nothing, and store flat in a shoebox.
How to Style It: Wrap the yarn in crisscross layers over a glue-soaked balloon, let it dry overnight, pop the balloon, and glue on a twig stem.
Why It Photographs Beautifully: The yarn’s woven texture gives the pumpkins a cozy, tactile quality that reads beautifully in flat-lay photos.
Pro Tip: Use slightly under-inflated balloons for a squat, realistic pumpkin shape rather than a perfect sphere.
Budget-Smart Swap: One skein of yarn makes four to five pumpkins, making this the cheapest pumpkin patch you will ever grow.
7. Build a Cardboard Haunted House Village
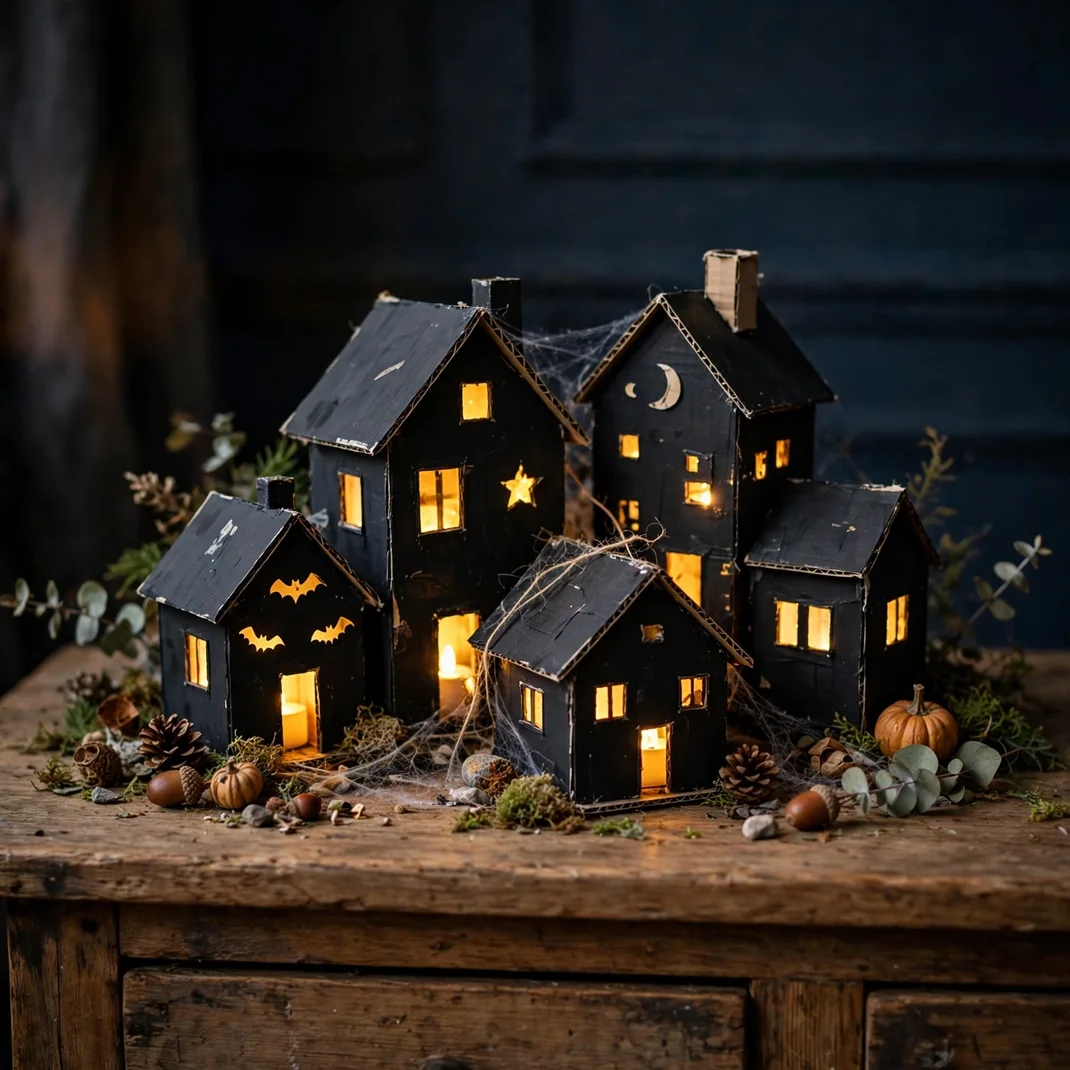
Cardboard boxes become a haunted village with black paint, cut-out windows, and LED tea lights inside: craft three or four houses at different heights, cluster them on the mantel or a sideboard, and light them from within. The glowing windows against the black cardboard look like a miniature haunted neighborhood. Kids can help build it, and adults will admire it.
How to Style It: Cut windows and doors before painting, vary the roof shapes, and set one tea light inside each house on a shared timer.
Why It Photographs Beautifully: The glowing windows in the dark village create a magical miniature world that photographs like a movie set.
Pro Tip: Add cotton-ball chimney smoke and paper bats on the roofs for the details that make people lean in closer.
Budget-Smart Swap: Shipping boxes and cereal boxes are the perfect free building stock; the paint does all the unifying work.
8. Wrap Mason Jars as Mummy Lanterns
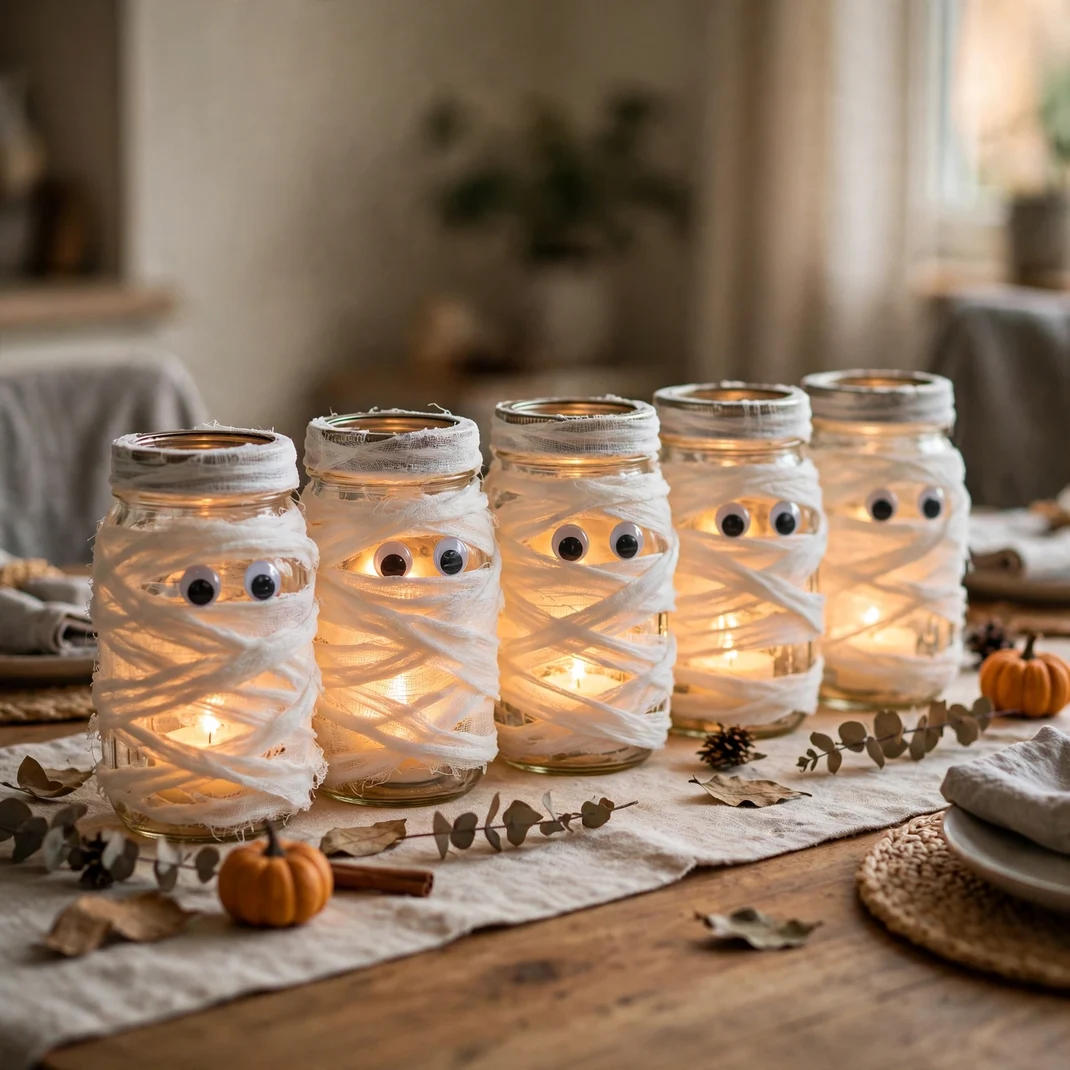
Mason jars wrapped in strips of gauze with googly eyes peeking through become mummy lanterns that glow with goofy charm. The gauze diffuses the candlelight into a soft mummy-white glow, and the eyes give each jar a personality. Line them down the center of the dining table or cluster them on the porch steps.
How to Style It: Wrap each jar in overlapping gauze strips secured with dabs of glue, leave a gap for two googly eyes, and drop in an LED tea light.
Why It Photographs Beautifully: The googly eyes catch the light and give every photo an instant focal point full of character.
Pro Tip: Vary the eye placement on each jar; perfectly aligned eyes look manufactured, crooked ones look alive.
Budget-Smart Swap: Draw the eyes with a black marker directly on the gauze if googly eyes are not on hand.
9. Weave Embroidery Hoop Spiderwebs
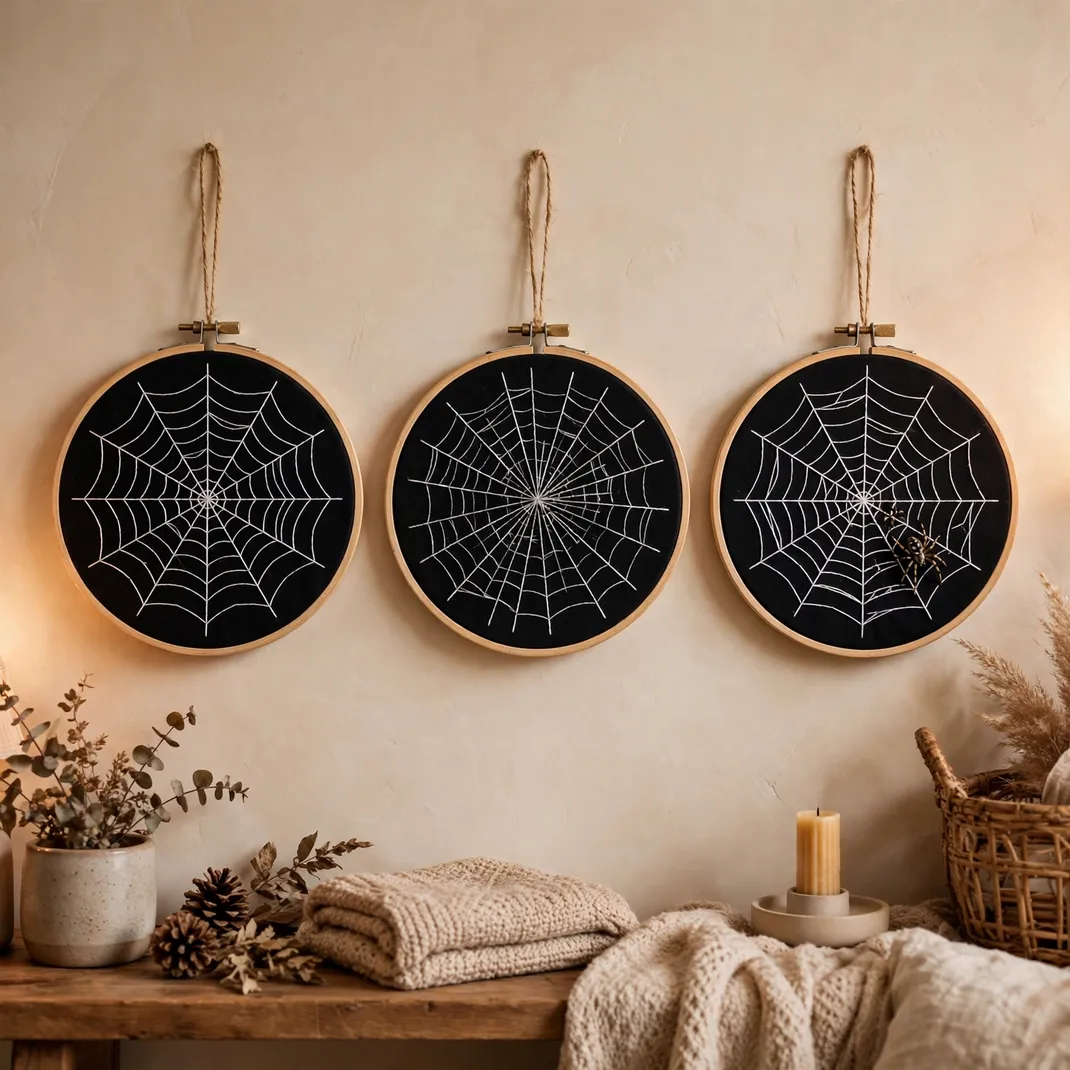
An embroidery hoop strung with white thread in a radial web pattern becomes delicate Halloween wall art that looks far more refined than its materials suggest. Add a small felt or plastic spider at the web’s edge, and hang two or three hoops in a gallery grouping. They bring Halloween to the walls without a single orange pumpkin.
How to Style It: Stretch black fabric in the hoop, stitch radial lines from the center, weave the spiral with white thread, and perch the spider off-center.
Why It Photographs Beautifully: The fine white web against black fabric photographs with crisp, graphic elegance.
Pro Tip: Use a tiny drop of glue at each radial anchor so the web stays taut for years, not weeks.
Budget-Smart Swap: One large hoop makes a statement piece; the trio is lovely but optional.
10. Sew No-Sew Fabric Pumpkin Pillows
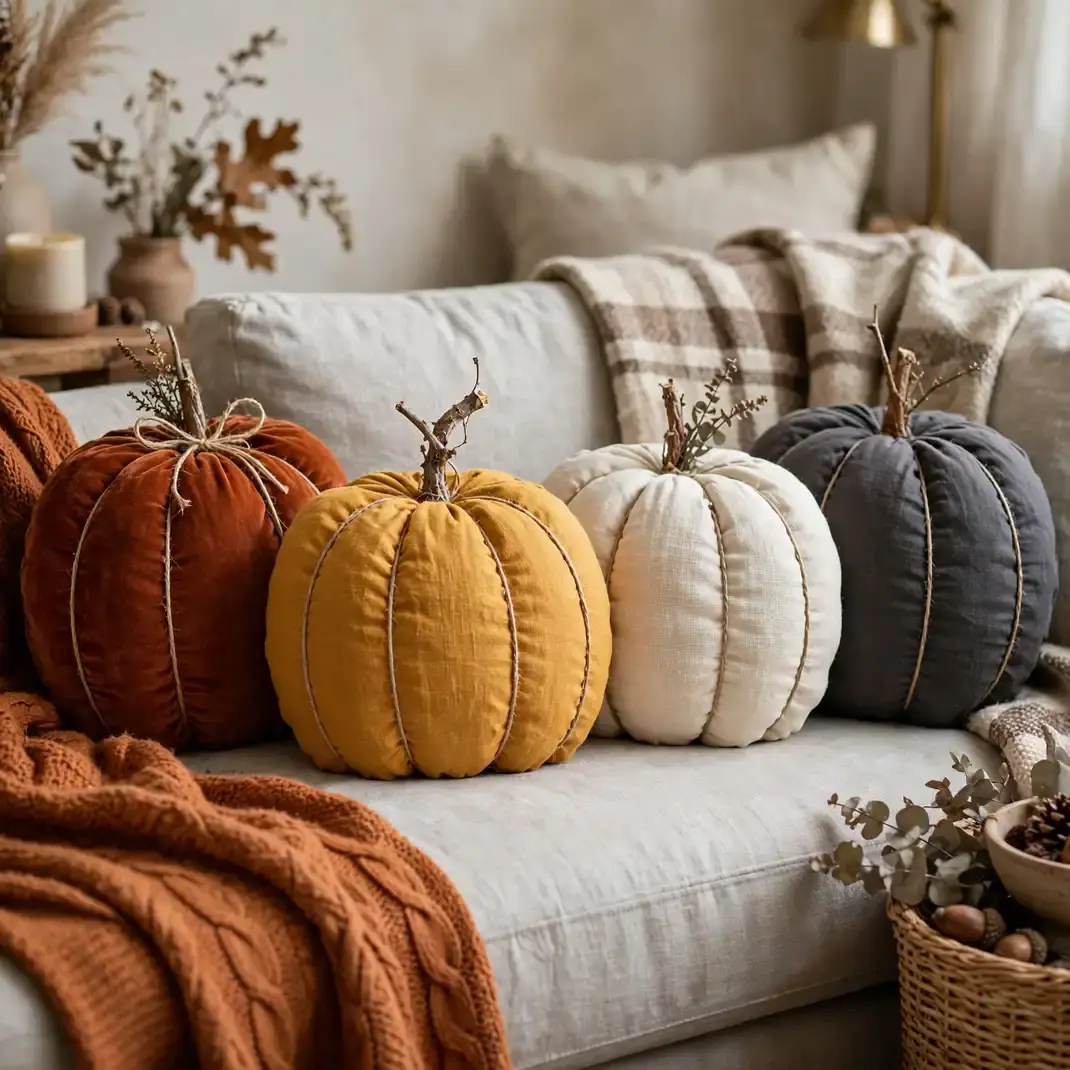
Fabric pumpkin pillows need no sewing at all: gather a circle of fall fabric around a ball of stuffing, cinch it with twine to form the ribs, and add a twig stem. In velvet or linen they look like boutique decor, and they are soft enough for the couch. Make them in rust, mustard, cream, and charcoal for a designer pumpkin patch indoors.
How to Style It: Cut an 18-inch fabric circle, run a gathering stitch around the edge by hand, stuff firmly, cinch, and wrap twine around the ball six times for ribs.
Why It Photographs Beautifully: The soft gathered fabric and defined ribs give these pumpkins a plush, high-end look in styled shelf photos.
Pro Tip: Velvet shows the ribs best; thin cotton collapses and hides the shaping you worked to create.
Budget-Smart Swap: Old sweaters and flannel shirts in fall colors make perfect pumpkin fabric for free.
11. Craft Pinecone Bats with Felt Wings
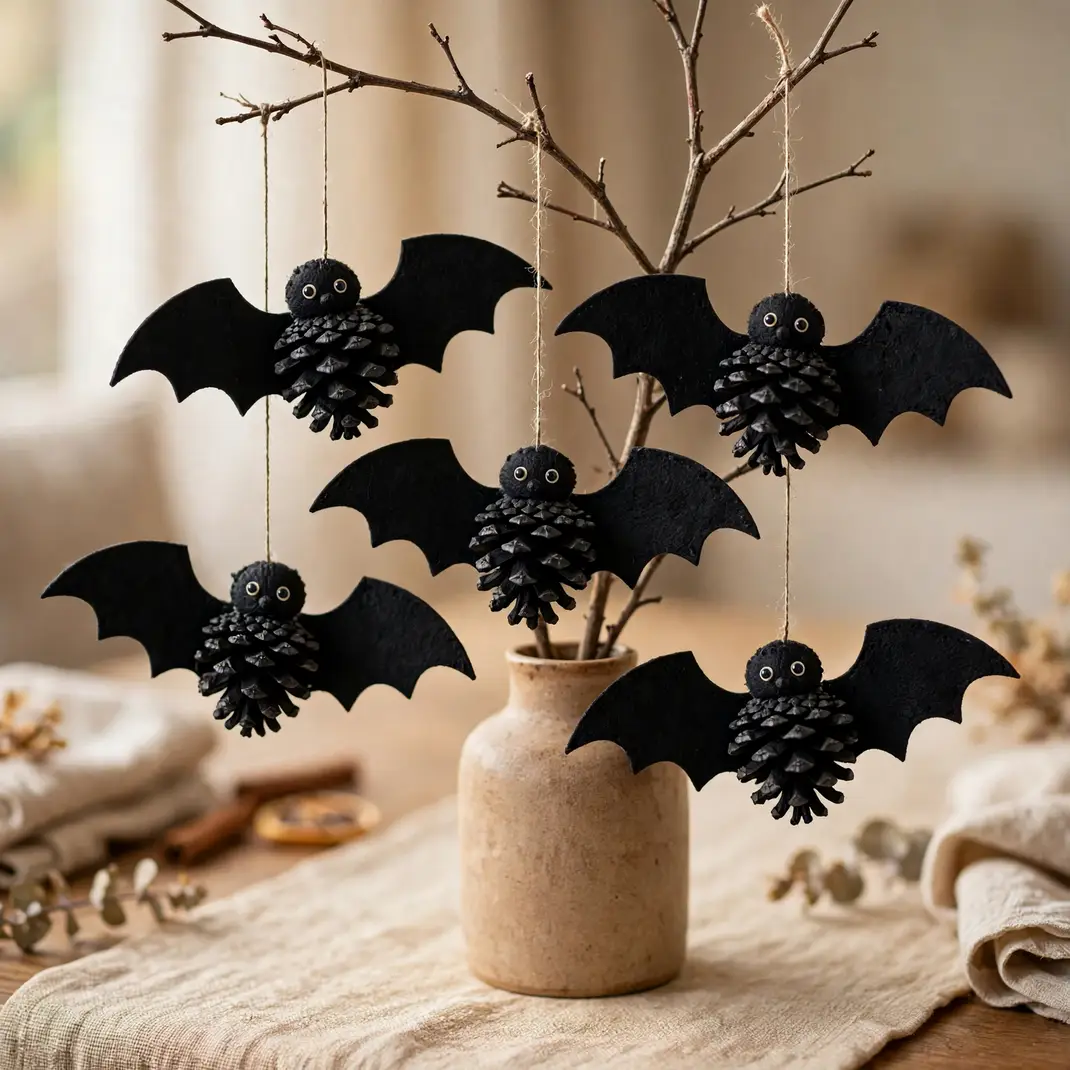
Pinecones become bats with nothing more than black paint and cut felt wings: paint the cone, glue on scalloped felt wings and tiny googly eyes, and hang the bats from branches or a mantel garland. They are a classic kids’ craft that actually looks good enough for the grown-up decor. Cluster them in odd numbers for the best effect.
How to Style It: Spray-paint pinecones matte black, cut wing shapes from black felt with scalloped bottom edges, and hang each bat by a thread from a bare branch.
Why It Photographs Beautifully: The natural pinecone texture under black paint gives the bats an organic, realistic quality.
Pro Tip: Bake gathered pinecones at 200°F for an hour first to kill bugs and open the scales.
Budget-Smart Swap: A nature walk supplies the pinecones; the only purchase is felt and paint.
12. Cut Paper Bag Luminaries
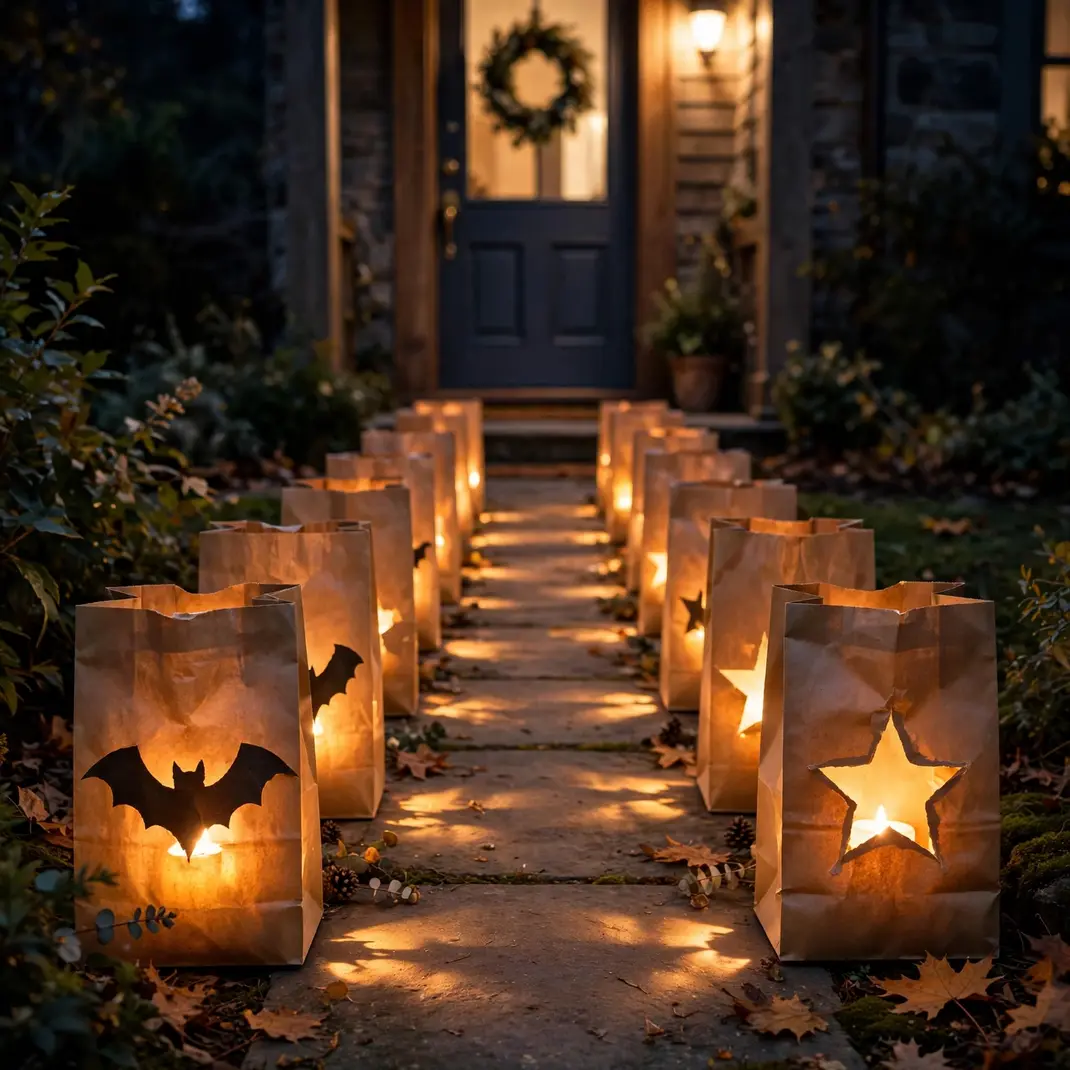
Brown paper bags with cut-out bats, moons, and stars become glowing luminaries that line walkways and porches for pennies. The cut designs glow when the LED candle inside lights them, and a whole street of them looks magical on Halloween night. This is the highest-impact, lowest-cost craft on the entire list.
How to Style It: Fold each bag flat, cut simple shapes through both layers with scissors, unfold, add a scoop of sand, and set in an LED tea light.
Why It Photographs Beautifully: Rows of glowing cut-out shapes photograph as a warm, welcoming river of light leading to the door.
Pro Tip: Keep the cut shapes in the top two-thirds of the bag so the sand-weighted base stays sturdy.
Budget-Smart Swap: Lunch-size bags make charming table luminaries from the same technique.
13. Weave a Corn Husk Harvest Wreath
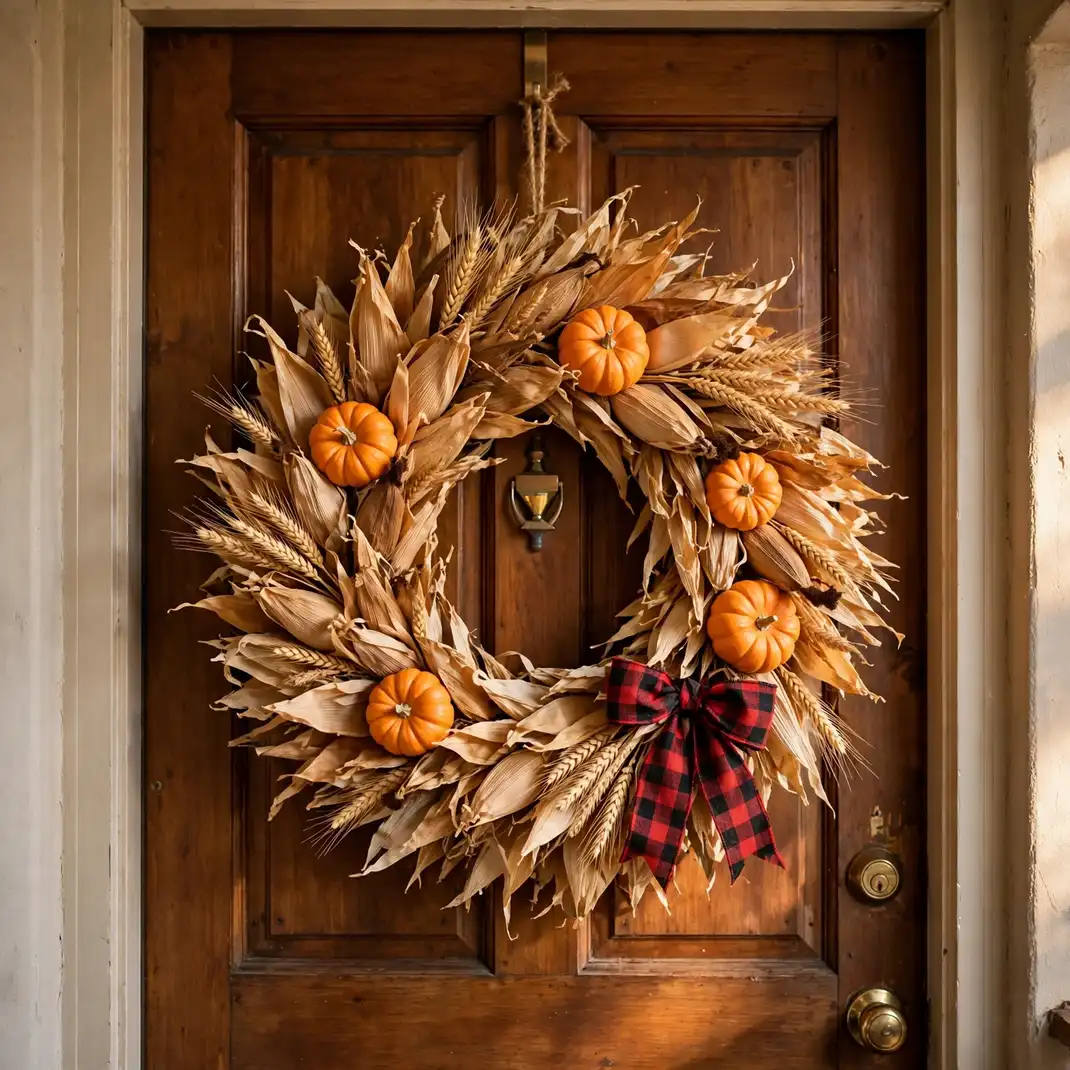
Dried corn husks layered around a wreath form create a ruffled, golden harvest wreath that is pure autumn craft tradition. Tuck in a few mini pumpkins, dried wheat, and a plaid bow, and it rivals anything from a home store. Hang it on the front door as the season’s handmade welcome.
How to Style It: Soak the husks until pliable, fold each over the wreath form, and pin with floral pins, overlapping generously for fullness.
Why It Photographs Beautifully: The layered golden husks catch sunlight with a warm, dimensional glow no artificial wreath matches.
Pro Tip: Mist the finished wreath with hairspray to keep the husks from becoming brittle and shedding.
Budget-Smart Swap: Save husks from fresh corn all summer; by October you will have wreath material for free.
14. Paint a Rock Ghost Family
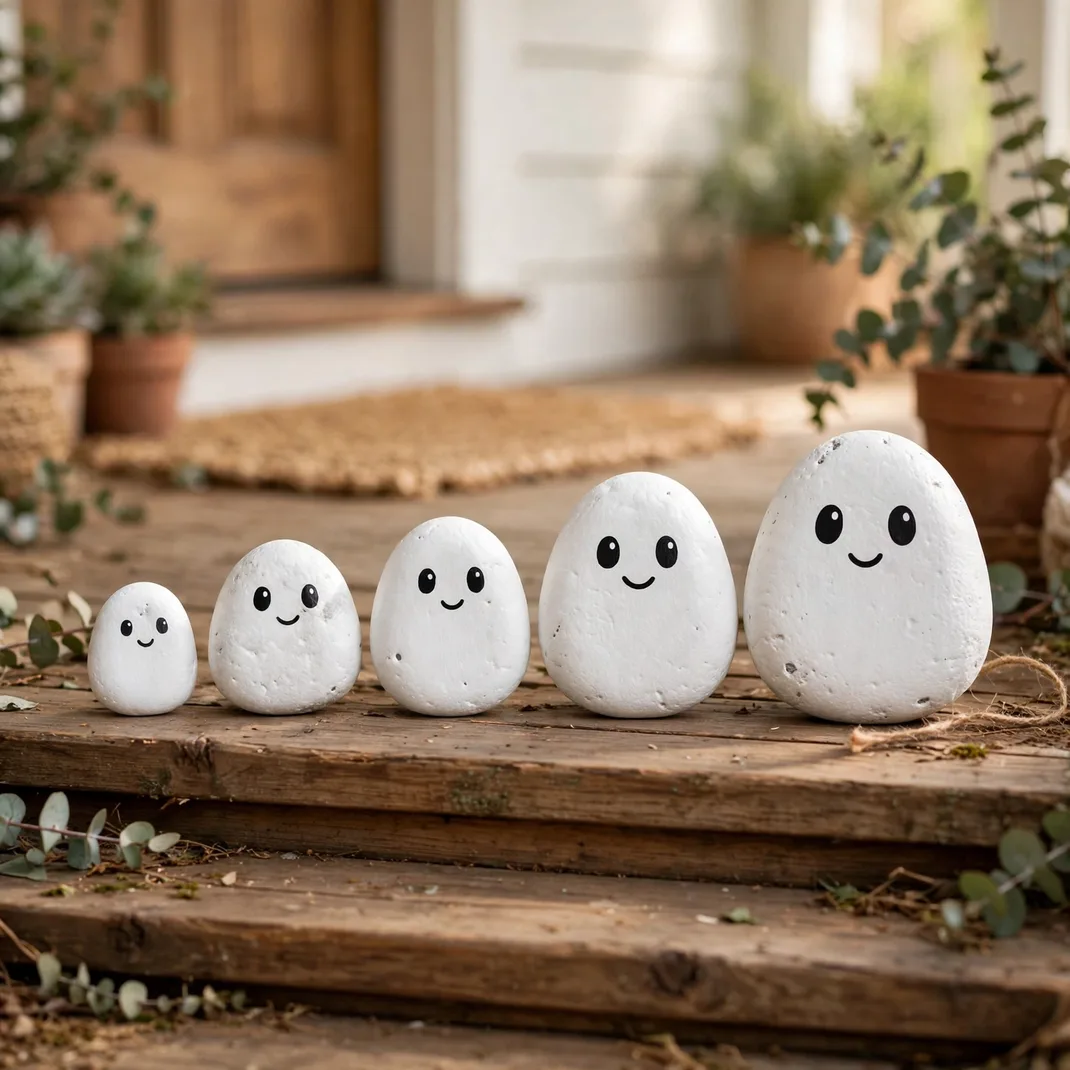
Smooth stones painted white with simple ghost faces become a ghost family when grouped in graduated sizes on the porch steps or in a garden bed. It is a ten-minute craft with paint pens that children adore, and a row of plump little ghosts has genuine charm. Seal them for outdoor use and they will haunt for years.
How to Style It: Paint smooth stones with two coats of white acrylic, draw oval eyes and mouths with a black paint pen, and seal with clear outdoor spray.
Why It Photographs Beautifully: The graduated sizes lined up like a family portrait make an irresistibly sweet photo.
Pro Tip: Give each ghost a slightly different expression; a surprised one and a sleepy one beat five identical faces.
Budget-Smart Swap: River rocks from the yard are free; a single set of paint pens covers dozens of ghosts.
15. Knot a Macramé Ghost Wall Hanging
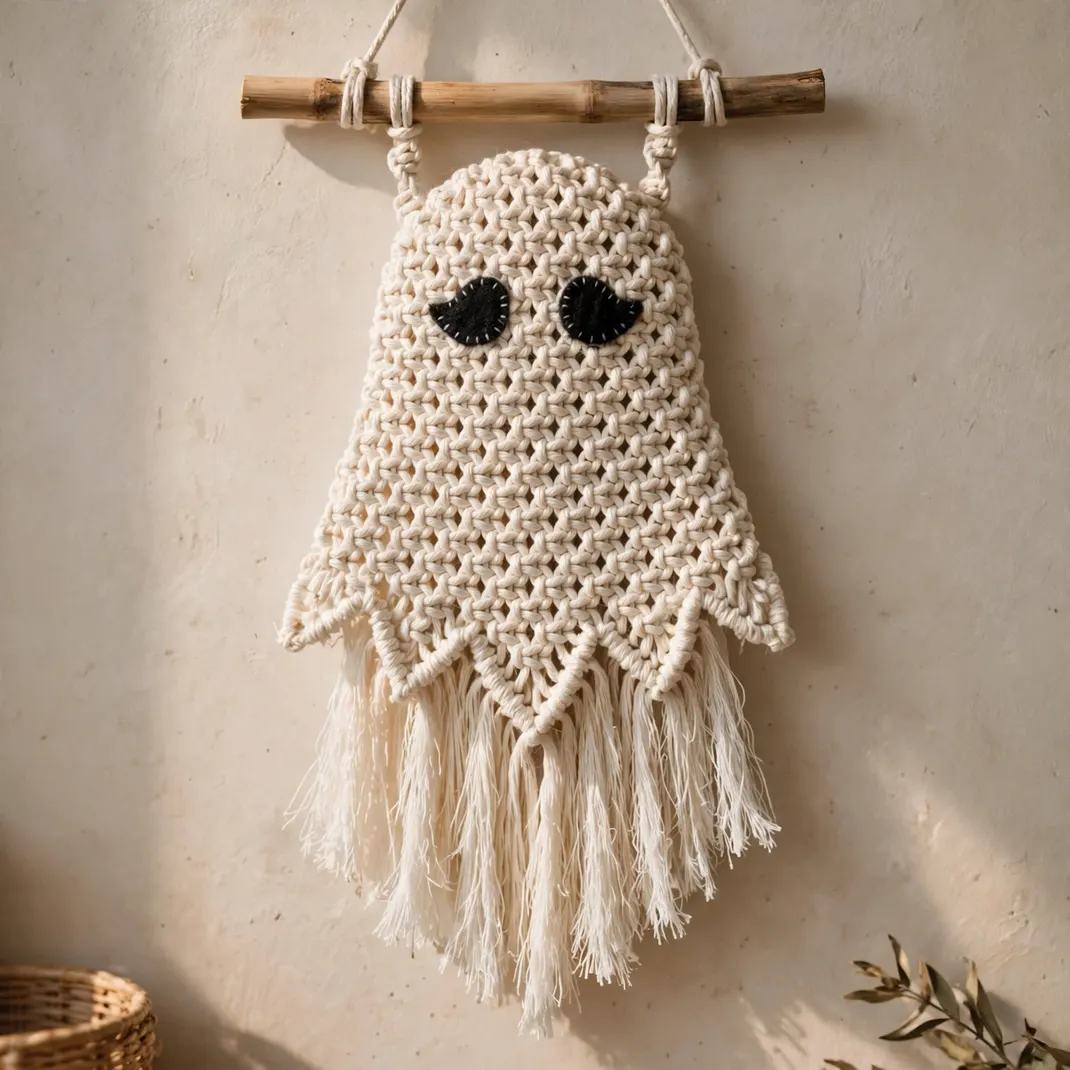
Macramé ghosts bring boho craft to Halloween: white cotton cord knotted into a ghost shape on a wooden dowel, with long fringe forming the wispy bottom and felt eyes completing the face. It is the rare Halloween craft that fits a modern neutral interior year-round in October. Hang it where the fringe can move freely.
How to Style It: Work square knots in decreasing rows to taper the ghost body, leave eight inches of fringe, brush it out, and trim into a soft V.
Why It Photographs Beautifully: The brushed fringe photographs with beautiful texture and movement, pure boho elegance.
Pro Tip: Steam the fringe after brushing to set the soft waves and stop the cords from re-twisting.
Budget-Smart Swap: Mop-head cotton cord from the hardware store is the same fiber at a fraction of craft-store prices.
16. Glue Wine Cork Mini Pumpkins
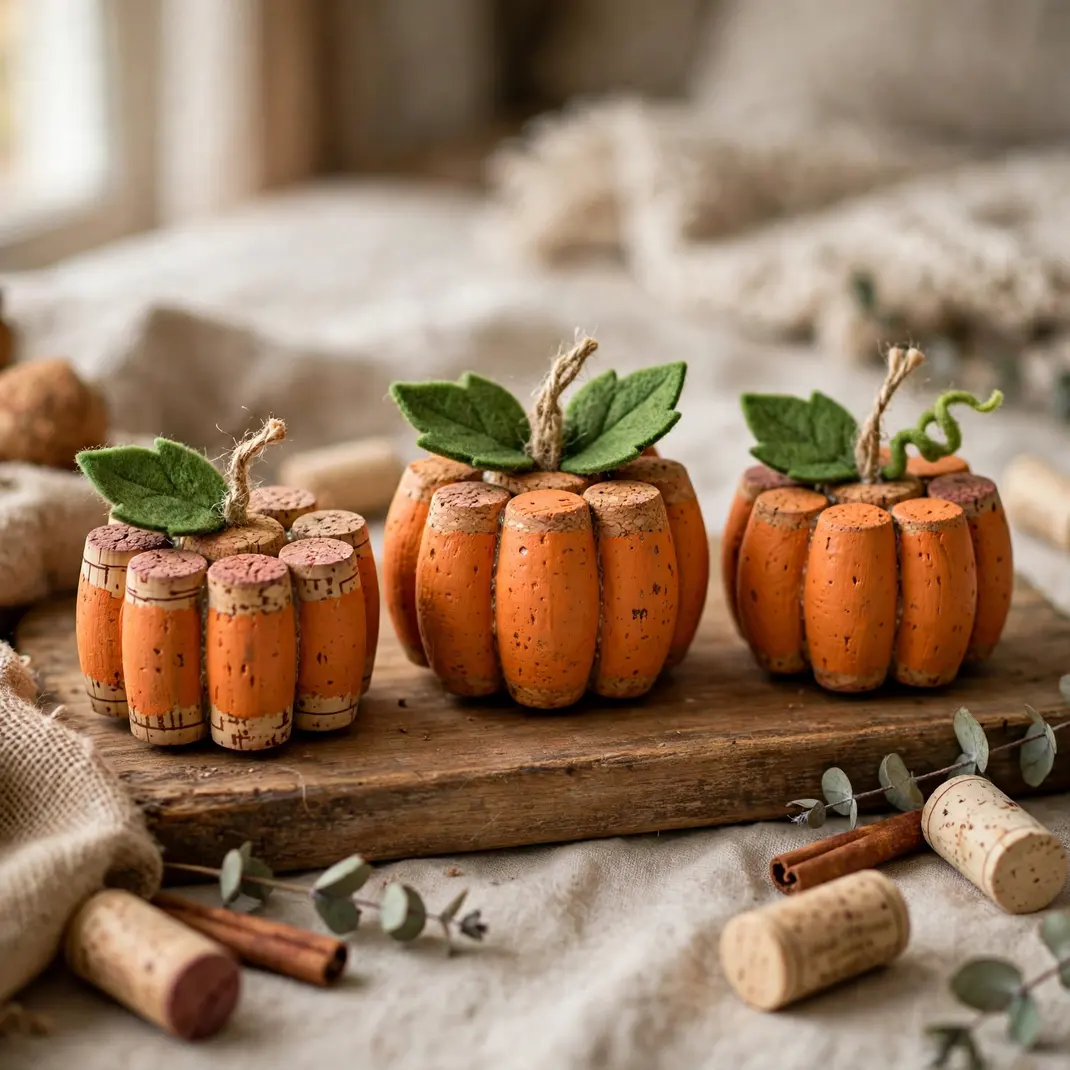
Wine corks glued into a pumpkin-shaped cluster make the cutest mini pumpkins on this list: arrange the corks in a rounded triangle, paint them orange, and top with a green felt leaf and twig stem. They are the perfect use for the cork collection in the kitchen drawer, and a trio of them fits anywhere a full pumpkin cannot.
How to Style It: Hot-glue corks in rows of five, four, three, and two into a pumpkin silhouette, paint with two coats of orange acrylic, and finish with the leaf and stem.
Why It Photographs Beautifully: The cork texture peeking through the paint gives these minis a rustic, tactile close-up appeal.
Pro Tip: Sand the cork ends lightly before painting so the acrylic grips instead of beading.
Budget-Smart Swap: Ask a local restaurant to save corks; most are happy to hand over a bag for free.
17. Hand-Paint a Wooden “Boo” Sign
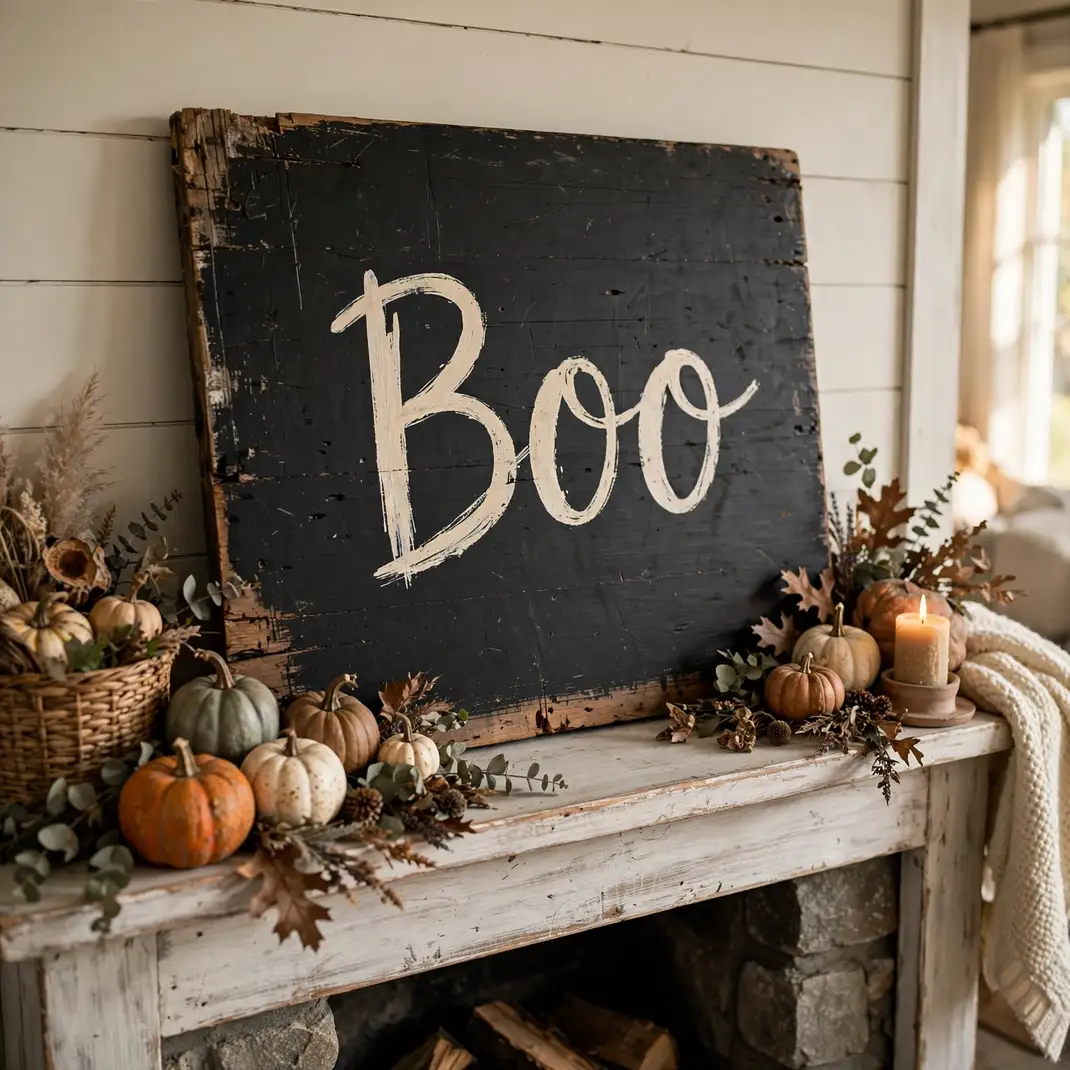
A reclaimed plank painted with a hand-lettered “Boo” in cream over matte black is farmhouse Halloween at its simplest and most effective. The beauty is in the imperfection: slightly wobbly letters prove it is handmade and give it the vintage sign character that printed versions lack. Lean it on the mantel or hang it by the door.
How to Style It: Sand the plank, paint it matte black, sketch the letters in chalk, and fill with cream acrylic using a small flat brush.
Why It Photographs Beautifully: The high-contrast black and cream lettering photographs crisp and graphic from across the room.
Pro Tip: Distress the edges with sandpaper after painting for an authentically aged sign, not a freshly painted board.
Budget-Smart Swap: Pallet wood and fence offcuts are free sign stock; the paint is the only cost.
18. Arrange a Dried Botanical Pumpkin Centerpiece
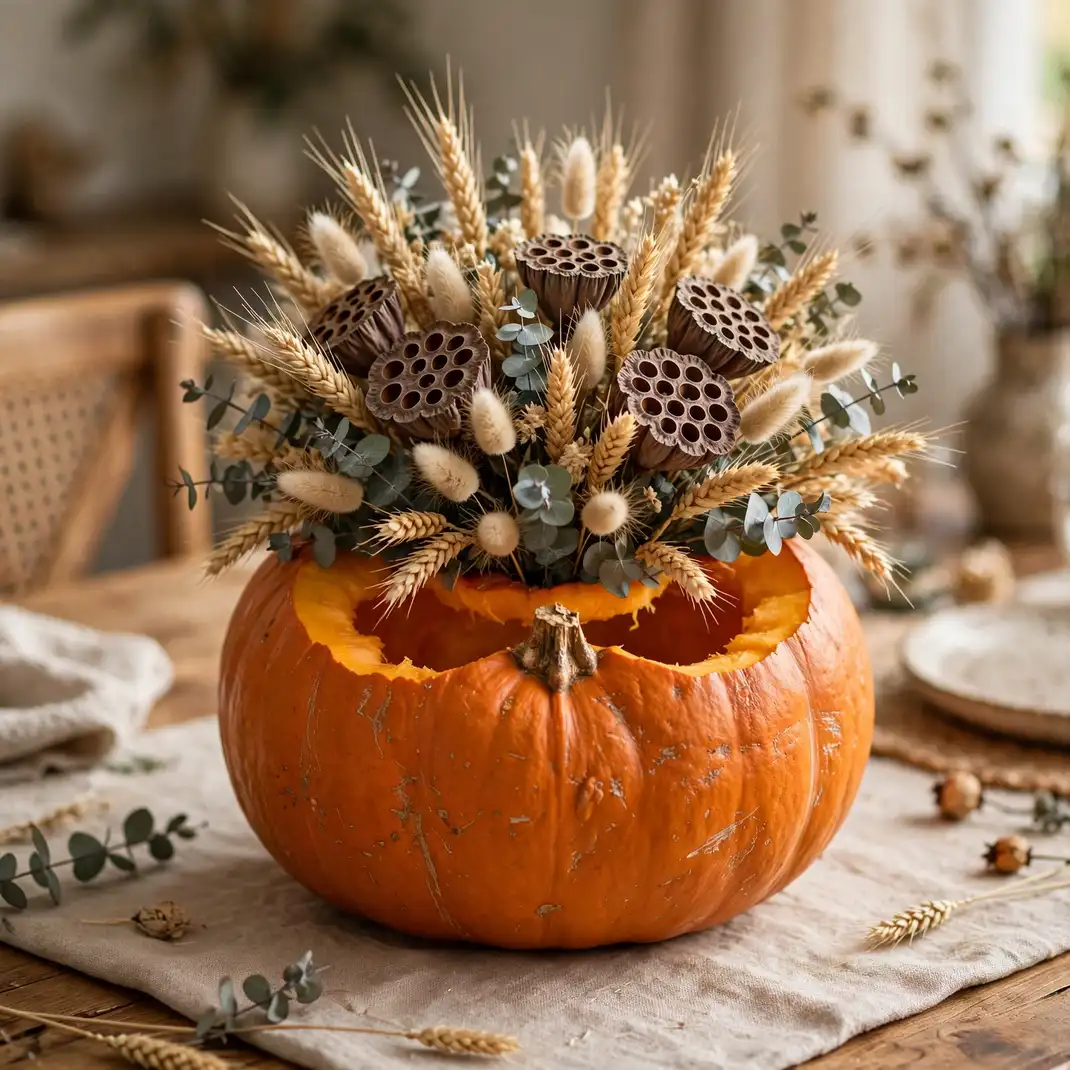
A hollowed pumpkin filled with dried wheat, bunny tails, preserved eucalyptus, and lotus pods becomes a centerpiece that outlasts every fresh arrangement on the table. The dried botanicals keep their shape for the whole season, and the pumpkin vessel ties it to Halloween without a single plastic spider. Build it the first week of October and enjoy it through Thanksgiving.
How to Style It: Set a jar of water-free floral foam inside the hollow pumpkin, arrange the tallest stems first, and work outward in a loose dome.
Why It Photographs Beautifully: The feathery dried textures against the smooth pumpkin create a rich contrast that looks professionally styled.
Pro Tip: Spray the inside of the pumpkin with a clear sealer to slow softening so the arrangement lasts the full season.
Budget-Smart Swap: Forage dried grasses and seed heads from fields and roadsides for a fully free filler.
19. Stake Black Cat Silhouette Plant Stakes
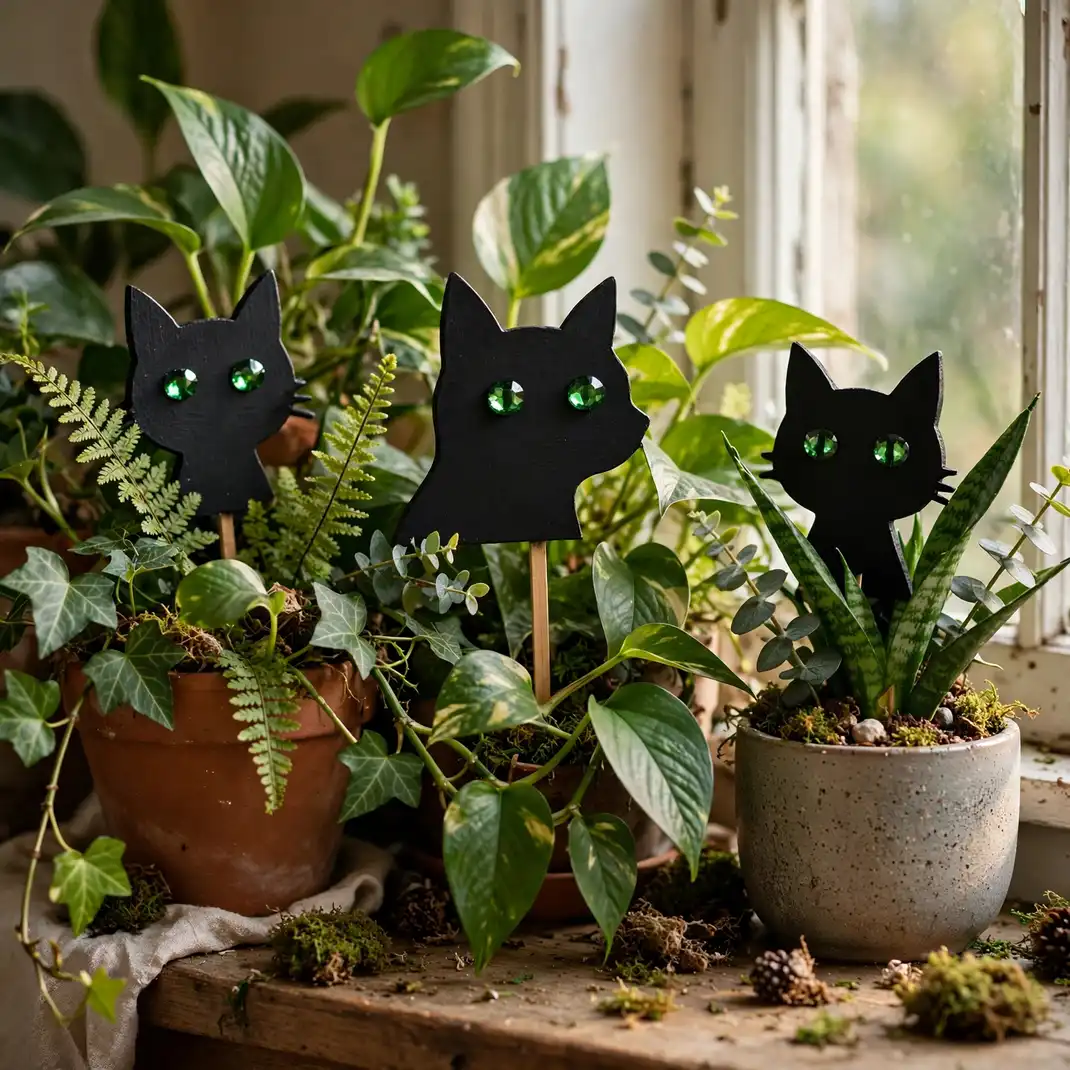
Black cat silhouettes cut from craft plywood and staked among the houseplants or garden beds add Halloween to the greenery in minutes. Paint them matte black, add green gem eyes, and push the stakes into pots and planters. They peek from the foliage like the house’s cats have multiplied for the season.
How to Style It: Trace a simple sitting-cat template onto thin plywood, cut with a jigsaw, paint black, glue on green gem eyes, and attach a dowel stake.
Why It Photographs Beautifully: The black silhouettes against green leaves create a striking graphic contrast in plant photos.
Pro Tip: Vary the cat poses: sitting, arching, and tail-up silhouettes look like a real clowder.
Budget-Smart Swap: Heavy black cardstock laminated with packing tape survives the season indoors for nearly nothing.
20. Float Tissue Paper Candle Lanterns
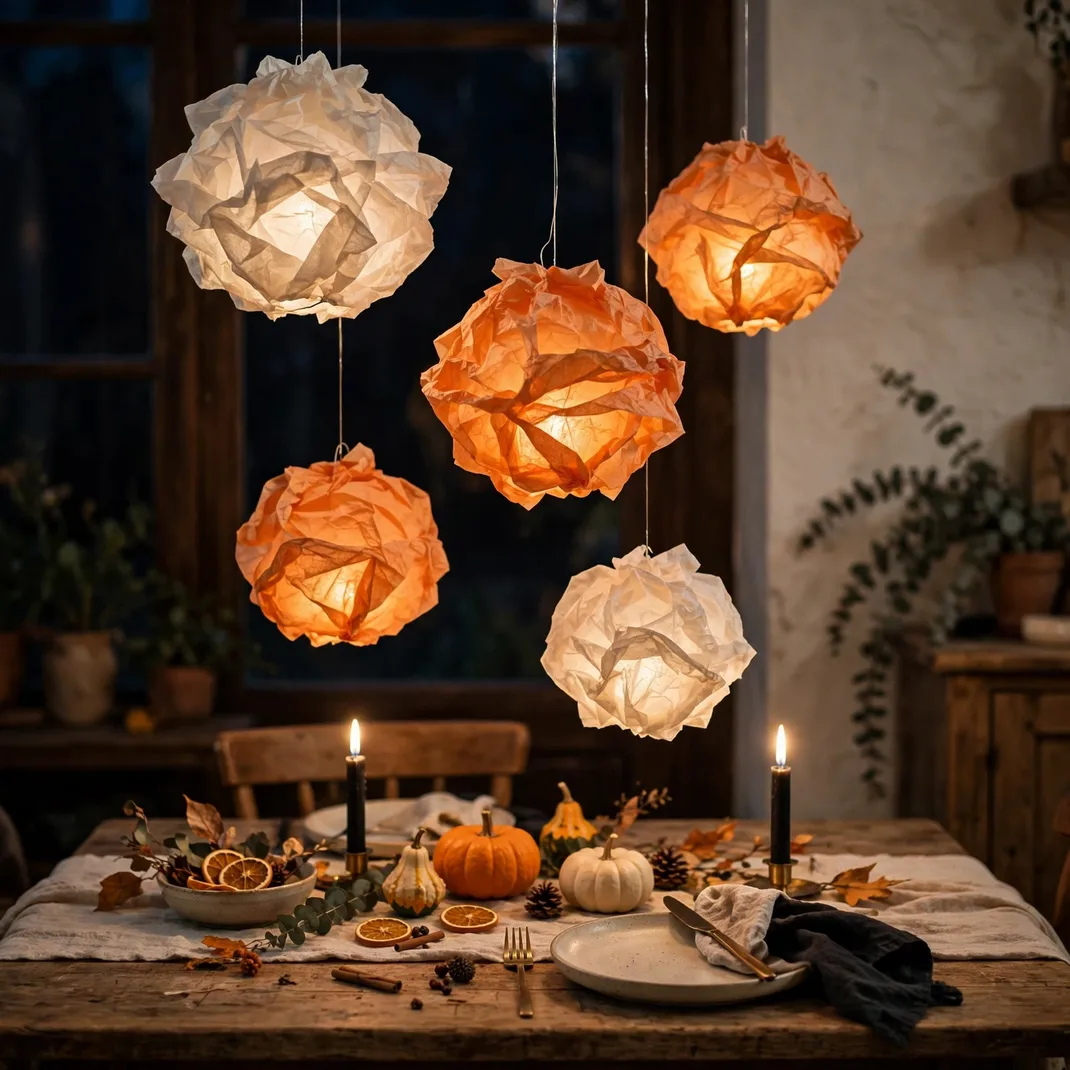
Tissue paper lanterns shaped like mini hot-air balloons float above the Halloween table when hung from the ceiling on fishing line: paste the tissue over a small balloon frame, light with an LED tea light inside, and they hover like a fleet of glowing spirits. They are ethereal, cheap, and unforgettable at a Halloween dinner party.
How to Style It: Brush diluted glue over tissue on a small inflated balloon, dry overnight, pop the balloon, and hang the shell at varied heights with an LED inside.
Why It Photographs Beautifully: The floating orbs of warm light photograph like a magical installation above the table.
Pro Tip: Use two layers of tissue; one layer tears, three layers block too much light.
Budget-Smart Swap: White and orange tissue from the dollar store makes a full fleet for the price of a coffee.
21. Fold Book-Page Bat Garland
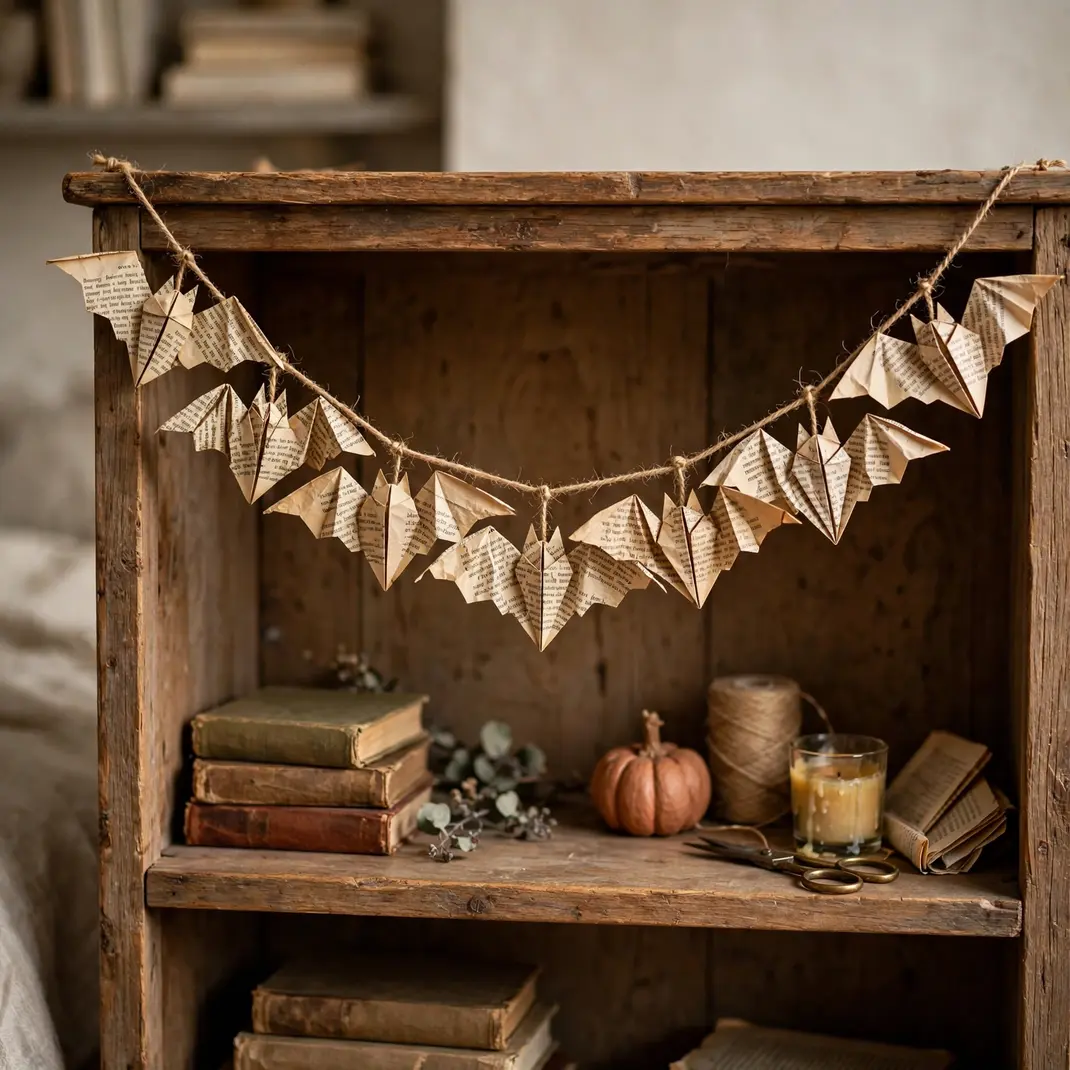
Old book pages folded into bat shapes and strung on twine make a literary Halloween garland with real character: the printed text shows on the wings, and the bats look like they flew out of a haunted library. It is the perfect companion to the book-page pumpkins from idea three, tying the room’s crafts together. Drape it across a bookshelf for the full effect.
How to Style It: Fold each page into a simple bat with accordion-folded wings, secure the body with a staple, and clip the bats along a length of twine.
Why It Photographs Beautifully: The visible text on the wings adds a layer of detail that rewards close-up photos.
Pro Tip: Use pages from the same book for a consistent typeface, or mix books for an eclectic ransom-note charm.
Budget-Smart Swap: The same thrift-store paperbacks from the pumpkin project supply endless bat material.
22. Build a Moss and Twig Tabletop Terrarium
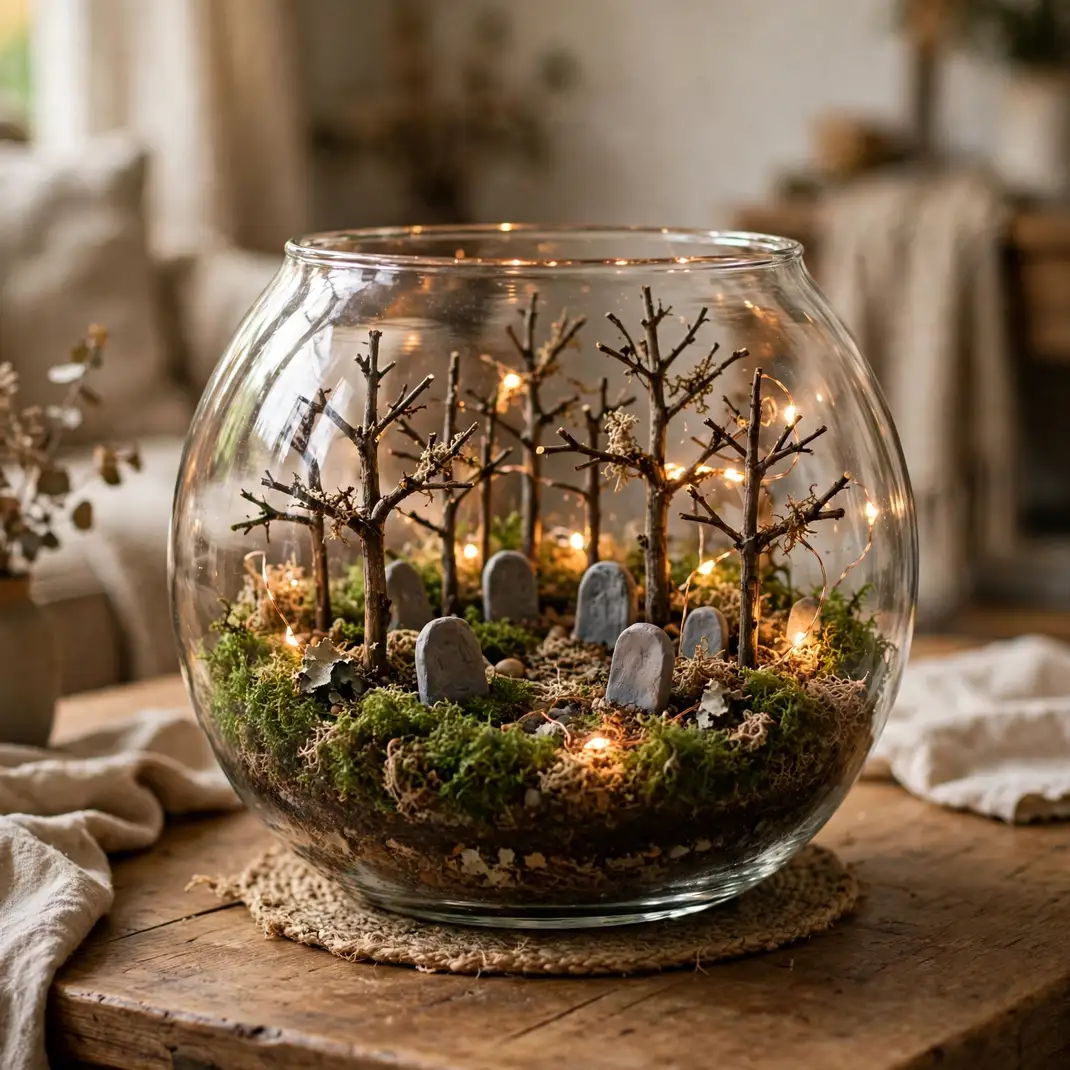
A glass terrarium layered with moss, twigs, and tiny handmade tombstones becomes a miniature haunted forest for the coffee table. Add a tiny skeleton or a battery fairy light string, and the little world glows from within. It is a craft, a centerpiece, and a conversation piece in one glass vessel.
How to Style It: Layer pebbles, soil, and sheet moss in a glass bowl, arrange twig trees and mini tombstones, and tuck in a string of warm fairy lights.
Why It Photographs Beautifully: The tiny scale against the glass creates a storybook world that looks enchanting in macro shots.
Pro Tip: Mist the moss lightly once a week; live moss keeps the terrarium fresh all season.
Budget-Smart Swap: A large glass mixing bowl works as the vessel if a proper terrarium is not on hand.
23. Paint Terracotta Pot Jack-o’-Lanterns
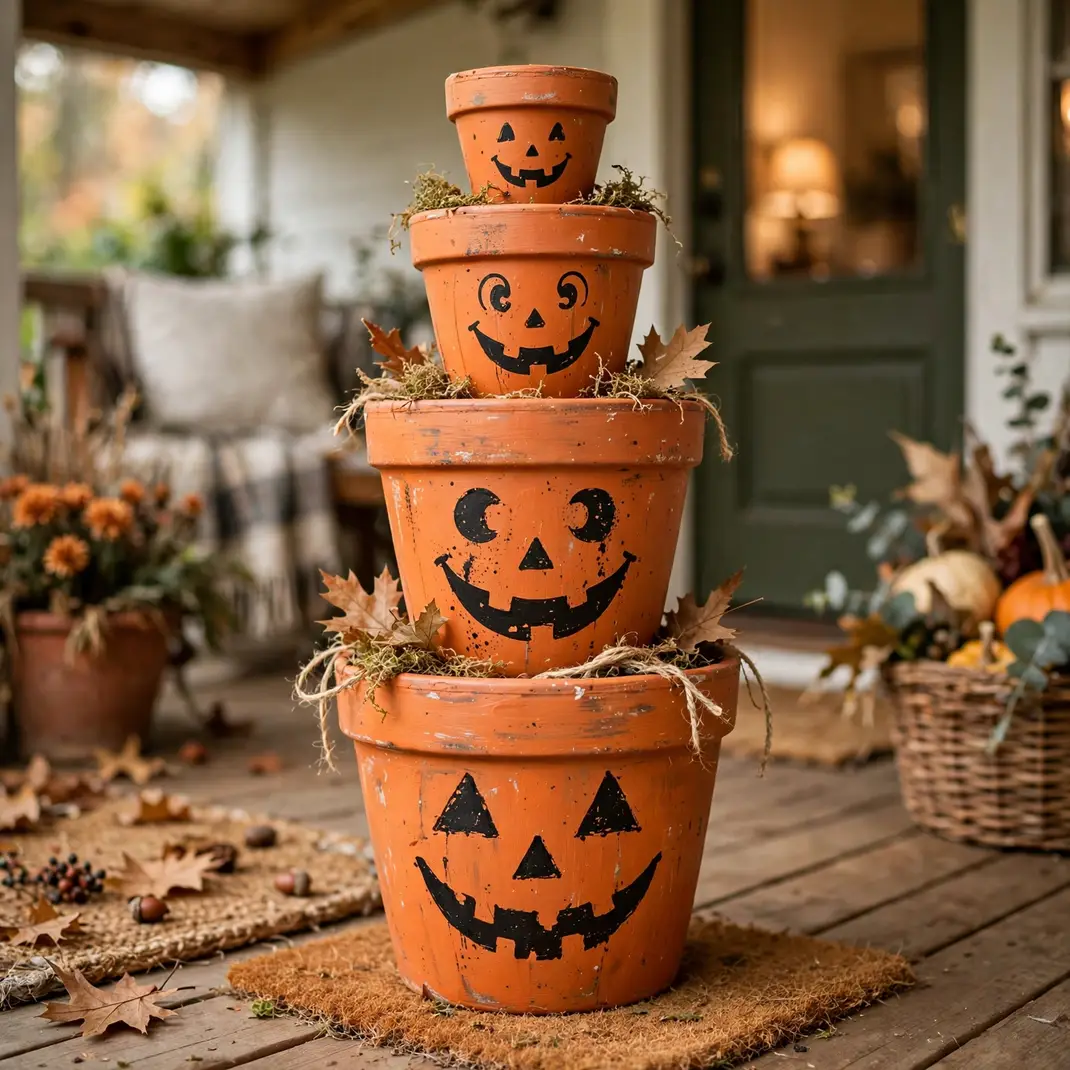
Terracotta pots painted orange with jack-o’-lantern faces stack into the jolliest pumpkin totems for the porch: paint two or three pots, stack them largest to smallest, and the faces grin from every level. They never rot, survive the rain, and stack away nested for next year. It is the most durable pumpkin craft on the list.
How to Style It: Paint the pots orange inside and out, add faces with black acrylic, stack with the rims facing up, and top with a faux leaf.
Why It Photographs Beautifully: The stacked faces at different heights create a totem-pole effect that is pure porch-photo gold.
Pro Tip: Thread the stack onto a dowel staked in the ground so wind cannot topple the totem.
Budget-Smart Swap: Chipped or stained pots from the garden shed paint up perfectly; flaws disappear under the orange.
24. Dye Acorns for a Black and Orange Garland
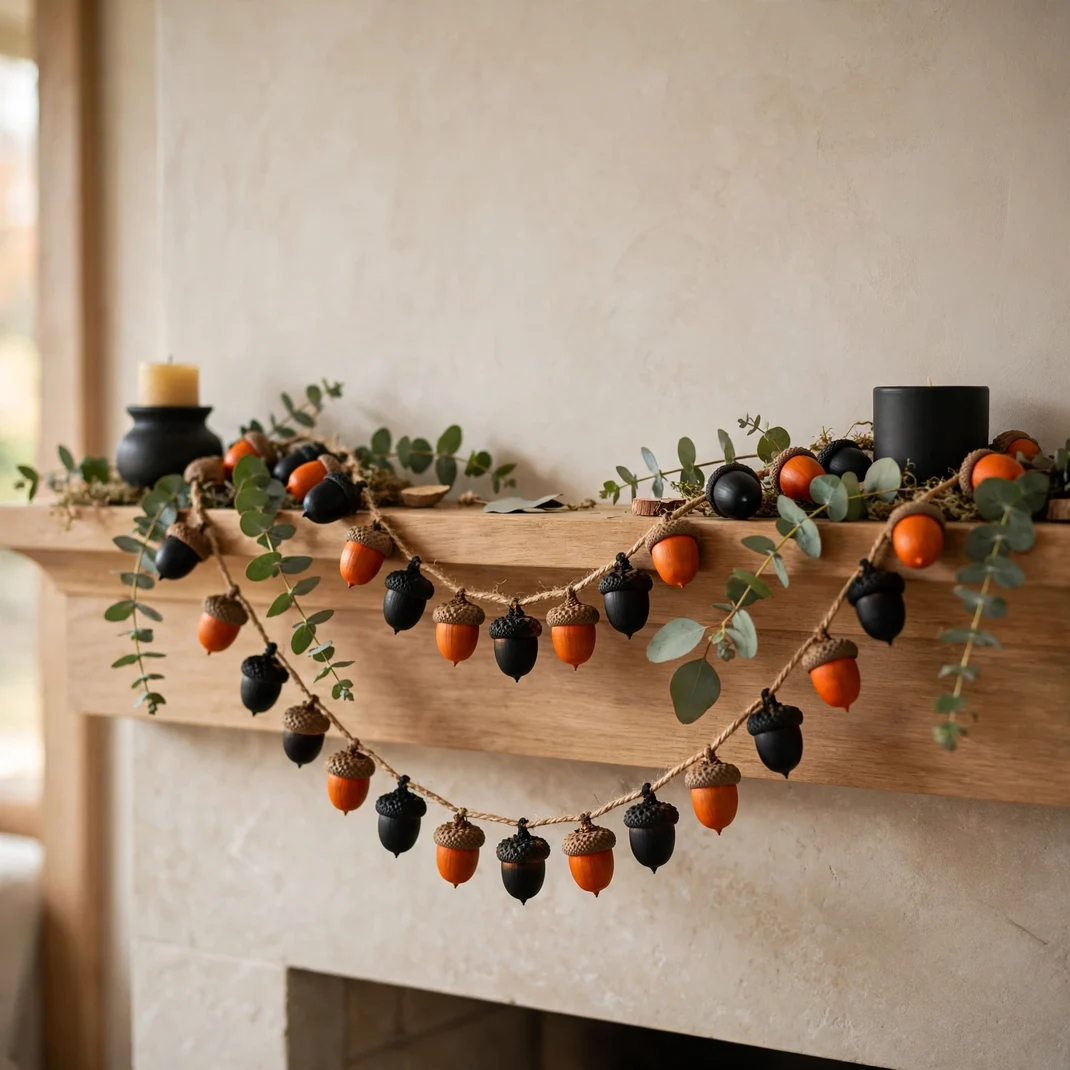
Foraged acorns dyed black and orange and strung on twine make a garland that is pure woodland Halloween: the natural acorn shape keeps it elegant, while the dyed colors keep it seasonal. Drape it along the mantel with eucalyptus or pine sprigs. It is the subtlest craft here, and sometimes subtle wins.
How to Style It: Drill a tiny hole through each acorn cap, dye batches in black and orange fabric dye, dry, and string alternating colors on twine.
Why It Photographs Beautifully: The tiny scale and rich dyed colors create a jewel-like garland that looks expensive in photos.
Pro Tip: Bake the acorns at 200°F for an hour before dyeing to kill weevils and dry them evenly.
Budget-Smart Swap: A single park visit in September gathers enough acorns for three garlands.
25. Design DIY Apothecary Jar Labels
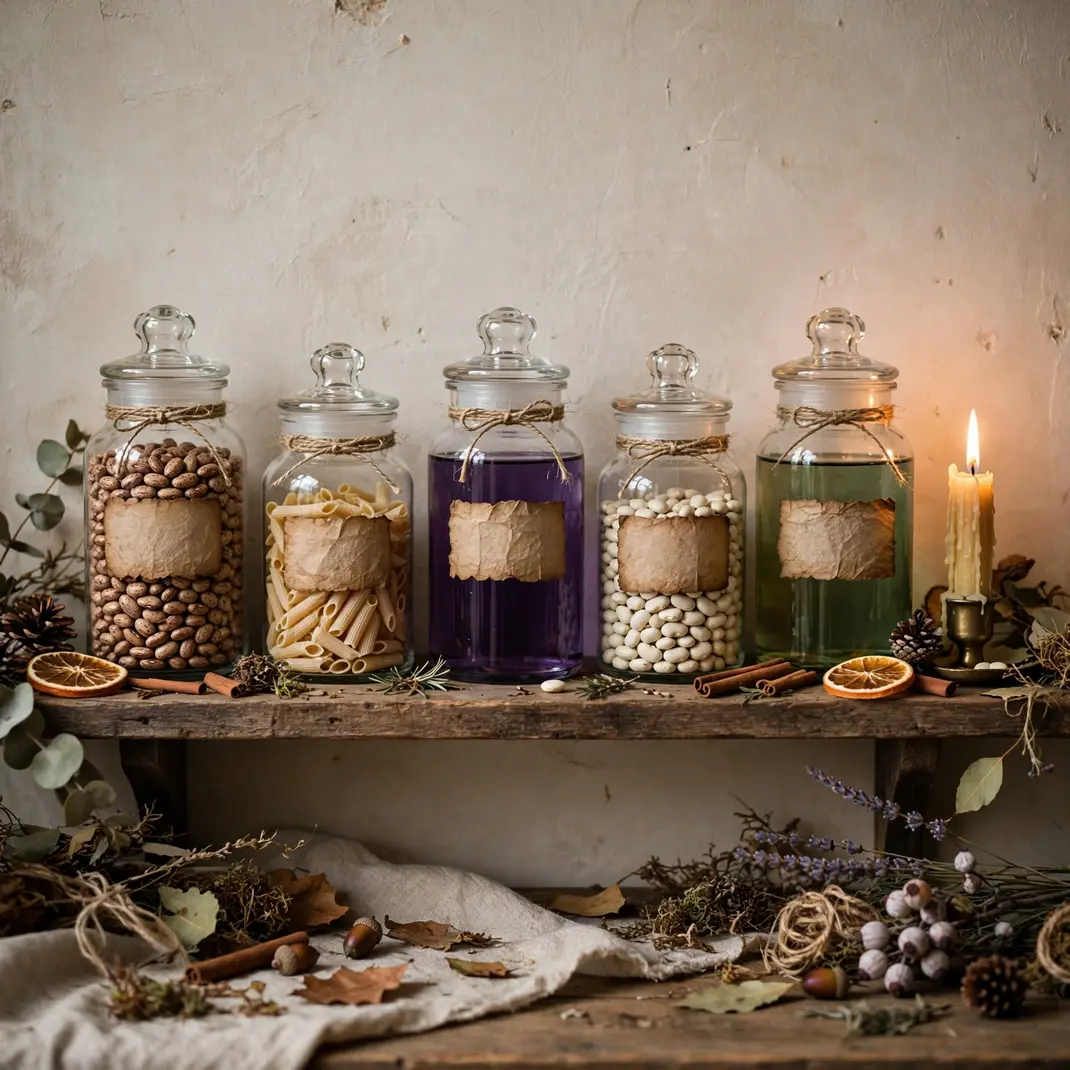
Plain jars become a witch’s apothecary with hand-designed labels: print or hand-letter labels reading things like “Bat Wings,” “Eye of Newt,” and “Moonlight,” age the paper with tea, and glue them onto jars filled with dried beans, pasta, and colored water. Lined up on a shelf with a candle, they are the finishing touch every Halloween vignette needs.
How to Style It: Design the labels in a free font like a vintage serif, tea-stain the paper, and fill each jar with a different pantry texture for variety.
Why It Photographs Beautifully: The row of mysterious labeled jars tells a story in photos that single decorations cannot.
Pro Tip: Vary the jar heights and shapes; a uniform row looks like a store display, a varied one looks like a real apothecary.
Budget-Smart Swap: Hand-letter the labels with a calligraphy pen for a personal touch that no printable can match.
Make Something That Feels Like You
The thread running through all twenty-five of these crafts is simple: the best Halloween decor carries your fingerprints, literally. A drilled pumpkin, a folded book page, a hand-painted sign, each one turns an ordinary October evening into something that could only come from your home. Pick the three that made you reach for the scissors, clear the kitchen table this weekend, and craft a Halloween that is unmistakably yours.