26 Paper Craft Wall Art DIYs for a Halloween Bedroom
Paper is one of the most versatile materials for Halloween bedroom decor: it can look architectural, sculptural, translucent, textile-like, or delicately hand-cut, yet most finished pieces remain light enough for easy seasonal hanging. The strongest paper craft wall art does more than repeat bats and pumpkins—it uses proportion, shadow, texture, and a controlled palette to make the room feel thoughtfully styled. These 26 projects range from quick folded-paper installations to slower heirloom-style crafts, with practical placement guidance and budget alternatives built into every idea.
1. Layer a Haunted Rowhouse Paper Relief
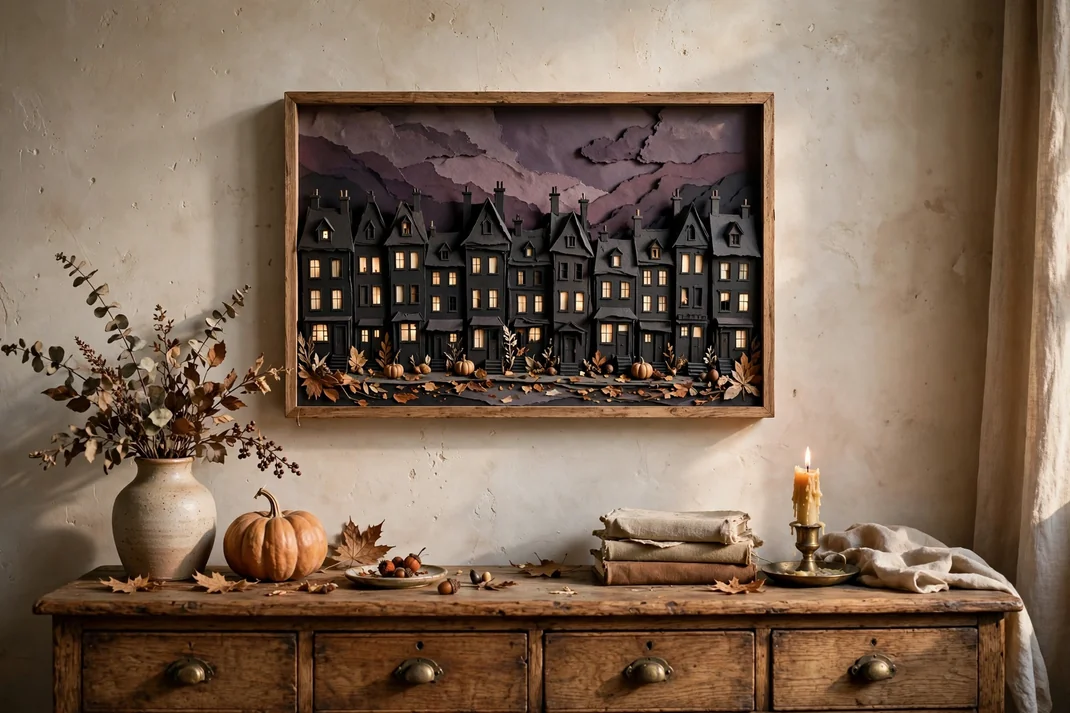
A row of crooked charcoal townhouses, stacked in shallow layers, gives the wall the depth of a miniature Halloween street. Warm cream windows and a muted plum sky keep the scene atmospheric rather than cartoonish, making it strong enough to anchor the wall above a dresser.
- How to Style It: Cut five building silhouettes from heavyweight charcoal, black, and deep-gray cardstock, varying the rooflines and window shapes. Mount each layer on 3–5 mm foam adhesive inside a wide landscape frame, then slip small amber-paper rectangles behind selected windows; leave at least one third of the composition as open night sky.
- Why It Photographs Beautifully: Side lighting catches the stepped rooflines and creates real shadows between the layers. The limited palette also gives a camera a clear focal plane, so the tiny lit windows read crisply instead of disappearing into visual noise.
- Pro Tip: Score every roof edge lightly from the back before assembly; the crisp fold makes inexpensive cardstock look architectural. Keep the tallest building slightly off-center so the skyline feels naturally composed rather than perfectly symmetrical.
- Budget-Smart Swap: Use cereal-box card painted with matte craft paint for the hidden layers, saving purchased cardstock for the front silhouette. A thrifted panoramic frame can be sprayed one uniform black.
2. Sculpt a Papier-Mâché Man-in-the-Moon Plaque
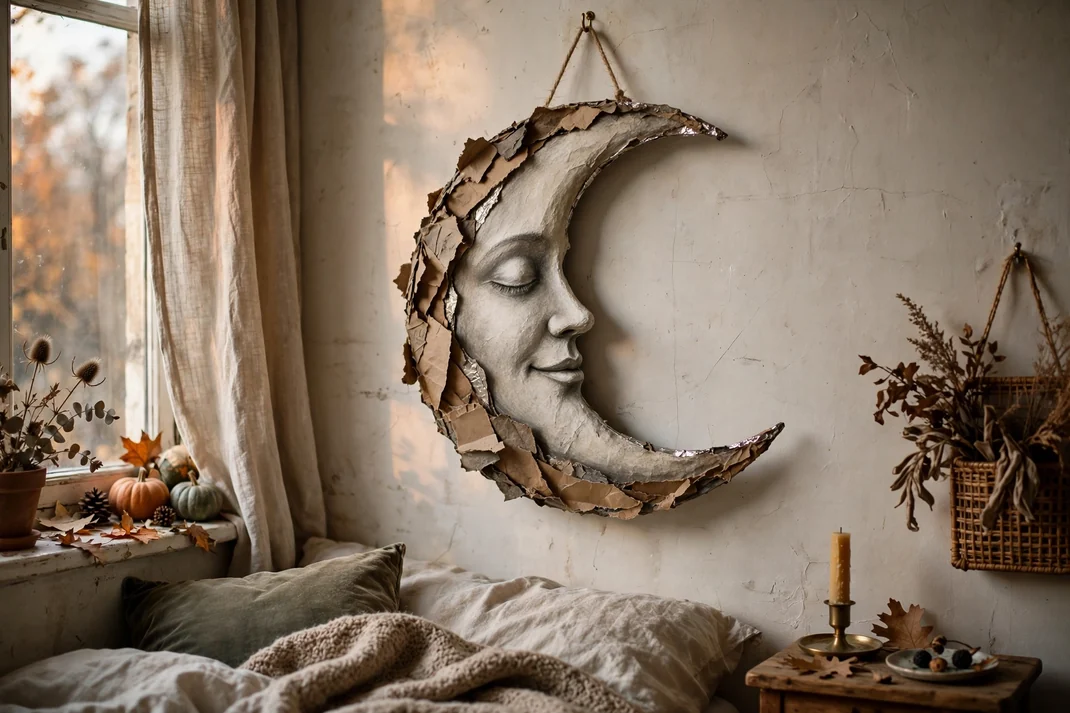
A softly sculpted moon face brings old-storybook mystery to a bedroom wall without the weight of ceramic or plaster. Finished in chalky ivory with smoky gray shading, it feels timeworn and theatrical while remaining light enough for renter-friendly hanging.
- How to Style It: Form a shallow crescent over a foil armature, cover it with three thin layers of torn kraft paper and paste, and model the nose and eyelids with paper pulp. Dry it fully, paint with matte ivory and gray washes, then seal and hang it from an embedded ribbon loop on a dark round backing board.
- Why It Photographs Beautifully: The raised brow, nose, and crater texture catch soft window light beautifully, producing gentle highlights and shadows in close photographs. A dark circular backing isolates the pale profile and gives the camera an easy, graphic shape to lock onto.
- Pro Tip: Keep the relief shallower than 2 inches and hollow at the back; bulky papier-mâché can pull away from its hanger. Brush the darkest glaze only beneath the features, then wipe the high points clean for believable age.
- Budget-Smart Swap: Use newspaper, flour-and-water paste, and leftover wall paint. If sculpting a face feels ambitious, create a simple cratered full moon by pressing bottle caps into the damp pulp.
3. Quill a Nocturnal Moth Specimen Triptych
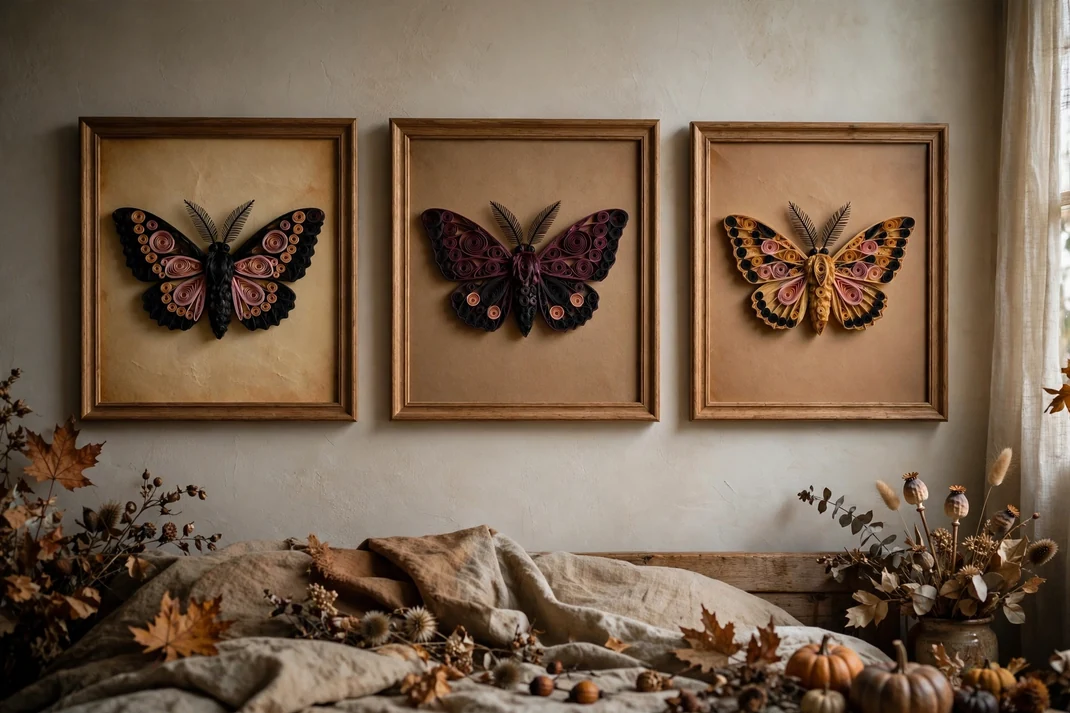
Three paper moths with tightly coiled wings create the delicacy of a natural-history display without using real specimens. Black, aubergine, ochre, and dusty rose strips give each insect its own pattern while the repeated frames keep the arrangement sophisticated.
- How to Style It: Quill 1/8-inch paper strips into teardrops, marquises, and loose coils, then assemble three different moths on warm-white card. Float each finished insect in a 6-by-8-inch shadow box, align the frames in one horizontal row, and keep the labels visual only—no printed words are needed.
- Why It Photographs Beautifully: The coiled edges throw dozens of tiny shadows, which give macro shots unusual depth and handmade detail. Repeating the same frame size creates a calm rhythm, while the color changes keep the triptych lively in wider bedroom photographs.
- Pro Tip: Build both wings at the same time, alternating left and right pieces as you work; this keeps the patterns balanced. Use tweezers and the smallest possible dots of clear-drying glue so adhesive does not shine in the finished photograph.
- Budget-Smart Swap: Slice strips from colored printer paper with a ruler and craft knife instead of buying quilling packs. Shallow thrift-store frames can be deepened with black foam-board spacers.
4. Cut a Gallery of Midnight Cameo Portraits
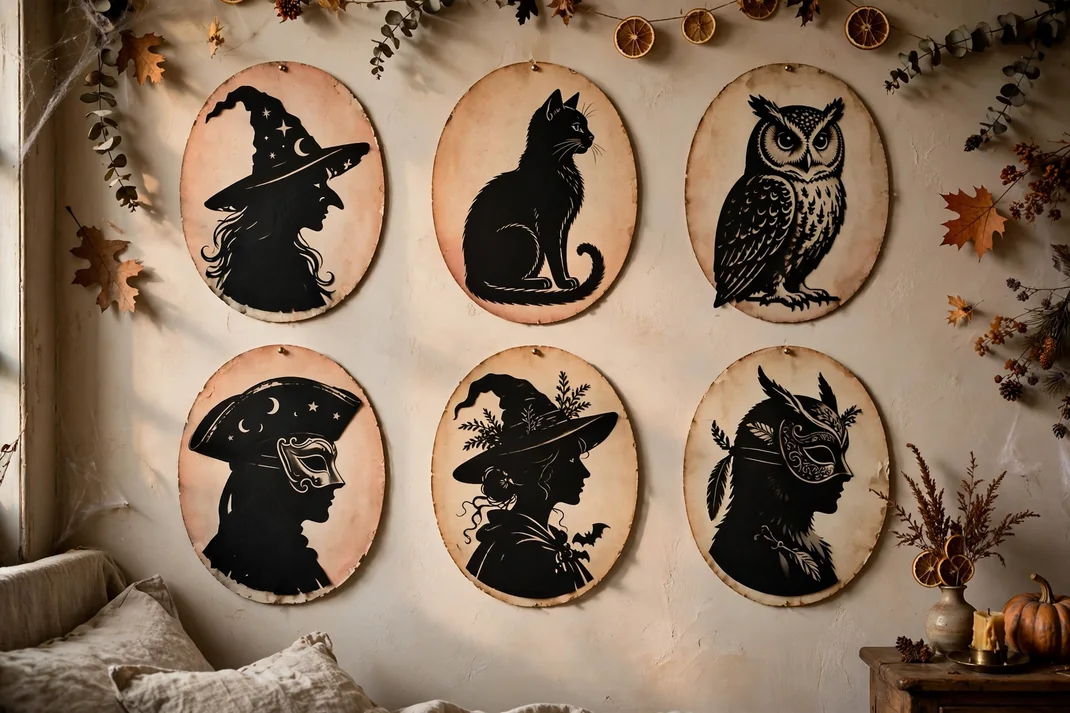
A cluster of black cut-paper profiles set against faded peach and parchment ovals feels like a mysterious ancestral portrait wall. The silhouettes can depict invented witches, cats, owls, and masked figures, giving the bedroom a narrative element without relying on recognizable characters.
- How to Style It: Trace six simple side-profile silhouettes onto black paper, cut them with a fine craft knife, and mount them on alternating peach, taupe, and aged-cream ovals. Place the pieces in mismatched black frames, arranging one larger portrait in the center with smaller frames stepping outward by 2–3 inches.
- Why It Photographs Beautifully: Strong black profiles remain readable even in a full-room image, while the varied frame shapes create an editorial collected-over-time composition. The pale grounds prevent the cluster from becoming a dark block on camera.
- Pro Tip: Turn every portrait toward the central frame; the implied eye line quietly holds the gallery together. Before cutting, simplify hair, hats, and feathers into a continuous outer contour so the silhouettes stay legible from across the room.
- Budget-Smart Swap: Cut the ovals from shipping boxes covered with tea-stained copy paper and use printable tracing templates you draw yourself. Paint assorted inexpensive frames the same matte black to make them feel like a set.
5. Fold a Grid of Origami Witch Hats
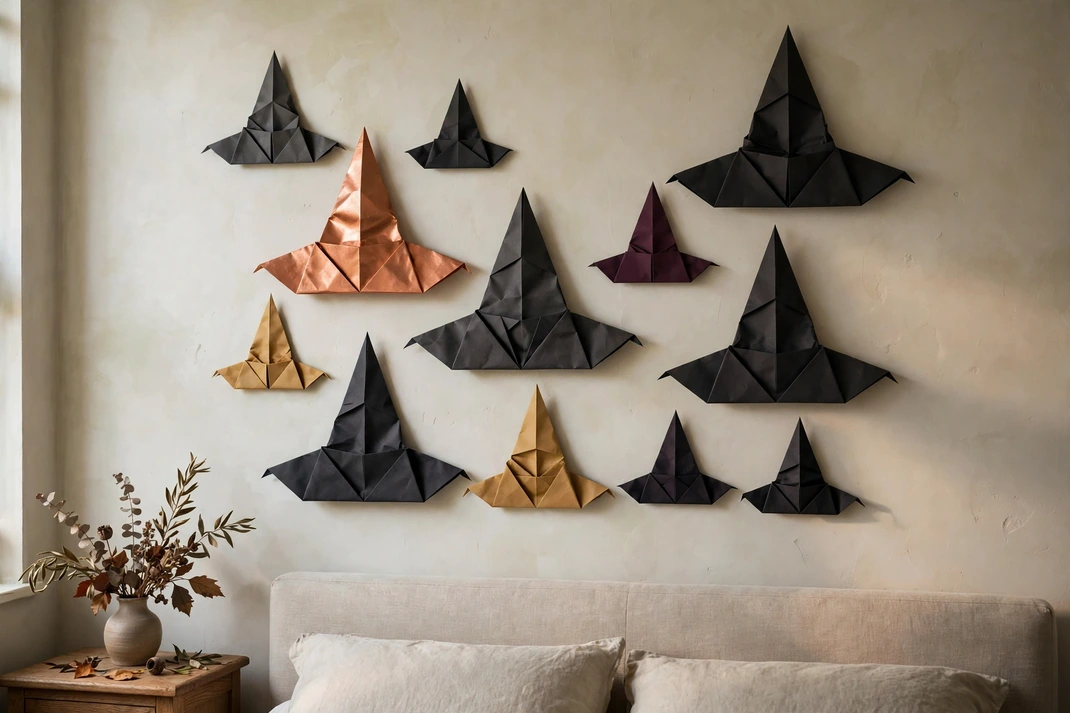
A staggered grid of folded witch hats turns a familiar Halloween symbol into crisp, geometric wall sculpture. Charcoal, aubergine, muted ochre, and one copper-paper hat reveal the folds without making the arrangement feel like party decor.
- How to Style It: Fold 12–15 hats from square papers in three sizes, opening each brim enough to create a shallow three-dimensional profile. Mount them on a removable foam-board panel above a dresser, beginning with the largest hats near the lower center and spacing the smaller forms more widely toward the edges.
- Why It Photographs Beautifully: Angled brims cast sharp shadows that make dark paper readable on camera, while the grid gives the playful forms a disciplined editorial structure. One copper accent provides a controlled point of light in wider bedroom photographs.
- Pro Tip: Rotate the hat tips in only three directions rather than at random; a limited set of angles creates movement without visual chaos. Hide each mounting tab beneath the back fold so the hats appear to float.
- Budget-Smart Swap: Cut squares from black wrapping paper and paint a few sheets with leftover plum or ochre wall paint. If the paper reverses to white, darken exposed edges with a marker before folding.
6. Build an Enchanted-Forest Tunnel Frame
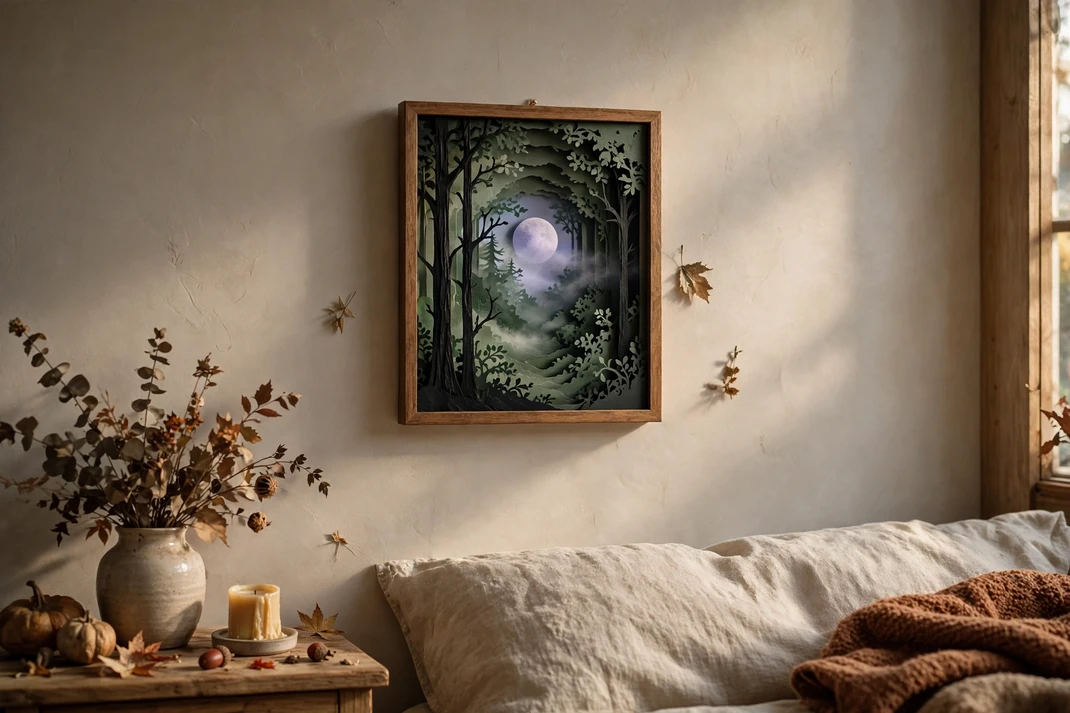
Layered paper trees recede into a deep moonlit forest, turning a small frame into a portal with remarkable visual depth. Near-black trunks at the front, smoky green foliage in the middle, and a pale lavender moon at the back create a quiet, cinematic Halloween scene.
- How to Style It: Cut four forest layers from cardstock, making the foreground openings wider and the distant trees finer. Separate the layers with folded 1/2-inch paper spacers inside a deep frame, add a vellum moon to the back panel, and place the finished piece where a bedside lamp can skim across it.
- Why It Photographs Beautifully: The repeated cut edges create true perspective, while side light reveals each plane separately. In photographs, the pale moon becomes a natural point of focus and the frame reads as deeper than its actual 2–3 inches.
- Pro Tip: Draw all four layers on tracing paper first and check the sightline by stacking them against a window. Avoid placing a trunk directly across the moon; a clean crescent of negative space makes the scene feel intentional.
- Budget-Smart Swap: Reuse the backing card from old picture frames and cut the spacers from cardstock offcuts. A deep gift-box lid painted black can stand in for a shadow box.
7. Glow a Tissue-Paper Gothic Rose Window
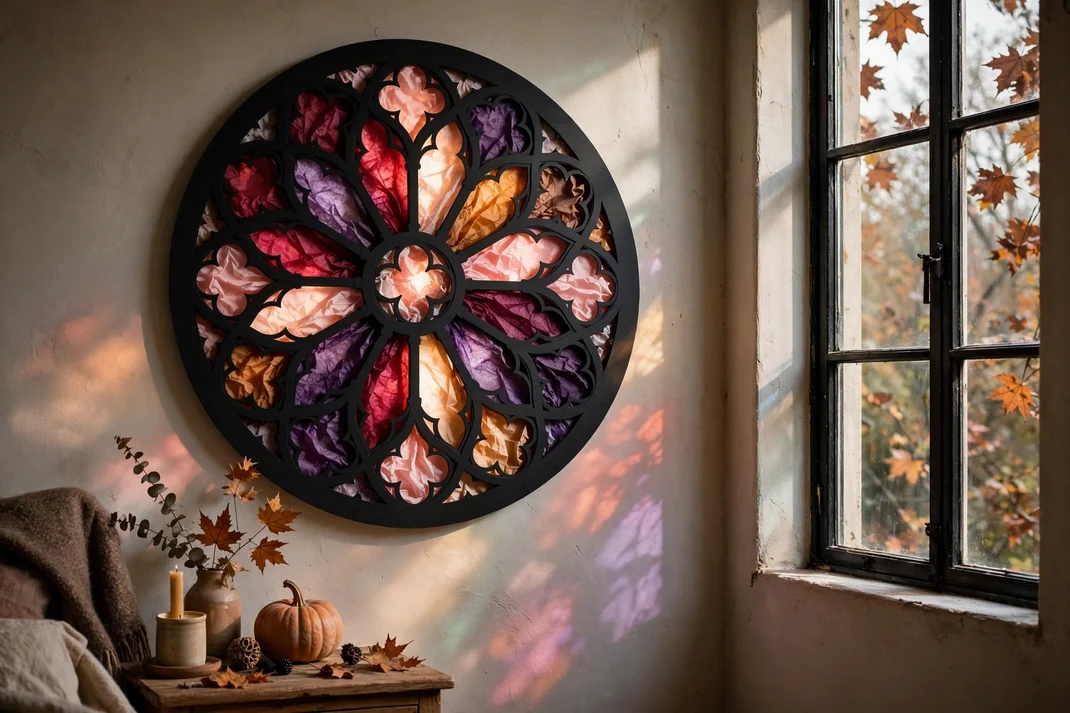
A translucent paper rose window introduces stained-glass color without adhesive vinyl or permanent alterations. Wine red, smoke purple, amber, and blush tissue sit inside a black tracery pattern, casting a soft jewel-toned glow when mounted near natural light.
- How to Style It: Cut two identical circular tracery layers from black cardstock, sandwich small tissue-paper pieces between them, and glue only along the dark framework. Mount the finished 18–24-inch disc in a simple embroidery hoop or slim black frame, then hang it beside—not directly over—a bright window to protect the tissue from harsh exposure.
- Why It Photographs Beautifully: Backlighting makes the tissue colors luminous and reveals the cut pattern clearly. The circular shape also balances the straight lines of a headboard or dresser, giving wide bedroom shots a strong secondary focal point.
- Pro Tip: Double the tissue only in the darkest panes and leave the pale areas single-layered; controlled variation creates the look of real colored glass. Press the finished panel under books overnight before framing so the tracery lies flat.
- Budget-Smart Swap: Use gift-wrap tissue and a painted cardboard hoop cut from a large delivery box. Contact-paper offcuts can replace tissue in humid rooms where ordinary paper may ripple.
8. Tear a Foggy Graveyard Landscape
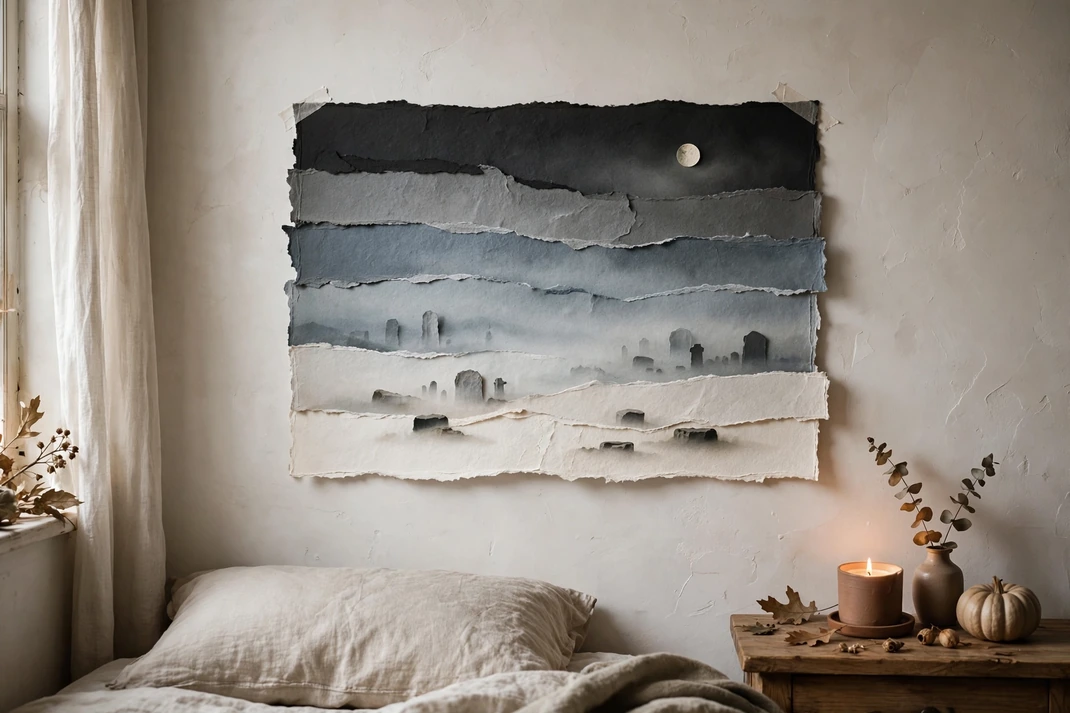
Deckled layers of gray paper turn a familiar graveyard scene into a soft, almost abstract landscape. Torn edges suggest low fog rolling between distant stones, while one tiny cream moon keeps the artwork calm enough for a bedroom.
- How to Style It: Tear six horizontal bands from charcoal, dove gray, blue-gray, and warm-white paper, making each foreground band slightly taller and darker. Add a few simplified headstones and bare branches between the layers, then glue the collage to a 16-by-20-inch board with the darkest strip along the bottom.
- Why It Photographs Beautifully: The tonal gradient creates atmospheric perspective that reads immediately in a full-room photograph. Fibrous torn edges catch light softly, preventing the monochrome scene from looking flat or computer-printed.
- Pro Tip: Tear toward yourself when you want a visible white fiber line and away from yourself when you want a cleaner dark edge. Limit the grave markers to odd-numbered groups so the open fog remains the star.
- Budget-Smart Swap: Use the unprinted interiors of envelopes, packing paper, and old sketchbook pages brushed with diluted gray paint. A recycled foam-board panel can replace a stretched canvas.
9. Iris-Fold a Pair of Watchful Cat Eyes
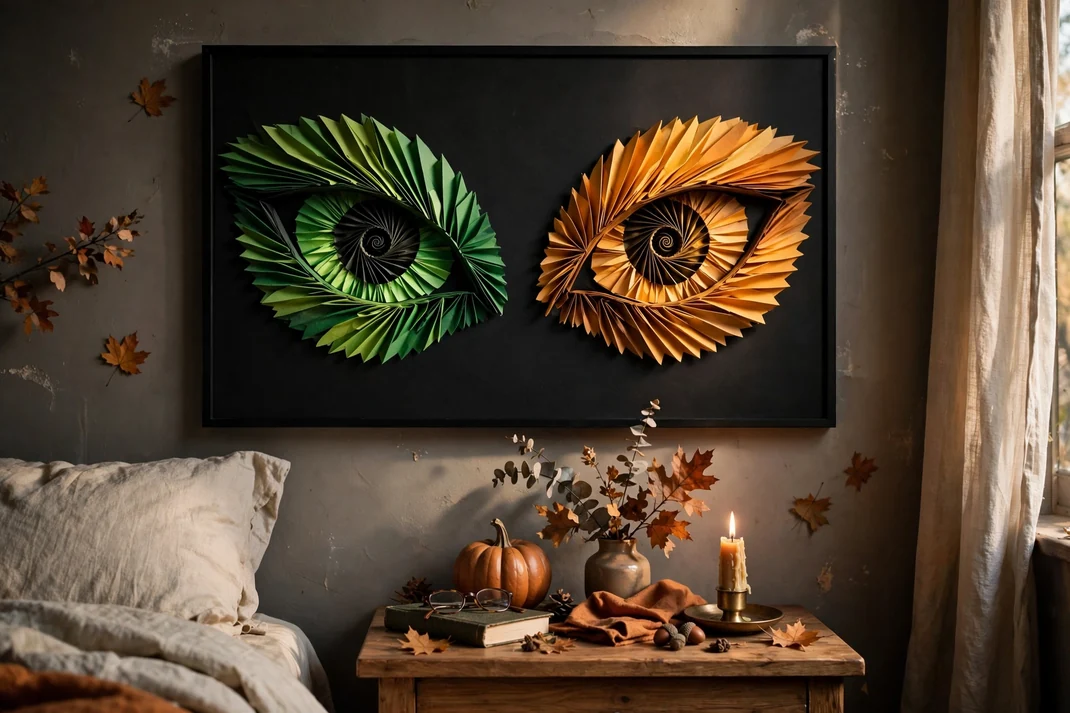
Two luminous paper eyes peering from a matte-black field create a playful moment of suspense above a bedside table. Iris folding gives each pupil a spiraling, faceted finish in acid green, amber, or violet—dramatic from afar and intricate up close.
- How to Style It: Cut two almond-shaped openings in black card and tape numbered strips of colored paper behind each opening, overlapping them in a rotating sequence toward a small dark center. Mount both eyes in one wide frame, leaving at least 3 inches of black space around the pair.
- Why It Photographs Beautifully: The concentric paper edges reflect light at slightly different angles, creating a gemlike center without glitter. Against the broad black ground, the eyes stay clear in both low-light room shots and tight process photographs.
- Pro Tip: Use the same folding template for both eyes but reverse the spiral direction on the second; mirrored movement makes the pair feel alert and balanced. Burnish every fold before taping so the iris remains crisp.
- Budget-Smart Swap: Cut strips from magazine pages arranged by color rather than buying specialty paper. A black-painted cereal box makes a sturdy front mat for a lightweight frame.
10. Fan Out an Eclipse Rosette Installation
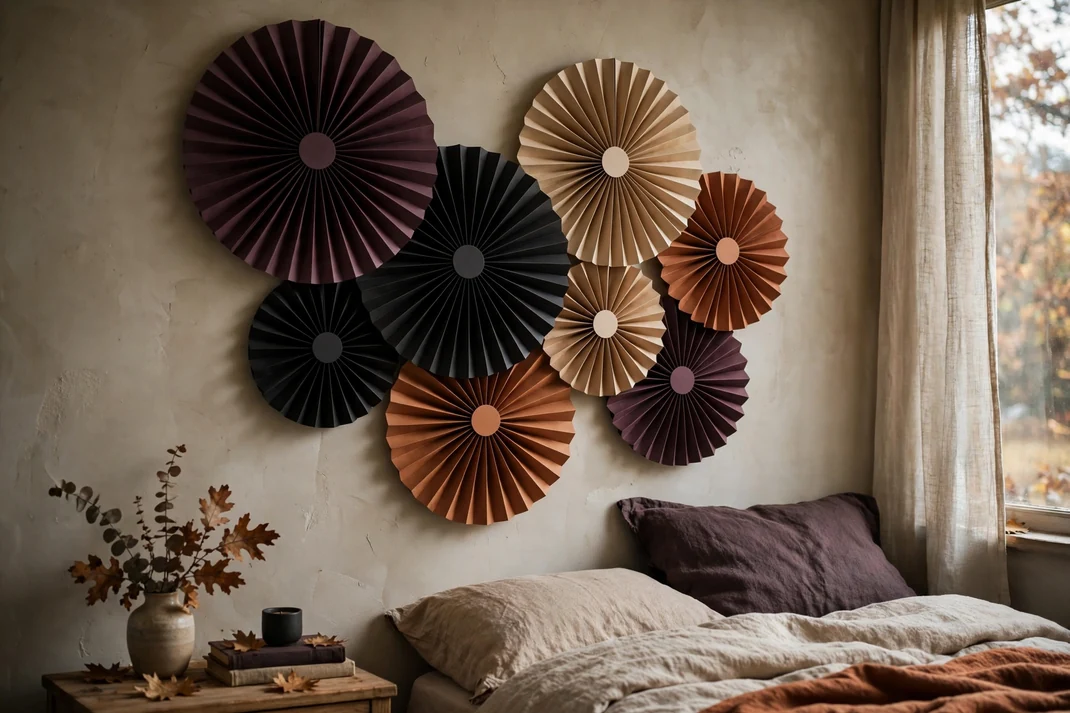
Pleated paper rosettes in black, sand, rust, and plum overlap like a wall of eclipses. Mixed diameters give the installation movement, while flat circular centers keep it cleaner and more bedroom-friendly than a party backdrop.
- How to Style It: Accordion-fold paper strips, join the ends, and press them into rosettes ranging from 5 to 16 inches wide. Arrange seven or nine forms in an asymmetrical crescent above a low dresser, overlap no more than one third of each disc, and secure them to a removable foam-board base before hanging.
- Why It Photographs Beautifully: Pleats create strong radial highlights, and the varied sizes fill the frame without requiring many props. A crescent-shaped cluster photographs more gracefully than a rectangular grid because it leaves breathing room around the outer edges.
- Pro Tip: Choose papers with different finishes—matte, vellum, and one soft metallic—but keep the palette tight. Reinforce the back of every rosette with a cardstock circle so humidity cannot pull the center open.
- Budget-Smart Swap: Make the largest rosettes from kraft packing paper painted on one side, and reserve decorative scrapbook paper for the smaller foreground pieces. Paper cupcake liners can become the tiniest accents.
11. Float Honeycomb Pumpkins in Shadow Boxes
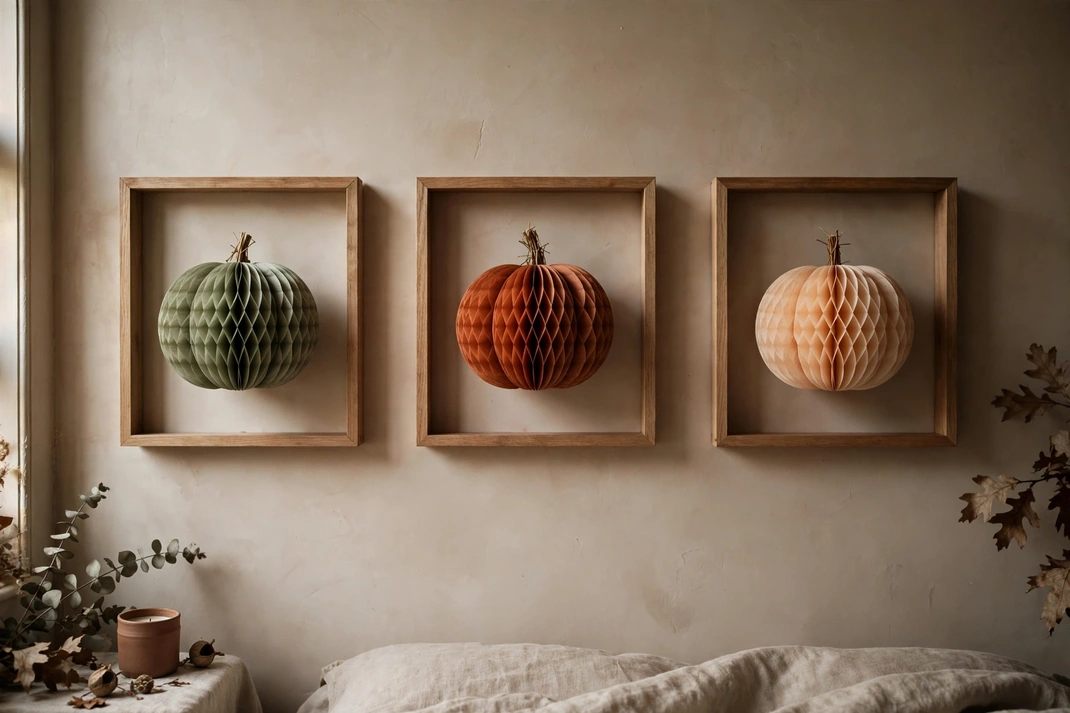
Honeycomb-paper pumpkins appear to hover inside simple box frames, giving classic October orange a refined sculptural treatment. Sage, terracotta, and pale apricot forms feel warmer and more nuanced than a bright novelty palette.
- How to Style It: Cut matching half-pumpkin shapes from 20–24 sheets of lightweight paper, glue the layers at alternating points, and open each stack into a honeycomb half-form. Attach one pumpkin to the back of each of three shadow boxes, add a slim brown-paper stem, and hang the frames in a vertical column.
- Why It Photographs Beautifully: The honeycomb cells catch directional light and create a rhythmic pattern that looks especially rich in close detail. Repeating one pumpkin per frame gives the dimensional forms enough negative space to remain legible.
- Pro Tip: Trim the outer edge only after the glued stack has dried; cutting the layers together produces a cleaner silhouette. Rotate the center pumpkin a few degrees so the trio avoids catalog-perfect stiffness.
- Budget-Smart Swap: Use coffee filters tinted with diluted watercolor for the layered forms. Deep box frames can be improvised from sturdy gift boxes with their interiors painted warm white.
12. Mold a Set of Paper-Pulp Fossil Tiles
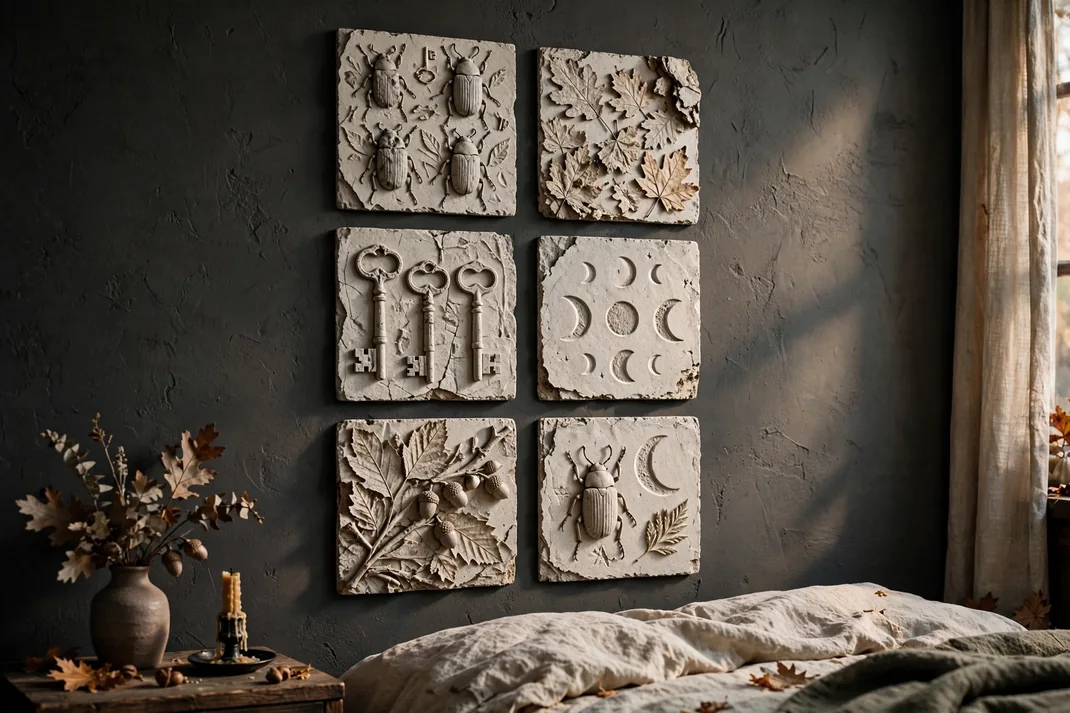
A grid of chalky paper-pulp tiles embossed with beetles, leaves, keys, and moons resembles fragments from an imaginary excavation. Their bone-white finish works beautifully against charcoal or olive walls, adding Halloween interest through texture instead of overt decoration.
- How to Style It: Blend soaked paper with paste into a thick pulp, press it into six shallow square molds, and imprint each surface with a clean found object or carved stamp. Dry the tiles completely, brush them with warm-white paint and a taupe wash, then mount them in a 2-by-3 grid on a dark backing board.
- Why It Photographs Beautifully: Raking light reveals the recessed shapes and rough fibers, creating depth in neutral photographs. The orderly grid makes the handmade irregularities feel curated rather than crafty.
- Pro Tip: Dust the mold with cornstarch before adding pulp, and keep each tile under 1/2 inch thick to reduce curling. Use one motif twice at opposite corners so the grid has a subtle visual echo.
- Budget-Smart Swap: Make molds from jar lids or shallow food containers and use shredded junk mail with glossy pieces removed. A single large board frame is cheaper than buying six individual frames.
13. Marble a Cabinet of Midnight Beetles
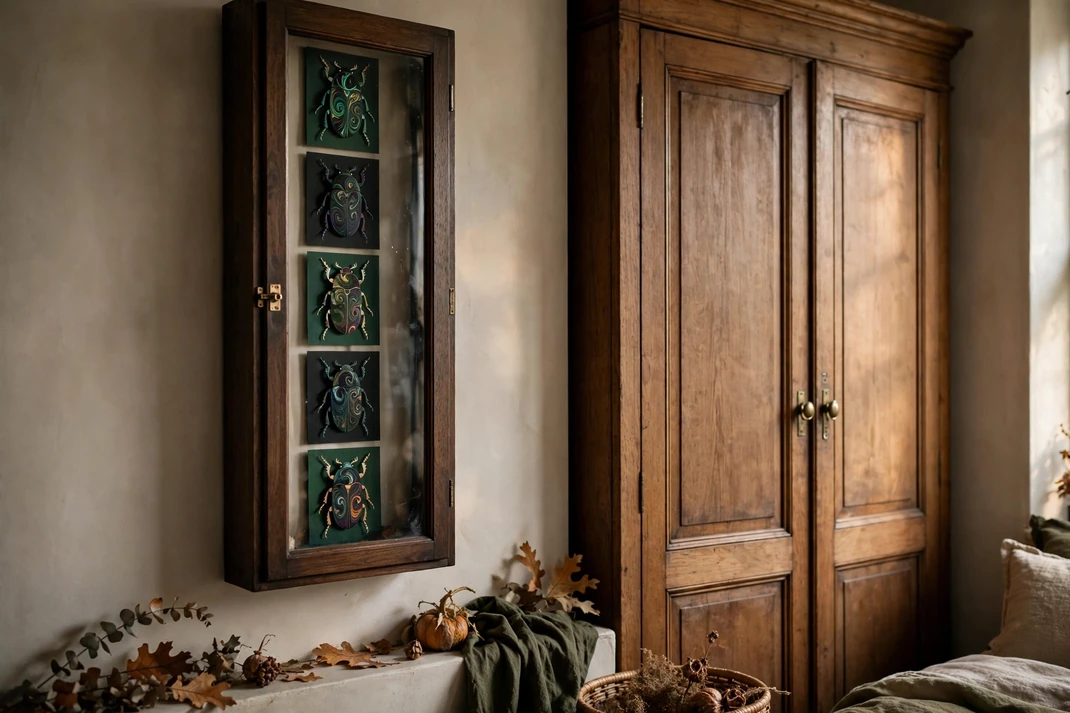
Hand-marbled paper turns a set of beetle silhouettes into jewel-like specimens with swirling, unpredictable markings. Mounted on deep green or matte black cards, the insects feel elegant and slightly uncanny—ideal for a narrow wall beside a wardrobe.
- How to Style It: Create marbled sheets with floating ink or shaving-foam marbling, then trace and cut five beetle bodies in distinct shapes. Add black-paper legs and antennae, mount each insect on a separate 5-by-7-inch card, and align the frames in a tight vertical stack with 1–2 inches between them.
- Why It Photographs Beautifully: Marbling creates fine color movement that rewards close-up photography, while the solid backing preserves the silhouettes from a distance. A vertical arrangement makes the most of a slim wall and naturally pulls the eye upward.
- Pro Tip: Choose one metallic or pale vein color that appears in every beetle; the repeated note unifies otherwise different patterns. Slightly lift the wing cases with tiny foam dots but keep the legs flat for a convincing specimen effect.
- Budget-Smart Swap: Marble scraps of printer paper with diluted craft paint and shaving foam. Cut simple frames from black mat board and display the set with removable picture strips.
14. Build a Corrugated Gothic-Arch Relief
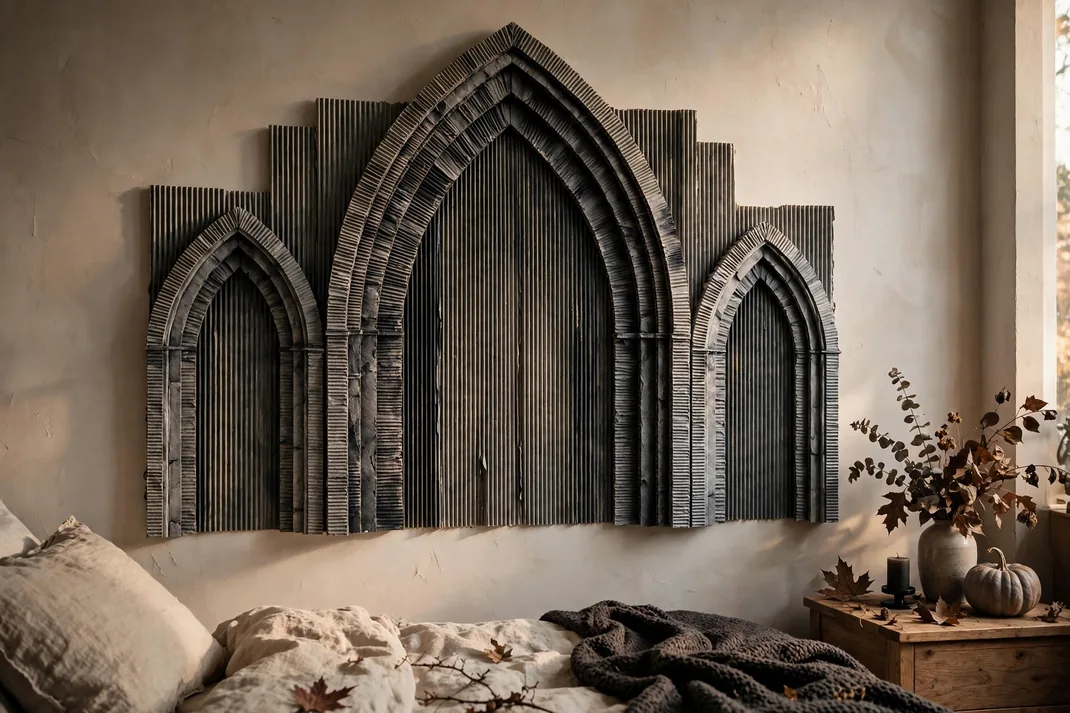
Narrow gothic arches cut from corrugated card create a convincing architectural panel with almost no weight. Layered in soot black and weathered stone gray, the relief suggests an old cloister while staying graphic enough for a contemporary room.
- How to Style It: Cut one large pointed arch and two smaller side arches from double-wall cardboard, then stack narrower arch strips around each opening to form molding. Paint the recesses matte black and dry-brush the raised edges gray, mounting the completed 24–30-inch panel above a low headboard with secure lightweight fasteners.
- Why It Photographs Beautifully: Corrugation and stacked edges cast real architectural shadows, making the panel look more substantial on camera than its materials suggest. The repeated arches frame the bed symmetrically without adding a heavy piece of furniture.
- Pro Tip: Seal exposed corrugated edges with narrow kraft-paper strips before painting; this single step makes the relief look finished. Keep the paint matte, because gloss reveals dents and glue seams.
- Budget-Smart Swap: Use clean shipping cartons and leftover sample pots. If cutting a full panel is difficult, make three separate arch plaques and hang them close enough to read as one composition.
15. Open a Row of Kirigami Monster Windows
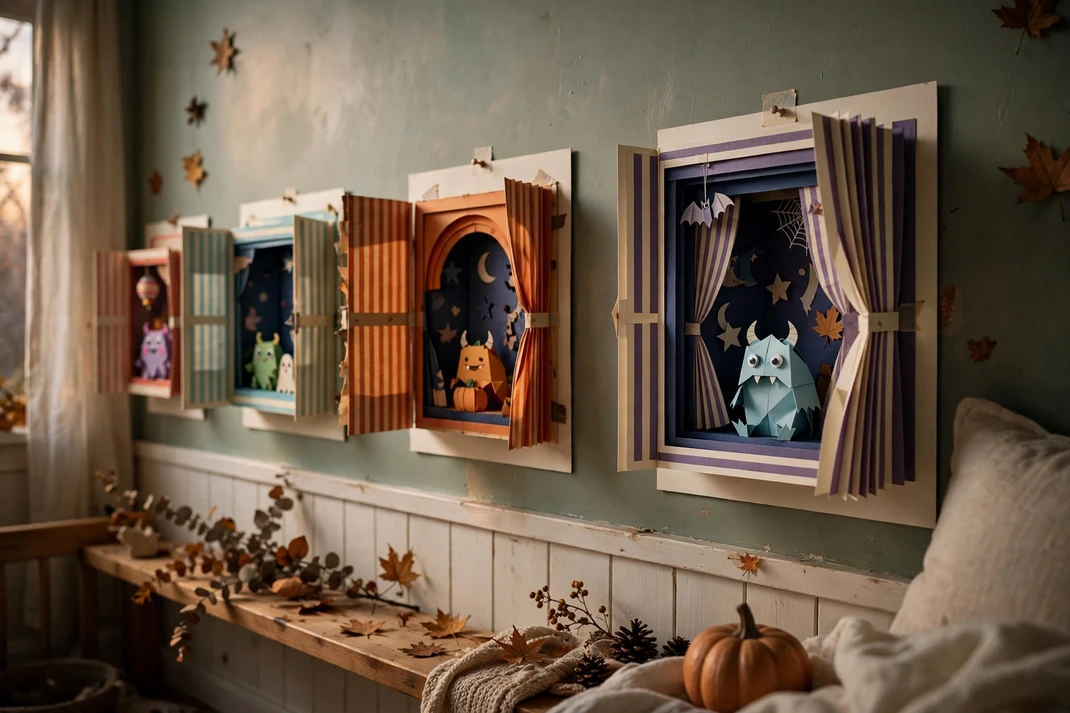
A series of folded paper windows reveals tiny monsters, striped curtains, and moonlit rooms when viewed from the side. The pop-up construction gives a humorous Halloween detail to a child’s or guest bedroom without turning the entire wall into a theme.
- How to Style It: Cut four card fronts with shutters or arched openings, score the hinges, and fold simple figures forward from contrasting inner sheets. Frame the cards without glass in a horizontal row at eye level, using a consistent cream outer card with black, orange, teal, and plum interiors.
- Why It Photographs Beautifully: Angled folds produce changing shadows as daylight moves, so the artwork feels animated in photographs. Repeating the same outer size gives the playful interior scenes a polished gallery structure.
- Pro Tip: Test every pop-up by closing it before mounting; folds that extend beyond the card edge will look messy in a frame. Give each scene one dominant figure and one tiny supporting detail rather than filling every corner.
- Budget-Smart Swap: Repurpose blank greeting cards and colored packaging. Display them on narrow picture ledges if glass-free frames are unavailable, securing each card with a small removable dot.
16. Bloom a Crepe-Paper Midnight Dahlia
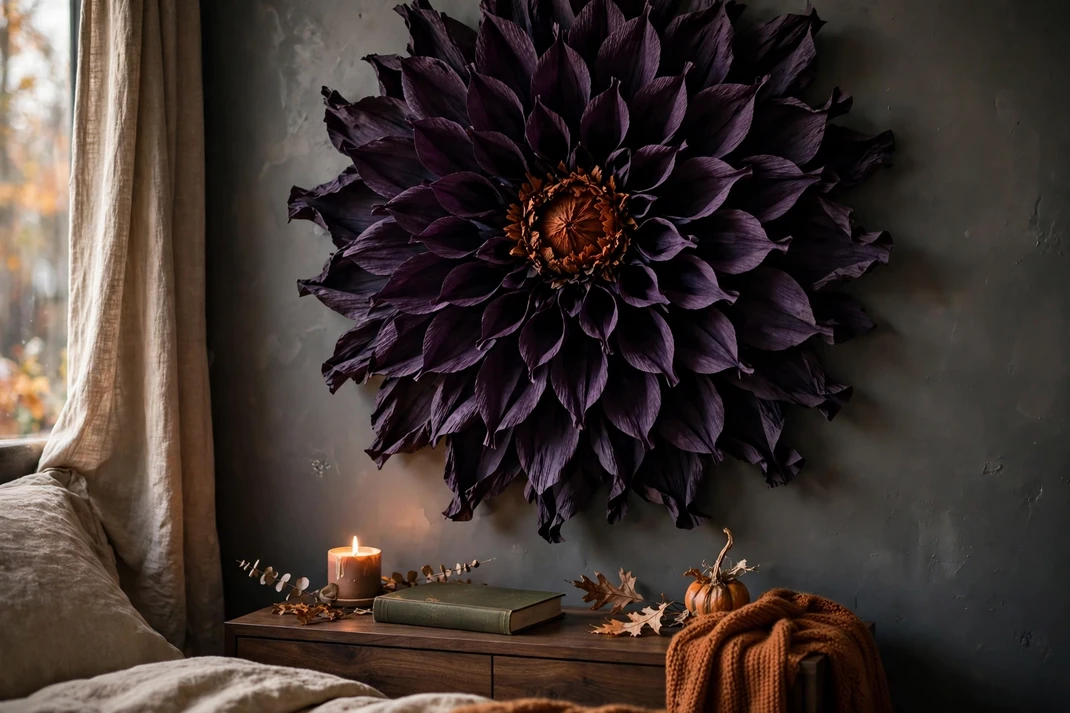
One oversized dahlia in near-black plum crepe paper can fill the wall above a nightstand like a dramatic botanical sculpture. A rust-colored center and curled outer petals bring seasonal warmth, while the single-flower scale keeps the room from feeling like a party setup.
- How to Style It: Cut graduated petal sets from heavy crepe paper, cup each petal around a dowel, and glue them in concentric rings onto a 12-inch cardboard disc. Build the finished flower to roughly 24 inches wide, attach a secure hanging loop, and place it off-center above a small bedside surface.
- Why It Photographs Beautifully: Crepe ridges and curled edges capture warm light beautifully, creating a velvety appearance in photographs. The large silhouette supplies impact with one object, leaving the surrounding wall calm.
- Pro Tip: Stretch each petal only through its center and keep the tips firm; over-stretching makes the flower floppy. Mix two closely related plum tones in alternating rings to prevent the dark bloom from reading as a flat circle.
- Budget-Smart Swap: Use party-streamer crepe for the inner petals and reserve florist-grade crepe for the outer row. A pizza box makes a strong hidden base once cut into a disc.
17. Emboss a Metallic Paper Moon-Phase Strip
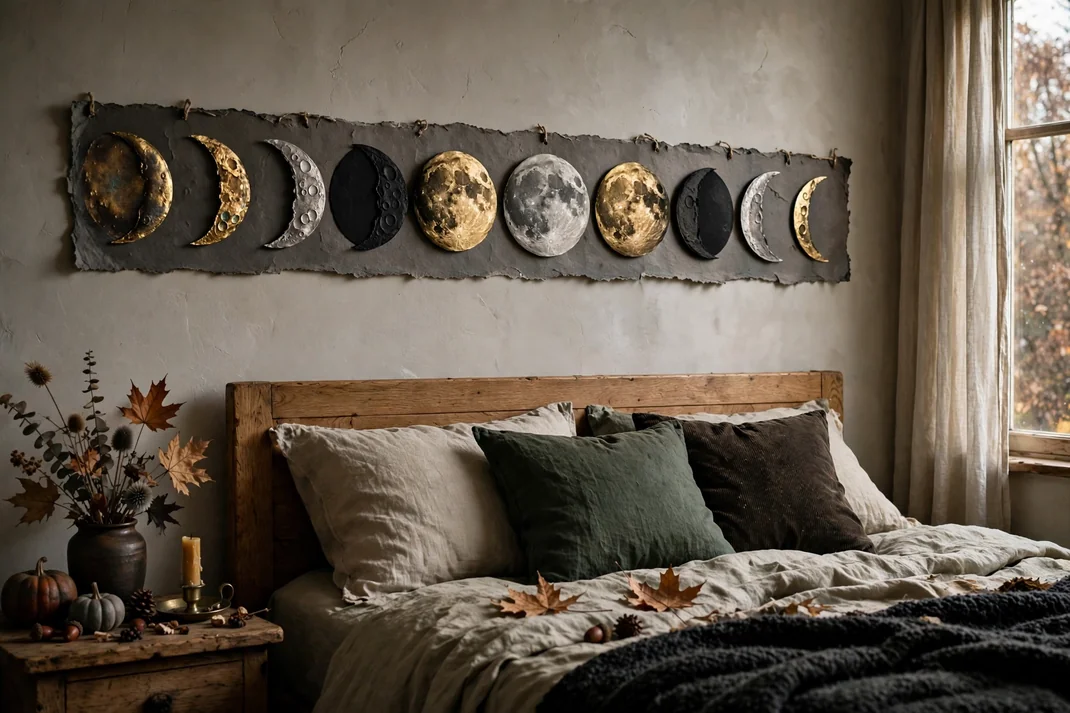
A long strip of embossed paper moons adds a quiet gleam above the bed without repeating a predictable printed lunar chart. Tarnished gold, pewter, and black finishes make the sequence feel like hand-tooled metal, even though it is built from cardstock and foil.
- How to Style It: Cut nine moon discs from heavy card, cover them with thin metallic paper or kitchen foil, and emboss crater patterns from the back with a blunt stylus. Mount the phases across a narrow black board with equal 1 1/2-inch spacing, allowing the crescents to reveal the dark ground beneath.
- Why It Photographs Beautifully: Embossed craters catch highlights while the long horizontal format echoes the width of the bed. Because each phase has a clear silhouette, the artwork remains readable in wider editorial shots.
- Pro Tip: Vary the crater marks instead of repeating one stamped texture; identical surfaces immediately expose the DIY shortcut. Rub a little black paint into the recesses and wipe the raised areas clean for an aged-metal effect.
- Budget-Smart Swap: Use heavy aluminum foil glued over recycled cardstock and color selected moons with watered-down acrylic. Mount everything on a painted shelf offcut instead of buying a custom panoramic frame.
18. Piece a Paper-Mosaic Jack-o’-Lantern Grid
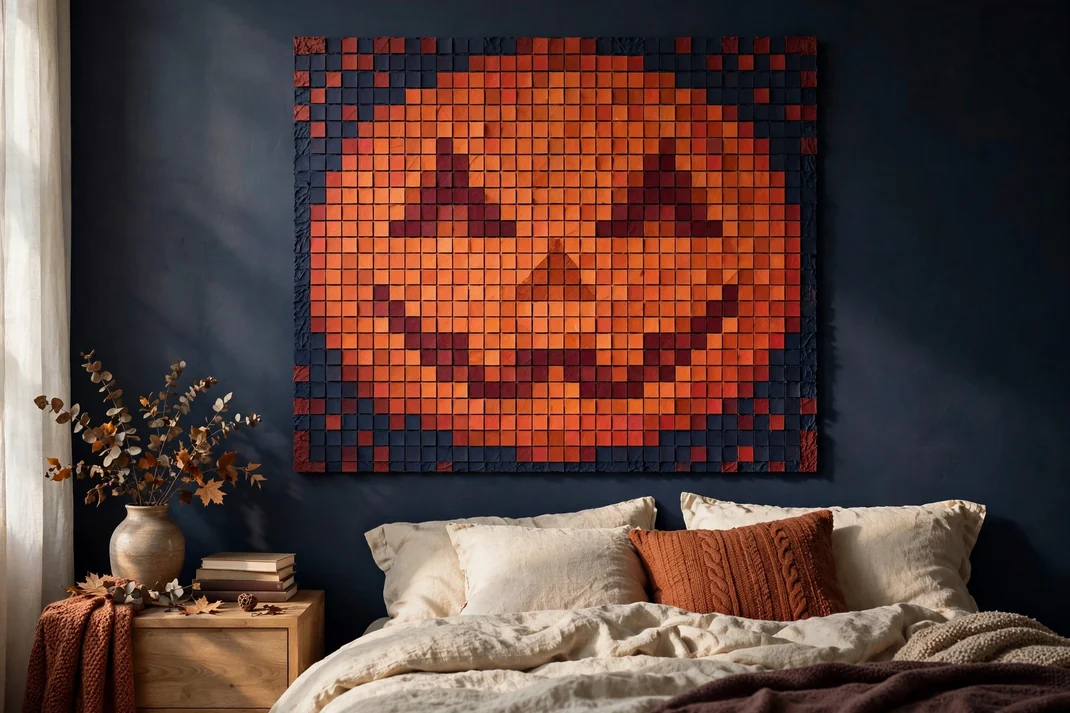
A jack-o’-lantern assembled from hundreds of small paper squares feels more like modern pixel art than a seasonal cutout. Burnt orange, rust, coral, and burgundy give the pumpkin depth, while a deep navy background makes its expression glow without actual lighting.
- How to Style It: Cut 3/4-inch squares in six orange values and three background values, then map a simplified pumpkin face on graph paper. Glue the tiles to a rigid 18-inch square board with narrow, even gaps, keeping the eyes and mouth in pale apricot rather than stark white.
- Why It Photographs Beautifully: The small color shifts create a rich surface that photographs cleanly from both near and far. A square format also crops naturally for Pinterest while remaining easy to center over a compact dresser.
- Pro Tip: Work from the center outward and use a metal ruler every four rows; tiny alignment errors multiply quickly in a grid. Let a few background tiles enter the pumpkin edge so the silhouette feels integrated, not sticker-like.
- Budget-Smart Swap: Cut tiles from paint swatches, magazine covers, and packaging sorted by color. A piece of foam board wrapped in navy paper makes an inexpensive lightweight base.
19. Curl a Ghostly Paper-Smoke Mural
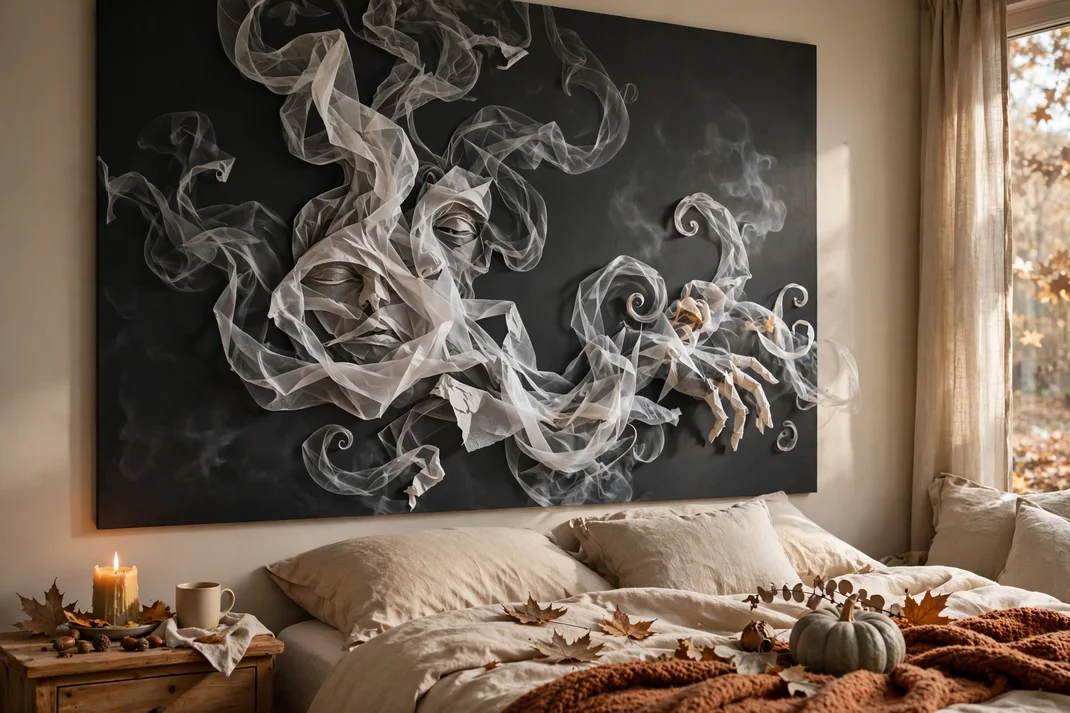
Long curls of translucent white and gray paper rise across a charcoal panel like smoke forming fleeting faces. The composition feels abstract at first glance, then rewards a closer look with subtle eyes, mouths, and drifting hands hidden in the curves.
- How to Style It: Cut tracing paper, vellum, and thin gray paper into tapered strips, curl them around dowels, and arrange the coils across a 20-by-30-inch dark board. Glue only the ends and a few hidden contact points, building the densest movement at the lower corner and letting it dissolve upward.
- Why It Photographs Beautifully: The lifted curls throw soft looping shadows that change with side light, giving still photographs a sense of motion. Translucent layers keep the large piece airy instead of becoming a heavy white mass.
- Pro Tip: Photograph the layout before gluing; loose curls shift easily and the reference will preserve your best arrangement. Suggest faces with negative space rather than drawing features—the ambiguity is what makes the piece sophisticated.
- Budget-Smart Swap: Use baking parchment for some translucent strips and gray packing paper for the opaque ones. Paint a reclaimed presentation board charcoal rather than purchasing a large canvas.
20. Weave a Black-and-Rust Paper Tapestry
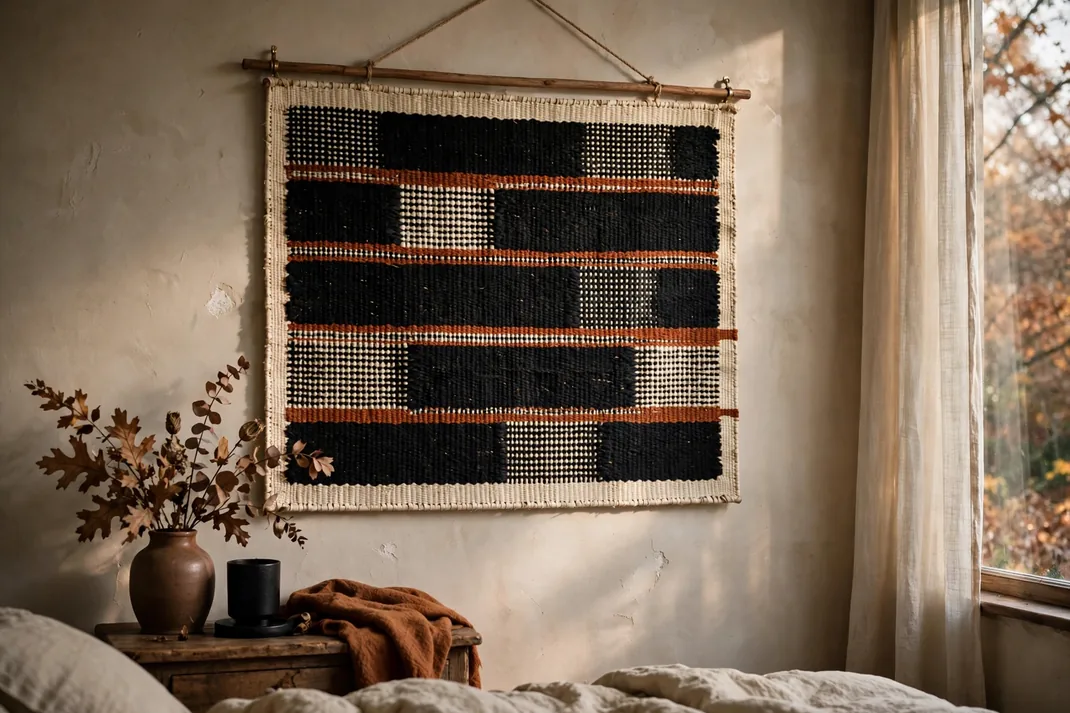
A handwoven paper panel adds textile-like warmth while remaining crisp and lightweight. Broad black bands, narrow rust lines, and occasional cream checks form an abstract nocturnal pattern that nods to Halloween without using a literal motif.
- How to Style It: Cut even vertical slits in a 16-by-24-inch black paper base, leaving a 1-inch border intact, then weave strips of rust, charcoal, cream, and muted copper through the openings. Vary the strip widths, secure the backs, and suspend the panel from a slim wood dowel with its lower edge cut into shallow steps.
- Why It Photographs Beautifully: The over-under construction produces subtle surface shadows, while the controlled geometric pattern gives the camera clean lines. Hanging it from a dowel makes the paper read like a small art textile in a layered bedroom shot.
- Pro Tip: Plan the rhythm on graph paper and repeat one narrow rust stripe every fourth or fifth row. Crease only the back turns; hard folds across the front strips flatten the woven texture.
- Budget-Smart Swap: Use brown grocery bags painted with diluted acrylic and black gift wrap for the widest strips. A straight fallen twig can replace a purchased dowel if it is clean and fully dry.
21. Carve a Scherenschnitte Folklore Scene
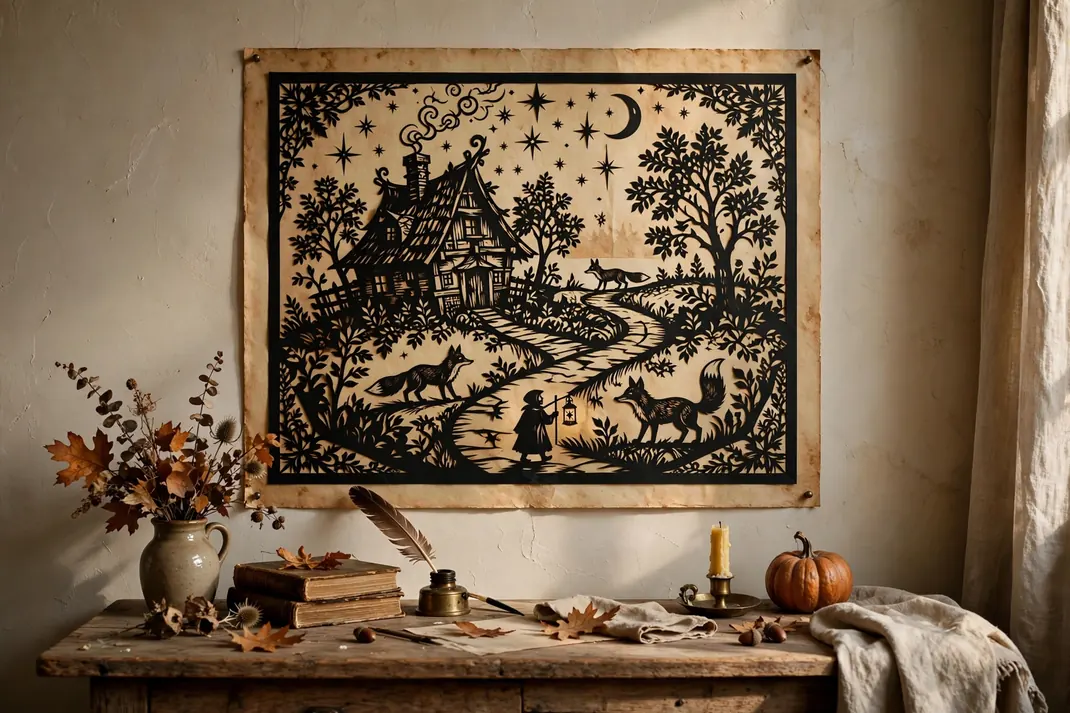
A single sheet of intricately cut black paper can tell an entire Halloween story: a winding path, a crooked cottage, foxes, stars, and a tiny figure carrying a lantern. Backed with warm parchment, the silhouette has the charm of an old folktale illustration and works beautifully over a writing desk.
- How to Style It: Sketch a connected design on the back of black paper, ensuring every shape touches the border or another element, then cut the smallest openings first with a sharp craft knife. Mount the finished 12-by-16-inch cutting on parchment-colored paper and frame it with a generous 2-inch mat.
- Why It Photographs Beautifully: The contrast makes even fine details visible, while the single unbroken silhouette looks refined in a room-wide photograph. Close shots reveal the craftsmanship without requiring additional styling props.
- Pro Tip: Leave bridges at least 1/8 inch wide around delicate branches and stars; thinner connections may buckle when glued. Apply adhesive with a sponge to the back rather than drawing wet lines that can wrinkle the paper.
- Budget-Smart Swap: Use black construction paper backed with kraft packing paper. Simplify the scene into larger shapes and a few strategic cutouts if you do not own a precision knife.
22. Layer a Topographic Pumpkin Cutaway
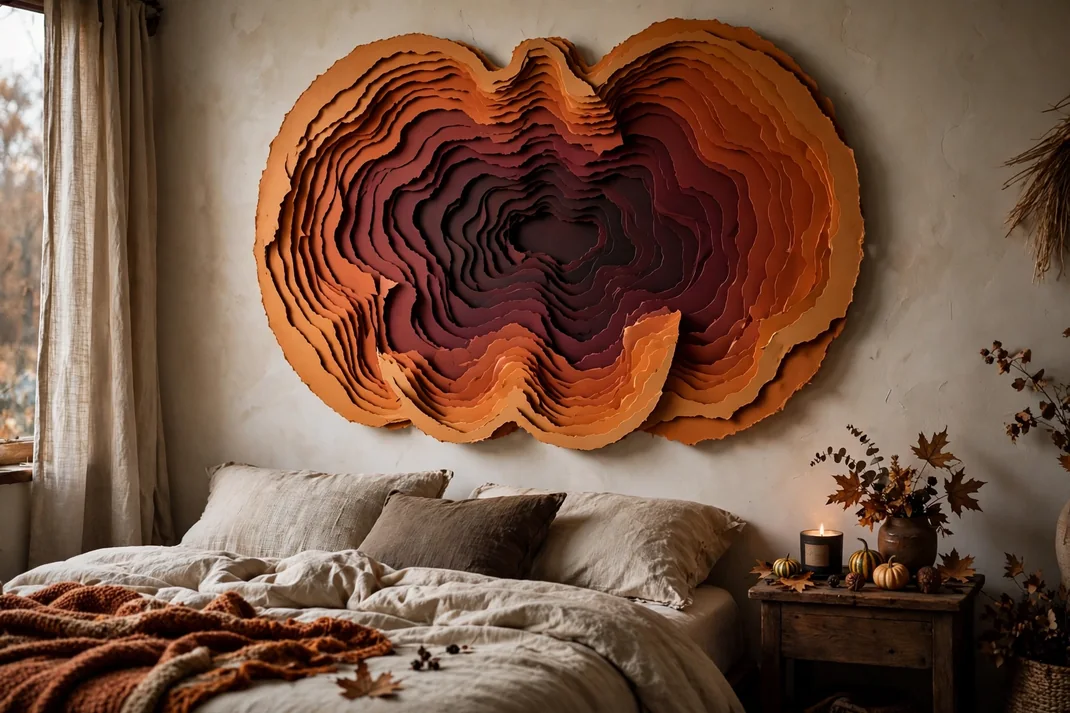
Concentric slices of orange and burgundy card turn a pumpkin into a topographic relief, with each contour revealing a deeper color beneath. The result is sculptural and contemporary, making it a clever choice for a bedroom that favors modern art over rustic Halloween decor.
- How to Style It: Draw one pumpkin silhouette, then trace progressively smaller irregular contours inside it to create eight cutting templates. Stack the cut layers on thin foam spacers, alternate warm orange values, and mount the completed relief on a dusty-pink or deep-plum square ground.
- Why It Photographs Beautifully: Stepped contours cast tidy shadow lines that clarify the form without drawn outlines. The bold central shape and color gradient produce a striking vertical image for social sharing.
- Pro Tip: Offset the contours slightly toward the lower left rather than shrinking them perfectly from the center; the uneven depth feels more geological. Keep the stem flat and dark so it does not compete with the layered body.
- Budget-Smart Swap: Cut the hidden middle layers from painted food cartons and use premium paper only for the top and visible edges. Hand-cut foam-board slivers can replace commercial adhesive spacers.
23. Pin-Prick a Vellum Phantom Panel
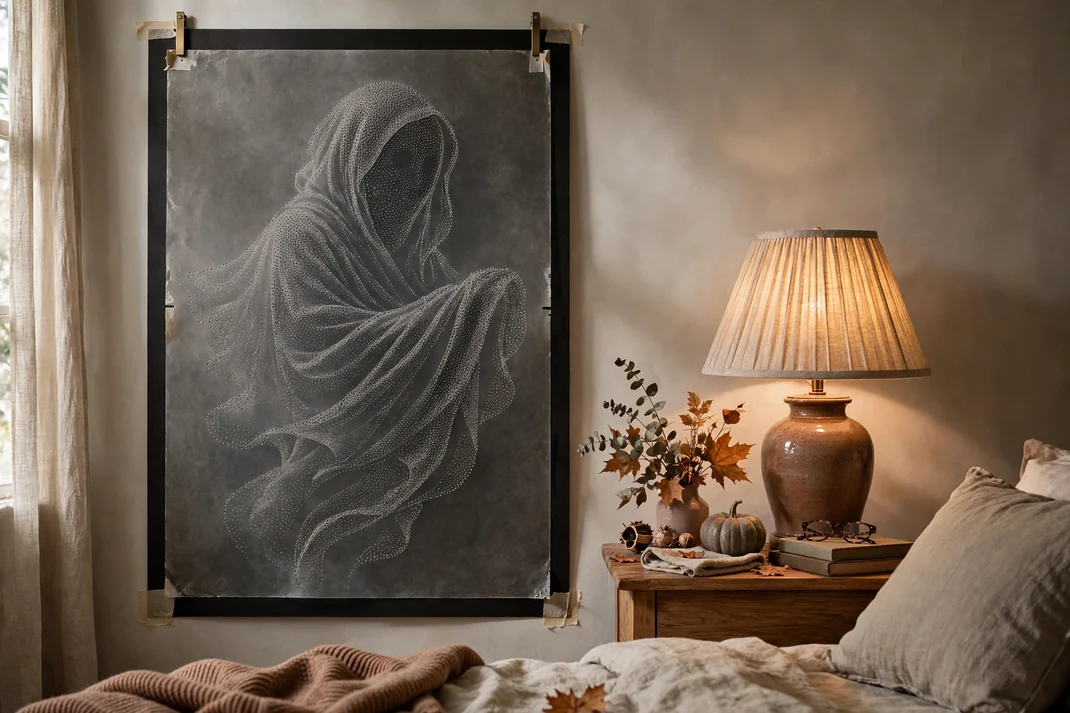
A pale ghost seems to emerge only when light passes through hundreds of tiny holes in a sheet of smoky vellum. Mounted over matte black card, the image is nearly abstract by day and delicately luminous beside a warm bedside lamp at night.
- How to Style It: Draw a simple flowing ghost outline on scrap paper, place vellum over it, and pierce dots more densely along the face and folds while leaving the outer edges sparse. Float the vellum 1/4 inch above black card with hidden spacers and frame it without pressing the layers together.
- Why It Photographs Beautifully: The varying dot density creates tonal shading from nothing but light, which looks refined in close photographs. The shallow gap behind the vellum adds a second set of tiny shadows for extra depth.
- Pro Tip: Use three needle sizes and rotate among them gradually; abrupt changes make the pattern look mechanical. Rest the work on dense craft foam so every puncture stays clean and round.
- Budget-Smart Swap: Trace onto translucent baking parchment and use a pushpin for the holes. A black gift-box lid can serve as both backing and frame.
24. Block-Print a Ghost Pattern on Handmade Paper
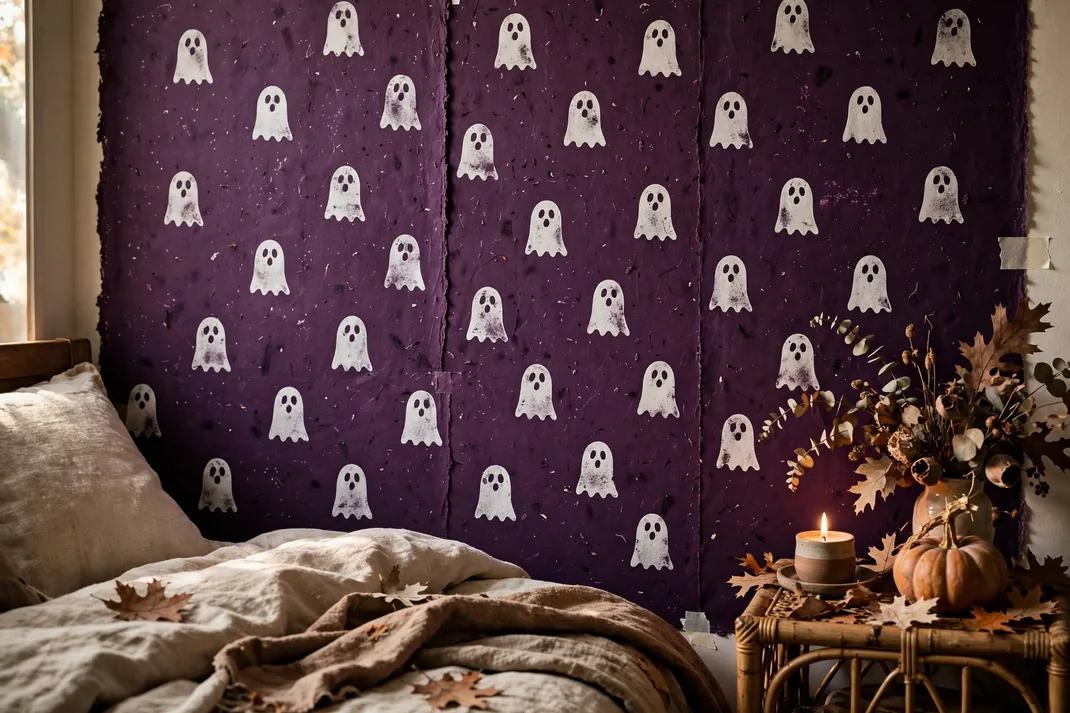
Hand-printed ghosts arranged in a loose repeat feel graphic and charming, especially when the ink is slightly imperfect. Printing in bone white over aubergine or soot-black handmade paper gives the familiar motif an art-studio finish rather than a mass-produced look.
- How to Style It: Carve a simple ghost shape into a small rubber block or dense foam sheet, roll on opaque ink, and stamp a staggered repeat across two or three deckle-edged papers. Frame the sheets as a vertical set, rotating the stamp occasionally and leaving a few deliberate gaps in the pattern.
- Why It Photographs Beautifully: Uneven ink edges and visible paper fibers add tactile detail that photography captures beautifully. The repeated white shapes create rhythm, while the missing impressions keep the pattern from looking like wallpaper.
- Pro Tip: Make one tiny change to every third ghost—tilt it, add a cutout eye, or print it lighter—so the viewer has something to discover. Test ink coverage on scrap paper before every fresh row.
- Budget-Smart Swap: Cut the stamp from a clean foam food tray and apply paint with a small makeup sponge. Make deckled paper edges by wetting a ruler line and tearing slowly.
25. Feather an Owl-Wing Paper Panel
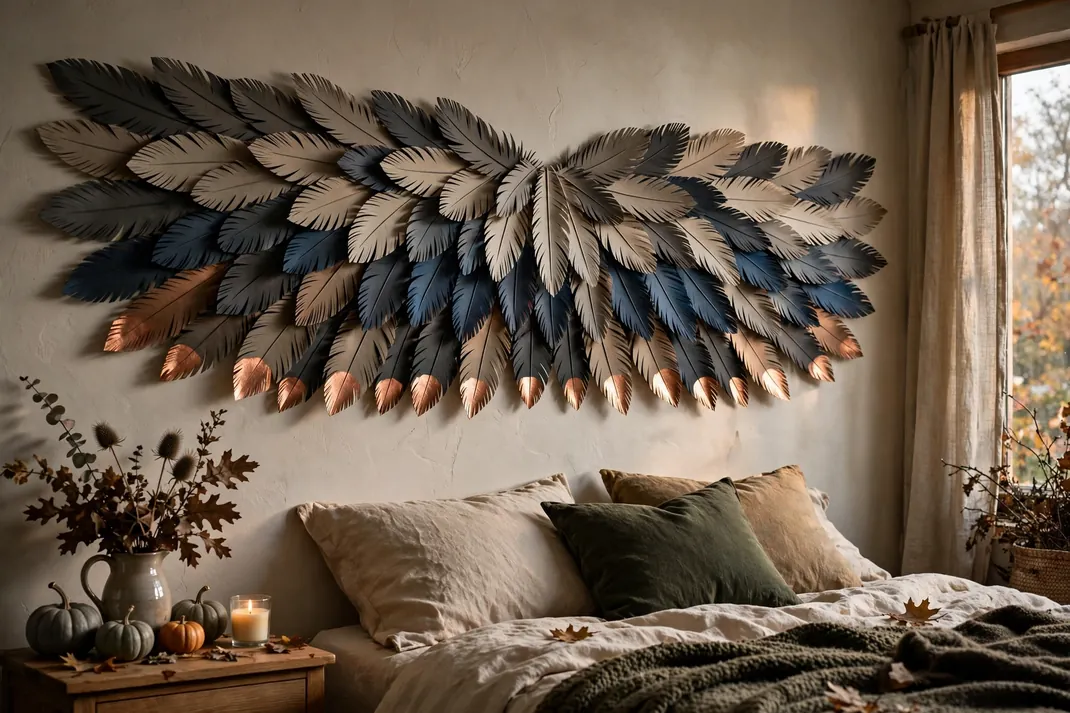
Overlapping paper feathers form a dramatic pair of abstract owl wings, bringing a tactile nocturnal motif to the wall without depicting a literal bird. Charcoal, mushroom, ink blue, and a few copper-tipped feathers create movement across a long horizontal panel.
- How to Style It: Cut 60–80 tapered feather shapes in three sizes, score a center vein, and fringe only the outer third of each edge. Glue them in overlapping rows that sweep outward from a narrow center gap on a 36-inch board, placing the darkest feathers along the lower edge and the copper details sparingly near the tips.
- Why It Photographs Beautifully: Layered feather edges cast fine shadows and create a strong wing-like direction across the frame. The wide format visually broadens the bed and photographs especially well with symmetrical bedside lamps.
- Pro Tip: Curl each feather gently over a pencil before gluing so the tips lift from the board. Keep the central gap visible; filling it completely turns the composition into an undefined texture instead of two wings.
- Budget-Smart Swap: Use painted kraft paper for most feathers and metallic gift-wrap scraps for the accents. Mount the composition directly on a lightweight painted cardboard panel if a panoramic frame is costly.
26. Stage a Miniature Paper Phantom Theater
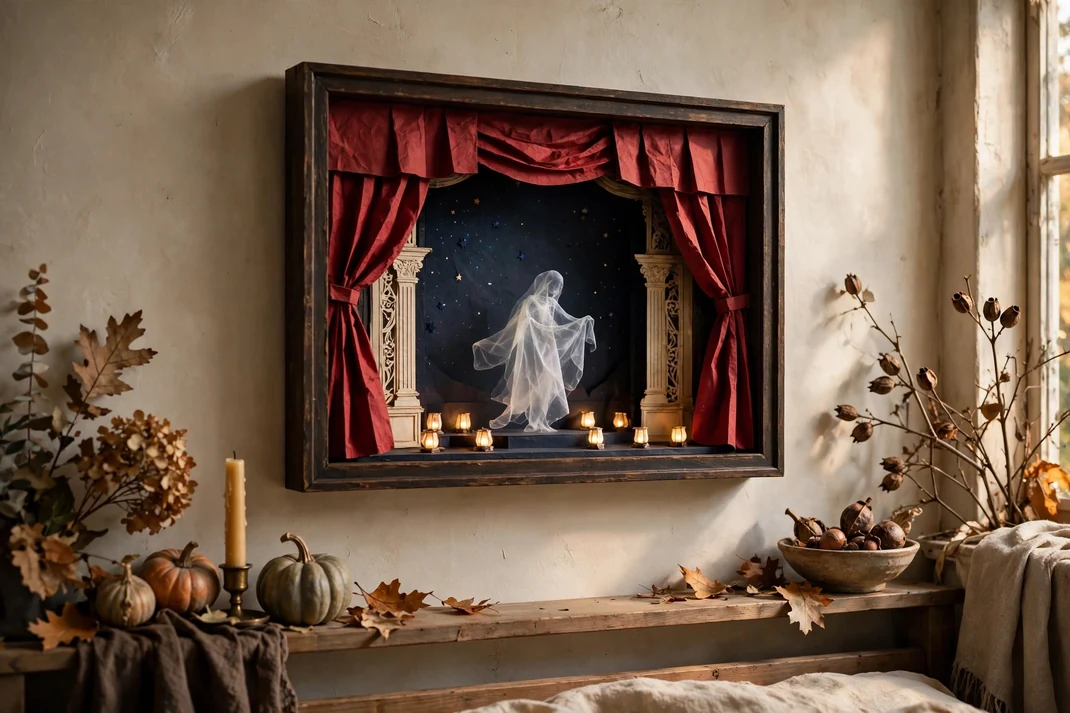
A shallow paper theater filled with layered curtains, a tiny stage, and one translucent phantom makes an irresistible final focal piece. Deep red side drapes, a midnight-blue backdrop, and ivory footlights give it the atmosphere of a vintage Halloween performance in miniature.
- How to Style It: Convert a deep box frame into a proscenium by adding cut-card columns, folded-paper curtains, and a small platform. Suspend a vellum phantom on clear thread between the foreground and backdrop, then add a row of tiny gold paper circles along the stage edge; display it on a secure picture ledge or mount it firmly.
- Why It Photographs Beautifully: The framed stage creates a complete story in one shot, with foreground, middle ground, and background all visible. Warm room light catches the translucent figure and gold details, making the tiny scene feel convincingly theatrical.
- Pro Tip: Keep the phantom at least 1/2 inch away from both the backdrop and frame glass so it casts a separate shadow. Darken the interior side walls more than the back panel to pull the eye toward center stage.
- Budget-Smart Swap: Use a shoebox lid, paper doilies trimmed into curtain edges, and metallic candy wrappers for the footlights. A clear strand from ordinary sewing thread is enough to suspend the figure.
Make the Paper Feel Intentional
The difference between temporary craft decor and convincing wall art is usually editing. Repeat one or two colors across the room, give dimensional pieces enough empty wall around them, and choose mounting methods that suit both the artwork’s weight and your wall finish. Paper is naturally sensitive to moisture, heat, and open flame, so keep these projects away from radiators, candles, and damp windows; warm LED lighting delivers the atmosphere far more safely. You do not need to make all 26 projects. One large relief above the bed, a narrow framed series beside the wardrobe, or a compact sculptural piece over a nightstand can establish the entire Halloween mood while leaving the bedroom restful and usable.