12 DIY Picture Frames for Beautiful & Budget-Friendly Wall Decor
Some walls feel unfinished even when the furniture is perfect. A bare wall makes a room look temporary, like you just moved in and never quite settled. The trouble is that store bought frames cost far more than they should, especially when you want a whole gallery wall of them. This list solves that problem with twelve frame projects you can build yourself using supplies that are cheap, easy to find, and honestly fun to work with. Each idea comes with a full walkthrough, from gathering materials to the final styling touch. Whether you love rustic textures, clean modern lines, or something playful and colorful, there is a frame here that fits your home and your budget.
Scroll through, pick the ones that suit your style, and set aside a relaxed afternoon. By evening you could have walls that finally feel like yours.
1. Popsicle Stick Grid Frames
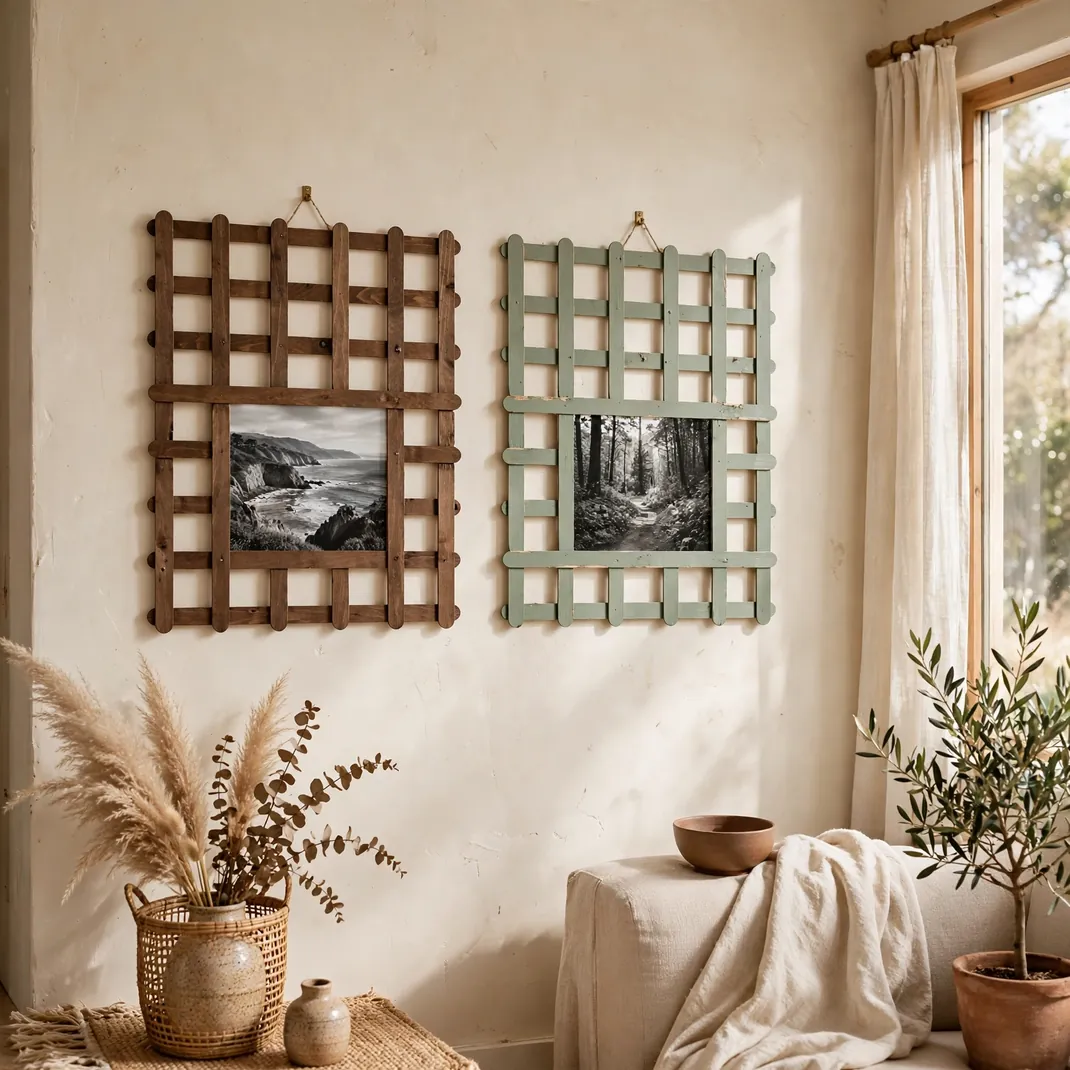
Thin wood sticks from the craft aisle become something far more refined when they are lined up with care. This project stacks and glues craft sticks into a neat lattice edge that appears surprisingly custom around a favorite photo. The warm honey tone of the wood suits kids art, travel snapshots, and black and white portraits equally well. You can stain the sticks deeper for a richer tone or leave them pale for a Scandinavian feel. Line up a handful of these in a row above a desk and that spot suddenly feels styled. It is proof that humble supplies can produce genuinely art worthy results.
What to Gather: Pack of plain wooden craft sticks, strong craft glue or a mini glue gun, sturdy card for the mounting panel, a ruler, small binder clips, and your favorite photo or print.
How to Build: Lay out sticks into a square or rectangle and glue another layer crosswise for strength. Clamp with binder clips until dry, then attach a card backing with the photo taped in place. Add a triangle of card at the rear should you wish it to stand on a shelf.
Style Lift: Brush the finished piece with a coat of clear matte sealer. It deepens the wood tone and protects the sticks from dust, making a cheap build look professionally finished.
2. Reclaimed Wood Plank Frames
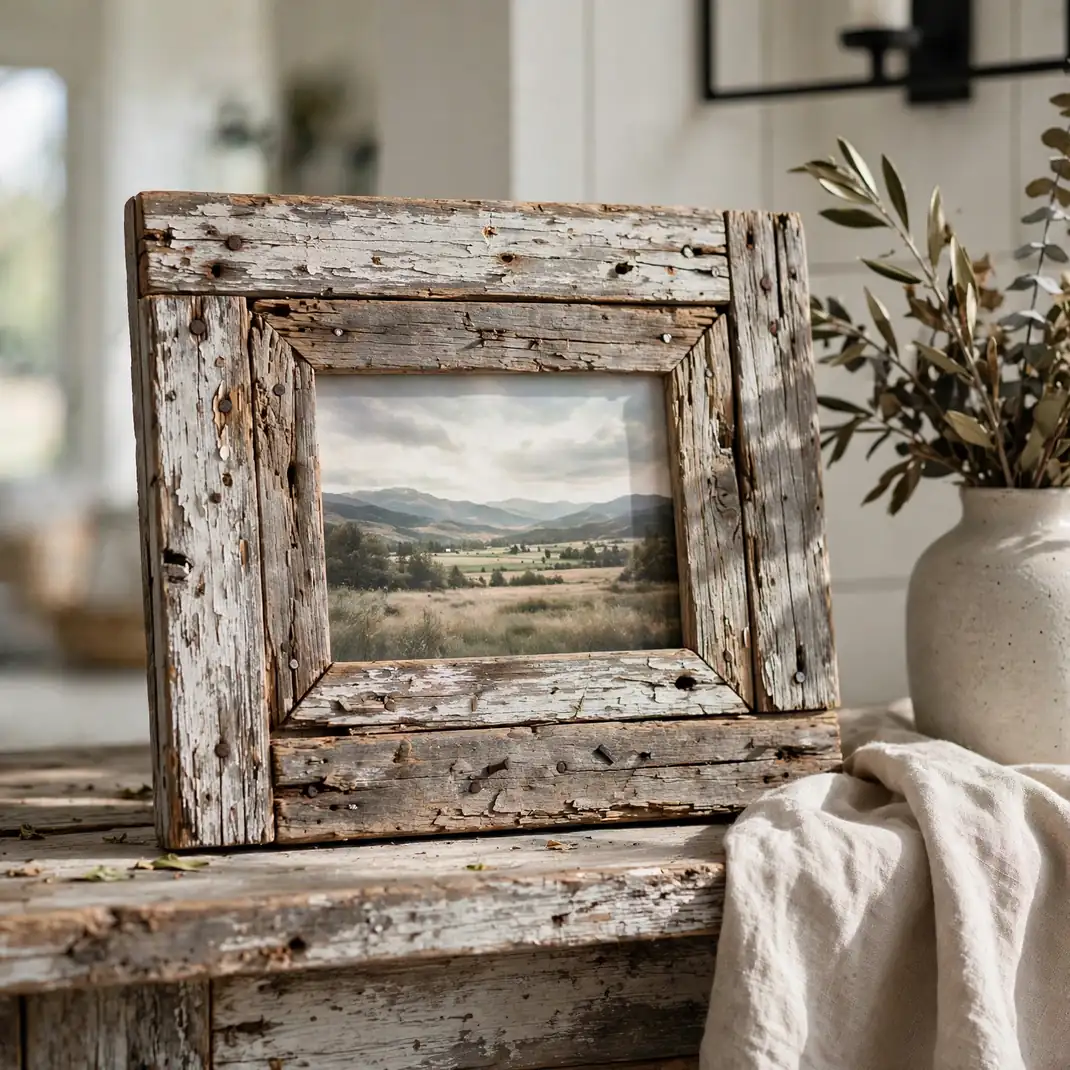
Old fence boards, pallet slats, and offcuts from the garage all carry a texture that new lumber cannot fake. This frame celebrates every knot, crack, and weathered grain line, turning scrap wood into a chunky border with real character. It is an ideal home for landscape shots, wedding portraits, and botanical art. The wide profile of plank wood gives even a small photo serious presence in the room. No two frames will ever match, and that individuality is exactly the point. If your taste leans farmhouse, cabin, or earthy modern, start here.
What to Gather: Four lengths of reclaimed wood cut to equal size, wood glue, small nails or a brad nailer, sandpaper, a saw or a hardware store cutting service, and mounting hardware.
How to Build: Lightly sand to remove splinters while keeping the aged texture. Join the planks at each corner using glue and nails, keeping edges square. Staple or tape your photo to a thin support board and drop it in from behind the panel.
Style Lift: Rub a dab of white candle wax over the high spots ahead of a thin wash of paint, then buff it off. The result is a timeworn aged patina that looks authentically vintage.
3. Washi Tape Instant Borders
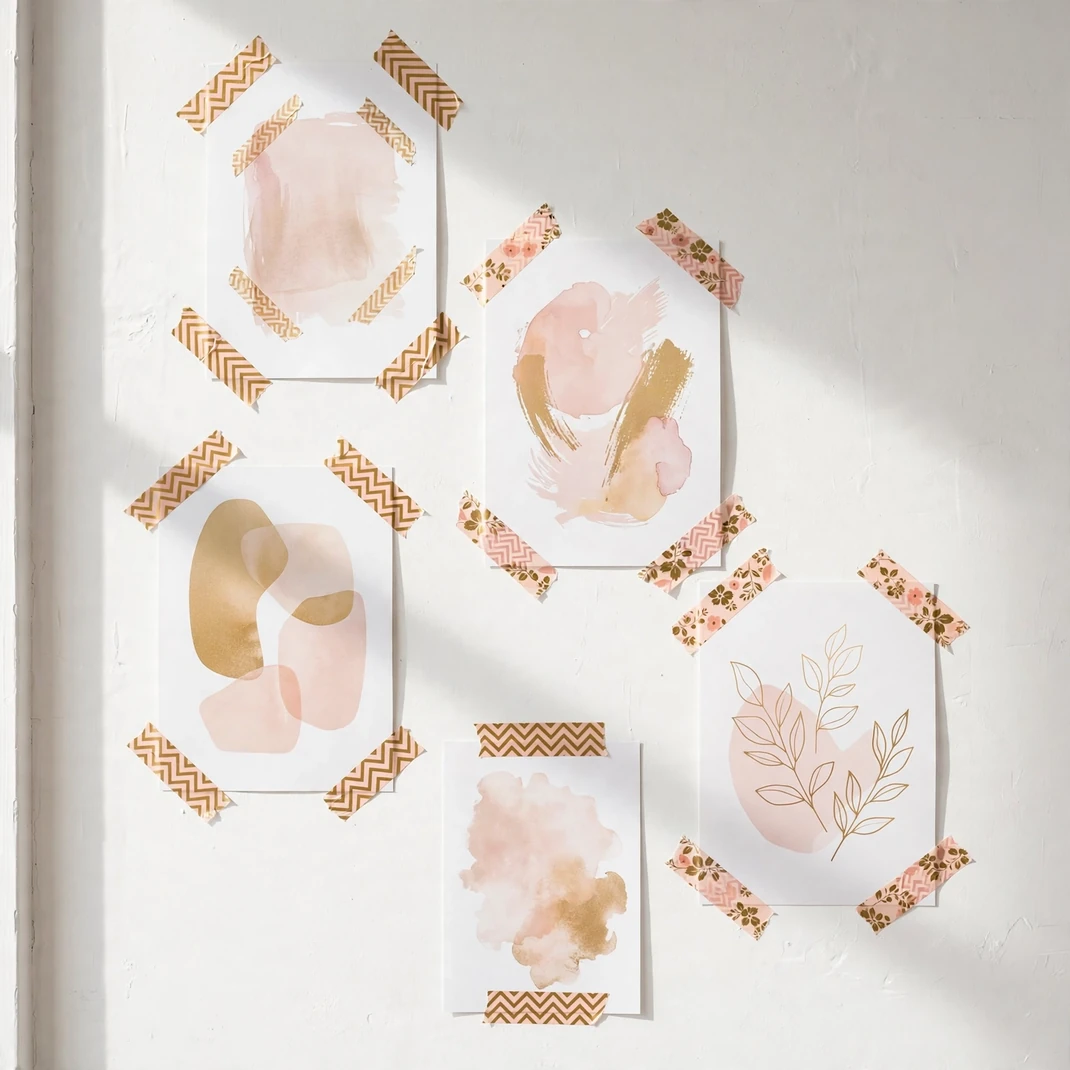
Not every frame needs wood, glass, or glue. Decorative washi tape turns a bare print into complete wall art in about five minutes flat. You simply tape the print right onto the wall, building a patterned border that frames it in stripes, angled cuts, or a full outlined rectangle. The patterns available today are endless, from delicate florals to bold geometrics to metallic foils. It is the perfect solution for renters because the tape peels away without damage. Swap the tape seasonally and your photo wall gets a fresh look every few months. Kids can help with this one, which makes it a lovely family afternoon activity.
What to Gather: Several rolls of washi tape in coordinating patterns, printed photos or art posters, scissors, and a level or a phone level app.
How to Build: Use the level to set the top line, then stick the print in place with small tape loops. Frame the edges with tape strips, mitering the edges by folding the tape neatly. Press all the tape flat and step back to check alignment.
Style Lift: Combine two tape widths, a wide pattern with a thin metallic stripe within it. The double border reads like a real mat and frame from across the room.
4. Cardboard Layered Stack Frames
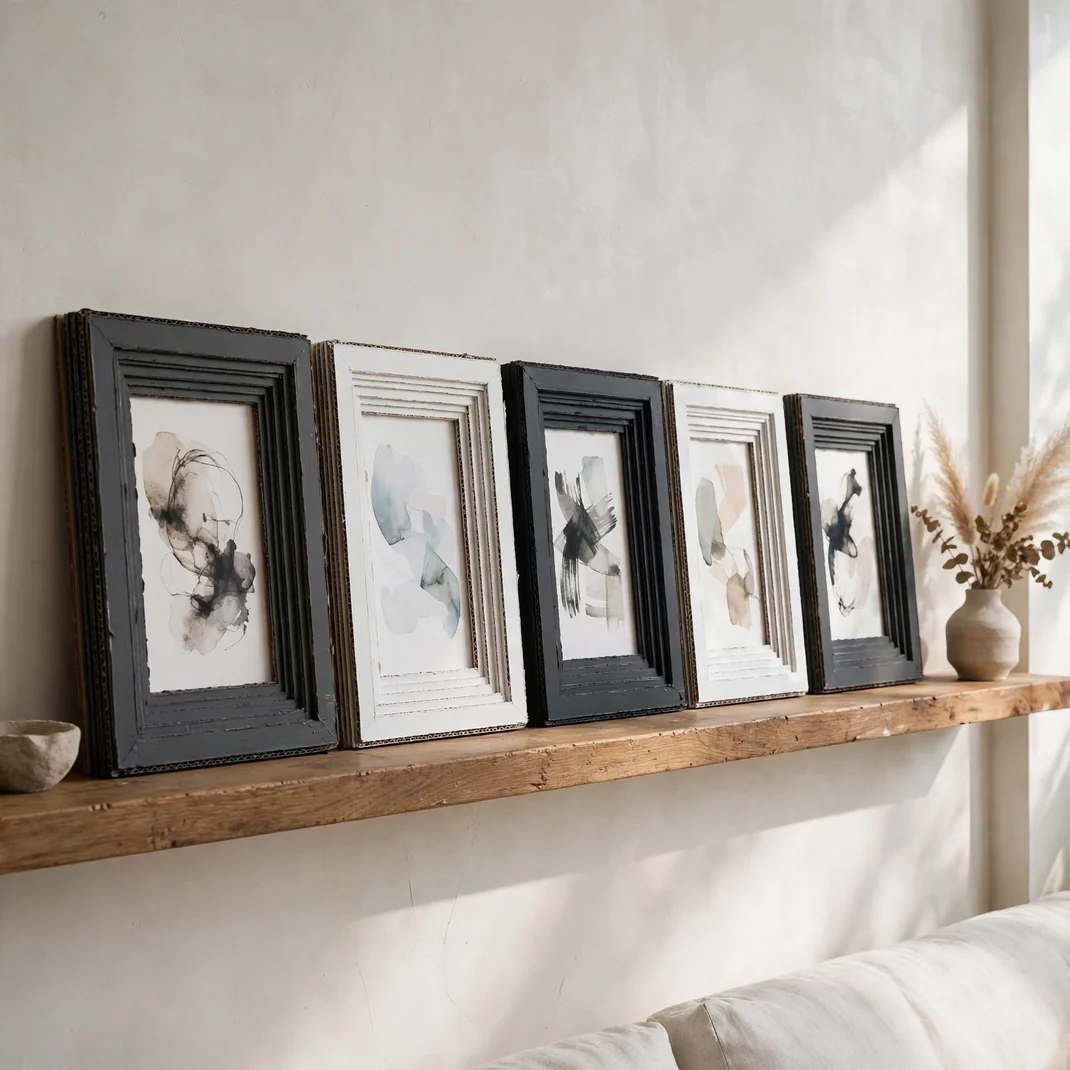
Corrugated board from shipping boxes is tough, free, and easy to cut with a sharp blade. Layering multiple cut frames on top of each other builds a deep, substantial border with a satisfying shadow line. Coated in paint or patterned paper, nobody will guess the humble origin. This method is ideal when you need many matching frames for a big photo wall on a tiny budget. Large statement sizes are easy since cardboard cuts to any dimension you like. Paint the set in one color for cohesion, or alternate two tones for rhythm along the wall. It stays the quickest route to a full, curated looking display.
What to Gather: Clean corrugated cardboard boxes, a craft knife and cutting mat, white glue, craft paint or gift wrap, and a metal ruler.
How to Build: Cut four identical frame shapes from cardboard and glue them into a stack. Once dry, paint the whole stack or wrap the edges in paper. Fix the photo to card and tape it to the back opening.
Style Lift: Paint the inside edge a contrasting color so a thin reveal line outlines the photo. That small detail makes the frame look molded rather than handmade.
5. Rustic Jute Twine Frames
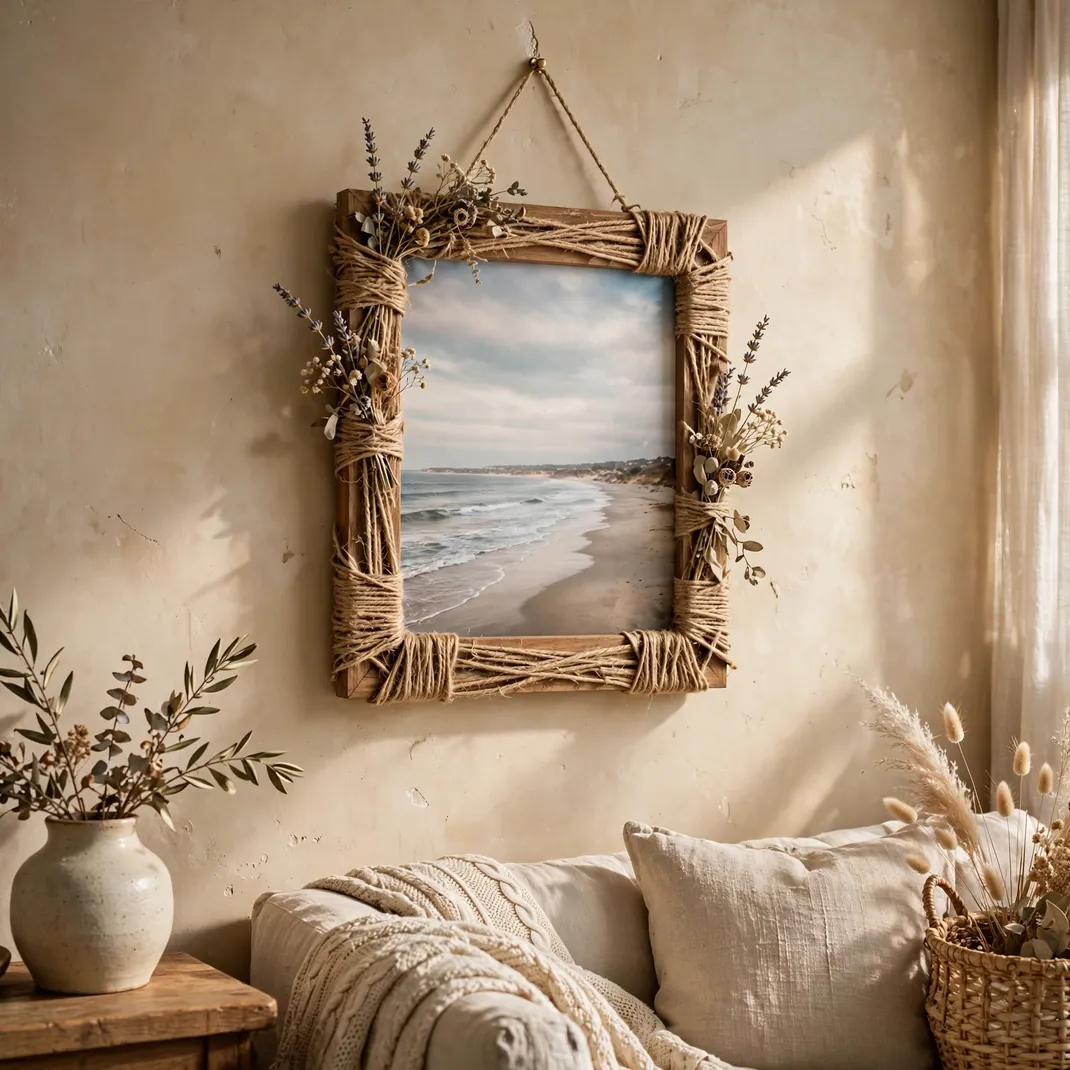
A plain thrift store frame can be completely transformed with nothing but a ball of natural twine. Wrapping the frame tightly in overlapping rows hides scratches, dated finishes, and boring profiles under a warm fibrous texture. The result has a relaxed coastal cottage feeling that pairs beautifully with beach scenes and family vacation shots. Add a few tiny shells or a small sprig of dried lavender tucked under the last wrap for a personal touch. This is one of those crafts that looks complicated but is mostly just patient, repetitive motion. Put on a podcast and the time flies by.
What to Gather: A simple frame of any size, natural jute twine, hot glue, small shells or dried botanicals for decoration, and scissors.
How to Build: Anchor the twine end at a back corner with glue and wrap the frame firmly, holding each row snug against the last. Dab glue every few inches so nothing slips. Tuck the finishing end under the final rows and glue it flat.
Style Lift: Mix in an extra strand of thin gold cord every tenth row. The subtle shimmer elevates the rustic look and ties the piece to warmer metallic decor.
6. Painted Linen Mat Frames
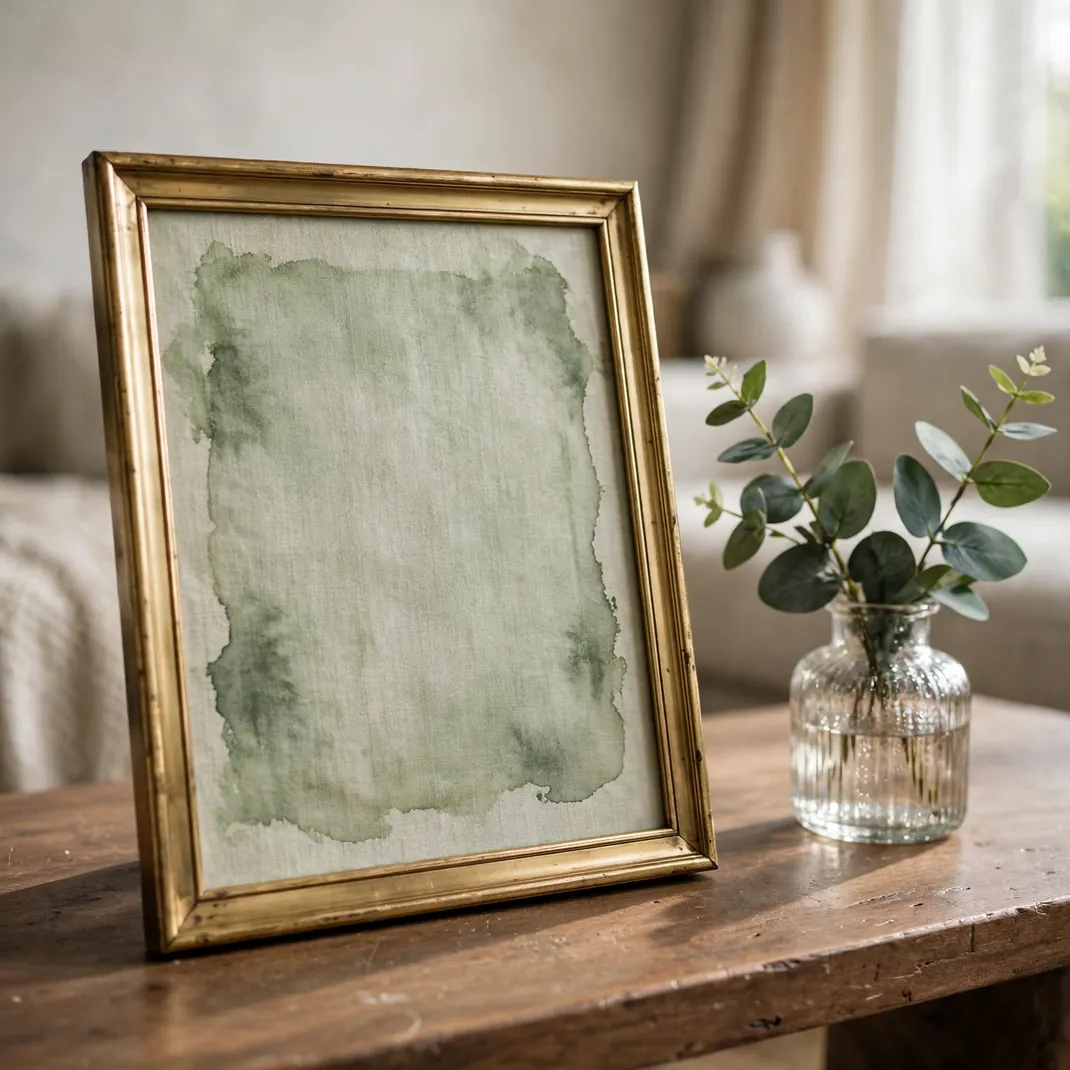
Sometimes the frame itself is fine and the plain white mat is what needs the upgrade. Brushing watered down paint onto a linen mat creates a soft colored border that makes the photo within glow. Sage green, dusty blue, and warm clay are gorgeous choices that flatter most photography. The linen weave catches the paint unevenly in the best way, giving a hand dyed effect no machine can copy. Use this trick to unite mismatched frames by painting all their mats the same tone. It makes a quiet change with a big payoff, and it costs almost nothing.
What to Gather: Your frame of choice that includes a fabric or paper mat, acrylic paint in your selected color, a wide soft brush, a cup of water, and masking tape.
How to Build: Remove the mat and tape off the inner edge for a crisp line. Thin the paint with water and brush it onto the linen in smooth strokes. Let it dry fully, add another coat if the color looks pale, then put the frame back together.
Style Lift: While the paint is still wet, drag a dry brush lightly over the surface for a streaked denim like look. It adds depth that flat paint simply cannot match.
7. Branch and Driftwood Frames
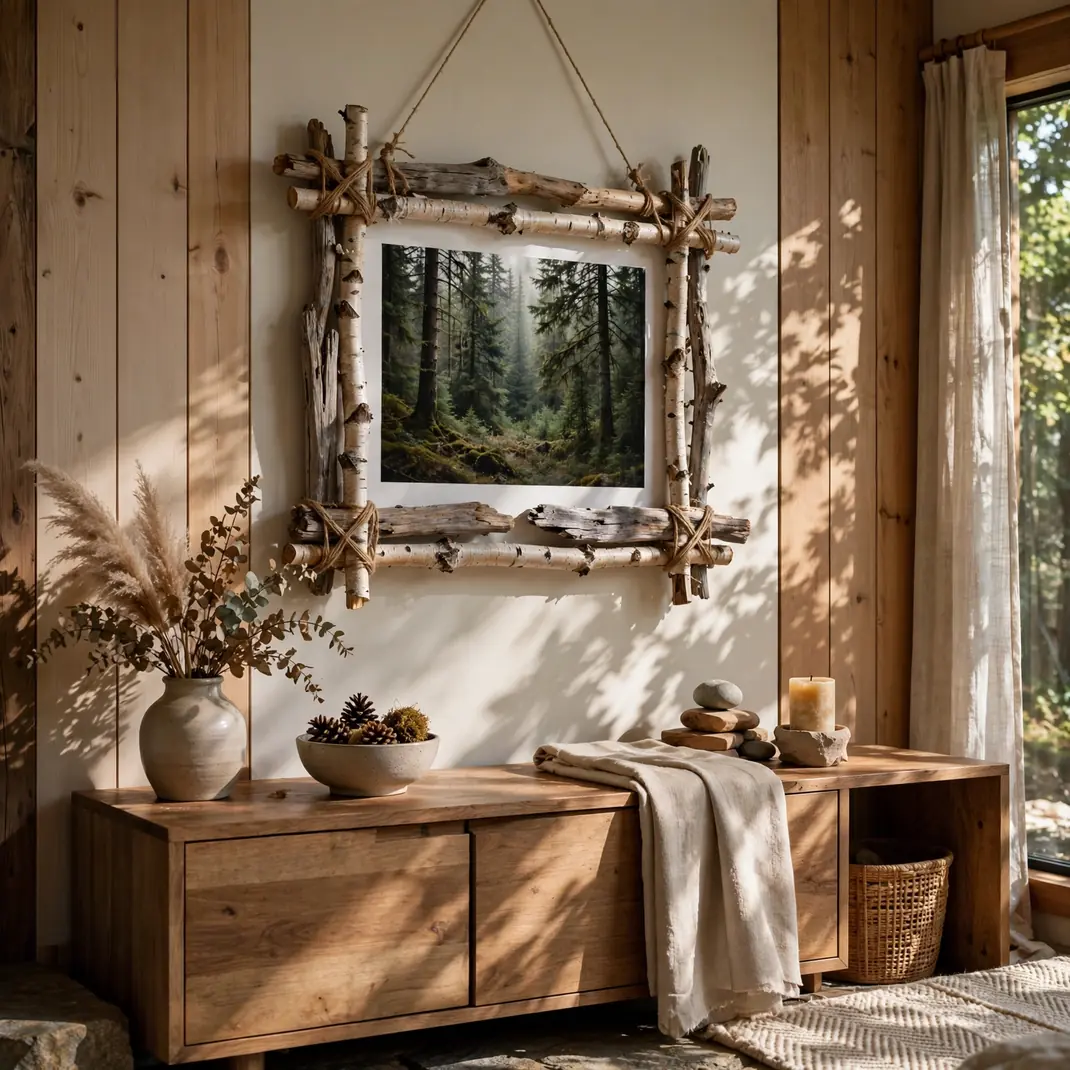
Sticks gathered on a walk can become the most charming frame in your home. Lean branches lashed at their ends form an organic frame edge that feels plucked from a woodland cabin. Driftwood pieces, with their silvery weathered sheen, are especially beautiful near ocean and lake photography. Each frame is shaped by what nature provides, so no two will ever look alike. This is a wonderful make to do with children, who love the treasure hunt for the perfect sticks. Seal the completed piece and it will last for years, carrying a small piece of the outdoors inside.
What to Gather: Straight dry branches or driftwood, garden twine or thin wire, a hot glue gun, pruning shears, sandpaper, and clear wood sealer.
How to Build: Clip branches to four matching lengths and sand any rough spots. Lash the corners tightly with twine in a crisscross weave, adding glue for extra hold. Brush on sealer, let it cure, then secure the photo onto the support board behind the border.
Style Lift: Weave a few sprigs of preserved eucalyptus or dried grasses into the twine lashings. The greenery softens the whole piece and makes it feel alive.
8. Gold Leaf Foil Edge Frames
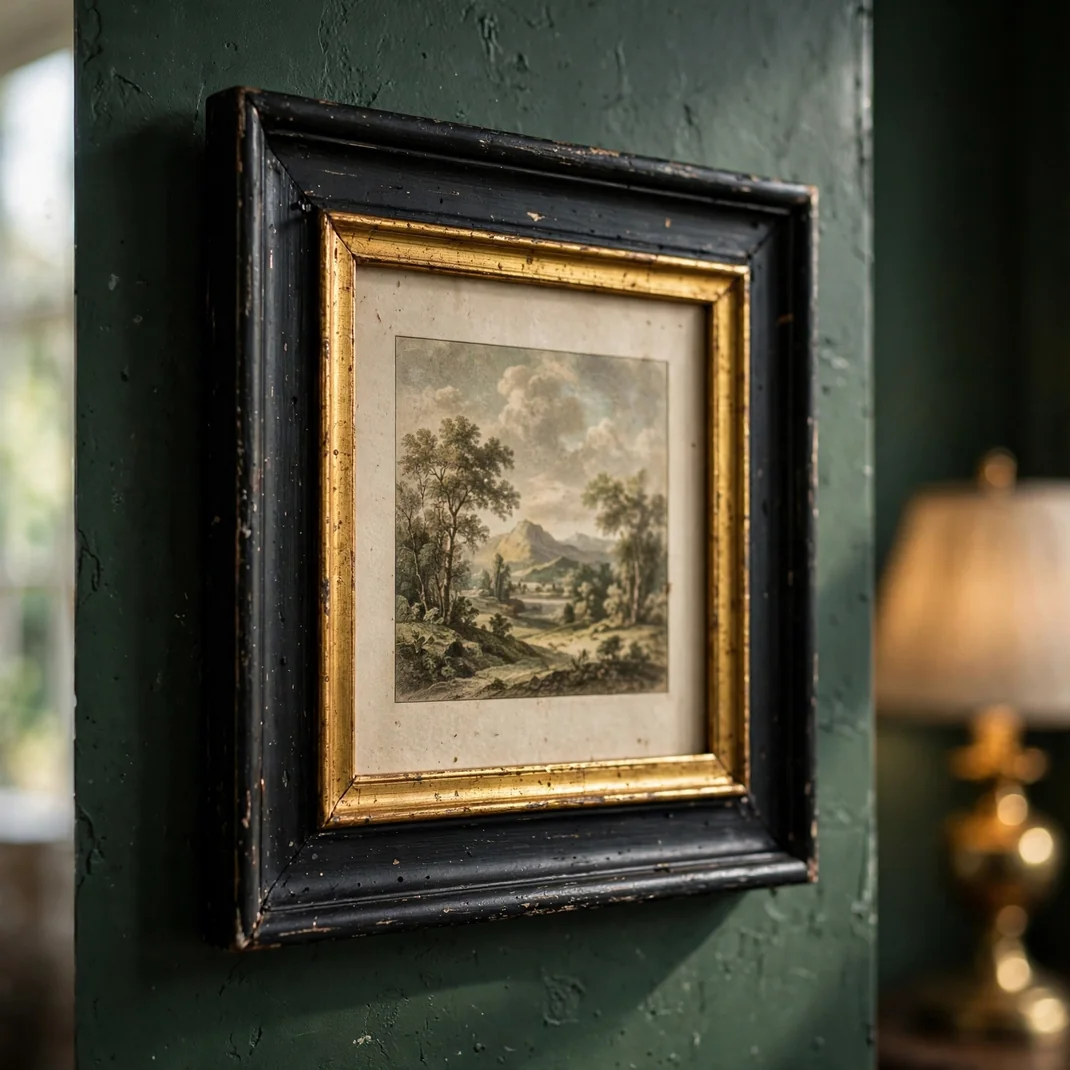
A touch of gold instantly makes any room feel more considered. Gilding just the inner or outer edge of a plain frame adds that jewelry like detail without the cost of a solid brass frame. Imitation gold leaf sheets are inexpensive and surprisingly forgiving for beginners. The slightly imperfect application is part of the charm, catching light in a way flat gold paint never does. Try it on black frames for drama, white frames for freshness, or navy frames for rich classic style. Your guests will assume these came from a high end boutique.
What to Gather: Any plain frame, imitation gold leaf sheets, gilding adhesive or size, a soft brush, masking tape, and a clear topcoat.
How to Build: Mask the areas you want to keep plain and brush adhesive onto the exposed edge. Wait until it turns tacky, then press leaf sheets on gently with the soft brush. Brush away the excess flakes and seal with topcoat once dry.
Style Lift: Gild only the inner bevel and leave the outer edge matte. That slim golden line pulls the eye toward the artwork.
9. Padded Fabric Upholstered Frames
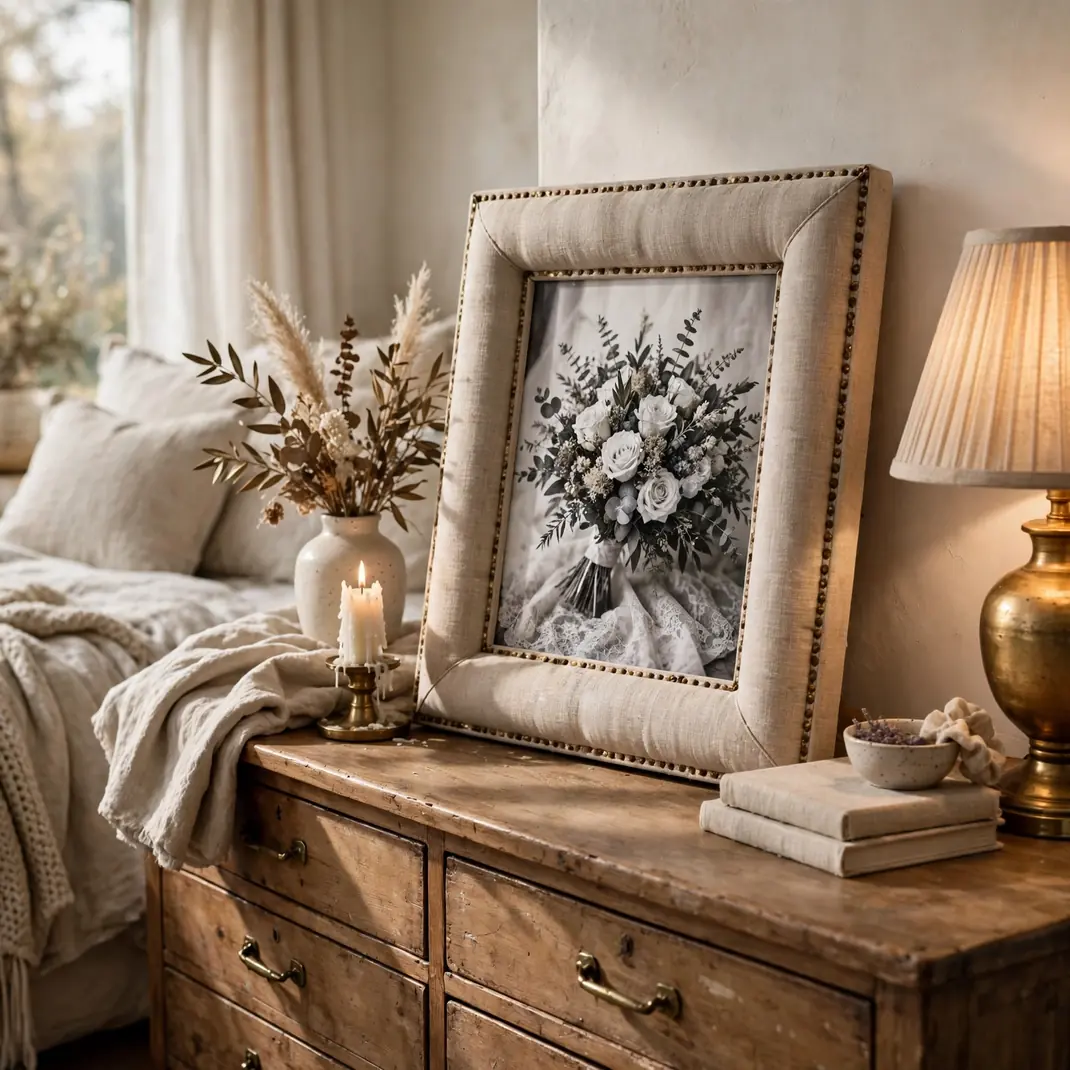
Upholstered frames bring a softness that wood and metal never offer. Wrapping a base frame in batting and fabric creates a plush padded border that looks lifted from a designer nursery or an elegant bedroom. Velvet gives a luxe jewel box effect, linen keeps things airy, and printed cotton adds personality to a kids room. The padding also makes these frames safe to hang low where small hands might bump them. Choose a fabric that echoes your bedding or curtains so the room feels pulled together. It is sewing light work, mostly folding and stapling.
What to Gather: The basic frame, thin quilt batting, your preferred fabric, a staple gun, an iron, and a pencil.
How to Build: Trim batting slightly larger than the base and staple it neatly across the back. Iron the fabric, center it on the batting, and staple it taut, folding the edges like a gift. Trim the excess and pop your photo in as usual.
Style Lift: Add a line of small brass nailheads along the outside edge. They read as tailored upholstery detailing and take the build from crafty to couture.
10. Clipboard Style Clip Frames
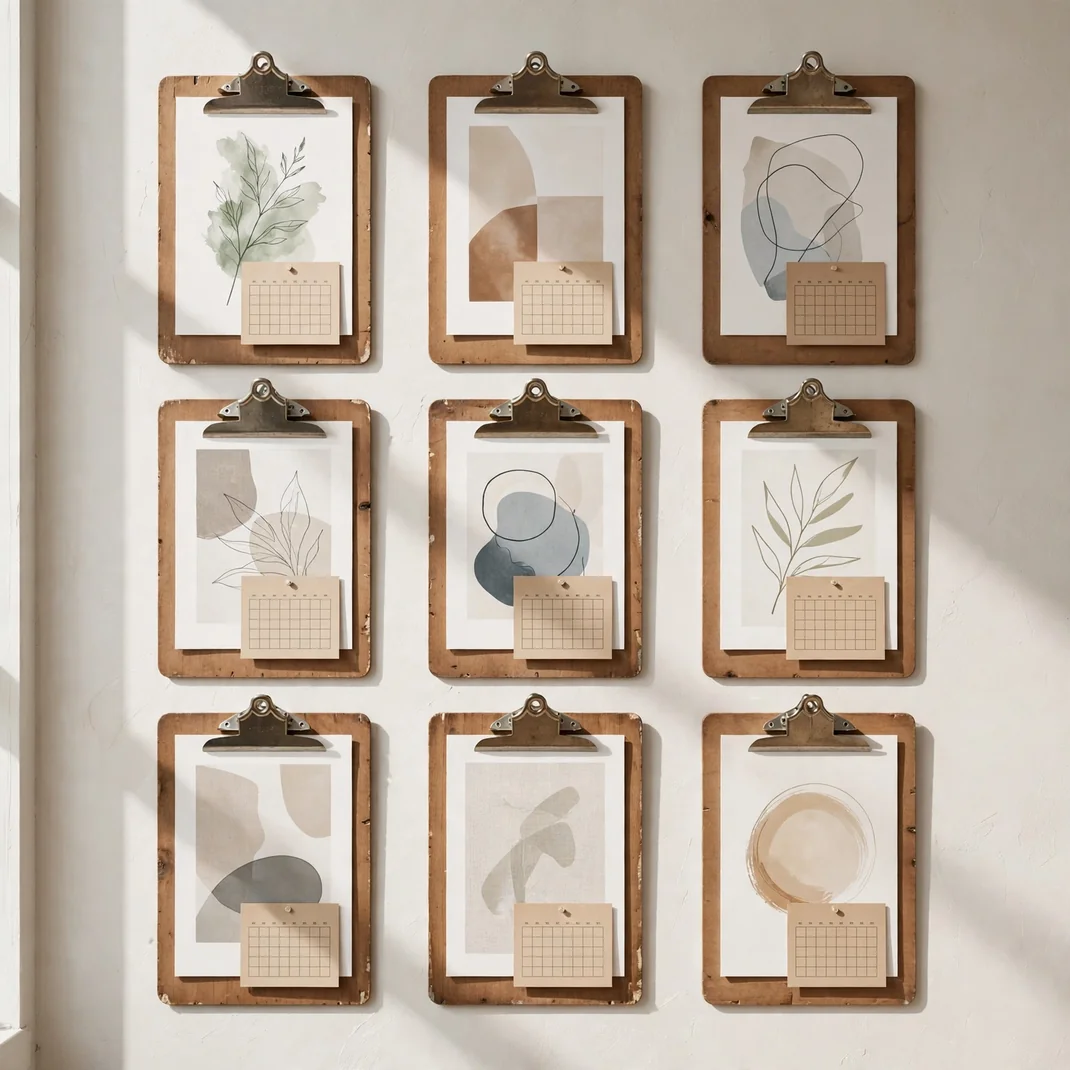
For art that changes often, few options beat a frame you can swap in seconds. A timber board fitted with a sturdy clip at the top holds art, kids drawings, and seasonal snapshots with zero fuss. Slide the old art out, slide the new one in, and your wall display is refreshed in under a minute. Stain or paint the boards to match your decor, from natural oak tones to crisp white to moody charcoal. Arrange several clipboards in a grid for a studio like display that always feels current. It is equal parts practical and stylish, and guests always ask about it.
What to Gather: Wooden boards cut to size, metal binder clips or clipboard clips, small screws, wood stain or paint, plus a sanding block.
How to Build: Smooth the boards with the sanding block and apply your selected topcoat. Screw the clip firmly near the top center of each board. Mount the boards on the wall with picture hooks and clip your art in place.
Style Lift: Attach a tiny bulldog clip to the bottom edge too and hang a handwritten caption card under the art. It gives the display a curated museum label feeling.
11. Mosaic Tile Fragment Frames
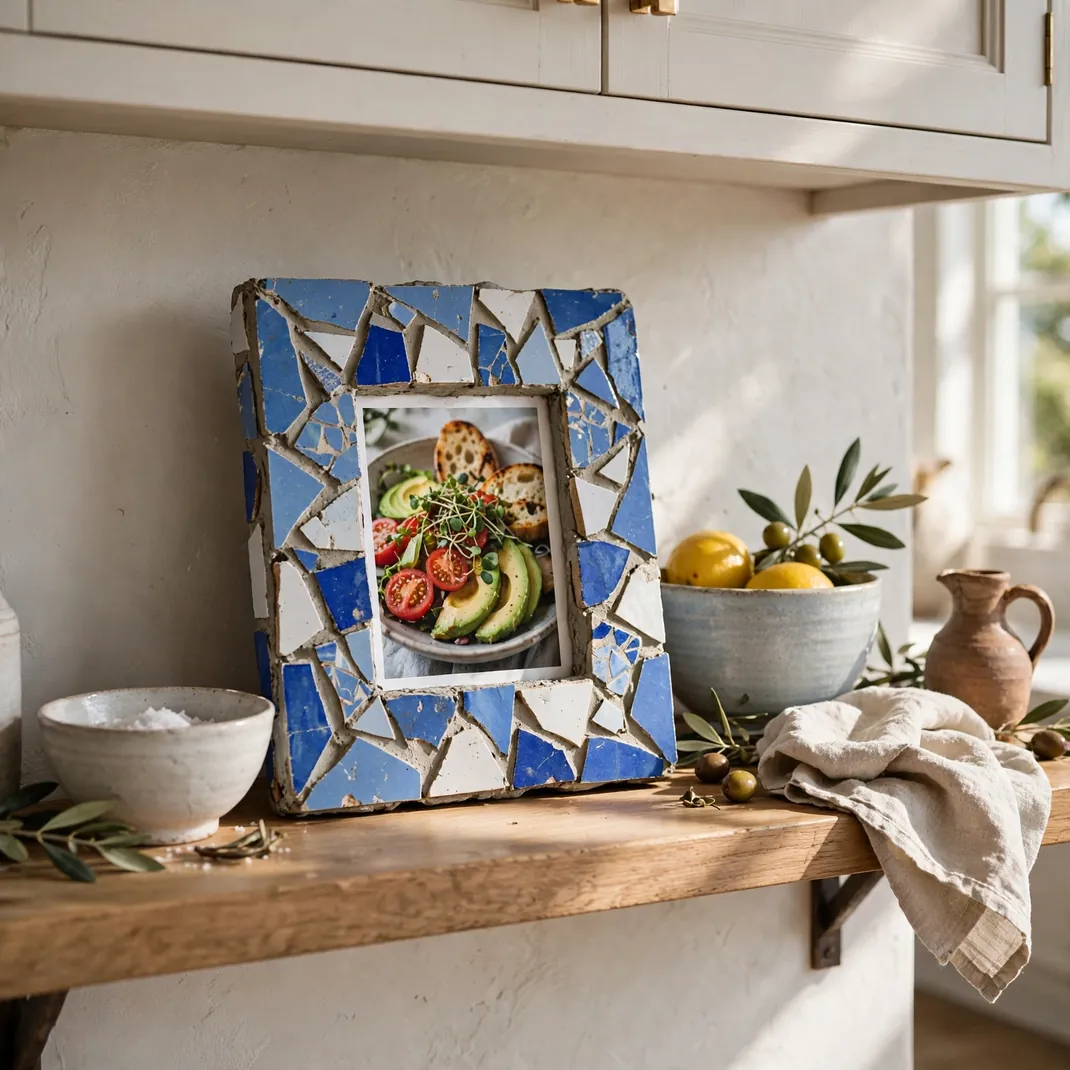
Broken tiles, leftover backsplash pieces, and chipped saucers get a glamorous second life as mosaic. Pressing the fragments into adhesive around a frame base forms a sparkling patchwork that catches the light beautifully. Blues and whites give a Mediterranean feel, while mixed jewel tones look bold and bohemian. This technique is wonderfully forgiving because irregular pieces are the whole aesthetic. Grouting the set surface locks everything in and gives it a professional tiled look. Hang one in a bathroom or kitchen where a bit of shimmer and color is always welcome.
What to Gather: One flat timber frame base, broken tile or china shards, tile adhesive or strong glue, ready mix grout, a sponge, and safety glasses.
How to Build: Spread the fragments on the frame with no glue at first to plan your pattern. Glue the pieces down with small gaps between them and let the adhesive cure fully. Spread grout over the whole top, work it well into the gaps, then wipe the tiles clean with a damp sponge.
Style Lift: Slip one or two mirror shards into the mosaic. They flash unexpectedly as you walk past and make the frame feel magical.
12. Floating Acrylic Sandwich Frames
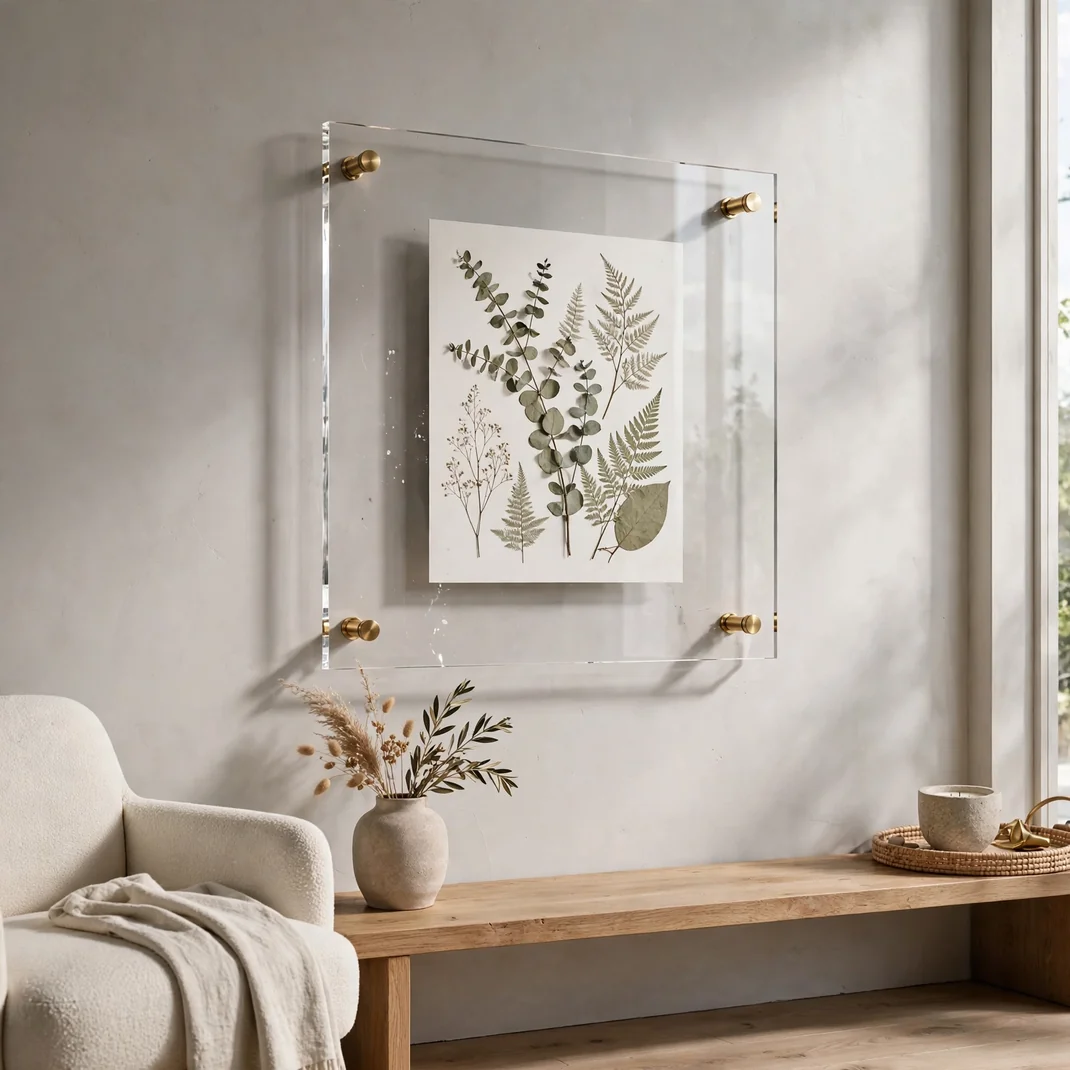
Two clear acrylic sheets and four small bolts create the sleekest frame on this list. Your photo appears to float between the transparent layers with no visible border at all, a look that suits modern interiors perfectly. Pressed botanicals, concert tickets, and minimalist art looks especially striking suspended in clear acrylic. The hardware doubles as decoration, so choose bolts in brass or matte black to suit your room. It remains the most contemporary option here and also one of the quickest to assemble. If clean minimal lines are your thing, this is your frame.
What to Gather: Two acrylic sheets cut to the same size, four decorative bolts with nuts, a drill with a fine bit, your photo or keepsake, and soft cloth for cleaning.
How to Build: Mark and drill the four corners of both sheets carefully, keeping the protective film on while you work. Peel the film, clean both sheets, and place your photo between them. Thread the bolts through and tighten the nuts just enough to hold everything snug.
Style Lift: Hang the completed frame a few inches in front of the wall on standoff mounts. The shadow it casts adds depth and a true floating illusion.
Conclusion
Beautiful walls do not require a big budget, only a spark of imagination and an afternoon of making. These twelve frame ideas prove that the most personal decor is often the kind you build with your own hands. Start with one simple design, enjoy the process, and watch how a few handmade frames change the mood of a room. Your walls have been waiting for this.
The Frame to Room Matcher
Not sure which design suits which space? Use this quick guide to match each frame style to the room where it shines brightest.
- Living room: Reclaimed Plank, Gold Leaf Edge, Acrylic Sandwich
- Bedroom: Padded Frame, Twine Rustic, Painted Linen
- Kids room: Popsicle Stick, Washi Tape Borders, Clipboard Clip
- Kitchen or bath: Mosaic Tile, Driftwood
- Home office: Cardboard Stack, Clipboard Clip, Acrylic Sandwich
The 15 Minute Hang Formula
Finished your frames? Hang them like a pro with this quick routine.
- Lay all frames on the floor and plan the layout before touching the wall.
- Cut paper templates for each frame and tape them up to test spacing.
- Keep two to three inches between frames for calm, balanced spacing.
- Hang the largest piece first, then build outward from it.
- Step back often. Your eye spots crooked lines faster than any level..