23 Small Sewing Room Ideas for a Beautiful and Organized Workspace
Sewing needs more room than people give it credit for — a machine, a cutting surface, an ironing zone, fabric that spreads, and the small tools that multiply like rabbits. Yet some of the most inspiring sewing rooms I’ve styled for this site have been closets, alcoves, and the spare corners of bedrooms. The secret isn’t square footage; it’s intention. A small sewing room only works when every inch is assigned a job: the machine at the light, the cutting surface at the right height, fabric stored where it can be seen and reached, and every notion close enough to grab without standing up. Spaces like these aren’t compromises — they’re concentrated, and concentration is a kind of luxury.
The ideas below are built for rooms that range from a shared corner to a full small bedroom. Some are furniture solutions, some are storage systems, and several are simple habit changes that cost nothing. What they share is a rule I’ve learned from years of this work: in a small space, the furniture should disappear when it’s not being used, and reappear instantly when it is. Here are 23 small sewing room ideas that make that happen.
Corner Sewing Nook
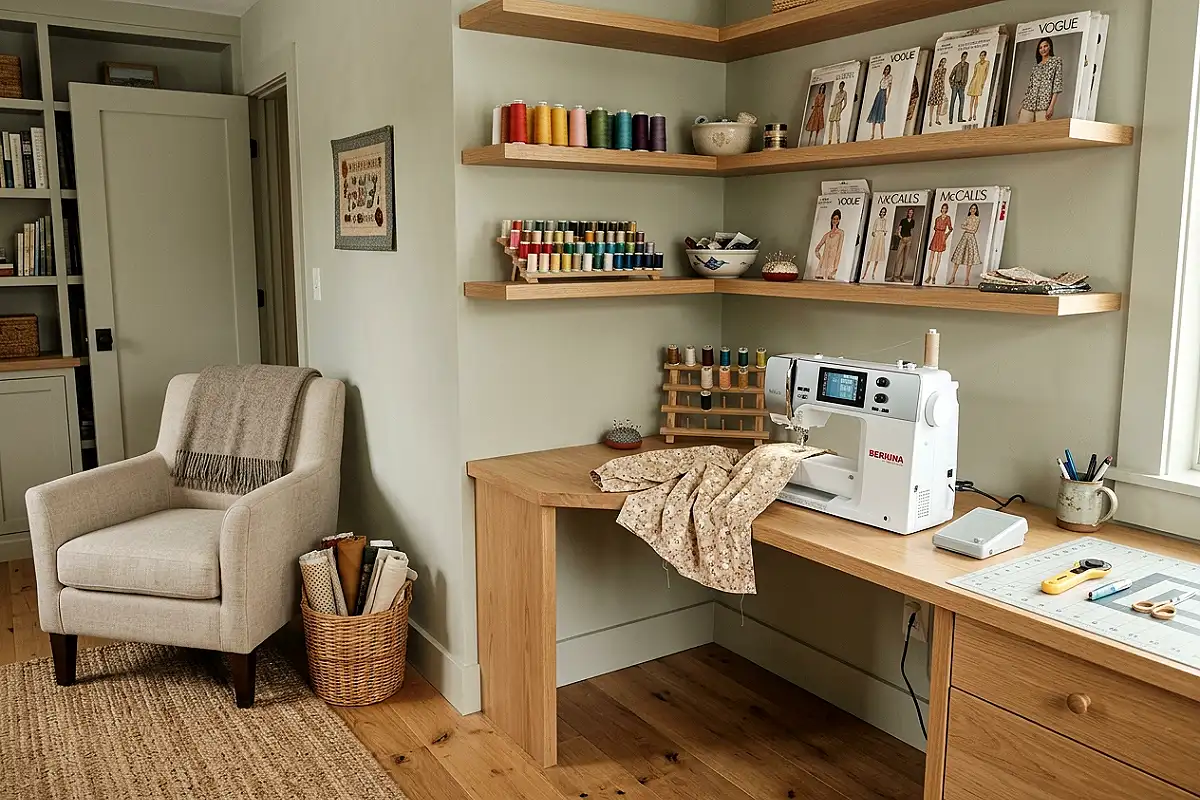
The dead corner of a bedroom or hallway is the small sewing room’s most underused real estate. A triangular or L-shaped corner desk — custom-cut or a cleverly arranged pair of narrow desks — tucks your machine into the angle where two walls meet, giving you a workstation that wraps around you. Shelves rise up both walls, holding thread, patterns, and notions within a pivot of your swivel chair, while the corner’s natural intimacy makes evening projects feel cocooned rather than cramped. Paint the two walls the same soft tone — pale sage, warm white — and the nook reads as a purpose-built studio, not a leftover space.
Pro Tip
Mount a power strip to the wall behind the corner and route the machine cord up — floor cords in a tight nook are trip hazards, and wall-mounted power keeps the machine’s plug reachable without crawling.
Sewing Machine Cabinet with a Drop-Leaf
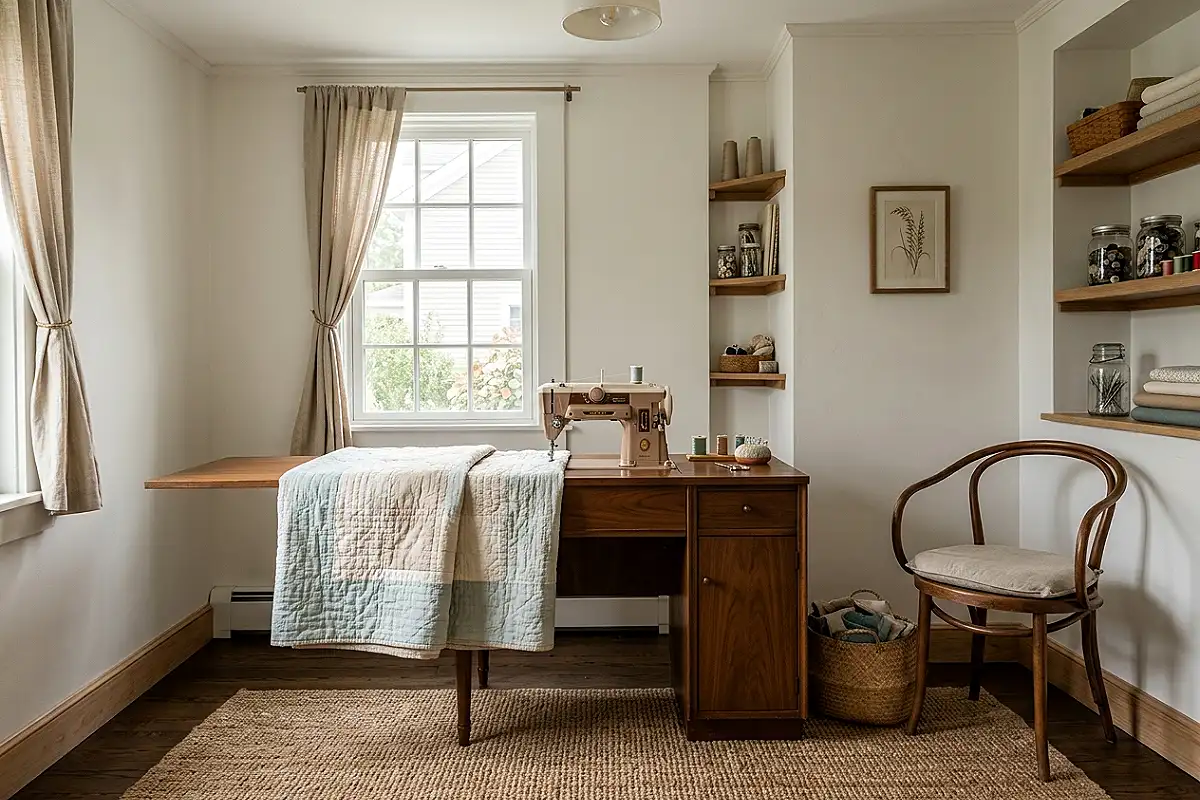
The classic answer to the bulky machine problem is a sewing cabinet: a table with a hinged leaf that folds down to hide the machine entirely, its bed dropping below the surface on hinges so the top closes flush. When you sew, the leaf lifts, the machine rises to working height, and a generous extension surface appears on the far side for supporting quilt weight. Modern versions — from flat-pack builders and Amish workshops alike — keep the vintage form but fit contemporary machines. In a small room, the closed cabinet reads as a tidy sideboard or console, and the transformation takes ten seconds.
Pro Tip
Measure your machine’s bed height before buying — the cabinet’s insert should let the machine sit just 1-2mm below the table surface so fabric glides across the seam between machine and leaf without catching.
Wall-Mounted Folding Cutting Station
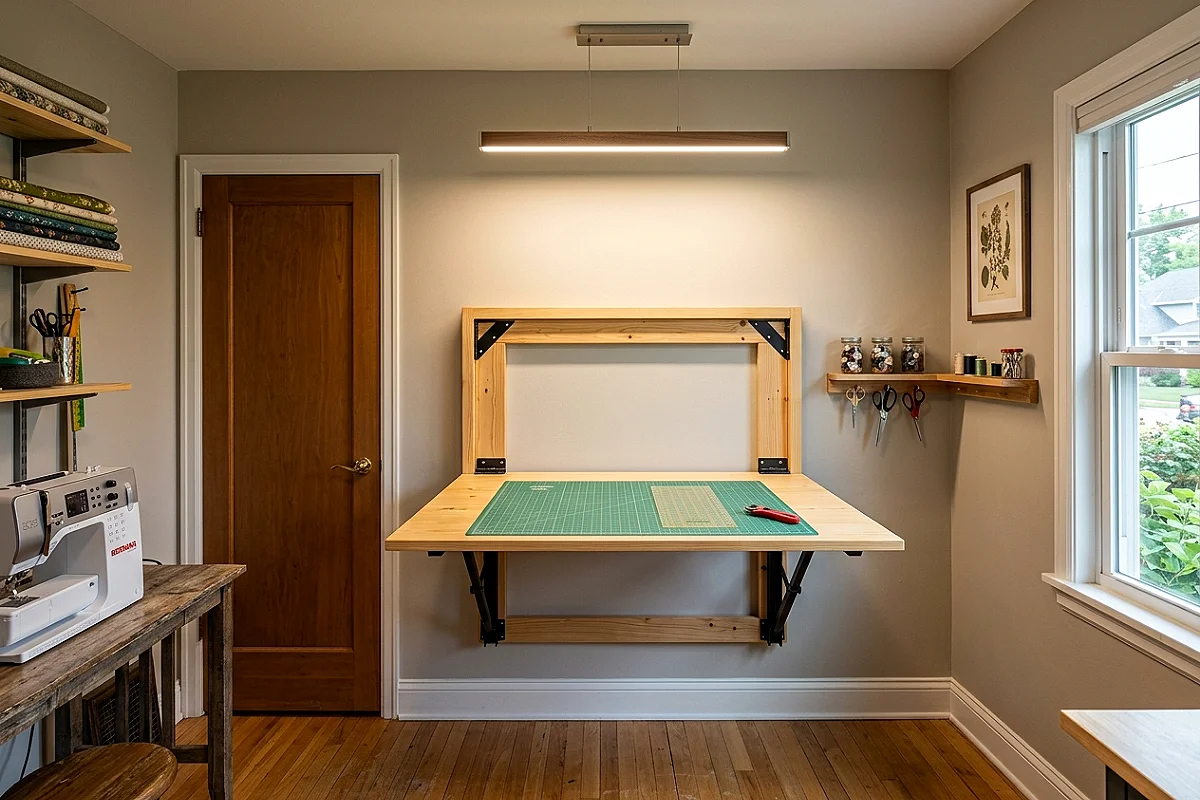
Cutting is the one sewing task that demands space you don’t have — until the cutting table folds out of the wall. A sturdy wall-mounted drop-leaf table, roughly 20 by 36 inches when open and three inches deep when closed, gives you a dedicated cutting height that won’t destroy your back. Brace it with heavy-duty folding brackets rated for at least 150 pounds, top it with a removable self-healing mat sized to fit, and store the mat flat against the wall beneath the table when the leaf is down. The whole system occupies less floor space than a dining chair and returns the room to its normal shape in seconds.
Pro Tip
Anchor the brackets into studs, not drywall — a wet pressing session on the table or a child leaning on the open leaf will test those anchors, and you want them to hold for years.
Vertical Spool Rack on the Machine Table
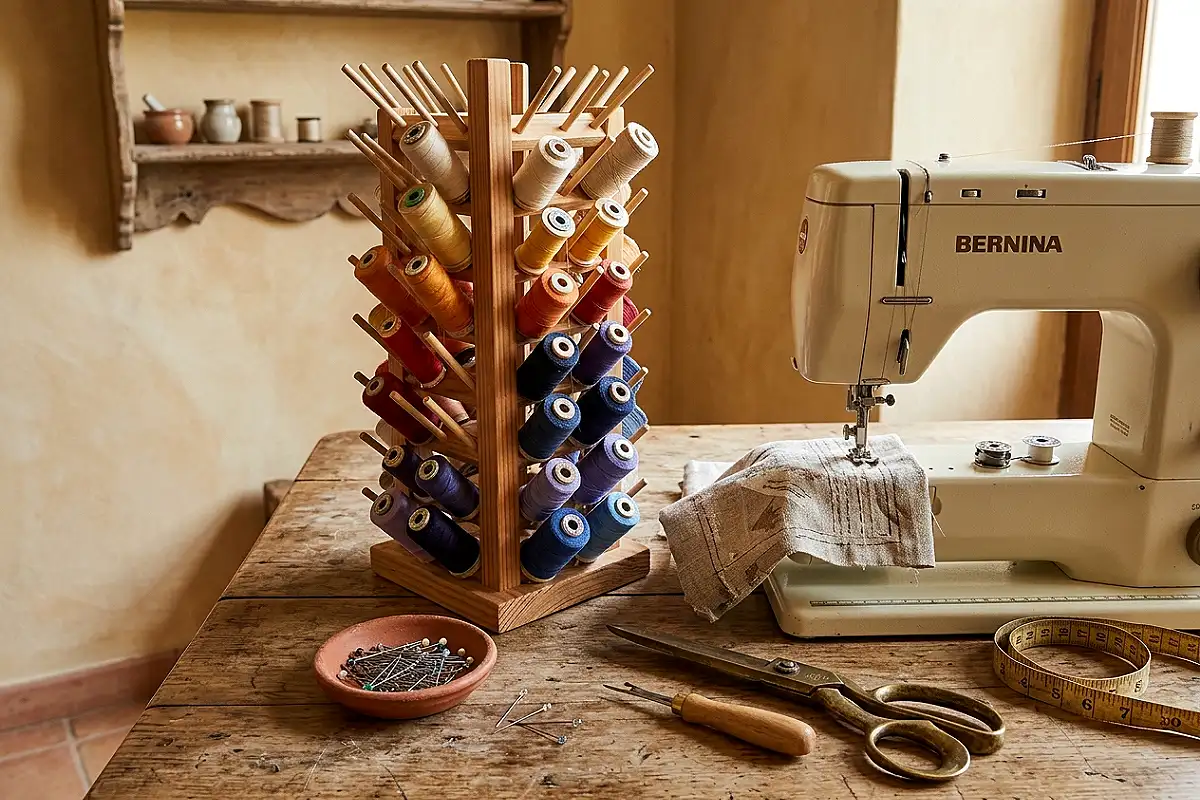
Thread cones and spools are the sewing room’s most beautiful clutter, and they deserve a home at machine height. A vertical spool rack — a slim wooden or metal tower that holds fifteen to thirty spools standing on pegs — sits on the machine table beside the needle or on a shelf directly behind it, so every color is visible and reachable without leaving your seat. Choose a rack with pegs tall enough for cone threads, which most small racks don’t accommodate, and pick a finish that matches your table so it reads as part of the furniture. The color array itself becomes the room’s prettiest decoration — living evidence that this is a room where things get made.
Pro Tip
Keep the rack away from the window — direct sun fades thread colors within a season, and faded thread leads to mismatched seams you won’t notice until the garment is finished.
Serger Shelf Above the Machine
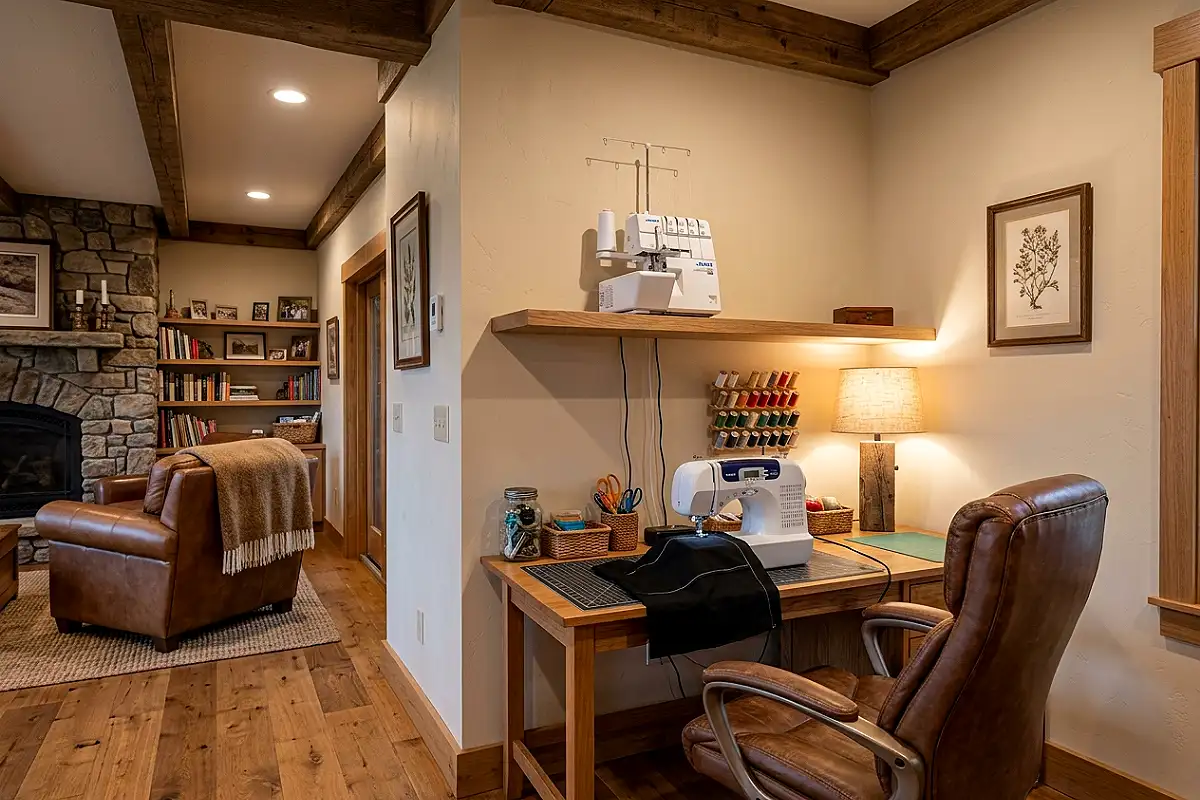
Serger owners in small rooms face a double-machine problem — until vertical stacking solves it. Mount a sturdy floating shelf above your sewing station, sized and braced for your serger’s weight, and it becomes a dedicated serger station: plugged in via a wall-mounted power strip, threaded, and ready. Sewing happens at the table, serging happens above, and both machines live permanently in their spots without ever being stored or retrieved. The shelf can be painted the wall color so it nearly disappears, and having both machines always threaded is the single biggest speed upgrade a small room can offer.
Pro Tip
Position the shelf so the serger’s thread cones won’t drip thread onto your sewing machine below — a shelf lip or a small tray around the serger base catches wandering threads before they tangle your lower machine.
Window Seat with Lift-Top Fabric Storage
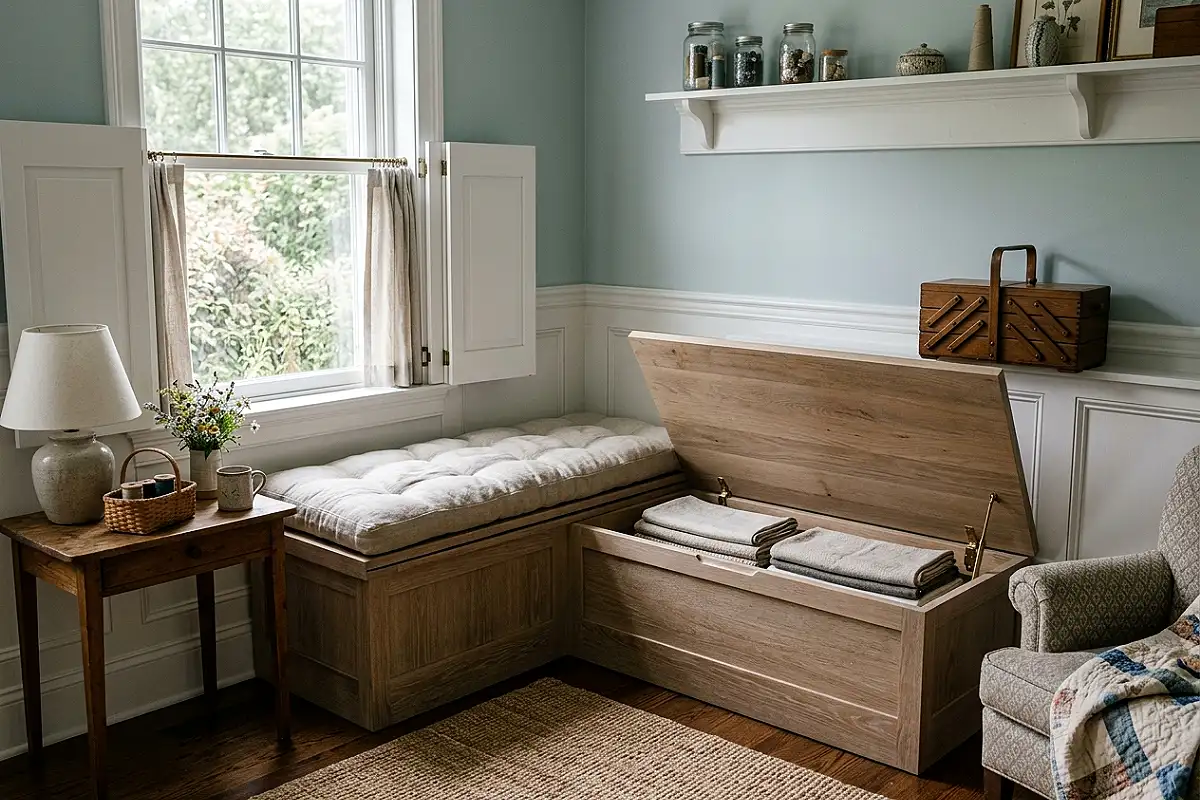
A window seat is a small sewing room’s best multitasker: seating, storage, and daylight in one object. Build — or buy — a bench beneath the window with a hinged lift-top, and the deep box inside becomes bulk fabric storage: bolts and folded stacks that would otherwise sprawl across every surface. Pad the top with a fitted cushion and it doubles as guest seating or a comfortable hand-stitching perch, while the window above provides the consistent north-facing light sewists crave. In rooms too small for a built-in, a storage bench from a furniture store achieves the same effect with a woven basket aesthetic.
Pro Tip
Line the storage box with a cedar panel or hang cedar sachets inside — fabric stored under a window is vulnerable to humidity swings, and cedar keeps both must and moths away from your best wools.
Murphy-Style Fold-Away Sewing Table
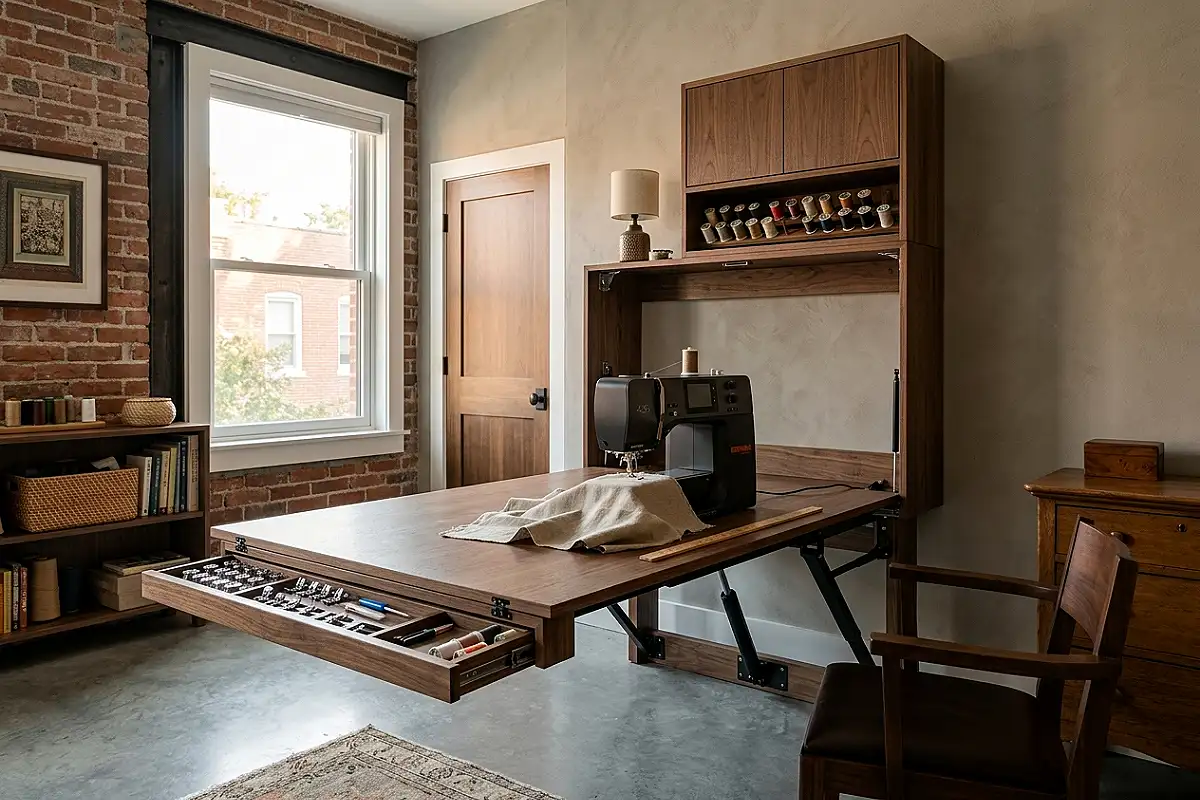
When a room must return to being a guest room, an office, or simply empty floor, the fold-away sewing table is the answer. A wall-mounted table on gas-spring or folding-arm hardware — roughly the depth of a machine plus an extension leaf — lowers from the wall in seconds, complete with the machine attached. Some systems fold the machine down with the table inside a shallow cabinet; simpler versions just fold the leaf flat. The machine never moves, never gets stored, never gets bumped; the room simply returns to its day job when the table folds up. It’s the small-space solution with the most theater, and the most relief.
Pro Tip
Attach a small tray beneath the fold-away table for your machine feet, bobbins, and needle pack — they ride up with the table and are exactly where you need them the moment it folds down.
Sewing Closet Behind Sliding Doors
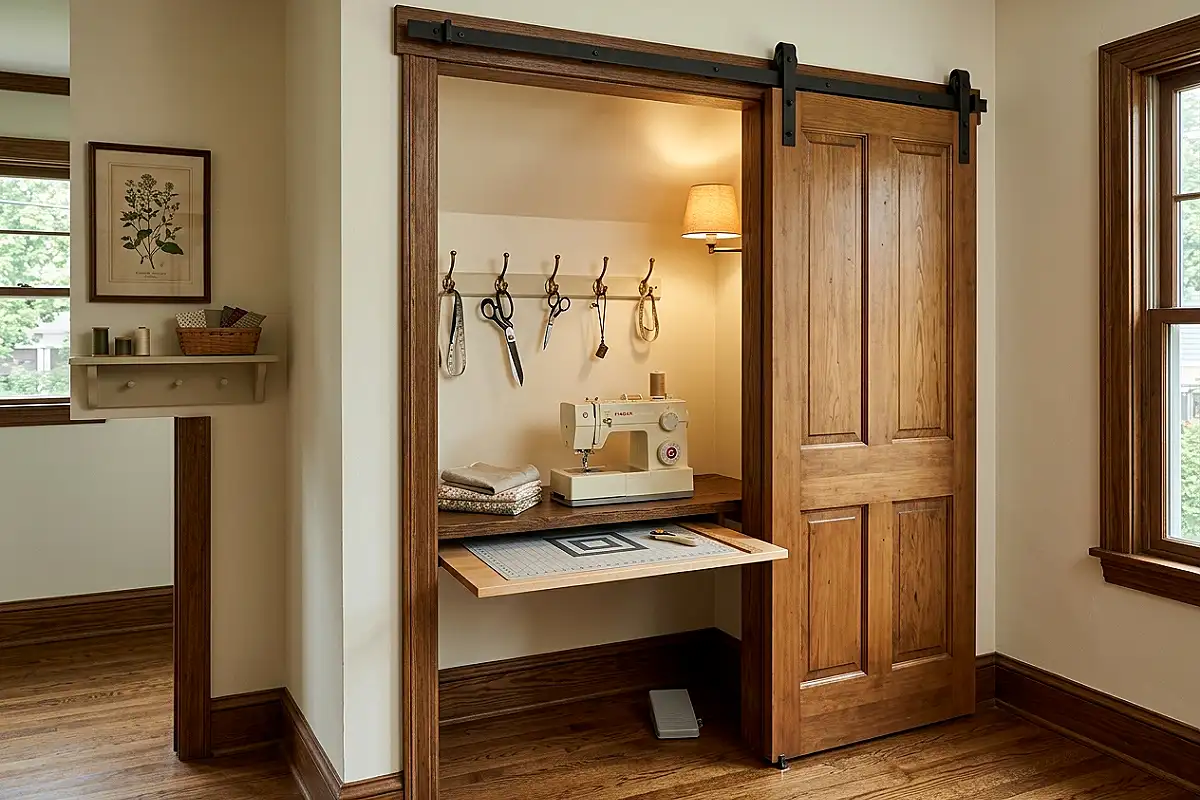
Not every sewing room needs to be a room — sometimes it needs to be a closet with intentions. Clear out a deep wardrobe or spare closet and install sliding or barn-style doors, then line it with a wall-mounted shelf for the machine, a narrow cutting ledge, and hooks for scissors and rulers. The doors slide shut and the entire workspace vanishes — ideal for sewing in shared living spaces where an open station feels like clutter. Because closets run deep, the machine shelf can sit inside the doors while a fold-down table occupies the door-side wall, giving a working room inside five feet of wall space.
Pro Tip
Install an outlet inside the closet before finishing the doors — machines need power at the shelf, and retrofitting wiring behind closed doors is the one fix you can’t easily do later.
Rolling Machine Cart with Extension Leaf
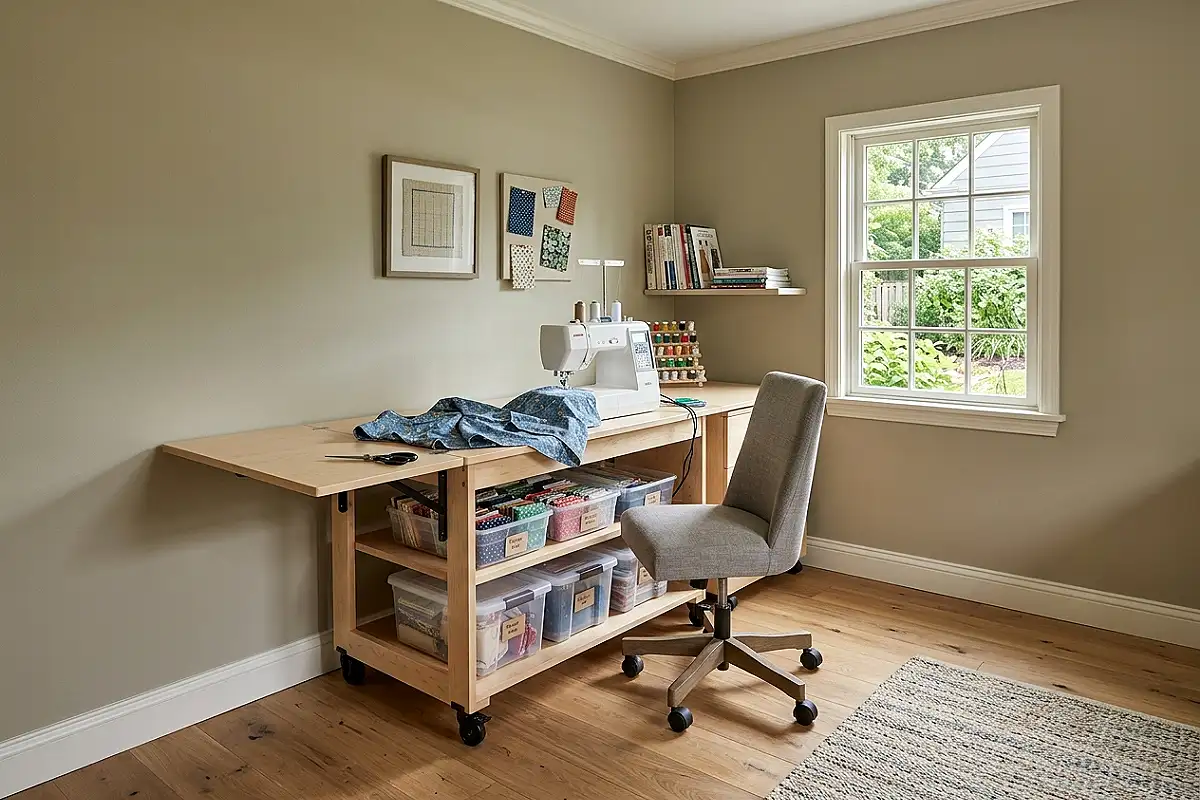
The rolling sewing cart is the small room’s mobile solution: a sturdy cart on locking casters carrying the machine on its top, with a drop-leaf extension that adds cutting or pressing room, and shelves below for your current project’s supplies. Push it to the window for daylight sewing, roll it against the wall for vacuuming, tuck it into the alcove when guests arrive. The locking casters matter — a sewing machine must sit perfectly level to sew evenly, and good locks keep the cart from drifting mid-seam. For a room that serves three purposes, the cart is the piece that makes all three possible.
Pro Tip
Choose a cart with a top surface at least as wide as your machine plus six inches of clear space on the left — free-arm sewing and sleeve work need that clearance, and it’s the dimension most carts skimp on.
Tool Tray Under the Table Edge
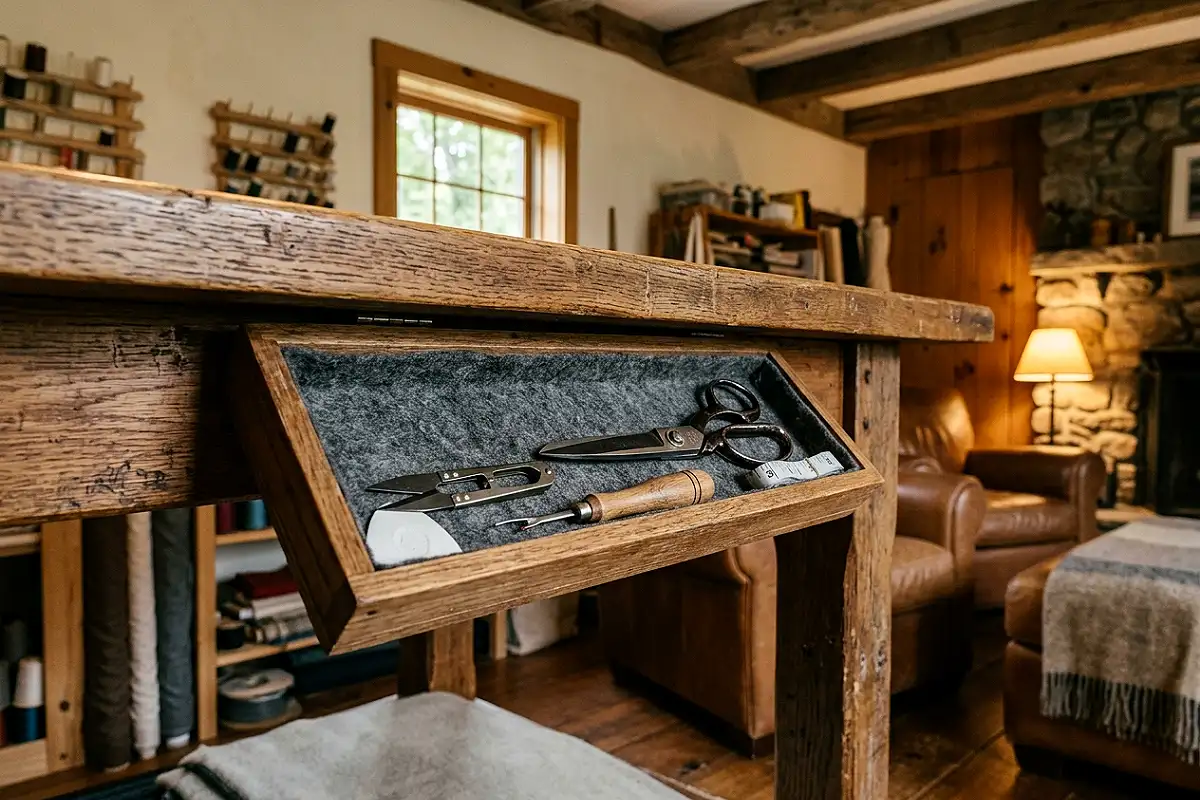
In a small room, drawer space is gold, and the space under the table’s edge is a vein nobody mines. Screw a shallow wooden tray — three inches deep, the length of the table’s front rail — beneath the tabletop on the side facing you, and it becomes the home for your always-tools: fabric scissors, snips, seam ripper, pins, tape measure, and chalk. Everything lives at fingertip height, visible but out of the way, and the tray takes up zero drawer space and zero floor space. A vintage drawer pulled from a junk shop and mounted upside down makes a charming version; a modern plywood one makes an invisible one.
Pro Tip
Glue a strip of felt inside the tray where scissors rest — it protects the blades, keeps tools from sliding toward you when the machine vibrates, and makes the tray quiet during loud sewing.
Fabric Hung from Ceiling Curtain Rods
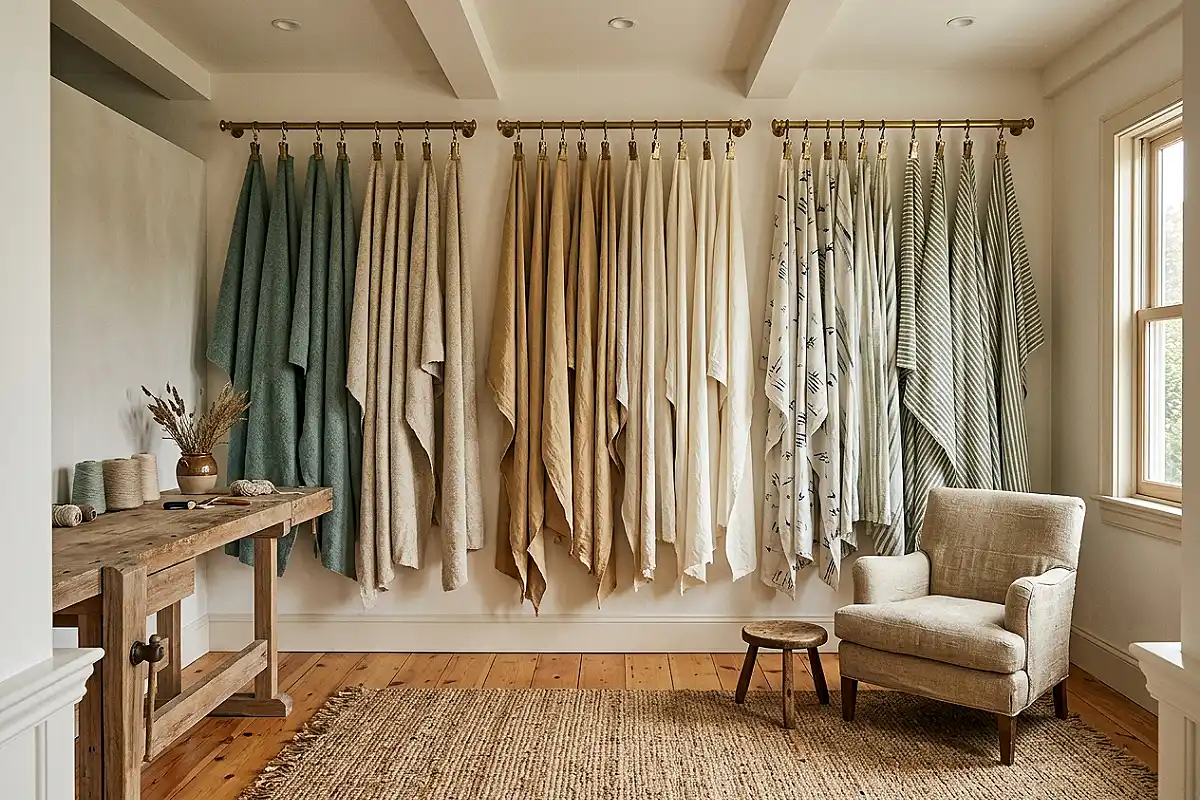
Fabric bolts stored flat take over shelves; fabric hung takes over nothing. Mount a pair of ceiling-height curtain rods — or a single rod on high brackets — along an empty stretch of wall and hang fabrics from them on large S-hooks or fabric clips, like drapes in a fabric shop. Each piece hangs in full view, colors visible at a glance, and the display makes the wall itself feel curated rather than crowded. It suits quilters with large cuts and garment sewists with fashion fabric alike, and the gentle curtain of textiles adds softness and color to the room that no shelf of bins can match.
Pro Tip
Fold each fabric around a pool noodle cut lengthwise before hanging — the foam core supports the fold, prevents hard creases along the rod, and keeps heavy wools from stretching at the top edge.
Magnetic Seam Allowance Guides
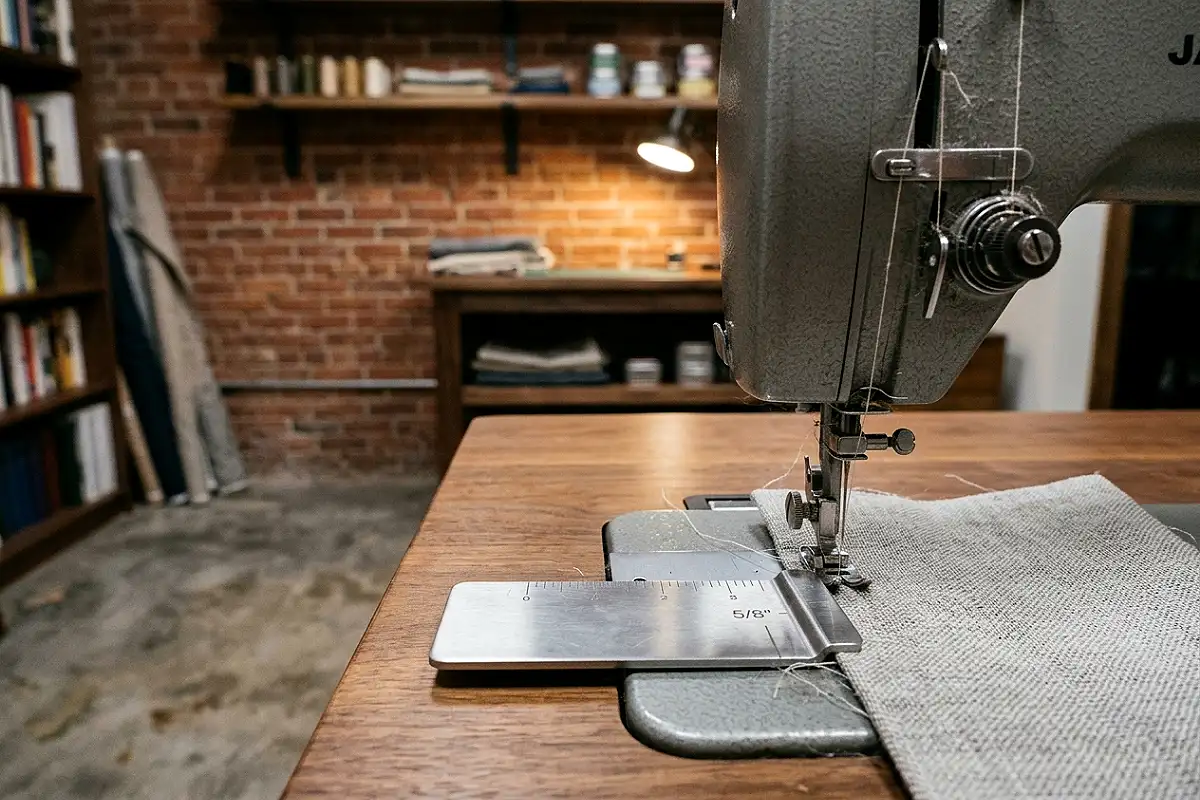
The smallest idea on this list may be the most valuable: a magnetic seam guide. Sewing machines with worn throat plates or no markings lose their seam allowance reference, and small rooms rarely have space for a measuring ritual before every seam. A slim magnetic ruler bar — or a set of magnetic seam guide blocks — snaps onto the metal bed beside the needle and holds a perfect 5/8″ (or your preferred width) forever. They cost a few dollars, store in the machine’s own accessory drawer, and eliminate the ruler-marking habit that slows every small-room sewist down.
Pro Tip
Keep a guide at both 5/8″ and 1/4″ — garment seams and quilting seams live at different widths, and swapping a magnet takes two seconds while re-measuring takes twenty.
Collapsible Dress Form in the Corner
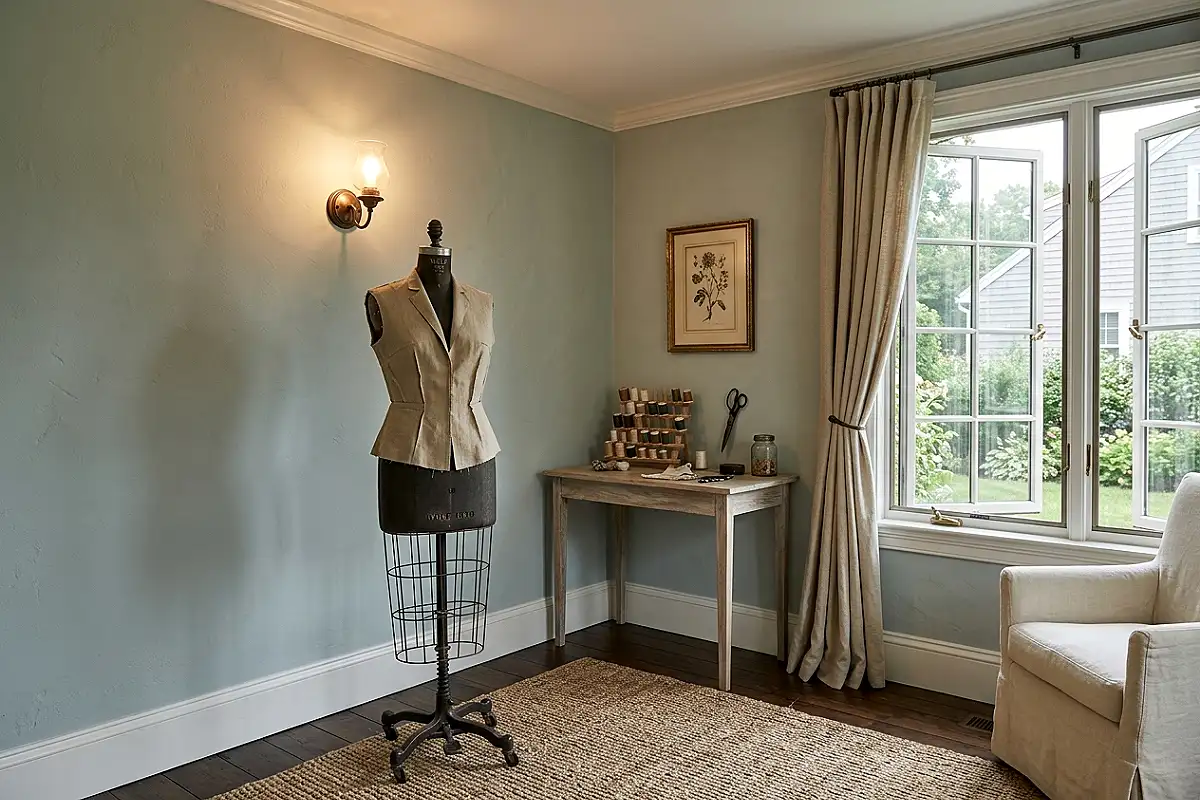
Fitting garments needs a body, and small rooms can’t spare floor space for a permanent dress form — but the collapsible wire form solves both. The collapsible wire dressmaker’s form folds nearly flat against the wall or behind a door when not in use, then expands into a working torso for pinning, draping, and hemming. It handles muslin mock-ups and finished garments alike, and hung with a current project, it becomes a sculpture of your work-in-progress. In the tightest rooms, it earns bonus duty as a display stand for finished pieces and a drying rack for steamed garments.
Pro Tip
Cover the wire form with a fitted jersey sleeve cut from an old T-shirt — it gives pins something solid to grip, and you can mark your own measurements on the jersey for fitting accuracy.
Pull-Out Ironing Shelf Between Cabinets
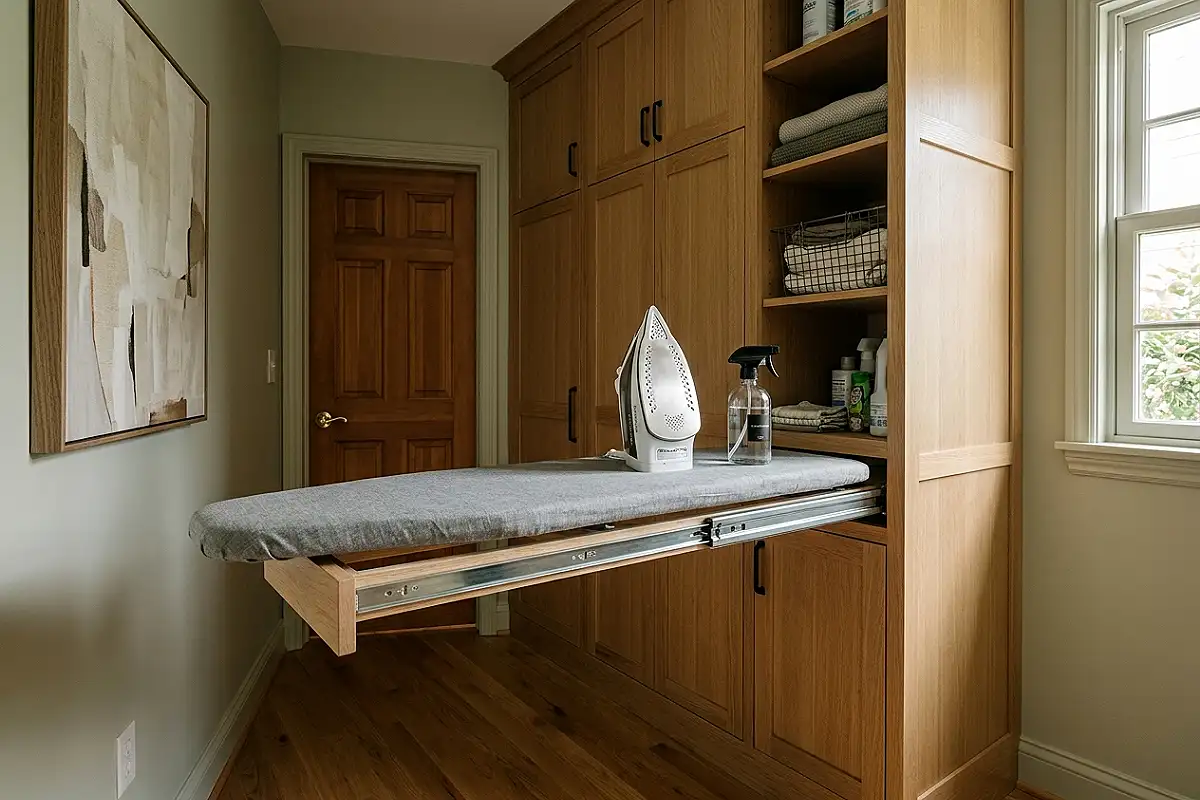
The ironing board is the small sewing room’s most awkward occupant — until it becomes a shelf. Between two cabinets or bookshelves, a narrow 16-inch gap can house a slide-out ironing surface on full-extension drawer slides: a slim padded board that pulls out to full length, holds the iron at working height, and slides back to a thickness of three inches. At home, the gap reads as a tidy slot between furniture; in use, it’s a pressing station that never blocks the floor. Build the surface from a sturdy shelf board padded with quilt batting and a cotton cover, and it presses as well as any store-bought board.
Pro Tip
Mount a heat-resistant pad on the cabinet wall behind the shelf and a small hook for the iron’s cord — the iron can rest on its heel at the shelf’s end, plugged into a strip just inside the gap.
Stackable Clear Project Bins
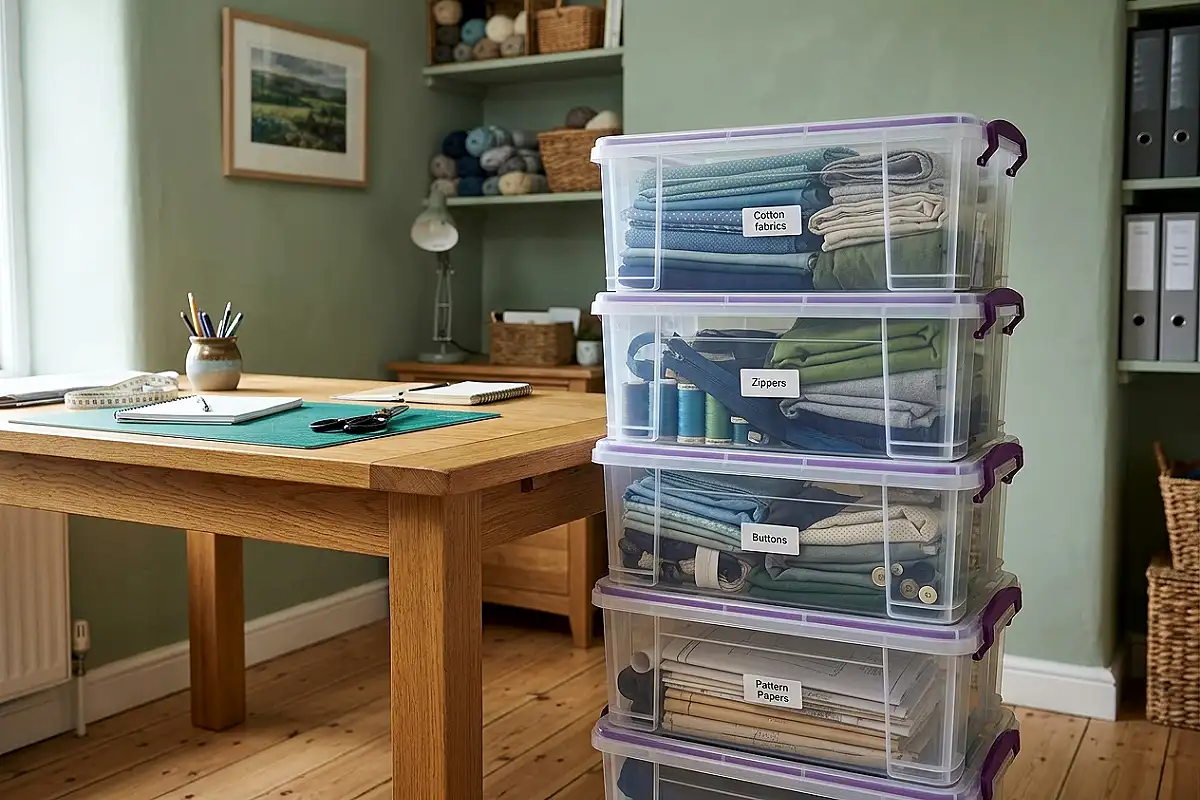
Project-based sewing — one outfit, one quilt, one gift — dies in rooms where supplies live scattered across surfaces. Stackable clear bins fix it: one bin per active project, with all its fabric, pattern, thread, and notions inside, stacked in a neat column beside your machine or in a closet. The transparency means you can see every project’s state at a glance, and the stacking discipline means only your current three or four projects are visible at once. When a project finishes, its bin empties and the stack shrinks — a built-in visual record of what you’ve made. Clear bins with clip-on lids keep dust and pet hair out of half-cut projects.
Pro Tip
Add one small zip bag inside each bin for its loose pieces — buttons, interfacing scraps, zipper pulls — so the bin’s small parts never rattle loose at the bottom and disappear between projects.
Antique Sewing Cabinet with Mirror Door
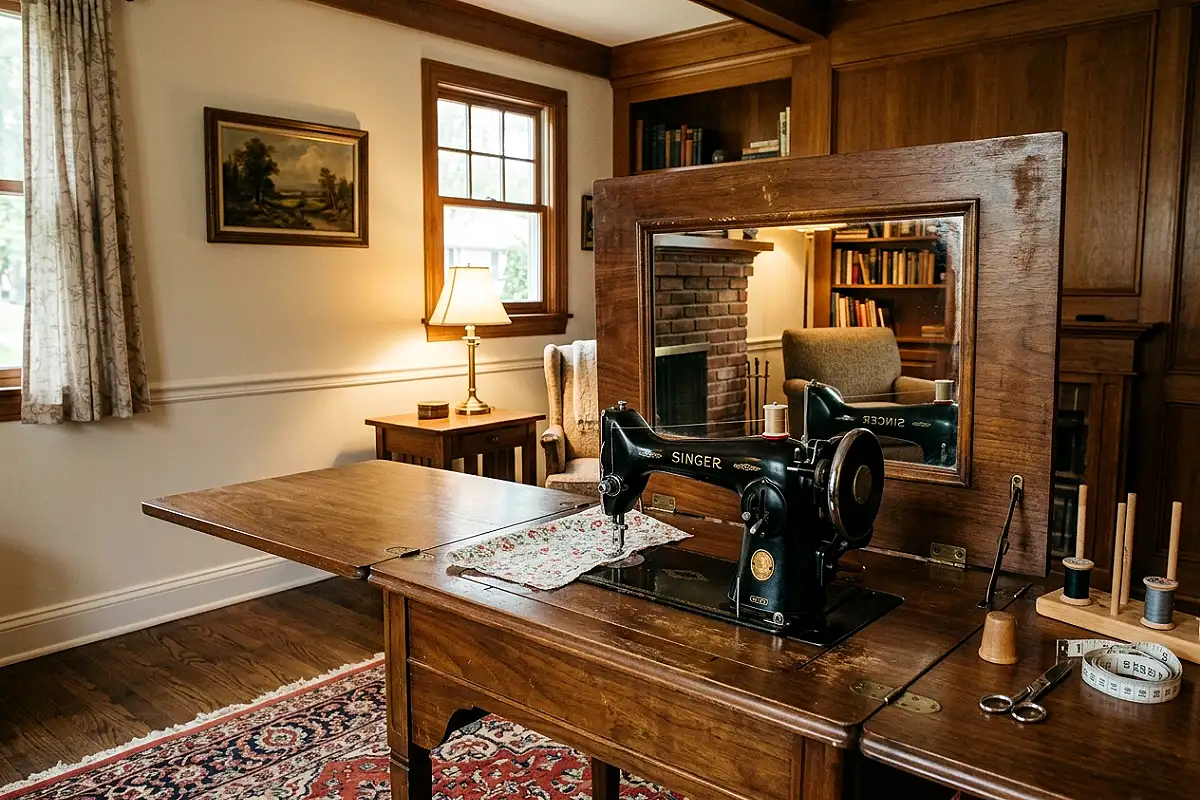
The antique sewing cabinet — the Victorian kind with the treadle base, or the mid-century kind with a mirror on the inside of its lid — brings beauty to a small room the way no plastic bin ever could. Open it and the machine sits ready at the table; close it and the mirrored lid reflects light around the room, making the small space feel larger while hiding the machine completely. Vintage cabinets often carry a small drawer for notions and a hinged top that becomes an extra work surface. Hunt estate sales and online auctions; the treadle-base kinds are heavier and less practical for modern machines, but the 1950s and 60s portable cabinets fit today’s machines beautifully.
Pro Tip
Before buying, place your machine in the cabinet’s opening with the seller’s help — insert sizes vary wildly, and a machine that hangs below or towers above the surface defeats the whole purpose.
Overhead Pot Rack for Scissors
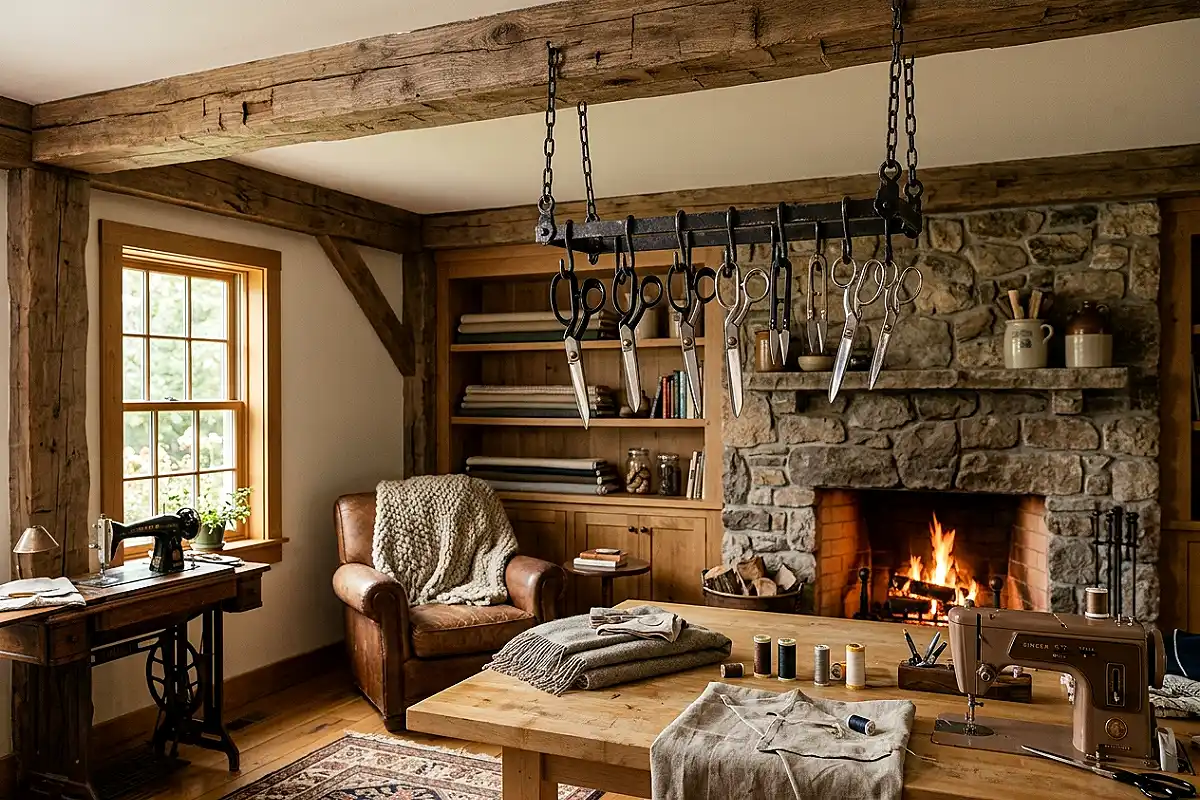
Above a sewing table hangs air that does nothing — until a ceiling-hung pot rack arrives. A small iron or wooden pot rack, hung from the ceiling by chains or a single hook at table height, gives your scissor collection a home that’s both displayed and out of the way: fabric shears, pinking shears, appliqué snips, and embroidery scissors all hang from the rack’s pegs or hooks, blades down and safely separated. The rack reads as kitchen charm borrowed for the craft room — exactly the kind of detail that makes styled photos pause-worthy — while keeping expensive shears from jostling in a drawer.
Pro Tip
Hang the rack from a ceiling joist with a toggle-rated hook — scissors are heavier than they look, and a rack that swings when you brush past it will eventually lose a pair to the floor.
Slim Pattern Library Shelf
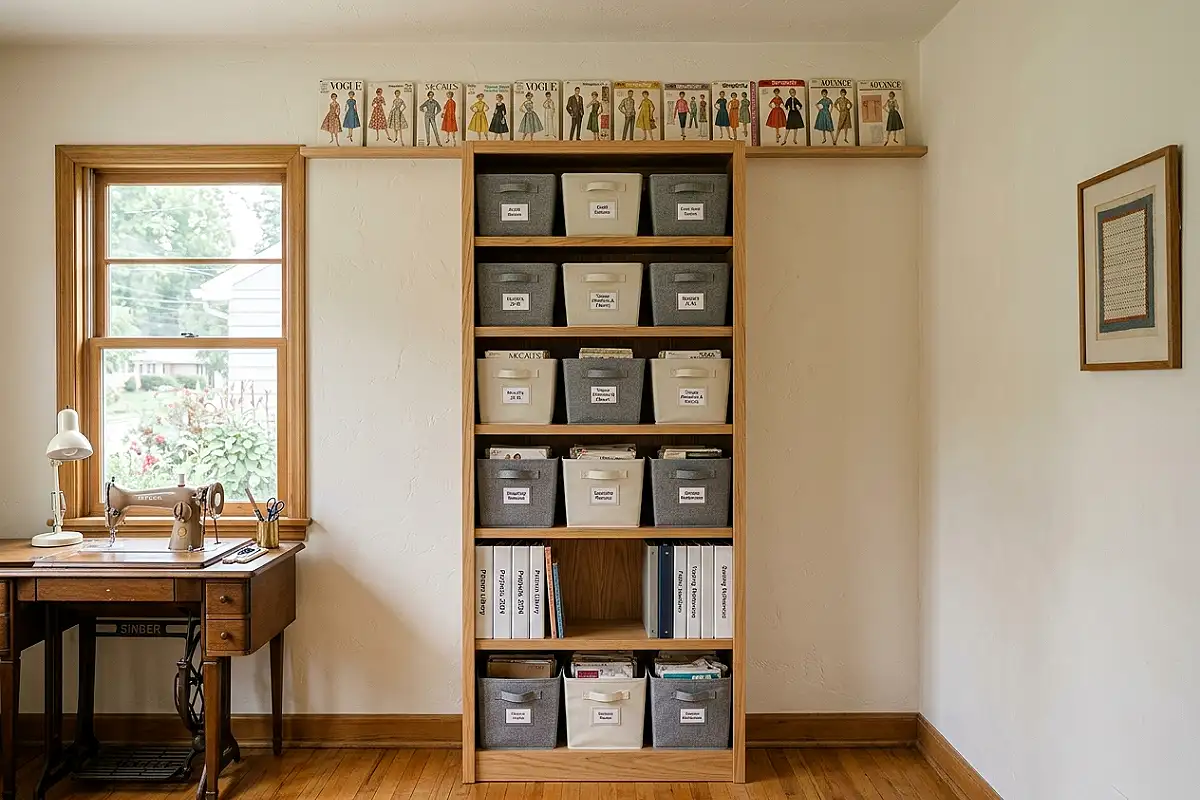
Sewing patterns — the printed envelopes and the growing stack of printed PDFs — need a home that honors them. A single slim shelf unit, twelve inches deep and as tall as your ceiling allows, becomes the pattern library: commercial envelopes filed upright in shallow bins by garment type, PDFs printed and clipped into binders on the shelf’s lower rows, and a top row for treasured vintage envelopes displayed face-out. Label the bins by category — dresses, tops, trousers, children’s — rather than by number, and pattern shopping becomes a browse instead of a dig. The library’s slim footprint fits beside a door or behind the sewing station, and it photographs like a bookshop.
Pro Tip
Add a small pocket to each pattern envelope’s bin holding the pieces you’ve traced or altered — the original stays intact, and your working copy never gets separated from its parent pattern again.
Extended Windowsill Notion Shelf
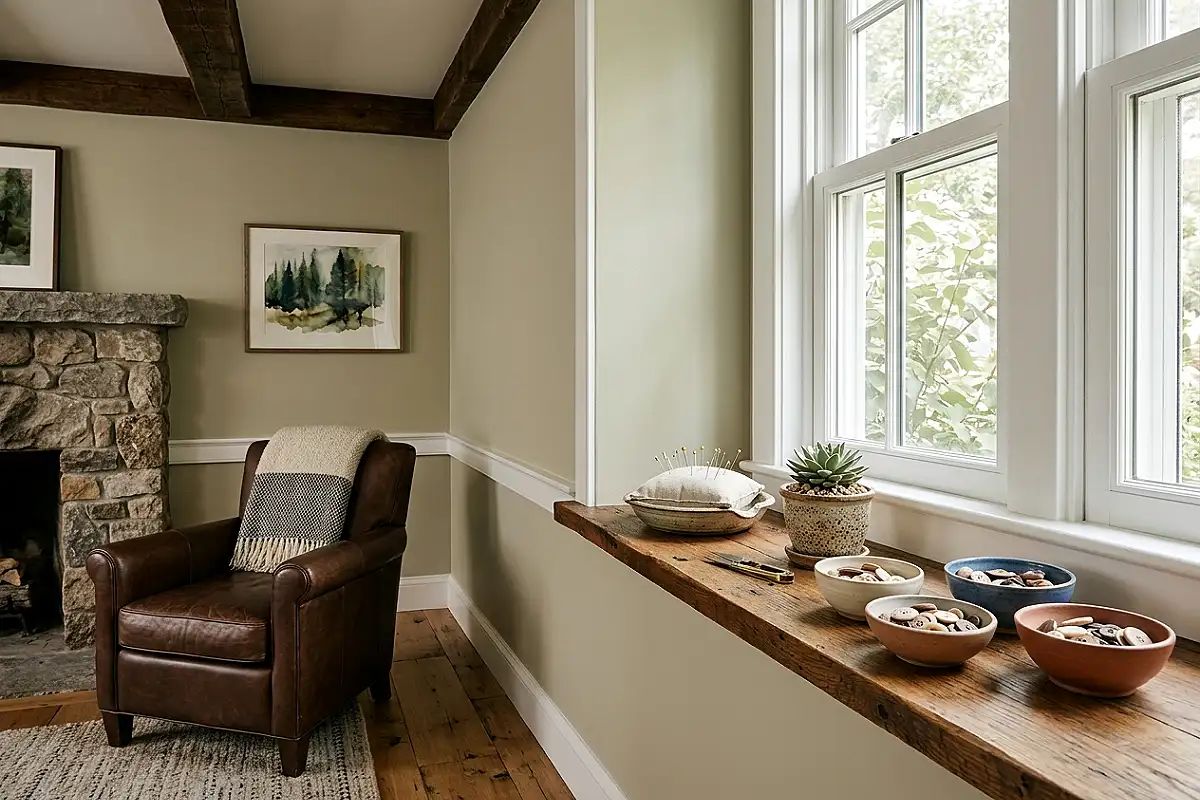
A deep windowsill — or a shelf built out to mimic one — is the small sewing room’s free display ledge. Extend the sill with a shelf board matching its depth, and it becomes the notion ledge: thread scissors on a small stand, a pin cushion in a ceramic bowl, a glass of water for brushes, the current project’s buttons in a dish, all bathed in daylight. The ledge keeps the table itself clear for actual work while putting small tools where the light finds them, and its sill-like proportions make it feel like the room was designed around the window rather than squeezed into it. Plants thrive on the same ledge, softening the whole scene.
Pro Tip
Keep only daily tools on the ledge — permanent-resident items like pin cushions and snips — and let everything project-specific travel back to the tool tray; ledges clutter the moment they become overflow.
Wall-Mounted Bobbin Panel
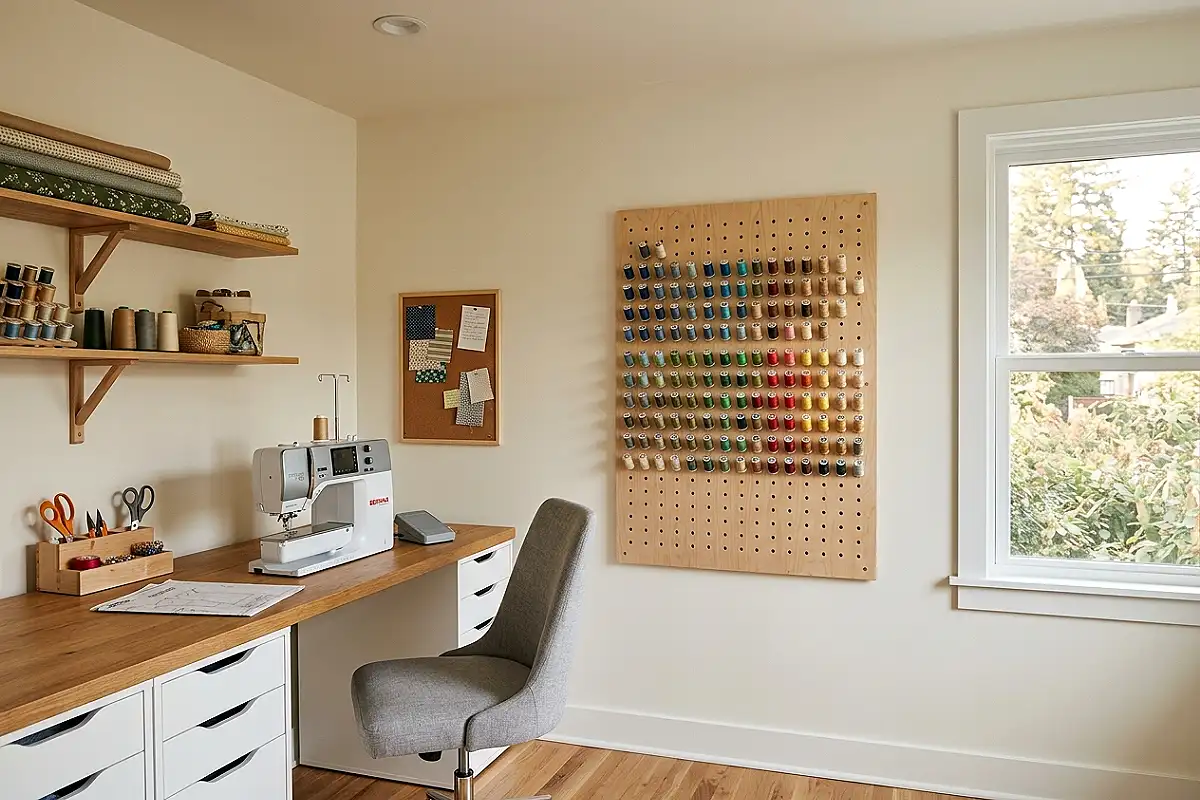
Full bobbins are sewing’s most frustrating small-parts problem — until they live on a panel. A shallow wooden board mounted on the wall beside the machine, drilled with rows of holes sized to your bobbin diameter, holds dozens of full bobbins standing like tiny spools. A glance tells you what’s wound and ready: grey for jeans, white for shirts, black for knits. Wind new bobbins, stick them in the next hole, and the panel becomes a visual inventory of your thread wardrobe. Empty bobbins go back to the machine’s tray; only full ones earn wall space. The panel’s grid of tiny color dots is quietly one of the prettiest details a sewing room can have.
Pro Tip
Drill the holes slightly deeper than the bobbins are tall — a bobbin that sits proud of the board catches fabric edges and tumbles off; a recessed one stays put through years of use.
Slim Rolling Garment Rack
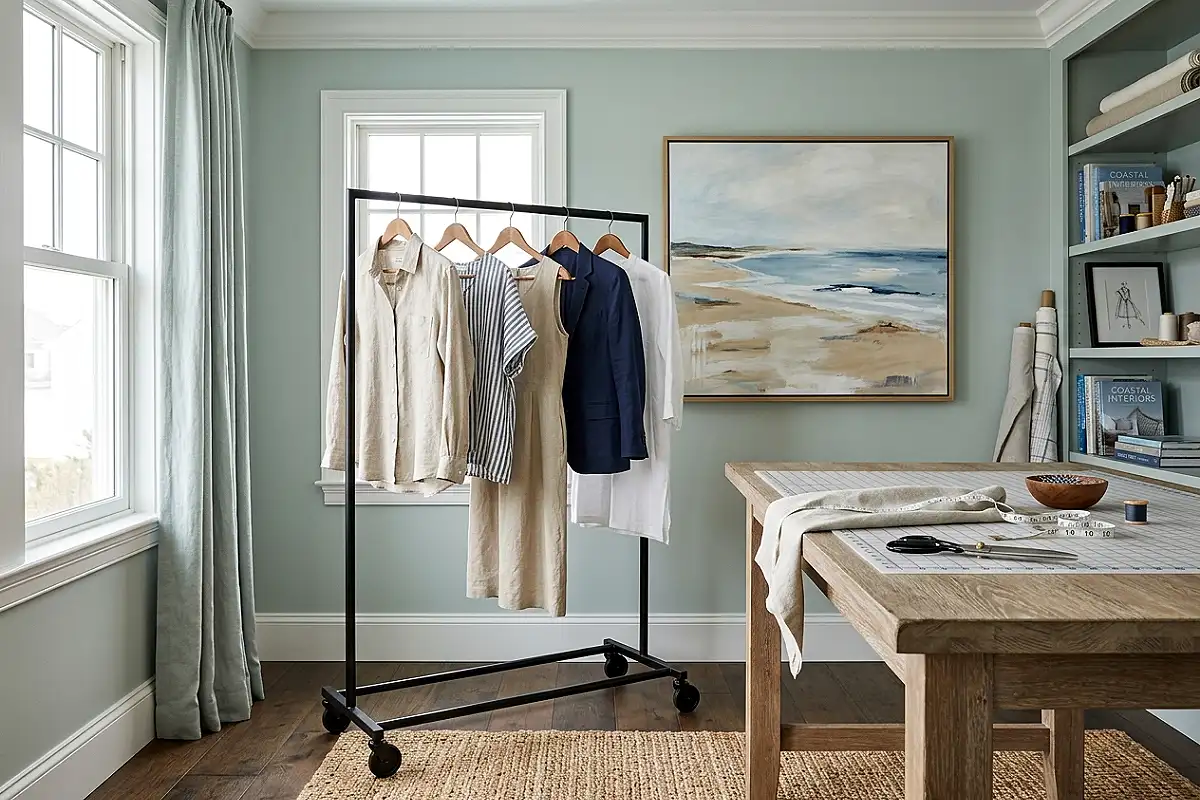
Finished and pressed garments need somewhere to live that isn’t a chair, and the slim rolling garment rack earns its place: eighteen inches deep, waist-high, on quiet casters, holding five or six finished pieces on wooden hangers. It rolls against the wall during work, parks beside the ironing shelf during finishing, and stores inside a closet or under a table’s extension when the room must shrink. Wooden hangers keep the pieces shop-ready — no wire-shoulder bumps in your careful shoulders — and the rack’s narrow profile means it can slide between furniture where nothing else fits. In styled photos, it’s the detail that says this room makes real clothes.
Pro Tip
Hang garments inside-out immediately after pressing seams, then flip them right-side-out for final pressing — the rack holds both stages, and the habit alone halves your re-pressing work.
Sewing Setup Inside an Armoire
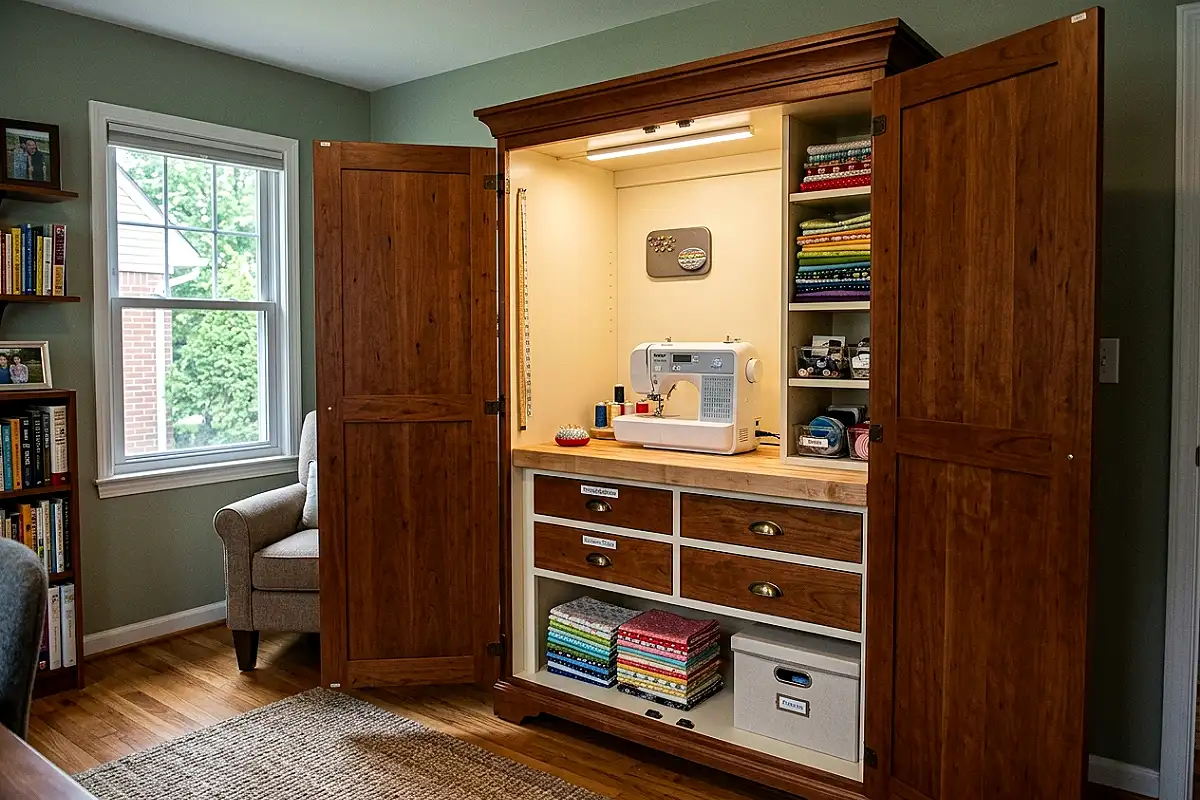
The most complete small-space solution is the armoire sewing room: a tall wardrobe that opens to reveal the entire workspace — machine on a pull-out shelf, notions in its drawers, fabric folded on its lower shelves, patterns hanging on its rod. Close the doors and the room becomes furniture, guest-ready, dust-proof, and pet-proof in one motion. Antique armoires take real modification — cutting the machine shelf, adding an outlet — while modern “sewing armoire” products come purpose-built with extension tables and cord management. For rooms that must serve as bedrooms or offices by day, it’s the only solution that truly hides everything.
Pro Tip
Cut the machine opening with the machine present and mark the insert depth twice — an armoire opening cut too large leaves the machine floating, and the repair means rebuilding the shelf.
Under-Shelf LED Task Lighting
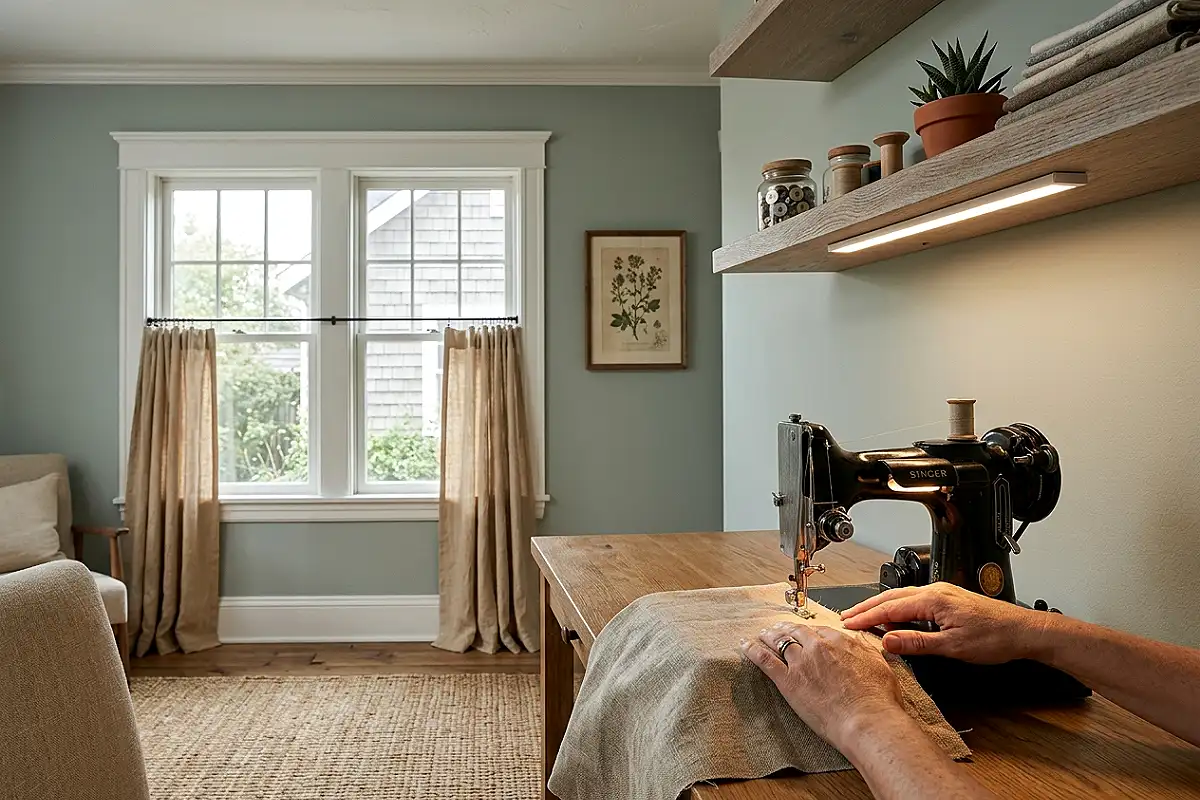
Small sewing rooms often have poor light, and lamp bases consume the tabletops small rooms can’t spare. The answer is light with no footprint: an LED task bar mounted under the shelf above your machine. The slim bar throws bright, even light across the needle area — enough to see dark fabric on dark thread — while the shelf above and the table below stay completely clear. Choose a bar with adjustable color temperature and you can dial from warm evening light to daylight-bright detail work. It’s the cheapest upgrade on this list, it installs with two screws or strong adhesive, and it transforms night sewing from a strain into a pleasure.
Pro Tip
Mount the bar six to ten inches in front of the needle, not directly above it — front-mounted light casts no shadow from your hands or the presser foot, which is the difference between seeing the seam and guessing at it.
A Small Room That Sews
Twenty-three ideas, one truth: a small sewing room isn’t defined by its walls but by its workflow — machine in the light, fabric in view, tools at fingertip height, and everything else able to disappear. Start with the one idea that matches your room’s biggest frustration, then let the others follow as the room teaches you what it needs. Small spaces sew beautifully; they just ask for a little more intention.
Frequently Asked Questions
How do I set up a sewing room in a small space?
Assign every inch a job: machine at the window for daylight, a fold-down wall table for cutting, and vertical storage — wall racks, ceiling rods, shelves above the machine — so the floor stays clear. Furniture that folds away or rolls is the small-space sewist’s best investment, because the room must work for more than sewing.
What size room do I need for a sewing room?
As little as a 4-by-6-foot corner can work with fold-away furniture and wall storage. Comfortable minimums for a dedicated room are around 6 by 8 feet, which fits a machine table, cutting surface, ironing zone, and fabric storage with room to move a chair. Depth matters more than total area — you need clear floor in front of the machine for fabric to spread.
Where should I store fabric in a small sewing room?
Store fabric where it can be seen and reached without spreading out: on ceiling-hung rods with S-hooks, in a lift-top window seat, in clear stackable bins by project, or rolled on shelf rods. Keep current-project fabric accessible and stash fabric in closed or under-seat storage so it doesn’t crowd your working surfaces.
How do I store a sewing machine when not in use?
The best solution is a machine that never gets stored at all: a sewing cabinet with a drop-leaf, a fold-away wall table, or an armoire setup keeps the machine threaded, level, and ready in seconds. If the machine must be covered, keep it on its rolling cart with a fitted cover — moving a heavy machine in and out of storage is what most sewists eventually stop doing.
How do I keep a small sewing room organized?
Organize by project rather than by category: each active project gets one clear bin holding its fabric, pattern, and thread, so only three or four bins are ever visible at once. Give tools fixed homes at fingertip height — an under-table tray, a bobbin panel, a tool ledge — and clear the table completely at the end of every session.
Can I set up a sewing room in a closet?
Yes — a deep closet with sliding doors makes an excellent mini sewing room. Mount the machine on a wall shelf inside, add a fold-down table on the door-side wall, and fit an outlet before closing the doors. The machine stays threaded and hidden behind the doors, which is ideal for shared living spaces where an open station would feel like clutter.