21 Vintage Craft Room Ideas Full of Charm and Creative Inspiration
There’s something about a vintage craft room that no amount of flat-pack furniture can replicate. After years of styling maker spaces — and watching hundreds of Pinterest boards drift toward the same bright, beigeness — I’ve become convinced that the most inspiring craft rooms are the ones with a past. A scarred wooden table that once belonged to someone’s grandmother, a glass cabinet that once held cough syrup, a stack of leather suitcases full of ribbons: these pieces carry stories, and stories are what make you want to sit down and create. A vintage craft room doesn’t just hold your supplies; it whispers that making things is a tradition, and that you’re part of a long line of women and men who made beautiful things with their hands.
The good news is that vintage charm is surprisingly accessible. Most of the ideas below cost less than a single piece of new furniture, because the best vintage craft room pieces are the ones other people are giving away. Here are 21 vintage craft room ideas that blend antique charm with genuinely smart organization — each one designed to be as practical as it is photogenic.
Antique Dresser as a Supply Station
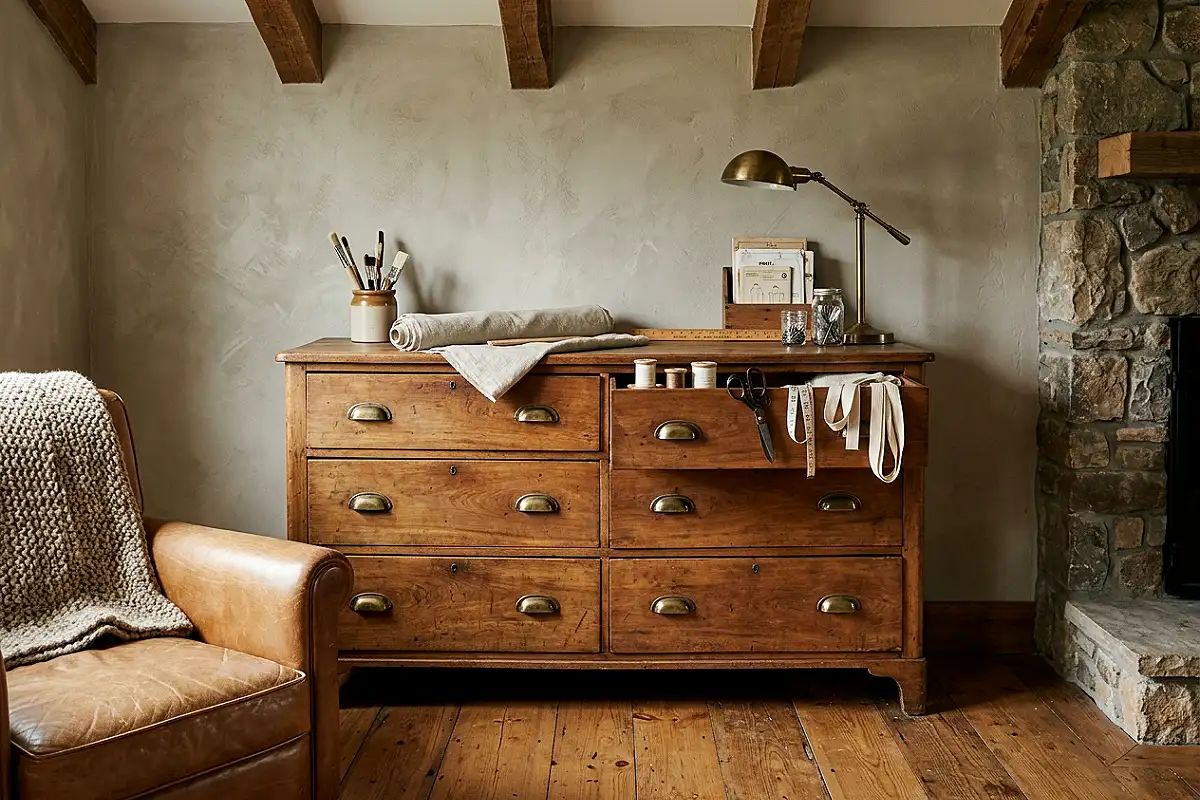
The single best furniture swap in any vintage craft room is the antique dresser. A solid-wood dresser with softly worn finish — the kind with slightly uneven drawer pulls and a patina that took eighty years to earn — becomes a supply station with character no new piece can fake. Dedicate each drawer to a category: top drawer for scissors and snips, middle for threads and needles, deep bottom drawers for fabric and yarn. Refinish the top with wax rather than polyurethane so the wood keeps its soft, hand-rubbed glow. A marble or soapstone top, if you can find one, is a small luxury that makes the whole piece feel like it belongs in an old apothecary.
Pro Tip
Replace mismatched pulls with a set of glass knobs or unlacquered brass bins from a hardware store — a unified set of vintage-style hardware instantly makes a thrifted dresser look intentional rather than rescued.
Glass Apothecary Cabinet
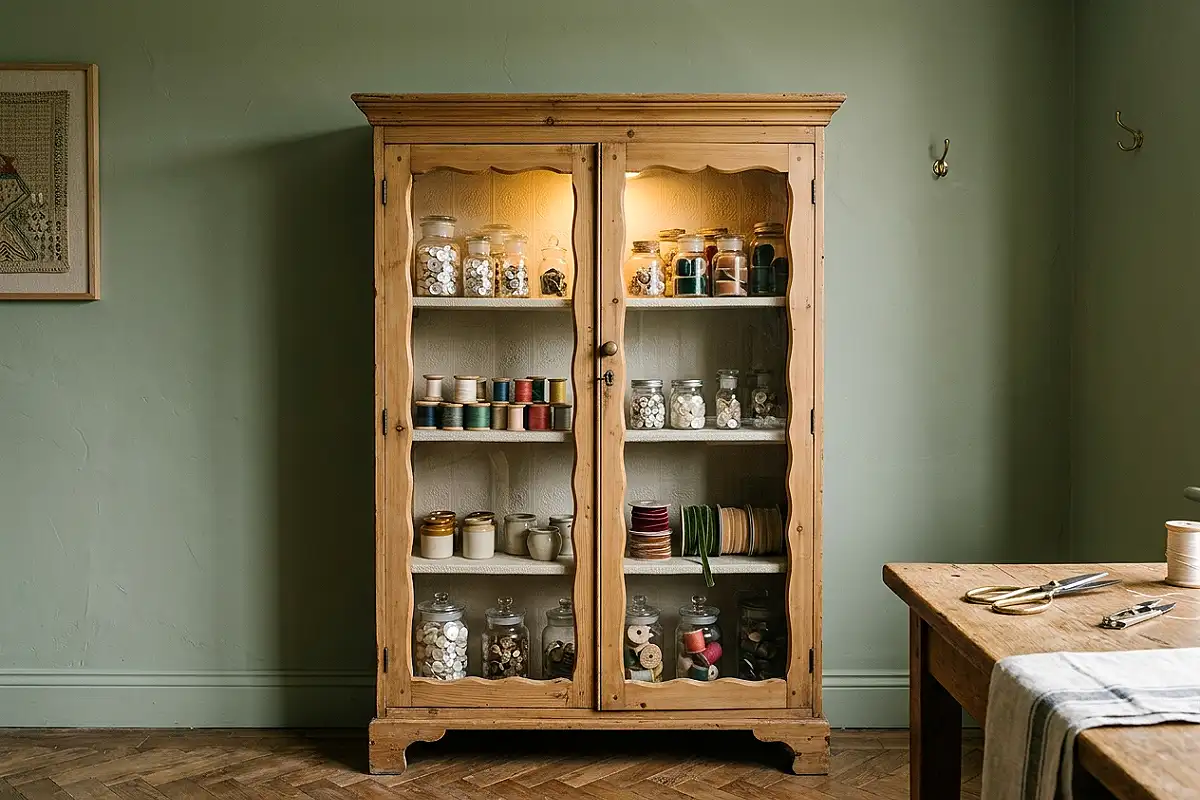
Nothing says “vintage craft room” like an antique glass-front cabinet — the pharmacy style with wavy glass doors, or the shopkeeper style with a single full pane. Inside, line the shelves with your treasures: spools of thread standing in rows, ribbons wound around wooden sticks, buttons sorted into porcelain dishes. The glass keeps dust out and everything in view, turning your supplies into the room’s display piece. Hunt at estate sales and antique malls for cabinets in pine or oak; even ones with clouded, bubbled glass add atmosphere. Place it against your deepest wall, and it becomes the heart of the room — the piece people photograph before they photograph anything else.
Pro Tip
Line each shelf with vintage-patterned shelf paper or a flat piece of embossed wallpaper — it protects the wood, hides wear, and makes even plain white supplies look collected and intentional.
Typewriter Display Shelf
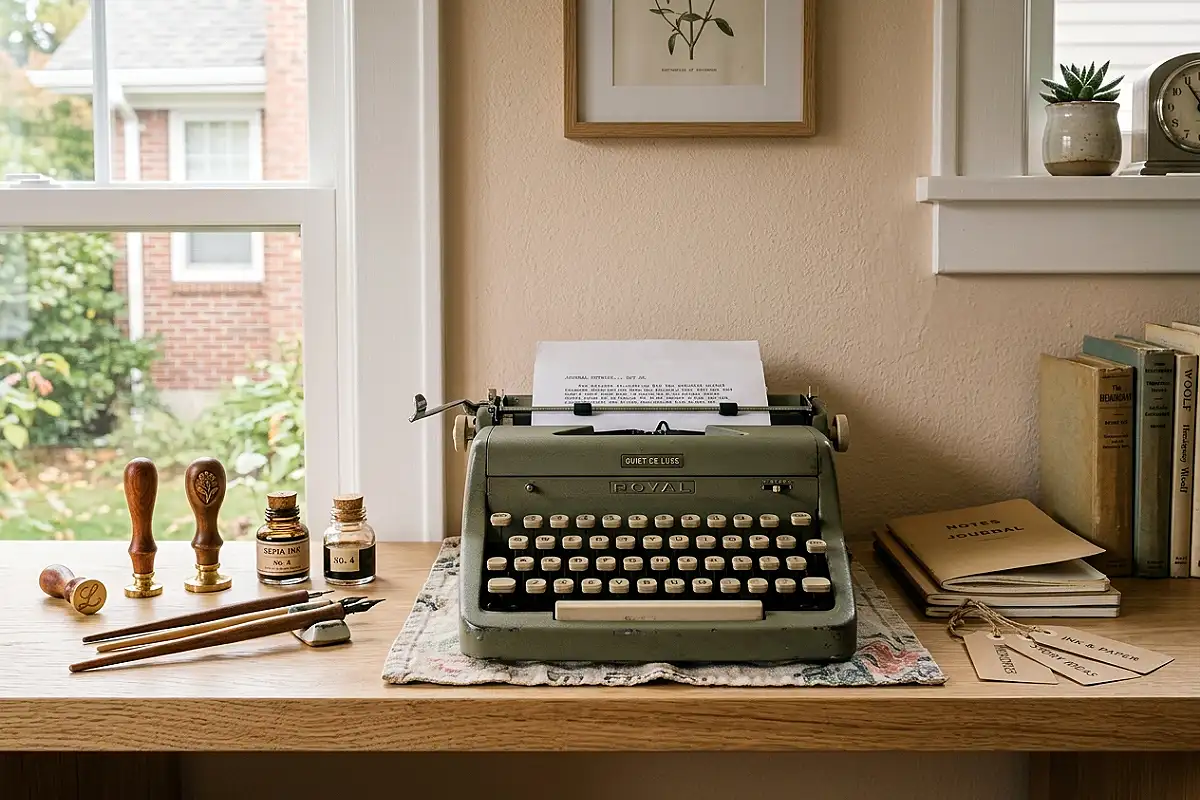
A working vintage typewriter on a shelf is a craft room’s best conversation piece — but it can also earn its keep. Set the typewriter on a low shelf and use the space beneath and beside it for your smallest tools: ink pads, letterpress cards, wax seal supplies, or calligraphy pens. For the writers and papercrafters among us, the typewriter becomes a functional part of the station — tags, labels, and little poems typed for handmade gifts. Choose a machine with round keys in cream or olive green, and place it where afternoon light catches the chrome, and it transforms from decoration into the room’s creative muse.
Pro Tip
Keep the typewriter under a glass cloche or inside the cabinet when not in use — decades-old rubber rollers and ribbons deteriorate in dusty, sunlit air, and a $30 thrift find deserves to keep working.
Wooden Spool Tower Display
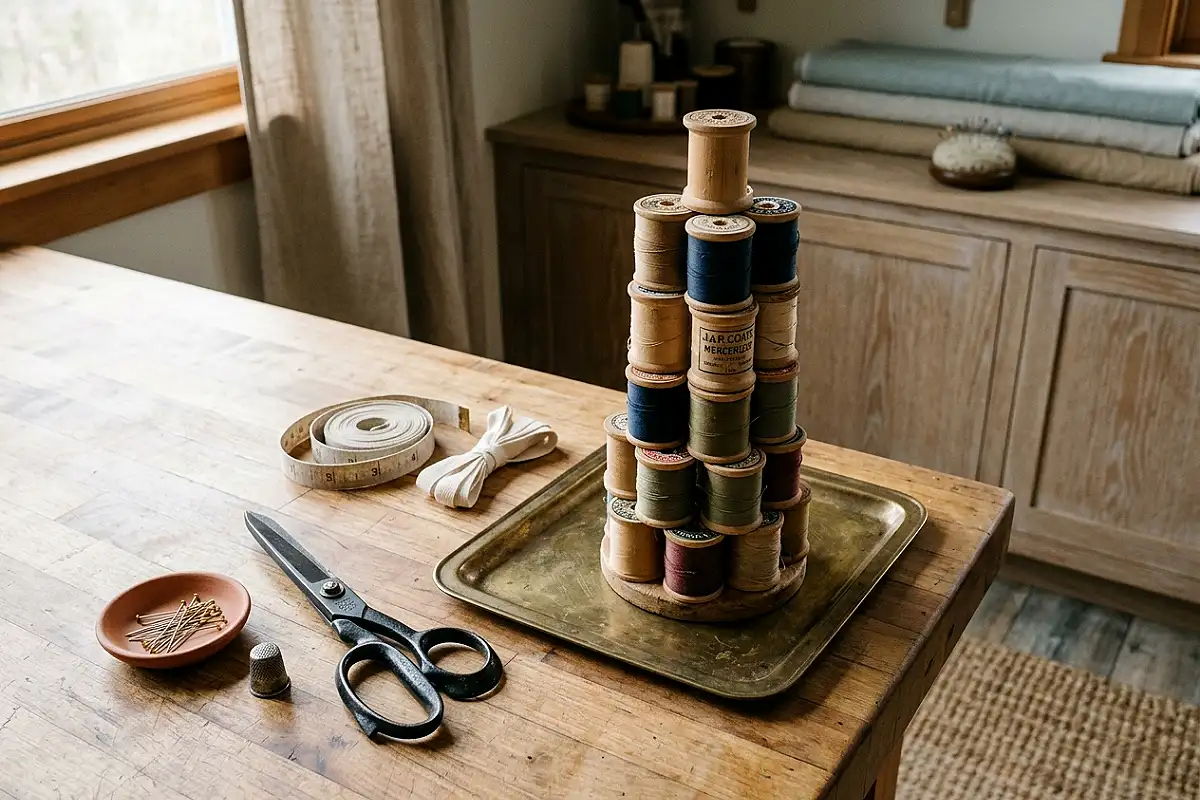
Antique wooden thread spools — the fat, heavy kind from real sewing rooms of a century ago — are among the most collected vintage objects for a reason. Gather a dozen or more, in graduated sizes and worn shades of maple, and stack them into a “spool tower” beside your work table: a leaning column held together by a thin brass rod running through the centers, or a free-form sculpture on a small tray. Use them as risers for your prettiest scissors or as candle-height stands for small jars of pins. Each spool’s stamp — the maker’s mark, the thread count — is a tiny piece of history sitting on your desk, and the whole tower says “this room was made for making.”
Pro Tip
Buy spools in lots at flea markets and resist the urge to sand them — the worn finish, chipped stamps, and faded labels are exactly what gives them character. A light coat of paste wax is all they need.
Stacked Vintage Suitcase Storage
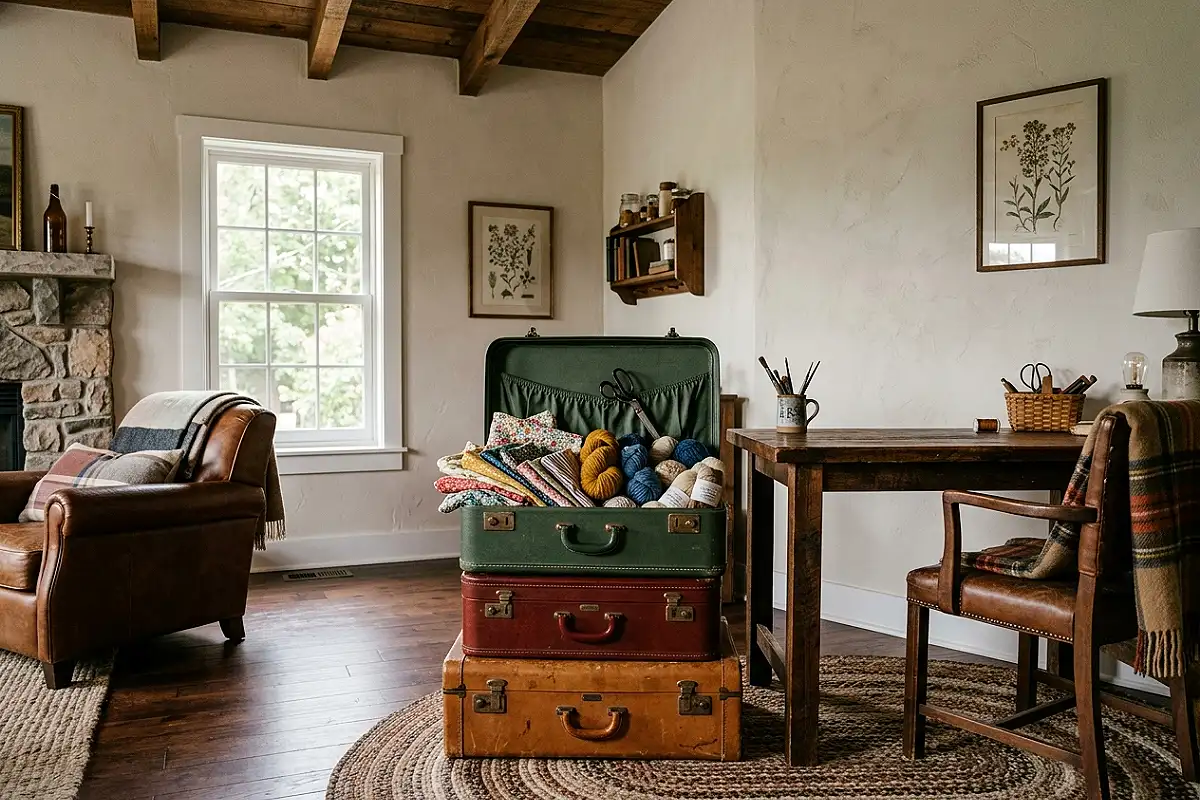
Three leather suitcases of different sizes, stacked corner-to-corner beside a table, become instant cubbies with a travel story attached. Unlatch the top two and prop them open — one for fabric scraps, one for works-in-progress — and keep the bottom one closed for long-term stash. The patina of a hundred trips is built into every seam and latch, and the stacked arrangement fills a corner like sculpture. Look for hard-shell suitcases with brass clasps in tan, oxblood, or olive; a set of three runs remarkably cheap at thrift stores because everyone owns a few and nobody knows what to do with them.
Pro Tip
Check every suitcase for moth evidence — old wool linings and fabric scraps are prime moth habitat. A few days of sunning and a cedar sachet inside will protect your supplies and your sanity.
Grandmother’s Sewing Table
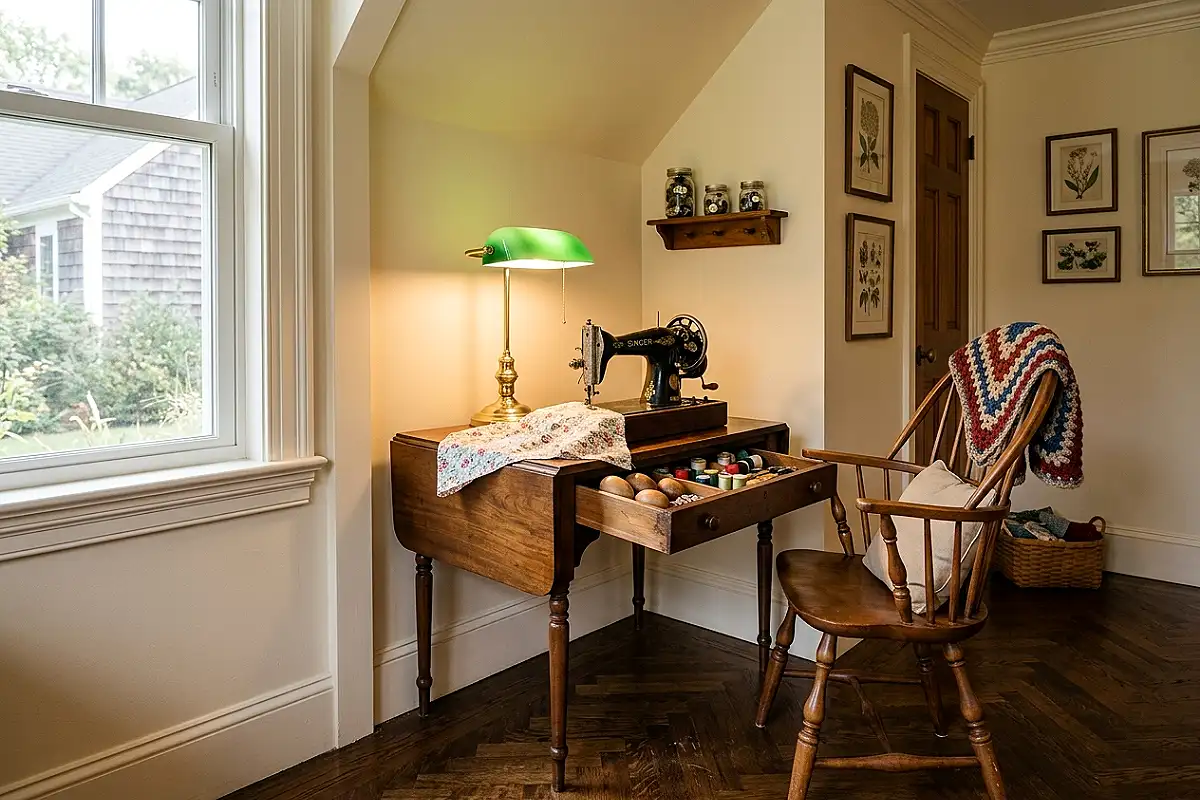
The small drop-leaf sewing table — narrow, waist-high, often with a little drawer and turned legs — is the vintage craft room’s original piece, and it still works better than most modern desks. Its compact top holds a current project perfectly, the leaf folds down against the wall when the room needs to breathe, and the little drawer is exactly the right depth for hand-sewing tools. Pair it with a wooden spindle-back or cane-seat chair you’ve rescued, drape a crocheted shawl over the back, and you’ve recreated the most romantic corner in crafting history. Add a small oil lamp or a brass banker’s lamp, and evening projects suddenly feel like a century of tradition.
Pro Tip
Have the table’s wobbly leg repaired rather than replaced — a properly glued mortise joint restores its sturdiness, and hand-crank sewing machines sold with these tables often fetch more than the table itself at auction.
Salvaged Door Pinboard
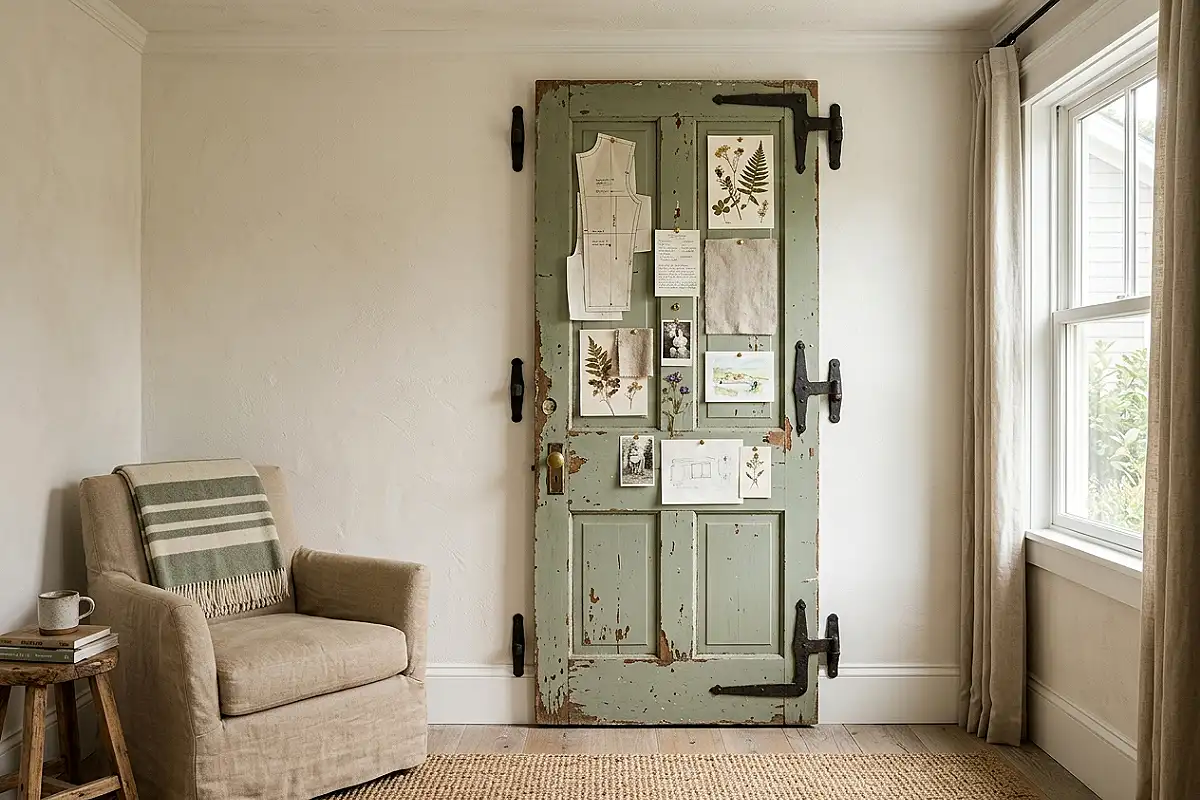
An old paneled interior door — six-panel, painted a dozen times over, hardware holes still visible — mounted flat against a wall becomes the largest pinboard you’ll ever own. The panels create natural sections for organizing: one panel for this month’s projects, one for inspiration clippings, one for patterns, one deliberately left sparse so the door’s history shows through. Push pins find old nail holes easily, and the chipped paint layers read as geology. Paint only the door’s face in a soft heritage green or dusty blue if the patina is too chaotic, and leave the edges raw. It’s the single most dramatic vintage statement a craft room can make, for the cost of a door nobody wanted.
Pro Tip
Mount the door with heavy mirror clips or a cleat rather than nails — it keeps the door proud of the wall so pins slide in easily, and lets you pull the whole door down to rehang it elsewhere someday.
Tin Trays as Wall Storage
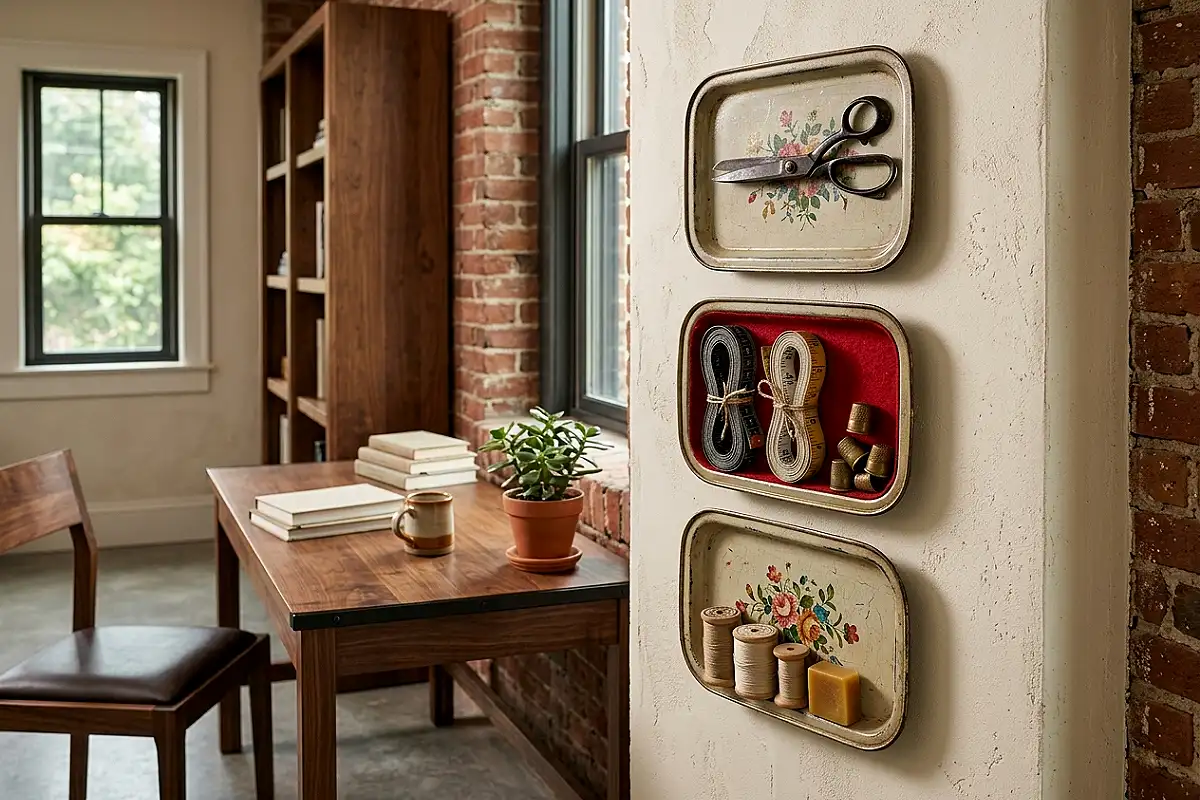
Vintage metal trays — the hand-painted toleware kind, the engraved brass tea trays, the enamel hotel trays — were made to carry, and they carry beautifully on a wall. Mount two or three in a vertical row with small brackets, and each becomes a floating holder for your most-used tools: scissors resting along the rim, measuring tape coiled in the center, thimbles gathered at the corner. The trays’ original scenes — florals, pastoral landscapes, city skylines — become a free gallery wall with function underneath. Wipe them with a soft cloth and a touch of wax, and never scrub away the gentle crazing; age is the entire point of the look.
Pro Tip
Glue small felt pads inside each tray where tools rest — it prevents that tinny scratch-and-slide sound, protects the trays’ painted surfaces, and keeps your good scissors’ blades from touching bare metal.
China Hutch for Craft Display
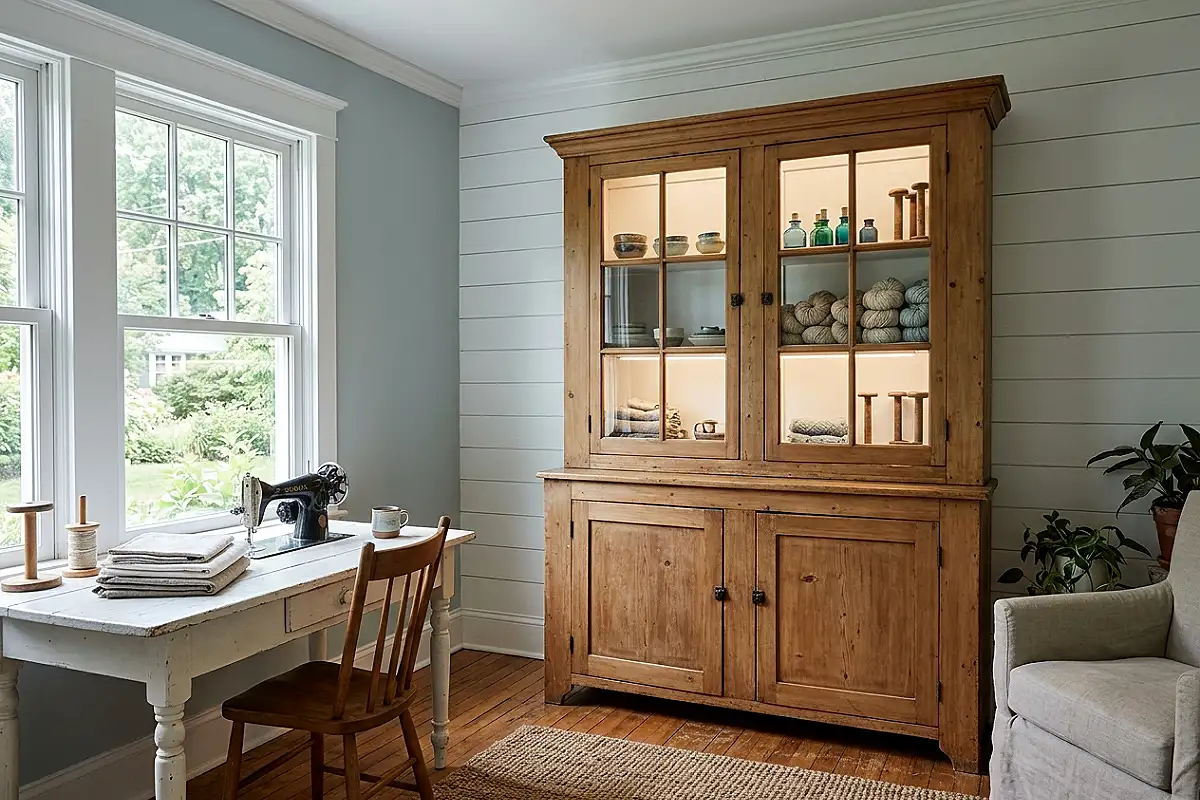
The china hutch — two stacked cabinets, glass up top, wood below — is the vintage craft room’s crowning piece. Its upper glass doors display your prettiest collections: vintage scissors on a lace doily, porcelain pin dishes, glass thread spools, a small collection of hand-blown ink bottles. The closed cabinets below hide the unglamorous reality: bulk paper, glue bottles, unfinished projects. It’s the classic “pretty above, practical below” arrangement that makes a room photograph like a magazine while functioning like a workshop. Look for hutches in oak, pine, or painted farm-table green; the chunkier the proportions, the more charming the result.
Pro Tip
Install a small battery-operated puck light inside the upper cabinet — vintage hutches were built before good lighting, and a warm glow transforms your glass display from dim curiosity into glowing showcase.
Milk Glass Task Lighting
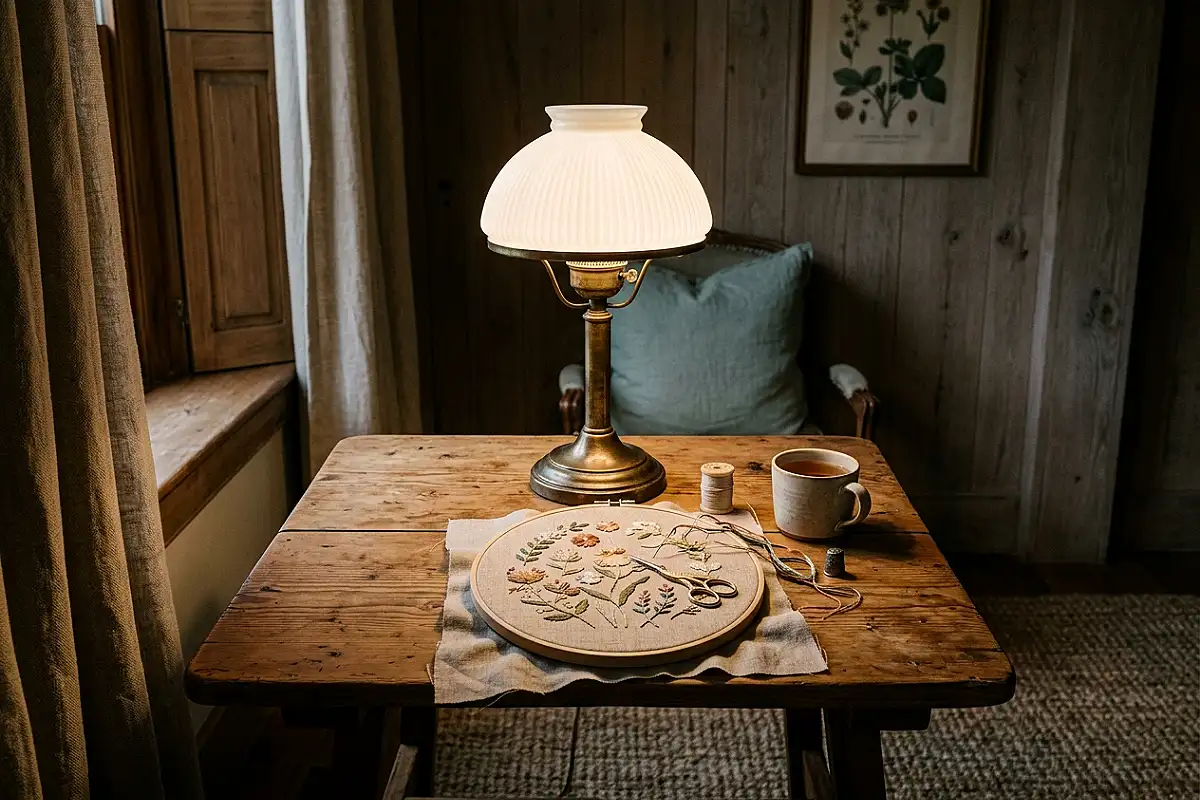
No vintage craft room is complete without proper lighting, and nothing casts a warmer glow than milk glass. Hunt for a vintage milk glass table lamp — the kind with a fluted white shade and brass base, often found at barn sales for the price of a lunch — and give it a proper task-lighting job beside your work table. Fit it with a warm LED bulb and it becomes both atmosphere and utility: the soft opaque shade throws light downward exactly where hands work, with none of the harsh glare of modern desk lamps. A pair of them, flanking a mirror or hutch, elevates the entire room’s evening mood.
Pro Tip
Before plugging in any vintage lamp, have the cord and socket rewired by an electrician — original wiring from the 1940s and 50s is a genuine fire hazard, and a twenty-dollar rewire protects a lamp you can’t replace.
Library Card Catalog for Small Parts
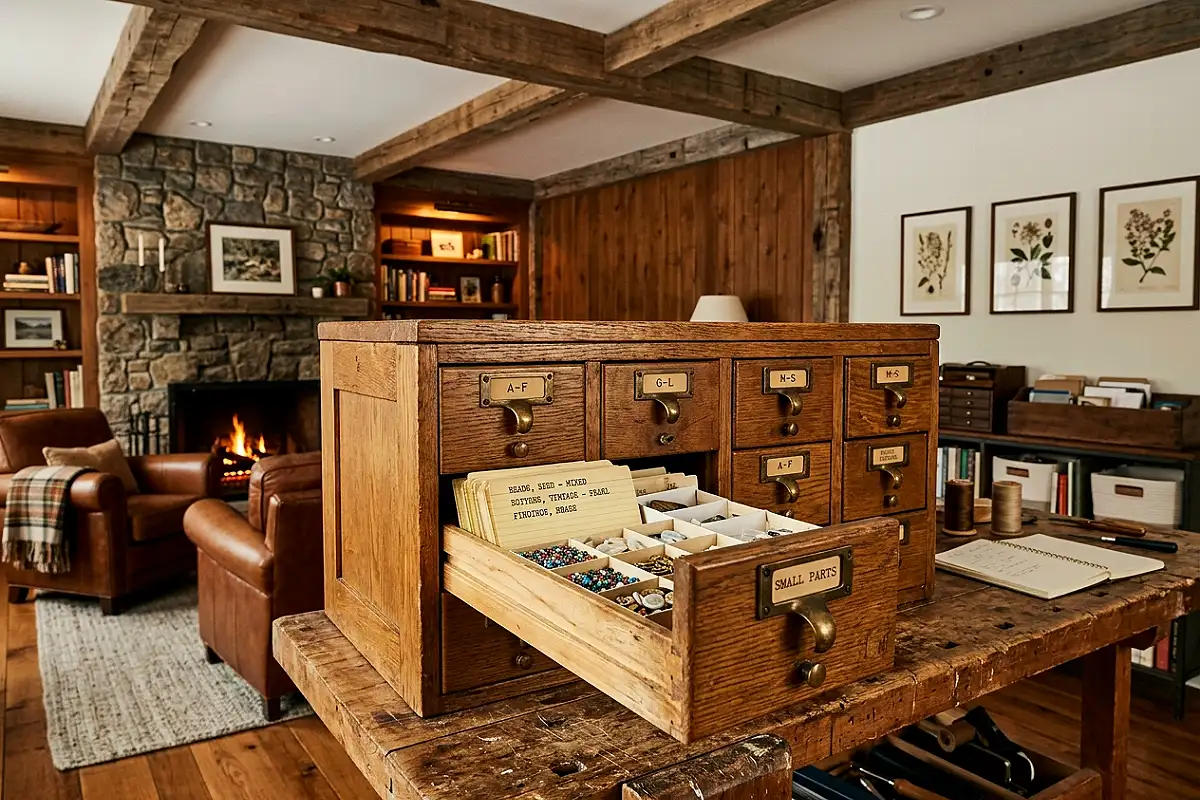
The antique library card catalog — rows of shallow wooden drawers, each about the size of a sandwich — was designed for exactly what craft rooms need most: tiny things, sorted, indexed, retrievable. Dedicate drawers by category — one per drawer of beads by color, buttons by size, embroidery floss by hue — and make index cards for each, typed or handwritten in a vintage style. The result is the most satisfying small-parts system ever devised: every drawer opens to a neat, level field of tiny treasures, and the catalog itself is one of the most beautiful objects money can buy secondhand. Brass-pull catalogs run a premium; painted wood versions are nearly as charming at half the price.
Pro Tip
Line each drawer with acid-free paper before filling it — decades-old drawers often carry acid from old card stock, which can tarnish metal findings and yellow fabric scraps over time.
Enamelware Canister Collection
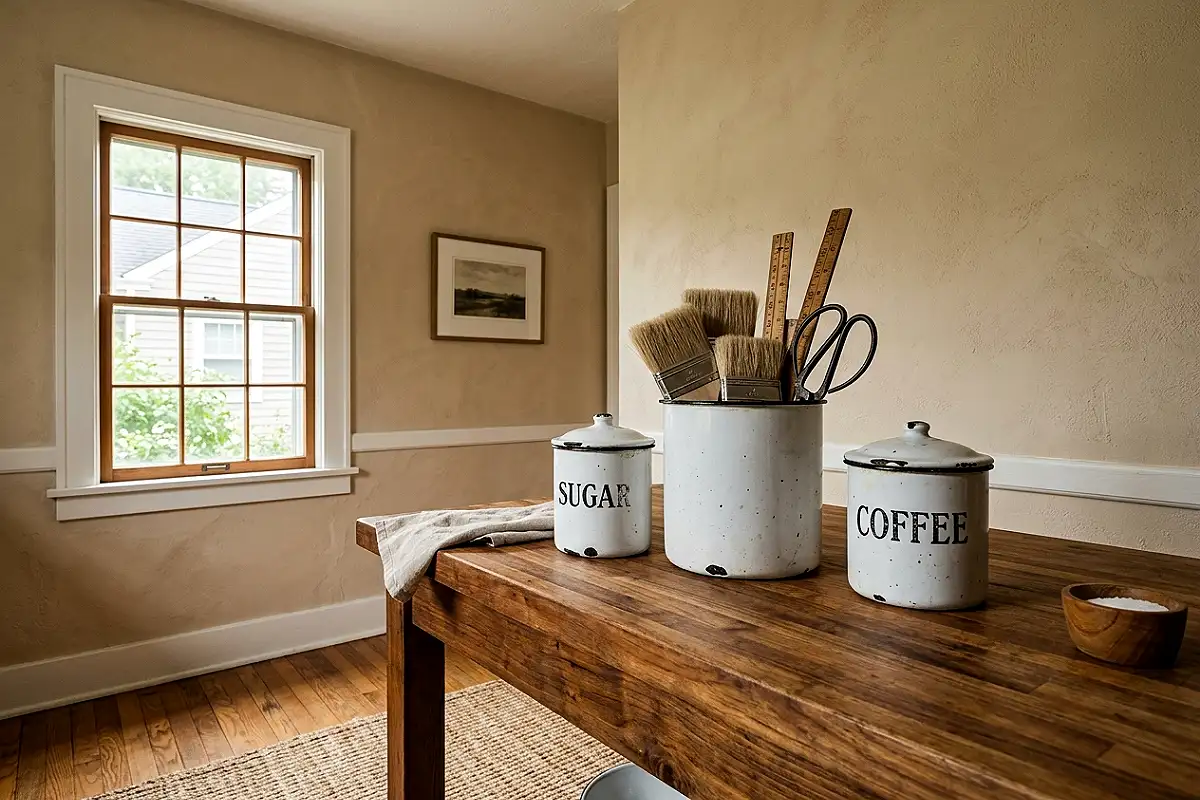
Vintage enamelware — the speckled white-and-black or soft pastel canisters from old country kitchens — is made for brushes. A canister on your work table holds paintbrushes and pens upright, bristles-up, exactly the way they should dry; a second holds scissors; a third, your rulers and stencils. The mottled enamel, worn chip-free rim, and soft rounded lips make even the mundane act of grabbing a brush feel like a still life. Enamelware is nearly indestructible, rinses clean in seconds, and stacks for storage — which is why it has survived a century of hard kitchen use and now deserves a century in your craft room.
Pro Tip
Check enamelware chips before buying — a deep chip that exposes the iron beneath will rust in a damp craft room. Surface scratches are character; exposed metal is a countdown.
Heritage Wallpaper Accent Wall
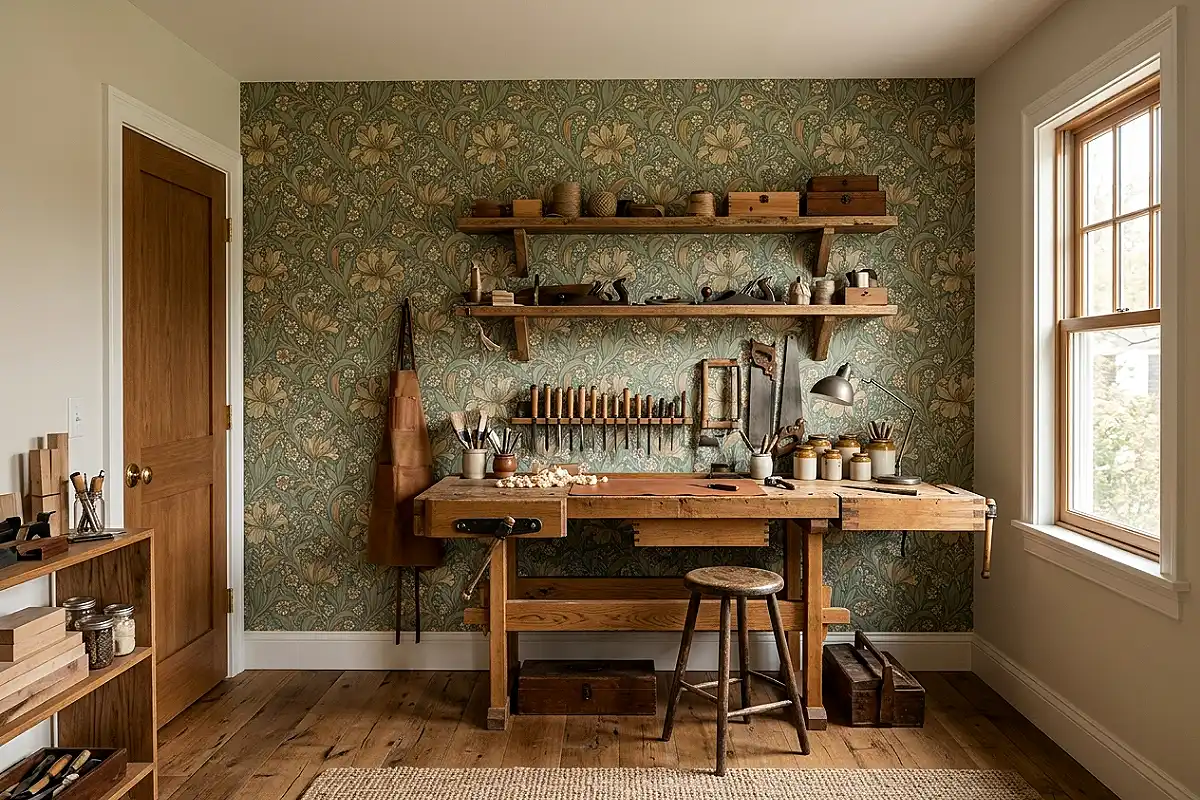
The fastest way to make a room feel a hundred years old is the wallpaper. Choose a small-scale vintage pattern — a William Morris floral, a Victorian damask, an arts-and-crafts foliate — in muted heritage tones: sage, dusty rose, ochre, or oxford blue. Paper a single accent wall behind your main work table so the pattern frames your hands while you work, and keep the other three walls in a warm off-white so the room stays airy. If real wallpaper feels like a commitment, high-quality peel-and-stick reproductions of classic patterns have become remarkably convincing. The effect is immediate: the moment the pattern goes up, the room stops being a spare room and starts being a studio.
Pro Tip
Choose a matte, washable finish and hang the paper at least two feet from your work table — glue splatters and paint flicks will find the wall eventually, and distance is your best defense.
Antique Vanity for Jewelry Making
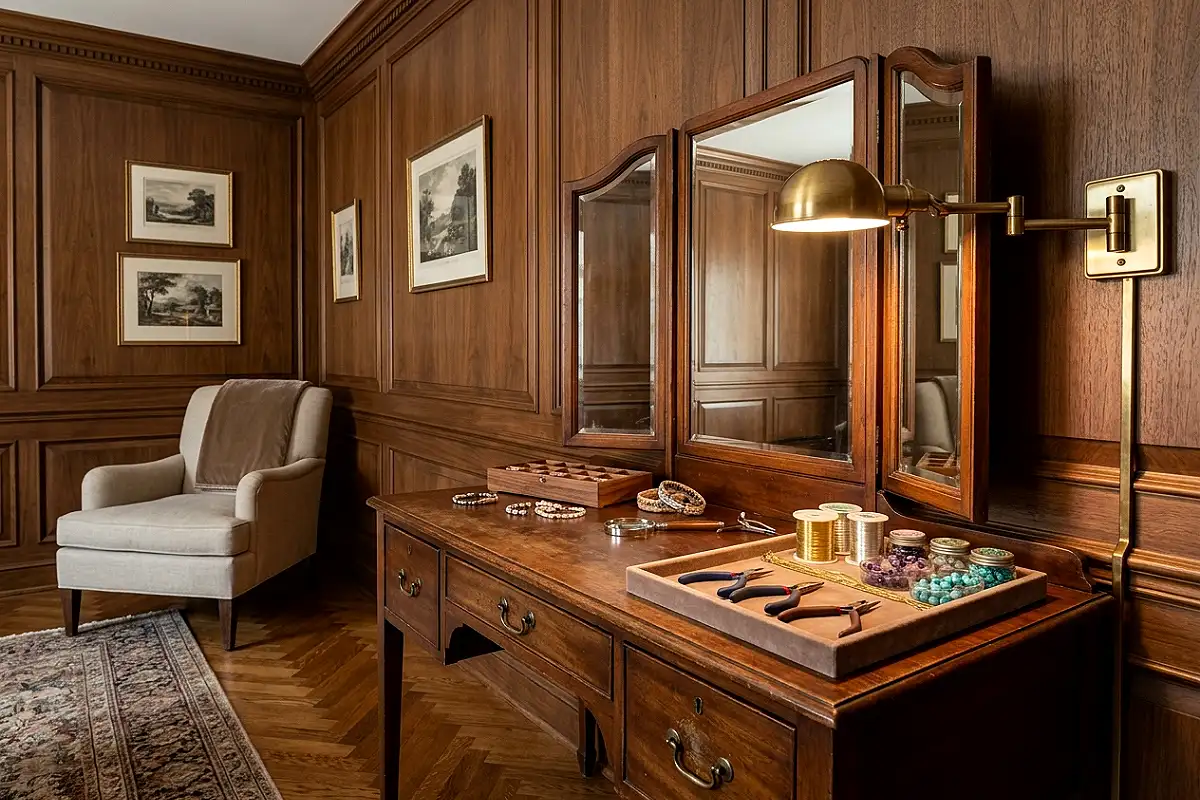
A vintage vanity — the bedroom dressing table with a tri-fold mirror and shallow drawers — is the ideal station for jewelry making, beading, and any craft that demands detail work. The three-mirror arrangement lets you see every side of a piece as you work, the shallow drawers fit beads and findings perfectly, and the intimate scale forces a gentle, focused posture that suits fine work. Place it near a window for daylight, tuck a velvet-lined tray on the top for your current piece, and hang a small chandelier or brass swing-arm lamp above. It’s the most ladylike corner a craft room can have — and the most photogenic.
Pro Tip
Line the vanity’s shallow drawers with felt or suede scraps cut to size — tiny findings stop sliding and clattering, and the soft lining reads as luxury in every photo you’ll ever take of the station.
Vintage Book Shelves
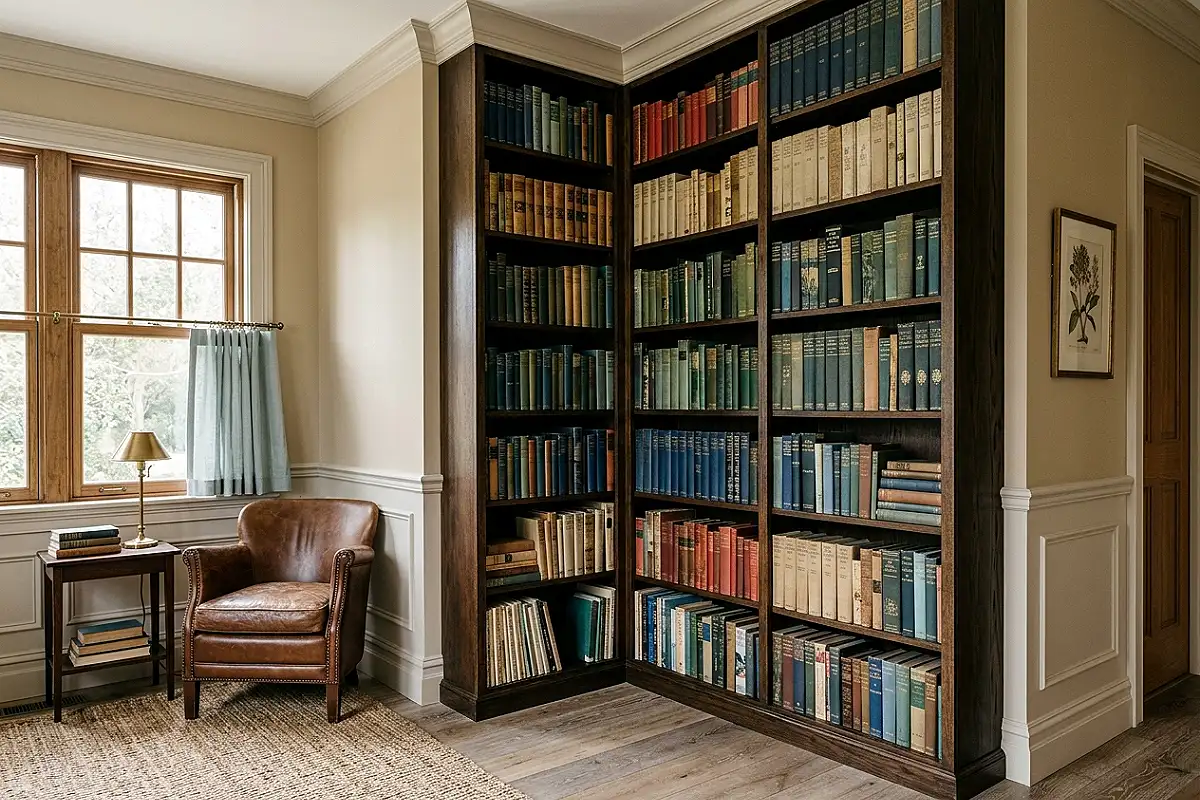
An old craft room feels literary before it feels crafty, and the book wall does that work. Fill one shelf or one unit entirely with vintage books — cloth-bound novels, old craft manuals, botanical volumes, children’s books with cloth spines — arranged by color for that classic collected look. Among them, tuck in the books that matter: vintage craft manuals, pattern books, and how-to volumes whose yellowed pages teach techniques the internet forgot. A few books can be hollowed — carefully, with a craft knife — to hold small treasures, turning the library itself into a cabinet. The spines’ faded gold lettering against deep cloth colors is a gallery wall made of paper.
Pro Tip
Buy books from thrift stores’ craft, sewing, and homemaking sections — old McCall’s guides, 1940s needlework books, and mid-century design manuals are often priced at a dollar and are genuinely still useful today.
Farmhouse Apron Sink
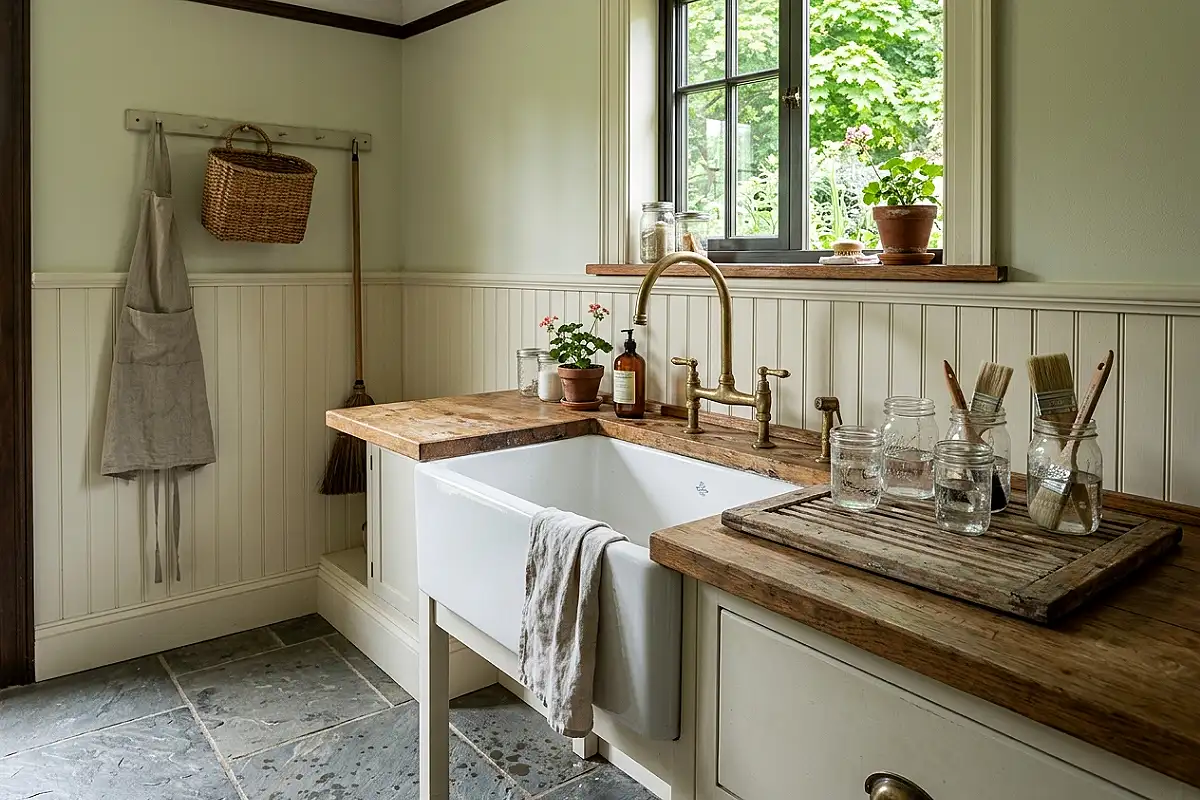
If you’re renovating even a corner of your craft room, the farmhouse apron sink is the vintage element that changes everything. A deep fireclay or cast-iron basin, its front apron facing the room, handles every messy job a maker has: rinsing brushes, soaking dye baths, washing hands full of glue, cooling wax, mixing plaster. Pair it with a gooseneck brass or unlacquered-brass-look faucet and a wooden drainboard shelf beside it, and the sink becomes the room’s working heart. Set it into a butcher-block or painted wood counter, and even modern machines placed nearby start to look like they’ve always belonged.
Pro Tip
Install a removable sink strainer and a second-hand glass jar of soapy water beside the basin for brush rinsing — it keeps paint and glue from ever touching your plumbing, which farmhouse sinks forgive less kindly than plastic ones.
Vintage Dress Forms as Display
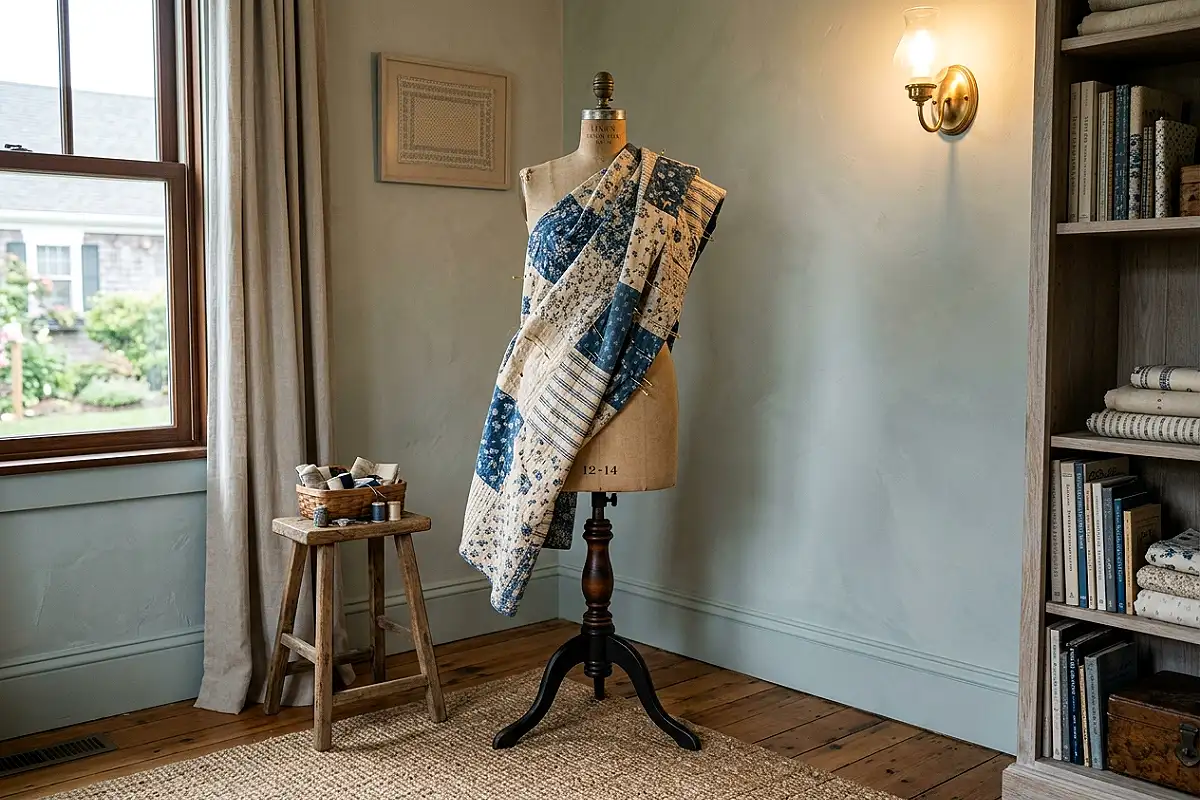
A wire or papier-mâché dress form — the collapsible wire kind from old dressmaking shops, or the padded torso with the wooden tripod stand — is sculpture that works. Beyond holding half-finished garments, dress forms display everything a craft room accumulates: a cascade of necklaces on the wire form, a drying wreath over the shoulders, a work-in-progress quilt draped like a gown. Set one in the room’s corner by the window and let morning light fall across it; the silhouette alone reads as “creative studio” to every visitor. Collect two or three in different styles and the group becomes a small gallery of making itself.
Pro Tip
Keep at least one dress form permanently draped in muslin pinned with your current project — a form in progress is far more inspiring than a bare one, and it tells the room’s story at a glance.
Botanical & Needlework Gallery Wall
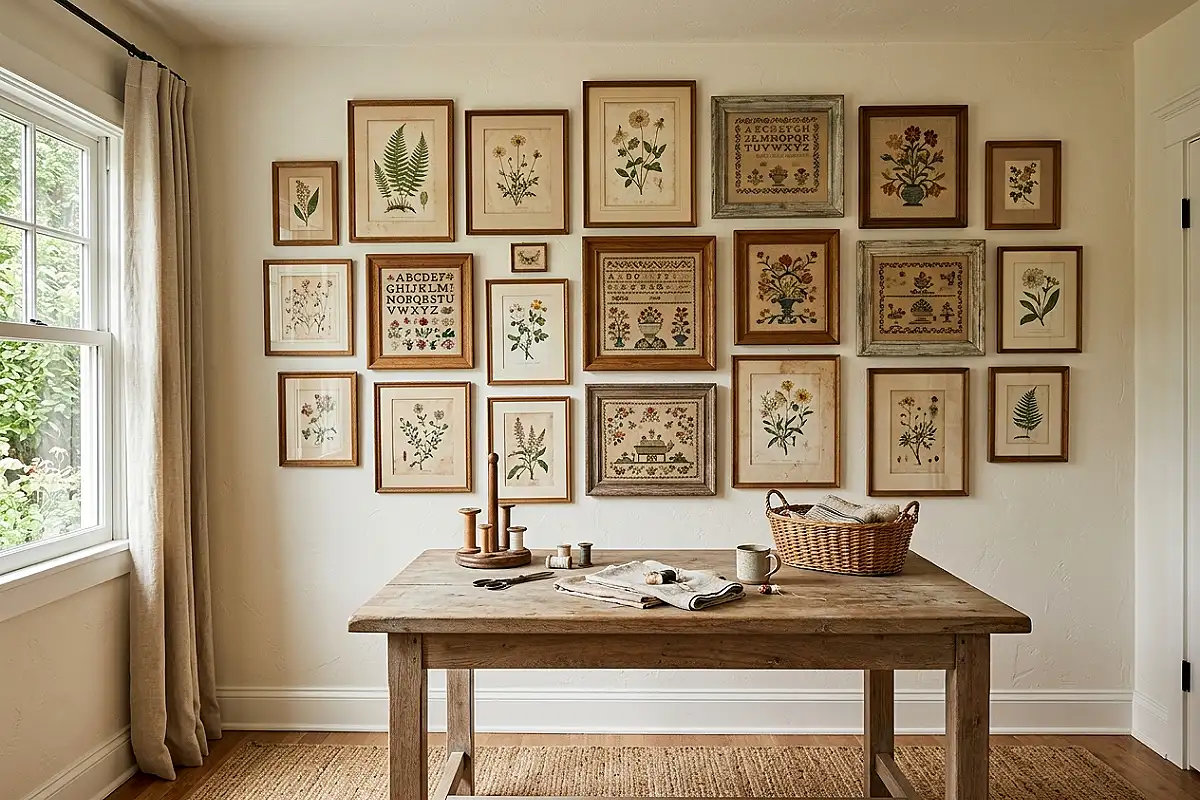
Every vintage craft room needs a gallery wall, and the most charming combination pairs antique botanical prints with vintage needlework. Hunt estate sales for framed botanical lithographs — ferns, wildflowers, seed catalogs — and pair them with found embroidery: old samplers, crewel-work pictures, tiny framed cross-stitch flowers with their foxed mats intact. Hang them salon-style around your work table, frames in mixed gilt, oak, and black, and the wall becomes a reminder that craft has always been art. The needlework pieces, often priced at a few dollars because their frames are tired, bring something store-bought art never can: someone’s patient hands, preserved.
Pro Tip
Keep vintage textiles out of direct sunlight — UV fades century-old dyes quickly. Hang needlework on walls opposite windows, and use UV-filtering glass if you ever reframe a treasured piece.
Vintage Metal Cart as Mobile Caddy
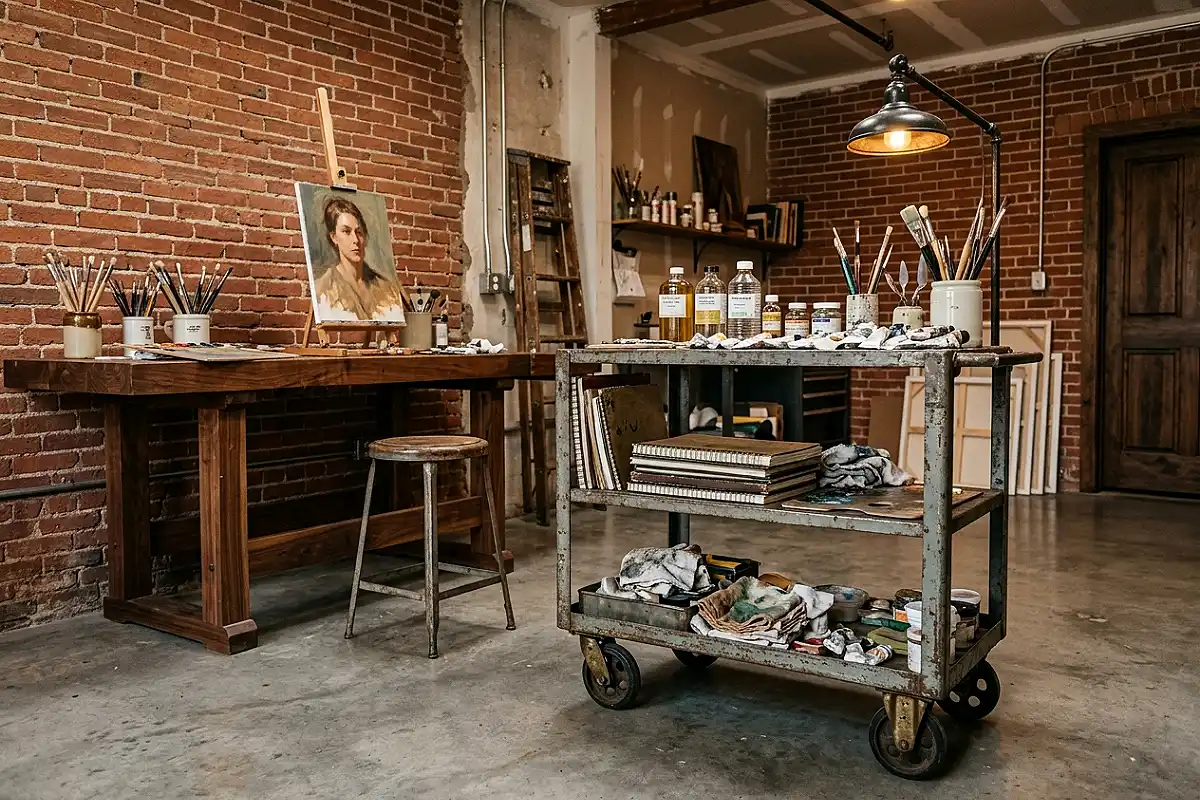
The old rolling cart — the steel tea cart with brass casters, the enamelware step cart, the retro kitchen trolley with its chrome rails — was built for service, and it serves a craft room perfectly. Its shelves roll beside whatever you’re working on: paint on top, brushes in the middle, rags and solvent below. The chrome and steel against your room’s soft woods and linens create the exact tension that makes styled photos sing. These carts are plentiful and cheap because they’ve been displaced from a thousand kitchens, and their industrial bones make them the most durable piece you’ll own.
Pro Tip
Oil the casters and replace any missing wheels before loading it — a cart that squeaks and wobbles ends up parked in a corner, and a stationary rolling cart is just a sad shelf.
Steamer Trunk as Project Chest
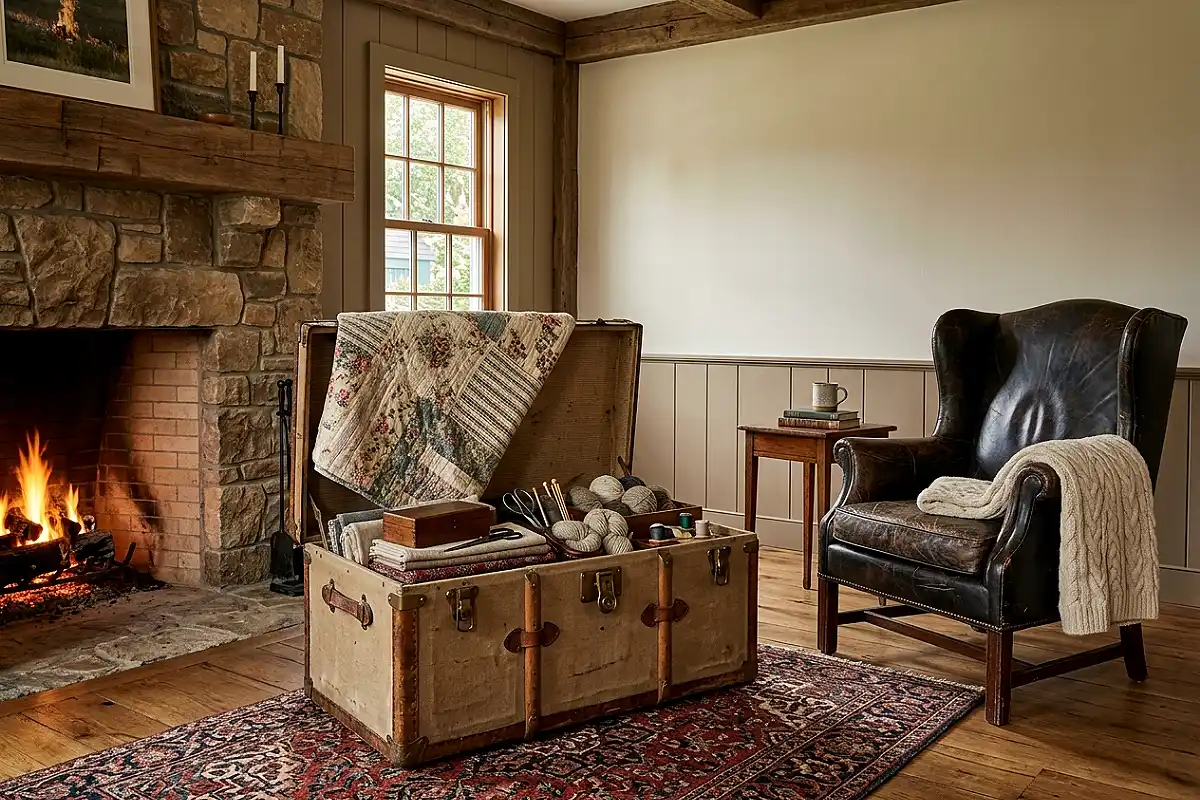
The canvas-and-wood steamer trunk — banded, buckled, stamped with travel initials — is a craft room’s most romantic container. Unlatched and kept open, it becomes the room’s “project chest”: the current quilt folded across the top, works-in-progress nestled inside, a wool blanket folded over the lid as a lap cover for evening hand-stitching. Its leather straps and brass corners age beautifully under use, and the trunk’s very shape — made for journeys — quietly suggests that every project is a voyage. Place it at the foot of your table or beside your best chair, and it anchors the room with old-world weight.
Pro Tip
Condition the canvas and leather with a light application of leather conditioner once a year — trunk canvas dried out by radiators cracks along its seams, and the repair never looks as good as the prevention.
Vintage Pattern Envelope Gallery
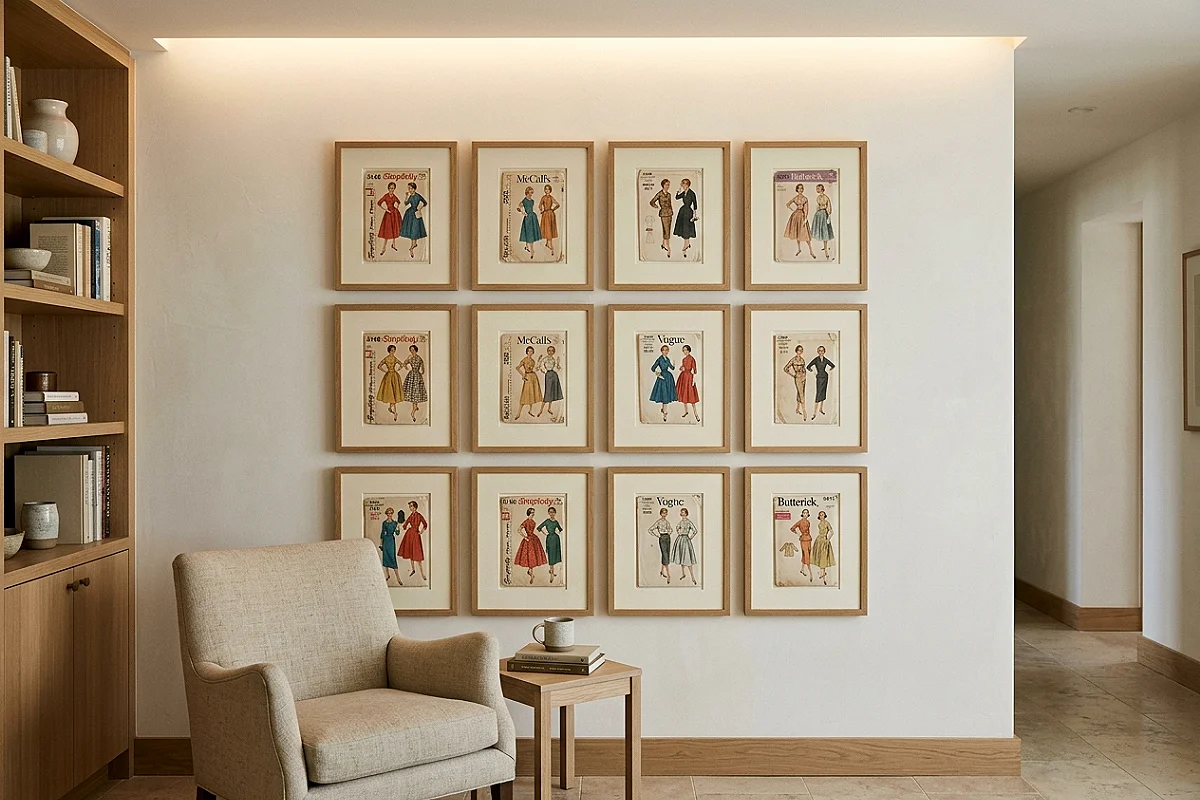
Vintage sewing pattern envelopes — the illustrated McCall’s, Simplicity, and Butterick covers from the 1940s through the 70s — are among the most charming collectibles a maker can own, with their watercolor illustrations of elegant women and their bold period typography. Frame a dozen in matching simple frames and hang them in a grid: they form an instant gallery of making, each envelope a miniature poster of its era’s idea of beauty. Buy complete patterns on Etsy or eBay for a few dollars each, and the ones too fragile to frame can live in a glass-top tray on your table. Few wall arrangements say “this room is for makers” more eloquently.
Pro Tip
Mount envelopes on acid-free matboard before framing and keep them out of sunlight — the inks on 1950s envelopes are beautifully fugitive, and a sunny wall will bleach them to ghosts within a few seasons.
A Room Made for Making
Vintage charm isn’t about recreating the past — it’s about filling your room with objects that prove making things has always mattered. Start with the one piece that speaks to you most, a dresser or a card catalog or a door, and let the rest gather slowly. Rooms like these are never finished; they’re collected, one thrift store Saturday at a time, and they get better with every load of laundry they never see.
Frequently Asked Questions
How do I give my craft room a vintage look on a budget?
Focus on three cheap, high-impact changes: swap modern hardware for glass or brass knobs on furniture you already own, hang a gallery wall of vintage prints and pattern envelopes, and introduce milk glass or enamelware accents for lighting and storage. Thrift stores and estate sales supply nearly everything else for the cost of a few modern candles.
Where can I find affordable vintage furniture for a craft room?
Estate sales in the final hours offer the deepest discounts, followed by flea markets, thrift stores, Facebook Marketplace, and local auction houses. Smaller pieces — card catalogs, sewing tables, enamelware — also turn up regularly at church sales and in the “free” sections of local listings, because most people don’t know what to do with them.
What colors work best in a vintage craft room?
Heritage tones build the most authentic vintage feel: sage green, dusty rose, ochre, oxford blue, oxblood, and warm cream. Use one or two of these as your main palette — on an accent wall, cabinetry, or large furniture — and let the wood tones of vintage pieces provide the rest of the color naturally.
How do I organize small craft supplies in a vintage style?
Use vintage containers designed for small things: a library card catalog for beads and findings, apothecary jars for buttons, enamelware canisters for brushes, and wooden spool towers for thread. The vintage look survives as long as every container has a single purpose and a visible label or index.
Is it okay to mix vintage and modern pieces?
Not only okay — essential. The most livable vintage craft rooms pair antique furniture with modern task lighting, ergonomic chairs, and contemporary tools. The rule of thumb is roughly seventy percent vintage character to thirty percent modern convenience: charm where you look, comfort where you work.
How do I light a vintage craft room well?
Layer three kinds of light: soft ambient light from a vintage-style fixture (a milk glass lamp or small chandelier), focused task light at your work surface (a brass banker’s lamp or adjustable arm lamp), and natural daylight positioned to fall across your hands, not behind them. Warm bulbs around 2700K keep the vintage mood without dimming your detail work.