25 Easy Fall Crafts Anyone Can Make This Autumn
There’s a particular kind of magic in making something with your hands as the air turns crisp. Fall crafts don’t require artistic talent, expensive supplies, or a whole weekend — most of the ideas below take under an hour, cost just a few dollars, and use things you can gather on a walk, pull from a thrift store, or find in your pantry. Whether you want a glowing mantel, a gift that smells like October, or a front porch that makes the neighbors slow down, start anywhere on this list. Every project is beginner-friendly and endlessly adaptable to your own style.
1. Pressed-Leaf Glass Coasters
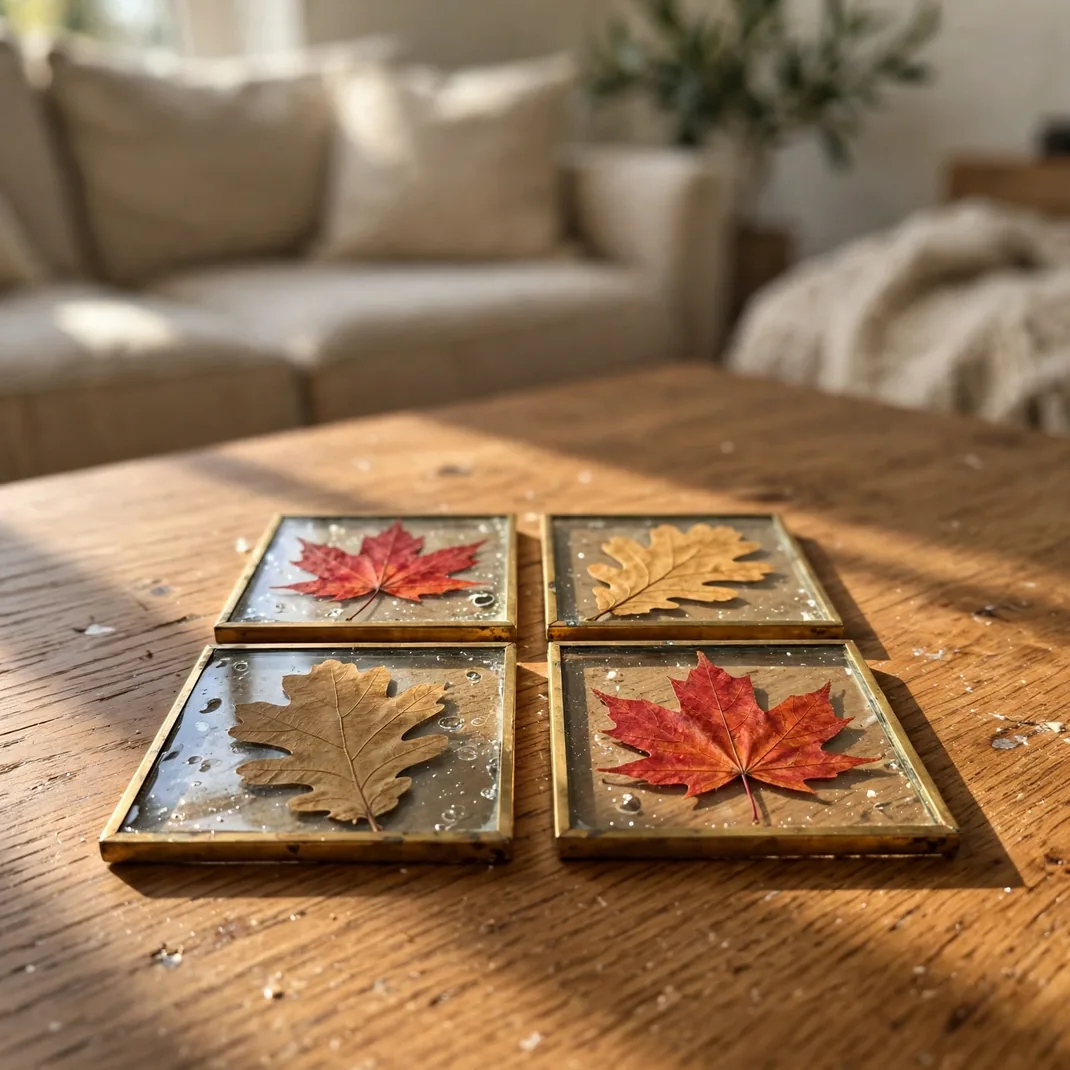
Turn the prettiest leaves of the season into functional art. Real pressed maple and oak leaves, sealed between glass panes in slim brass frames, become coasters with the jewel tones of autumn suspended inside.
You’ll need: Freshly fallen leaves, a heavy book and parchment paper, four-inch glass panes or glass photo coasters, slim brass frames, clear-drying craft glue, and small cork dots.
How to make it: Press leaves between parchment inside a heavy book for five to seven days. Arrange one or two per pane, run a thin bead of clear-drying glue around the edges to seal out moisture, and set them into the frames. Stick cork dots on the back corners so they won’t scratch your table.
Tip: Choose leaves with bold veining — red maples and golden oaks photograph best through glass. Slightly imperfect leaves look the most natural.
2. Cinnamon-Stick Candle Wraps
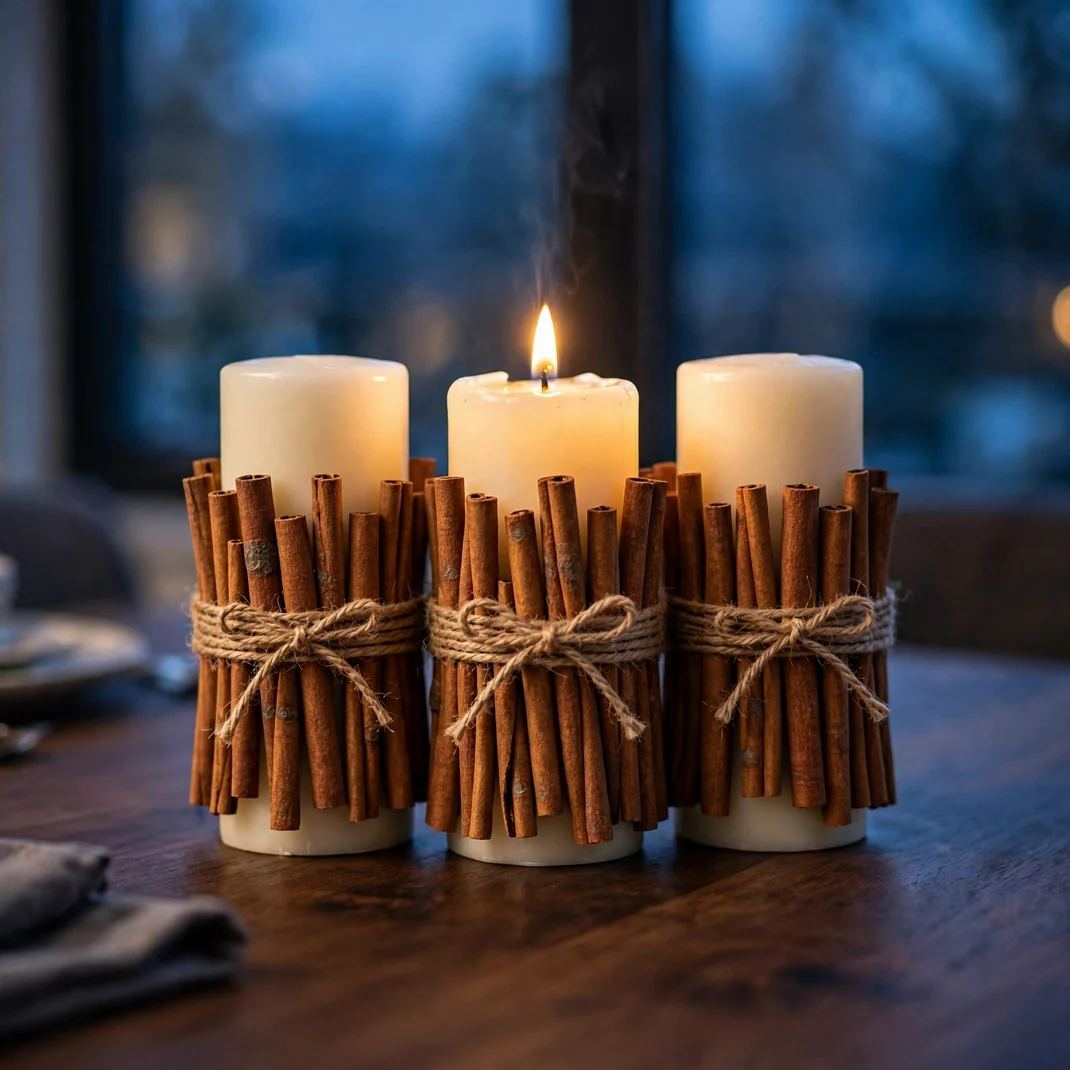
Plain pillar candles become a sensory experience when bundled in whole cinnamon sticks. As the candle burns, the gentle warmth releases a soft spiced scent — no plugins or sprays required.
You’ll need: Ivory pillar candles, whole cinnamon sticks (about twenty per candle), jute twine, and a hot glue gun.
How to make it: Stand the cinnamon sticks upright around the candle, snug against the wax. Wrap jute twine twice around the bundle and knot it at the back, adding a tiny dot of hot glue behind the knot to keep everything anchored. Trim any uneven stick tops with scissors.
Tip: Keep the sticks at least an inch below the wick line and never leave a lit candle unattended. When the scent fades, rub the sticks with a drop of cinnamon oil to refresh them.
3. Acorn-Cap Mini Wreath
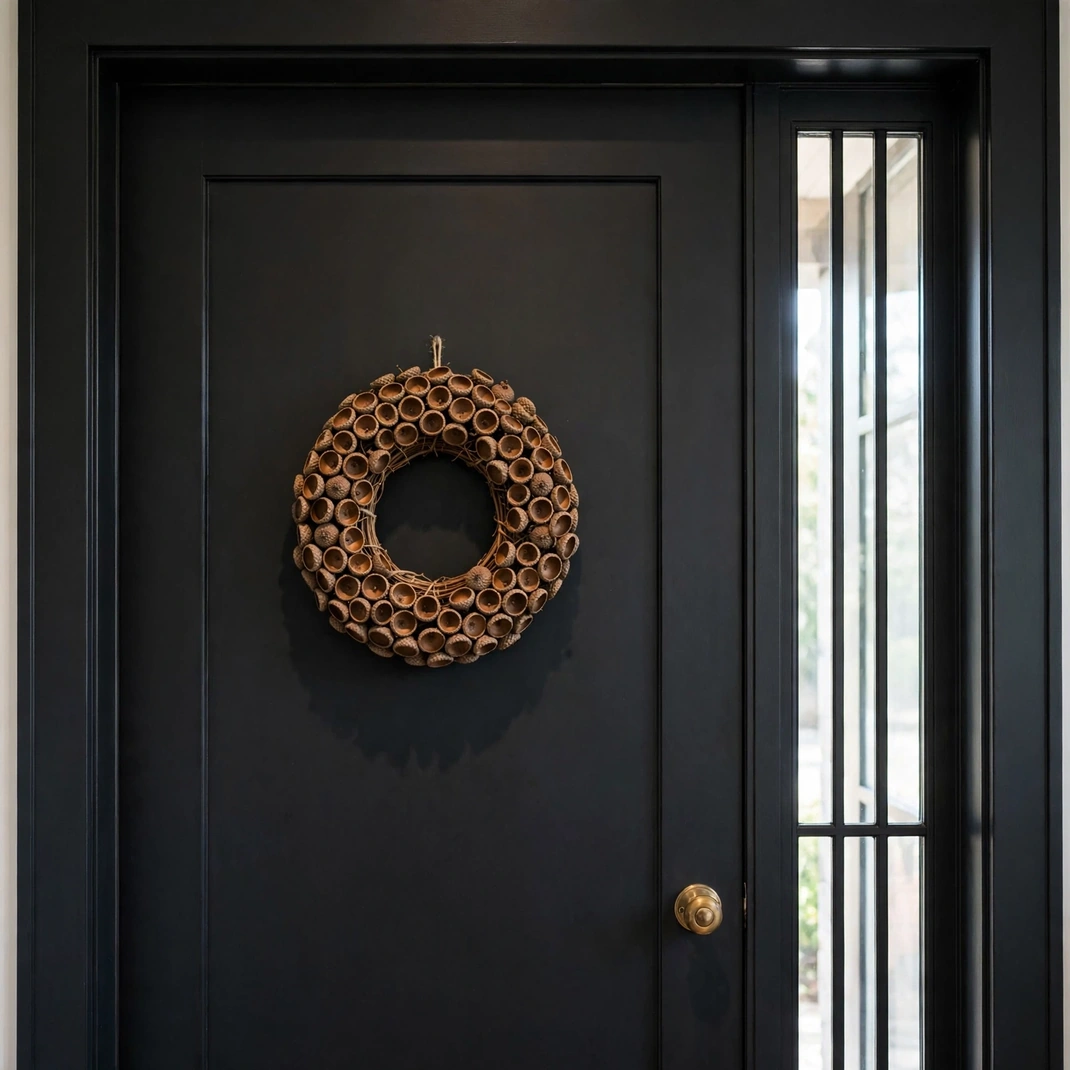
Hundreds of gathered acorn caps, glued in overlapping rows onto a small grapevine base, create a wreath with incredible texture — rich, woodland, and completely free if you forage the caps yourself.
You’ll need: Acorn caps (gathered and baked ten minutes at 200°F to evict any tiny residents), an eight- to ten-inch grapevine wreath, a hot glue gun, and velvet ribbon for hanging.
How to make it: Starting at the outer edge, hot-glue caps in overlapping rows, working inward and turning the wreath as you go. Fill gaps with smaller caps until no vine shows through. Tie on a ribbon hanger.
Tip: Mix cap sizes for a natural look — the variety is what makes it read as gathered rather than manufactured. A small wreath like this is perfect for interior doors and mirrors.
4. Embroidered Hoop Fall Art
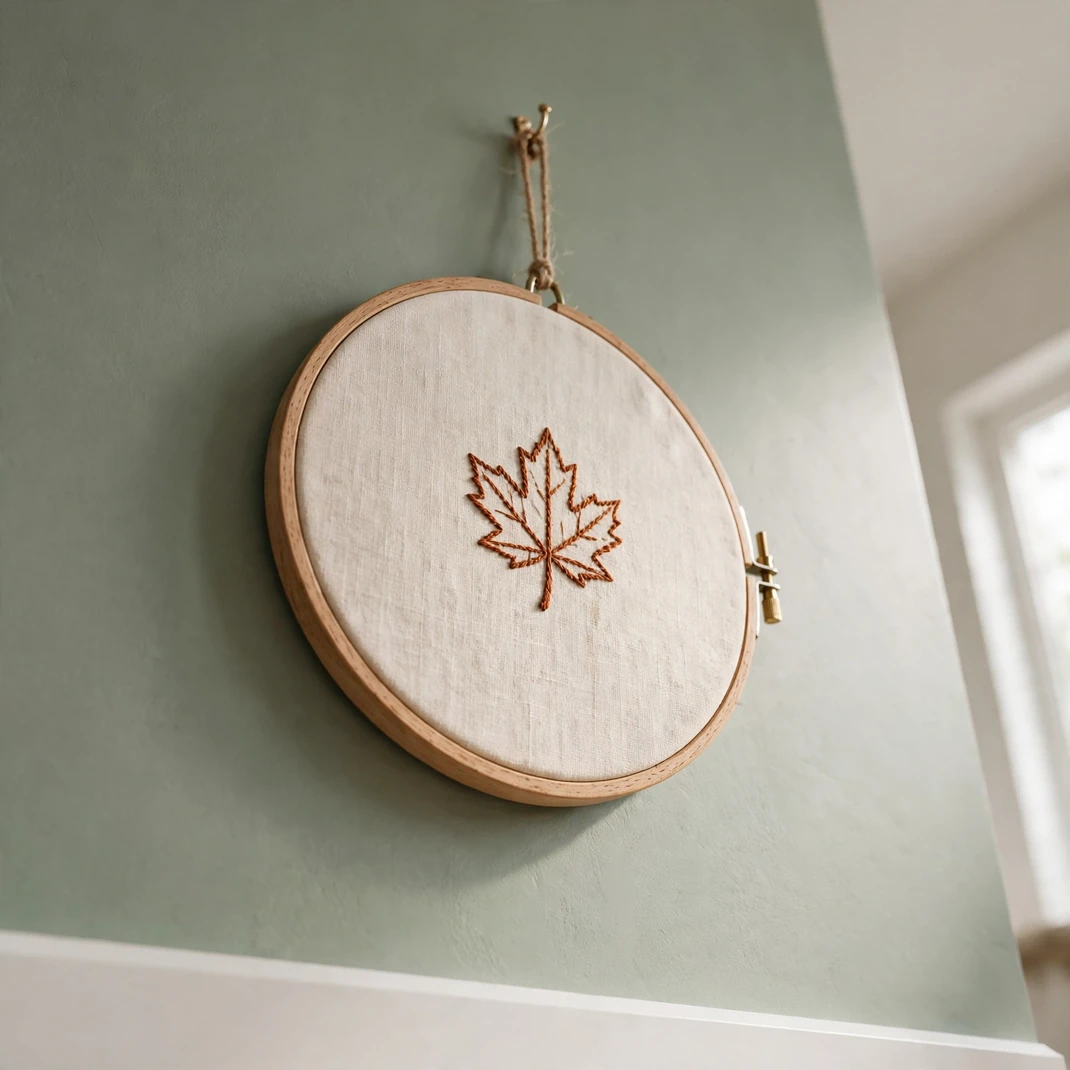
A simple stitched maple leaf on cream linen, left in its wooden hoop, is wall art with handmade soul. Hang one solo or a trio in different sizes for an instant gallery moment.
You’ll need: A six-inch wooden embroidery hoop, cream linen or muslin, embroidery floss in rust, gold, and olive, a needle, and a simple leaf template drawn or printed on paper.
How to make it: Trace the leaf onto the fabric, then outline it in backstitch. Fill the shape with satin stitch or add French-knot veins for texture. Tighten the fabric in the hoop, trim the excess to about an inch, and glue the raw edge to the back of the inner hoop.
Tip: Total beginners can stitch the whole leaf in simple running stitch — the handmade wobble is part of the charm. Group three hoops at slightly different heights for a styled look.
5. Corn-Husk Flower Bouquet
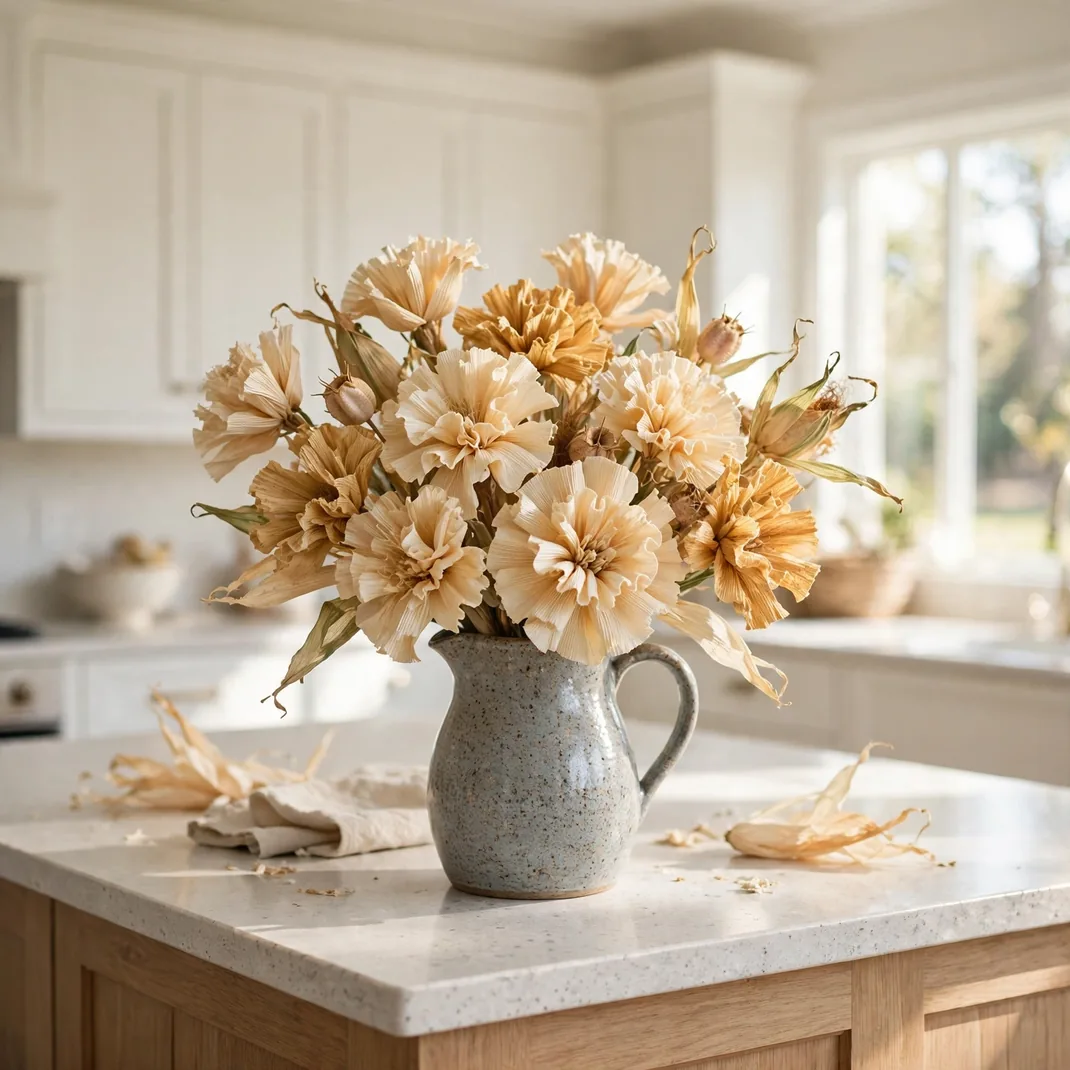
Soak, shape, and dry ordinary corn husks into ruffled blooms in cream and gold. The result looks like a florist’s dried arrangement and costs practically nothing — tamale wrappers from the grocery store work perfectly.
You’ll need: Dried corn husks, a bowl of warm water, scissors, floral wire, twine, and a pitcher or jar for display.
How to make it: Soak husks in warm water for ten minutes until pliable. Cut petal shapes, layer five or six together, gather at the base, and wrap tightly with floral wire. Let dry for twenty-four hours, then arrange in a pitcher.
Tip: While damp, roll petal edges around a pencil for a natural curl. For deeper golden tones, steep the husks in strong black tea before shaping.
6. Sweater-Sleeve Pumpkins
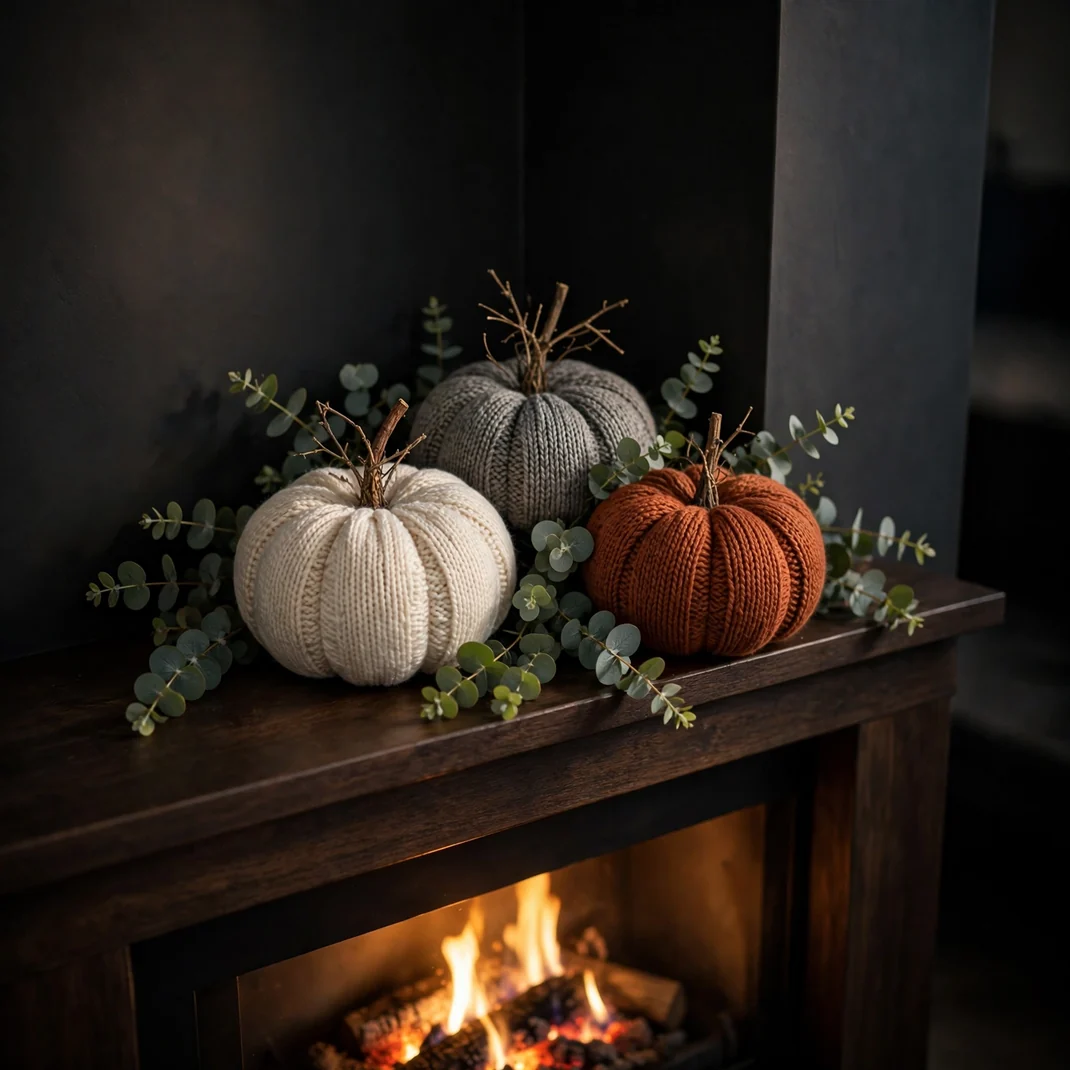
The sleeves of a retired knit sweater become the coziest pumpkins you’ve ever seen — soft, textured, and requiring zero sewing if you use hot glue.
You’ll need: An old knit sweater, scissors, fiberfill or quilt batting, strong twine or string, a cinnamon stick or real twig for the stem, and a needle or hot glue gun.
How to make it: Cut a sleeve section about twice as long as it is wide. Stitch or glue one end shut, turn it right-side out, and stuff firmly. Cinch the top closed, then wrap twine vertically around the pumpkin four to six times, pulling gently to create segments. Poke in the stem.
Tip: Ribbed cuffs make perfect pumpkin bottoms with no finishing needed. Make a cluster in three sizes and complementary colors for a true pumpkin-patch feel.
7. Gilded Pinecone Garland
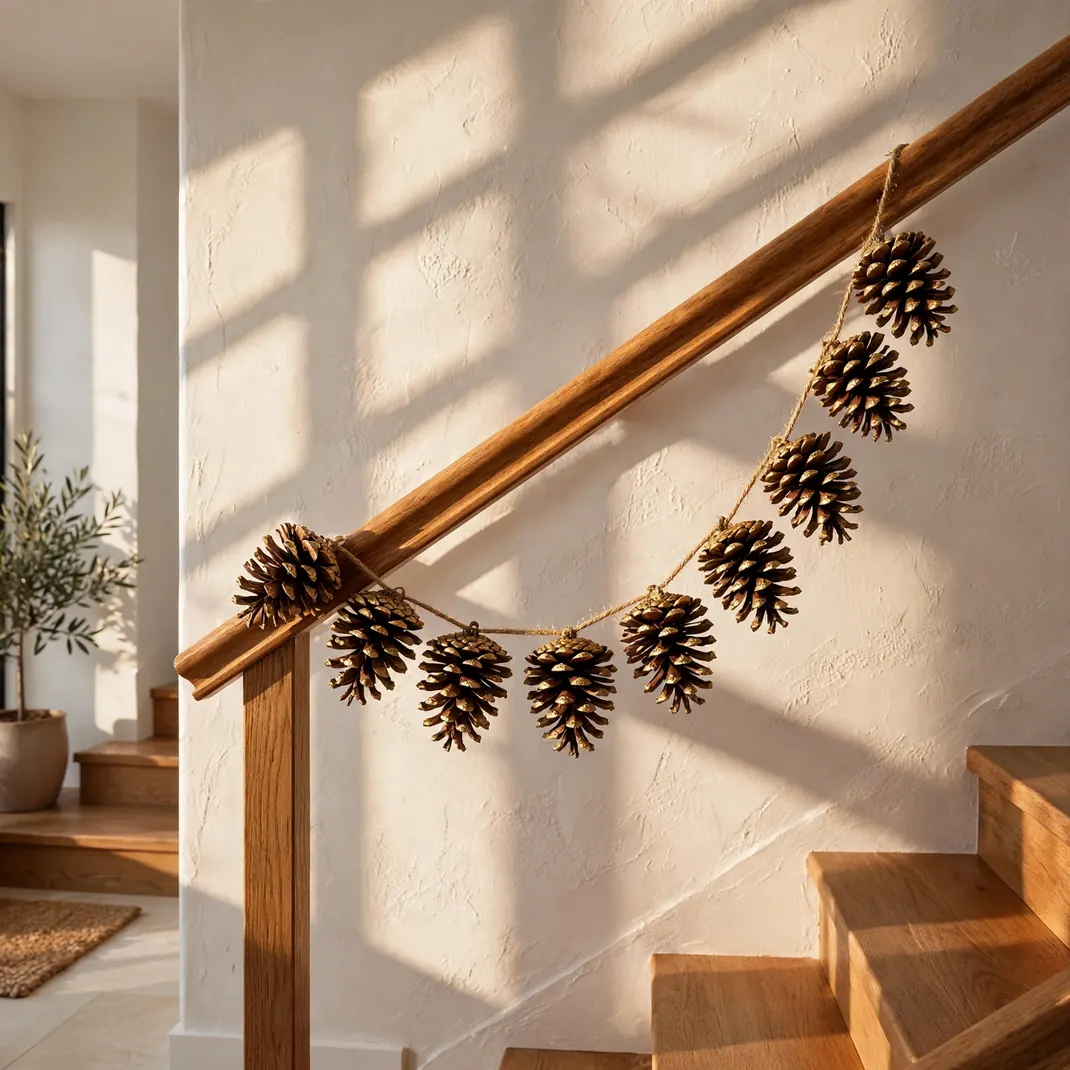
A handful of pinecones with gold-tipped scales, strung on twine, brings quiet luxury to a mantel, stair rail, or doorway. It reads expensive and takes about thirty minutes.
You’ll need: Pinecones (baked ten minutes at 200°F), gold acrylic craft paint or a gold leaf pen, a small brush, natural twine, and thin wire or a small drill.
How to make it: Lightly brush just the tips of each pinecone scale with gold paint — restraint is what makes it elegant. Let dry, then thread twine through the top of each cone, securing with a wrap of wire or a dab of hot glue. Space cones about four inches apart.
Tip: Alternate gold-tipped cones with plain ones for rhythm, and thread a few wooden beads between cones for a finished look.
8. Apple-Crate Harvest Centerpiece
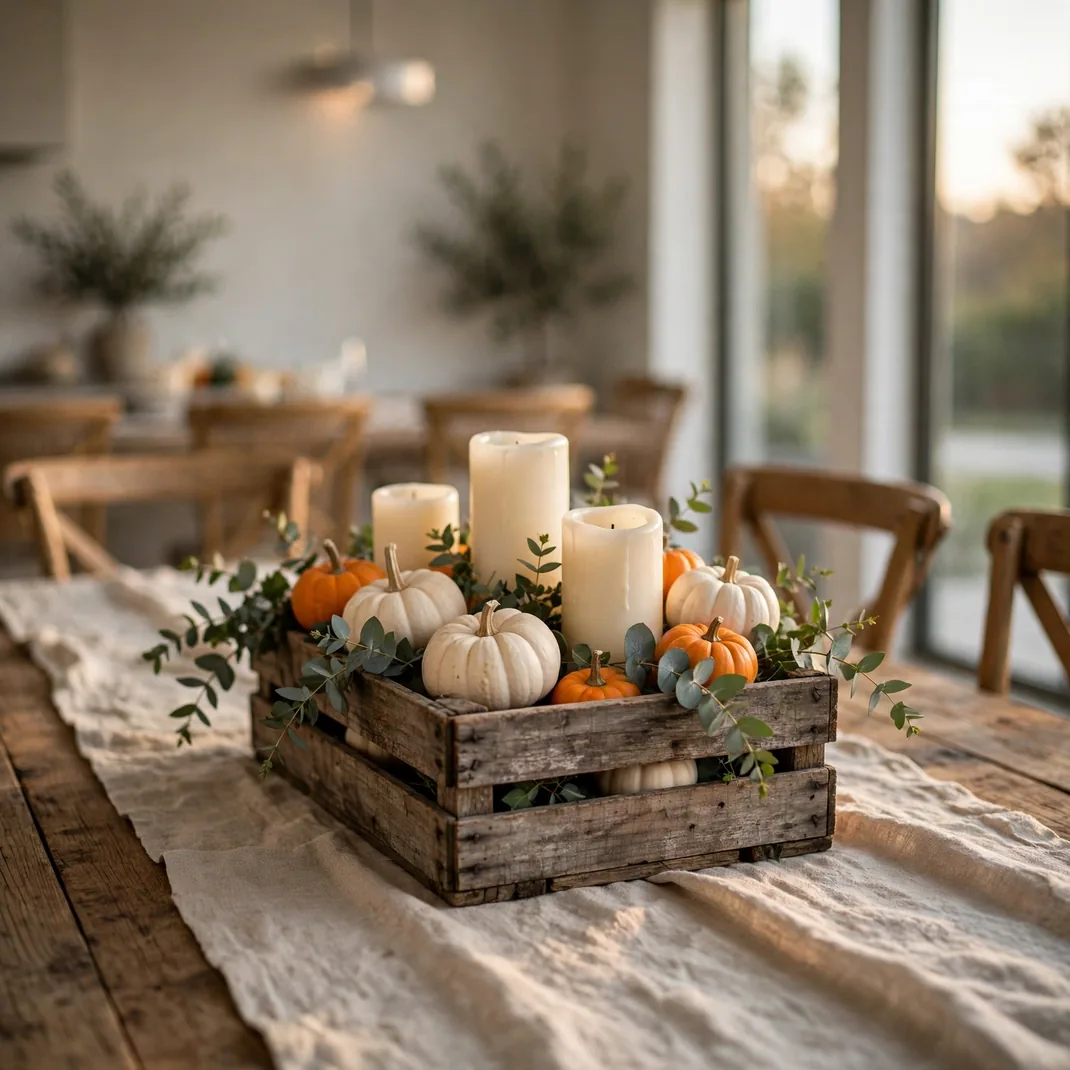
A small wooden crate filled with candles, mini pumpkins, and eucalyptus is the fastest way to anchor a dining table for the whole season. When a holiday arrives, swap a few elements and it’s a new centerpiece.
You’ll need: A small wooden crate, pillar candles in glass holders, mini pumpkins and gourds, fresh eucalyptus sprigs, and a linen table runner.
How to make it: Set the crate on the runner, place the candles in their holders first (always in glass for safety), then nestle pumpkins and gourds around them. Tuck eucalyptus sprigs into the gaps so everything looks abundant.
Tip: Refresh the eucalyptus every week or two as it dries. Keep a few spare mini pumpkins on hand — they’re the first things guests “borrow.”
9. Leaf-Stencil Burlap Table Runner
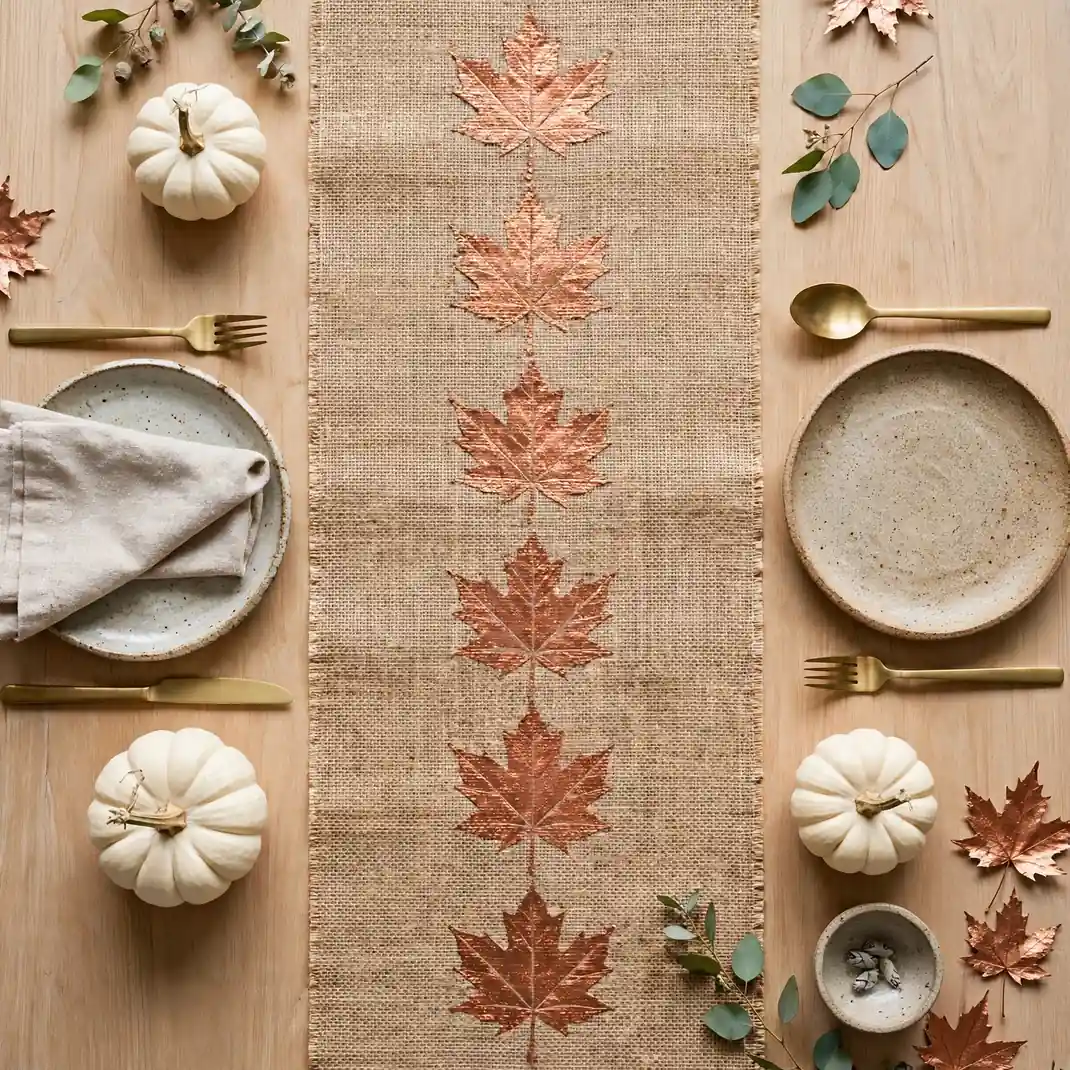
Custom table linens sound expensive until you stencil them yourself. Metallic maple leaves marching down a burlap runner look like something from a boutique — and you made it in an afternoon.
You’ll need: A burlap runner (or burlap yardage finished with iron-on hem tape), a maple leaf stencil or a large real leaf to trace, metallic acrylic paint in copper or gold, a stencil brush, and painter’s tape.
How to make it: Tape the stencil in place and dab paint straight up and down — never brush side to side, which bleeds under the stencil. Lift, reposition, and repeat down the center of the runner. Mix a little fabric medium into the paint so it survives washing, and heat-set with an iron.
Tip: Stagger the leaf trail slightly off-center for a modern, designer feel rather than a formal symmetrical line.
10. Harvest Simmer-Pot Gift Jars
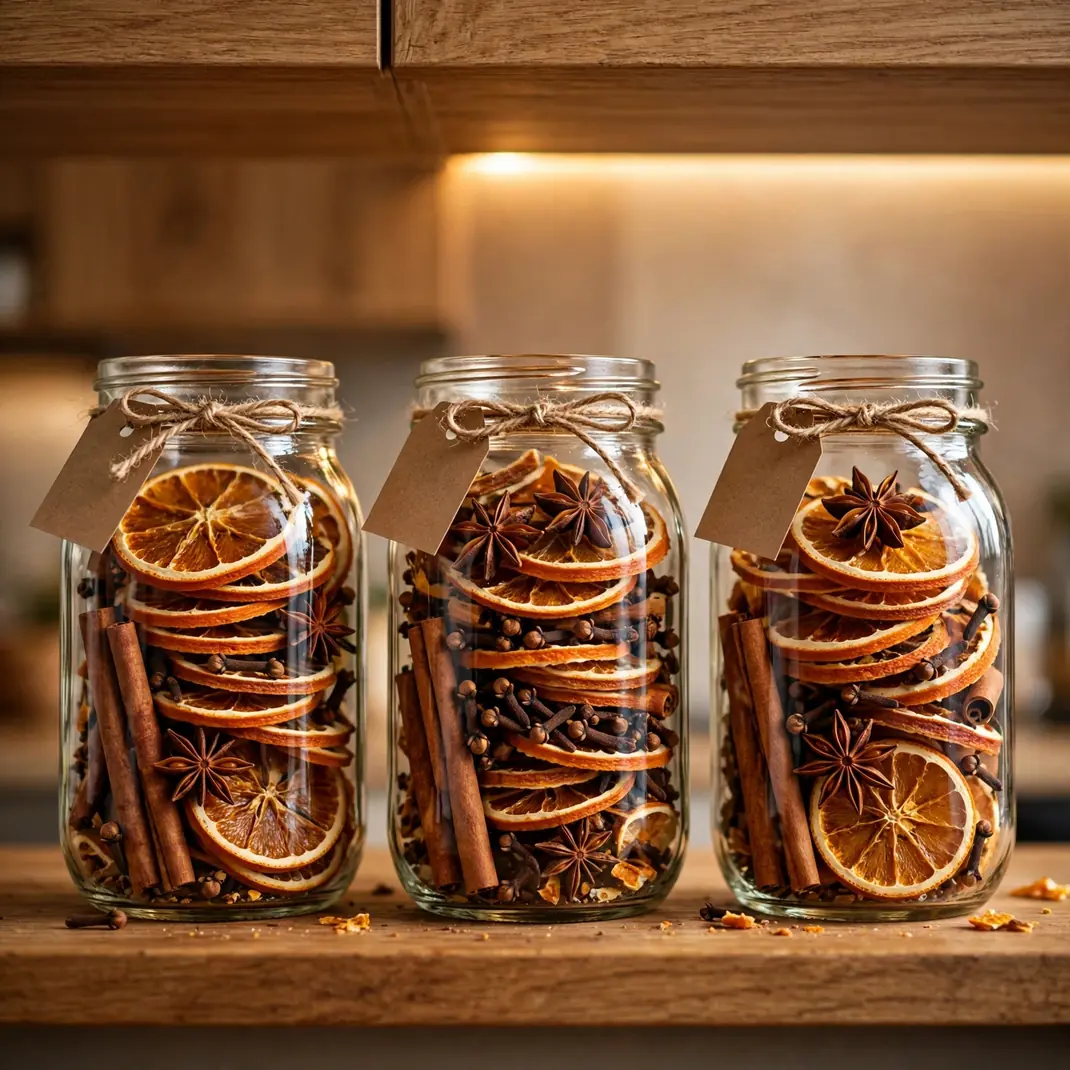
Layer dried orange slices, cinnamon sticks, cloves, and star anise in a mason jar, tie on a tag with simmering instructions, and you’ve made the gift that makes someone’s whole house smell like fall. Make a dozen at once for teachers, neighbors, and hostesses.
You’ll need: Mason jars, dried orange slices, cinnamon sticks, whole cloves, star anise, dried apple rings, kraft tags, and twine.
How to make it: Layer the ingredients so the colors show through the glass — oranges against the cinnamon is the money shot. Close the jar, then tie on a tag reading: “Simmer in 4 cups of water on low for 2–3 hours. Add water as needed.”
Tip: Dehydrate your own orange slices at 200°F for two to three hours — they’re cheaper than store-bought and you can cut them extra thick so they hold their shape.
11. Wheat Sheaf Door Bundle
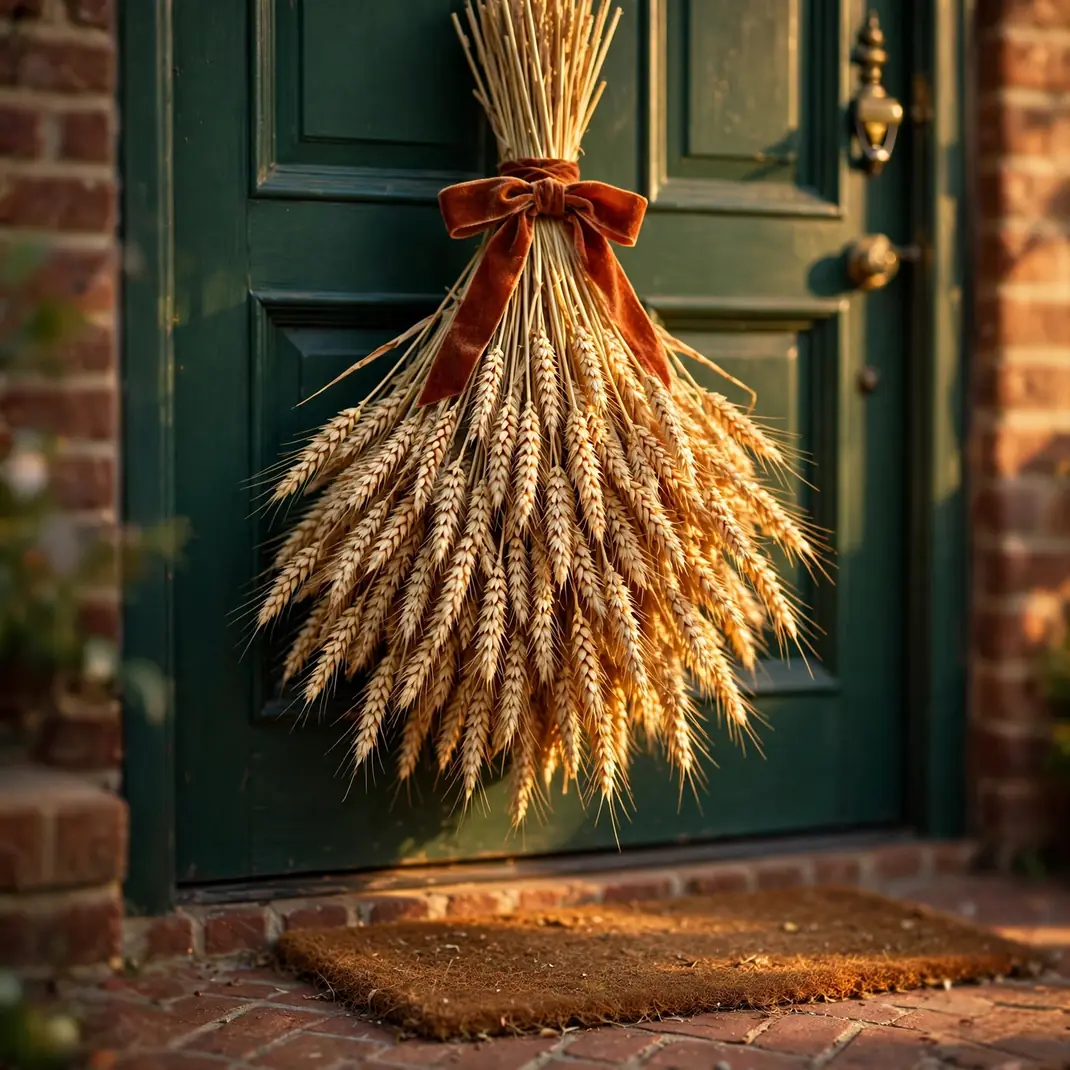
A generous bundle of dried wheat tied with velvet ribbon is a beautiful alternative to a wreath — it has golden color, lovely movement in a breeze, and takes about ten minutes to assemble.
You’ll need: A dried wheat bundle from a craft store, velvet or burlap ribbon, floral wire, and an over-door hook.
How to make it: Trim the stem ends even, bind the bundle tightly with floral wire about a third of the way down, then wrap the wire with a wide ribbon and tie a full bow. Hang at eye level on your front door.
Tip: Take the bundle outside and shake it upside down before bringing it in — and give it a light mist of hairspray to keep shedding to a minimum all season.
12. Felt Acorn Garland
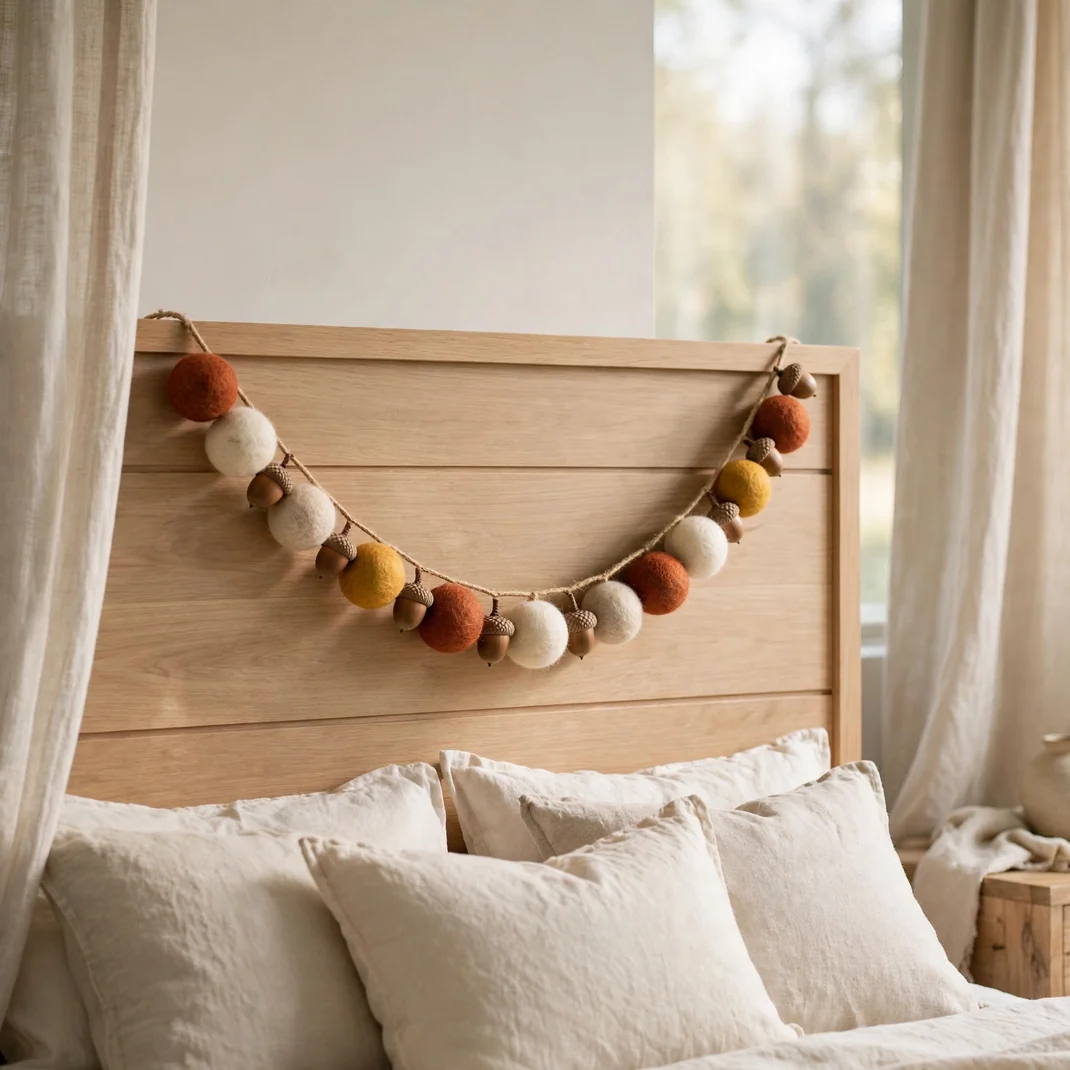
Wool felt balls in rust, cream, and mustard, interspersed with real acorn caps, make a garland that’s soft, playful, and nothing like the pinecone-and-berry garlands everyone else has.
You’ll need: Wool felt balls in fall colors, real acorn caps, natural twine, a large embroidery needle, and hot glue.
How to make it: Thread felt balls onto the twine with the large needle, knotting the twine between every few balls to keep spacing. Hot-glue an acorn cap onto the top of every third or fourth ball to create tiny “acorns.” Finish with looped ends for hanging.
Tip: Drape it somewhere unexpected — across a headboard, a mirror, or a bookshelf — instead of the predictable mantel.
13. Dried Orange Slice Wreath
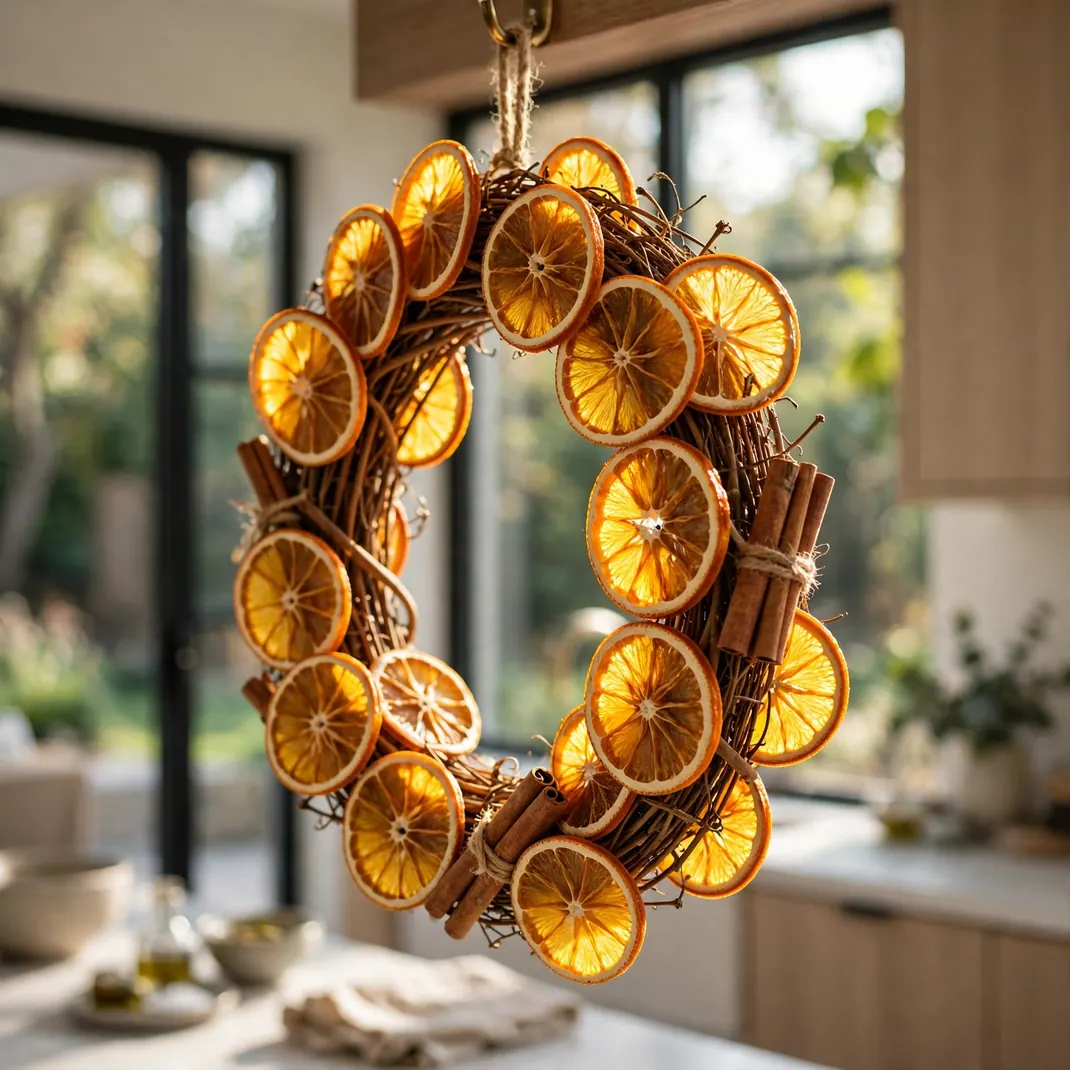
Wire translucent dried orange slices onto a grapevine wreath and hang it in a window, where backlight turns every slice to glowing amber. It looks like stained glass and smells faintly of citrus and spice.
You’ll need: Dried orange slices (about twenty), a twelve-inch grapevine wreath, floral wire or a hot glue gun, cinnamon sticks, and dried bay leaves.
How to make it: Attach slices in overlapping shingles around the wreath with short lengths of floral wire — wiring holds better than glue for heavier slices. Tuck cinnamon sticks and bay leaves into the gaps. Hang with a loop of raw linen ribbon.
Tip: A window is the whole point of this wreath — the translucency only shows with light behind it. Add a simple bow and nothing else; the slices are the star.
14. Twig Picture Frames
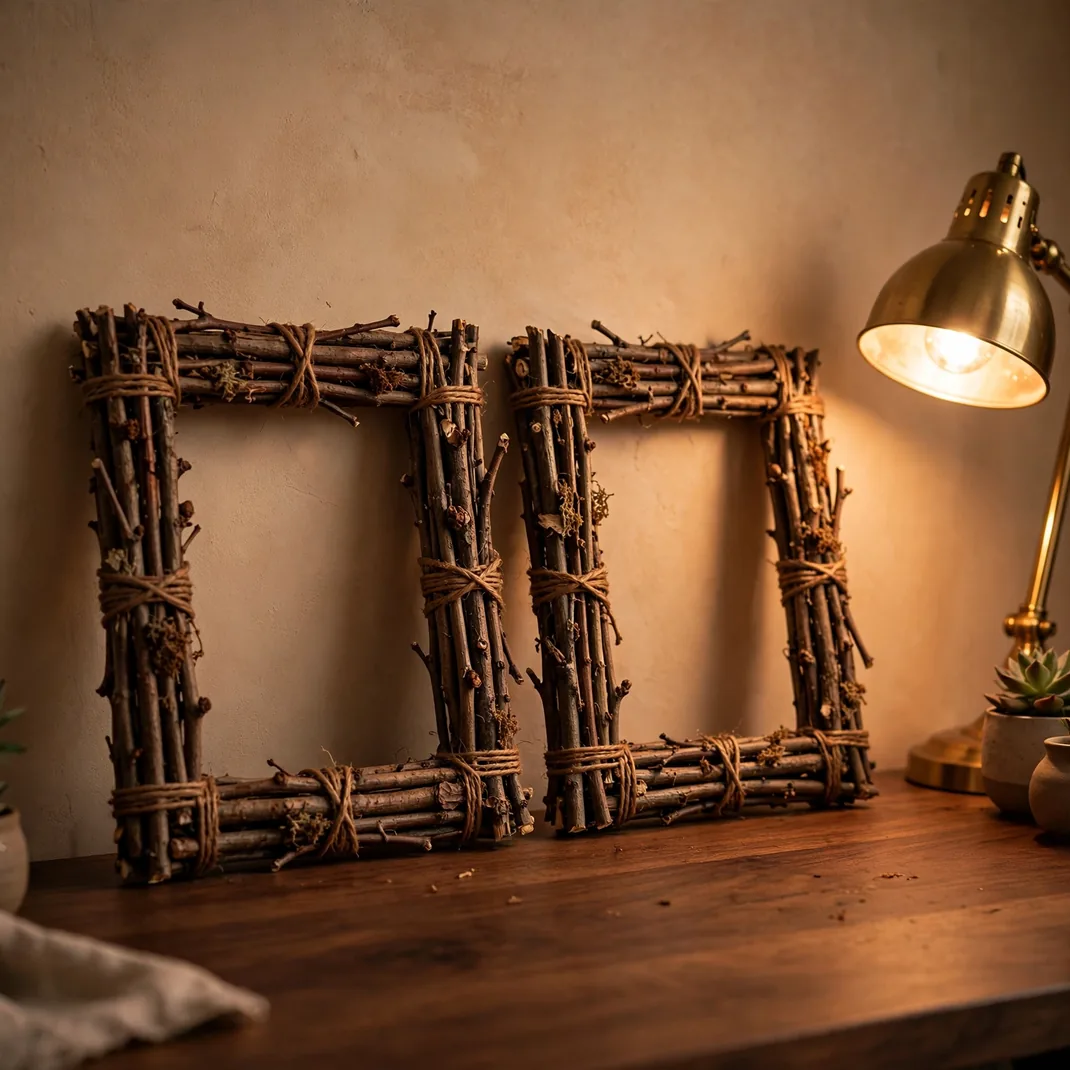
Straight twigs from the yard, hot-glued around plain frames, become rustic frames with genuine bespoke character. They cost nothing and look like something you’d find in a cabin boutique.
You’ll need: Plain wood frames, straight dry twigs (pruned branches are ideal), pruning shears, a hot glue gun, and twine for the corners.
How to make it: Cut twigs to match each side of the frame. Glue them in snug rows around the frame’s face, then bind each corner with a few wraps of twine to hide the joints. Let cool fully before standing upright.
Tip: Pale birch twigs on a dark-stained frame give striking contrast. A coat of matte clear spray seals everything and keeps bark from flaking onto your shelves.
15. Flannel No-Sew Pillow Wraps
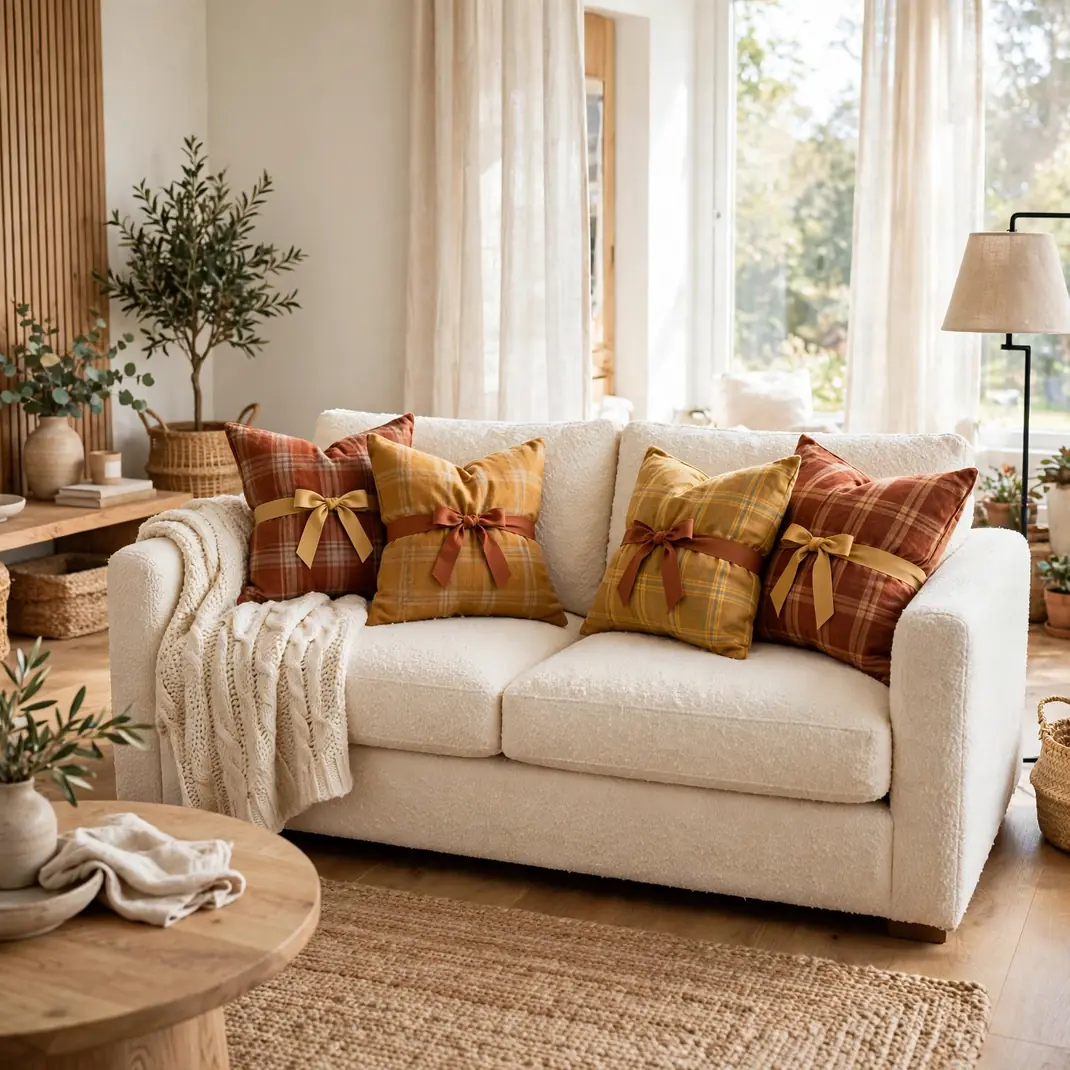
Wrap your existing throw pillows in flannel like a gift and tie with ribbon — an instant seasonal pillow swap with zero sewing and almost zero storage, since the fabric folds flat in January.
You’ll need: Flannel fabric or old flannel shirts and blankets (about one yard per standard pillow), and grosgrain ribbon or twine.
How to make it: Lay the fabric wrong-side up, set the pillow diagonally in the center, and fold the corners in like wrapping a present. Tie securely with ribbon in a bow at the front. Tuck raw edges under as you fold for a clean look.
Tip: Cut fabric about three times the pillow’s width for full coverage. Mix one plaid with one solid for a styled, not matchy, sofa.
16. Hollowed Pumpkin Flower Vase
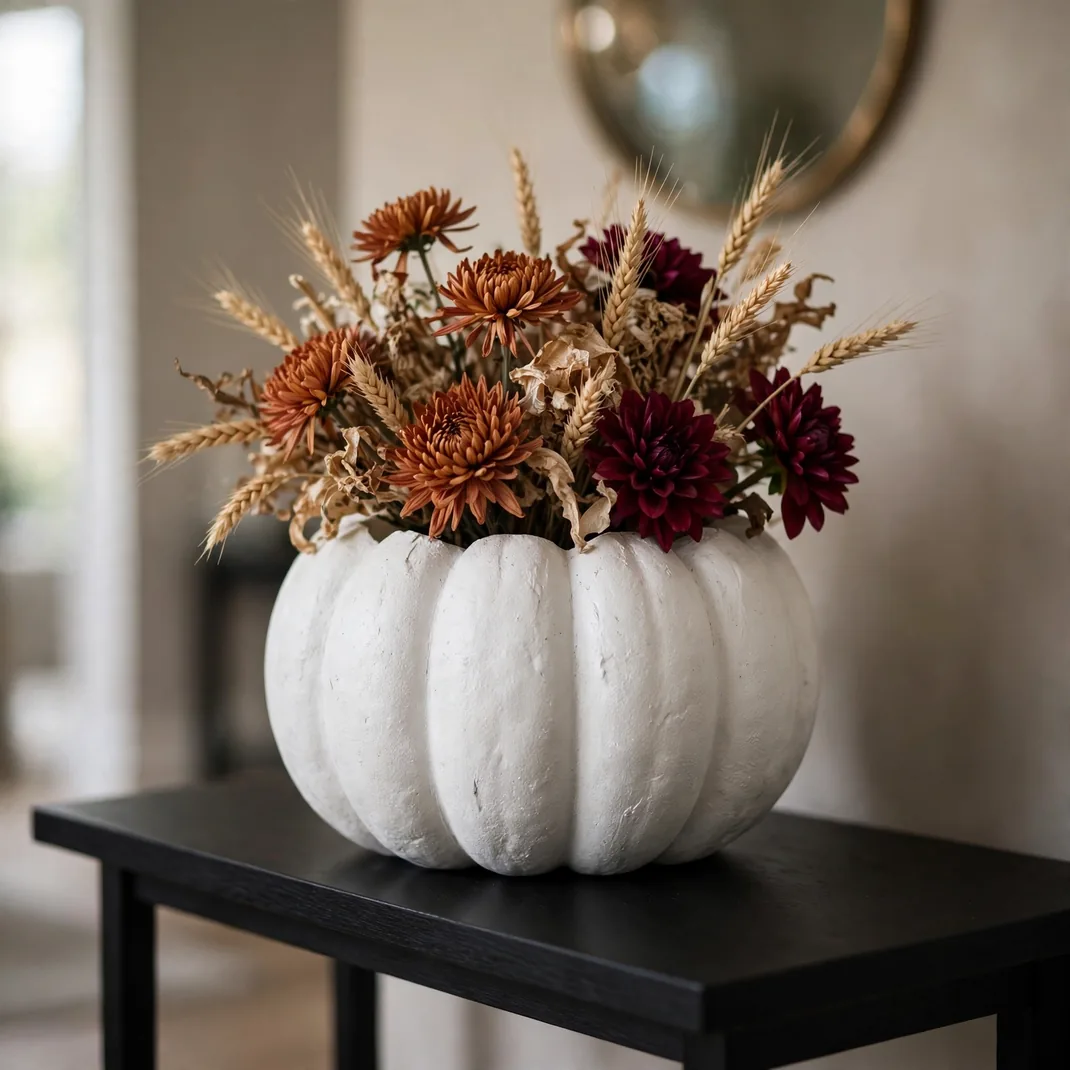
Hollow a pumpkin, drop in a jar of water, and fill it with mums, wheat, and dried grasses. It has more presence than any store-bought centerpiece — and using a faux pumpkin means zero rot and years of reuse.
You’ll need: A faux carvable pumpkin, a jar that fits inside the opening, chrysanthemums, dried wheat, burgundy dahlias or dried grasses, and a sharp knife.
How to make it: Cut the top off the faux pumpkin and clear the inside. Set the water-filled jar inside, then arrange the tallest stems first (wheat), fill in with mums, and finish with a few dramatic dahlias at the front.
Tip: White and cream faux pumpkins look the most modern and let the flowers’ colors pop. This same technique works beautifully with real pumpkins for a party — just line with a plastic bag.
17. Leaf-Stamped Linen Napkins
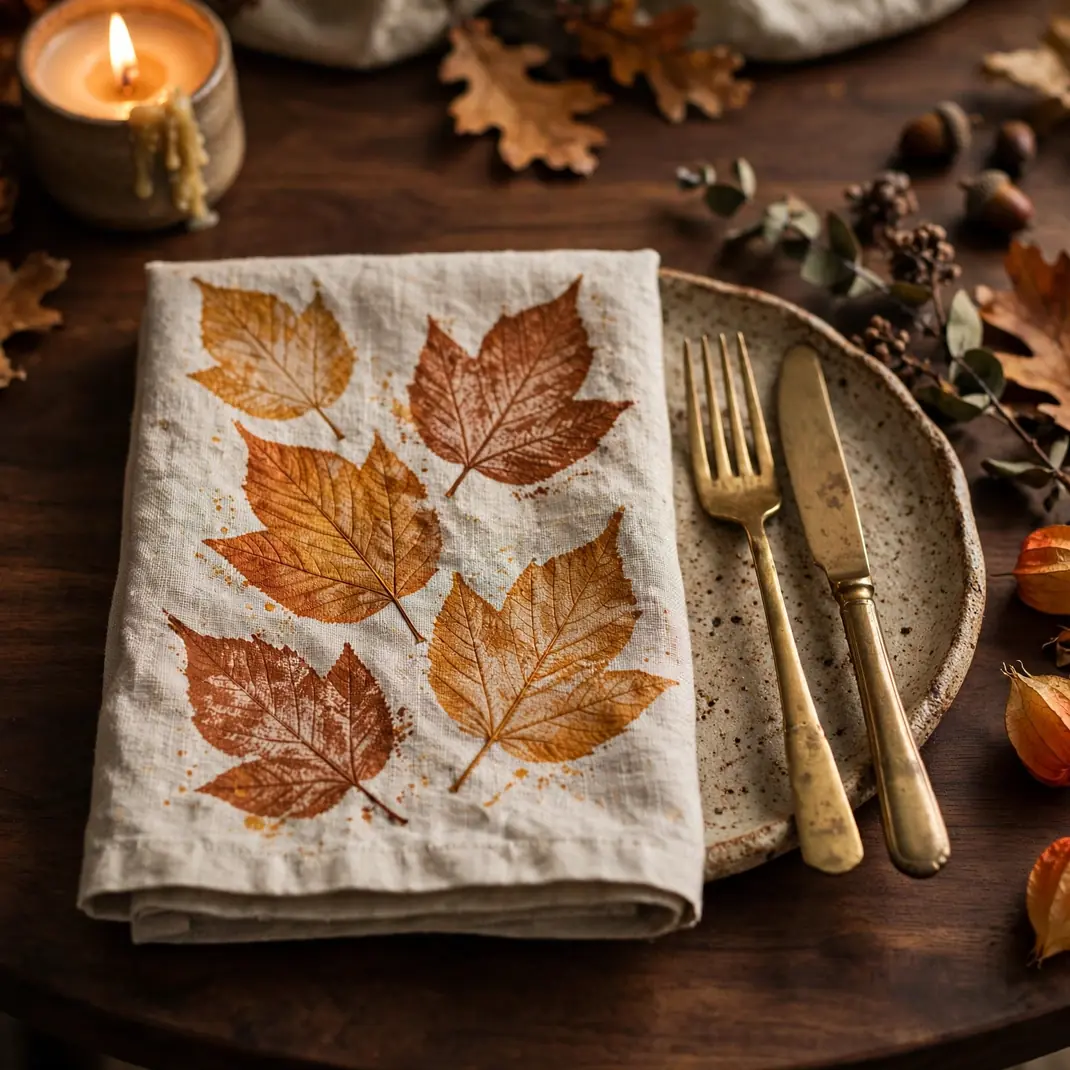
Real leaves, used as stamps with fabric paint, print one-of-a-kind botanical patterns onto linen napkins. No two are ever alike, which is exactly the point.
You’ll need: Plain linen or cotton napkins, fresh leaves with strong veins, fabric paint in ochre, rust, and olive, a foam brush, and an iron.
How to make it: Brush a thin, even coat of paint on the veined back of a leaf, press it firmly onto the napkin, and lift straight up. Let dry, then heat-set with an iron according to the paint’s instructions so the design survives gentle washing.
Tip: Maple and oak leaves print the crispest veins. Practice on a muslin scrap first to learn how much paint is “just enough.”
18. Pinecone Cinnamon Fire Starters
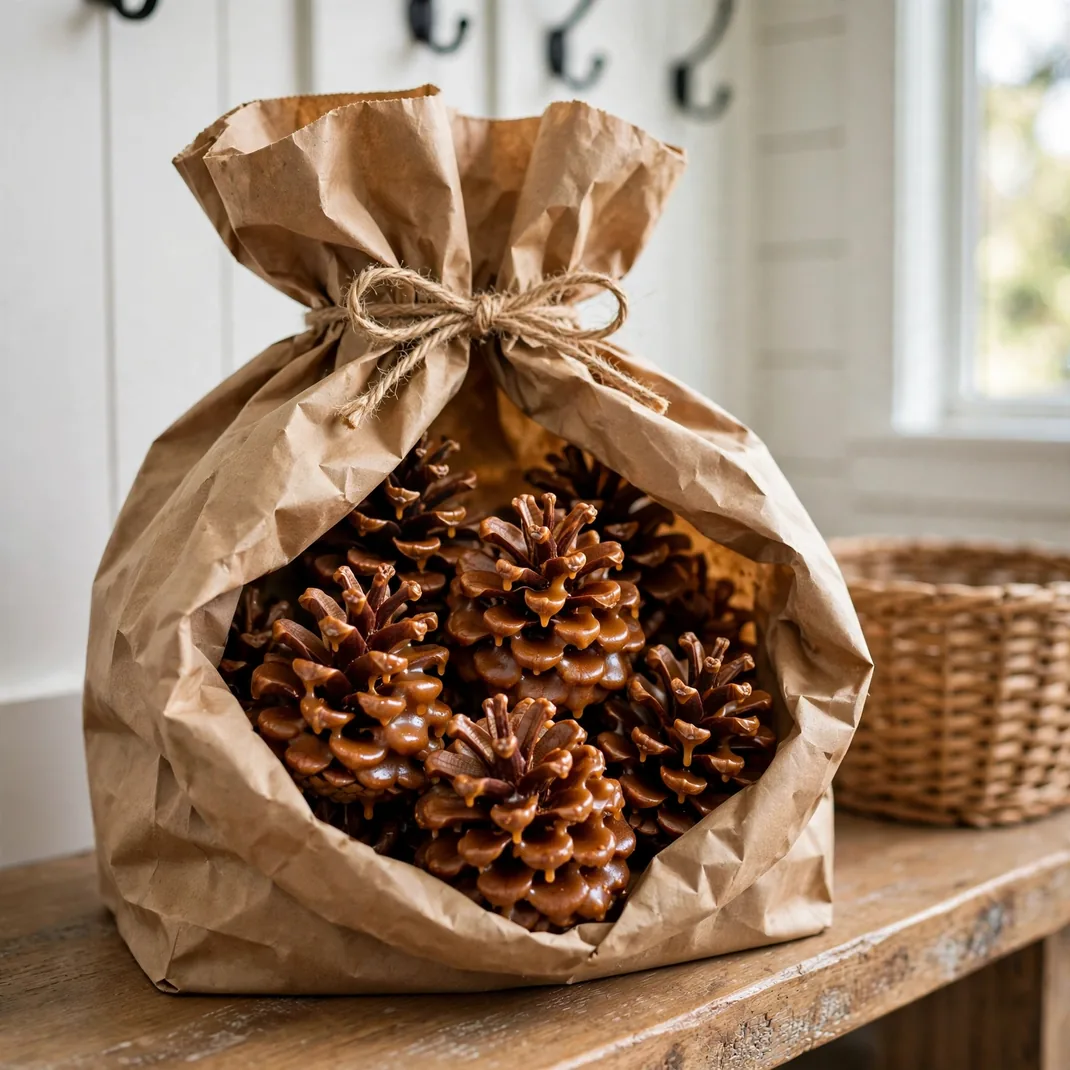
Pinecones dipped in cinnamon-scented wax, bundled in kraft bags with twine, are the rare craft that’s both beautiful and genuinely useful — one tucked under kindling lights a fire with a wonderful scent.
You’ll need: Pinecones (baked ten minutes at 200°F), soy or paraffin wax, cinnamon fragrance or essential oil, a double boiler, parchment paper, kraft gift bags, and twine.
How to make it: Melt the wax in a double boiler — never directly over heat — and stir in the cinnamon oil off the heat. Dip each pinecone twice, letting the first coat set in between, then cool on parchment. Bag them up with a handwritten tag.
Tip: Tuck a dried orange slice into each bag for a gift that looks as good as it smells. Keep finished starters away from open flame until you’re ready to use them.
19. Folded Book-Page Pumpkins
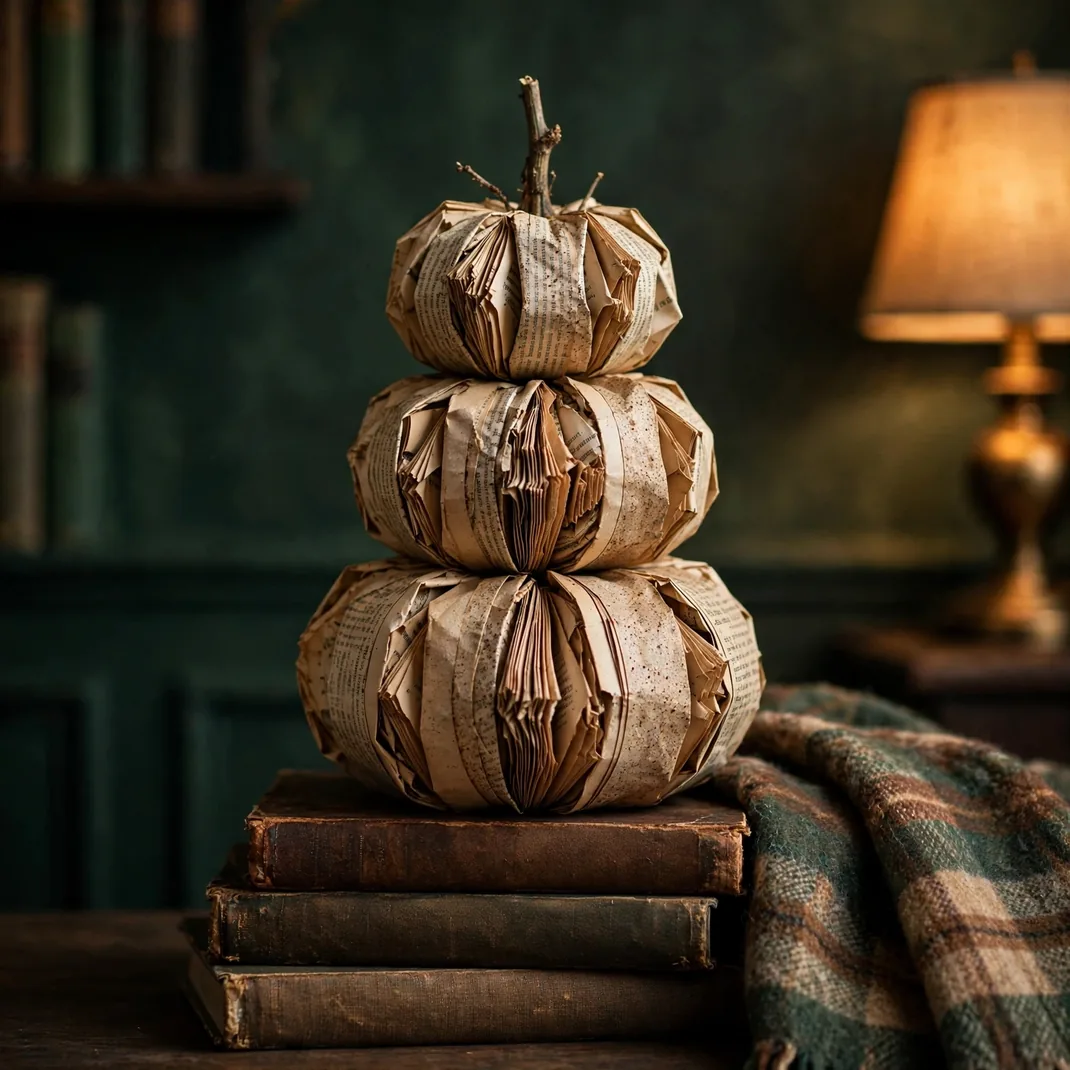
Old book pages, folded and glued in overlapping rows around a core, become literary pumpkins with vintage soul — perfect for readers, libraries, and anyone who loves a moody autumn corner.
You’ll need: An old paperback, a craft knife, a foam ball or crumpled-paper core, a hot glue gun, a twig for the stem, and twine.
How to make it: Cut the pages free from the spine and fold each in half lengthwise. Starting at the bottom of the core, glue folded pages in overlapping rows, working upward like shingles. Finish by gluing a twig stem into the top.
Tip: Naturally yellowed pages give the best vintage tone — if your pages are bright white, steep them in strong tea and dry before folding.
20. Rustic Twig Star Decor
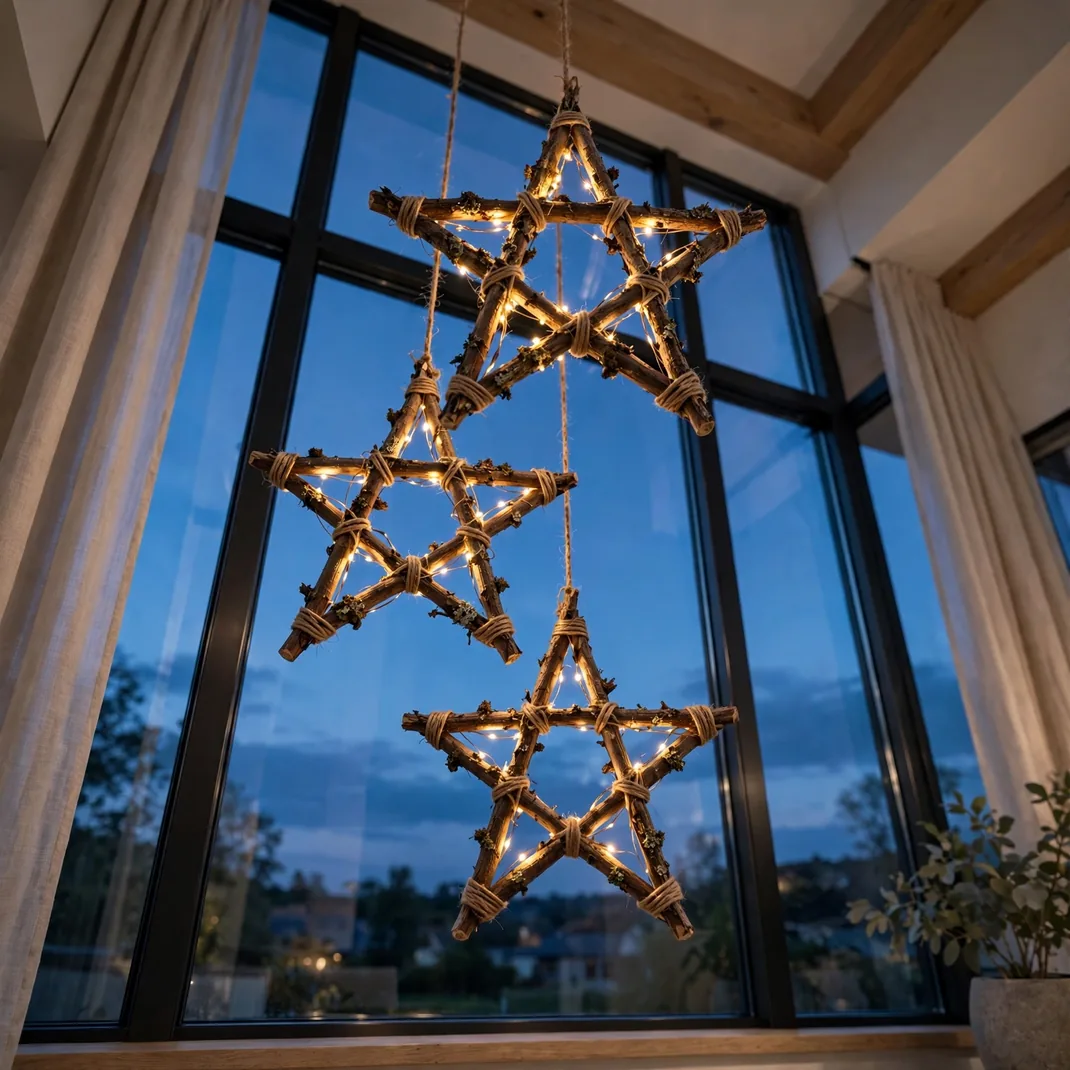
Five twigs lashed into a star with twine is folk art at its simplest. Hang a few at different heights in a tall window, weave in fairy lights, and you have the coziest corner of the house.
You’ll need: Straight twigs, pruning shears, jute twine or thin wire, and warm-white fairy lights (optional).
How to make it: Cut five twigs to equal length and lay them out in a five-pointed star. Lash each intersection tightly with twine, wrapping in a figure-eight for strength. Hang with varying twine lengths from a curtain rod or branch.
Tip: Make three sizes for visual interest, and keep the twine tails long at the top — they become part of the rustic look. The fairy lights woven through take it from craft to magic after dark.
21. Painted Wood-Slice Pumpkins
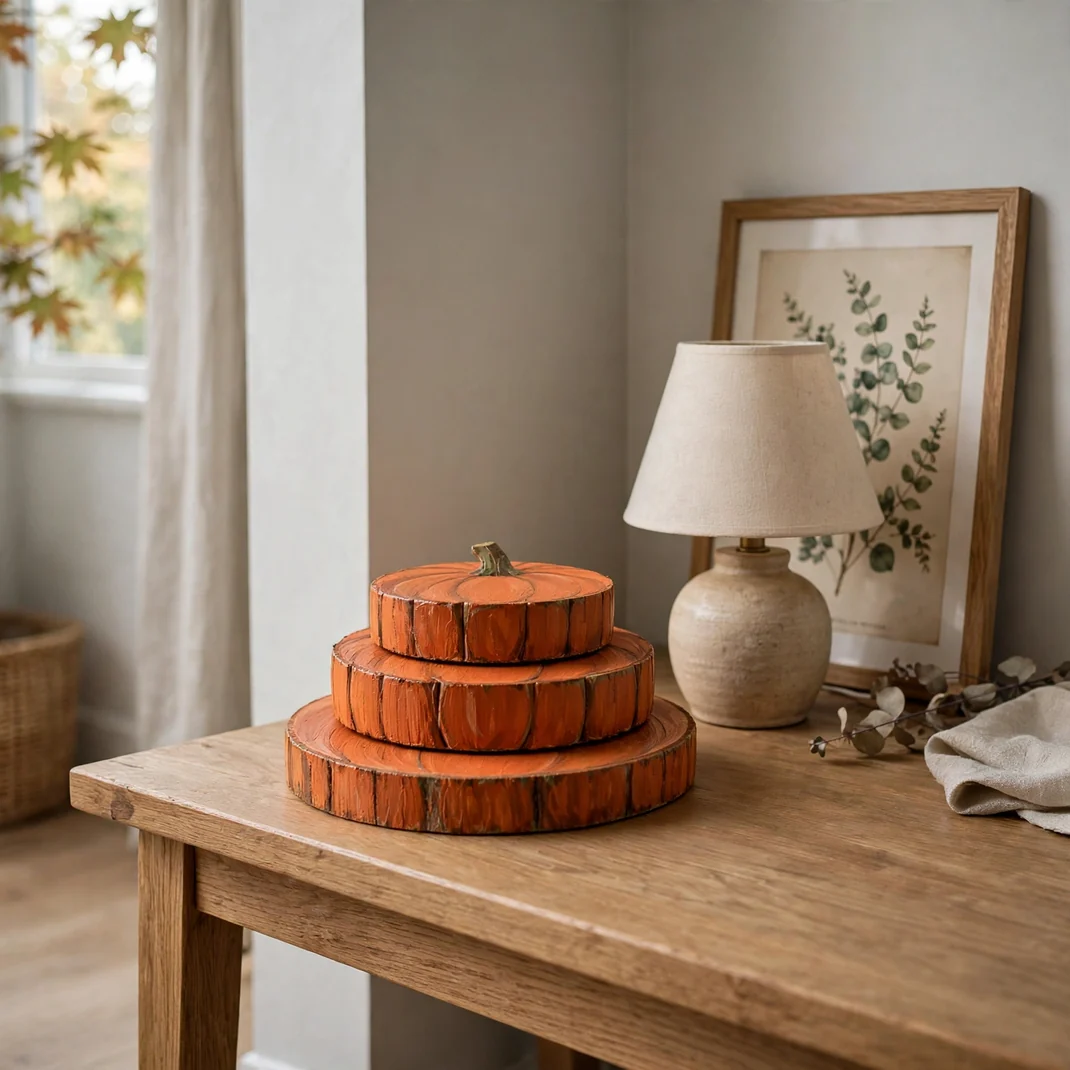
Round wood slices painted pumpkin-orange with hand-painted stems stack into a charming little pumpkin tower. It’s a great kid-friendly project — and the wood grain showing through the paint gives them real character.
You’ll need: Round wood slices in three sizes, acrylic paint in burnt orange, green, and brown, brushes, sandpaper, and a clear matte sealer.
How to make it: Sand the slices smooth, paint the faces burnt orange, and paint a small stem in green-brown on the top edge of each. Once dry, lightly distress the edges with sandpaper so wood peeks through, then seal. Stack largest to smallest, slightly offset.
Tip: Paint a simple jack-o’-lantern face on one slice for a kid’s porch, or keep them plain and elegant for the mantel. A dot of hot glue between slices keeps the stack stable outdoors.
22. Layered Harvest Grain Vase
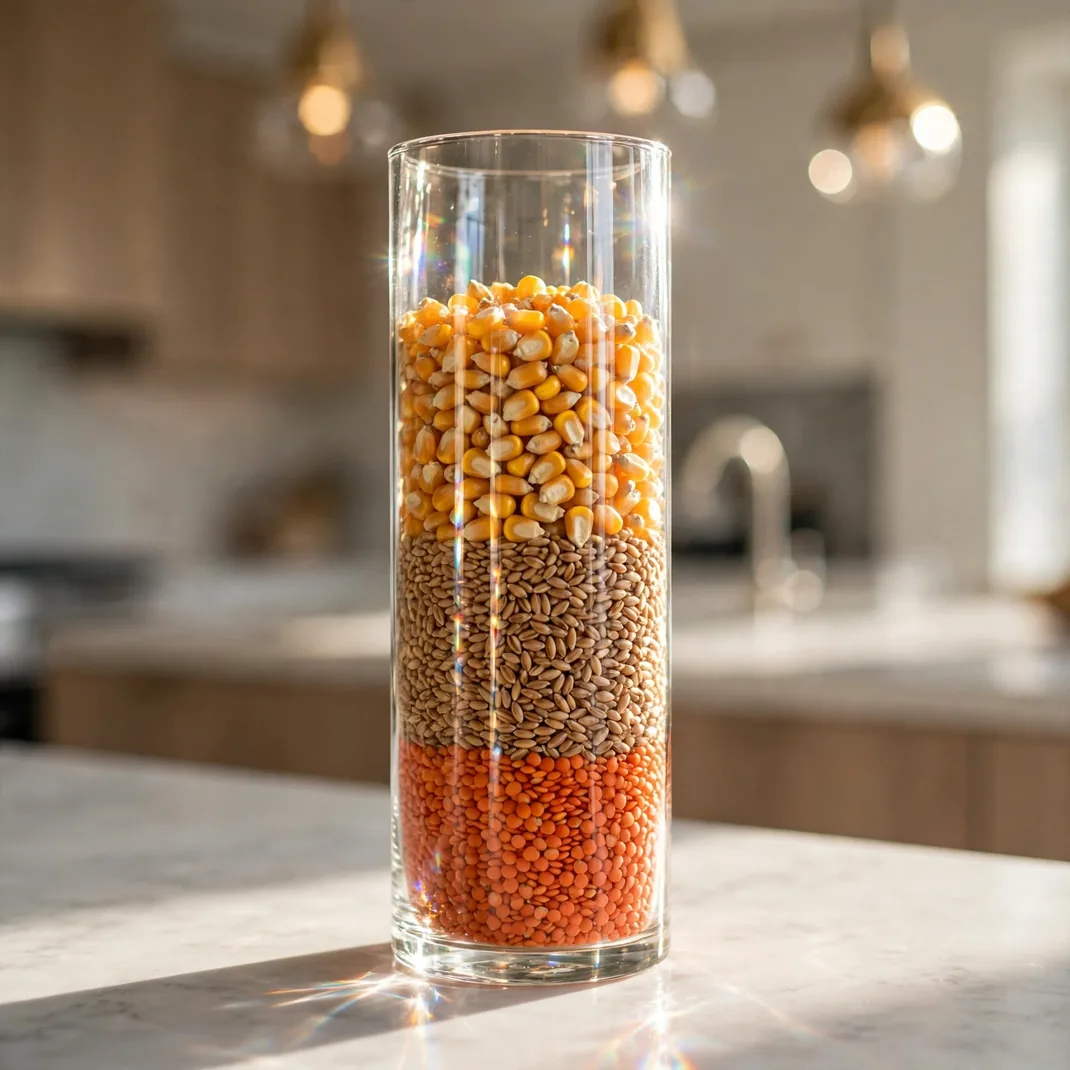
Dried corn, wheat berries, and lentils poured in distinct layers inside a tall glass vase create a sculptural, zero-maintenance piece — part decor, part harvest still life.
You’ll need: A tall cylindrical glass vase, dried corn kernels, wheat berries, red lentils, and barley or split peas for extra bands.
How to make it: Pour in two- to three-inch layers, tapping the vase gently to level each one before adding the next. Alternate light and dark grains for the strongest visual bands. Top with a battery-operated candle for a glowing harvest lamp effect.
Tip: Keep the vase completely dry and it will last for years — just refresh the top layer if it dulls. This is also a lovely base for a single tall branch of dried wheat.
23. Mini Hay Bale Porch Stack
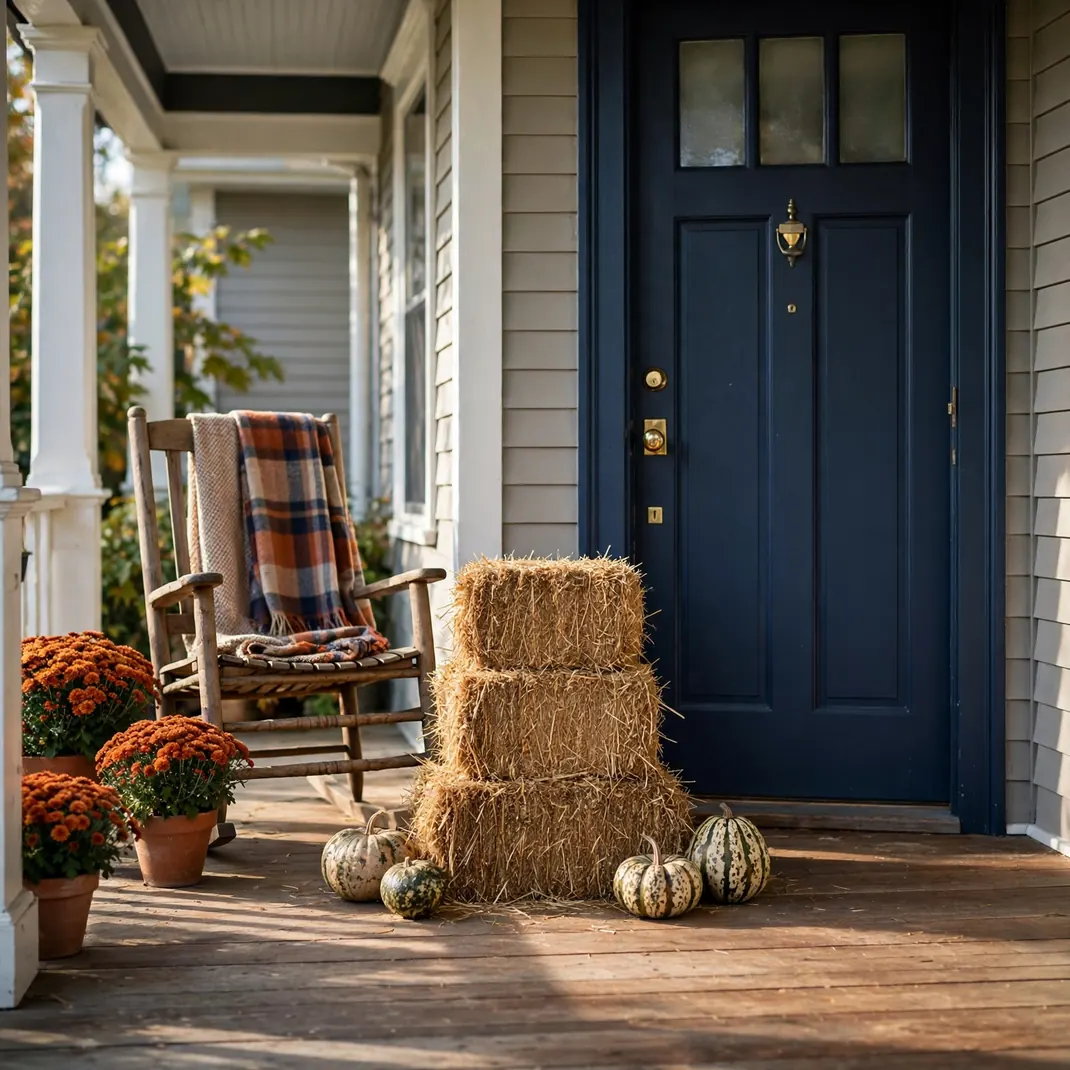
Three mini hay bales stacked by the front door, topped with mums and gourds, deliver classic fall curb appeal in about five minutes. It’s the highest impact-per-minute project on this list.
You’ll need: Mini decorative hay bales, potted mums in rust and gold, speckled gourds, a plaid throw, and a lantern.
How to make it: Stack two or three bales beside your front door, set potted mums on top, and nestle gourds around the base. Drape the plaid throw over a nearby chair and set the lantern beside the stack.
Tip: Set the bales on a boot tray to protect your porch boards, and bring the arrangement under cover during heavy rain — decorative bales aren’t weatherproof.
24. Fall Leaf Mason Jar Lanterns
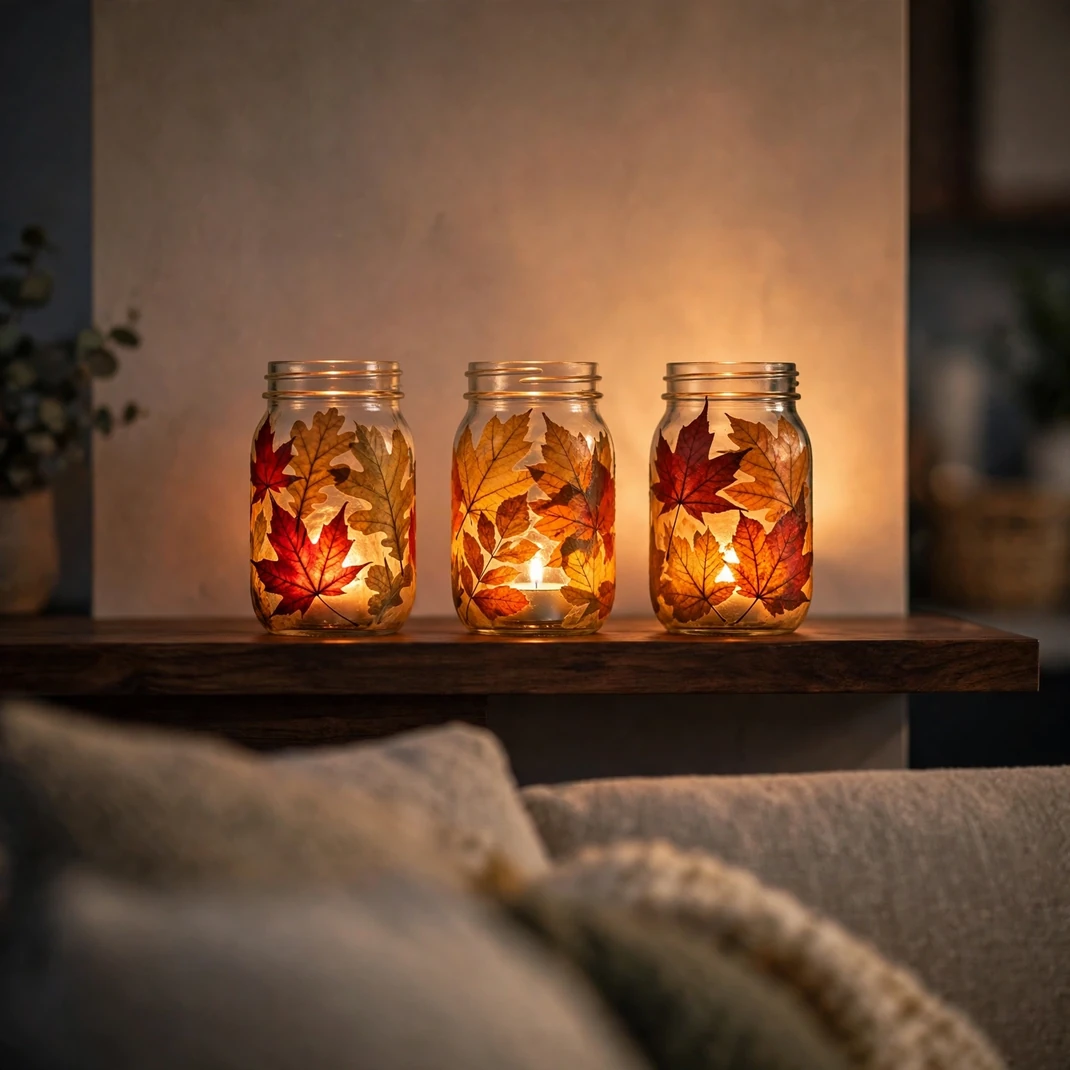
Pressed fall leaves decoupaged onto mason jars turn into glowing autumn lanterns the moment you drop a tea light inside. Line a mantel with them and the whole room warms up.
You’ll need: Mason jars, pressed fall leaves, decoupage glue such as Mod Podge, a foam brush, and flameless tea lights.
How to make it: Brush a thin coat of decoupage glue on the jar, press leaves into place, then seal with another thin topcoat. Let dry completely — about two hours — before adding the tea light.
Tip: Flameless candles are the safe choice, especially with dried leaves involved. Cluster the lanterns in odd numbers and vary the jar heights for the prettiest glow.
25. Plaid Scarf Wreath
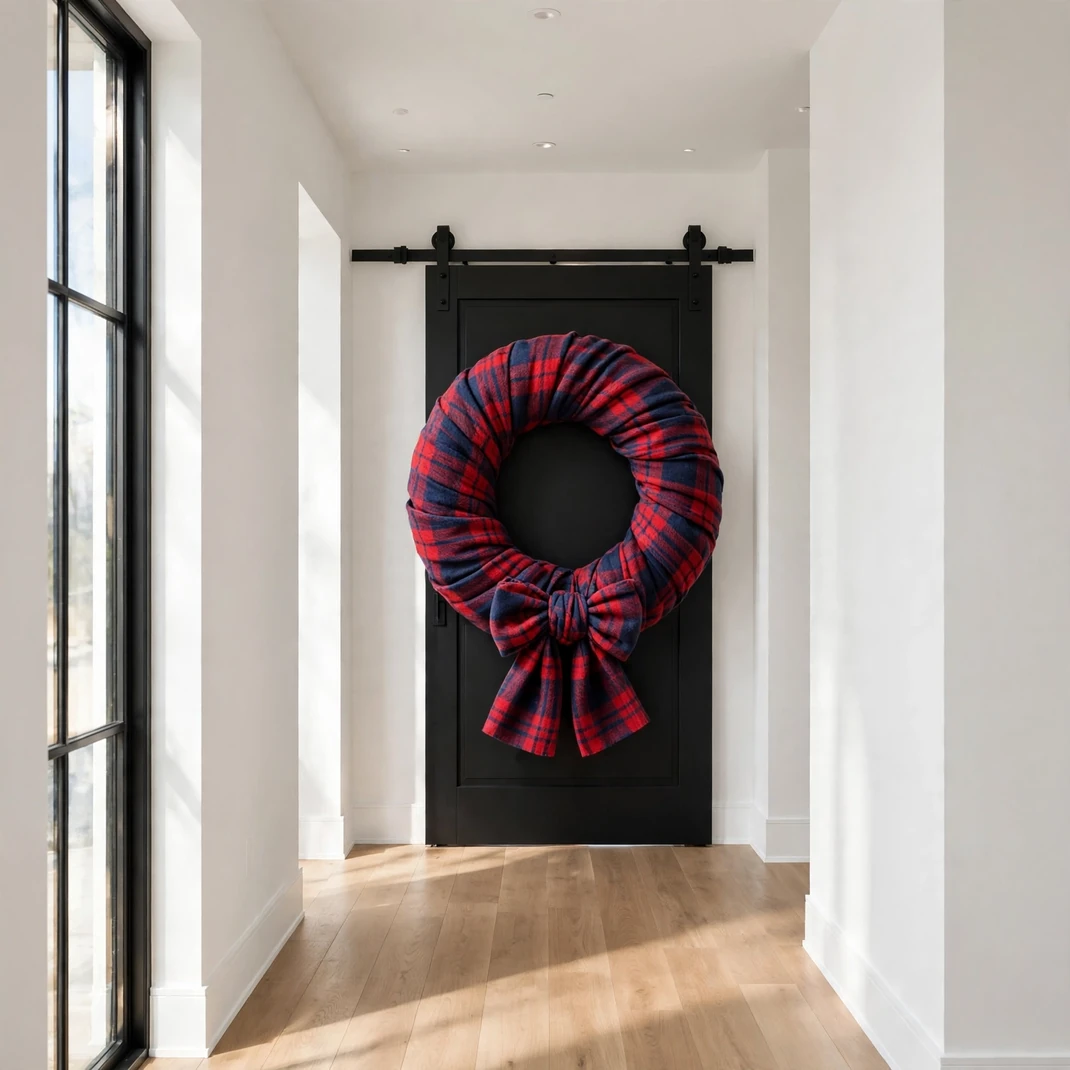
A thrifted plaid scarf wrapped snugly around a foam wreath form, finished with a knotted bow, gives you a cozy, textile wreath in about twenty minutes — no sewing, no wiring, no fuss.
You’ll need: A foam wreath form, an oversized thrifted plaid flannel scarf, straight pins or a hot glue gun, and extra ribbon for hanging.
How to make it: Starting at the back of the form, wrap the scarf snugly around and around, slightly overlapping, until the foam is fully covered. Pin or glue the end at the back, then knot the scarf’s fringed ends into a bow at the bottom front. Hang with ribbon.
Tip: Oversized scarves give the fullest coverage with the fewest wraps. Buffalo plaid in red and black is the classic, but a muted green-and-navy plaid looks wonderfully sophisticated.
Pick the three that made you smile and start there — by the time the leaves are at their peak, your home will feel like the season itself. Happy crafting, and happy autumn.