18 Green Christmas Bedroom Schemes With Fresh Holiday Cheer
Green is the color Christmas was built on — pine boughs, cedar garlands, the deep emerald of a well-dressed tree. This year, let green lead your bedroom instead of playing backup to red and gold. These 18 schemes layer fresh botanicals, rich velvets, live plants, and clever low-cost swaps into a bedroom that smells like December and looks like the holidays feel.
1. Cedar Garland Swagged on the Footboard
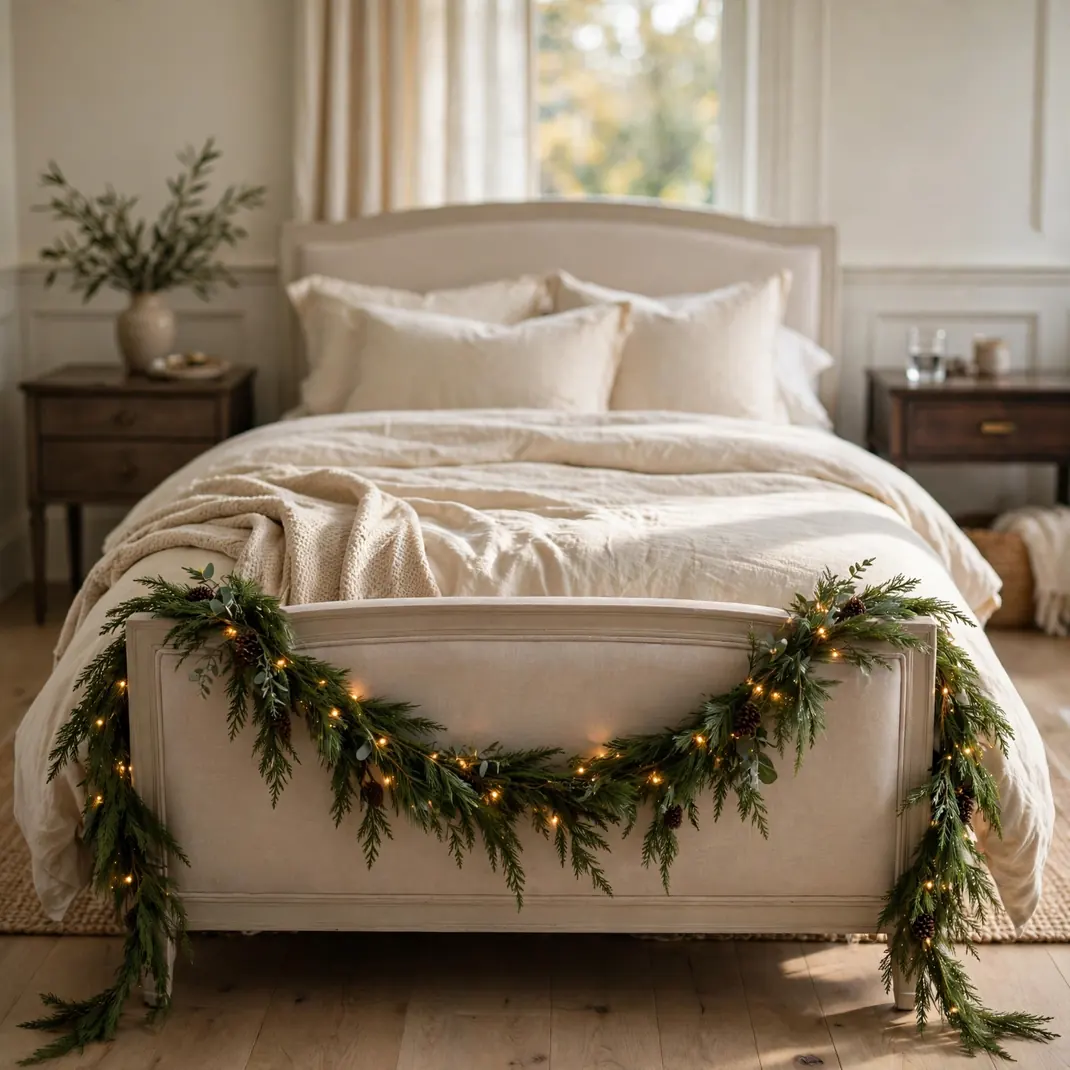
Most people hang garland over the headboard, but the footboard is the sleeper hit of bedroom Christmas styling. A fresh cedar garland draped along the foot rail frames the bed from the doorway and catches the eye the second you walk in. Let the ends trail a little past each corner for that just-gathered look, and tuck in a few pinecones or dried orange slices if you want extra texture. It takes ten minutes and changes the whole room.
How to Style It Drape one 6-foot cedar garland along the top rail of the footboard, securing it every 18 inches with green floral wire twisted discreetly around the rail. Let both ends cascade 8 to 10 inches past the corners, and weave in two or three battery-operated micro fairy light strands for evening glow.
Why It Photographs Beautifully The footboard sits in the foreground of every wide bedroom shot, so the garland creates a lush green frame around the bedding. Cedar’s blue-green tones contrast gorgeously with warm white bedding and lamplight.
Pro Tip Mist fresh cedar lightly every few days to slow drying, and lay a narrow runner of kraft paper under the garland on the rail to catch falling needles before they reach your bedding.
Budget-Smart Swap Use a faux cedar garland from a craft store instead — fluff the branches well and it reads nearly identical in photos, and you can reuse it for years.
2. Rosemary Topiary Trees on the Nightstands

A pair of rosemary topiaries — one on each nightstand — is the prettiest kind of multitasking. They look like miniature Christmas trees, they perfume the whole side of the bed with that piney-herb scent, and after the holidays you can snip sprigs straight into your cooking. Choose cone-shaped topiaries in simple ceramic pots and they read instantly festive with zero ornaments needed. This is the idea guests always ask about.
How to Style It Set matching 10 to 12-inch rosemary cone topiaries in white or terracotta pots, one per nightstand, slightly angled toward the bed. Wrap the pots with a loose twine bow and tuck a single gold bell into the twine for a tiny festive wink.
Why It Photographs Beautifully The symmetrical pair frames the bed like living bookends, and rosemary’s fine needle texture catches side light in a way that looks almost frosted. Close-ups of the dewy needles are pure December.
Pro Tip Rosemary hates wet feet — water only when the top inch of soil is dry, and give the pots the brightest spot you have. Rotate them a quarter turn every few days so they grow evenly.
Budget-Smart Swap Buy small rosemary plants from the grocery herb section and trim them into rough cones yourself — a $4 plant and five minutes with scissors gets you 80 percent of the look.
3. Boxwood Wreath on the Bedroom Door
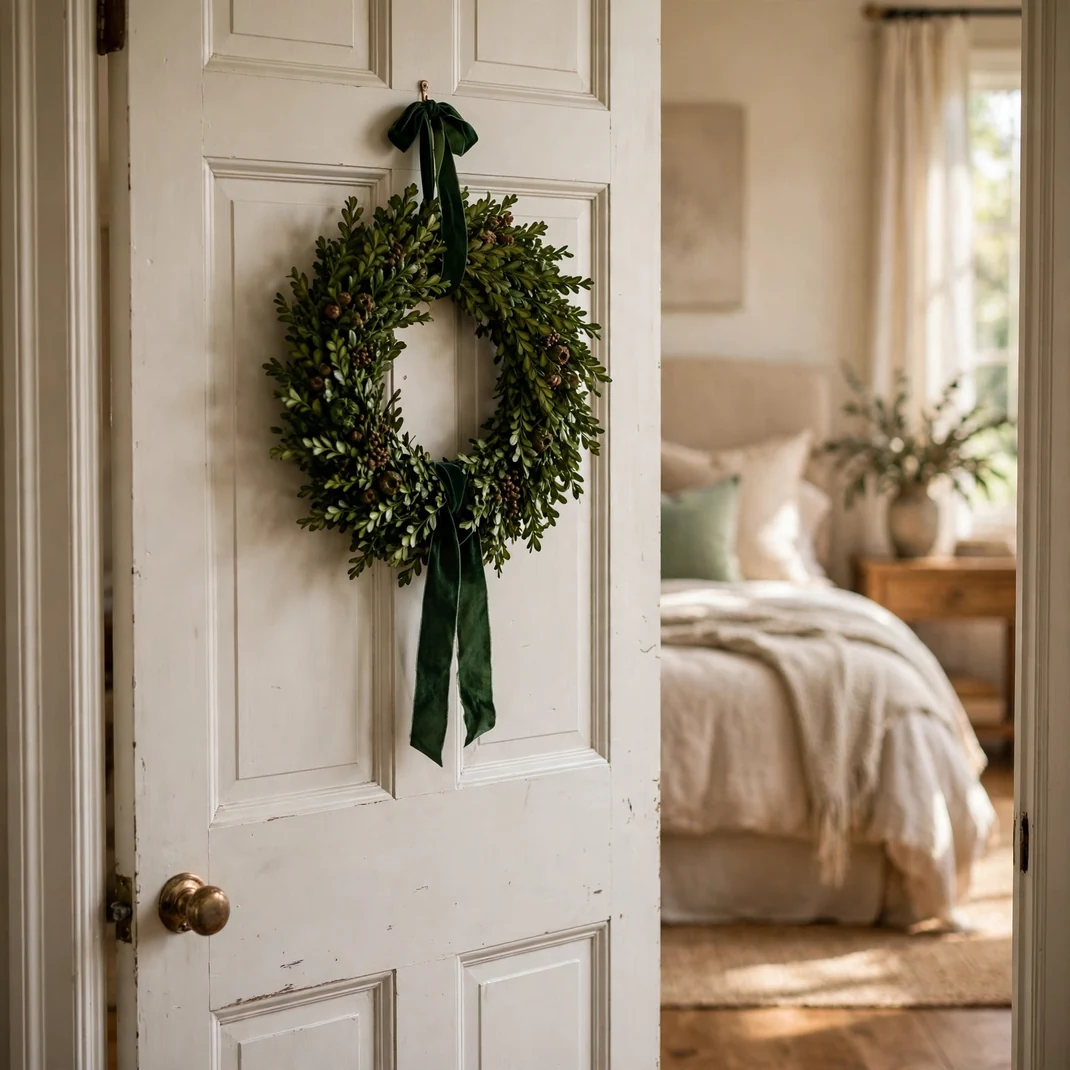
Hang the wreath where you’ll actually see it every day: the inside of your bedroom door. A preserved boxwood wreath gives you that dense, manicured green that looks expensive, and every time you close the door at night you get a little hit of holiday. It also greets you first thing in the morning, which is a surprisingly lovely way to start a December day. One wreath, one hook, done.
How to Style It Hang a 16 to 18-inch preserved boxwood wreath centered on the inside of the bedroom door using an over-the-door hook or a removable adhesive hook. Finish with a simple forest-green velvet ribbon looped through the top — skip the bow and let the ribbon tails hang long.
Why It Photographs Beautifully Boxwood’s tight, even texture reads as lush and luxe in photos, and the round shape softens all the hard rectangles of a door. Shot slightly ajar, it frames a peek of the styled bed beyond.
Pro Tip Check your adhesive hook’s weight rating — preserved boxwood wreaths run 2 to 4 pounds. An over-the-door hook is the zero-risk option and costs a few dollars.
Budget-Smart Swap A faux boxwood wreath looks nearly identical indoors and never sheds. Buy it after Christmas on clearance and store it flat in a garment bag for next year.
4. Olive-Green Linen Duvet Cover
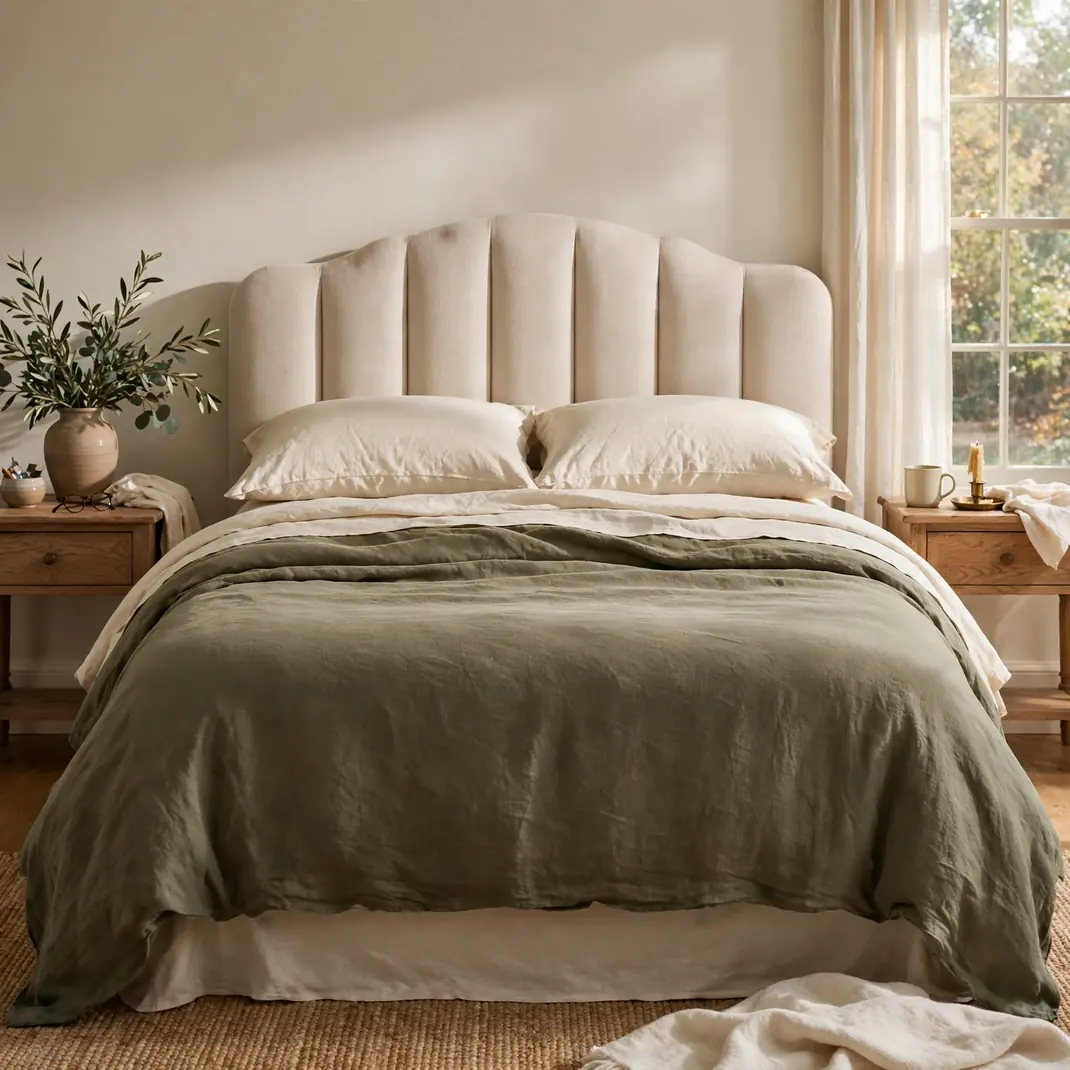
If you only change one thing this December, make it the duvet cover. An olive-green washed linen duvet cover turns the bed into the holiday centerpiece without a single ornament in sight. The muted, earthy green plays beautifully with cream sheets, a chunky throw, and warm lamplight — and unlike novelty Christmas bedding, you will happily keep sleeping in it through March. It is festive without trying too hard.
How to Style It Dress the bed with the olive linen duvet over crisp cream or ivory sheets, then fold the top third of the duvet back to show the contrast. Add two sleeping pillows in cream and one lumbar pillow in a natural textured weave to keep the palette calm.
Why It Photographs Beautifully Olive green sits in that perfect middle ground — rich enough to feel seasonal, neutral enough to let warm light do the talking. Linen’s natural wrinkles add texture that flat cotton sheets just cannot match.
Pro Tip Washed linen softens with every wash, so launder the cover once before styling — it drapes better and the wrinkles look intentional rather than fresh-from-the-package.
Budget-Smart Swap Dyeing not an option? A sage or olive flat sheet layered over your existing white duvet and folded back at the top gives the same color-block effect for a fraction of the price.
5. Deep-Green Velvet Storage Bench at the Foot of the Bed
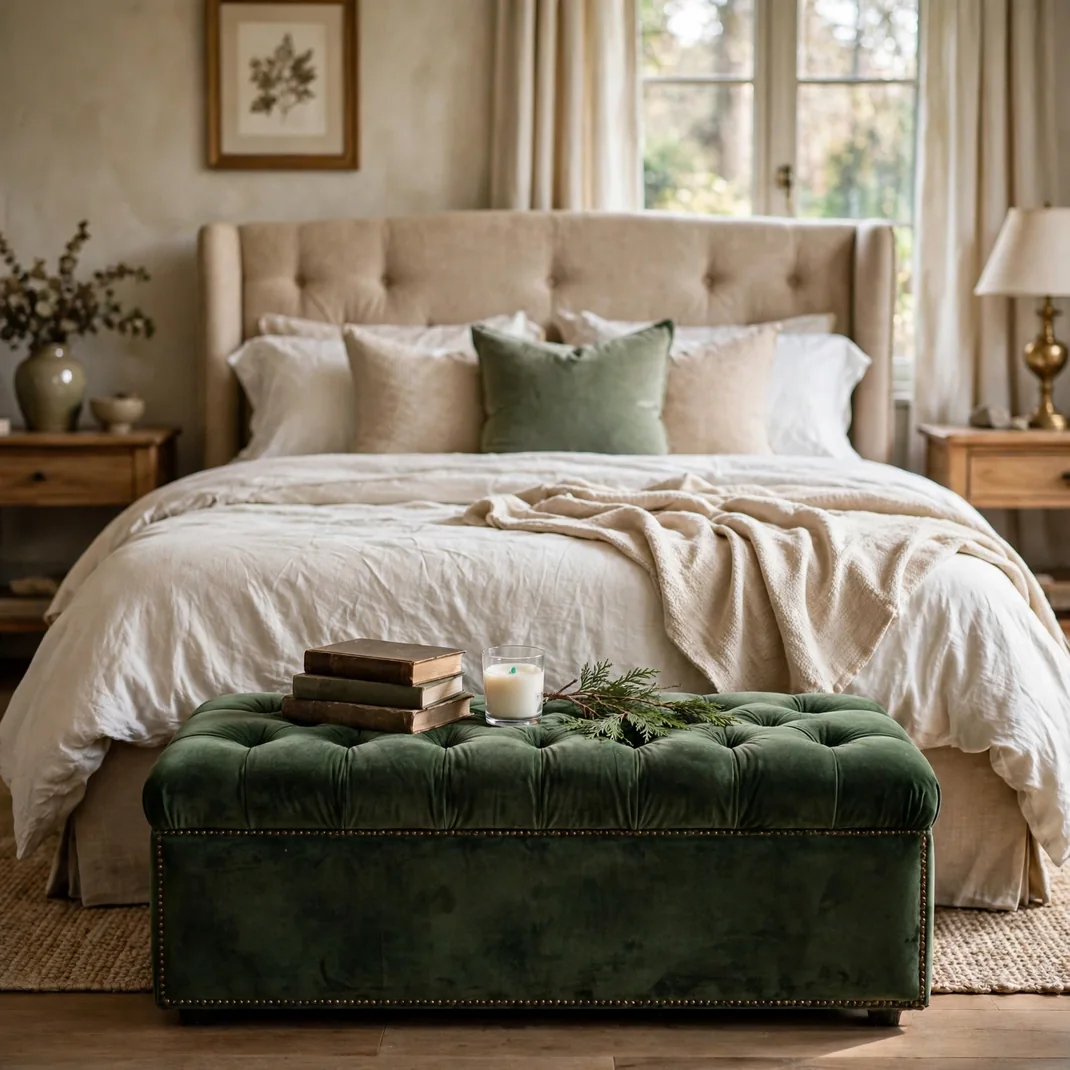
A bench at the foot of the bed is already a classic bedroom move — making it deep-green velvet turns it into your holiday anchor piece. The jewel-toned velvet soaks up lamplight and gives the whole room a pulled-together, intentional feel. Open the lid and you have hidden storage for extra throws and the gift wrap you keep meaning to put away. Style the top with a single cedar sprig and a candle, and resist the urge to add more.
How to Style It Center a tufted deep-green velvet storage bench at the foot of the bed, leaving a few inches of clearance on each side. Style the top minimally: a small stack of two coffee-table books, one flameless pillar candle, and a loose cedar sprig laid diagonally.
Why It Photographs Beautifully Velvet’s nap catches light directionally, so the bench glows emerald from one angle and deep forest from another — instant richness in every shot. It also grounds wide bedroom photos with a strong horizontal base.
Pro Tip Brush velvet with a dry soft cloth in one direction before photos to even out the nap and remove dust — it makes a visible difference on camera.
Budget-Smart Swap Drape a deep-green velvet throw or tablecloth over an existing bench or trunk — tucked neatly, it reads as upholstery in photos and costs next to nothing.
6. Peel-and-Stick Botanical Wallpaper Behind the Headboard
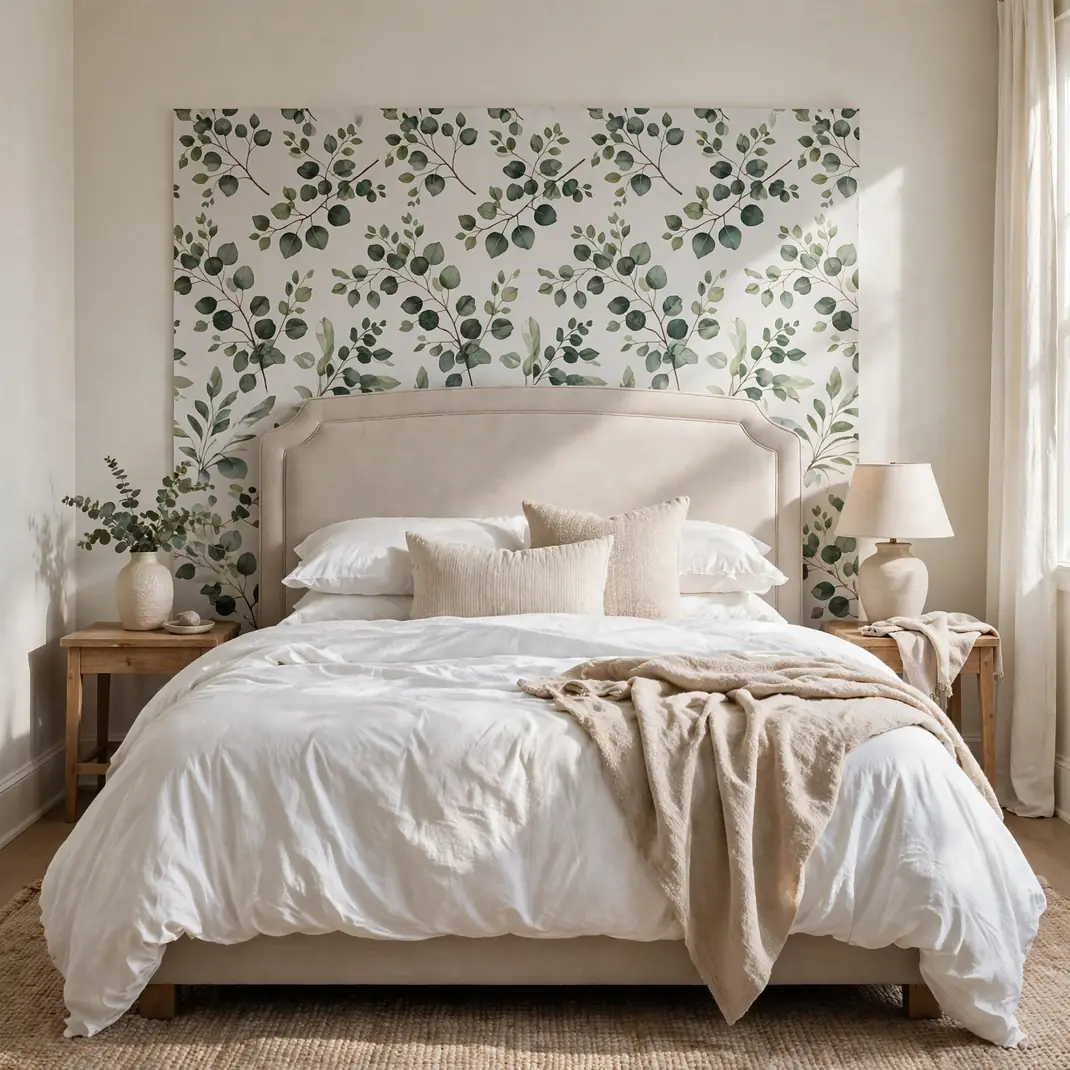
Renters, this one is for you. A single panel of peel-and-stick wallpaper in a eucalyptus or fern print, applied just behind the headboard, creates a headboard wall that looks custom and costs less than a dinner out. The botanical green print does all the holiday heavy lifting — hang nothing else on that wall and let the pattern be the art. Come January, it peels off cleanly with no paint touch-ups.
How to Style It Measure the wall area your headboard covers plus 12 inches on each side, and apply the peel-and-stick panels top to bottom in that zone only — a defined panel looks more deliberate than a partial wall. Smooth each panel with a credit card wrapped in a soft cloth to push out bubbles as you go.
Why It Photographs Beautifully A patterned backdrop adds instant depth behind the bed, making even a simple headboard look styled. Botanical prints in green photograph as texture rather than busyness, especially in soft daylight.
Pro Tip Start at the top center and work outward so the pattern stays symmetrical behind the headboard. If a panel goes crooked, peel-and-stick is forgiving — lift and reposition within the first few minutes.
Budget-Smart Swap One roll is usually enough for the headboard zone, and many brands sell single rolls. Split a roll with a friend doing the same project and halve the cost.
7. Fiddle-Leaf Fig Dressed With Tiny Gold Ornaments
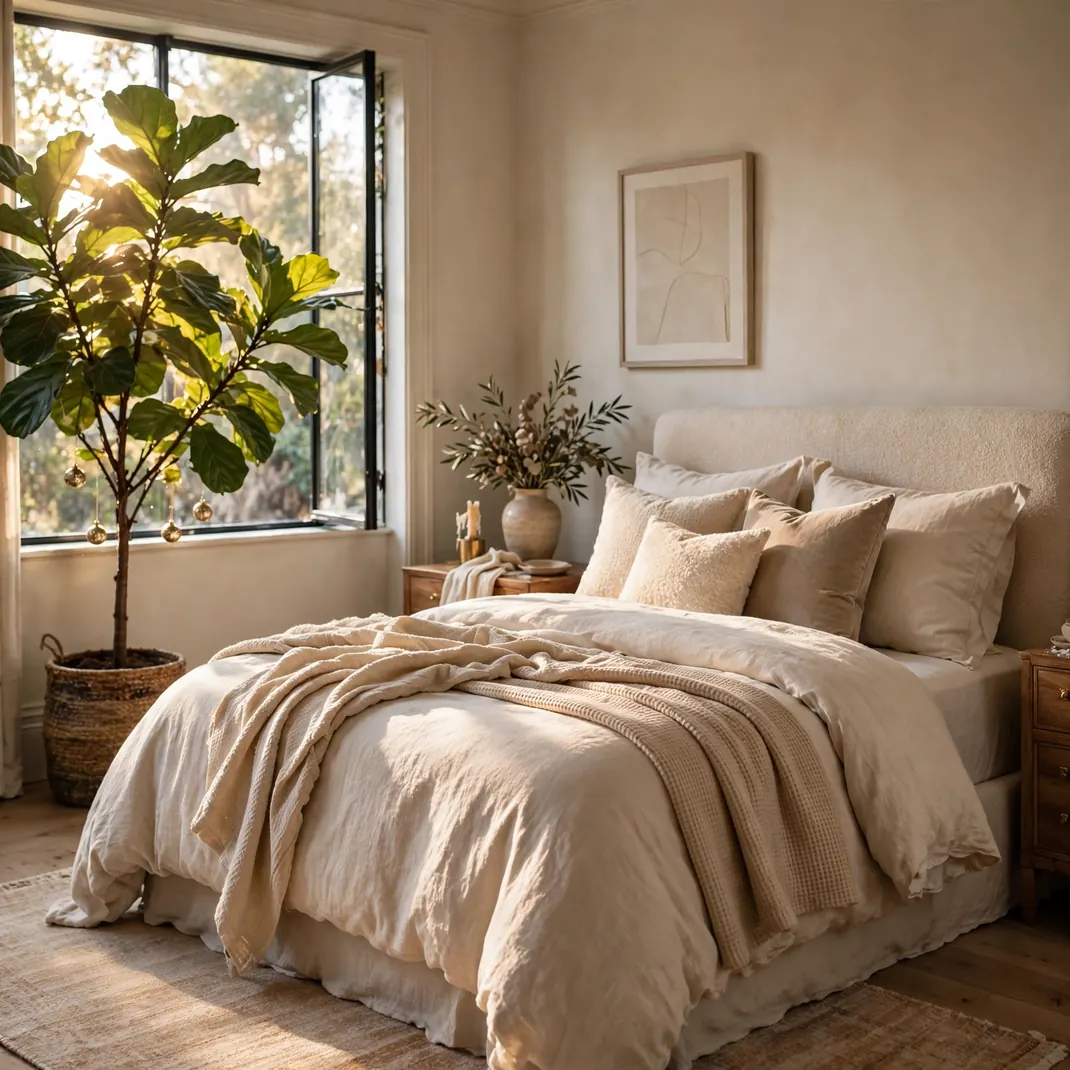
Already have a fiddle-leaf fig in the corner? Congratulations — you own a Christmas tree that just doesn’t know it yet. Hang six to eight miniature shatterproof ornaments in gold and champagne on the sturdiest branches and your everyday houseplant becomes the most charming tree in the house. It is unexpected, it costs almost nothing, and plant people absolutely lose their minds over it. Just keep the ornaments feather-light.
How to Style It Choose 1 to 1.5-inch shatterproof ball ornaments in gold and champagne tones, and hang them with short ribbon loops on the fig’s thickest, lowest branches only. Space them unevenly — five to eight ornaments total — so the plant still reads as a plant first.
Why It Photographs Beautifully The contrast of glossy gold against the fig’s big matte leaves is striking, and the quirky concept makes for the kind of photo people stop scrolling for. Backlight from a nearby window makes the ornaments glow.
Pro Tip Stick to the lowest, sturdiest branches — fiddle-leaf stems snap easily under weight. Remove the ornaments right after the holidays so the branches aren’t stressed long-term.
Budget-Smart Swap A six-pack of miniature ornaments costs a few dollars at any craft store. Or raid last year’s tree for the smallest baubles you already own.
8. Christmas Cactus Blooming on the Windowsill
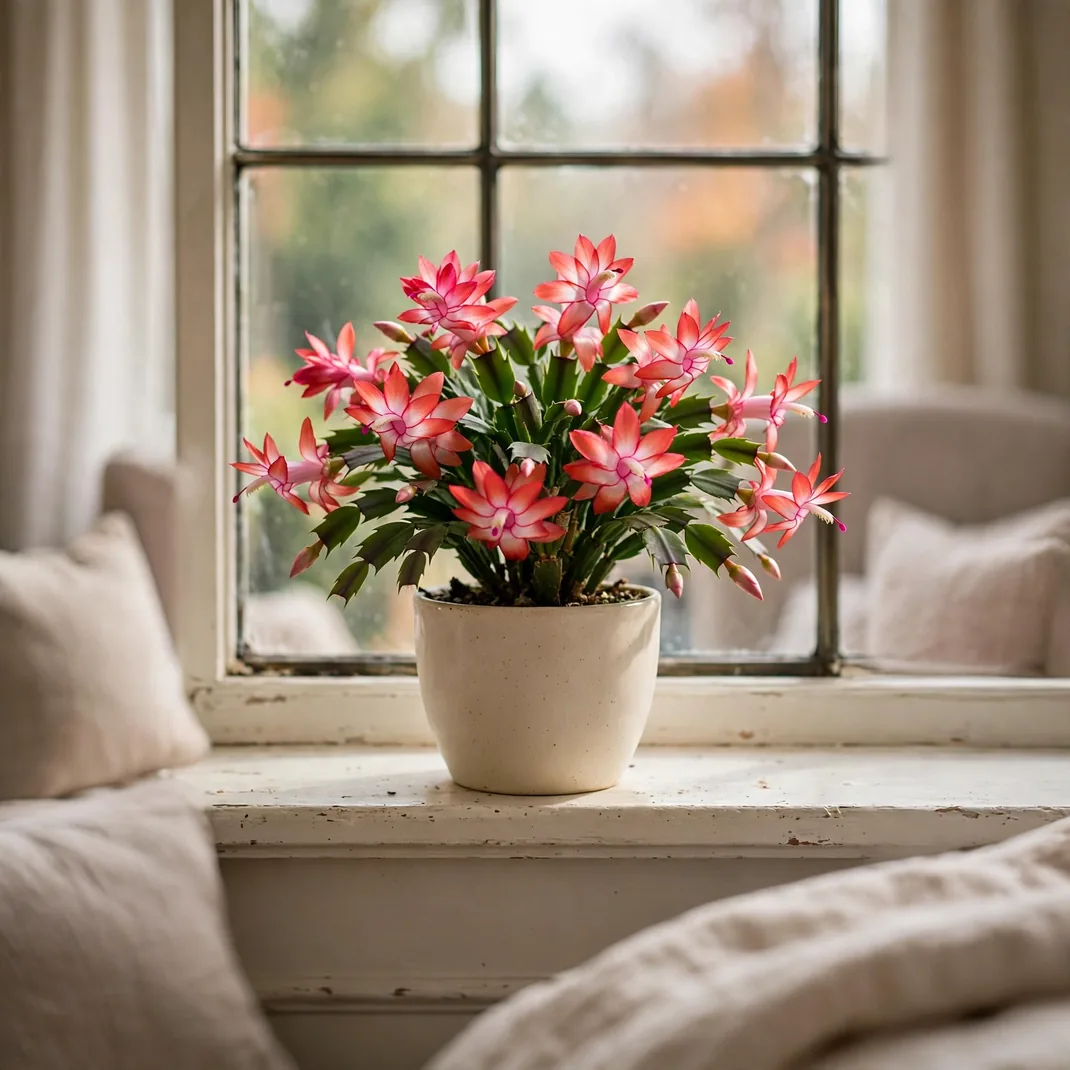
Few things feel more like a Christmas miracle than a cactus bursting into bloom in December. Buy a Christmas cactus in tight bud in late November, set it on the bedroom windowsill, and let nature handle the decorating — those layered pink, red, or white flowers against the segmented green leaves are genuinely stunning. It asks for almost nothing and gives you weeks of color. My grandmother grew these, and now I get why she was so smug about them.
How to Style It Place the cactus in a simple ceramic or brass pot on the windowsill where it gets bright, indirect light. Let the stems cascade naturally over the pot’s edge, and keep the sill otherwise clear so the blooms are the star.
Why It Photographs Beautifully Backlit blooms on a windowsill practically photograph themselves — the translucent petals glow against the darker green segments. It is the rare living decor that looks better in real light than in styled shoots.
Pro Tip Buds drop if the plant gets cold drafts or is moved around a lot, so pick its spot and leave it there. Water when the top inch of soil feels dry — soggy roots are the number one cactus killer.
Budget-Smart Swap Grocery stores sell budding Christmas cacti for under $10 in late November. One plant is plenty — its blooms carry the whole windowsill.
9. Emerald Taper Candles in Brass Holders
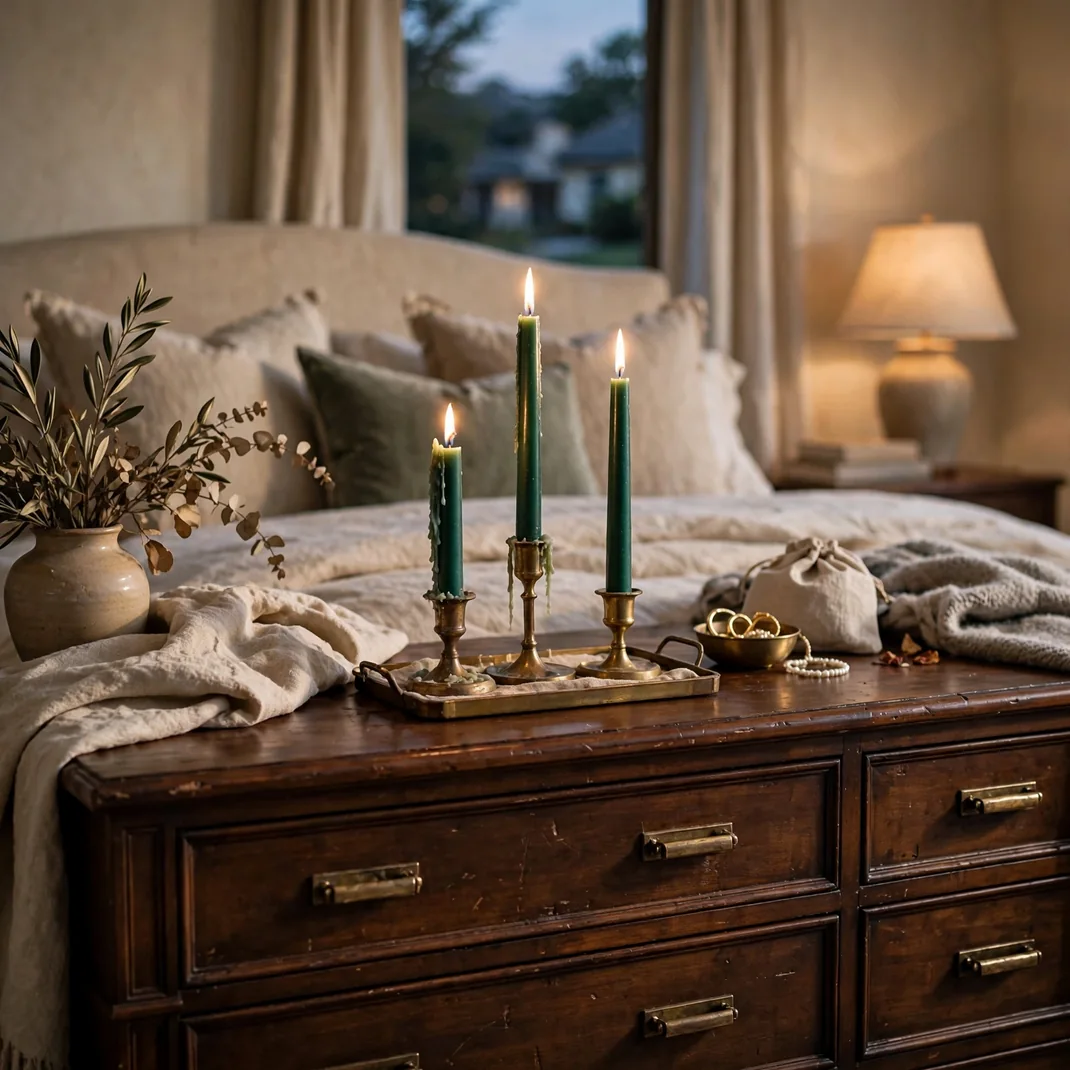
There is something about real candlelight that no LED has ever managed to fake. Three emerald-green taper candles at staggered heights in brass holders turn an ordinary dresser into a scene from a holiday film. The green wax looks almost black in daylight and glows jewel-toned when lit — it is pure drama for the price of a coffee. Just treat real flames with real respect, especially in a bedroom.
How to Style It Group three brass candlesticks — 6, 8, and 10 inches tall — on a small tray on the dresser, each holding a dripless emerald taper. Keep the grouping at least 12 inches from curtains, bedding, and the wall, on a stable surface that won’t wobble.
Why It Photographs Beautifully Real flame creates a warm flicker that makes brass gleam and green wax glow from within. Dusk shots with the candles lit and the room lights low are the money photos of the whole article.
Pro Tip Never leave real tapers burning unattended, and blow them out before sleep — bedroom candle fires are no joke. For the look with zero risk, high-quality flameless tapers in green now come with remarkably realistic flicker.
Budget-Smart Swap Thrift stores are full of brass candlesticks for a dollar or two. A quick polish with lemon and baking soda brings them back to life.
10. Eucalyptus-and-Pine Bundles Tied to the Bedposts
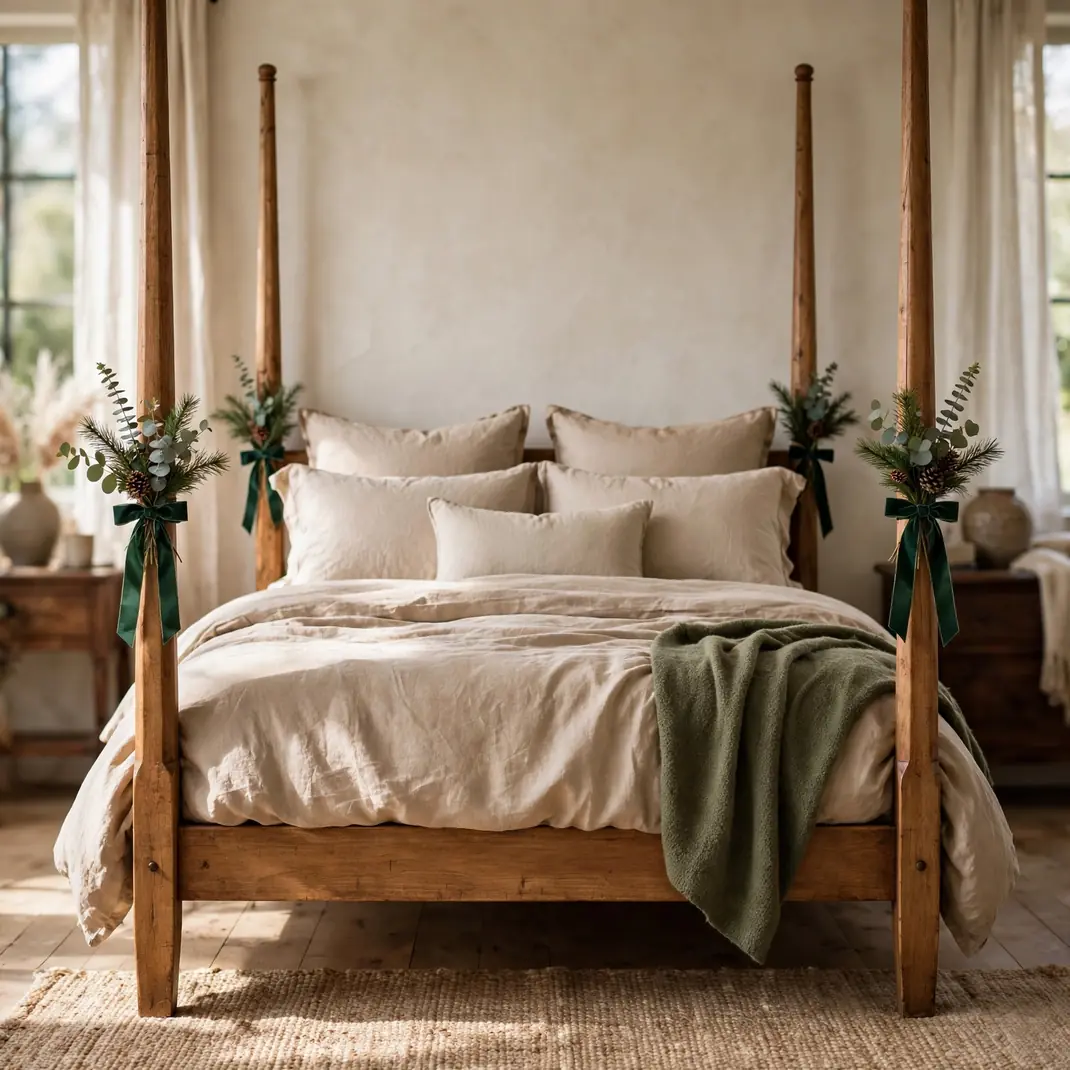
Think of these as tiny bouquets for your bed. Small bundles of eucalyptus and pine, tied with ribbon to each bedpost, put greenery and scent exactly where you’ll notice them — right at pillow height when you’re falling asleep. They take five minutes to make, cost almost nothing if you trim from your tree or yard, and they make a plain bed frame look custom-decorated. Four posts, four posies, endless charm.
How to Style It Gather 3 to 4 stems each of eucalyptus and pine into small bundles, bind with floral wire, and tie one to each bedpost at about pillow height with a 1-inch satin or velvet ribbon in deep green. Angle the bundles slightly outward so they fan over the pillows.
Why It Photographs Beautifully The bundles create four matching green accents that frame the headboard symmetrically — photographers call this “repetition with intent” and it always works. Eucalyptus’s silvery green pops against dark wood posts.
Pro Tip Shake pine stems outside before bringing them in to drop loose needles. Eucalyptus dries beautifully and keeps its shape for weeks; pine will shed, so plan to refresh the bundles once mid-season.
Budget-Smart Swap Ask for trimmings at a Christmas tree lot — most lots give away cut branches free, and a handful is all you need for four bundles.
11. Fern With Fairy Lights in a Woven Basket
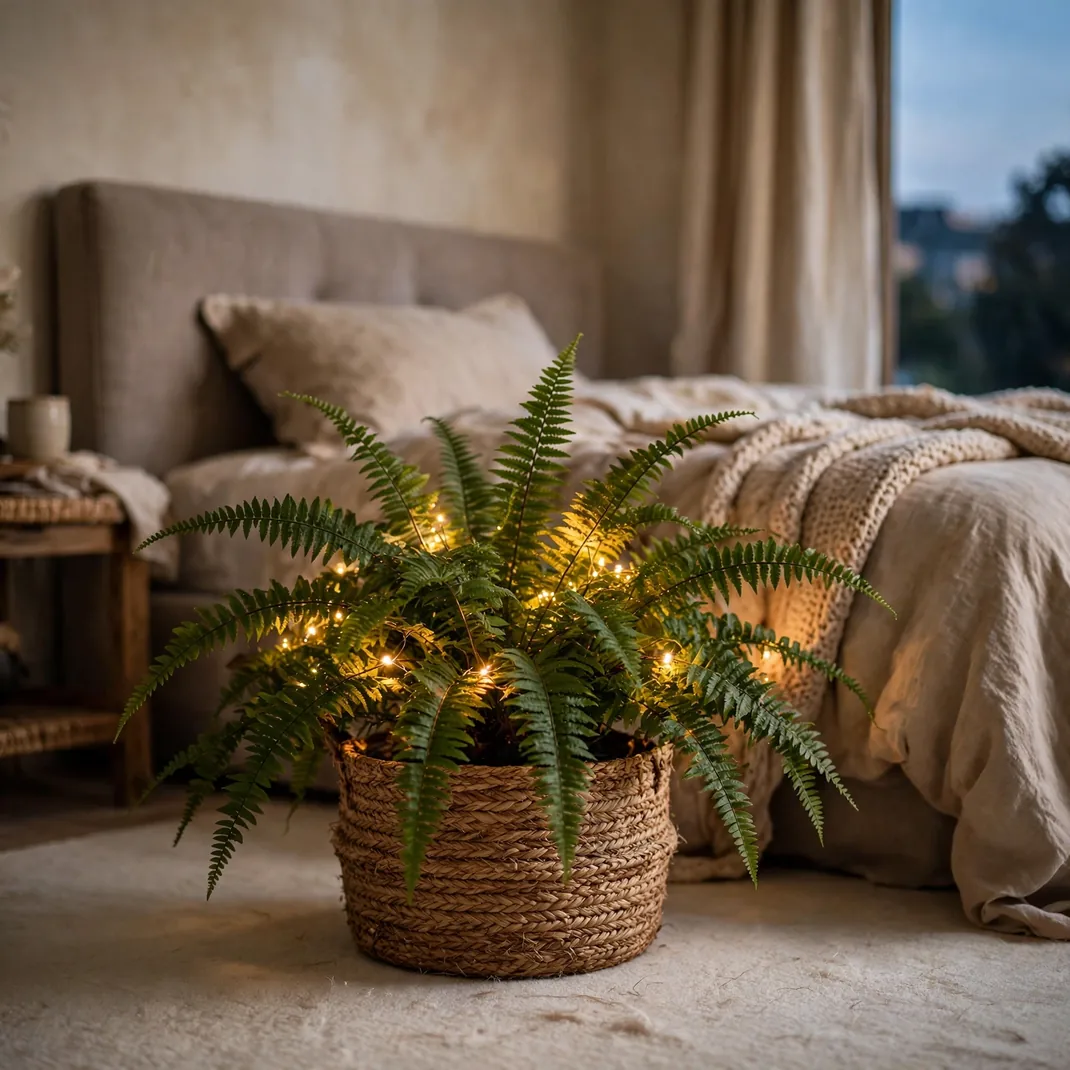
A Boston fern in a seagrass basket is already a lovely bedroom plant — tuck a string of warm battery fairy lights into its fronds and it becomes a living Christmas light display. The lights nestle into the greenery and glow through it like fireflies, which is somehow more magical than any ornament arrangement. Set it on the floor in an empty corner and watch that dead space come alive. No tree required.
How to Style It Drop a nursery-pot Boston fern into a woven seagrass basket, then weave one 20-light battery fairy light strand loosely through the fronds, working from the center outward. Tuck the battery pack into the basket behind the pot and switch it on at dusk.
Why It Photographs Beautifully Light glowing through layers of fern fronds creates depth that flat decor can’t touch. Evening shots with the room lights low turn the whole corner into a green lantern.
Pro Tip Ferns love humidity, and winter bedrooms are dry — mist the fronds every couple of days and water when the top of the soil feels dry. Keep the battery pack clear of the soil so it stays dry.
Budget-Smart Swap Grocery-store ferns in December are often under $12. The basket can be any thrifted woven tote or planter — nobody sees it once the fronds flop over the edge.
12. Forest-Green Quilted Coverlet Folded at the Foot
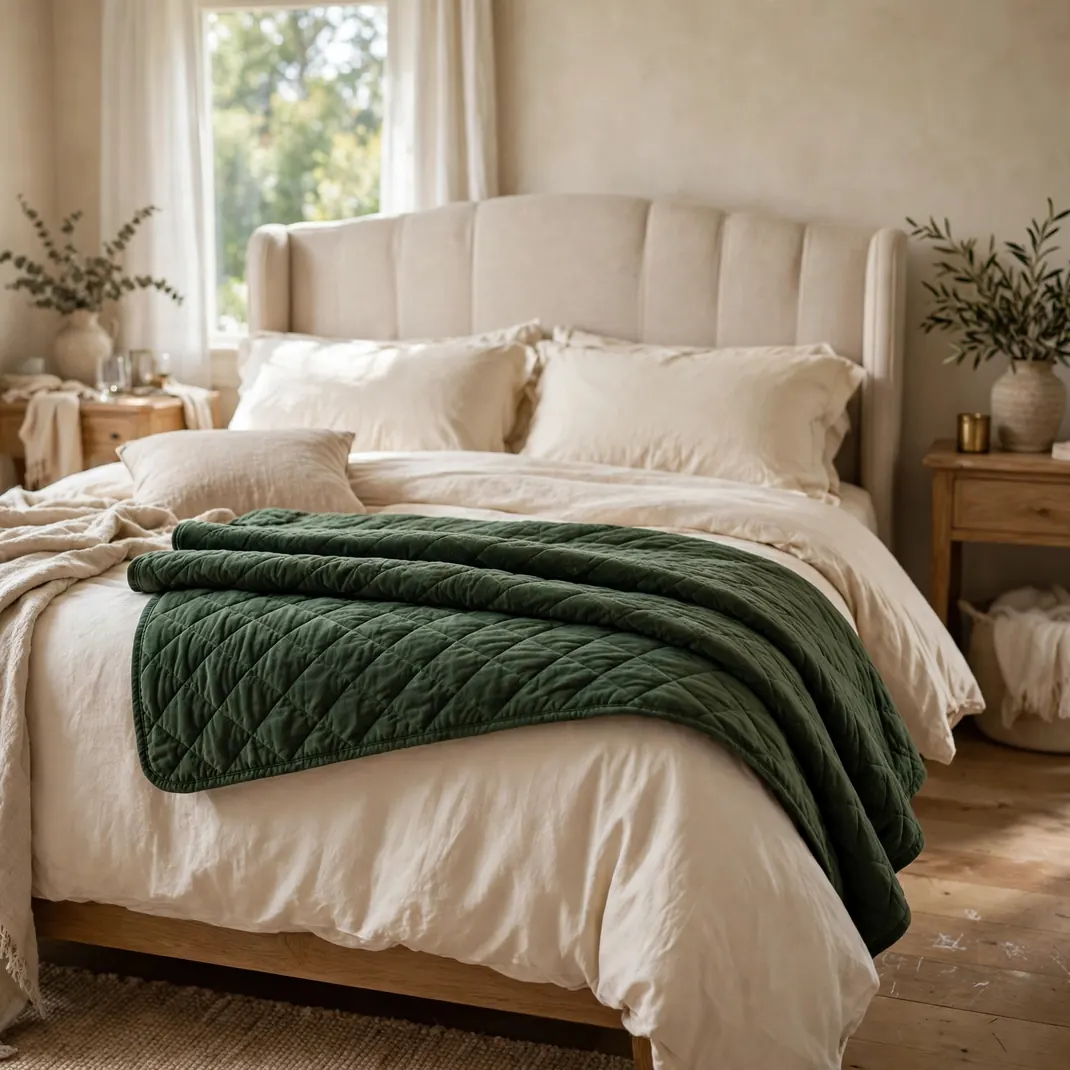
Sometimes the simplest move is the strongest. A forest-green quilted coverlet, folded in thirds and laid across the foot of the bed, adds a band of rich holiday color exactly where the eye lands in photos. The quilting gives it that cozy, heirloom texture that reads Christmas without a single motif. It layers over whatever bedding you already own, so there’s no full-bedding commitment — just fold, place, and done.
How to Style It Fold a queen-size quilted coverlet in thirds lengthwise and lay it across the foot of the bed, letting 10 to 12 inches hang over each side. Smooth the top fold flat and let the bottom edge fall naturally — the slight asymmetry is what makes it look styled rather than staged.
Why It Photographs Beautifully A horizontal band of deep green across the foot of the bed anchors every wide shot and gives the bedding a layered, designer look. Quilt stitching catches raking light beautifully in morning photos.
Pro Tip Quilted cotton coverlets wash and dry easily, so don’t baby it — toss it in with your regular bedding laundry and it comes out softer every time.
Budget-Smart Swap A green flat sheet folded the same way gives you the color band for almost nothing. Iron the fold creases first so it holds a crisp line.
13. Magnolia Branches in Tall Green Glass Vases
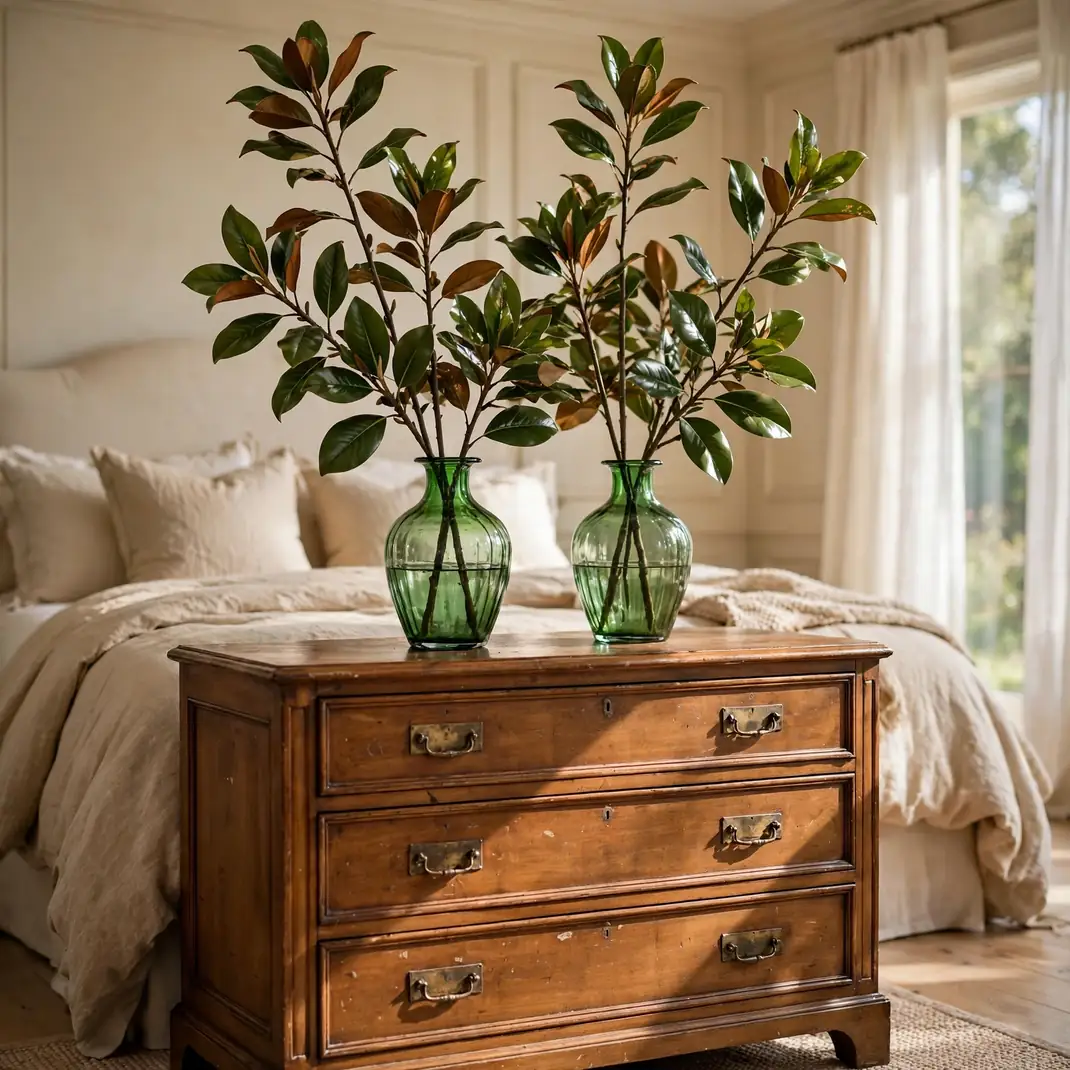
Magnolia branches are the unsung heroes of winter decorating — glossy green on top, velvety bronze underneath, and sculptural enough to carry a whole dresser on their own. Stand a few tall stems in green glass vases and you get height, color, and texture in one move. The green-on-green layering (bronze-green leaves in emerald glass) is the kind of tonal styling designers charge for. Faux stems work just as well and never drop a leaf.
How to Style It Place three tall magnolia stems — real cut or high-quality faux — in each of two green glass vases (12 to 16 inches tall) on the dresser, spacing the vases 18 inches apart. Fan the stems at slightly different angles so the arrangement feels gathered, not stuck.
Why It Photographs Beautifully Tall branches draw the eye upward and make ceilings feel higher in photos. The glossy leaves reflect window light in bright spots that dance across the frame — instant life in a still image.
Pro Tip Tall branches are top-heavy — use vases with some weight to them, and add a few inches of water or decorative stones at the base of real stems to keep everything stable and the stems fresh.
Budget-Smart Swap Thrift stores almost always have green glass vases for a couple of dollars. Pair them with branches trimmed from your own yard — holly, pine, or even interesting bare branches all work.
14. Moss Terrarium on the Nightstand
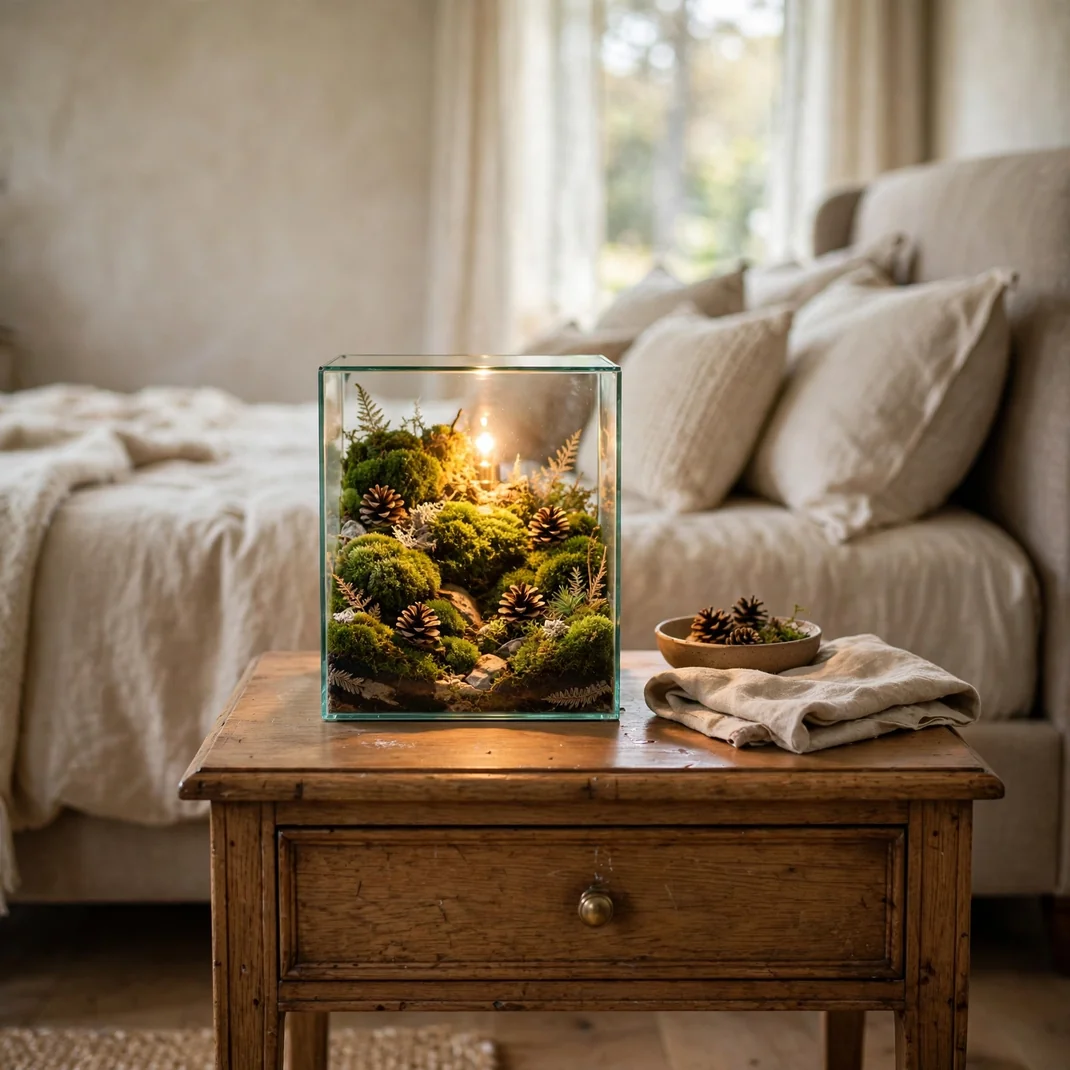
A little glass terrarium of preserved moss on the nightstand is like a tiny forest you get to keep by your bed. Layer reindeer moss in two or three greens, tuck in a couple of mini pinecones and maybe one tiny faux mushroom, and you have a no-water, no-light, no-maintenance piece of living-looking decor. It is the lowest-effort idea in this entire article and somehow one of the most charming. Kids love making these too.
How to Style It Fill a 6 to 8-inch glass terrarium or apothecary jar with a base of reindeer moss, mounding it higher in the center. Nestle in two or three mini pinecones and one small faux mushroom or acorn, keeping everything below the rim so the silhouette stays soft.
Why It Photographs Beautifully Macro shots of moss texture are endlessly satisfying — all those tiny branching fronds read as a miniature winter forest. The glass catches lamplight and makes the whole thing glow from within.
Pro Tip Use preserved (not live) moss so there’s zero watering and no mold risk in a closed container. A light mist once a season keeps the color fresh — that’s the entire maintenance schedule.
Budget-Smart Swap A clear glass candy jar from the dollar store works perfectly as the vessel. Bags of preserved moss are a few dollars at any craft store and fill three or four jars.
15. Mini Wreaths on the Curtain Tiebacks
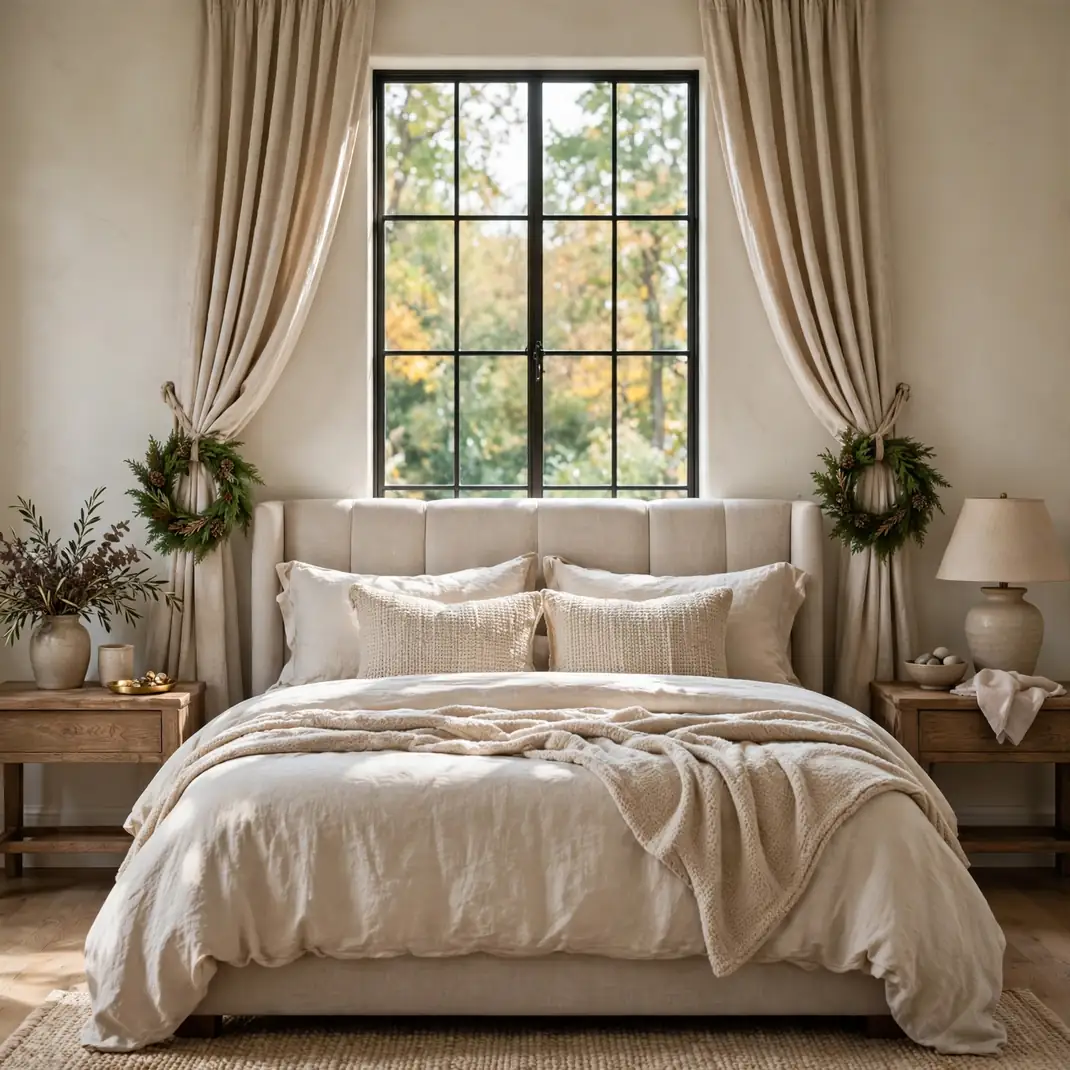
Your curtains are just sitting there being curtains — put them to work. Looping a 4-inch mini wreath over each curtain tieback turns plain window treatments into holiday styling in about thirty seconds per panel. It is the kind of tiny detail that makes a room feel thoroughly, thoughtfully decorated without any big gestures. Use matching wreaths on both panels and the symmetry does the rest.
How to Style It Slip a 4-inch faux boxwood or cedar mini wreath over each curtain tieback so it hangs centered on the gathered fabric. If the wreath slides, secure it with a small piece of green floral wire twisted behind the tieback where it won’t show.
Why It Photographs Beautifully Window shots gain a focal point at exactly the height where the eye naturally rests. The small round wreaths echo the shape of a larger tree or wreath elsewhere in the room, tying the whole scheme together.
Pro Tip Keep the wreaths small — 4 inches max. Anything larger overwhelms the tieback and fights with the curtain folds instead of accenting them.
Budget-Smart Swap Craft stores sell mini wreaths in multi-packs for a few dollars. Buy one pack and you have enough for every window in the house.
16. Pine-Scented Reed Diffuser in a Green Glass Bottle
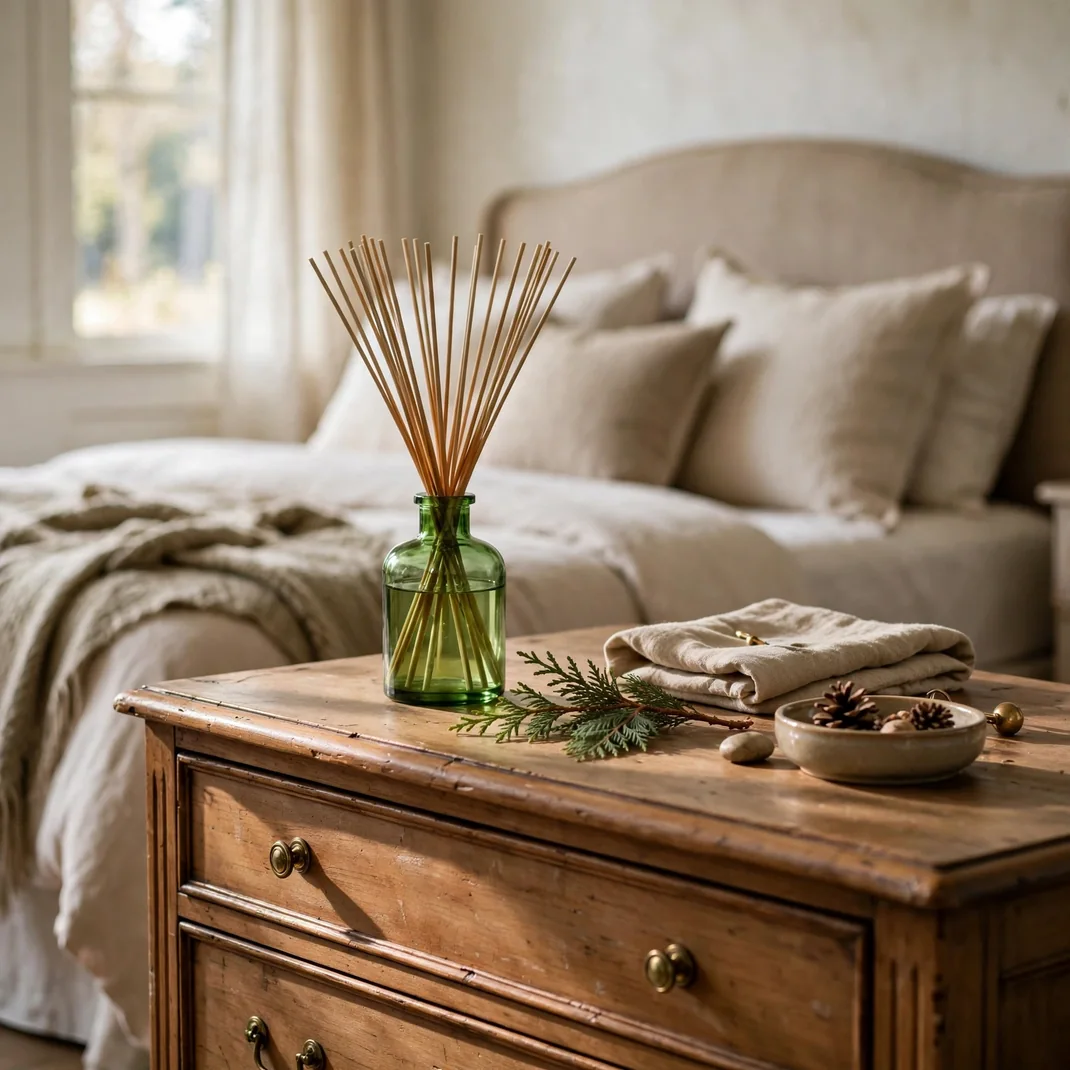
Holiday decorating isn’t only visual — the bedroom should smell like December too. A pine or fir-scented reed diffuser in a green glass bottle layers scent into the room around the clock with zero effort and zero flame. It sits prettily on the dresser, the green bottle doubles as decor, and every time you walk in you get that just-cut-tree smell. Scent is the most underrated decorating tool there is.
How to Style It Set the diffuser on the dresser or nightstand on a small brass or wood coaster to protect the surface. Fan five to seven reeds outward at angles, and place a small sprig of cedar beside the bottle to visually explain the scent.
Why It Photographs Beautifully It won’t show up in photos the way garland does — but the green bottle and fanned reeds add a slim vertical accent that balances heavier decor nearby. And the scent makes the room feel finished in person.
Pro Tip Flip the reeds once a week to refresh the scent throw, and keep the bottle away from linens — diffuser oil stains fabric permanently. Wash your hands after flipping.
Budget-Smart Swap Decant any pine-scented diffuser oil into a thrifted green glass bottle and add inexpensive rattan reeds — the same look and scent for half the price of a branded set.
17. Trailing Ivy in a Hanging Brass Planter by the Window
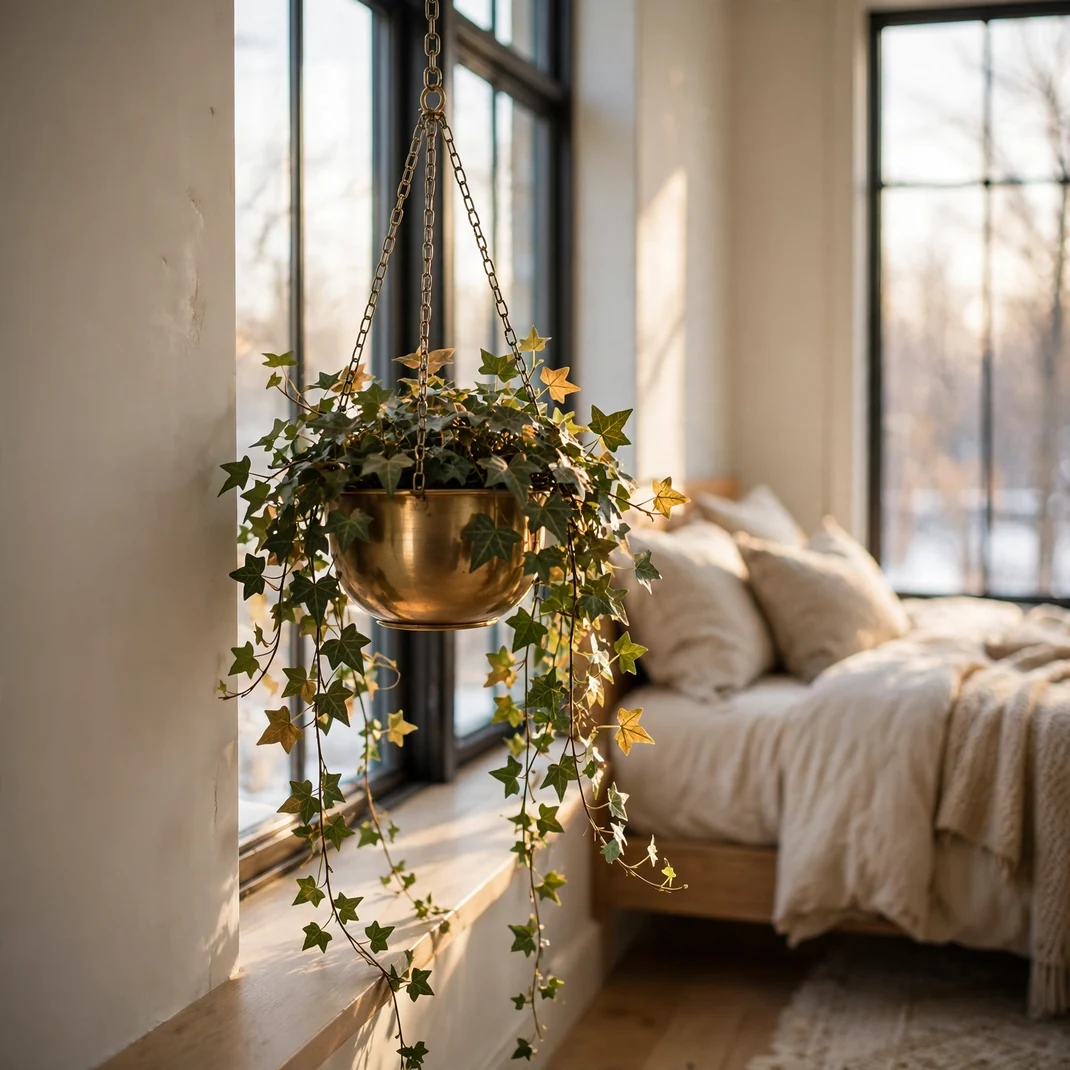
While everyone else is fussing with garlands, hang a brass planter of trailing ivy by the window and let gravity do the styling. The vines cascade down in a living green waterfall that feels festive without a single ornament — especially when the low winter sun hits it. It is the easiest statement greenery you can own, and unlike cut garlands it just keeps growing. One hook, one plant, months of payoff.
How to Style It Hang a brass planter with a trailing pothos or English ivy from a ceiling hook or wall bracket beside the window, at a height where the longest vines fall to about windowsill level. Let the vines trail naturally — resist trimming them into neatness.
Why It Photographs Beautifully Cascading vines create leading lines that pull the eye through the photo, and backlit leaves glow translucent green. It adds a vertical garden moment no cut arrangement can match.
Pro Tip Use a ceiling hook rated for at least 10 pounds — a watered hanging plant is heavier than it looks. Water when the top two inches of soil are dry, and empty the drip tray so it doesn’t stain the floor.
Budget-Smart Swap A $6 pothos from the hardware store trails just as prettily as pricier ivy and is nearly indestructible. Hang it in any basket with a rope handle.
18. Bud Vases With Fresh Evergreen Sprigs on the Windowsill
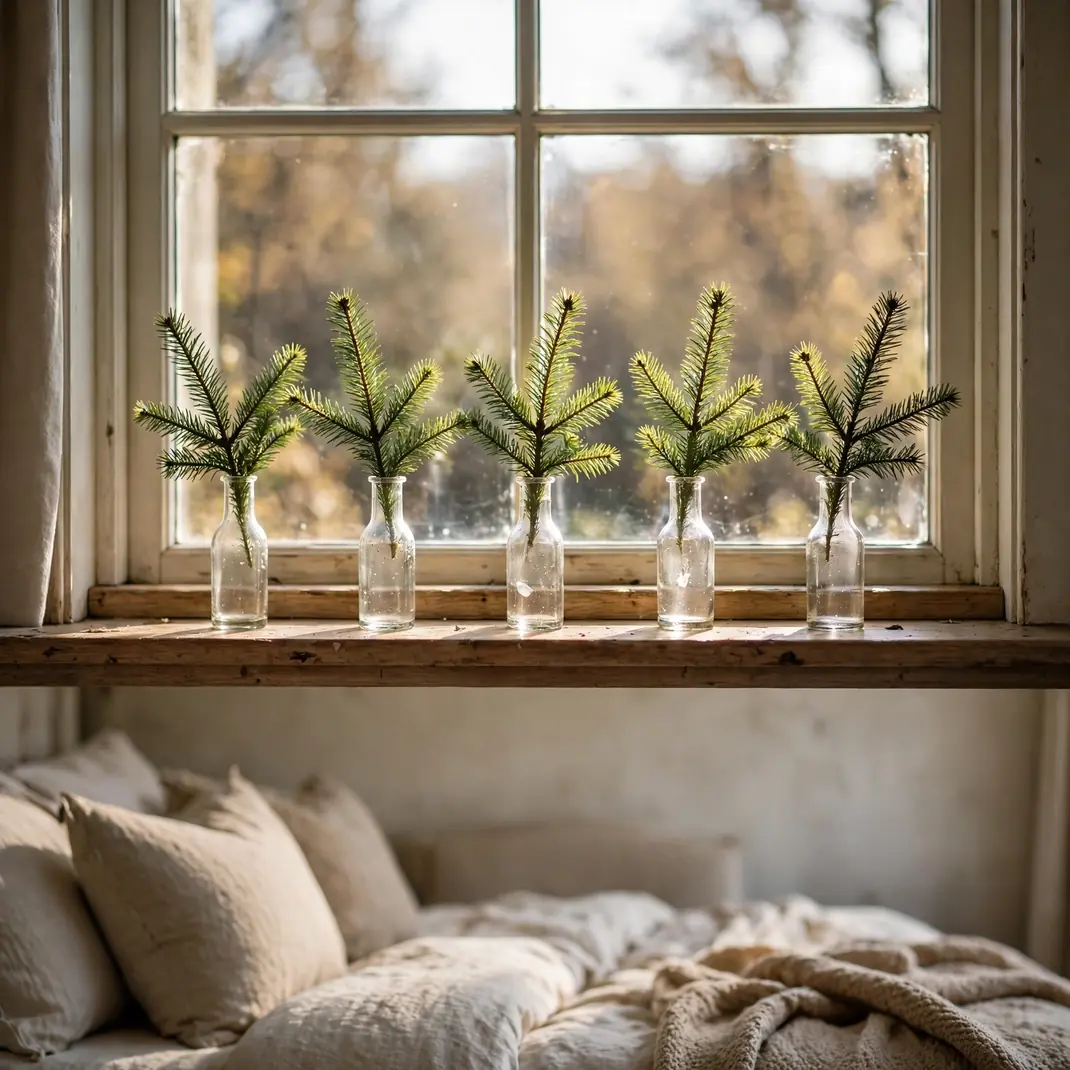
The last idea is also the simplest: a row of little bud vases, each holding a single fresh evergreen sprig, lined up along the windowsill. Fir, cedar, pine — whatever you trimmed from the tree or the yard — each in its own tiny vase like a green exclamation point. It costs nothing, takes five minutes, and looks like something from a Scandinavian design magazine. Sometimes the best decorating is just editing nature down to its essentials.
How to Style It Line up five to seven small bud vases — mismatched is fine, keep them all under 5 inches — along the windowsill with 3 to 4 inches between each. Trim one fresh sprig per vase to about 6 inches tall and strip the lower needles so they sit cleanly in the water.
Why It Photographs Beautifully Repetition of small identical-ish forms is catnip for cameras — the row of vases creates rhythm that leads the eye across the whole window. Backlit sprigs against the glass look crisp and graphic.
Pro Tip Change the water every three or four days and re-trim the stem ends — fresh cuts drink better and the sprigs stay perky for two weeks or more.
Budget-Smart Swap Small glass yogurt jars or spice jars make perfect bud vases. The sprigs are free if you trim your own tree — ask the tree lot for cuttings if you have a faux tree.
Green Christmas decorating is really about letting nature do what it does best — and your bedroom is the perfect place to let it. Start with one or two of these schemes, like the footboard garland or the olive duvet, and layer in the smaller touches as December unfolds. Before you know it, you’ll be falling asleep to the smell of cedar and waking up in the freshest room in the house.